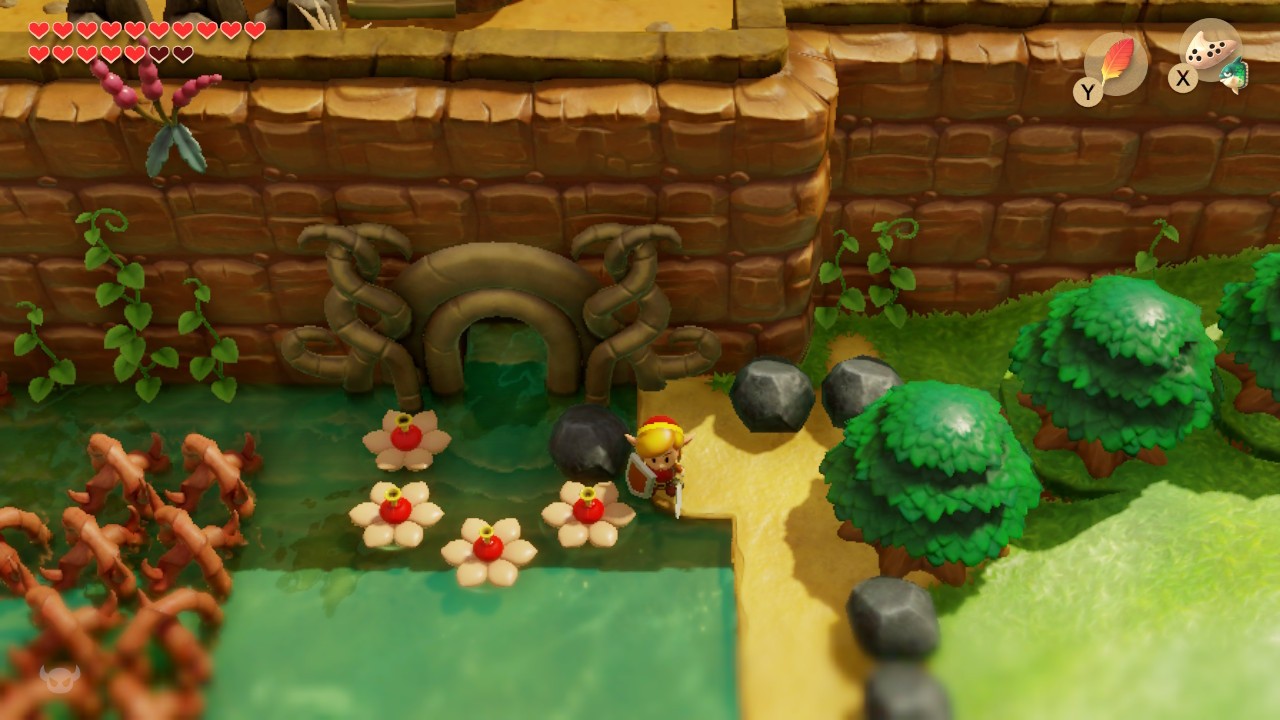

With the coral triangle from the Face Shrine you now own six of the eight siren instruments. The next clue clearly leads to the Tal-Tal Mountains, but access to the seventh dungeon is not yet possible. Even with Hookshot, Roc’s Feather and Pegasus Boots, there is a chasm that Link cannot overcome on his own. That’s exactly why we’ve already learned Mamufrosch’s song. This allows us to bring a long-dead companion back to life in Mabe Village, which will carry Link through the air for the coming section.
This section is particularly important for our 100% route. In front of the Eagle Tower we collect Secret Seashells 23 to 25 and Piece of Heart 11 of 12. Finally, the 26th and last Secret Seashell is waiting in the Eagle Tower itself. Only when it has been safely collected can we accept the reward in the shell bazaar without losing any of the shells. However, we deliberately took the twelfth and final photo of the DX version after the eagle tower on the way to the turtle rock. If you remembered from the last section that this photo should have been taken beforehand: the decisive factor is the later path over the mountain bridge after the seventh dungeon.
The eagle owl sends you to the mountains
Leave the Face Shrine and go south one screen. The eagle owl appears again and talks to Link about it Wind Fish. His clues are now much more direct: The next instrument is in a tower high up in the mountains, and in order to get there, Link has to do that fly like a bird. This makes our next step clear.
Play Manbo’s Mambo to quickly transport you to the western part of the island, then return to Mabe Village. In the center of the village there is still the large weathercock in front of which Marin used to sing the ballad Wind Fish.
Move the weathercock
With the Power Bracelet L-2 from the Face Shrine you can now move the heavy weathercock. Push the entire monument up. Below, a hidden staircase appears that leads deep beneath Mabe Village.
Climb down and go one room north. There you will only find an old skeleton or a pile of bones. Equip the Ocarina and play Mamufrong’s Song. The magical melody brings the long-dead blue rooster back to life. He immediately starts following Link, similar to BowWow and Marin before him.
The flying rooster has a unique ability. If you lift him over Link’s head with the Power Bracelet, he will start flapping his wings and carry Link through the air. As long as you hold on to it, you can overcome even huge chasms and float safely over floor traps. This is exactly the ability we need to achieve the bird key.
Secret Seashell 23 of 26 – west of Kanalet Castle
Before we set off for the Tal-Tal Mountains, we use our new companion for a previously unreachable cave. Go to the main gate of Kanalet Castle and from there go one screen west. On the other side of a large abyss you will see a staircase or a cave entrance. Neither Roc’s Feather nor Pegasus Boots are sufficient for this distance.
So lift the flying rooster with the Power Bracelet. He carries Link safely across the gorge. Enter the cave on the other side and open the Treasure Chest. Inside is Secret Seashell 23 of 26. If, contrary to our route, you have already picked up the stronger shell sword at 20 shells, the chest will only contain Rupees instead. That’s exactly why we waited to give the reward.
Then leave the cave again and fly back with the rooster. This leaves only three shells left, and all three are on our direct route through the Tal-Tal Mountains or in the Eagle Tower.
Climb into the Tal Tal Mountain Range
Play Manbo’s Mambo again and head to the western entrance of the Tal Tal Mountain Range. Lift the stones at the entrance out of the way and enter the already familiar cave. Follow it east, climb down the stairs and work your way through the rooms you already passed through on the way to the Angler’s Tunnel.
In one of the cave rooms you will see a Piece of Heart on a raised platform, which we have come across several times but has not been able to reach so far. We’re not getting it directly from this site yet. First go further east, use Pegasus Boots and Roc’s Feather for the long jump or the Hookshot for the chest opposite and take the 50 Rupees. Then return and exit the cave on the eastern side.
Follow the mountain path to the right and climb the long ladder. The actual section to the Eagle Tower begins up here.
Get the bird key
From the upper mountain platform, first go west and enter the cave. In the next room there are numerous holes in the floor. If Link falls into one of these, he will fall out of the cave and end up much further down in the mountains. With normal jumps the room would be difficult, but with the flying rooster it becomes trivial.
Lift the rooster above your head and simply float north across the entire hole area. In the next room there is an even larger gorge that cannot be overcome even with a Pegasus jump. Let the cockerel carry you again and fly west. There on the floor is the bird key.
Take him with you and return with the rooster across both chasms. The bird key opens access to the Eagle Tower in the far east of the Tal-Tal Mountains.
Secret Seashell 24 of 26 – under the rock
Leave the Bird Key Cave again and go east across the bridges. Three large stones lie next to each other on a platform. Lift the upper or right rock with the Power Bracelet. Hidden underneath is Secret Seashell 24 of 26.
The same applies here again: If you had already received the shell sword, the shell would have disappeared. Our route therefore continues to leave them untouched in the mussel bazaar until all Locations have been dealt with.
The chicken coop in the mountains
Then go back west to the small house with the green roof. The chicken keeper lives there and has been raving for years about how great the roosters used to be able to fly. As soon as he sees your blue companion, he is completely thrilled.
For now the rooster stays with Link. We no longer need him for the Eagle Tower itself, but as long as the seventh dungeon has not yet been completed, he will continue to follow us. Later he moves permanently to the mountains to keep chickens and can no longer be taken along as a companion.
Piece of Heart 11 of 12 – Cave in the Tal Tal Mountain Range
From the chicken coop, go several screens west. Smash the bush that hides a staircase and descend into the cave. Defeat the enemies in the first room and then knock them out with your sword southern wall away. At one point you hear the typical hollow sound of a wall being blown up.
Plant a bomb there and go south through the newly created passage. In the next section, avoid the enemies and then go to the right. There you finally reach the Piece of Heart, which we were able to see from a different side on our previous mountain tours. Collect Piece of Heart 11 of 12.
This means that only a single fragment is missing for the complete collection of heart parts. This is located in the western Tal-Tal Mountains on the way to the last regular dungeon and is collected after the Eagle Tower.
Secret Seashell 25 of 26 – secret chest in the mountains
Then return to the chicken coop and from there go down the stairs, several screens east and then south. Swim through the water and enter the cave on the right. Almost the entire room is under water; There is only a small piece of dry ground in the upper area.
Put one there Bomb on the north wall. The passage opens and you can take the stairs up. There are five in the next room Treasure Chests between movable blocks. For our route it is first important that you Don’t open any of these chests yet. Push the block next to the upper left chest to the left and then push the block below it down so that you can reach the southern exit.
Leave the cave there. There is another Treasure Chest right outside. Open it and you will get Secret Seashell 25 of 26. This means that only one shell is missing – and it is in the Eagle Tower.
Take all five ruby chests
Then enter the cave again through the southern entrance. From this page you can actually reach all five Treasure Chests. Each contains 20 Rupees, so in total there are 100 Rupees. However, if you open one of the chests and then leave the room before you have collected the rest, the rewards left behind will disappear. That’s why we deliberately didn’t open a chest the first time we traversed.
Now work your way through the block arrangement from bottom to top and take all five ruby chests with you. This detour would be unimportant for a normal story run, but in our complete route we don’t leave the unique chests untouched.
To the Eagle Tower
Then continue east. An owl statue tells you that you are approaching the Eagle Tower and to be careful of the bird. Climb the stairs and enter the cave. Follow the fairly straight path to the east, leave it briefly and re-enter the same cave complex via the next entrance.
In the following passage, jump over the gap, climb the steps and continue east and south. Pull yourself over the big abyss with the Hookshot. After leaving the cave you will see a cracked area on the lower rock wall. If you blow it up with a bomb, you will find a fairy fountain behind it where you can completely replenish your health.
Then enter the cave on the right and follow it to the other exit. Go west one screen and you’ll find yourself in front of the massive Eagle Tower. Lift the rock next to the keyhole and insert the Bird Key. The entire tower rotates and reveals its entrance.
Eagle Tower – four floors and four columns
The Eagle Tower is one of the most challenging dungeons in Link’s Awakening DX. Unlike previous mazes, the most important task is not just finding a specific item and the Nightmare Key. On the second floor there are four massive columns that support the upper part of the tower. You have to transport a heavy iron ball through several rooms and use it to destroy all four pillars. Only then does the upper part of the tower sink and the previously inaccessible areas become accessible.
Take enough bombs for the dungeon and if possible a portion of secret medicine. The Boomerang is also extremely useful. Within a dungeon, you can play Manbo’s Mambo at any time to return to the entrance without losing your previous progress.
First Small Key
From the entrance, first go one room to the right. Use the Roc’s Feather to avoid the blade traps and then go right again. Two Like Likes are waiting there. These enemies can devour your shield if they hold Link long enough. So keep your distance and kill them as quickly as possible with your sword or Boomerang.
Once both Like Likes are defeated, a Small Key will fall from the ceiling. Use it to open the locked door in the same area and climb the stairs to the second floor.
The iron ball and lever
On the second floor you first see a Treasure Chest, which is blocked by colored blocks. If you have the Boomerang, you can already hit the Crystal Switch diagonally and lower the blocks; However, this is not absolutely necessary at the moment. First go north.
In the next room you will find a large iron ball, an owl statue and a lever. The orb is the key to the dungeon’s central puzzle. With the Power Bracelet you can pick them up and carry or throw them into adjacent rooms. The lever on the right pulls the two blocks apart. Pull it out completely and then quickly run between the blocks to the left. Leave the iron ball here for now, because we need to explore the lower level first.
In the next room, go to one of the holes and deliberately let Link fall down.
Stone beak
You end up on the first floor again. Defeat all enemies and follow the only possible path several rooms to the west. Then go south and open the Treasure Chest. Inside lies the stone beak.
The owl statues in the Eagle Tower provide particularly important clues. One explains that you have to jump from an upper floor to reach an otherwise unreachable chest. Another makes the central puzzle unmistakable: Only when the four pillars fall can the tower be defeated.
In the original Link’s Awakening there is again a stone tablet fragment in place of the beak. This does not change the basic solution of the Eagle Tower.
Crystal Switch and Mirror Shield
Return east and go to the room with the Crystal Switch surrounded by spikes. Hit him with the sword, Boomerang or another ranged weapon so that the colored blocks change position. Then run back to the stairs via the lower or right path and climb to the second floor again.
Due to the changed block position you can now open the previously unreachable Treasure Chest. Inside is the Mirror Shield. It automatically replaces Link’s old shield and, in addition to normal projectiles, can now also block significantly stronger attacks such as fire beams and certain energy balls.
The Mirror Shield will be very helpful for the final boss of the Eagle Tower and will later be absolutely necessary to even reach the last dungeon. So keep it in mind if fire suddenly blocks your path in the valley-valley-mountains.
Small Key and Dungeon Map
Fall through the small hole to the right of the chest with the Mirror Shield. You land on a raised platform on the first floor that wasn’t accessible from below. Follow the narrow path north and open the Treasure Chest with another Small Key. Then jump off the platform and return up the nearby stairs.
There are two horse heads in the next room. Pick them up and throw them until they both land upright on their bases. As soon as this is successful, a Treasure Chest appears with the Dungeon Map. Here you can see for the first time how unusual the Eagle Tower is constructed: four floors lie one on top of the other, with the upper floors changing their structure after the columns collapse.
Destroy the first pillar
Now return to the room with the iron ball. Pick up the ball and first throw it between the two blocks on the left. Pull the lever completely out, quickly run through the opening and pick up the ball again. In the next room is the , the first of the four pillars.
First defeat the slimes so that they don’t bother you when you throw them. Stand to the right of the column or in a good straight line and throw the iron ball against it. The pillar breaks immediately. Be careful not to accidentally throw the ball into one of the holes; If it falls down a floor, it will reappear in its original place and you have to get it again.
Then pick up the orb again and go south.
Destroy the second pillar
The second pillar is already in the next room. Position yourself below or to the side of it and throw the ball so that it hits the massive pillar without falling into an abyss. The second pillar also breaks with a single hit.
Pick up the ball again and return to the previous room. Then push away the single block on the left and carry the ball further west. In the following area you first have to leave them behind or throw them over a barrier, as Link himself has to take a different route.
Compass and throw the ball over the barrier
Three opponents with changing card symbols are waiting in an adjacent room. Beat them each so that at the end all three the same symbol show. As soon as the combination is correct, one will appear Treasure Chest with the Compass.
Then take the iron ball and carry it into the southern corridor. You cannot yet reach the third pillar directly from your current site. Therefore, throw the ball over the low barrier and leave it there. Link himself now has to take a detour via the lower floor.
To the other side of the third pillar
Go back to the stairs and climb down. Follow the familiar path through the first floor until you reach the second floor again via another staircase. A room with flying floor tiles awaits you there. Stand in a corner and hold the shield up until all the plates on it are shattered. The Boomerang also instantly kills flying sparks and turns them into fairies in case you need healing.
Then go through the now opened door. You reach the other side of the room where you previously threw the iron ball.
Destroy the third pillar
Pick up the ball again and throw it at the third pillar in the middle of the room. Then push the lower stone block into the hole to create a safe transition. Pick up the ball again and throw it over the next chasm to the right side. Jump after it and carry it two rooms south.
There is a Crystal Switch and again a low barrier. Throw the ball down over the barrier. We have to reach it again by a different route before the fourth and final pillar can be destroyed.
Hinox and Secret Seashell 26 of 26
Return again via the lower paths and stairs. This time you go south from the corresponding upper room and encounter a red Hinox. He is stronger than the previous Hinox from the Bottle Grotto and also throws bombs. However, thanks to the boomerang, the fight is very easy: a few hits are enough without you even having to approach it. After his death, a Small Key falls from the ceiling.
Now comes one of the most important moments of our 100% route. Go to the holes on the left side of the room and intentionally let Link fall down. You land on a raised platform on the floor below. Follow it north several rooms until you reach a stand-alone Treasure Chest.
Open it and you will get Secret Seashell 26 of 26. We have actually collected every single Secret Seashell from the Game Boy Color version, including the two missable bonus shells on exactly five and ten copies.
From now on we can pick up the shell sword safely. The rest of the game’s chests no longer contain any more shells anyway.
Reach the fourth pillar
Jump down from the platform and return to the second floor. Go into the room where you just defeated Hinox and continue east to the next card symbol puzzle. Here too, bring all three opponents to the same symbol. This causes a Treasure Chest to appear, which we immediately need as a target for the Hookshot.
First, continue east, pick up the iron ball waiting there and carry it back to the map symbol room. Throw the ball over the barrier to the upper area. You then take the detour via the rooms to the north or west and return from above.
You open a hidden passage by placing a bomb on the southern wall between the two torches. In the following room, blow up the next wall and finally use the Hookshot to move to the previously created Treasure Chest on the other side. Pick up the iron ball there again.
Destroy the fourth pillar
Carry the ball north. There is the fourth and final pillar. Throw the iron ball at it. As soon as it breaks, a short cutscene follows: The upper part of the Eagle Tower collapses and the previously separate upper floors are connected.
The central puzzle of the dungeon is now solved. The iron ball is no longer needed and we can fully concentrate on the path to the Miniboss, to the Nightmare Key and finally to the eagle.
To the third floor
If necessary, play Manbo’s Mambo to quickly return to the dungeon entrance. Then go two rooms to the right, north and up the stairs again. Due to the collapse of the upper floors, new paths are now open. Use the Small Key on the locked block, jump off the platform and use the Crystal Switch so that the right blocks are lowered.
Climb the next set of stairs. You are now on the third floor, which could hardly be explored in any meaningful way before the four pillars were destroyed.
Miniboss: Grim Creeper
Go north one room and then right. The Grim Creeper is waiting here. He himself doesn’t attack Link directly. Instead, he summons six large bats or flying servants and sends them at you one after the other in different formations.
The peculiarity of the fight is that you all six enemies within a single attack wave have to defeat. If even one escapes, the Grim Creeper calls a new formation and the fight begins again. Therefore, stand as centrally as possible in the room and carefully observe the order in which the bats attack. They can be reliably eliminated with quick sword strikes or a well-prepared whirling attack. Also that one Boomerang is excellent because it can hit multiple targets on its way there and back.
Once all six are defeated in the same round, the Grim Creeper gives up and flees. What remains is a warp field to the entrance.
Find Nightmare Key
After the Grim Creeper, go north. In the next room there are three sparks floating around and in the middle is a Crystal Switch. It’s best to kill the sparks with the Boomerang; This creates fairies at the same time. Then press the Crystal Switch once.
There are two movable blocks in the same room. Push both towards the middle of the room until they are right next to each other. As soon as the correct position is reached, a Treasure Chest appears. Open it and you will get the Nightmare Key.
Secret medicine in the Eagle Tower
Before we go to the final boss, we take a valuable chest with us. From the Grim Creeper room, go west several rooms and open the big boss door with the Nightmare Key. Follow the passage further north, avoiding the blade traps and the laser beams from the Beamos, and finally go right.
There are two horse heads in this room again. Throw them until both are standing correctly on their bases. A Treasure Chest appears and contains Secret Medicine. If you already have one portion, you cannot consume a second one at the same time. However, medicine is a useful backup for the upcoming boss fight, especially if you are aiming for a score without deaths.
On the roof of the Eagle Tower
Then return one room to the west and one room to the south. Climb the stairs at the top left of the room and aim the Hookshot at the block on the opposite side. Link is pulled across the gap.
From there, go south, then east and climb the next set of stairs. For the first time you leave the actual dungeon and reach the roof of the Eagle Tower. Run up the long stairs. The Grim Creeper appears above again – but this time not alone. He sits on the back of a massive eagle and sends it into battle against Link.
Boss: Evil Eagle
The Evil Eagle fights fully in side view at the top of the tower. The biggest danger is not losing all the hearts, but rather being blown over the edge of the platform by strong winds. If you fall down, you won’t immediately land dead on the ground, but you will have to return to the roof and the fight will start again.
The eagle has multiple attacks. If he flies low over the platform, you can hit him directly with your sword. If it is a little higher, jump with the Roc’s Feather and strike while jumping. Hookshot and Boomerang can also cause damage, although you should aim for his head for long-range attacks if possible.
The phase in which the eagle positions itself at one end of the screen and generates wind with powerful flaps of its wings is particularly dangerous. At this moment, hold towards the eagle so that Link runs into the wind, and at the same time point the Mirror Shield at the incoming feathers. The new shield blocks them reliably and prevents Link from being additionally knocked back.
During another attack, the eagle shoots across the screen at high speed. Keep your shield ready or land a well-timed sword strike as he approaches. If you stay calm and concentrate on not being blown off the roof, the fight is easy to control despite its spectacular staging.
After several hits, the eagle gives up and crashes. The Grim Creeper also disappears for good.
Heart Container and Abendruh organ
After the victory, a complete Heart Container will appear. Collect it and then climb back down the ladder. Enter the tower and jump from the platform to the right. Go north one room.
The seventh instrument of the sirens is waiting there: the Abendruh organ. With her, all that’s missing is a regular dungeon and an instrument before we can wake up the Wind Fish.
The message of the instrument refers again to your ocarina. The journey now continues into the western part of the Tal-Tal Mountains and to the final dungeon, the Turtle Rock.
What happens to the flying rooster?
After completing the Eagle Tower, the blue rooster will no longer accompany you. Instead, he moves to the chicken farmer in the Tal-Tal-Mountains, who is delighted with his extraordinary new friend. That’s no problem: We have already completed all the jobs for which the flying rooster is absolutely necessary.
In particular, Secret Seashell 23 and the bird key are safely collected. All later paths can be managed with Hookshot, Pegasus Boots, Roc’s Feather and Mirror Shield.
All 26 Secret Seashells – Collect Shell Sword
Since we found the 26th and last Secret Seashell in the Eagle Tower, we can now finally return to the Shell Bazaar. Play Manbo’s Mambo and travel to the Urunga Steppes. Enter the Shell Bazaar and stand on the pedestal.
The system responds to your collection and gives Link the stronger shell sword. It automatically replaces your current sword and causes significantly more damage. As long as your health is completely filled, the sword can also fire energy waves and hit enemies from a distance.
Normally it is enough to own 20 Secret Seashells to receive this reward. For our 100% route, we intentionally waited until 26 so that all of the shells were actually collected as items. The entire shell collection is now finally complete.
Note on the last DX photo
You should still be missing exactly one shot in the photo album: “Close Call”. We’ll get this photo in the next section. It is located on a long bridge in the western Tal Tal Mountain Range and can only be triggered on the way to Turtle Rock. The photographer wants to take a picture of Link on the bridge, but keeps walking backwards and ends up falling backwards into the depths – of course not without pressing the shutter button as he falls.
This concludes the photo album with 12 of 12 pictures in the next section. In the original Link’s Awakening, this side quest is completely omitted.
Differences from the original
The path with the flying rooster, bird key and eagle tower is already present in the original Link’s Awakening from 1993 and has only been slightly adapted for DX. The four pillars, the iron ball, the Mirror Shield, Grim Creeper and the Evil Eagle also function almost identically in both versions. As usual, within the dungeon, DX replaces the old stone tablets with stone owl statues and beaks.
The biggest DX-specific feature surrounding this section is the photo album. The “Close Call” recording on the mountain bridge only exists in Link’s Awakening DX and is only triggered as you continue through the mountains. Of course, the red or blue robe from the Color Dungeon remains a pure DX extension and makes the fight against the Evil Eagle easier through higher damage or reduced hit effectiveness, depending on the variant chosen.
In the next section we cross the western part of the Tal-Tal mountain range. There we get Piece of Heart 12 of 12 and with it the complete collection of heart parts, trigger the last DX photo “Close Call”, save Marin from the mountain bridge, find the last capacity improvement and finally wake up with Mamufrosch’s song the huge turtle in front of the turtle rock. Then the eighth and final regular dungeon awaits.