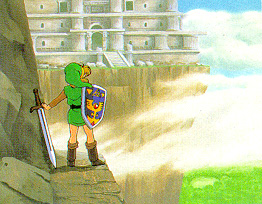

After defeating the Lanmolas in the Desert Palace, Link now also has the Amulet of Courage and the Amulet of Strength. Only one amulet separates us from the Master Sword. It is located high on the Death Mountain in the Tower of Hera. However, the power gloves from the desert palace have opened up numerous new paths in the Light World, which is why we don’t climb the mountain straight away.
For our 100% pass, we first combine the path to the third dungeon with a larger collection round. We visit King Zora and buy the Zora Fins, take the next Piece of Heart with us, improve the shield and Boomerang for free at the Waterfall of Wishes, get our third bottle and can already start with the permanent expansions for bombs and arrows on Lake Hylia. Only then do we climb up to the Death Mountain, get the magic mirror, collect two more Pieces of Heart and enter the Tower of Hera. One of the most important items in the entire game is waiting there: the Moon Pearl.
If you followed our previous A-Link-to-the-Past walkthrough, you start this section with eight hearts and eight of 24 Pieces of Heart. You also have two bottles, power gloves, Pegasus Boots, bow, Boomerang, Ice Rod, book of Mudora and the first two amulets.
Before Death Mountain: Zora’s Domain
For our next trip you should, if possible, have at least 500 Rupees. That’s exactly how much King Zora charges for his fins. If you still lack money, you can collect the ruby chests you missed so far or use the productive caves from the previous section. The Zora fins are not yet needed within the Tower of Hera, but they are part of regular game progress and at the same time open several collectibles that we can now connect with each other without any major detours.
Head to Witch’s Magic Shop in the northeast Hyrule’s. Directly east of it, a large light-colored rock blocks the path. Before the desert palace we couldn’t go any further, with the power gloves you can now simply lift the rock and throw it to the side.
Follow the exposed path north and then east. The further you go into the area, the more watercourses cross the landscape. River Zora emerge from the water and fire projectiles at Link. You don’t have to spend long with them. Stay on the shallow water areas and sandy paths and continue working your way through the branched area to the northeast.
At the very end of the river, the huge King Zora finally emerges from the water.
Zora fins for 500 Rupees
Talk to King Zora and ask him about the fins. He charges a proud 500 Rupees. Pay the price. Link receives the Zora fins and can now swim in deep water. At the same time, you can now use the numerous whirlpools in Hyrule’s waters, which connect different water areas like a small fast travel network.
The fins will be needed later and are therefore not one of the items we want to put off. In addition, immediately after purchase we can collect several previously unattainable secrets.
Piece of Heart 9/24 – at King Zora
Swim directly south from King Zora and let Link slide down the first waterfall. Then head west. There a shallow waterway leads to a small green area of land.
Go ashore and follow the narrow path between the trees further west. At the end the next Piece of Heart lies face up on the floor.
Collect Piece of Heart 9/24. Since our last Heart Container composed of four parts, you now own a quarter of a new container.
The Waterfall of Desires
Return to the water and continue swimming out of Zora’s Domain. After the next larger waterfall you will return to the area above the magic shop. In the northwestern part of the water area there is a waterfall, which at first glance looks like an ordinary rock boundary.
Swim straight into the water wall. Link disappears behind the waterfall and enters a secret cave with a mysterious pond. This is where the Great Fairy of the Waterfall of Desires lives.
The pond works differently than an ordinary fairy fountain. You can throw certain items in. The fairy then appears and asks if the item belongs to you. Answer honestly with Yes. For some items, it rewards your honesty with a permanent improvement.
Magic Boomerang
First, throw your normal Boomerang into the pond. After you confirm that it is yours, you will receive it back improved. The normal Boomerang becomes the magical Boomerang.
The new variant flies faster and has a significantly longer range. This allows you to hit distant switches and collect items over greater distances. Since the enhancement is free and permanent, there’s no reason to skip it.
Obtained the Red Shield
Use the pond a second time and this time throw in your normal shield. Answer the fairy’s question honestly again. She gives you back the improved shield and Link receives the Red Shield.
The Red Shield not only protects against the same projectiles as the previous model, but also blocks weaker fireballs. This upgrade is particularly noticeable against River Zora and various later opponents.
You can also throw an Empty Bottle into the pond. The fairy gives it back to you filled with a green magic potion. However, this is only a consumable item and not an additional permanent improvement.
bottle 3/4 – the man under the bridge
After the waterfall of wishes, we continue to use the new waterways. There is a whirlpool south of the secret waterfall. Swim in and you will be transported via the underground water network to the Lake Hylia area.
From there you swim across the lake and then up the river to the west or northwest. Our goal is the large stone bridge. Instead of climbing onto the bridge, you swim under it. In the shade under the bridge a man has set up a small campsite.
Talk to him. He gives Link a Empty Bottle. You now own bottle 3 of 4. The additional space is particularly useful for the upcoming dungeons because you can now, for example, take several fairies and still have a potion with you at the same time.
You can also find all four Locations in our overview bottles in A Link to the Past.
Bombs and arrows permanently expand
Stick with Lake Hylia. The Fountain of Joy is located on an island in the middle of the lake. Swim to the island and enter the cave. There is a pond in the back that Link can throw Rupees into.
As soon as you have deposited a total of 100 Rupees, Venus, the queen of the fairies, will appear. You can then choose whether you want to increase your maximum bomb or arrow capacity. Bombs start at a maximum of 10, arrows at 30. Most improvements increase the respective maximum by five, the last level brings a larger jump.
Link can be fully expanded 50 bombs and 70 arrows carry. To bring both categories from baseline to maximum, a total of 1.400 Rupees needed.
You don’t have to invest this amount right away. After spending 500 Rupees for Zora fins, your wallet may have become significantly empty anyway. However, for our 100% run, we note the well and continue to deposit on subsequent visits until both capacities are maximized.


The climb to Death Mountain
This concludes our big water tour. The third amulet is waiting on the Death Mountain. Its entrance is northwest of the cathedral. Go there and look for the cave entrance, in front of which there is a large light rock. Use the power gloves to lift him and enter the dark cave.
Inside, visibility is severely limited. The lamp automatically creates a small circle of light around Link; If necessary, you can also light individual torches. Jump down from the first ledge and follow the narrow cave paths. At the junctions, initially keep to the right and work your way through the eastern part of the cave system.
After a short while you find an old man who is lost in the darkness.
Take the old man to the exit
Talk to the old man. Since he has lost his lamp, he asks Link to guide him safely through the cave. He follows you automatically. Go east with him and follow the narrow path along the abyss.
The old man gives some tips on the right direction along the way. Continue following the cave passage until you finally get outside again. Once outside you just have to walk a short distance to the east. As soon as you reach his cave, he thanks you for your help.
The magic mirror
As a thank you, the old man gives you the magic mirror. It is one of the most important items in A Link to the Past and is needed to switch between the light and shadow worlds.
If you use the Magic Mirror in the Shadow World, Link will return to the Light World at the same geographical location. A glittering portal remains in place. If you enter it, you will return to the shadow world. Within a dungeon, however, the mirror has a different function: There it takes Link directly back to the dungeon entrance.
Calmly enter the old man’s cave. If you talk to him there, he will completely heal Link’s health. This free healing point is particularly useful on the Death Mountain, as falling rocks and deadrocks can quickly cost you a few hearts.
Piece of Heart 10/24 – in the mountain cave
Leave the old man’s cave and climb further up the ladders. On the open mountain slopes, large rocks constantly fall from the top of the screen. Don’t try to stop them with your sword, just keep moving and dodge to the sides. The Deadrocks cannot be defeated permanently either. A sword blow only turns them into immobile stones for a short time.
On the upper western level of Death Mountain you finally come close to the eye-catching Spectacle Rock. There are several places on the southern edge where Link can jump onto lower ledges. Look for the ledge with a cave entrance below and drop down onto the small platform.
Enter the cave, walk north inside and climb the stairs. On the upper level you will find Piece of Heart 10/24. Take it with you. If you need healing, you can also access a small fairy area in this cave system.
The first controlled visit to the shadow world
Afterwards, return to the upper level of Death Mountain and go as far east as possible. Near the Tower of Hera is a striking blue warp teleporter. Stand on it.
Link is transported to another version Hyrule’s. Since we don’t have the Moon Pearl yet, he automatically turns into a pink bunny. In this form you cannot use the sword or most of your equipment. This is exactly why the Moon Pearl in the Tower of Hera becomes so important.
For the moment, however, we only stay in the shadow world for a few seconds. It allows us to reach a place that is blocked in the light world by the Spectacle Rock.
Piece of Heart 11/24 – on the spectacle rock
In bunny form, go a little west from the warp teleporter. On the floor you can see a bright area whose shape is reminiscent of the spectacle rock of the Light World. Stand on the northern or right part of this marking and use the magic mirror.
Link is pulled back into the Light World. However, since the huge spectacle rock rises in the same place, you land directly on its plateau. Piece of Heart 11/24 is openly visible here.
This means you already have three new Pieces of Heart since the last complete Heart Container. One more is still missing until the next additional heart.
Then jump down from the northern side of the Spectacle Rock. You land on the elevated level directly in front of the Tower of Hera.
The stone tablet west of the Tower of Hera
West of the Tower of Hera, a long, narrow bridge leads to another stone tablet with ancient Hylian script. Since you have the Book of Mudora, you can already read the inscription. The plaque announces the Air Medallion.
However, we cannot receive it yet. To unlock the magic locked within, Link needs the Master Sword. This is exactly what we only get after the Tower of Hera once all three amulets have been collected. We will therefore leave the board for now and return in the next chapter.


The Tower of Hera
Now enter the Tower of Hera. The dungeon is significantly different from East and Desert Palace. Instead of a spacious ground floor, Link continues to climb upwards over several levels. At the same time, Crystal Switch determine which colored blocks are raised and which are sunk into the ground. In addition, so-called star switches change the position of the holes in the floor.
These two mechanics are combined with each other several times. In addition, in some places you have to deliberately drop through holes to lower floors – especially for the Moon Pearl.
Crystal Switch and colored blocks
The first Crystal Switch is located directly in the entrance area. Its current color shows you which barriers are currently active. When you get hit, all of the dungeon’s switches change state at the same time: one color is lowered while the other comes out of the ground.
You can’t hit a Crystal Switch with just the sword. Boomerang and arrows also work, which becomes important later when a switch is on the other side of a barrier.
First hit the first switch so that the blue blocks are lowered. Then go down the western stairs.
Small Key and card
Two Stalfos and a mini-Moldorm are waiting in the lower room. The Small Keys is located within the colored block arrangement. You can rearrange the Crystal Switch accordingly and walk in. The Boomerang is even easier: stand within reach and use it to pull the key directly to Link.
Return to the entrance area via the stairs. Change the Crystal Switch so that you can get to the northern part of the room. Mini-Moldorms and small fire-breathing Kodongos are waiting there. Eliminate them and open the chest with the Dungeon Map Tower of Hera on the raised area.
Then use the Small Key on the locked door and go back down to the lower floor.
Flying floor plates and Big Key
In the next room, a sequence begins again with flying floor tiles, as you already know from the desert palace. This time you can’t hide so easily in a doorway. If possible, stand in a corner and destroy the plates flying towards Link with your sword. As soon as the last plate has disappeared, the further path opens.
Continue through the dungeon and always rearrange the Crystal Switch so that the required passages are free. In the next section, eliminate the mini-Moldorms and continue south. There are two red Stalfos waiting there.
Defeat both of them and then look at the four torches in the room. Use the lamp to light all four. As soon as the last one burns, a Treasure Chest appears. Inside lies the Great Key.
Under the jars you will find magic with which you can replenish the supply used when lighting the torches.
hardhat beetle and star switch
Return to the entrance area and this time take the path to the upper floors. You will soon meet Hardhat Beetle for the first time. They have hard armor and are thrown back strongly by sword blows. Since there are numerous abysses in the ground at the same time, you don’t have to defeat them in the classic way: position yourself so that there is a hole between the beetle and Link and push him into it.
In the following room you will get to know the second central mechanic of the Tower of Hera. If you step on a star switch, the holes in the floor change. Where there was just safe ground, there can now be an abyss – and vice versa.
Use this mechanic to create your own path through the room while simultaneously pushing Hardhat Beetles into newly created holes if necessary. Then open the large door in the north with the Big Key.
In the long room behind, follow the path to the east. Change the star switches so that you can reach the stairs safely. Before you go up, the Crystal Switch should be positioned so that the blue blocks are raised. We need this setting for the Moon Pearl.
The Compass
Several mini moldorms await you on the next floor. Instead of running after them with your sword, you can use the jars standing around as weapons. A direct hit instantly eliminates a Mini-Moldorm.
Then open the chest in the middle area and take the Compass. This means that all of the normal dungeon aids have been collected in the Tower of Hera.
There is also a Sahasrahla tablet in the western area. She specifically points out the Moon Pearl and makes it clear that you should not leave the Tower of Hera without taking this item with you.
The Moon Pearl
Keep climbing up. Hardhat beetles, blue bumpers and a rotating fire rod await you in the next larger room. Fighting here is less important than the correct position of the holes.
Step on the star switch to change the hole pattern. For the large chest below you, you need the hole in the northern or middle area of the room.
Then stand directly north of the correct hole and go in from above. Direction is crucial because Link maintains his horizontal position as he falls. If you fall down in the right place, you will land one floor below within the closed block border with the large Treasure Chest.
Open the chest with the Big Key and take the Moon Pearl.
From now on, Link will no longer turn into a rabbit in the shadow world. Instead, he remains in his normal form and can use all weapons and objects. The Moon Pearl is therefore a mandatory requirement for the entire second half of the game.
Fairies in front of Moldorm
Before you become the boss, it’s worth making some final preparation. In the upper area of the Tower of Hera there are several holes that can be used specifically. Fall through the northern one of the corresponding holes and after several floors Link will end up in a hidden room with fairies.
Heal yourself completely and, if possible, catch at least one fairy with the butterfly net in a bottle. The following boss doesn’t necessarily cause a lot of direct damage, but its knockback mechanics can make the fight unpleasant very quickly.
On the way back up you will also find jars with hearts. Feel free to leave some of them lying around. If Moldorm knocks you off his platform, you can use it to heal when you climb back up.
Boss: Moldorm
Climb to the top of the Tower of Hera. Moldorm waits on a small platform high above the Death Mountain. The giant worm has no projectiles or complicated attack patterns. Nevertheless, he is one of the most unpleasant bosses in the first half of the game, because almost the entire arena is surrounded by abysses.
The only vulnerable point is on Moldorm’s glowing tail. Hits to the head or body do no damage and instead force Link back. It is precisely this recoil that is the real danger of the fight.
Fight safely
Stay at the bottom of the platform if possible. There, the southern wall offers a little more protection from a direct fall. Don’t constantly run after Moldorm. His movements are difficult to predict and a hasty attack often ends in Link flying off the platform.
Instead, charge up a spin attack and watch Moldorm move. As soon as his tail comes close to you, you release the attack. Normal sword strikes also work, but the larger hit area of the whirl attack makes the fight a little more pleasant.
With the normal sword, Moldorm needs a total six hits to the tail. After four hits it will be significantly faster. From this point on you should play even more carefully and not try to force the last two hits.
If you fall off the platform
If you are pushed over the outer edge, you will end up on the floor below and have to go up the path to the boss again. Even more annoying: Moldorm regains all of his health. So the fight starts again from the beginning.
If you fall through the big hole in the middle, you can fall even further down. That’s exactly why it’s worth not completely using up your heart reserves on the way up.
Stay patient, focus only on landing sure hits on the tail and avoid unnecessary attacks on the body. As soon as the sixth hit hits, Moldorm is defeated.
Heart Container and Amulet of Wisdom
After Moldorm’s defeat, a complete Heart Container first appears. Collect him. On our route so far, Link’s maximum health increases from eight to nine hearts .
In addition, you still have three individual Pieces of Heart – number 9 at King Zora as well as the two Pieces of Heart on the Death Mountain. So all that’s missing is another Piece of Heart until the next complete container.
The Amulet of Wisdom then appears. Link now has all three amulets:
- the amulet of courage from the Eastern Palace,
- the Amulet of Strength from the Desert Palace,
- the Amulet of Wisdom from the Tower of Hera.
The requirement is met. Link can now return to the Lost Forest and pull the legendary Master Sword from its socket.


Go to Master Sword
After the Tower of Hera, Link has nine hearts, eleven of 24 Pieces of Heart, three of four bottles, Zora Fins, Magic Boomerang, Red Shield, Magic Mirror and Moon Pearl. There are also all three amulets.
Our next route leads back to the Lost Forest. There we pull the Master Sword. We then briefly return to the Death Mountain to use the new blade to remove the air medallion from the stone tablet west of the Tower of Hera. After that, events in Hyrule take over: Zelda reports telepathically from the cathedral and Agahnim’s tower becomes our next main target.