

With the victory over Moldorm, Link finally has all three amulets: the Amulet of Courage from the Eastern Palace, the Amulet of Strength from the the desert palace and the Amulet of Wisdom from the Tower of Hera. This fulfills the requirement to pull the legendary blade from the Lost Forest. Our next target is therefore the Master Sword.
Before we face Agahnim in Hyrule Castle, we make an important detour on our 100% route: With Master Sword and Book Mudora we can now get the Air Medallion on the Death Mountain received. We then follow Zelda’s’s call for help to the cathedral, break Agahnim’s magical seal and climb up through his seven-story castle tower to the first direct fight against the sorcerer.
If you have fully followed our previous Walkthrough on A Link to the Past, Link now has nine hearts and eleven of 24 Pieces of Heart. There are also three bottles, Moon Pearl, magic mirror, Zora fins, red shield, magic Boomerang, bow, Ice Rod, power gloves, Pegasus Boots and all three amulets. For the castle tower, you should fill at least one of your bottles with a fairy.
Back to the Lost Forest
After the Tower of Hera you first have to go from Death Mountain back to the level Hyrule’s. From the tower, go west past the Spectacle Rock and follow the mountain path to the long ladders. You can return to the lower level via the well-known caves. From there you can walk west to the lumberjack house and then directly into the Lost Forest.
Alternatively, you can of course also reach the forest via Kakariko. In both cases, the goal is the same enclosed area deep between the trees. There are still several fake master swords lying around in the normal forest. They only serve to deceive and can be ignored.
Work your way deeper and deeper into the forest through the hollowed out tree trunks. From the northeastern entrance, you first go southwest through the horizontal trunk, then through the neighboring trunk again to the north. Follow the path west, cutting the bushes out of the way and using the other logs until you finally reach the completed Sacred Grove.
The Master Sword
As soon as you enter the Sacred Grove, the animals disappear between the trees and the base of the real Master Sword lies in front of you. The atmosphere and the significantly larger clearing make it immediately clear that this time you are not standing in front of one of the dummies from the rest of the forest.
There is an ancient inscription on the base. You can read them with the book Mudora, but you don’t need the book to actually pull them out. Only the three amulets are decisive.
Go around the base and stand on the north side of the sword. Press the action button. The three amulets react with each other and Link pulls the Master Sword out of the stone.
This will permanently replace your current sword. Sahasrahla immediately makes telepathic contact and explains that Link now has the weapon that can break through Agahnim’s magical barrier.
What can the Master Sword do?
The Master Sword Causes more damage than Link’s previous blade and has a longer range. His long-range attack is particularly practical: as long as Link’s health completely filled is, a normal sword strike also creates a sword beam that flies straight across the room. If Link loses even part of a heart, this ability disappears until his energy is fully replenished.
However, another feature is crucial for the story section that is about to begin. Agahnim’s magical barrier on the upper terrace of Hyrule Castle can only be destroyed with the Master Sword. The magician himself, on the other hand, is not easily vulnerable to direct sword blows. In battle we must use his own magic against him.


air medallion on the Death Mountain
Even before the Tower of Hera we discovered a large stone tablet west of the dungeon. With the Book of Mudora we were able to read her inscription, but we have not yet obtained the medallion enclosed within it. Now we also have the Master Sword and can deal with this discovery straight away.
Leave the Lost Forest via the northeast exit and climb back up the Death Mountain via the well-known cave route. On the upper level, go back towards the Tower of Hera. To the west of the tower, a long, narrow bridge leads to the green stone tablet.
Stand directly in front of it and use the book Mudora. Link reads the inscription and then holds up the Master Sword. The tablet breaks and you receive the Air Medallion.
The Air Medallion unleashes a powerful magical attack across the entire screen. Many weaker opponents are defeated immediately, stronger opponents are often frozen. Even more important: Later we will need the medallion to open the entrance to the Misery Mire. Since we just received the Master Sword anyway, we’ll take it with us now and save ourselves an additional climb to the Death Mountain.
Zelda’s Call for help
Shortly after receiving the Master Sword, Princess Zelda reports telepathically to Link again. Agahnim’s soldiers have entered the cathedral and Zelda urgently asks for help. There is no actual time limit. You can therefore easily collect the air medallion first and then take care of the story.
Descend from the Death Mountain again and run to the Cathedral north of Hyrule Castle. As soon as you enter the building, however, it becomes clear that Link has arrived too late.
Zelda was kidnapped
Princess Zelda is no longer in the cathedral. Agahnim’s soldiers have already taken them to Hyrule Castle. The priest lies seriously injured in the back of the building. Talk to him. With the last of his strength, he explains to Link what happened and sends him to the castle.
This begins the final section of the Light World main plot. Agahnim now possesses Zelda and attempts to finally complete his ritual. Our path therefore leads directly to Hyrule Castle.
The magical seal in Hyrule Castle
This time enter Hyrule Castle through the normal main entrance. The gates are open and the secret entrance from our first chapter is no longer needed. In the large entrance hall, go left or west and climb to the upper level in the following area.
Then leave the building via the southern exit. You are now standing on the raised terrace above the main entrance to the castle. Go east. There, a glowing magical barrier blocks the entrance to Agahnim’s Tower.
Stand in front of it and hit once with the Master Sword. The seal breaks and the previously inaccessible entrance is opened.
Enter the castle tower.
Agahnim’s Castle Tower
The Castle Tower is its own dungeon, but is significantly different from the three palaces we have completed so far. There is no , no Dungeon Map, no Compass, no Big Key, and no special dungeon item. Instead, Link continues to climb through seven floors and has to collect a total of four Small Keys.
The real challenge is the numerous stronger soldiers. Many doors only open when all enemies in the respective room have been defeated. However, the Master Sword now deals enough damage that you can save arrows and magic for situations where they offer a real advantage.
Small Key 1
Go north from the entrance. In the first real fight, two soldiers with large morning stars wait. You already know this type of opponent from the dungeon master from the first chapter, but this time two are fighting at the same time.
Keep your distance while they keep their morning stars circling. The Magic Boomerang can briefly stun them, giving you the opportunity for multiple hits with the Master Sword. Alternatively, you can also use arrows from a distance.
Once both are defeated, the path to the east opens. In the next room, two blue sword soldiers attack directly. Their long blades and aggressive movements make frontal attacks unnecessarily risky. Move sideways around her and hit her from an angle where her sword won’t protect Link.
After both are defeated, a Treasure Chest appears. Open it and take the first Small Key. Use it on the locked door and climb up to the next floor.
Dark Labyrinth and Small Key 2
When you reach the top it gets dark. In the first room you can eliminate the lone soldier and the bat or continue directly west. Behind it begins a large, dark labyrinth full of soldiers and bats.
If you can’t orient yourself safely, light the torch with your lamp. The additional light allows you to see the narrow aisles much better.
Our first destination is the west side of the labyrinth. From the entrance, first follow the hallway north and then west. Work your way further and further through the winding passages to the left side of the room. There is a Treasure Chest with the second Small Key.
After collecting, you don’t have to go back to the original entrance. Your target is now in the southeast corner of the same labyrinth. Orient yourself on the outer walls and work your way down through the corridors and then to the right.
Open the locked door there and climb further up through the next dark room. You only have to eliminate the enemies on the way if they block your passage.
Small Key 3
The next section is also initially in the dark. A swordsman and an archer wait just inside the entrance. Your Red Shield can intercept arrows from the right direction, but you should still kill the melee fighter first so that you have enough freedom of movement.
Then continue west. In the following room, narrow paths lead along a large abyss. Here it makes sense to light the torches. Not because you necessarily need light, but because a single hit from a soldier can otherwise quickly send Link off the path and into the abyss.
Work your way carefully through the room and eliminate the enemies one at a time if possible. In the next section there are two archers and another soldier waiting. One of the archers carries the third Small Key.
Defeat the key holder, pick up the key and open the next locked door. Another staircase then leads to the next floor.
Small Key 4
There are two red spear soldiers and bats waiting in the first room on this floor. Here you have to eliminate all enemies before the exit opens. Don’t stand between the two spear soldiers. Lure one enemy aside, defeat him and only then deal with the second one.
Follow the next rooms through the tower. Eventually you will reach a large chamber with several concentric rows of blocks and jars. Bats and red spear soldiers move between them.
The soldier in the inner area carries the fourth and final Small Key. The magical Boomerang is particularly helpful here. Stun the enemy through the openings between the jars and then go in for some sword slashes. Alternatively, you can use one of the jugs as a weapon.
Once the soldier is defeated, pick up the key and open the last locked door of the tower.
The last floors of the castle tower
In the next room there is another Morgenstern soldier and more guards waiting. You don’t have to defeat every opponent this time. If the exit is clear, you can concentrate on the path and take the stairs up.
On the next floor, several statues block the passage. Push the left statue out of the way while watching out for the archers in the room. Once a gap has appeared, go through it and continue climbing up.
The final normal room consists of a very narrow path over a chasm. Two blue soldiers guard the passage. You shouldn’t try to just push past here. Defeat both of them first on the wider part of the room and then calmly cross the narrow bridge.
At the end the last staircase leads up to Agahnim.


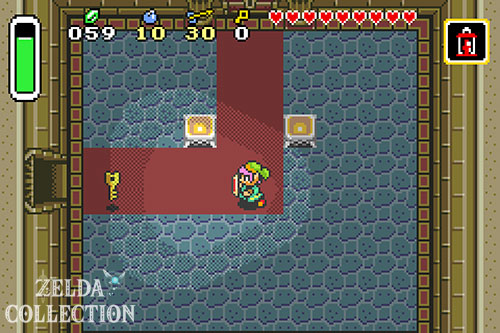


Agahnim completes the ritual
At the top of the castle tower, Agahnim stands together with the unconscious Zelda. Link reaches them both, but can no longer prevent the ritual. Right before his eyes, Agahnim makes the princess disappear and also banishes the last descendant of the wise men into the shadow world.
The seal is finally broken.
Agahnim itself then retreats and seemingly disappears behind the north wall. There is no normal door there. Instead, go to the middle of the large curtain and hit it with the sword. The fabric is cut, revealing a secret passage.
Go through and enter the arena.
Boss: Agahnim
The fight against Agahnim works completely differently than the previous boss fights. The Master Sword was necessary to even get to him, but direct sword blows do not hurt the magician. Instead, you must throw his own magic back at him.
Agahnim periodically teleports to a different position in the room and then prepares one of its three attacks. Therefore, stay in the middle of the arena and first observe where he appears and which spell he uses.
The large energy ball
His most common attack is a large bright ball of energy. Stand a few steps in front of Agahnim and already point the link towards him. As soon as the bullet has almost reached you, you strike with the Master Sword. If the timing is right, the ball will be thrown back towards the magician.
If it hits Agahnim, he takes damage. In total, the magician needs six successful hits with his own energy balls.
Don’t try to catch the ball as early as possible. The closer she gets to Link, the easier it is for you to control her trajectory and hit right back at Agahnim.
The blue bullet
Not all of Agahnim’s attacks can be repelled. Occasionally he fires a bluish sparkling projectile. You should simply avoid this attack.
If you hit the blue projectile with your sword, it will burst into several smaller projectiles that spread across the room in a star shape. They cause damage to Link, but cannot hurt Agahnim themselves. So don’t reflexively hit after every spell, but instead take a quick look at the color of the projectile.
Agahnim’s Lightning Attack
At the same time, the strongest attack is particularly easy to predict. If Agahnim after a teleport right up in the middle of the room appears and faces south, he next uses his lightning spell.
Several bolts of lightning then shoot through the room. This attack cannot be repelled. As soon as you see Agahnim in this position, run far left or right and focus solely on dodging.
The butterfly net trick
One of the most well-known features of A Link to the Past actually works in this fight: the normal large energy balls can be beaten back not only with the Master Sword, but also with the butterfly net.
This doesn’t give you any advantage in terms of play and with the Master Sword the timing is much more intuitive. Of course, you don’t have to use the trick for our 100% run, but it is one of the most interesting hidden mechanics in the game.
Six hits until victory
Stay patient and don’t try to pursue Agahnim directly. Wait for the normal reflectable energy balls and send them back. After a total of six hits, the magician collapses.
If you took a fairy with you in one of your bottles, you don’t need to use it as a precaution. Leave it in your inventory – if Link loses all of his hearts, it will automatically be released and revive him.
The shadow world
Agahnim is defeated, but the victory only lasts a moment. With his last strength, the magician pulls Link through the open gate into the shadow world.
This time Link won’t transform into the pink bunny we saw on the Death Mountain. Thanks to the Moon Pearl from the Tower of Hera, he retains his normal form and can use all weapons and objects.
Link lands at the top of the massive Pyramid of Power. Sahasrahla speaks telepathically and explains what actually happened. Zelda and the six other descendants of the wise men have been encased in crystals and are found in seven dungeons in the Shadow World. Only when Link frees all seven girls can the fight against the dark force behind Agahnim continue.
This means that A Link to the Past now opens up significantly. The shadow world is a modified version of the light world and can be connected to it in many places via the magic mirror. Numerous collectibles can only be accessed by switching between the two worlds.
Before we enter the Palace of Darkness
Immediately after Agahnim’s defeat, several new collectibles are practically on our route. There is already another Piece of Heart at the pyramid. Additionally, we can now access additional secrets in Light and Shadow World that were not available before.
We take these finds with us at the beginning of the next chapter and then connect them with the path to the first Shadow World dungeon, the Palace of Darkness. Not only is the first crystal waiting there, but also one of the most important items for further exploration of the shadow world, the hammer.
After this chapter, Link still has nine hearts and eleven of 24 Pieces of Heart, plus three bottles, Master Sword, Air Medallion, Moon Pearl, Magic Mirror, Zora Fins, Power Gloves, Red Shield, Magic Boomerang, arch and Ice Rod. Of course, the three amulets also remain part of your completed collection.