

The second big half of The Legend of Zelda: A Link to the Past begins with Agahnim’s defeat. Link was drawn to the pyramid of the Shadow World and learns from Sahasrahla that Zelda and six other descendants of the Sages are being held captive in crystals. Seven dungeons now lie between us and access to Ganon’s tower.
The first crystal is located in the Palace of Darkness in the east of the Shadow World. Before we enter the dungeon, however, we use our new freedom of movement to find two finds that are practically on the route: the twelfth Piece of Heart on the pyramid and the earth medallion, which will be required later. We then lead Kiki to the palace and completely clear the most extensive dungeon to date. We collect all six Small Key, card, Compass and Big Key as well as all reasonably accessible Treasure Chests. The most important find is the Magic Hammer, which then opens up large parts of the shadow world.
If you followed our previous A-Link-to-the-Past walkthrough, you start with nine hearts, eleven of 24 Pieces of Heart and three of four bottles of. You also have Master Sword, Red Shield, Magic Boomerang, Zora Fins, Magic Mirror, Moon Pearl, Bow, Bombs, Ice Rod and the Air Medallion. To access the palace you should also have at least 110 Rupees – a little reserve doesn’t hurt.
The Pyramid of the Shadow World
After the fight against Agahnim you stand at the top of the huge pyramid. Thanks to the Moon Pearl, Link retains his normal form in the Shadow World and can use all weapons and items. Nevertheless, you should not underestimate the new world. Many enemies deal significantly more damage than their counterparts in the Light World, and familiar paths can look completely different here.
Geographically, the two worlds are largely on top of each other. This is exactly what we will use again and again in the rest of the game: With the magic mirror you can return from the shadow world to the light world in the same place and thus reach ledges, caves and other areas that would be inaccessible from a world alone.
Piece of Heart 12/24 – on the pyramid
Before you completely leave the pyramid, let’s get the next Piece of Heart. From the summit, descend to the south via the large staircase and then stay on the eastern or right side. There you will see a break in the low wall.
Jump to the lower level at this point. Run east and then north again around the raised pyramid section. At the end of the narrow ledge, Piece of Heart 12/24 lies open on the ground.
This means that since our last complete Heart Container four again Pieces of Heart came together. Link’s maximum health automatically increases from nine ten hearts.
Since Agahnim’s defeat, another Piece of Heart has also become available at the strange tree near the lumberjacks. However, we do not prefer this find yet. After the Palace of Darkness we have the hammer and can make our next round of collecting through the Light World and shadow much more efficient.
The Earth Medallion
Before we set off for the palace, we get the third of the large medallions in the northeast of the shadow world. On Zeldacollection we use the name Earth Medallion. It is not needed for the Palace of Darkness itself, but later it is a mandatory requirement for the entrance to Turtle Rock.
Descend completely from the pyramid and head east. Then work your way further and further along the northern paths towards the area that corresponds to the magic shop and Zora’s Domain in the Light World. Several large, light-colored rocks block the path, but can be easily lifted with the power gloves.
Follow the winding terrain further to the northeast. On the higher levels you can destroy smaller piles of stones with the Pegasus Boots. Eventually you will reach a section of river with shallow water. There is a striking circle of stones.
Throw a bush, stone, or other portable object into the circle. An angry catfish emerges from the water and gives Link the Earth Medallion so that he will be left alone in the future.
When used, Link slams his sword into the ground, causing a massive earthquake. The attack affects almost the entire screen and costs a lot of magic. What is most important to us, however, is that the earth medallion is already in our inventory when we reach Turtle Rock later. ([zeldadungeon.net](https://www.zeldadungeon.net/wiki/Quake_Medallion))


To the Palace of Darkness
From the northeastern river area it goes back south and then into the area that corresponds to the Eastern Palace of the light world. The Palace of Darkness is located in almost the same geographical location, but the surrounding area has been transformed into a dense maze of trees and bushes.
At the southern edge of the thicket you will find several apparent entrances. Orient yourself on the floor plates, which look like a North arrow are arranged. The real path through the labyrinth begins there.
In the thicket, some passages initially seem like dead ends. Nevertheless, run close to the rows of trees and try out the narrow passages. Our actual target is not the palace itself, but a little monkey named Kiki.
Kiki – have at least 110 Rupees ready
As soon as you have reached the right part of the labyrinth, Kiki will speak to you. The monkey offers to accompany Link, but first asks for 10 Rupees. Pay him. You cannot enter the palace without Kiki.
From now on you should be extra careful. If Link is hit by an enemy, Kiki runs away. In this case you have to return to his meeting point and pay 10 Rupees again. Therefore, eliminate opponents from a safe distance if possible or run past them in a controlled manner.
Follow Kiki the rest of the way through the labyrinth to the palace entrance. The next demand is waiting there: Kiki opens the entrance for more 100 Rupees.
Pay this amount too. The monkey jumps onto the roof and activates a hidden switch. The entrance to Palace of Darkness opens permanently. Even if you leave the dungeon later, you don’t need Kiki for the door a second time.


Palace of Darkness
The Palace of Darkness is significantly larger and more complex than the previous dungeons. In total there are six Small Keys, and we will actually need each of them. In addition, we take the card, Compass, Big Key and all permanently relevant or permanently placed Treasure Chests with us.
The magic mirror is extremely practical here. If you use it inside the palace, Link will immediately return to the dungeon entrance. Since the palace has several long side paths, this saves us some unnecessary treks back.
Small Key 1 – western side wing
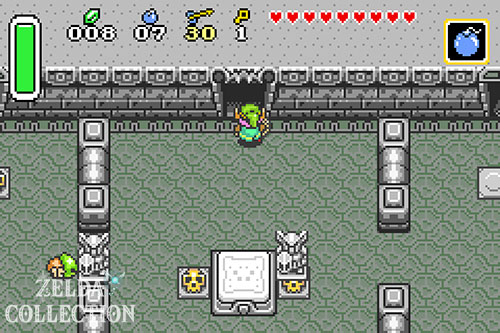
From the entrance room three paths lead north. We start on the far left. Activate the hidden Floor Switch and go through the western door.
In the next area you will meet a small Helmasaur. The hard mask on his head blocks frontal sword strikes. You can try to get behind the enemy, but it’s much easier to use a skull lying around at this point. Pick it up and throw it directly at the Helmasaur.
Then go down the stairs to the basement. Two Medusa statues periodically fire projectiles at Link’s position. So keep moving and go to the skull at the bottom left. Lift it. Hidden underneath is a Floor Switch.
Step on it and a chest will appear. Open it and take Small Key 1. Then you return to the entrance room.
East Wing – Map and Small Key 2
From the entrance we now take the right path. Here too the door is opened by a hidden Floor Switch. Then go down to the basement. At the anti-fairy you will find a yellow teleporter field. If you have Magic Powder with you, you can transform the anti-fairy into a normal fairy beforehand and replenish your energy if necessary.
Then use the teleporter. There is a telepathy plate in the target room. Open the cracked south wall with a bomb or dash with the Pegasus Boots and follow the U-shaped hallway. Pay attention to the Bari as you go: As long as they are electrically charged and visibly flashing, you should not touch them with your sword.
At the other end of the corridor you will find suspicious walls again. Open the right passage and go into the next room.
Red Goriya
Here you will meet green and red Goriya. They move in mirror image to Link. You can defeat the green variants with normal attacks, but the red variant requires arrows.
Position Link slightly offset from the red Goriya, shoot an arrow and then move so that the opponent runs into the trajectory due to his mirrored movement. After two arrow hits, the red Goriya is killed.
As soon as all enemies have been defeated, the further path opens. In the next long room, a conveyor belt works against your direction. Go or sprint north and climb the stairs at the end. In the following room is the chest with the Dungeon Map.
Small Key 2 and fairy fountain
The map room has cracked walls on both sides. Open both. Behind the western wall is a chest with Small Key 2.
The eastern opening, on the other hand, leads to a small fairy fountain. Three fairies are waiting here. Heal yourself completely if necessary and feel free to catch one of them with the butterfly net in a free bottle.
This side wing is now finished. Use the magic mirror and return directly to the entrance.
Middle Way – Small Keys 3 and 4
Now go through the middle door of the entrance area and use one of your two keys. Behind it you come to a large room with a huge abyss, around which several narrow paths lead.
In addition, terror pins are running around here for the first time. The armored turtles cannot be defeated properly with your current weapons. Your tank must first be turned over – that’s exactly what we’ll need the hammer for later. Avoid them for now.
First take the eastern or right arm of the bridge. Push the offending stone block into the abyss and continue into the northeast room. A chest with Small Key 3 is waiting there.
Go back one room and then jump down at the point where you previously pushed the block down. Link ends up in the basement.
Go west. Several Stalfos fall from the ceiling and their heads separately track Link. At the end of the row of blocks there is a skull. Lift it up and step on the switch underneath. Another chest appears. In it you will find Small Key 4.
Then use the teleporter field and return to the upper area.
The Big Key
Back in the large central area, this time we take the western arm of the bridge. You can see a clearly damaged area on the floor. Place a bomb on it and go back until the floor cracks.
Fall through the newly created hole. Link ends up in the basement again, but this time on a raised ledge. Don’t jump down to the normal ground here. Instead, follow the narrow walkway to the locked door.
Open it with a Small Key and climb the stairs. In the chamber above is the chest with the Big Key.
With this we can finally open the large Treasure Chest of the palace. Then return to the entrance area – the quickest way is to use the magic mirror again.
The Magic Hammer
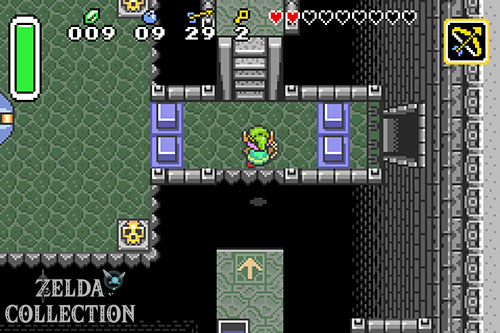
Take the middle path again and this time work your way consistently into the eastern part of the large middle room. There you will find platforms with arrow symbols. When Link runs over such an arrow, he automatically jumps over the abyss to the opposite side.
Follow the path and open the next locked door. A narrow walkway begins behind it, which collapses piece by piece shortly after you step on it. Lift the skull directly in front of you and sprint with them immediately Pegasus Boots north. Don’t try to fight long battles against the Helmasaurs along the way.
At the end of the footbridge you enter a dark labyrinth.
Small Key 5 and three bombs
There are no torches in this room, so you have to use the walls for guidance. In the northwest corner is an optional chest with 3 bombs. Take them with you because we need at least one explosion right away.
The important chest is in the southeast area. Inside is Small Key 5.
There is a crack on the eastern wall immediately north of the key chest. Place a bomb in front of it and go through the newly created passage. Behind it finally stands the large Treasure Chest of the palace.
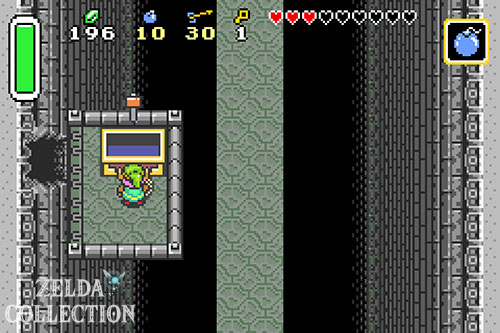
Open it with the Big Key and Link will receive the Magic Hammer.
With it you can drive stakes into the ground, remove certain obstacles and open numerous new paths in the shadow world. Within this dungeon we need him especially against the Terror Pins.
Compass and Small Key 6
Return to the dark labyrinth and take the northeast exit. In the next room, four terror pins are waiting around a Treasure Chest.
Stand near them and hit them with the hammer. This causes a turtle to tip over on its back and its soft underside becomes visible. Then attack her with the sword. Don’t take too much time, because the opponents will stand up again after a few seconds.
After all four terror pins are defeated, open the chest and receive the Compass.
270 Rupees and the last key
From the compass room, stairs lead into a dark U-shaped area. There are numerous blue Rupees on the floor here. In total you can collect 270 Rupees – a very welcome compensation for Kiki’s expensive entrance fee.
At the southern end there are two Treasure Chests. The western one only contains and an arrow. For our full chest route, we’ll open it anyway. In the eastern chest, however, lies Small Key 6, the last key of the dungeon.
Then return to the compass room and open the southern locked door. In the following trap room there is also a small chest with a blue Rupee. You can also take them with you on our complete tour.
With the hammer to the boss
In the large room with the jumping arrows you can get to the central platform. Several Hardhat Beetles attempt to knock Link off the narrow paths. Use their own recoil against them and send them into the abyss with the sword.
Then hit the Crystal Switch south of the platform with the Magic Boomerang or an arrow. Adjust it so that the required blue blocks are lowered and go through the eastern door.
In the following area there is a Floor Switch under a skull, which only keeps the northern door open while it is pressed. So push the nearby statue onto the switch and go through the now permanently open door.
Goriya and the Eye Statue
Green and red Goriya are waiting again in the next room. Eliminate the green ones with the sword and the red version with arrows. Then continue north.
There is a large green statue behind the spike trap. Her prominent eye is a clue: Shoot a arrow directly into the eye. The room begins to shake and a side wall shifts. Behind it a staircase appears to the basement.
hammer pegs and Crystal Switch
Climb down and ram the small obstacles into the ground with the hammer. Eliminate the terror pins and then work your way through the crystal switch puzzle.
You have to change the switch several times from a distance using Boomerang or arrows and move behind the different colored block rows. This is how you get to the western door little by little. Open it with your last Small Key.
Cross the dark hallway and defeat all the Terror Pins in the following room. It is particularly practical to turn several turtles at the same time with the hammer and then quickly kill them with the sword.
The last teleporter
In the next dark room you will find a teleporter field surrounded by blocks. One of the adjacent blocks can be moved. Push him out of the way and step on the teleporter.
You end up in the inner part of the familiar U-shaped room. Go north and eliminate the last terror pins. After that there is only the big boss door in front of you.
Open it with the Big Key.









Boss: Helmasaur King
Helmasaur King is the game’s biggest boss so far. Its head is protected by a massive mask, while a long tail with a heavy tip swings back and forth behind its body. In addition, the boss spits fireballs that break up into several smaller projectiles after impact.
As long as the mask exists, you cannot hurt the actual weak point. The fight therefore consists of two clearly separated phases.
Phase 1: Destroy the mask
The intended method uses the magic hammer that we just found. Stand in front of Helmasaur King’s head, wait for a tail attack and engage in melee combat for a brief moment. In total, the mask in the SNES version requires 16 direct hammer hits until it breaks completely. ([gamefaqs.gamespot.com](https://gamefaqs.gamespot.com/snes/588436-the-legend-of-zelda-a-link-to-the-past/faqs/81779))
Don’t try to force all hits at once. As soon as the tail begins to swing back and forth much faster, a big blow is imminent. Then retreat south and wait for the next safe window.
A very good alternative are bombs. Five correctly placed bomb explosions will also destroy the entire mask. This method keeps Link further away from the dangerous tail, but requires better timing as Helmasaur King constantly changes position. You can also combine hammers and bombs with each other.
The fireballs
Helmasaur King periodically spits out a large ball of fire. After a short time it breaks up into several smaller floors that are spread further across the arena. Therefore, do not head straight for the first trajectory, but stay as far down as possible and observe in which directions the smaller projectiles are distributed.
The tail is the greater danger at short distances. After a hammer attack, do not stand to the side of the boss, but retreat as straight as possible to the south. This leaves most of the tail arch behind.
Phase 2: The green forehead mark
Once the mask is completely broken, the large green jewel on Helmasaur King’s forehead will be visible. Now you don’t need the hammer anymore.
The Master Sword can injure the weak point, but the bow is much safer. Stay in the lower part of the arena, first avoid tails and fireballs, then shoot the green mark. With normal arrows or normal master sword hits you need approximately eight hits to finally defeat Helmasaur King. ([gamefaqs.gamespot.com](https://gamefaqs.gamespot.com/snes/588436-the-legend-of-zelda-a-link-to-the-past/faqs/81779))
Don’t try to fire constantly here either. A well-placed arrow between two attacks is better than several hectic shots while the fireballs are already flying towards Link.
Heart Container and first crystal
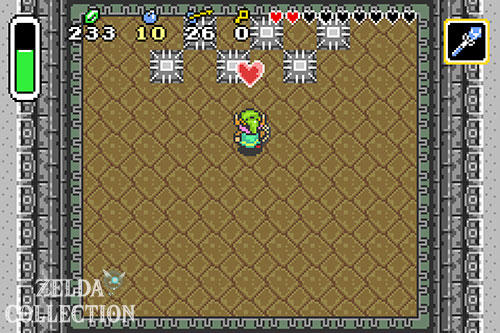
After the last hit, Helmasaur King explodes. First collect the complete Heart Container. Since the pyramid heart piece has already increased our health to ten hearts before the dungeon, Link then eleven complete hearts.
Afterwards the first crystal appears. It contains one of the seven descendants of the wise men. As soon as you touch the crystal, she tells Link more about Ganon’s power, the seven wise men and the meaning of the crystals.
Six girls still need to be freed from the remaining dungeons of the shadow world. Only their combined strength can later open the way to Ganon’s tower.
What the hammer now makes possible
With the Magic Hammer, Link has one of the most important items for further exploration of the shadow world. The numerous wooden stakes that previously blocked entire paths can now be driven into the ground. This opens the way to the western areas in particular.
That’s exactly why we’ve left various collectibles behind until now. Before the next dungeon we can now combine several tasks very efficiently. These include the woodcutters’ tree that has changed since Agahnim’s defeat, additional Pieces of Heart, the flute and the third large medallion.
The seven Shadow World dungeons do not have to be completed completely strictly in their numbered order. However, for our 100% run we choose a route where important equipment becomes available early, making later sections easier. Our next main target therefore remains the Swamp Palace.
After this chapter, Link has eleven hearts, twelve of 24 Pieces of Heart, three bottles, Master Sword, Magic Hammer, Air Medallion, Earth Medallion, Moon Pearl, Magic Mirror, Zora Fins, Red Shield and Magic Boomerang. Additionally, the first of seven crystals is freed.