
This Walkthrough uses Ocarina of Time – Master Quest for the GameCube as a basis. It also works for Ocarina of Time 3D – Master Quest. On the Nintendo 3DS, the entire game world is mirrored, so all directional information must be swapped accordingly. Additionally, enemies in the 3DS Master Quest deal double damage.
After defeating Phantom Ganon and liberating the Forest Temple – Master Quest, the next part of our journey takes us back to the Death Mountain. The situation there has deteriorated dramatically over the past seven years. Ganondorf has resurrected the ancient fire dragon Volvagia and had almost all of the Gorons captured. They should be thrown to the dragon in Fire Temple. Darunia has already set off alone to the temple to save his people.
Before following it, let’s catch up on several important 100% tasks. We first fully activate the Scarecrow’s Song, which is required for one of the Master Quest Skulltulas in the Fire Temple. We then collect the adult Skulltula in Goron City, receive the Goron Tunic from Darunia’s son, discover the secret entrance to the Death Crater and learn the Bolero of Fire from Sheik. Since this allows us as a young Link to travel directly into the central death crater for the first time, we also plant the penultimate Magic Bean and collect the Earth Skulltula there.
Correction to Dodongo’s Cavern – Master Quest:
Dodongo’s Cavern is located in Master Quest as a whole five Gold Skulltulas. If you have completed the Childhood Gathering Round from our previous chapter, this dungeon is already complete. There is no additional sixth adult Skulltula within Dodongo’s Cavern.
Quick Overview
| Found item or task | Location |
|---|---|
| Activate Scarecrow’s Song | Lake Hylia – Bonooru |
| Gold Skulltula | Goron City – behind the former Goron’s Ruby socket |
| Goron Tunic | From Darunia’s son |
| Bolero of Fire | From Sheik in Death Crater |
| Gold Skulltula | Death Crater – soft earth, young link |
| Magic Bean | Death Crater – Warp Pedestal |
| Piece of Heart | Death Crater – via Magic Bean Plant |
| Megaton Hammer | Early area of the Fire Temple |
| Dungeon Map | After the first Flare Dancer |
| Compass | Hidden area of Lizalfos Labyrinth |
| Boss Key | Flying tile room in the large lava area |
| Gold Skulltulas | 5 pieces in Fire Temple – Master Quest |
| Double Magic Meter | Great Fairy in Death Crater – after Megaton Hammer |
| Gold Skulltulas | 2 pieces on the Death Mountain Trail – after Megaton hammer |
| Heart Container | To Volvagia |
| Fire Medallion | By Darunia |
Before Death Mountain: Activate Scarecrow’s Song
During Link’s childhood, we played a self-chosen melody of eight tones to Bonooru on the Lake Hylia. At that time we were only able to prepare the first part of the scarecrow quest. Now, as an adult link, let’s complete it. This is particularly worthwhile because one of the five Gold Skulltulas in the Fire Temple – Master Quest can only be reached in a meaningful way via Pierre and the Hookshot or later the Longshot.
Travel to Lake Hylia and find the scarecrow Bonooru again. Pull out the Ocarina of Time and play the exact same eight notes you set during Link’s childhood. If the melody matches, Bonooru will remember the song. From this moment on, the Scarecrow’s Song is fully activated.
Scarecrow’s Song activated
Whenever the navigation system lights up green in an unusual place even though there is no visible target, it may be worth trying out your personal eight-tone melody. Pierre will then often appear on a high ledge and serve as a target for Hookshot or Longshot.
Then return to Kakariko and from there to the Death Mountain.
The Death Mountain Trail seven years later
The Death Mountain Trail initially seems largely familiar. The bomb flowers from Link’s childhood are mostly gone and several red boulders now lie in places we can’t destroy with bombs. In particular, note the red rock on the ledge above Dodongo’s Cavern, as well as another rock in the upper section of the mountain. Both hide Gold Skulltulas, but can only be destroyed with the Megaton Hammer. We’ll catch up immediately after the Fire Temple.
First enters Goron City.
Goron City – the abandoned city
The Goron homeland is almost completely empty. Most of the residents were captured by Ganondorf’s henchmen and taken to the Fire Temple. Only a single small Goron rolls in circles continuously on one of the middle levels.
Before we stop him, we collect another Gold Skulltula.
Gold Skulltula to Goron City
Go to the upper level and make your way to the floating platform in the center of the city where the Goron’s Ruby lay during Link’s childhood. Carefully cross the narrow ropes or stand so that you can see the back of the stone base.
There is a Gold Skulltula. Defeat them with the Hookshot and drag the remaining symbol directly to Link.
If you have already collected the Skulltula from the wooden box in the rock labyrinth during Link’s childhood, Goron City is now completely complete in terms of its Gold Skulltulas.
Stopping Darunia’s son
Jump back to the middle ring level. The little Goron continues to roll through the hallway at high speed. You can’t talk to him while driving. Therefore, place a bomb in his path and make sure that the explosion hits him as soon as possible before he arrives.
If he is hit, he stops. Talk to him. The little Goron introduces himself as Darunia’s son out and was named after Link. At first, however, he thinks the adult Link is one of Ganondorf’s minions.
Speak to him repeatedly, asking about both the dragon and the missing Gorons. He finally reports that Ganondorf has resurrected the fire dragon Volvagia and kidnapped almost all of Goron City’s inhabitants to Fire Temple. Darunia has already set out to save his people without the legendary hammer.
After listening to the entire story, Darunia’s son will give you the Goron Tunic. At the same time, he opens several doors within Goron City, including Darunia’s chamber.
New equipment: Goron Tunic
The red Goron Tunic permanently protects the adult Link from the extreme heat of the Death Crater and the Fire Temple. Without it, a time limit appears in hot areas, after which Link continuously takes damage or dies.
Equip the Goron Tunic immediately.
The secret path to Death Crater
Climb to the lowest level of Goron City and enter Darunia’s chamber. In the back there is a large stone Goron statue. Grab it by the side and pull or push it backwards.
Behind the statue a secret passage to Death Crater appears.
Enter the tunnel. Thanks to the Goron Tunic, Link can now move around in the scorching hot environment without a time limit. Outside, turn left and follow the narrow rocky path to a destroyed bridge.
On the opposite side there is a strong wooden beam. Target him with the Hookshot and pull yourself over the abyss. Follow the partially destroyed bridge a few steps further.
The Bolero of Fire
Sheik appears again and explains to Link that the Fire Temple lies deep beneath Death Crater. He then teaches him the Bolero of Fire.
New song: Bolero of Fire
The Bolero of Fire teleports Link directly to the warp pedestal at the center of Death Crater. Particularly important: The song also works as a young link. This means we can now reach a previously unreachable area of soft ground for our 100% route.
After Sheik disappears, we could descend directly into the Fire Temple. For our complete route, however, we’ll take a short jump in time beforehand.
As a young Link in the death crater
Play Cantata of Light and return to the Temple of Time. Place the Master Sword in the Pedestal of Time and become young Link again.
Get a bottle of bugs and at least one Magic Bean. Then play the newly learned Bolero of Fire. Link will be transported directly to the warp pedestal in Death Crater.
Since young Link cannot wear Goron Tunic, a heat time limit immediately appears. However, both of our tasks are right next to the warp pedestal and can easily be completed within a few seconds.
Gold Skulltula in Death Crater
There is a soft area of ground next to the Triforce pedestal. Pour bugs on it. A Gold Skulltula jumps out of the ground.
Defeat them and collect the symbol. If necessary, catch one of the remaining beetles back in the bottle.
Plant penultimate Magic Bean
Then plant a Magic Bean in the same spot. We have also prepared these for the future.
Immediately play Cantata of Light again and return to the Temple of Time before the heat time limit expires. Pull the Master Sword out of the Pedestal of Time and become an adult Link again.
Play the Bolero of Fire.
Piece of Heart about the Magic Bean plant
The Magic Bean that was just planted has grown into a large floating plant in the future. Climb onto its leaf and let it carry you through the death crater.
The plant passes several high rocky peaks. On one of them there is a clearly visible Piece of Heart. Jump off the Magic Bean plant at the right moment and land on the summit.
Collect the Piece of Heart. From there you can drop back onto the plant or carefully make your way back to the warp area.
Preparation for the Fire Temple
The Fire Temple – Master Quest uses Din’s Din’s Fire unusually often. Several torches and switches can sometimes be solved with arrows, but Din makes many puzzles much easier. Before entering the dungeon, make sure your magic bar is as full as possible.
If you want, you can fill a bottle with a green elixir. A fairy in a second bottle is also recommended, especially in the 3DS Master Quest with double enemy damage. Several Iron Princes, Stalfos and Flare Dancers can be extremely dangerous there.
Equip the Goron Tunic and follow the bridge from the warp pedestal to the deep shaft. Climb down the long ladder and enter the cave entrance at the bottom.
Fire Temple – Master Quest
The Fire Temple was almost completely rebuilt for Master Quest. In the first few minutes we encounter enemies that only appear much later in the normal version. The order of the items is even more unusual: we receive the Megaton Hammer surprisingly early. It is then needed for large parts of the actual dungeon.
The five Gold Skulltulas have also been completely repositioned. For one of them we need the Scarecrow’s Song, which is why we activated it before climbing the Death Mountain.
Gold Skulltulas in the Fire Temple – Master Quest:
There are a total of 1 in the dungeon five Gold Skulltulas. With Hookshot, Fairy Bow, Song of Time, Megaton Hammer, and activated Scarecrow’s Song, all five can be collected during this run.
The entrance room and the robbery slime
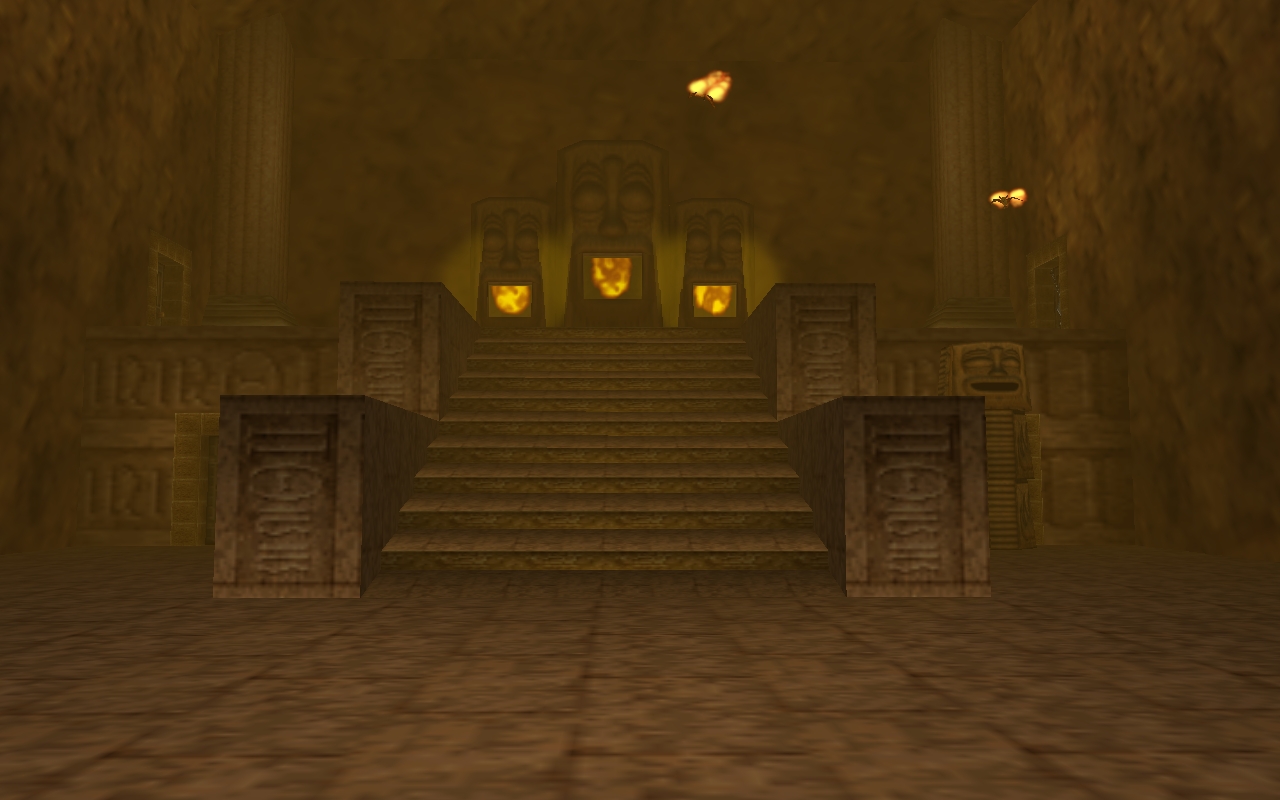
After entering the temple, climb down the short ladder. In front of you, a wide staircase leads up to several stone totem poles. As soon as Link tries to run straight up the stairs, a fire barrier will appear.
First enter the door to the right of the stairs. Immediately behind the entrance, a Robbery Slime falls on Link. This enemy can swallow both the Hylian Shield and the Goron or Zora Tunic. If you want to be absolutely sure, put the Hylian Shield down briefly before entering the room.
Defeat the predatory slime from a safe distance using bombs, arrows or careful sword slashes. A small Treasure Chest appears. It contains a Hylian Shield or returns swallowed equipment.
The further path in this room is currently blocked by a grate. Note the area for later and return to the entrance hall.
The torches on the entrance stairs
Since the flames block direct ascent, you climb sideways onto the railing or the raised edge and bypass the fire wall.
There are two extinguished torches at the top. Stand between the two and place Din’s Din’s Fire. Both are ignited at the same time.
Then run to the stone totem poles at the top of the stairs and use Din’s Din’s Fire again. As soon as these fire mechanisms have been activated, the next door will open.
Go through.
Darunia and the large lava room
In the next room, Link encounters Darunia. The Goron leader declares that he will save his people and then fight alone against Volvagia. Since he doesn’t have the legendary hammer, he knows that his chances are extremely slim. Nevertheless, he continues running towards the dragon.
After the cutscene we focus on the large lava area. First jump onto the platform on the left and use the Hookshot to pull yourself forward on the target on the opposite side.
Destroy the wooden crates there. An additional torch appears under one of them.
Jump to the lower level. Stand between the two torches there and use Din’s Din’s Fire. Both start to burn.
Then quickly draw the fairy bow and shoot an arrow through one of the burning torches onto the still extinguished torch on the opposite platform. When all three burn at the same time, the grate in front of a small chest opens.
Cross the room and open it. You will receive the first Small Key.
Stalfos and Iron Prince
Return to the Entrance Hall. Bypass the fire wall on the stairs again and this time open the locked door on the bottom left.
In the following room there are several Keese waiting and then two Stalfos. Block their sword strikes and focus on a single knight at a time.
After the fight you can play the Anthem of the Sun in the middle of the room. This will cause a large healing fairy to appear if you have lost health.
Go through the next door and immediately hold up your shield. Numerous floor tiles come off one after the other and fly towards Link. If possible, stay with your back against a wall and block the projectiles until everything calms down.
Then go to the large armor in the back area. She awakens as Iron Prince.
Miniboss: Iron Prince
The Iron Prince is one of the most dangerous opponents in the game. His massive ax causes enormous damage. In Ocarina of Time 3D – Master Quest, a clean hit can massively injure even a very well-equipped Link due to the double damage.
Stay out of his range and provoke an attack. If he hits the ax vertically on the ground, you will jump sideways or backwards at the last moment. His weapon gets stuck in the ground for a brief moment.
Run up and land a sword slash or two. Then withdraw immediately.
After several hits, part of his armor falls off. The Iron Prince becomes significantly faster, but also loses a large part of his defense. Keep the same strategy.
After his defeat, the next door opens.
Flare Dancer and the Megaton Hammer
A Flare Dancer awaits you in the following round room. His body is completely surrounded by fire and in this form cannot be directly injured with the sword.
Target him and wait until he stops briefly. Pull its black core out of the fire shell using the Hookshot. Alternatively, a bomb works.
The little black body then runs around the room in panic. A particularly effective method is to pull him towards Link again with the Hookshot and then hit him with a jump attack from the Master Sword.
After a few hits he jumps back into his fire shell. Repeat the process until the opponent is defeated. After his final hit, keep your distance as the Flare Dancer will explode at the end.
A large Treasure Chest appears.
Open it and you will receive the Megaton Hammer.
New weapon: Megaton Hammer
The massive hammer activates rusted switches, destroys certain red and gray boulders, knocks special pillars into the ground, and can even injure some particularly tough enemies. It is indispensable for the other Fire Temple.
Dungeon Map and first freed Goron
Exit the Flare Dancer room through the south door. Behind it is a rusted Floor Switch. Hit him into the ground with the Megaton Hammer.
The bars of a prison cell open. Talk to the captured Goron. He flees the temple and warns Link again about Volvagia.
Next, examine the large Treasure Chest he left behind. Inside lies the Dungeon Map of the Fire Temple.
The next door leads back into the entrance hall.
Destroy the Great Totem Pole
Climb to the upper level of the entrance room again. At the western or corresponding end there is a large stone totem pole that Link was previously unable to move.
Hit it several times with the Megaton Hammer. The pillar sinks or breaks and provides access to the large lava area.
Go through.
Another Goron and Small Key
Jump onto the left platform in the large lava area and use the Hookshot to pull yourself over the fire barrier to the target.
Light the torch there with Din’s Din’s Fire. This means that multiple hook targets move from different platforms in the room, making navigation much easier.
Then examine the suspicious door frame or the cracked area. Blow them up with a bomb.
There are two extinguished torches in the small side room. Stand between the two and use Din’s Din’s Fire. The prison door opens.
Talk to the Goron and open his little Treasure Chest. Inside is another Small Key.
Gold Skulltula 1/5 – Lava Room Prison
Return to the large lava room and work your way to the north side using the newly spawned grappling hook targets. One of the platforms behaves unusually: instead of sinking into the lava, it shoots up.
Use this platform to reach a small niche with a pitcher. Use Din’s Din’s Fire to light a torch there.
Then quickly shoot an arrow through the flame at the distant torch next to the barred door in the lower area. If the shot hits, the gate opens.
Jump down and enter the cell or small room. Behind the freed Goron or in the rear area sits the first Gold Skulltula 1/5.
Defeat them and collect the symbol with the Hookshot.
The Boss Key
Return to the lava room. There is another door directly above the area you just visited. Use the Hookshot to pull yourself onto the platform and go through.
Numerous floor tiles fly towards Link again. Hold up the shield and wait until all projectiles have been destroyed.
On the opposite side the path is blocked by flames. Use the Hookshot to pull you past the appropriate target points or through the safe area.
At the end there is a large blue and gold Treasure Chest waiting. Open it and take the Boss Key.
Master Quest Special:
The Boss Key is also found unusually early in the Fire Temple. However, there is still a large part of the dungeon ahead of us before the final boss.
The climb to the third floor
Return to the large lava room and open the door in the western corner with a Small Key.
Behind it are several tall metal grilles. Climb up one side and then jump onto one of the narrow pillars.
In the middle, a large block moves vertically through the room. Wait for it to go down and jump to its top. Stay there until the block shoots up again.
Don’t jump onto the block while it’s surrounded by fire at the bottom, as the flames will immediately knock Link back.
At the top, go through the door and climb up the platforms on the right.
A huge extinguished torch stands in this area. Use Din’s Din’s Fire. The torch begins to burn and a hook target moves up.
Pull yourself up, defeat the Lizalfos and then climb the metal grate to the next floor.
The Lizalfos Labyrinth
You reach a large room where, in the normal version, boulders roll through narrow corridors. In Master Quest, the area is instead populated by several Lizalfos. Numerous false walls and hidden switches make it one of the most important hubs in the dungeon.
First follow the right wall and look for a small niche. Hit the walls with the sword. A false wall sounds different than solid stone.
Place a bomb there. Behind the destroyed wall there is a Skull Wandtula and a rusted switch.
Eliminate the spider and hit the switch with the Megaton Hammer. Multiple hook targets move up the maze. This means we can now reach the upper levels.
The Compass
Pull yourself up using the hook targets. You will find a detonable spot near a damaged section of ground. Place a bomb on it.
The ground cracks. Climb or jump carefully into the room below.
Destroy the wooden crates and look for the rusted switch there. Hit him with the Megaton Hammer.
A Treasure Chest becomes accessible. Open it and you will get the Compass.
Then climb back to the upper Lizalfos labyrinth.
Another Goron and Small Key
On the upper level, go to the southern area. There is a Crystal Switch behind a grate, which is difficult to reach with a normal bomb.
Take a bomb, hold it in your hand for a few moments and throw it so that it explodes in the air just in front of the grid. The explosion must hit the Crystal Switch on the other side.
The grid opens. Climb over.
On the left there are several boxes with bombs. On the right side you can hold a small wooden box. Take them with you and jump to the lower level.
Then look for another false wall in the northern area. Blow them up. Behind it is a blue Floor Switch.
Place the small wooden box on the switch. This means the neighboring door remains open.
Go through, free the Goron and open his chest. Inside is another Small Key.
Gold Skulltula 2/5 – first Golden Tower
For the next Skulltula we return to the top level of the Lizalfos Labyrinth. Use the hook targets to pull yourself to the northern area.
On the eastern wall there is a small platform with a target. Pull yourself over. Then turn around and look for a second hook target on the opposite side.
Move there too. The platform then moves up and transports Link to a higher area.
Go through the only door. Navi focuses on a stone face on the wall. Shoot the Hookshot directly at the face. The upper door unlocks.
Eliminate the fire flutters or Torch Slug and climb further up the metal grates.
In the following round room you initially ignore the visible Floor Switch. Carefully walk along the edge until you find a block surrounded by fire and a rusted switch.
Hit the switch with the Megaton Hammer. This causes another hook target to rise above the entrance.
Return to the original Floor Switch and step on it. The fire barrier around the block disappears for just a few seconds.
Immediately pull yourself up on the newly appeared target, run to the block and pull it far enough out of its position. Below or behind him sits the Gold Skulltula 2/5.
Move away from the returning flames and defeat the Skulltula with the Hookshot. Drag its icon to you.
Back to the Lizalfos Labyrinth
Return to the Lizalfos Labyrinth via the door you already used or by making a controlled jump to a safe platform.
Pull yourself back up to the upper level and open the door in the northeast area with a Small Key.
The next large section of the fire temple begins behind the door.
crate on the blue switch
Climb over the metal grate on the right. You see a blue Floor Switch and a distant door. The switch must be permanently loaded.
Use the Hookshot to pull yourself to the large box or platform on the other side and pick up the small wooden box there.
Carefully jump back and place it on the blue switch.
Then use the Hookshot to pull yourself up to the higher platform again and jump onto the plates floating above the lava.
You can use the fairy bow between two golden torches. Shoot the extinguished torch above the blue switch through one of the flames.
The eastern door opens.
Use the Hookshot to pull yourself to the corresponding platform and go through it.
Hit the big pillar to the boss chamber
Go through the short hallway. In the next room you will see a large stone pillar or block that stands above the depths. It is the same massive pillar that Link saw during the encounter with Darunia.
Jump over the blue time block to the upper platform and equip the Megaton Hammer.
Hit the pillar hard.
The entire block is knocked down several floors and ends up right in front of the boss chamber. This means that the basic path to Volvagia is already open.
However, three Gold Skulltulas and some additional rooms are still missing for our 100% route.
Gold Skulltula 3/5 – Time Block and Fire Walls
Jump from the pillar area onto the platform with the eastern side door. At one point Navi reacts to empty space.
Play the Song of Time. A blue time block appears or changes its position.
Jump onto the block and from there over the fire walls to the northwest door.
Enter the small room. A Lizalfos guards the Gold Skulltula 3/5.
Defeat the enemy first and then the Skulltula. Collect the symbol.
Return to the previous room and play the Song of Time again so that the block returns to a suitable position for the return journey.
Gold Skulltula 4/5 – behind the false wall
Climb back up to the upper platform and take the other door this time.
In the next room there is a deep fire pit between Link and the opposite side. Pull yourself over the flames with the Hookshot on the target.
There is a rusty switch there. Hit him with the Megaton Hammer.
A hook target or block is activated. Use it to get back over the fire barrier or to the lower path.
Search the small alcove for a suspicious wall. Blow them up with a bomb.
Behind it sits the Gold Skulltula 4/5. Defeat them with the Hookshot and drag the symbol to you.
The second Flare Dancer
Exit the Skulltula room and take the north door in the large fire area. Work your way through the flames on the eastern side until you reach a Floor Switch.
Step on it. Several fire barriers disappear for a short time.
Immediately run through the released path and reach the next door in time.
Behind it is a second Flare Dancer. The fight works exactly like the first copy: remove the fire shell with Hookshot or a bomb, pull in the black core and injure with a sword or jump attacks.
After his defeat, the central platform of the room begins to rise.
First stand on it, but immediately jump down again. There is a Small Key under the platform. Collect him.
Wait for the platform to return, get back on and this time ride all the way to the top.
The second Golden Tower
In the following shaft, climb further up the metal grates and platforms. Then enter the large round room on the next floor.
There is a Crystal Switch right near the entrance. Meet him. Multiple hook targets move up in different parts of the room.
A large Treasure Chest in the center is surrounded by fire. The Floor Switch, which deactivates the flames, is located in the ring-shaped trench on the southwest side.
The switch only has a very short time window. This is exactly where our activated Scarecrow’s Song pays off.
Go near the switch and pay attention to Navi. Play your personal eight-tone melody. Pierre appears on a high ledge above the room.
Now joins the Floor Switch. The flames around the Treasure Chest disappear.
Immediately target Pierre with the Hookshot and move towards him. Then run straight to the chest before the fire barrier returns.
Open it. Inside is another Small Key.
Alternative without scarecrow:
The time-limited route to the chest can also be completed via the normal hook targets or the outer wall. However, the Scarecrow’s Song is much more comfortable and is needed for our final Skulltula route anyway.
Gold Skulltula 5/5 – deep in the Golden Tower
Return to the Crystal Switch at the beginning of the room. There is a large stone face pillar in the ground.
Hit him with the Megaton Hammer. The entire block falls down one floor and opens a deep shaft.
Jump after it and open the locked door with your last needed key.
A Stalfos attacks Link immediately. Defeat him.
In the next area there is another large stone face pillar. Hit it with the Megaton Hammer. The mechanism lowers or creates a staircase.
As you descend, another Stalfos will appear. Turn him off too.
Near the bottom, Navi responds to a face on the wall. Aim at it with the Hookshot and shoot directly at its nose or middle.
The next door is unlocked.
Go through. Sitting on the wall is the fifth and final Gold Skulltula 5/5 of the fire temple.
Defeat them and drag the symbol with the Hookshot to Link.
Fire Temple – Master Quest: 5/5 Skulltulas
This means that all of the Gold Skulltulas in the dungeon have been collected.
Then hit the next face pillar down with the megaton hammer and jump after it. You will return to the area with the fire walls and time blocks.
To the boss chamber
Find the area where we previously knocked the giant pillar down several floors with the Megaton Hammer.
Jump through the resulting opening or follow the uncovered path downwards. The large pillar has formed a platform on the lowest level directly in front of the boss door.
Open the door with the Boss Key.
Jump onto the large central platform. The fight against the fire dragon begins.
Boss: Volvagia
Volvagia fights on a large octagonal platform with nine lava pits embedded in it. The fire dragon repeatedly disappears into a hole and then appears somewhere else.
The Megaton Hammer is the decisive weapon of this battle. Without it, Volvagia cannot be reliably stunned.
Lure Volvagia from the lava pits
At the beginning, Volvagia disappears into one of the nine openings. Several lava pits begin to light up one after the other. Not every movement means that the dragon actually appears there.
Volvagia often fools Link twice, only fully appearing on the third hole. Therefore, stay as close to the center of the platform as possible and watch the openings.
As soon as his head emerges from a lava pit and stands still for a moment, run to him and hit his head with the Megaton Hammer.
Volvagia is stunned and falls to the platform.
Attack immediately with the Master Sword. A jump attack causes a particularly high amount of damage. Then retreat before the dragon disappears back into the lava.
Fire breath from the air
After a few attacks, Volvagia completely leaves the lava pits and flies around the arena. He chases Link and breathes a long stream of fire.
Run continuously along the edge or in a circle across the platform. Since Volvagia has a relatively large turning circle, it can only correct Link’s movements slowly.
Alternatively, stand close to the hole from which Volvagia started. Due to his angle of flight, it is often difficult for him to hit Link there.
Still have the Hylian Shield ready and avoid being thrown into the lava by the fire jet.
Falling rocks
Volvagia’s most dangerous attack begins when he flies up to the ceiling and strikes the rock. Numerous burning boulders then fall onto the arena.
Watch the shadows on the ground and keep moving. The impacts are usually concentrated in the area where Link was standing when Volvagia flew to the ceiling. A quick move to the opposite side of the arena often helps.
In an emergency, you can even hang briefly on the outer edge or slightly below the platform to avoid a particularly unfavorable hail of stones.
Defeat Volvagia finally
Repeat the basic process: wait for the real appearance, hit the head with the Megaton Hammer and then immediately attack with the Master Sword.
As the damage increases, Volvagia will more often try to deceive Link with fake lava pits. Don’t let this tempt you to make hectic movements.
After several successful hammer and sword combinations, the fire dragon is defeated. Volvagia flies over the arena one last time, burns from the inside and finally falls to the ground as a skeleton.
Heart Container and Fire Medallion
After Volvagia’s defeat, a Heart Container appears. Be sure to collect it and then enter the blue light.
Link is transported to the Hall of the Sages. There he meets Darunia. The Goron leader reveals himself to be Sage of Fire. Since Link defeated Volvagia and saved his people, Darunia can now fight alongside the rest of the Sages against Ganondorf.
As a sign of his power, he gives Link the Fire Medallion.
New quest item: Fire Medallion
With Rauru’s Light Medallion, Saria’s Forest Medallion, and Darunia’s Fire Medallion, Link now has the power of three awakened sages.
After the Fire Temple: two Skulltulas on the Death Mountain Trail
Before we leave the Death Mountain, we immediately use the Megaton hammer for two previously unattainable Gold Skulltulas. Both appear exclusively at night. Therefore, play the Anthem of the Sun if necessary.
Gold Skulltula over Dodongo’s Cavern
Exit Goron City towards the Death Mountain Trail and go to the ledge above Dodongo’s Cavern. Exactly where the single bomb flower grew during Link’s childhood, there now lies a large red boulder.
Smash him apart with the Megaton Hammer.
At night a Gold Skulltula appears behind it. Defeat her with the Hookshot and collect her symbol.
Gold Skulltula in the upper Death Mountain Trail
Then climb towards the summit. In the section where young Link was bombarded by falling boulders earlier, there are several red rocks along the path.
Examine the rocks on the right or GameCube-side wall and break the corresponding chunk with the Megaton Hammer.
Behind it sits another Gold Skulltula at night.
Defeat them and collect the symbol. This completes all Gold Skulltulas of the Death Mountain Trail.
Double Magic Meter
Now climb all the way to the top of Death Mountain and enter the Death Crater from there. Thanks to the Goron Tunic you can still move freely.
Near the summit entrance there is a large gray or red boulder that can withstand even bombs. Destroy it with the Megaton Hammer.
Behind it a path leads to another source of the Great Fairy. Enter the cave and stand on the Triforce symbol.
Games Zelda’s Lullaby.
The Great Fairy appears and doubles Link’s magic capacity. This makes his magic bar twice as long.
Permanent Enhancement: Double Magic Meter
From now on, Link has twice as much magical energy. This is particularly valuable for Din’s Din’s Fire, Farore’s Wind, and the later magical arrows.
Fire Temple – all five Gold Skulltulas
For the final check of our 100% route, here are all the Master Quest locations again:
Gold Skulltula 1/5: In the lower prison room of the large lava area. First activate the distant torch with a burning arrow and then enter the Goron room.
Gold Skulltula 2/5: In the first Golden Tower above the Lizalfos Labyrinth. Activate the rusted switch with the Megaton Hammer, use the timed fire path and pull the block away from the Skulltula.
Gold Skulltula 3/5: In the area with fire walls and time blocks. Play Song of Time, jump over the blue block and defeat the Lizalfos in the side room.
Gold Skulltula 4/5: In the adjacent area behind a false wall. Pull over the flames with the Hookshot, activate the rusted switch with the Megaton Hammer and blow up the wall in the small niche.
Gold Skulltula 5/5: In the second Golden Tower. After the timed key room, sink the face pillar with the Megaton Hammer, defeat Stalfos, clear the stairs and activate the stone face with the Hookshot.
Fire Temple – Master Quest: 5/5
If you have completed all five Locations, the Fire Temple is fully completed and does not require a subsequent Skulltula return visit.
Continue to the Zora
With the Fire Medallion, Darunia has now also awakened as a sage. The Death Mountain calms down after Volvagia’s defeat and the rescued Gorons can return to Goron City. Link also has one of the most important new weapons for the upcoming collectibles and dungeons, the Megaton Hammer.
Our next destination is back to the east Hyrule’s. Zora’s Domain is completely frozen seven years after Link’s childhood and King Zora is stuck in a massive red ice crystal. Behind Zora’s Fountain the entrance to a previously unknown cave has opened.
In the next chapter of our Master Quest walkthrough we explore the completely changed Ice Cavern – Master Quest, collect all the Skulltulas there, get the Iron Boots, learn the Serenade of Water, free King Zora and get the Zora Tunic. We then prepare the way to the Water Temple.
Frequently asked questions about the Fire Temple – Master Quest
Do I need Din’s Din’s Fire for the Fire Temple – Master Quest?
The spell is used particularly frequently in the Master Quest version and significantly simplifies numerous torch puzzles. For our route described, you should definitely have Din’s Din’s Fire and go into the dungeon with enough magic.
How many Gold Skulltulas are there in the Fire Temple – Master Quest?
There are a total of five Gold Skulltulas in the Master Quest Fire Temple. With the Scarecrow’s Song, Hookshot, Fairy Bow, Song of Time, and Megaton Hammer, all five can be collected during this run.
Where is the Megaton Hammer?
The Megaton Hammer is found very early in Master Quest. After you get the first Small Key, you fight two Stalfos, an Iron Prince and then a Flare Dancer. After his defeat, the big Treasure Chest appears with the hammer.
Where is the Dungeon Map?
Immediately after receiving the Megaton Hammer, go through the southern door and smash the rusted switch into the ground. This will free the first Goron. The large Treasure Chest in this range contains the Dungeon Map.
Where is the Compass?
In the large Lizalfos labyrinth on the third floor, you first blow up a false wall and activate a rusty switch behind it with the megaton hammer. This causes hook targets to appear. On the upper level you then blow up a damaged floor and get to a hidden room with the Compass.
Where is the Boss Key?
The Boss Key is located in the upper area of the large lava room. After lighting a distant torch and collecting the first Skulltula, pull yourself to the upper door. In the following room you fend off flying floor tiles and then reach the large chest with the Boss Key.
Do I need the Scarecrow’s Song?
There are alternative ways to simply complete the Fire Temple. However, for our complete and much more comfortable 100% route, the Scarecrow’s Song activated makes a lot of sense, especially in the second Golden Tower at the time-limited chest and the high areas.
How do I defeat a Flare Dancer?
Use the Hookshot to pull the black core out of its fire shell. As soon as the small body runs through the room, you can pull it in again with the Hookshot and hit it with a jump attack. Repeat the process until the enemy explodes.
How do I beat Volvagia?
Wait for Volvagia’s real head to appear from a lava pit. Hit it with the Megaton Hammer and then attack the stunned dragon with the Master Sword. During his flight phases you avoid the fire breath and the falling rocks.
Where can I get the double magic meter?
After obtaining the Megaton Hammer, you can remove a previously indestructible rock in Death Crater. Behind it is a source of the Great Fairy. Play Lullaby on the Triforce Symbol Zelda’s and the fairy will double Link’s magic capacity.