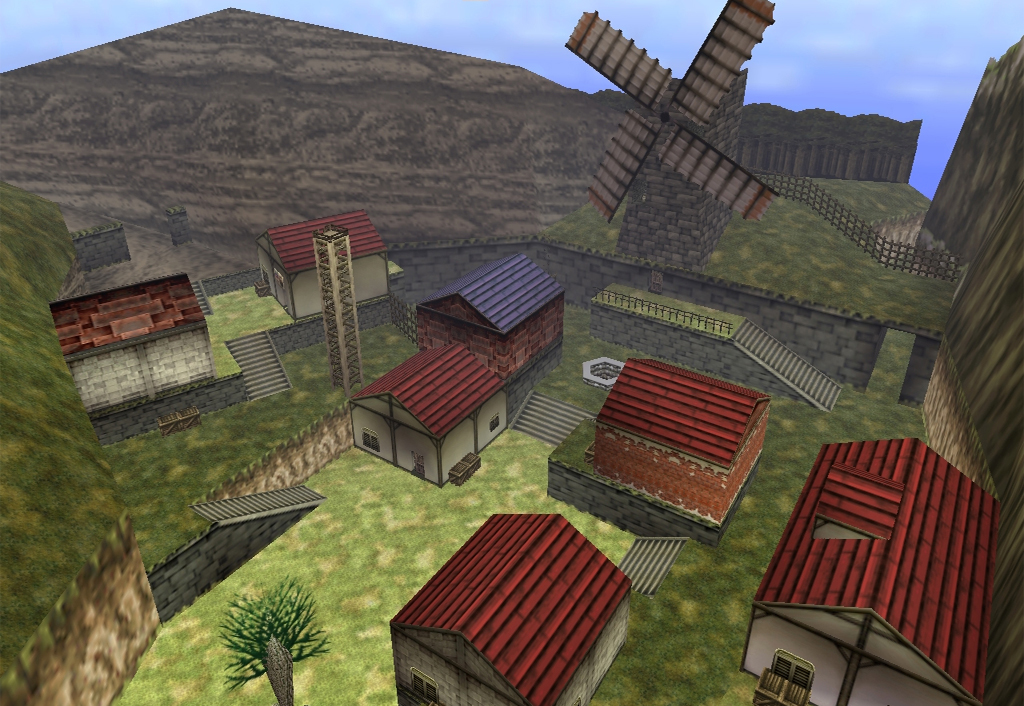

This Walkthrough uses Ocarina of Time – Master Quest for the GameCube as a basis. It also works for Ocarina of Time 3D – Master Quest. On the Nintendo 3DS, however, the entire game world is mirrored, so all directional information such as left and right must be swapped accordingly. Additionally, enemies in the 3DS Master Quest deal double damage.
After defeating Queen Gohma and obtaining the Kokiri’s Emerald, Link leaves his home for the first time. Saria gives him the Fairy Ocarina as a farewell and the Great Great Deku Tree has left him a clear order: He should find Princess Zelda and warn her about Ganondorf. This begins the first major overworld section of our Master Quest walkthrough.
The content of the overworld does not differ from the normal version of Ocarina of Time. However, for our Master Quest 100% route, we use the route to Kakariko very thoroughly. We visit Hyrule City and the castle, meet Princess Zelda, learn Zelda’s lullaby, get the first bottle and Epona’s song at Lon Lon Ranch, return to Lost Woods for Saria’s song and then do a large part of the early collectibles in Kakariko and in the cemetery. This means we are excellently prepared for the Death Mountain.
Quick Overview
| Found item or event | Location |
|---|---|
| Gold Skulltula | Hyrule City Guardhouse |
| Ammo Pouch Upgrade | Shooting Gallery in Hyrule City |
| Gold Skulltula | Tree on the castle grounds |
| Strange Egg | From Malon at the castle |
| Zelda’s Letter | From Princess Zelda |
| Zelda’s Lullaby | From Impa |
| Bottle 1 | Super Chicken Game at Lon Lon Ranch |
| Epona’s Song | By Malon |
| Piece of Heart | Lon Lon Ranch storage building |
| Gold Skulltulas | 2 immediately available copies on the Lon Lon Ranch |
| Pieces of Heart | 2 pieces in the Lost Woods |
| Saria’s song | Sacred Forest Meadow |
| Gold Skulltulas | 2 earth sites in the Lost Woods + 1 in the Kokiri Forest |
| Bottle 2 | Chicken Task in Kakariko |
| Sun’s Song | Royal Family’s Tomb in the cemetery |
| Hylian Shield | Free in a grave |
| Pieces of Heart | 2 pieces in the cemetery |
| Gold Skulltulas | 5 in Kakariko + 1 in the soft earth of the cemetery |
| Large wallet | House of Skulltulas from 10 symbols |
| Piece of Heart | Bring Richard to the owner in Hyrule City |
| Maximum Deku Staff Capacity | Optional over skull mask and forest stage |
The Hyrule Field
Leave Kokiri Forest via the long bridge. Kaepora Gaebora, the great owl, stops Link immediately after his first step into the wide world and explains some basics for orientation. The Hyrule Field then opens up in front of you, which serves as a central connection point between almost all regions Hyrule’s for the rest of the game.
Our first destination is the castle in the north. Follow the wide path towards Hyrule City. Most likely the sun will set before you reach the drawbridge. At night the bridge is raised and access to the city is blocked. At the same time, stalkers are emerging all over the steppe. You can fight them or just keep moving until sunrise.
The next morning the drawbridge is lowered again. Before you completely cross it, you can walk up the two chains on the sides. If you jump down from their upper ends, you can collect several valuable Rupees. We need the money for the shooting gallery.
Hyrule City – first Gold Skulltula
Directly behind the drawbridge you first come to a small anteroom. Enter the guardhouse immediately at the entrance. The soldier there obviously doesn’t mind if Link destroys all the jars and boxes in the room. This makes the building ideal for collecting Rupees early in the game.
Roll against the wooden crate next to the guard post. The box breaks and a Gold Skulltula appears. Defeat them with the Kokiri Sword and collect the symbol.
Leave the guardhouse and continue into the large marketplace of Hyrule City. There are numerous shops and mini-games here, some of which will only become available later.
Optional: The shooting gallery and the larger ammunition bag
Since we have already found the fairy slingshot in the Great Deku Tree – Master Quest, we can visit the shooting gallery immediately. Pay the entrance fee and hit all the Rupees that appear as targets one after the other. You only have a limited number of shots, which is why almost every Deku core has to be right.
The target patterns are always the same. Some Rupees move from side to side, others briefly appear in fixed positions. Aim the slingshot at the approximate height of the next target before it becomes fully visible. If you hit all targets, you will receive a permanent upgrade for the fairy slingshot ammo bag.
Slingshot upgrade order:
If you have followed our previous route and have already received the first upgrade to 40 Deku cores in the Lost Woods, the shooting gallery will now increase your capacity to 50 Deku cores. If you skipped the forest upgrade, you will first receive the 40 bag here and can get the second improvement later.
Bombchu bowling and several other offers on the marketplace do not play a role for us at the moment. They will be incorporated into our 100% route after we receive the bombs or other equipment.
Malon and the path to the castle
In the marketplace, talk to the red-haired girl at the fountain. It is Malon from Lon Lon Ranch. Her father Talon was supposed to deliver milk to the castle, but he still hasn’t returned. Malon is worried about this.
Leave the marketplace through the northern passage. On the castle grounds, Kaepora Gaebora reports again and explains that the royal guards will throw out intruders immediately. After its departure, you should run straight to the tree where the owl was sitting.
Gold Skulltula on lock
Roll with link against the trunk. A Gold Skulltula falls from the treetop. Defeat them and collect the symbol. You don’t need a specific time of day to make this discovery.
Sneak past the guards
Of course, the soldier in front of the big gate doesn’t let Link into the royal house. So go back towards the tree and look for the vines on the rock wall. Climb up, run over the wall and get behind the guarded main gate.
From here you have to avoid the soldiers’ fields of vision. First stay away from the main paved path and walk across the grassy slope. Watch the patrols and only move forward when the soldiers turn their backs on Link. If you are discovered, you will simply be returned to the entrance and can try again immediately.
Work your way to the moat, jump into the water and let yourself float to the opposite side. There you finally find Talon, sleeping soundly next to his milk crates. However, we can’t wake him up at the moment.
Let yourself be caught by a guard on purpose or return to the beginning of the castle grounds. Malon is waiting there now. Talk to her and she will give Link a Strange Egg. Wait in the castle grounds until a new morning begins. The egg hatches automatically and turns into a chicken.
Wake up Talon
Sneak again along the familiar path to Talon. Stand right next to him and use the hatched chicken. His crowing wakes Talon from his sleep. When he realizes how long he has neglected his work and his daughter, he immediately runs back to the Lon Lon Ranch.
There are two large milk crates behind his previous sleeping area. Push the first box to the edge of the moat and then in. Push the second box onto the first. Climb onto the resulting stack and jump from there to the small drainage channel in the castle wall. Crawl through it.
Important:
Access to the inner castle courtyard only works during the day. If it is now night, wait until the next morning.
Through the castle garden
A longer secret passage begins in the castle garden. Link must not be discovered by any of the patrolling guards. Your routes are constantly repeating, so patience is more important than speed. Use bushes, wells and walls as privacy screens and always move directly behind a guard as soon as he has passed Link.
In one section the safe route leads over a narrow wooden footbridge. In another, two guards walk around a bed at the same time. Wait there until there is enough distance between the two soldiers. If you are discovered, the secret passage begins again.
Shortly before Zelda you can shoot at the windows of the castle with the fairy slingshot. There’s a small Easter Egg behind one of the windows, while another hit can yield a red Rupee. This is not necessary for the actual solution.
After the last guard post you reach the castle garden. Princess Zelda stands there and watches Ganondorf through a window.
Princess Zelda and Ganondorf
Talk to Zelda and listen to her story in full. She tells Link about her dream and her belief that Ganondorf, the King of the Gerudo, is searching for the legendary Triforce. To gain access to the Sacred Realm, he needs the three Sacred Stones and the Ocarina of Time.
Link already has the Kokiri’s Emerald. Zelda therefore asks him to find the two remaining stones before Ganondorf gets his hands on them. As proof that Link is acting on their behalf, you will receive Zelda’s letter.
New quest item: Zelda’s Letter
The letter identifies Link as an ally of the princess. We need him in Kakariko immediately to open the gate to Death Mountain.
Then leave the garden via the exit. Zelda’s Bodyguard Impa is already waiting for you. She belongs to the almost extinct Sheikah people and teaches Link an important melody of the royal family.
Zelda’s Lullaby
Impa teaches you Zelda’s Lullaby. This song is one of the most important melodies in the entire game. Whenever you find a Triforce symbol on the floor, on a wall, or in another special place, you should remember to play Zelda’s Lullaby.
New song: Zelda’s Lullaby
With Zelda’s Lullaby we activate numerous mechanisms, open certain entrances and identify Link as an ally of the royal family at various points.
After the lesson, Impa accompanies Link out of Hyrule City and explains that the next Sacred Stone is with the Gorons on Death Mountain. The way there leads through her home village Kakariko. However, before we go there, let’s complete several important tasks.
The Lon Lon Ranch
Travel from the Hyrule Field to the large farm in the center of the country. It is best to enter the area during the day. The house is immediately to the left or on the GameCube side of the entrance. Inside, Talon has already fallen asleep again.
Bottle 1 – Talons Super Chickens
Speak to Talon and pay 10 Rupees for his mini-game. He throws three special super chickens among the normal animals. Within the time limit you have to find exactly these three chickens and pick them up one after the other.
You can make the task much easier by throwing as many normal chickens as possible behind Talon’s counter before the game begins. As a result, after the start there are almost only the three animals you are looking for in the freely accessible area.
If you find all three in time, Talon will give you a bottle of Lon-Lon milk. The milk can be drunk twice and restores several hearts with each sip. The most important thing for us is the bottle itself.
New equipment: Bottle 1
Bottles are one of the game’s most important optional items. Among other things, fairies, milk, beetles, fish and later various potions can be stored in it.
Gold Skulltula – Lon Lon Ranch Tree
Leave the house and go towards the large paddock. There is a single tree between the buildings and the paddock. Roll against his tribe. A Gold Skulltula falls down. Defeat them and collect the symbol.
Piece of Heart in the warehouse building
Go to the small stone storage building at the back of the farm. Inside there are several large boxes or milk crates. Move it so that the low crawl tunnel is exposed in one corner.
Crawl through the opening. In the small chamber behind it lies a Piece of Heart. Collect it and leave the building again.
Epona’s Song
Enter the large paddock during the day and look for Malon. A young horse named Epona runs with her. Talk to Malon several times until she talks about the song her mother used to sing. Then take out the Fairy Ocarina.
Malon teaches you Epona’s song. The young horse loses his fear of Link and comes running to him.
New Song: Epona’s Song
Later, adult Link can use this melody to summon Epona. If you play Epona’s Song in front of a cow, she will also fill an Empty Bottle with Lon-Lon milk for free.
Gold Skulltula at night
Leave Lon Lon Ranch and wait on the Hyrule Field until nightfall. Then enter the farm area again. The second currently accessible Gold Skulltula is located on the outside of the wooden feeding place or at the rear edge of the paddock.
Defeat her with the fairy slingshot. The symbol can be collected from the ground or from the adjacent fence.
For later:
There are two more Gold Skulltulas at Lon Lon Ranch. One sits at an upper window of the house at night, the other sits high on a rock wall at the back of the building. For your symbols we will need the Boomerang later. We’ll both catch up with Jabu-Jabu’s belly together.
With the first bottle back to the Kokiri forest
Our first bottle immediately opens up several new Skulltula locations. Drink the Lon-Lon milk empty and then catch beetle. For example, you can find beetles under various small stones. If you spill a bottle of beetles on a soft area of soil, one of them will crawl into the ground and attract a Gold Skulltula.
A practical trick prevents you from having to look for new beetles every time: After you have poured out the contents of the bottle, you immediately catch one of the beetles that is still crawling on the ground. The remaining animals disappear into the ground and still trigger the Skulltula.
Gold Skulltula in Kokiri Forest
Travel back to Kokiri Forest and go behind the Kokiri Shop. There is a soft area of ground there. Dump the bugs on it. After a few moments, a Gold Skulltula jumps out of the ground.
Defeat her and collect her symbol. If you later want to plant all ten Magic Beans, we will also note this area of soil for a later visit with a Magic Bean.
The Lost Woods – 100% round
Now enter the Lost Woods. In addition to Saria’s Song, two Pieces of Heart, two more Earth Skulltulas and several permanent equipment improvements are already waiting here.
Piece of Heart – Ocarina game with the Skull Kids
From the entrance, go right and jump to the lower level in the next area. You can get your Fairy Ocarina out on a small tree stump. Two Skull Kids appear and begin a musical memory game.
The two play short sequences of sounds that you have to repeat exactly. With each successful round the melody becomes longer. If you complete all three rounds without mistakes, you will receive a Piece of Heart as a reward.
Before you leave the area, you can also hit the hanging target with the fairy slingshot. Three perfect hits of 100 points each unlock an upgrade to the Deku Core Bag. If you already got these in the previous chapter, nothing new will of course happen. Together with the shooting gallery in Hyrule City, Link can finally do the most 50 Deku Cores carry.
Gold Skulltula – soft earth at the forest bridge
Return to the Lost Woods entrance and go left twice. You will reach the area below the bridge that Link used to leave Kokiri Forest at the beginning. There is another soft area of earth here.
Pour beetles on it and catch one again immediately if necessary. The next Gold Skulltula jumps out of the ground. Defeat them and collect their symbol.
Gold Skulltula – forest stage
For the second earth skulltula, follow the route right → left → right → left → left from the entrance. You will reach a grassy clearing near the hidden forest stage. There is soft earth again at the edge.
Release beetles here too. The Gold Skulltula appears immediately from the ground. Defeat them and collect the symbol.
This area of earth becomes particularly important later, because a Magic Bean planted here brings the adult link to another Gold Skulltula. As soon as we can buy the Magic Beans, we will return again.
The path to the Sacred Glade
Now we are looking for Saria. The correct route through the Lost Woods can be identified by its music: the closer Link is to the correct tunnel, the louder the melody becomes. From the entrance, the direct route in the GameCube version is:
right → left → right → left → straight ahead → left → right
On the 3DS Master Quest, the entire overworld is mirrored. The corresponding left/right information must therefore be reversed there.
At the end of the route you reach the Sacred Forest Meadow. A Wolfsheimer initially blocks the entrance. Have the Deku Shield ready, wait for his attack and counter as soon as his back is turned to Link. After his defeat, the grate opens.
Then go through the small hedge maze. Several Trader Deku shoot out of their flowers at Link. Reflect their projectiles with the shield or run past them. At the top of the long stairs you will finally find Saria.
Saria’s song
Saria tells Link that the Sacred Glade is her favorite place in the entire forest, and then teaches him Saria’s song. Link can use this melody to contact his girlfriend at any time.
New song: Saria’s song
Saria’s song is already required in Goron City. Darunia initially refuses to help Link and is only encouraged by Saria’s melody.
On the way back you can reach a small secret cave above the hedge labyrinth in which several fairies float. With a free bottle you can capture a fairy. If Link’s health is completely used up, it will automatically revive him – a very valuable safeguard, especially in the 3DS Master Quest with double enemy damage.
Piece of Heart from the single Skull Kid
Return to Lost Woods and go left from the entrance. A single Skull Kid stands on a tree stump opposite, playing his flute.
Stand on the small stump in front of him and play Saria’s song. The Skull Kid thereby recognizes Link as a friend of Saria and gives him another Piece of Heart.
Kakariko
Leave the forest and travel northeast across the Hyrule Field. Beyond the small bridge and the wide stone steps is Kakariko, founded by Impa and located at the foot of Death Mountain.
Before we enter the mountain, there is an extraordinary amount of work to do in the village and the adjacent cemetery. Let’s start with a second bottle.
Find Bottle 2 – all seven chickens
Near the entrance to the village, the chicken woman stands next to an empty enclosure. Because of her allergy, she cannot catch her seven escaped chickens herself. Pick up each animal and throw it into the fenced area next to her.
The seven chickens are located in the following locations:
- right near the chicken woman,
- near the entrance of Kakariko,
- in a wooden box at the carpenters’ house – roll against the box,
- in the northern village area near the shops,
- on the raised ledge opposite the construction site,
- behind the high fence in the northeast area,
- behind the windmill on the same elevated side.
For the animals that are difficult to reach, you will need a chicken yourself. Pick one up, jump with it from an elevated position and use its slow glide to get over the large fence. Then throw the chickens you find there back over the fence before you return yourself.
As soon as all seven animals are in the enclosure, talk to the chicken woman. As a thank you, she gives Link a second Empty Bottle.
New equipment: Bottle 2
For example, with two bottles we can now take a fairy and a beetle with us at the same time. For our 100% route, this is much more convenient than just a single container.
The Kakariko Cemetery
Go through the eastern passage of the village to the cemetery. At the far end there is a particularly large tomb of the royal family. Stand on the Triforce symbol in front of it and play Zelda’s Lullaby.
Lightning strikes and blows the grave open. Jump into the resulting opening.
The Royal Family’s Tomb and the Sun’s Song
Climb down the stairs and enter the first room. Several Keese sit on the walls. Defeat all enemies with the fairy slingshot. As soon as the last one disappears, the next door opens.
Behind it there is a room full of ReDeads. Their screams can completely paralyze Link, causing them to cling to him. Since we only get the intended countermeasure at the end of this grave, you should run as far as possible past the undead and stick to the wall.
Reach the stone tablet in the last room and examine it. Link learns the Anthem of the Sun.
New song: Sun’s Song
The anthem of the sun alternates between day and night. It also paralyzes ReDeads and mummies for a few seconds. This is extremely helpful, especially in the cemetery and later in the Shadow Temple.
On the way back you can immediately try out the new melody on the ReDeads and then safely eliminate them with the Kokiri sword.
Free Hylian Shield
We don’t buy the Hylian Shield in Hyrule City because there is a free copy in the cemetery. Make sure it’s nighttime. During the day, the little cemetery boy prevents Link from moving certain graves.
Look for the gravestone with flowers in front of it in one of the front rows of graves and drag it back. A hole opens underneath. Jump in and open the Treasure Chest. Inside is the Hylian Shield.
New equipment: Hylian Shield
Young Link is too small to carry the Hylian Shield in front of him like a normal shield. When blocking, he crouches down and uses the shield on his back like a tank. However, against fire, the metal shield is much safer than the flammable Deku shield and becomes very useful on the Death Mountain as well as in Dodongo’s Cavern.
Piece of Heart in the tomb
Stay in the cemetery and look for another moveable grave in the back row of normal gravestones. Behind or under one of the gravestones you will reach a small chamber with a ReDead.
Play Sun’s Song to immobilize the undead and defeat him. Then stand on the small stone platform or in front of the designated spot and play the Sun’s Song again.
A Treasure Chest appears. Open it and collect the next Piece of Heart.
Gold Skulltula in the soft earth
There is another soft area of ground on the left side of the cemetery. Take out the beetle bottle and pour the animals onto the ground. A Gold Skulltula pops out.
Defeat them and collect the symbol. Then, if possible, catch one of the remaining beetles in your bottle before it disappears.
For later:
A second Gold Skulltula sits high on the outer wall of the cemetery at night. We can already defeat her with the fairy slingshot, but we can’t reliably reach her symbol yet. With the Boomerang we can get it later without any hassle.
Piece of Heart on Dampé’ grave horror tour
The second Piece of Heart We get the cemetery from Dampé and Dampé respectively. His mini-game only runs in the early evening 6:00 p.m. and 9:00 p.m. The Anthem of the Sun is not particularly suitable for this because it sets the clock too far into the night.
Leave Kakariko and wait on the Hyrule Field until the sun sets and the wolf cry announces the beginning of the night. Then immediately enter Kakariko and the cemetery. Since time stands still within the village, Dampé should now do his rounds.
Always talk to him when he is standing directly in front of a dark area of earth. He digs at this location for 10 Rupees. The reward is random and can consist of nothing, different Rupees or the Piece of Heart you are looking for. Repeat the attempts until Dampé digs up the Piece of Heart.
GameCube Note:
Be sure to collect the unearthed Piece of Heart immediately and do not leave the cemetery beforehand.
Five Gold Skulltulas in Kakariko
With the Anthem of the Sun we can now comfortably do a full nighttime tour of Kakariko. There are five Gold Skulltulas in the village, which can be collected by young Link without any later dungeon equipment.
Gold Skulltula 1/5 – Construction site
Go to the unfinished construction site in the center of the village. At night a Gold Skulltula appears on one of the half-finished stone or brick walls. Defeat them with the Kokiri Sword or Fairy Slingshot and collect the symbol.
Gold Skulltula 2/5 – House of Skulltulas
Go to the Skulltula house near the path to the cemetery. The second spider crawls on the outside wall of the building at night. Defeat them and take the symbol with you.
Gold Skulltula 3/5 – Tree at the village entrance
There is a large tree right behind the entrance to Kakariko. Roll against the trunk at night. A Gold Skulltula falls down. Defeat her and collect her symbol.
Gold Skulltula 4/5 – observation tower
Run to the high wooden lookout tower in the center of the village. A Gold Skulltula sits high up on the ladder or tower at night. Shoot them with the fairy slingshot and then climb high enough to collect the symbol.
Gold Skulltula 5/5 – House at Death Mountain Gate
The last child skulltula of Kakariko sits at night on the side of the house near the northern gate to Death Mountain. Search the outside wall until you hear the typical scratching sound. Defeat the spider and collect its symbol.
For later:
Another Skulltula of Kakariko can be found on the roof of Impa’s house. This copy is intended for the adult Link and will be collected later with the Hookshot.
The House of Skulltulas and the Great Purse
Now enter the House of the Skulltulas. The family living there was cursed because of their greed. With every Skulltula symbol you collect, you weaken this curse. For certain total numbers you will receive permanent rewards.
After our big collecting round you should have at least 10 Gold Skulltulas. Talk to the first family member who has already been saved. You will receive the Large Wallet, with which Link can now carry up to 200 Rupees.
Rewards in the House of Skulltulas:
10 symbols = Large wallet with 200 Rupees
20 symbols = Stone of Agony or Shard of Knowledge on 3DS
30 symbols = Giant’s Wallet with 500 Rupees
40 symbols = 10 Bombchus
50 symbols = Piece of Heart
100 symbols = repeatable large Rupee
Open the gate to Death Mountain
Go to the north end of Kakariko. A soldier guards the locked gate to the Death Mountain Trail. Talk to him and show Zelda’s letter. After seeing the royal signature, he opens the passage to Death Mountain.
The soldier also tells Link about the Hylian Shield and the newly opened mask shop in Hyrule City. Since we already got the shield for free at the cemetery, we don’t need its discount. The reference to the mask shop, on the other hand, starts a larger optional Side Quest.
Optional: Start the mask swap quest
For a complete 100% route, we should at least complete the first steps of the mask exchange quest now. Return to Hyrule City during the day. The Happy Mask Shop is now open.
First borrows you the Keaton Mask or Keaton mask. Travel back to Kakariko and talk to the soldier at the gate to Death Mountain while Link is wearing the mask. He buys them for his son.
Return to the mask merchant and pay the requested price for the Keaton Mask. After that, the skull mask will become available.
Maximum Deku Staff Capacity
Borrow the skull mask and travel to Lost Woods. Before you sell them to the Skull Kid, you should definitely visit the hidden forest stage. From the entrance in the GameCube version , go right → left → right → left → left and look for the hidden hole in the tall grass area.
Jump down and put on the skull mask. Step onto the stage. A large group of Trader Deku appear and examine Link. Then talk to their leader. It improves your maximum Deku Staff capacity.
If you have already purchased the first upgrade to 20 sticks, you can then total 30 Deku Sticks carry – the maximum in the game.
Permanent upgrade: maximum 30 Deku Sticks
The large supply is particularly practical for Master Quest because some modified dungeons use significantly more fire puzzles with Deku staffs.
skull mask sell
Afterwards, go to the single Skull Kid just to the left of the Lost Woods entrance. If you followed our solution, you have already made him a friend with Saria’s song and received his Piece of Heart.
Put on the skull mask and talk to him. The Skull Kid buys it, but pays less than you have to pay back to the Happy Mask Salesman later. Pay the missing amount in the Happy Mask Shop. The scary mask or Spooky Mask will then be unlocked.
You can sell the scary mask to the little boy in the Kakariko cemetery during the day. Afterwards, the Bunny Ears Headdress becomes available. However, the full mask quest can only be completed later, which is why we won’t artificially lengthen it here.
Piece of Heart with Richard in Hyrule City
If we’re back in the capital anyway, we’ll take another Piece of Heart with us. First go to the castle grounds and wait there until nightfall. Then return to the marketplace. At night there are numerous dogs running through the streets.
We are looking for a certain small white dog named Richard. He is near a market stall not far from the exit to the Hyrule Field. Touch him to make him follow Link. Be careful not to bump into another dog afterwards, otherwise the wrong animal might come after Link.
Go with Richard into the side street of the market square and enter his owner’s house, which is open at night. Once she recognizes her missing dog, she rewards Link with a Piece of Heart.
Still open collectibles in this section
Although we have already done a lot, some finds are deliberately left open for later visits. This is not because of Master Quest, but because of the equipment required. We will incorporate them back into the route at the earliest reasonable point in time.
- Lon Lon Ranch: two more Gold Skulltulas require the Boomerang.
- Cemetery: We’ll get the skulltula up on the outer wall later with the Boomerang.
- Kakariko: the Skulltula on Impa’s house is intended for the adult Link with Hookshot.
- Hyrule Castle: A second Skulltula is in a secret cave that can be accessed later and requires the Anthem of the Storm and bombs.
- Lost Woods: an adult Skulltula is later achieved via a planted Magic Bean.
- Mask Quest: the final steps and the Mask of Truth will follow later.
- Marketplace: Bombchu bowling and treasure chest game are done with the right equipment.
Go to Death Mountain
We are now well prepared for the next stage. Link has two bottles, several additional Pieces of Heart, Zelda’s Lullaby, Epona’s Song, Saria’s Song and the Sun’s Anthem. With the Hylian Shield we are also much better protected against the fire hazards of Death Mountain.
In the next chapter of our Master Quest walkthrough, we enter the Death Mountain Trail, visit Goron City for the first time, meet Darunia and receive the Goron’s Bracelet. For the 100% route we take additional Skulltulas and the Piece of Heart in the rotating Goron jug. We then blow up the entrance to Dodongo’s Cavern – Master Quest.
Frequently asked questions about this section
Is Hyrule in Master Quest different from the normal version?
On the GameCube, Hyrule Field, Hyrule City, Lon Lon Ranch, Lost Woods, Kakariko and the rest of the overworld correspond to the normal version. Master Quest mainly changes the dungeons. In Ocarina of Time 3D – Master Quest, however, the entire game world is mirrored.
When will I get the first bottle?
You will receive the first bottle at the Lon Lon Ranch. Win Talon’s Super Chicken game by finding his three special chickens within the time limit. The reward is a bottle of Lon-Lon milk.
Where can I get the second bottle?
In Kakariko, catch all seven of the chicken woman’s escaped chickens and throw them into her enclosure. After the last animal is returned, she gives Link an Empty Bottle.
Do I have to buy the Hylian Shield?
No. At night in the Kakariko cemetery there is a secret chamber under a gravestone with flowers. There is a free Hylian Shield in the Treasure Chest.
How to get Anthem of the Sun?
Play lullaby in front of the great Royal Family’s Tomb in the cemetery Zelda’s. Inside you first defeat the Keese and then cross the room with the ReDeads. Examine the stone tablet in the final room to learn the Anthem of the Sun.
How many Gold Skulltulas can I collect in Kakariko as a child?
In the actual village you can already collect five children’s skulltulas. Another one emerges from the soft earth in the cemetery. A second cemetery skulltula later requires the Boomerang, while the skulltula on Impa’s house is only collected by the adult Link with the Hookshot.
Where do I learn Saria’s song?
Follow the music through the Lost Woods to the Sacred Forest Meadow, defeat the Wolfsheimer and cross the hedge maze. Saria waits at the end of the clearing and teaches Link Saria’s song.
Do I need Saria’s song for the main plot?
Yes. Darunia in Goron City is initially in a bad mood and refuses to help Link. Only when you play Saria’s song in front of him will you receive the Goron’s Bracelet and be able to pick up bomb flowers.
Should I start the mask quest already?
It is optional for the main plot. However, to get a complete 100% score, starting early is worth it. The skull mask is particularly important because it unlocks the maximum capacity for Deku staffs on the forest stage.