
This Walkthrough uses Ocarina of Time – Master Quest for the GameCube as a basis. It also works for Ocarina of Time 3D – Master Quest. On the Nintendo 3DS, the entire game world is mirrored, so all directional information such as left and right must be swapped accordingly. Additionally, enemies in the 3DS Master Quest deal double damage.
After defeating King Dodongo in Dodongo’s Cavern – Master Quest, Link already has two of the three Sacred Stones: the Kokiri’s Emerald and the Goron’s Ruby. The last stone is at Zora in the east Hyrule’s. However, before we can look for Princess Ruto in Jabu-Jabu’s belly, the journey first takes us up the Zora’s River, through Zora’s Domain and via an underwater tunnel to the Lake Hylia.
This section is particularly productive for our 100% route. We collect several Pieces of Heart and Gold Skulltulas, get the Silver Scale and our third bottle, already set the Scarecrow’s Song for the adult Link, win another Piece of Heart while fishing and find Farore’s Wind. Only then do we enter Jabu-Jabu’s belly – Master Quest, the structure of which differs significantly from the normal version. Cows are stuck in the walls, Bombchus are needed for puzzles, electric tentacles block entire corridors and several Skulltulas are in completely new positions.
Quick Overview
| Found item or task | Location |
|---|---|
| Gold Skulltula | Tree at the entrance of the Zora’s River |
| Magic Bean | Trader at Zora’s River |
| Pieces of Heart | 2 with chickens on the Zora’s River |
| Gold Skulltula | At night on the ladder near the waterfall |
| Piece of Heart | Light all torches in Zora’s Domain |
| Silver Scale | diving game in Zora’s Domain |
| Rutos letter / bottle 3 | Lake Hylia |
| Prepare Scarecrow’s Song | Bonooru on Lake Hylia |
| Gold Skulltulas | 2 pieces on Lake Hylia |
| Piece of Heart | fishing pond – record fish |
| Gold Skulltula | tree in Zora’s Fountain |
| Farore’s Wind | Great Fairy to Zora’s Fountain |
| Dungeon Map | Entrance room of Jabu-Jabu’s belly |
| Compass | Underwater area in the elevator room |
| Boomerang | water room after meeting Ruto |
| Gold Skulltulas in the dungeon | 4 pieces – one of them later with Song of Time |
| Heart Container | To Barinade |
| Zora’s Sapphire | By Princess Ruto |
The Zora’s River
Leave Kakariko and follow the river east on the Hyrule Field. Behind a small rock formation you reach the entrance to Zora’s River. Kaepora Gaebora waits for Link again and points out that access to Zora’s Domain can be opened by the melody of the royal family. Because we Zelda’s Lullaby we already know, we have the most important prerequisite.
Directly behind the owl, several boulders block the path. Blow them up with a bomb. Before you continue, however, you should examine the tree right at the entrance.
Gold Skulltula in tree
Roll against the trunk of the single tree next to the rock face. A Gold Skulltula falls out of the crown. Defeat her with the Kokiri Sword and collect her symbol.
This Skulltula appears both day and night and requires no special equipment other than the ability to reach the Zora’s River.
Buy Magic Beans
Immediately behind the blasted rocks, a trader sits on the bank. He sells Magic Beans. The first costs just 10 Rupees, after which the price increases by another 10 Rupees after each purchase. There are a total of ten Magic Beans that can be planted in the various soft soil areas Hyrule’s.
Unlike almost all other soft ground spots, the ground spot is next to the dealer no Gold Skulltula. Beetles are therefore not necessary here. Buy at least one Magic Bean and plant it directly in the ground. When Link returns here seven years later, it has grown into a large floating plant that makes moving through the area much easier.
100% note:
In order to complete the game, we need all ten magic peas in the long term. However, you don’t have to buy them outright right away. We always take the beans with us on our route when we visit the relevant planting sites.
Up the river with the chicken
Pick up the chicken near the entrance. If Link holds a chicken above his head, he will fall much more slowly after a jump and can therefore overcome larger abysses. We need exactly this mechanic for two Pieces of Heart.
Follow the path upstream. In several places you have to throw the chicken onto a higher platform, then jump up yourself and pick up the animal again. If it accidentally falls into the river, you can use another chicken higher up or return to the entrance.
The blue Tektites by the water can be defeated from a safe distance using the fairy slingshot. However, they are not necessarily relevant to the actual route.
Piece of Heart 1: On the Rock Pillar
column
About halfway along the Zora’s River you will reach an area with a small waterfall and a high central rocky plateau. The first Piece of Heart is clearly visible on top of a stone pillar.
Use the chicken to first reach the raised platform with the ladder. Climb up and grab the second chicken that is walking around there. Stand at the edge so that you are looking directly at the column with the Piece of Heart.
Jump over the abyss with the chicken and slide onto the pillar. Don’t let go of the animal until Link has landed safely. Then collect the Piece of Heart.
If you find these flight maneuvers difficult, you can get the Piece of Heart later with the Boomerang or as an adult Link with other equipment. We are already taking it with us for our route.
Piece of Heart 2 – before Zora’s Domain
Work your way further upstream. Behind the long wooden bridge the path finally leads to the large waterfall, behind which the entrance to Zora’s Domain is hidden. Before we open it, we get the second Piece of Heart.
Grab the chicken on the upper platform and look downstream again from the high ledge. Below or slightly away from the path is a small platform with the clearly visible Piece of Heart.
Jump off with the chicken and slide to the platform. Collect the Piece of Heart. You can then return to the main path via the surrounding ledges or the water.
Gold Skulltula on the ladder
Stay near the big waterfall and play the Sun’s Song to make night fall. Jump into the water below the waterfall and look for the ladder that leads up from the river to one of the raised paths.
At night another Gold Skulltula crawls on this ladder. Shoot them with the fairy slingshot and then climb the ladder to collect the symbol.
For later:
Two more Skulltulas at the Zora’s River only appear at night in the future. Both sit high on rock walls and are collected by the adult Link with the Hookshot and Longshot respectively.
Open Zora’s Domain
Return to the upper path by the large waterfall. There is a Triforce symbol in the ground right in front of the water. Stand on it and play Zelda’s Lullaby.
The waterfall weakens and reveals a passage in the rock face. Jump across and enter Zora’s Domain.
Zora’s Domain
Zora’s Domain consists of a large water-filled cave with several surrounding paths. The king of Zora sits on his throne in the upper area. If you talk to him, he will report that his daughter Princess Ruto has disappeared.
Before we look for her, we first complete the two most important optional tasks in the realm: the torch puzzle for a Piece of Heart and the diving game for the Silver Scale.
Piece of Heart – all torches light
This Piece of Heart is one of the more hectic early tasks. You have to light several torches one after the other within a short period of time before the previous ones go out again. However, thanks to Din’s Din’s Fire, the last part is much easier.
First go to King Zora’s throne room. A permanent torch burns next to the entrance. Light a Deku Stick from it and run down the stairs. Light the first extinguished torch at the bottom. It stays on permanently and can now be used as a starting point.
Light a new Deku Staff on this torch and run down the stone path. Turn towards the Zora Shop and light the next torch in front of the corresponding passage. Then run through the shallow water and light another torch.
The last two torches are close together in a small niche behind the waterfall. The easiest way is to stand between them and use Din’s Din’s Fire. Both are ignited at the same time.
If all the torches burn at the same time, a large Treasure Chest will appear behind the waterfall. Open it and take the Piece of Heart.
The Silver Scale
Return to the upper area near King Zora and take the side tunnel to the dive site. Talk to Zora waiting there and pay 20 Rupees for the mini-game.
He throws several blue Rupees into the deep water below you. Jump down and dive to all of the Rupees one after the other. With Link’s normal diving ability, there is little time left underwater, but the Rupees are positioned so that they are still easily accessible.
If you have collected all the Rupees before the time limit expires, you will return to the Zora at the top. As a reward you will receive the Silver Scale.
New equipment: Silverscale
With the Silver Scale, Link can dive much deeper. It gives us immediate access to the underwater tunnel to Lake Hylia.
Through the underwater tunnel to Lake Hylia
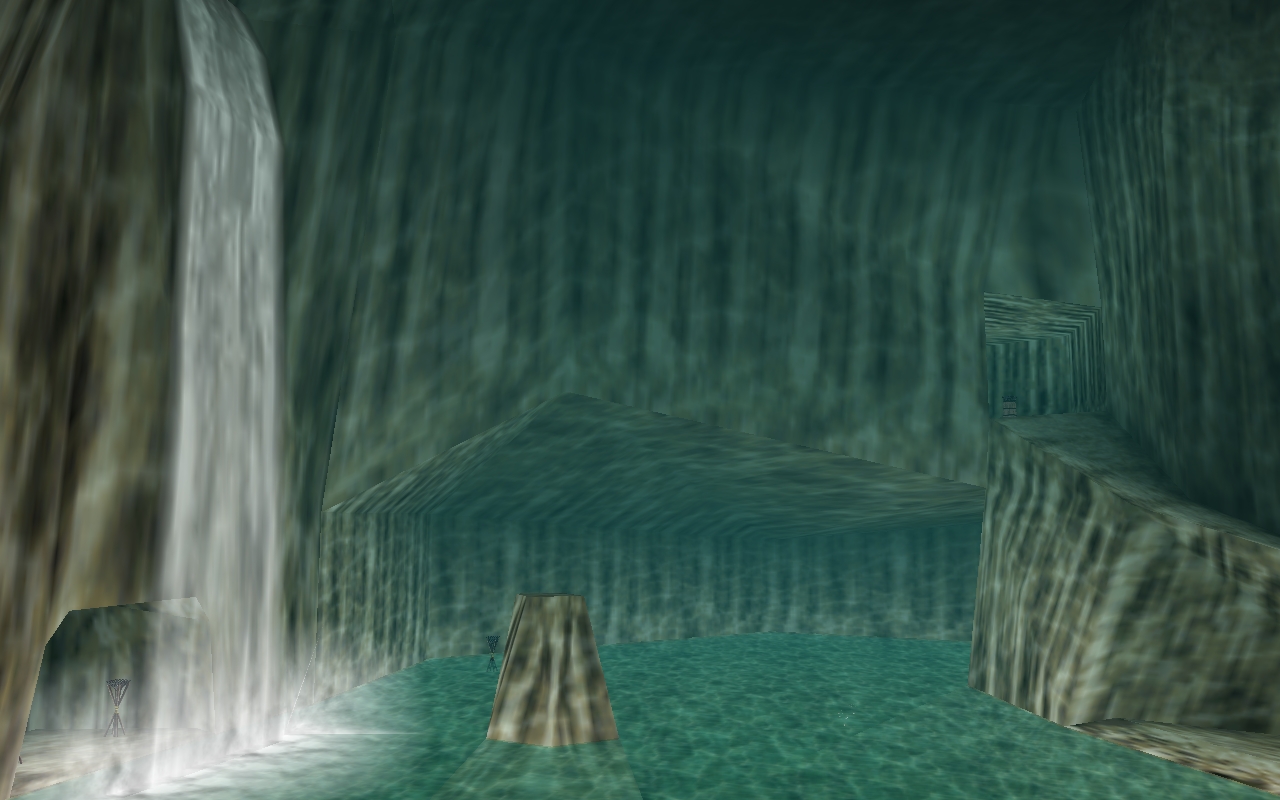
Jump from the waterfall again into the large pool of Zora’s Domain. In the deeper area there is a small underwater tunnel. With the Silver Scale you can dive deep enough to reach him.
Swim through. Link reappears at the other end in the Lake Hylia.
There is a bottle on the ground right near the exit. Dive down and collect them. Inside the bottle is a letter from Princess Ruto in which she explains that she is in Lord Jabu-Jabu and that her father should not find out about it.
New quest item: Ruto’s letter
The letter is initially in a bottle. After you show it to King Zora, the bottle will remain in Link’s possession permanently. This gives us our third bottle.
100% round on Lake Hylia
Since we’ve already completed the long journey to Lake Hylia, let’s complete several optional tasks right now. None of these are necessary for Jabu-Jabu’s belly, but they are part of our complete route and save additional journeys later.
Prepare Scarecrow’s Song
There are two scarecrows between the lakeside laboratory and the entrance to the fishing pond. Talk to the bottom scarecrow Bonooru. He claims to remember every tune you play him.
Pull out the Fairy Ocarina and play your own eight-note melody. In principle, the combination can be chosen freely, but should be as easy as possible to remember. For example, use a clear repeating pattern.
Bonooru memorizes the melody. This prepares the first part of the later Scarecrow’s Song. As an adult Link, we return and play him the same tune again. Afterwards we can summon Pierre as a hook target at certain points.
Important:
Write down the eight notes of your melody. The game will not automatically display them later.
Gold Skulltula in the soft earth
There is a soft area of ground next to the laboratory. Pour bugs on it from a bottle. A Gold Skulltula jumps out of the ground.
Defeat them and collect the symbol. Then plant a Magic Bean in the same spot. In the future, a floating plant grows here that we can use to reach the roof of the laboratory and a later Piece of Heart.
Gold Skulltula on the island
Play the Anthem of the Sun to make it night and swim to the small island in the lake. Another Gold Skulltula appears on one of its pages.
Defeat her with the fairy slingshot and collect the symbol. Since Link himself is on the island, no Boomerang is needed for this.
Piece of Heart when fishing
Then swim or walk to the fishing pond at the edge of Lake Hylia. Pay 20 Rupees and borrow a fishing rod.
As young Link, you must catch a fish that beats the previous record. Good large specimens often swim in the area of the sunken tree trunk or near the reed plants. Throw the bait slightly behind the desired fish and slowly move it through his field of vision.
As soon as a big fish bites, keep the rod taut and reel in the line in a controlled manner. Avoid hectic movements, otherwise the fish may come off the hook.
Bring a sufficiently heavy record fish to the owner of the fishing pond. In the GameCube version, a fish of around nine to ten pounds is usually sufficient. As a reward you will receive another Piece of Heart.
Ruto’s letter King Zora show
Return to Zora’s Domain via the underwater tunnel and climb up to the throne room. Stand in front of King Zora and use Ruto’s letter from the inventory.
After reading the message, the king realizes that his daughter has actually disappeared into Jabu-Jabu’s belly. He begins to move to the side extremely slowly, eventually revealing the passage behind his throne.
The letter disappears from the bottle. You now have the third Empty Bottle.
Catch a fish for Jabu-Jabu
Before going through the new passage, jump into the shallow water on the lower level of Zora’s Domain. Several small fish swim there.
Catch one of these in your new empty bottle. Alternatively, you could buy a fish in the store, but that is unnecessary and significantly more expensive.
We need this fish as an offering to Lord Jabu-Jabu.
Zora’s Fountain
Go through the passage behind King Zora. You get to the big Zora’s Fountain. In the center, Lord Jabu-Jabu rests on his platform. Before we enter the dungeon, we take care of two permanent items.
Gold Skulltula in tree
Go past Jabu-Jabu to the back of the spring. There is a piece of dry land with several rocks and a tree.
Roll against the trunk. A Gold Skulltula falls out. Defeat her and collect her symbol.
Farore’s Wind
There is a noticeable wall near the rocks. Put a bomb in front of it. The explosion opens access to another source of the Great Fairy.
Enter the cave and stand on the Triforce symbol. Play Zelda’s Lullaby. The Great Fairy appears and gives Link Farore’s Wind.
New spell: Farore’s Wind
Within many dungeons, Link can set a magical warp point. Later you can use the spell to either teleport it back to that point or cancel it completely. Farore’s Wind is not absolutely necessary for the main story, but it can save a lot of time in long Master Quest dungeons.
Enter Jabu-Jabu’s belly
Return to Jabu-Jabu’s platform and stand directly in front of his open mouth. Select the bottle with the fish and release the animal right in front of the giant Zora God.
Jabu-Jabu opens his mouth even wider and sucks in both the fish and Link. This begins the third dungeon.
Jabu-Jabu’s Belly – Master Quest
The Master Quest version of Jabu-Jabu’s Belly is one of the most unusual dungeon conversions in the entire game. Already in the entrance room, cows are stuck in the walls and take on the function of switches. Elsewhere they provide chests, shift after being hit, or can even be milked with Epona’s Song. There are also crawling mine puzzles, significantly more predatory slimes and Lizalfos as well as four completely repositioned Gold Skulltulas.
3DS Master Quest:
Jabu-Jabu’s stomach is also completely mirrored on the Nintendo 3DS. The spatial sequences and puzzles described remain identical, but the left and right are swapped.
Gold Skulltulas:
Jabu-Jabu’s Belly – Master Quest contains a total of four Gold Skulltulas. We can collect three during this round. The fourth is behind a time block in the boomerang room and is made up after receiving the Song of Time.
The Dungeon Map
In the first room, several Shaboms float through the air. There is a large boulder in the middle. As you approach, a Octorok will also appear in a shallow water area.
Eliminate the Octorok and place a bomb on the rock. A yellow Floor Switch appears under the destroyed stone. Step on it. A large Treasure Chest appears.
Open it and take the Dungeon Map.
Then look at the two cows that are stuck in the fleshy walls on the left and right. Shoot the left cow with the fairy slingshot to make a small chest with Deku Nuts appear. Hitting the other cow opens the next door.
Go through.
The elevator room and the Compass
Several Biri are floating in the next area. These electric jellyfish should not be attacked with the normal sword while they are electrified. Use the fairy slingshot, bombs, Deku sticks or Deku nuts.
There is another cow on the wall. A hit with the fairy slingshot causes a small Treasure Chest to appear on a lower platform. Ride the meaty elevator down or jump carefully into the water.
Several Stingers are waiting below, initially hiding in the ground or in the water. Find the underwater tunnel and dive through it with the Silver Scale.
On the other side, climb onto the platform and step on the Floor Switch. This will open a door at the top of the elevator room. Then turn around and shoot the cow embedded under the water. A Treasure Chest appears.
Open it and take the Compass. Dive back, take the elevator up and go through the now accessible door.
Princess Ruto
In the next large room, more Biri are floating above numerous holes. Princess Ruto stands between them. Talk to her. She initially claims that she doesn’t need any help at all and runs away. She promptly falls through one of the holes.
Jump through the same hole. Once you get downstairs, you talk to Ruto several times until she reluctantly accepts that Link accompanies her. From this moment on you can pick up and carry the princess.
Ruto can be placed on counters and carried through doors. If you lose it due to a fall or go too far away, it returns to certain starting points and has to be picked up again.
Bombchus and the water jet
Pick up Ruto and go to the middle of the lower room. Enter the yellow Floor Switch. A jet of water comes out of the ground and carries Link and Ruto up.
Jump from the highest point of the water jet to the upper platform and place Ruto on the blue switch there. The princess holds down the switch and opens a door.
Before you walk through, you look at the wall. There are two cows there. Shoot both of them with the fairy slingshot. This causes two small Treasure Chests to appear in the room. One contains Deku Nuts, the other Bombchus.
Important:
Be sure to take the Bombchus with you. One of the Master Quest Skulltulas is protected by a rock high on the wall and is easiest to uncover with a Bombchu.
Then step on the yellow Floor Switch again, ride up with the water jet and jump to the door that Ruto is holding open.
The Boomerang
In the following corridor a single Lizalfos attacks. Block his jumping attacks with the shield and counter with the Kokiri sword.
At the end of the corridor you jump into a deeper water pit. A predatory slime lurks inside and can swallow Link’s Deku or Hylian Shield. Therefore, keep enough distance and attack with jumping attacks before immediately retreating again.
Several Stingers are also hiding in the ground. Deku nuts force them upwards, then you can use the fairy slingshot to eliminate them.
In a corner of the room there is a blue time block. We can’t move him at the moment. Be sure to note this position, because behind or below this block is the fourth Gold Skulltula of the dungeon.
Remember for later:
After receiving the Song of Time, we return to this room, play the melody in front of the time block and collect the Gold Skulltula 4/4 hidden behind it.
Defeat all enemies and then step on the switch in the pit. The room fills with water. Swim to the discolored wall below the alcove and climb up.
In the large Treasure Chest is the Boomerang.
New weapon: Boomerang
The Boomerang is one of the young Link’s most important items. He defeats or stuns numerous enemies, activates switches, and can return removed items and Gold Skulltula symbols directly to Link.
Back to Ruto
Jump back down, activate the water switch if necessary and leave the room through the southern corridor. You get back to the elevator room.
Ride up and go back to the large room where Ruto fell through the holes. Climb the vines back to the upper level. With the Boomerang you can easily stun or defeat the electric opponents along the way.
In the northern area, a fleshy electrical appendage blocks the path. Throw the Boomerang at it. The appendage is temporarily paralyzed and Link can climb over it.
Behind it begins a wide corridor with a total of five doors. Several Lizalfos patrol between the junctions. From here we have to destroy the different colored parasitic tentacles one by one.
The first tentacle barrier
First take the corresponding side passage. In a room there are two cows stuck in the walls again. If you shoot one, an object will fall to the ground – immediately followed by a predatory slime that will try to swallow Link.
Trigger both cows and defeat the two predatory slimes. Once all enemies have disappeared, a chest with Deku Staffs will appear and a torch will be lit.
Light a Deku Staff from this flame and leave the room. Run to the spider web in the corridor with the burning stick and burn it. Enter the door behind it.
In the room, a huge parasitic tentacle hangs from the ceiling. Target it and throw the Boomerang at the narrow top section. After a hit, the tentacle retracts. Run closer to make him come back out and throw the Boomerang again while dodging his counterattack.
After several hits the tentacle dies. At the same time, all extensions of the same color disappear from the dungeon.
Gold Skulltula 1/4
Return to the corridor and enter the room with Shaboms and Tailpasarans. The Tailpasarans hide in the ground and jump out when Link approaches. It’s best to defeat all enemies from a safe distance with Deku Nuts and Boomerang.
Then look up at the wall. A boulder is stuck far above the ground. Place a Bombchu so that it runs up the wall and explodes on the rock.
Behind the rock sits the first Gold Skulltula 1/4. Often she is defeated by the same explosion.
Then step on the yellow Floor Switch in the middle of the room. A jet of water lifts Link into the air. Ride to the highest point and manually aim the Boomerang at the Skulltula symbol. Since the symbol may be outside normal aiming range, you must aim carefully.
The Boomerang drags the symbol to Link.
The remaining tentacles destroy
Return to the five-armed corridor and take the next accessible side room. Another large tentacle hangs there. Defeat him using the same principle: hit with the Boomerang, run closer, dodge the attack and hit the sensitive upper part again.
For the last tentacle you first have to take a small wooden box with you from one of the corridors. A Lizalfos guards a passageway blocked by rocks. Put the box down briefly, blow up the rocks with a bomb and then place the box on the blue switch behind it.
This means the door remains open permanently. Enter the room and destroy the last parasitic tentacle.
This means that all colored extensions have disappeared and several previously blocked holes and passages in the dungeon can be used.
Gold Skulltula 2/4 – hidden side room
Another Skulltula is located in a side room below the large hole room that was previously blocked by a tentacle. The room contains several hidden or difficult to see Keese as well as enemies in the water.
You don’t necessarily need the Lens of Truth you received later for this room. With target detection you can already detect the invisible Keese. Turn slowly through the room and pay attention to when the navigation system or the target lock detects an enemy.
Eliminate all Keese and the enemies in the water. A jet of water or an increased possibility of crossing the room is then activated.
On the other side, a spider web blocks access to the Skulltula. Since we already have Din’s Din’s Fire, you can easily burn the net. Alternatively, a burning Deku stick can be used if a suitable flame is available.
Behind the net sits the Gold Skulltula 2/4. Defeat them and get the symbol with the Boomerang.
Ruto and the Zora’s Sapphire
Return to the large hole room and jump down through one of the openings. Find Ruto again and talk to her until you can carry her again.
Stand with Ruto on the yellow switch in the middle. The jet of water lifts you up. This time jump onto the highest platform, the entrance to which was previously blocked by a tentacle.
Go through the door. Ruto immediately spots the Zora’s Sapphire on a raised platform. Throw the princess up. She is happy about her stone – but the platform suddenly moves up and Ruto disappears.
A few seconds later the platform comes down again. Instead of the princess, however, there is a huge Octorok waiting.
Miniboss: Bigocto
Bigocto runs in a circle around a rotating spike platform. His only vulnerable spot is the large green area on his back. As long as he is facing Link, the sword cannot cause any damage.
Throw the Boomerang at Bigocto to temporarily stun him. Then run around the platform in the same direction and try to reach his back. If he turns in the wrong direction, you can hit him again with the Boomerang and change his movement.
A particularly simple, if not very elegant, method is to intentionally run Bigocto into Link. After the hit, the opponent often turns around and shows their back to Link. Immediately stun him with the Boomerang and land a jump attack.
Two successful jump attacks or several normal sword strikes are enough to defeat the miniboss.
3DS Master Quest:
Intentional hits are much riskier because of the double damage. It’s better to use the Boomerang there to rotate Bigocto in a controlled manner.
The upper rooms
After Bigocto’s defeat, the central platform becomes an elevator again. Ride it up. There’s another cow stuck on the wall. Shoot her with the fairy slingshot to make the next door open.
In the following room you can make small wooden boxes appear by hitting another cow. Stun the two fleshy electrical appendages with the Boomerang, pick up a crate and jump over the temporarily paralyzed obstacles.
Place the box on the blue Floor Switch in front of the next door. This means the door remains permanently open.
Continue forward and enter the next large room.
Gold Skulltula 3/4 – in front of Barinade
In the room in front of the final boss, two robbery slimes fall from the ceiling. Don’t jump carelessly into the middle, but eliminate both opponents first. We don’t have arrows yet, so Boomerang, Deku Nuts and careful jumping attacks are the safest options.
There is a cow stuck on a wall. Shoot her several times with the fairy slingshot. After several hits, she moves along the wall and finally opens the door to the boss room. Another cow can spawn a Treasure Chest with a replacement Deku Shield.
Before you go through the boss door, climb up the vines on the side of the room. The Gold Skulltula 3/4 sits behind a semi-transparent or fleshy barrier.
Since we have Din’s Din’s Fire, you can use it to defeat the Skulltula directly through the barrier. Alternatively, the Boomerang can be thrown around the obstacle at a clever angle.
Then target the remaining symbol and throw the Boomerang. By locking on the target, the Boomerang can fly a turn and collect the symbol despite the barrier.
We have now collected all three Skulltulas that can be reached during the first round without any later songs.
Boss: Barinade
The bioelectric parasite Barinade is waiting behind the last door. This boss is considerably more dangerous than Gohma and King Dodongo, as numerous electrical attacks run through the arena at the same time. Especially in the 3DS Master Quest, just a few mistakes can be fatal.
Upgrade the Boomerang to an easily accessible button and, if possible, have a fairy in a bottle ready.
Phase 1 – the tentacles on the ceiling
At the start, Barinade is connected to the ceiling via three large tentacles. Target one tentacle at a time and throw the Boomerang at the junctions.
Keep moving all the time. Barinade fires electric energy blasts at Link. Run in a circle around the boss and, if possible, don’t change your direction suddenly, otherwise you could get directly caught in the next attack.
After all three tentacles are severed, Barinade detaches herself from the ceiling.
Phase 2 – the first group Bari
Several electric jellyfish will now begin floating in a circle around the main body. The electrical connections between Barinade and the Bari cause damage, so you shouldn’t just run through the formation.
Wait for an opportune moment and throw the Boomerang at Barinade’s main body. If he is stunned, the surrounding Bari lose their electrical protection for a short time.
Attack the jellyfish with the sword, Boomerang or Deku Nuts. Din’s Din’s Fire can also hit several people at the same time. If necessary, stun Barinade again before the electrical connection returns.
Phase 3 – the rotating barrier
After the first group of Bari is destroyed, Barinade uses the remaining jellyfish as a quick rotating defense while also moving around the arena himself.
Keep enough distance and aim at the main body. Continuously throw the Boomerang as soon as there is a gap between the Bari. A successful hit stuns Barinade and breaks his connection to the jellyfish.
Use this short moment to destroy as many Bari as possible. Repeat the process until there are no electric jellyfish left.
Phase 4 – Attack Barinade directly
Now the main body is completely exposed. Barinade moves faster through space and shoots electric beams more often, but can be stunned directly.
Hit him with the Boomerang. As soon as he becomes immobile, run up and attack several times with the Kokiri sword. After a few hits, Barinade retreats briefly into the ground.
Move away and wait for him to reappear. Stun him again and continue the sword strikes. After several successful rounds of attack, the parasite explodes and the battle is won.
Heart Container and Zora’s Sapphire
After Barinade’s defeat, a Heart Container appears. Be sure to collect it and then enter the blue light.
Link will be transported to Zora’s Fountain together with Ruto. The Princess explains that the Zora’s Sapphire is actually a traditional engagement stone of the royal family. Since Link saved her, she gives him the stone anyway.
New quest item: Zora’s Sapphire
Link now has all three Sacred Stones: Kokiri’s Emerald, Goron’s Ruby and Zora’s Sapphire. With this we can return to the Temple of Time and open the gate to the Sacred Realm.
Gold Skulltula in Zora’s Fountain – with the Boomerang
Before we leave Zora’s Fountain, we make night and go to the other side of Jabu-Jabu’s platform. There a long tree trunk or wooden footbridge protrudes over the water.
Go as far out onto the trunk as possible and look at the rock wall. At night another Gold Skulltula sits there.
Defeat her with the fairy slingshot or directly with the Boomerang and then get the symbol to Link with the Boomerang. Without the Boomerang the symbol would not have been accessible.
For later:
Another Skulltula in Zora’s Fountain can only be reached as an adult Link with Silver Gauntlets or silver gloves and other equipment.
The four Gold Skulltulas in Jabu-Jabu’s stomach
A later return is required for the Master Quest version. We were able to collect three of the four Skulltulas during the main route. The last one is in the boomerang room behind the blue time block.
Gold Skulltula 1/4 is in the room with Shaboms, Tailpasarans and the water jet. A Bombchu destroys the high rock; Then we get the symbol from the water jet with the Boomerang.
Gold Skulltula 2/4 is located in the hidden side room below the large hole room. After the invisible or difficult to recognize Keese and water enemies have been defeated, we reach the spider web via the path created and burn it with Din’s Din’s Fire.
Gold Skulltula 3/4 sits behind a barrier directly in front of Barinade’s boss chamber. Din’s Din’s Fire or a cleverly thrown Boomerang defeats them; the symbol is then collected with the Boomerang.
Gold Skulltula 4/4 is in the room where we found the Boomerang. The blue time block is currently preventing access. After receiving the Song of Time, we return and play the melody in front of the block. The Skulltula can then be collected.
100% return:
We get the fourth Skulltula immediately after receiving the Ocarina of Time and the Song of Time. This completes Jabu-Jabu’s belly completely.
With the Boomerang, additional Locations become available
The Boomerang now opens up numerous Skulltula locations that we have already noted in previous chapters. We are deliberately not clearing them all up here, as there is only a very short section of action separating us from the Ocarina of Time and the Song of Time. This allows us to then combine several return visits.
The locations that can now be reached include the two high-altitude skulltulas on the Lon Lon Ranch, the skulltula on the outer wall of the cemetery of Kakariko, other skulltulas in Dodongo’s Cavern – Master Quest and various secret caves in the Hyrule Field.
We can now also collect additional Skulltulas in the Great Deku Tree – Master Quest. Since at least one of them also requires the Song of Time, we’ll do the complete return together in the next big collection section.
Continue to the Ocarina of Time
With the Zora’s Sapphire, Link now has all three Spiritual Stones. Princess Zelda originally told us to return with them to the Temple of Time. However, the path there is different than planned.
In the next chapter of our Master Quest walkthrough we return to Hyrule City, experience Zelda’s escape from Ganondorf and receive the Ocarina of Time as well as the Song of Time. We then use our now extensive equipment for a large 100% collection round through Link’s childhood: We close open skulltulas in Great Deku Tree, in Dodongo’s Cavern and Jabu-Jabu’s belly, pick up the boomerang locations in the upper world, and do more Pieces of Heart and Side Quests and then pull the Master Sword from the Pedestal of Time.
Frequently asked questions about Jabu-Jabu’s Belly – Master Quest
How many Gold Skulltulas are there in Jabu-Jabu’s Belly – Master Quest?
In the Master Quest dungeon there are a total of four Gold Skulltulas. Three can be collected during the first round. The fourth is behind a time block in the boomerang room and requires the Song of Time.
Where is the Dungeon Map?
The Dungeon Map is already in the first room. Blast the large rock in the middle, step on the switch below and open the Treasure Chest that appears.
Where is the Compass?
In the second large area you take the elevator down and dive through the underwater tunnel. Press the Floor Switch on the other side and then shoot the cow lying under water. The chest that appears contains the Compass.
Where is the Boomerang?
After Ruto holds down the blue switch, you will reach a deeper water room with a predatory slime and several Stinger enemies. Defeat all enemies and activate the water switch. The large Treasure Chest in the raised niche contains the Boomerang.
Why do I need Bombchus in Jabu-Jabu’s belly?
In the room with Ruto you can use the cow switches to get Bombchus, among other things. One of these is needed to destroy a rock high in a wall. One of the Master Quest Skulltulas is hiding behind this rock.
How do I beat Bigocto?
Stun Bigocto with the Boomerang and try to get behind him. His weak point is the large green area on his back. Hit him there with a jump attack. Two successful jump attacks are usually enough.
How to defeat Barinade?
First, separate the three tentacles on the ceiling with the Boomerang. Then, stun Barinade’s main body to cause his Bari Jellyfish to lose its electrical protection and destroy it. Once all Bari are defeated, stun Barinade directly with the Boomerang and attack the main body with the Kokiri Sword.
What do I still have to do after the dungeon?
The most important open task is the fourth Gold Skulltula in Jabu-Jabu’s belly. It is behind the time block in the boomerang room and is collected after receiving the Song of Time. At the same time, it’s worth starting a larger childhood collecting session with the bombs that are now available and the Boomerang.