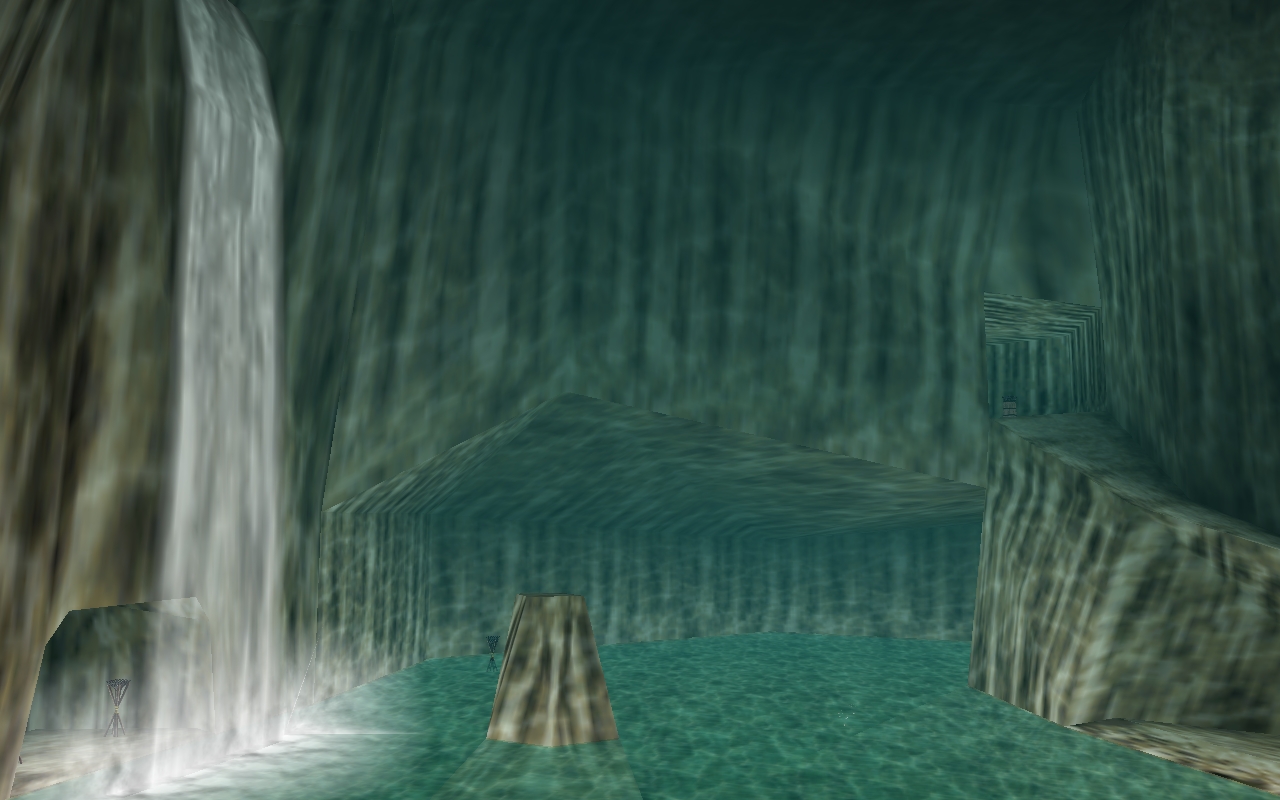

After defeating King Dodongo, Link possesses the Goron’s Ruby and his first Bomb Bag. This allows us to open several secrets that were still out of reach the last time we visited. First we get the Gold Skulltulas on the Death Mountain Trail and in Goron City, expand the bomb bag and climb up to the top of Death Mountain. There we visit our first Great Fairy, get the magic bar and get another Piece of Heart from the death crater. We then return to Hyrule, win the next improvement in crawling Bombchu Bowling and have a second Great Fairy give us Din’s Din’s Fire.
Afterwards our 100% route leads to the Zora’s River, to Zora’s Domain and through an underwater tunnel to Lake Hylia. In addition to several Gold Skulltulas and Pieces of Heart, we get the Silver Scale there, prepare the Scarecrow’s Song and discover Princess Ruto’s letter. At the end we reach the Zora’s Fountain, learn Farore’s Wind and finally enter Lord Jabu-Jabu’s belly. The solution applies to The Legend of Zelda: Ocarina of Time on Nintendo 64 and to Ocarina of Time 3D. The Master Quest version has a different labyrinth structure and is treated separately.
To Dodongo’s Cavern – back to the Death Mountain Trail
After Darunia gave Link the Goron’s Ruby and declared him his blood brother, you are back in front of the entrance to Dodongo’s Cavern. You can find out how to completely complete the second dungeon in our Walkthrough about Dodongo’s Cavern (German). Thanks to the bomb bag found there, you can now carry up to 20 bombs and are no longer dependent on permanently growing Bomb Flowers. Before we climb to the top of Death Mountain, we take care of two immediately accessible Skulltula locations and get the first expansion of the bomb bag.
We have already collected the Gold Skulltula from the soft earth immediately in front of Dodongo’s Cavern on our way to Goron City. The Piece of Heart on the high ledge above the cave entrance can also be reached early on with a targeted backflip. If you picked it up in Chapter 2, you don’t have to do anything else here. Otherwise, you can later plant a Magic Bean in the soft soil in front of the cave and, as an adult Link, let the fully grown plant carry you to the Piece of Heart. This variant requires less precise jump timing.
Gold Skulltula – behind the blastable wall
From Dodongo’s Cavern, walk down the Death Mountain Trail a bit towards Kakariko. Hold on to the rock wall and listen for the characteristic crawling noise Gold Skulltula. You will see one near the lower section of the path noticeably discolored or brittle wall. Place a bomb right in front of it and wait for the explosion. A small niche with a Gold Skulltula appears behind the destroyed wall. Shoot them with the fairy slingshot and then climb the wall to collect the golden symbol. As a young Link, the find can be done at any time of day and only requires a bomb.
After collecting the symbol, return uphill to Goron City. If you are still missing Rupees, you can examine the stones and bushes along the way or search the smaller caves on the Death Mountain Trail for known ruby sources.
Goron City – larger bomb bag and rock maze
In Goron City there are two important tasks with the new bombs. On the middle circuit, a large Goron rolls in continuous circles, while on the top level, a passage blocked by rocks leads to a hidden cave. First we take care of the rolling Goron, because his reward makes the next bomb puzzles easier for us.
Expand bomb bag to 30 bombs
Make your way to the ring-shaped corridor below the top level. A large Goron rolls through the corridors at high speed. He can be stopped with a bomb, but hitting him anywhere isn’t enough to get the reward. The explosion must catch him within the covered, tunnel-like section of his circuit. Therefore, stand at a safe distance at the edge of this tunnel and first observe how long the Goron needs to complete a complete round.
Then place a bomb on his path so that it explodes while he is rolling through the tunnel. You can either put it down a little earlier or throw it in his direction shortly before the fuse expires. If the Goron is hit outside of the correct area, he simply complains and continues his turn. However, if you meet him in the tunnel, he will stop and talk to you. As a reward you will receive the large bomb bag, with which Link can now carry 30 bombs instead of 20. We won the final expansion to 40 bombs later the same day at crawling Bombchu Bowling in Hyrule City.
Gold Skulltula in the rock labyrinth
Then climb up to the top level of Goron City. Near the entrance there is a side passage blocked by several large rocks. Blast the common boulders with bombs and follow the cleared path into a small cave. A real one awaits you there Rock labyrinth. Many of the brown stones can be destroyed with your bombs, while the striking gray, particularly resilient rocks have to remain standing for now. For the Skulltula However, you don’t need a path through these gray blocks.
First stay on the right side and blow up the brown rocks one after the other. Further back, the open paths lead to the center of the labyrinth and eventually into a small area with several Treasure Chests. Open the chests and collect the purple Rupees worth 50 Rupees each. In the same niche there is an eye-catching wooden box. Roll it with Link to break it. A Gold Skulltula appears from the box. Defeat them with the sword and collect the symbol. As a young link, you can get this find regardless of the time of day.
If you don’t already have the Piece of Heart from the rotating Goron jug, you can get it now too. To do this, all the torches on the lowest level must be burning so that the large jug in the middle of the room rotates. Then throw a bomb in from the next level up. If it explodes in the jug and then ‘s happy face remains standing, several Rupees and one Piece of Heart appear. If we have already completely dealt with the jug in the previous chapter, we now leave Goron City and continue climbing up to the Death Mountain summit.
Climb to the summit of Death Mountain
Leave Goron City through the main entrance and take the Death Mountain Trail to the junction at the red flag. There a steep path leads further up. Several boulders are blocking the climb, but you can now easily clear them with your bomb bag. Blast the first rock directly in front of you and climb onto the exposed ledge. The next rocks are a little higher. Therefore, hold a bomb briefly until its fuse has burnt down significantly and only then throw it onto the higher stone. So it explodes immediately after landing. If a bomb rolls down or explodes too early, just try a new one.
There is also access to a hidden cave with a cow under one of the blastable rocks. This detour is optional but interesting for our full exploration. If you have already learned Epona’s song, you can play it to the cow and then receive free Lon-Lon milk with an empty bottle. A bottle of milk contains two portions, each of which can be used to heal five hearts. If you have enough health, you can leave the cave without using a bottle.
Surviving the rock rain
It begins on the next steep stretch of road Death Mountain to suddenly tremble. Shortly afterwards, big ones fall glowing boulders from heaven. Don’t try to run to the top without stopping. Equip that instead Hylian Shield which we already found in the Kakariko cemetery. As a young Link, the shield is so large that he cannot hold it normally in front of his body. If you hold down the shield button, he will duck underneath and protect himself from the falling chunks.
Wait for a short break between hits, run a few meters up the slope and take cover under the shield again. Repeat this process until you reach the climbing wall at the top. There are several Skullwandtulas hanging on the plants, which can push you down as you climb up. So first stand on the ground at a safe distance and shoot the spiders with the fairy slingshot. As soon as the wall is clear, climb to the top and reach the summit of Death Mountain.


The Death Crater – Skulltula and Piece of Heart
The owl Kaepora Gaebora is already waiting for Link at the summit. Don’t talk to her yet, though. To the right or opposite of your seat is a cave entrance that leads directly to the Death Crater. As soon as you enter you notice the enormous heat. The young Link does not yet have Goron Tunic and can therefore only stay in the crater for a limited time. A countdown appears at the top of the screen. How long you can stay depends on Link’s current maximum health. We therefore first get the Gold Skulltula near the entrance and then return briefly for the Piece of Heart.
Gold Skulltula in the wooden box
Immediately after entering the Death Crater there is a wooden box near the entrance. Roll against it to break it. There is a Gold Skulltula hidden inside. Defeat them immediately and collect the symbol. Since the box is practically right at the entrance, the time limit is easily sufficient. Then return to the top of Death Mountain through the same entrance. This ends the heat countdown and allows Link to move safely again.
Piece of Heart on the rock face of Death Crater
Open
Enter the Death Crater a second time to restart the countdown. Now run straight from the entrance to the large ledge. Below it leads one long climbing wall into the depths. Instead of taking a running jump over the edge, walk slowly towards it until Link automatically turns around and grabs onto the rock wall. Then climb down. About halfway up there is a small niche on the side in which a Piece of Heart lies. Carefully move Link in and collect it.
If there is still enough time left, climb the same wall back up to the entrance. Otherwise, you can drop down in a controlled manner and find your way back to the exit. If Link falls into the lava, he loses some health and is reset to a safe platform. So you don’t have to wait seven years for this Piece of Heart or own the Goron Tunic. However, we leave the deeper areas of the Death Crater open for the adult Link because there are additional items and secrets that require a later return.
The Great Fairy of Power – Magic Bar and Spin Attack
Return to the top of Death Mountain. Near Kaepora Gaebora there is a strikingly fragile rock face. Place a bomb in front of it and enter the exposed cave entrance. Inside, a large, circular spring awaits you with a Triforce symbol on the floor. Stand exactly on the symbol and play Zelda’s Lullaby. The Great Fairy power then appears, giving Link his first magical ability.
You now have a green magic bar and can use the enhanced whirl attack. Hold down the sword button to charge energy around Link’s blade. Once the magical energy is fully concentrated, release the button and Link will perform a powerful circular attack. This allows you to hit multiple opponents at the same time. The magical variant uses energy from your magic bar, which you can later fill up with green magic jars from pots, grass or defeated enemies. The improved Spin Attack is particularly useful against groups of weaker enemies, but also against enemies that surround Link from multiple sides.
Visiting this Great Fairy is also an important prerequisite for the next two spells. Only after you have received the magic bar here can the others give you Great Fairies Din’s Din’s Fire and Farore’s Wind. We’ll get both in this chapter.
With the owl back to Kakariko
Leave the fairy spring and now talk to the owl at the summit. After the conversation, she spreads her wings and offers to take you back to the valley. Place Link directly under her claws so he can grab onto them. Kaepora Gaebora then flies down the Death Mountain Trail and places Link on it Roof of Impa’s house in Kakariko away. This saves you the entire return trip Death Mountain.
Directly under the roof is the small separate room with the cow and a Piece of Heart. If you skipped the optional early jump with a chicken, collect the find now: Drop from the roof onto the small ledge above the chicken run, go through the opening in the house wall and take the Piece of Heart. Then you leave the room and walk towards the village square.
We will not repeat the other tasks that have already been completed in Kakariko. These include the nightly Gold Skulltulas, the Anthem of the Sun, the Bottle of the Chicken Lady and the reward for ten Skulltula symbols. We will continue the mask exchange quest after the third Holy Stone if we can combine your next steps with the already necessary visit to Hyrule City. With this we can leave Kakariko for now and return to the Hyrule Field.


Bombchu Bowling in Hyrule City
Leave Kakariko and walk across the Hyrule Field back to Hyrule City. Since you have the bomb bag, the crawling Bombchu Bowling has opened in the marketplace. This mini-game is one of the most important early Side Quests, because here you can win both a Piece of Heart and the second expansion of your bomb bag. One round costs 30 Rupees. Before you pay, the operator will show you the current main price. In addition to bombs, Bombchus and a purple Rupee, possible rewards also include the two permanent upgrades we need.
During a round you get ten Bombchus and have to deal with them one after the other three targets meet. Position yourself so that the… Bombchu runs as straight as possible towards the target. As soon as you put it down, it moves independently across the floor and can even walk up walls. However, its fuse continues to burn and explodes after a short time. For high-up or far-away targets, you have to release the mine in the right place in good time. Some targets are easiest to hit if you… Bombchu from the opposite side of the track and use their movement over a sloping wall.
From the second target onwards, additional obstacles appear. A blade trap races across the track while chickens can run around in front of the final target. A chicken can touch your Bombchu and change its path. Therefore, if possible, wait until the animals clear the direct path to the destination. Especially with the last disc, you should not immediately use all the remaining mines one after the other, but first observe where the obstacles run along. If all of the mines miss the target, the round ends and you have to pay again.
Piece of Heart and bomb bag for 40 bombs
Open
Play crawling Bombchu Bowling until… Piece of Heart is displayed as the main prize. Win the round and take this Piece of Heart to you. Then we continue playing until the Bomb Bag Expansion it’s your turn. If you have already received the Rolling Goron upgrade, your capacity will now increase from 30 to 40 bombs. This gives you the largest regular bomb bag in the game. The two upgrades can generally be collected in reverse order, so that a different order of the mini-games does not prevent you from completing the game.
If you run out of Rupees while bowling, you can, for example, use the already known Treasure Chests in Goron City, the ruby springs in Hyrule City or the wallet capacity increased by your Gold Skulltulas. You don’t have to win all possible bowling prizes to complete the score. The decisive factors are the Piece of Heart and the permanently larger bomb bag. Bombs and Bombchus can also be obtained later in other ways.
Din’s Din’s Fire at Hyrule Castle
After bowling we leave the market square towards Hyrule Castle. Run to the large gate and climb over the vines on the side like you did on your first visit. Then follow the path towards the castle moat. In a small side area is a large boulder that previously blocked access to a low passage. You can now blow it up with your bomb bag. Then crawl through the uncovered opening and you will reach the second source of a Great Fairy.
Stand on the large Triforce symbol inside and play Zelda’s Lullaby. Since we have already received the magic bar on Death Mountain Peak, the Great Fairy of magic now appears and gives Link Din’s Din’s Fire. The spell creates a large wave of fire around Link, injuring enemies and igniting all reachable torches in the area at the same time. This is particularly useful in puzzle rooms with several torches spaced far apart. Later we need Din’s Din’s Fire, among other things, to access the Shadow Temple.
The spell consumes energy from the green magic bar. Therefore, don’t use it unnecessarily often if you don’t have any magic jars available. Din’s Din’s Fire is not absolutely necessary for the upcoming dungeon in Lord Jabu-Jabu’s Belly, but it is part of our complete 100% route and should therefore be collected now.


More secrets with the bomb bag
Before we head to the Zora’s River, there are two more interesting options made accessible by our new bombs. In the Lost Woods there is a hidden cave with a Deku merchant who sells a larger Deku Nut capacity. On the other hand, on the Hyrule Field there is a previously hidden Piece of Heart, which we can also get now. The two detours are particularly worthwhile for a complete game, as otherwise we would have to visit both locations again in the later adventure.
Deku nut upgrade to the Lost Woods
If you do not yet have the first expansion of your Deku Nut capacity, you will briefly return to the Lost Woods. Follow the familiar path towards the forest clearing where you previously visited Saria. Just before the entrance to the Sacred Forest Meadow there is a large boulder. Blow it up with a bomb and jump through the resulting hole in the ground. There are two Deku traders waiting in the hidden cave. Reflect their projectiles with your shield or stun them with a suitable attack so you can trade with them.
One of the dealers sells for 40 Rupees an improvement in yours Deku Nut capacity. This will allow you to do up to in the future 30 instead of 20 Deku Nuts carry. The second dealer sells regular ammunition that you don’t necessarily have to buy. Then leave the cave and return to the Hyrule Field. We will do a further improvement to 40 Deku Nuts later as part of the mask quest.
Piece of Heart in a secret cave on the Hyrule Field
Head towards the Hyrule Field Lake Hylia. Shortly before its entrance there is a striking arrangement four low fences that together form a square. Stand right in the middle of this fenced area and place a bomb on the ground. After the explosion, a hidden shaft opens. Jump down and you’ll land in a small cave with water and a Deku Merchant.
The dealer is selling a Piece of Heart for just 10 Rupees. Reflect his projectile or stun him first so that he is ready to talk, and then buy the Piece of Heart. This find can already be reached with the bomb bag from Dodongo’s Cavern and is therefore part of our current collection round. Then leave the cave through the beam of light and walk across the steppe to the entrance to the Zora’s River. If you have already picked up the Piece of Heart earlier, this detour is not necessary.
We remember another secret on the Hyrule Field for the later boomerang round: Near a single tree between Hyrule City and Kakariko, you can use a bomb to open a cave in which a Gold Skulltula sits high on the wall. The symbol is easily accessible with the Boomerang. Since we only find this in the next dungeon, we connect the find with the other still open Skulltulas after Lord Jabu-Jabu’s belly.


The Zora’s River
The Zora’s River is located in the eastern or northeastern part of the Hyrule Field. Follow the small tributary until you reach the entrance to the river area. Right at the beginning, Kaepora Gaebora appears again and explains to you that the kingdom of Zora is hidden behind the large waterfall at the end of the river. However, we can’t easily cross the area yet because several rocks block the narrow path. Before we blow it up, let’s get the first Gold Skulltula.
Gold Skulltula in the tree at the entrance
Immediately at the entrance there is a striking tree on the left. Run towards it and use the roll attack on its trunk. A Gold Skulltula then falls to the ground. Defeat them with the sword and collect the symbol. The spider appears regardless of the time of day and does not require any special equipment. Then go to the boulders that block the further path and blow them up with your bombs. Behind it, the path leads to a small dealer who sits directly on the river bank.
Buy Magic Beans from dealer
The man on the bank sells Magic Beans, which you as a young Link can plant in special fields made of soft earth. After the time jump, large moving leaf platforms grow from them, which transport you as an adult Link to previously unreachable ledges. The dealer has a total of ten Magic Beans. The first costs 10 Rupees, the second 20, the third 30 and so on. With each purchase, the price increases by another ten Rupees, until the tenth pea finally costs 100 Rupees. All ten together cost a total of 550 Rupees.
For our current route you should buy at least two Magic Beans. We plant one right next to the dealer, the other later in front of the laboratory at Lake Hylia. We will need more peas later for the cemetery, the Death Mountain Trail, the Gerudo Gorge and several areas that are not yet accessible. If your wallet is sufficiently full, you can already buy additional Magic Beans as a supply. If not, we’ll just return later. The dealer will stay at this location as long as you are on the move as a young link.
There is one right next to him Field of soft earth. Stand in front of it and plant the first Magic Bean. Unlike almost all other fields, however, soft earth appears here no Gold Skulltula, if you release beetles on it. This means you don’t have to waste any beetles and can move on to the next section straight away.


Along the river with a chicken
For the next two Pieces of Heart we need a chicken. There is one roaming freely in the lower part of the Zora’s River. Pick it up and carry it along the river. While Link is holding a chicken, he can slide to the ground much more slowly, allowing him to overcome distances that would be unreachable with a normal jump. At the same time, you can throw the chicken onto higher ledges, climb after it and then pick it up again. In this way we can move further upstream step by step without having to leave the animal behind.
Piece of Heart on the column in the middle of the river
Open
First follow the lower path until you reach the first larger rock platforms and the Tektites jumping in the water. Further in the river there is a narrow raised column, on which lies a Piece of Heart. With the chicken in hand, look for the higher ledge on the bank that roughly points towards the pillar. From there, jump towards the heart part and hold onto the chicken so that Link loses height as slowly as possible. As soon as you are directly in front of the pillar, let go of the chicken. Link can now grab the ledge and pull himself up onto the platform. Collect the Piece of Heart.
For the way back you can drop into the water and swim back to shore. Then pick up the chicken again if it is still within reach. If it has landed in the water and disappeared, you briefly return to the lower area of the river. After entering the area again, a chicken will appear again. Alternatively, this Piece of Heart can later be collected from a distance with the Boomerang, but we are already taking it with us for our route.
The five frogs on the tree trunk
A little further upstream, a long tree trunk protrudes over the water. Stand on the flat end of the trunk and take out your ocarina. Five small frogs then appear, sitting in the water in front of Link. The frogs respond to different ocarina songs and grow every time you play them a suitable melody. For each of the five songs required you will also receive a purple Rupee worth 50 Rupees. This is a good opportunity to replenish your wallet after paying for several Magic Beans and bowling rounds.
Now play Zelda’s Lullaby, Epona’s Song, Saria’s Song and the Sun’s Hymn to the frogs. For the fifth growth melody we are still missing the Song of Time, which we learn after the third Holy Stone. You can’t win the two Pieces of Heart during this visit.
Open
For the later collection round you also need the Song of Storms. She meets Link as an adult in Kakariko’s windmill. After the Forest Temple we can return to the Temple of Time and become young Link again. Then play the frogs the missing Song of Time and then the Song of Storms. For the Storm Melody you get Piece of Heart 11. Only when all five frogs are fully grown and you have picked up this Piece of Heart do they offer the quick insect game for Piece of Heart 12. Make a note of both finds for this later visit.
Optional fairy spring above the river
Then carry the chicken further upstream. There is a ladder on an elevated platform, which you can use to reach a small area above the normal path. There are several stones in a circle. Place a bomb in the middle and wait for the explosion. A hidden entrance to a small fairy spring opens in the floor. You can touch the fairies flying around to restore health or capture them with a free bottle. A captured fairy will automatically revive Link if he later loses all of his health. This is useful insurance for Lord Jabu-Jabu’s belly.
Piece of Heart immediately in front of the large waterfall
Open
Then throw the chicken back onto the upper river path and climb after it. Follow the path until just before the large waterfall, which is the entrance Zora’s Domain hidden. On one high side platform is the next one Piece of Heart. Find the highest possible jump point on the opposite bank and jump with the chicken towards the collectible. Hold on to the animal for as long as possible so that Link has enough time to reach the platform. Release it just before the edge, pull yourself up and collect it second Piece of Heart of the Zora’s River a.
This means we have the two Pieces of Heart, which can be reached with a chicken on the first visit. The two remaining Pieces of Heart in the river area belong to the five frogs and remain open until the missing ocarina songs are learned.
Gold Skulltula on the ladder in front of Zora’s Domain
Before you open the big waterfall, you should change the environment to night. To do this, play the Anthem of the Sun if it is daytime. In the upper part of the river, near a ladder in front of the waterfall, a Gold Skulltula sits on the wall at night. Shoot them with the fairy slingshot and then use the ladder or adjacent ledge to collect the golden symbol. This Skulltula only appears at night and can be reached as a young Link with the usual fairy slingshot.
Open the waterfall with Zelda’s lullaby
Then follow the narrow bridges and ledges to the large waterfall. Immediately in front of it is a stone slab with a Triforce symbol. Put link on it and play Zelda’s Lullaby. The waterfall then splits for a short time and reveals an entrance in the rock face. Run quickly through the opening before the water closes again. This will take you to Zora’s Domain, the home of the water people, for the first time.


Zora’s Domain – King Zora and the Silverscale
Inside of Zora’s Domain A large, blue-lit cave awaits you with several water pools and high platforms. First follow the lower path. At the first junction, keep left and climb the long stairs Throne room up. Sitting on the great throne King Zora. Talk to him. He tells you that his daughter Princess Ruto has disappeared and is very worried about her. Behind his throne there is a passage to the Zora’s Fountain, which he is currently blocking with his body. We therefore first need a clue to Ruto’s whereabouts before the king lets us pass.
Win the diving game
Don’t leave the throne room using the large stairs, but instead go from King Zora to the left to the top of the large waterfall. There is a Zora there who offers a diving game. Participation costs 20 Rupees. After paying, the Zora throws five blue Rupees into the deep pool of water below the waterfall. Then jump after it. You have 50 seconds to collect all five Rupees.
Swim directly over one of the Rupees and then dive vertically down until Link touches it. The Rupees are relatively easy to see, although some are a little deeper than others. Therefore, make sure that you waste as little time as possible with unnecessary changes of direction when surfacing. As soon as you have collected all five Rupees, swim back to the shore and climb the stairs to the game master. Speak to him again and he will give you the Silver Scale.
With the Silver Scale, Link can now dive much deeper than before. We need this ability for the underwater tunnel to the Lake Hylia. Later we can improve the diving depth again with the Golden Scale. For now, the Silver Scale is enough to complete all the tasks required for the next dungeon.
The big torch puzzle in Zora’s Domain
Open
Before we Zora’s Domain Exit via the underwater tunnel, we solve the torch puzzle for another Piece of Heart. You need at least one for this Deku staff. If you don’t have any more staffs, you can get more from the Zora store or from a merchant along the way. First go back into the throne room and look for them permanently burning torch near King Zora. Light a Deku Stick on it and then run down the stairs. At the first corner there is an extinguished torch, which you light with the burning stick. It then stays on permanently and serves as a new starting point for the actual torchlight round.
Now light a fresh Deku stick on this torch and continue downwards as quickly as possible. The next torches go out after a certain time, so you can in a single quick pass have to light it. First you reach the torch in front of the Zora shop. From there you walk to the shallow pool of water and light the next torch at the stone circle. Then you walk close to the rock wall to the area behind the large waterfall. There are located two more torches, which you light immediately one after the other.
As soon as all time-dependent torches burn at the same time, a large Treasure Chest appears behind the waterfall. Open it and you will get another Piece of Heart. If a torch goes out on the way before you reach the last one, return to the permanently lit torch at the staircase and repeat the round with a new Deku stick. Alternatively, since we already have the Din’s Din’s Fire spell, you can use it to light multiple torches that are close together at the same time. However, it is not necessary for the normal process.


Through the underwater tunnel to Lake Hylia
With the Silver Scale and the Piece of Heart from the torch puzzle, we can now investigate the real secret of Zora’s Domain. Jump again into the deep pool of water under the large waterfall. If you swim with your back to the waterfall, you will see a deep tunnel on the ground or on the opposite rock wall. Dive down with the Silver Scale and swim through this opening. The passage goes under the cave and ends in another watery area. After a short while, Link appears again and you reach the Lake Hylia.
Retrieve Ruto’s letter from the water
After leaving the underwater tunnel, stay close to it. There is a conspicuous object lying on the bottom of the water below you, which is clearly different from the usual ground. Swim directly above it and dive down with the Silver Scale. Once Link touches the item, you will receive a bottle with a letter from Princess Ruto. Read the message in inventory. In it, Ruto explains that she is in the belly of Lord Jabu-Jabu, the patron saint of Zora, and needs help.
So now we know where we have to go next. Before we show King Zora the letter, let’s take the opportunity to explore the Lake Hylia as completely as possible. Several Gold Skulltulas, a Piece of Heart and the preparation of an ocarina song that will be very useful later are waiting here. The bottle with Ruto’s letter remains in the inventory for now. After showing it to King Zora, we get the bottle back empty and can then use it for fish, fairies, potions or other transportable items.
The Lake Hylia – first 100% collection round
The Lake Hylia is significantly larger than the previous water areas. The scientist’s large laboratory is in the northwestern part, there is a fishing pond on the opposite bank and there are other collectibles on several small islands. As a young link, we can already completely collect two Gold Skulltulas and one Piece of Heart. Another nightly Skulltula at the laboratory and the Piece of Heart on its roof remain reserved for later equipment.
Prepare the Scarecrow’s Song
First go to the bank area where there are two large scarecrows. They are called Bonooru and Pierre. Talk to Bonooru and then take out the Fairy Ocarina. You can now play him a melody of your choice consisting of eight tones . You determine the order yourself, but you should definitely remember it. It’s best to use a simple combination that you can repeat at any time later. Bonooru remembers this melody and encourages you to play it again in the future.
Once Link is seven years older, we revisit Bonooru and play him the same tune. Afterwards, Pierre can appear in certain places in Hyrule if you play the melody on the ocarina. You can then pull yourself up to it with the Hookshot or Longshot. We need this, among other things, for one of the last Gold Skulltulas in Dodongo’s Cavern and for several hidden platforms. If you don’t set the Scarecrow’s Song now, you’ll have to go back to the Lake Hylia as a child later.
Gold Skulltula: Soft Soil Outside the Lakeside Laboratory
laboratory
Then go to the laboratory on the northwest bank. There is a field of soft earth directly in front of the building. Before we plant a Magic Bean there, we get a Gold Skulltula out of the ground. For this we need beetle in a bottle. If you don’t already have one, you can look for beetles in the area under stones or in suitable hiding places and catch them with an empty bottle.
Stand in front of the hole in the ground and release the beetles from the bottle. Several small beetles crawl across the ground and one of them disappears into the soft soil. Shortly afterwards a Gold Skulltula pops out. Defeat them immediately and collect the symbol. If you’re quick enough, you can add one of the remaining bugs back into your bottle and use it again later. Then plant a Magic Bean in the same hole in the ground. As an adult Link, a movable plant grows here, which you can later use to reach the roof of the laboratory, among other things.
Gold Skulltula on the small island
Now play the Anthem of the Sun to make it night. Then swim to the small island in the southeastern area of Lake Hylia. You can recognize it by two striking stone pillars, between which there is a low area of land. At night there is a Gold Skulltula sitting on one of the pillars. Swim to the island, climb onto land and defeat the spider with the fairy sling or sword. Then you collect the golden symbol. The discovery does not require any later equipment and can be done directly on the first visit.
Gold Skulltula at the laboratory reserve for later
When you return to the lab afterwards, you can do another one at night Gold Skulltula at the Exterior wall of the building discover. However, it sits so high that the golden symbol cannot be easily reached after shooting it with the fairy slingshot. For our 100% route we therefore wait until we reach Lord Jabu-Jabu’s belly Boomerang have received. With it we can defeat the spider and immediately bring the symbol back to Link. We’ll later connect the find with the other boomerang skulltulas that are still open so that we don’t have to use the item specifically for this one Lake Hylia have to travel.
Piece of Heart in the fishing pond win
Open
On the northeastern shore of the lake is the fishing pond. Enter the small building and talk to the operator. One round costs 20 Rupees. As a young Link you can win a Piece of Heart if you catch a big enough fish. You have a particularly good chance with the larger specimens that swim along the edges of the reeds or near the tree trunk that is partially submerged in the water. First, observe the fish and look for one that is clearly different from the smaller specimens.
Cast the rod slightly beyond the desired fish and then move the bait in its direction with short movements. If the fish shows interest, you should not move the bait hectically, but rather let it come closer with small interruptions. As soon as the fish bites, pull the rod back and wind up the line. Keep the tension as constant as possible as the fish tries to move left or right. The bigger the fish, the longer the fight lasts. So don’t try to pull him onto land with hectic movements.
Do you have a fish weighing… at least 10 pounds caught, you go to the operator and have the catch weighed. You will receive this as a reward Piece of Heart from the fishing pond. This means that the most important collectible in Lake Hylia has been collected for young Link. The Goldscale and further fishing rewards only become interesting later as an adult Link.
If you haven’t collected the Piece of Heart from the secret cave on the Hyrule Field before, you can do so from here. Leave the Lake Hylia via the normal land route to the steppe. Immediately in front of the entrance is the square of four fences. Blow up the middle with a bomb and buy the Piece of Heart from the Deku dealer for ten Rupees. Then return to Lake Hylia and use the underwater tunnel to get back to Zora’s Domain.


Back to Zora’s Domain – Show Ruto’s letter
Swim back to the underwater tunnel through which you originally entered the Lake Hylia. Dive down with the Silver Scale and follow the tunnel until you emerge again in the deep pool of Zora’s Domain. Then climb the long stairs to the throne room. King Zora is still sitting in front of the passage to the Zora’s Fountain and is waiting for news about his daughter. Stand directly in front of his throne and equip the Bottle with Ruto’s Letter to an item button.
Use the bottle while standing in front of King Zora. The king reads the message and learns that Ruto has apparently disappeared from Lord Jabu-Jabu’s home. He then moves his throne extremely slowly to the side and finally opens the narrow passage to the Zora’s Fountain. The letter disappears from the inventory, but the bottle remains and is now empty again. This additional bottle is an important part of our 100% score and is needed to access the third dungeon.
Catch a fish for Lord Jabu-Jabu
Before you use the released passage behind the king, you should fill one of your empty bottles with a fish. There are several small fish swimming in the shallow water of Zora’s Domain that you can catch for free. To do this, walk to the edge of the shallow pool and stand as close as possible to a fish. Equip the Empty Bottle and use it as soon as the fish is in range. Link catches it and you can then check the bottle in your inventory.
Alternatively, the Zora Shop sells a fish, but spending Rupees on it is unnecessary. The free fish in shallow water serve the same purpose. We need the fish immediately in front of Lord Jabu-Jabu, because only when we offer it to the great patron as food will he open his mouth and let us enter his body.
Explore the Zora’s Fountain
Now go through the narrow passage behind King Zora and you will reach the Zora’s Fountain. The area consists of a large body of water surrounded by high rock walls and several small areas of land. In the middle of the water lies Lord Jabu-Jabu, the giant patron saint of Zora. Although he appears peaceful at first, he is obviously ill. Princess Ruto is somewhere inside after her letter. Before we offer him the fish we caught and start the third dungeon, we get another Gold Skulltula and visit the last Great Fairy that is accessible for our current route.
Gold Skulltula in the tree near the fairy spring
Swim to the southeast side of the Zora’s Fountain. There is a small area of land with several trees and a cave entrance blocked by rocks. First, go to the prominent tree near the Fairy Spring and use the roll attack on its trunk. A Gold Skulltula then falls down. Defeat them with the sword and collect the golden symbol. The Skulltula can be collected as a young Link regardless of the time of day and does not require any special items.
Save Nocturnal Skulltula for the boomerang round
A second Gold Skulltula Zora’s Fountain appears at night on the high rock face near the long tree trunk south of Lord Jabu-Jabu. You can now target and defeat them with the fairy slingshot. However, the gold symbol is out of your normal range. Since we get the Boomerang in the next dungeon, it’s not worth trying a complicated jump for it. We return here to Lord Jabu-Jabu’s belly, set the night with the Sun’s Song and conveniently get the symbol with the Boomerang.
Great Fairy – Farore’s Wind
Go back to the small area of land on the southeast side of the Zora’s Fountain. There are several blocking there boulders access to a cave. Blast the rocks with your bombs and enter the uncovered entrance. Behind it there is another source Great Fairy. Place Link on the large Triforce symbol as usual and play Zelda’s Lullaby. Shortly afterwards it appears Great Fairy of magic and gives you another spell: Farore’s Wind.
With this spell you can create a magical return point within many labyrinths. For example, use Farore’s Wind in a central room before exploring a longer side path. If you want to return there later, use the spell again and choose to return to the previously marked point. Alternatively, you can remove the saved return point and reset it somewhere else. Farore’s Wind consumes magic, but can save a lot of time, especially in large dungeons. It is not absolutely necessary for the upcoming visit to Lord Jabu-Jabu’s belly, but is part of our complete game.
With this visit we have now received the Magic Bar, the Enhanced Spin Attack, Din’s Din’s Fire and Farore’s Wind. We will visit the remaining Great Fairies in later chapters as soon as the necessary equipment is available.
Lord Jabu-Jabu enter
Before you enter the next dungeon, you should replenish your health and, if possible, take a fairy in a bottle with you. It also makes sense to have enough Deku cores for the fairy slingshot, because there are several enemies waiting in the first rooms of Lord Jabu-Jabu’s belly that you can fight from a distance. Deku Nuts also help to temporarily stun enemies. However, the only thing that is absolutely necessary is the fish that we just caught in Zora’s Domain.
Now swim to the small platform directly in front of Lord Jabu-Jabu’s face. Stand as close as possible to its closed mouth and equip the bottle with the fish. Use it to make the fish fall into the water in front of Jabu-Jabu. The huge patron saint then opens his mouth and sucks the fish in. Link and Navi are also caught by the strong current and are swallowed completely in the next moment. This begins the third labyrinth of the game: Lord Jabu-Jabu’s belly.


After this chapter you should have numerous other items and improvements in addition to the Goron’s Ruby and the Bomb Bag. With our complete path, we have seven new Pieces of Heart collected: one in Death Crater, one in Crawlmine Bowling, one in the Secret Cave of the Hyrule Field, two at the Zora’s River, one in the Torch Room of Zora’s Domain and one while fishing on Lake Hylia. If you have already gotten one of these items in a previous chapter, it will of course not count towards your score again.
There are also eight Gold Skulltulas, which you can collect completely during this stage without any later equipment: one each on the blastable wall of the Death Mountain Trail, in the rock labyrinth of Goron City, in the wooden box of Death Crater, in the tree at the entrance to the Zora’s River, on the ladder in front of Zora’s Domain, in the soft earth at the Hylian Laboratory, on the night island in Lake Hylia and in the tree at the Zora’s Fountain. The magic bar, two spells, both bomb bag upgrades and the Silver Scale round out the most important equipment finds in this chapter.
We’ll get these collectibles later
Even after this extensive round of collecting, some items in the areas already visited remain open. This is intended for our 100% route since we don’t have the items required for it yet. The most important next find will be the Boomerang from Lord Jabu-Jabu’s belly. With it we can collect several Gold Skulltulas whose symbols are currently too high or too far away for Link. Other secrets require the adult Link first, the Hookshot, the Scarecrow’s Song or additional Ocarina Songs.
Continue with Lord Jabu-Jabu’s belly
With the Silver Scale, Ruto’s letter, the additional bottle, several new Pieces of Heart and the two magic spells, we have made all the preparations. The next section of our Walkthrough leads directly into Lord Jabu-Jabu’s belly. There we look for the missing Princess Ruto, find the Boomerang and fully explore the unusual labyrinth. We then collect the Gold Skulltulas of the dungeon and defeat the electro-parasite Barinade before getting the third Holy Stone.
After completing Lord Jabu-Jabu’s Belly, we also use the Boomerang for a coherent collection round through the areas we have already visited. This is how we get the still open Skulltula symbols from the Zora’s Fountain, from the Lake Hylia, from Dodongo’s Cavern and from the Great Deku Tree, without unnecessarily traversing already completely completed sections several times.