
This Walkthrough uses Ocarina of Time – Master Quest for the GameCube as a basis. It also works for Ocarina of Time 3D – Master Quest. On the Nintendo 3DS, the entire game world is mirrored, so all directional information must be swapped accordingly.
With the completion of the Gerudo Training Ground – Master Quest and the receipt of the Ice Arrows, all regular dungeons and optional mini-dungeons are outside of Ganondorf’s lock done. Before we follow the Wise Men’s call and return to the Temple of Time, we conduct one last full round of inspections. Link now has virtually all of the game’s tools at his disposal: Longshot, Megaton Hammer, Lens of Truth, Silver Gloves, Mirror Shield, Iron and Hover Boots, as well as all Warp Songs.
If you followed our route completely from the start, at this point Link should already have all 36 Pieces of Heart and 99 Gold Skulltula Symbols. The last Skulltula could only be reached in a meaningful way with the silver gloves and is waiting in Zora’s Fountain. Since individual mini-games can easily be overlooked with such a long 100% route, we’ll check some particularly frequently missing Pieces of Heart and capacity upgrades beforehand.
100% status before Ganondorf’s Lock:
Pieces of Heart: 36/36
Gold Skulltulas: initially 99/100
Ice Arrows: received
Biggoron Sword: obtained
Four bottles: received
Silver Gloves and Mirror Shield: received
Golden gloves and double defense: not yet possible – both follow in Ganondorf’s castle.
If still open: Dampé’s second race
One of the most easily overlooked Pieces of Heart is again at Dampé in the Kakariko Cemetery. In the first race we only received the Hookshot. Dampé’s spirit can then be challenged again at any time.
Enter his grave and talk to him. This time you have to cover the route in at most a minute complete. The route is identical, but Dampé doesn’t wait for Link. Each hit from his fire flames costs several valuable seconds.
Since we now have the Longshot, the last section can be shortened significantly. In the final room you can pull yourself forward using one of the torches or the intended target and thereby save a few seconds.
If you reach the goal in a minute or less, Dampé Link will give you a Piece of Heart.
Control:
If you have already completed Dampé’s second race during our previous adult round, you will of course skip this section.
If still open: Piece of Heart on the roof in Kakariko
Another easy-to-miss Piece of Heart is on a rooftop in Kakariko. As an adult Link, you can now easily reach the area with the Longshot.
Go to the windmill or the raised fence near it and look for a suitable eaves. Pull yourself up to the roof and work your way to the man sitting there.
Talk to him. He gives Link a Piece of Heart without any further task.
This Piece of Heart can theoretically be collected very early with a clever jump by the young Link. If you have already taken it back then, the man will of course still be on the roof, but will not give a second reward.
Zora’s River as a Child: Piece of Heart the Song of Storms
Two other Pieces of Heart are particularly often forgotten because they can only be meaningfully done after the adult Link has learned the Song of Storms. Travel to the Temple of Time and become young Link once again.
Go to Zora’s River. Approximately in the middle section a small tree trunk or a wooden platform protrudes into the river. Stand on the marked spot and pull out the ocarina.
Five frogs emerge from the water.
Play them these Song of Storms before. The frogs are thrilled by the fast melody and then jump in Piece of Heart up to link.
The five frog doors
Stay with the frogs. For the second Piece of Heart, all five animals must first grow completely. To do this, play them the five regular childhood songs one after the other:
- Zelda’s Lullaby,
- Saria’s song,
- Epona’s Song,
- Sun’s Song,
- Anthem of the times.
For each new melody, one of the frogs grows and Link receives an additional 50 Rupees. As soon as all five have reached their maximum size and you have played the Anthem of the Storm for them, you pull out the ocarina again.
Now the mini-game of the Fabulous Five Frog Gates begins. Flies appear one after another above the frogs’ heads. Each frog corresponds to a specific ocarina key. You have to play the displayed tones quickly enough.
On the Nintendo 64/GameCube version the full sequence is:
A → C-Left → C-Right → C-Bottom → C-Left → C-Right → C-Bottom → A → C-Bottom → A → C-Bottom → C-Right → C-Left → A
On Ocarina of Time 3D the corresponding sequence is:
L → X → Y → R → X → Y → R → L → R → L → R → Y → X → L
If you complete the entire sequence without making any mistakes, Link will receive another Piece of Heart.
36 of 36 Pieces of Heart
If you have completed all previous chapters and the checkpoints mentioned above, the heart part display should now be complete. Ocarina of Time has a total of 36 Pieces of Heart. Four of them each form a complete Heart Container.
Together with the three hearts from the start of the game and the eight heart containers from the main bosses, Link reaches the maximum 20 hearts.
Maximum health:
36 Pieces of Heart = 9 Heart Container
8 Boss Heart Containers
3 starting hearts
Total: 20 hearts
If you are still missing a Piece of Heart, the main things you should check are Dampé’s digging round, Dampé’s childhood digging shovel mini-game, the man on the roof of Kakariko, both frog heart pieces, the treasure chest game, the diving record in the laboratory, the two Gerudo rewards and the Magic Bean plant on the desert colossus.
Return to adult link
Then play the Cantata of Light, return to the Temple of Time and pull the Master Sword out of the Pedestal of Time again.
Our last Gold Skulltula is located in Zora’s Fountain. It has not been accessible during previous visits because a huge silver boulder blocks access to a secret cave.
Thanks to the silver gloves from the Spirit Temple we can now remove this obstacle.
The 100th Gold Skulltula
Travel to Zora’s Domain and move on to Zora’s Fountain. Play the anthem of the sun so that night falls. The Skulltula you are looking for only appears at night.
Go to the southeast or back part of the spring near the Great Fairy Spring, where we visited during Link’s childhood Farore’s Wind have received.
In the area lies a single large silver boulder . Grab him with the silver gloves and throw him aside.
A normal gray rock appears underneath. Place a bomb next to it.
After the explosion, a secret shaft opens.
Jump in.
Invisible Skulltulas in the secret cave
Immediately activate the Lens of Truth. Several normal Skulltulas hang invisibly from the ceiling or lurk along the narrow corridor.
Eliminate them with the Longshot before moving on. Without the Lens of Truth, they can catch Link by surprise and cause significant disruption in the narrow corridors.
Follow the entire tunnel to the far end. There is a climbable wall or a series of ledges leading up.
Climb all the way up.
At the top you look at the left rock wall. Since it’s night outside, the last Gold Skulltula is sitting there.
Defeat them with the Longshot and drag the icon to Link.
100/100 Gold Skulltulas
This means that all Gold Skulltulas from Ocarina of Time – Master Quest have been collected.
The final reward of the Skulltula family
Travel to Kakariko and enter the House of the Skulltulas one last time.
After collecting 100 symbols, the entire family is freed from the curse. Talk to the head of the family in the center of the house.
As a reward, Link will receive 200 Rupees.
Unlike the previous Skulltula rewards, this reward can be claimed as many times as you want. Simply leave the house and re-enter it. The man gives Link another 200 Rupees each time.
Skulltula Rewards Complete:
10 symbols = Large Wallet
20 symbols = Stone/Shard of Knowledge
30 symbols = Giant’s Wallet
40 symbols = Bombchus
50 symbols = Piece of Heart
100 symbols = 200 Rupees, repeatable as often as desired
Control capacity upgrades
Before we go to the finale, check the maximum capacities in the equipment menu. If you’ve fully followed our route, the key consumables should be fully upgraded by now.
| Equipment | Maximum position in front of Ganondorf’s lock |
|---|---|
| Deku Sticks | 30 |
| Deku nuts | 40 |
| Deku seeds | 50 |
| Bombs | 40 |
| Arrows | 50 |
| Rupees | 500 |
| bottles | 4 |
| Magic Bar | Double length |
If the bomb bag does not yet hold 40 bombs
The two bomb bag upgrades come from the rolling Gorons in Goron City and from the crawling Bombchu Bowling alley or Bombchu Bowling Alley in Hyrule City. The order doesn’t matter. The first upgrade increases the capacity to 30 bombs, the second to a maximum of 40 bombs.
If the arrow bag does not yet hold 50 arrows
There is an expansion in the Kakariko shooting range. As an adult Link, hit all the targets there with the fairy bow. We have the second extension at Archery on horseback received after at least 1,500 points. Together, both upgrades increase the maximum capacity to 50 arrows.
If the Deku seed bag does not yet hold 50 seeds
Both upgrades belong to Link’s childhood. One thing is won via the target in the Lost Woods: hit exactly the center three times in a row and score 100 points each time. The second upgrade comes from the Hyrule City Shooting Range when all targets are hit.
Deku sticks and Deku nuts
The Deku Staffs can be improved to a maximum of 30 pieces. A merchant Deku sells one upgrade under the bridge between Kokiri Forest and Hyrule Steppe, the other is received by young Link on the forest stage with the skull mask.
Deku nuts can be expanded to a maximum of 40 pieces. A merchant Deku in a secret cave near the Sacred Glade sells one of the upgrades. The second is from the Forest Stage when Link wears the Mask of Truth.
GameCube Note:
The forest stage upgrade for Deku Nuts can become missable in older versions of Ocarina of Time due to a known bug if the adult swap quest is already too advanced. In our route, we deliberately collected the upgrade before the first time jump.
Checking the four bottles
For a complete game, all four bottles should be present. They come from different Side Quests:
- Collect chickens in Kakariko,
- Super Chicken Minigame at Lon Lon Ranch,
- Letter from Princess Ruto on Lake Hylia,
- deliver all ten great Poes of the Hyrule Field to the Poe dealer.
For Ganondorf’s lock, a good bottle assignment is more important than money. Two fairies are a very safe choice. You can fill the remaining bottles with blue or green elixir. If you play very safely, you can bet entirely on fairies instead.
Magical ability control
Link should now have all three spells from the Great Fairies:
- Din’s Din’s Fire – Hyrule Castle,
- Farore’s Wind – Zora’s Fountain,
- Nayru’s Embrace – Desert Colossus.
In addition, the magic bar should have already been doubled by the Great Fairy in the death crater.
One final improvement to the Great Fairies is deliberately missing: the double defense. For this we need the gold gloves, which are only found inside Ganondorf’s castle. That’s why this upgrade belongs in the next chapter and not in our current collection round.
Control of permanent equipment
Before returning to the Temple of Time, Link’s equipment should look almost complete:
- Kokiri Sword, Master Sword and Biggoron Sword,
- Deku Shield, Hylian Shield and Mirror Shield,
- Kokiri Armor, Goron Tunic and Zora Tunic,
- Kokiri boots, Iron Boots and Hover Boots,
- Goron’s Bracelet and Silver Gloves,
- Silver Scale and Golden Scale,
- fairy slingshot, Boomerang and bombs,
- Fairy bow with fire and ice arrows,
- Longshot, Megaton Hammer and Lens of Truth,
- Ocarina of Time and all Ocarina songs.
Only two major equipment upgrades are still missing: the Gold Gloves and the Double Defense. Both will only become possible during our final chapter.
All six sages have awakened
After Twinrova is defeated and Nabooru awakens as a Sage of the Spirit, Rauru reports to Link. The six wise men are finally united. Now Link should return to the Temple of Time, where an important person is waiting for him.
Play the Cantata of Light.
Enter the main hall of the citadel as adult Link.
Sheik is already waiting in front of the Pedestal of Time.
The truth about the Triforce
Sheik first explains to Link what happened when Ganondorf entered the Sacred Realm seven years earlier. The Triforce can only be fully controlled by one whose heart combines the forces of power, wisdom and courage in perfect balance.
Ganondorf did not possess this balance.
Therefore, when he touched the Triforce, it fell into three parts. With Ganondorf only the Triforce of the power remained. The other two fragments looked for people who most strongly embodied the corresponding characteristic.
The Triforce of courage chose Link.
The Triforce of wisdom went to a second person.
Sheik raises his hand – and reveals the symbol of Triforce.
Sheik is Princess Zelda
Before Link’s eyes, Sheik’s disguise falls. The mysterious Sheikah warrior who has guided him through the temples since his awakening is actually Princess Zelda.
Zelda explains that she hid as Sheik for seven years to escape Ganondorf. She possesses the Triforce of wisdom and is also the seventh sage or the leader of the six awakened sages.
She also reminds Link of the events of her childhood. Zelda had hoped to keep Ganondorf away from the Sacred Realm with the three Sacred Stones and the Ocarina of Time. In fact, by drawing the Master Sword, Link opened the very path Ganondorf had been waiting for.
However, the possibility of reversing this error has now arisen for the first time. The Six Wise Men can seal Ganondorf in the Sacred Realm – but only if Link first defeats the King of Evil.
The Light Arrows
For this fight, Zelda gives Link one last magical weapon: the Light Arrows.
New weapon: Light Arrows
Light Arrows consume magic and concentrate holy energy. They are the only type of arrow that can make Ganondorf vulnerable during the final battle. Within Ganondorf’s Castle they are also needed to destroy the six magical barriers.
Link now has all three types of magical arrows:
- Fire Arrows,
- Ice Arrows,
- Light Arrows.
Ganondorf strikes
The moment of hope only lasts a few seconds. Ganondorf tracked down Zelda via the Triforce of Wisdom.
The citadel begins to shake. A massive magical crystal closes around Zelda and lifts her into the air. Link can’t do anything about it.
Ganondorf explains that he has finally found the bearer of the Triforce of Wisdom. With Zelda in his power, he has two of the three Triforce wielders right within his reach – because Link will of course try to save them.
Ganondorf kidnaps Zelda into his castle and challenges Link to follow him.
The way to Ganondorf’s Castle
Leave the Temple of Time and go through the ruined Hyrule City to the former castle area.
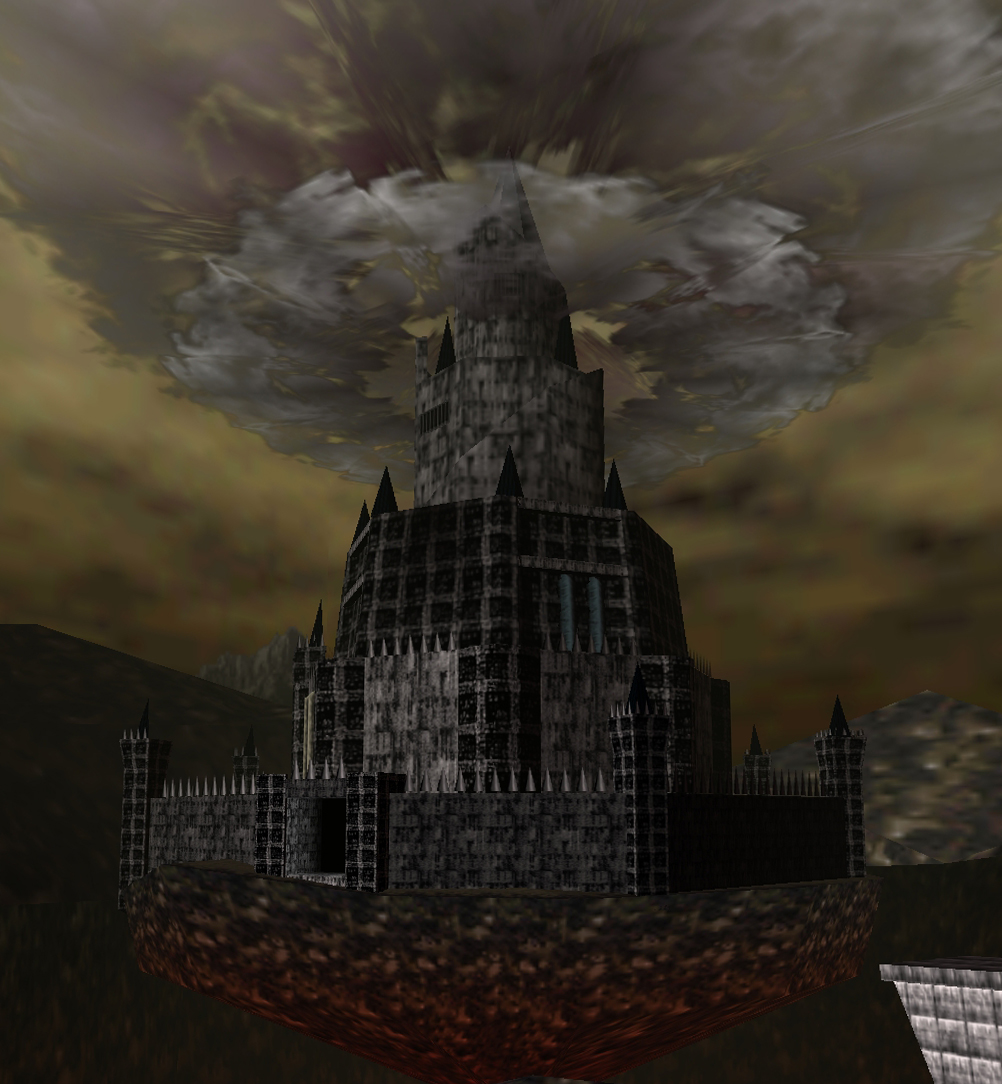
Where Hyrule Castle once stood, a huge Ganondorf’s fortress now hovers over a huge lava crater. There is no normal access.
Go to the edge of the abyss.
Rauru speaks to Link. The six wise men join forces and create a glowing rainbow bridge across the crater.
Cross the bridge.
In front of you is the entrance to Ganondorf’s Castle – Master Quest.
Not the full 100% yet:
Although all Pieces of Heart and Gold Skulltulas are completed, Link is still missing two permanent improvements. Inside the castle we get the Gold Gloves. With them we can then open the last Great Fairy Spring outside the castle and get the double defense. Only then will Link’s equipment be fully maximized.
100% inspection before Ganondorf’s lock
| Category | Target position |
|---|---|
| Hearts | 20 |
| Pieces of Heart | 36/36 |
| Gold Skulltulas | 100/100 |
| bottles | 4 |
| Ruby Capacity | 500 |
| Bomb capacity | 40 |
| Arrow capacity | 50 |
| Deku seeds | 50 |
| Deku Sticks | 30 |
| Deku nuts | 40 |
| Biggoron Sword | Get |
| Golden Scale | Get |
| Fire Arrows | Get |
| Ice Arrows | Get |
| Light Arrows | Get |
| Din’s Din’s Fire | Get |
| Farore’s Wind | Get |
| Nayru’s hug | Get |
| Double Magic Bar | Get |
| Gold Gloves | Still open – Ganondorf’s Lock |
| Double defense | Still open – after the Gold Gloves |
Continue with Ganondorf’s Lock – Master Quest
Link now has all six amulets, the three Triforce wielders are revealed and Zelda is in Ganondorf’s power. There is only the last big dungeon ahead of us.
In the next chapter of our Ocarina of Time Master Quest Walkthrough we enter Ganondorf’s Castle – Master Quest. There, six completely altered Barriers of the Sages must be destroyed. We get the gold gloves, leave the castle again for the last Great Fairy and get the double defense. Then we get the Boss Key, climb up the Ganondorf’s tower and face the king of evil.
After that, all that’s left is to escape from the collapsing castle – and the final fight against Ganon.
Frequently asked questions about the last 100% round
How many Pieces of Heart are there in Ocarina of Time?
There are a total of 36 Pieces of Heart. Four Pieces of Heart form one Heart Container. Together with the boss heart containers and the three starting hearts, Link can reach a maximum of 20 hearts.
Where is the last Gold Skulltula?
For a complete route, the last regularly reachable Skulltula is the specimen in Zora’s Fountain. Use the silver gloves to lift the silver boulder near the Great Fairy Spring, blow up the stone underneath and go through the secret cave with the Lens of Truth. The Skulltula only appears at the end of the cave at night.
What do I get for 100 Gold Skulltulas?
The head of the family in the Skulltula house gives Link 200 Rupees. This reward can be repeated as many times as you like by leaving and re-entering the house.
Can I achieve real 100 percent before Ganondorf’s lock?
Almost. All Pieces of Heart, Gold Skulltulas, bottles, normal capacity upgrades and optional weapons can already be completed. Two permanent improvements inevitably remain open: the gold gloves are only located within the Ganondorf’s castle and are needed to then achieve the Great Fairy of bravery and thus double defense.
Who is Sheik really?
Sheik is Princess Zelda. She hid as a member of the Sheikah for seven years to escape Ganondorf. Zelda possesses the Triforce of Wisdom and leads the six awakened sages.
Which Triforce does Link have?
Link was selected by Triforce of courage. Ganondorf has the Triforce of Power and Zelda has the Triforce of Wisdom.
Where can I get the Light Arrows?
After all six sages have awakened, return to the Temple of Time. There, Sheik reveals his true identity as Princess Zelda and gives Link the Light Arrows.
Why do I need the Light Arrows?
Within Ganondorf’s Castle the Light Arrows are needed to destroy the magical barriers. In the fight against Ganondorf you also have to hit him with a light arrow after his own energy ball has stunned him.
This Walkthrough uses Ocarina of Time – Master Quest for the GameCube as a basis. It also works for Ocarina of Time 3D – Master Quest. On the Nintendo 3DS, the entire game world is mirrored, so all directional information must be swapped accordingly. Additionally, enemies in the 3DS Master Quest deal double damage.
All six wise men have awakened, Princess Zelda has been kidnapped by Ganondorf and Link has the arrows of light finally the weapon that Ganondorf’s dark magic can break through. After the wise men created a rainbow bridge in front of the ruins of Hyrule Castle, only the last dungeon remains between Link and the King of Evil: Ganondorf’s Castle – Master Quest.
The interior of the castle initially consists of a large central hall. The actual tower is surrounded by a massive magical barrier powered by six individual energy beams. Each ray corresponds to one of the six wise men or the elements forest, fire, water, shadow, spirit and light. In order to enter the tower, we must pass six completely modified Master Quest trials and destroy the respective barrier core with a light arrow at the end of each route.
The ghost barrier is particularly important for our 100% route. Unlike the normal Ocarina of Time, the Gold Gloves in Master Quest are not in the Shadow Trial, but within the Spirit Trial. We therefore start there, then leave the castle again and get the double defense from the last Great Fairy. Then we return and destroy the remaining five barriers. Only when Link’s equipment is finally maximized do we climb up the Ganondorf’s tower.
Final Dungeon:
Gold Skulltulas: 0
Pieces of Heart: 0
Unique Item: Gold Gloves
Last permanent upgrade: Double Defense
Quick Overview
| Section | Important task or reward |
|---|---|
| Input | Armos, Green Bone Bubbles and Iron Prince defeat |
| Ghost Barrier | Gold Gloves + Small Key |
| Great Fairy | Double defense |
| Forest barrier | Small Key for water testing |
| Water barrier | Blue Fire + five Silver Rubies |
| Shadow barrier | Five Silver Rubies + Small Key |
| Fire barrier | Five silver rubies over lava |
| Light barrier | Use two keys + see through wrong barrier chamber |
| Ganondorf’s Tower | Dinalfos, Stalfos and Iron Princes |
| Boss Key | After the Stalfos battle |
| Ganondorf | Knock Back Energy Ball + Light Arrows |
| Escape | With Zelda out of the castle |
| Ganon | Tail attack and deliver final blow with Master Sword |
Preparation for Ganondorf’s lock
Save the game before entering the castle. After the final defeat of Ganon comes the end of the game; There is no classic save game that allows Link to continue playing in a permanently liberated world. After a restart you will find yourself before the last fight or at your last save point.
Our previous Master Quest 100% route has already prepared Link to the maximum. He should have 20 hearts, the Biggoron sword, four bottles, double the magic bar, all magic arrows and 100 Gold Skulltulas. Only the Gold Gloves and the double defense are still missing.
A good bottle topping consists of two or three fairies and optionally a green elixir. However, within the castle there are several ways to refill hearts, arrows and magic.
Cross the Rainbow Bridge and enter Ganondorf’s Castle.
The Entrance Area – Master Quest
Follow the first corridor down. Several Green Bone Bubbles float above the path. Eliminate them with arrows or wait until their protective flame disappears and then attack.
In the next area, several enemies are blocking the door to the actual main hall. A Iron Prince awaits next to two Armos statues. Due to the tight space and additional traps, this fight can be more unpleasant than previous Iron Prince fights.
First destroy the Armos statues so you have more space. Then you concentrate completely on the Iron Prince. Provoke his ax attack, dodge sideways and then attack with the Biggoron sword. Thanks to the maximum energy bar, combat should no longer be a major problem.
As soon as all enemies have been defeated, the door will open.
The six barriers
You enter the massive central hall. In the middle rises the Ganondorf’s tower. A purple magical barrier encloses the entire entrance. Six colored energy beams run from the outer spaces into the protective shield.
Each of the six doors is marked with the symbol of a sage. A floating barrier core awaits at the end of each trial. This can only be destroyed with a Light Arrow.
We use the following order:
- Spirit – Get Gold Gloves
- Great Fairy – get double defense
- Forest – Get water key
- Water
- Shadow – get additional key
- Fire
- Light
This order avoids unnecessary backtracking and maximizes Link’s defense very early.
Spirit Barrier – Master Quest
Find the door with the symbol of the Spirit Temple and enter the room. Several torch slimes or fire enemies attack immediately. Get rid of them first so that they don’t interfere with the following puzzle.
There is a Eye Switch above one of the inputs. Shoot it with the fairy bow.
An Iron Prince appears.
This time we shouldn’t kill him immediately. In the middle of the room are several heavy stone structures, beneath which is a rusted switch. Lure the Iron Prince to these obstacles and place Link right in front of them.
When the Iron Prince swings his ax, you dodge at the last moment. His attack destroys the stone blocks.
Repeat the process until the rusted switch is completely exposed.
Then defeat the Iron Prince.
Hit the rusted switch into the ground with the Megaton Hammer. The next door opens.
Bombchu through the grid
There is a Green Bone Bubble waiting in the next room. Eliminate them and open the Treasure Chest. There are several Bombchus.
On the other side of a grille is a Crystal Switch. Normal bombs cannot reach him.
Stand right in front of the grid and place a Bombchu. Align it so that it runs over the intended wall or floor directly to the Crystal Switch.
The explosion activates the switch and opens the door.
Go through.
The space of solar symbols
Several undead and other enemies are waiting in the large round room. If necessary, play Sun’s Song to temporarily immobilize Gibdos and ReDeads.
Eliminate all enemies.
Then look up. A large spider web blocks the opening in the ceiling, preventing sunlight from entering the room.
Shoot a Fire Arrow at the net.
The fabric burns and a powerful beam of light falls on the floor.
Equip the Mirror Shield. There are several sun symbols around the room that trigger different reactions. Some only make hearts or small supply chests appear; a wrong symbol can even cause a wallmaster.
The gold gloves
Place Link in the beam of light and first point the Mirror Shield at the sun symbol to the right of the locked door.
A large Treasure Chest appears.
Open it.
Link receives the Gold Gloves.
New equipment: Gold Gloves
The Gold Gloves are the strongest power upgrade in the game. Link can use it to lift the huge black stone monoliths and throw them several meters. They automatically replace the silver gloves.
We will need the gold gloves later for the fire barrier and to open the light barrier. But even more important is a secret outside the castle, which we will deal with immediately after this test.
Small Key in the ghost test
Stay in Sun Symbol Space. Turn around 180 degrees from the gold glove chest and reflect the beam of light onto the sun symbol opposite.
A smaller Treasure Chest appears.
Inside is a Small Key.
Remember the key. We’ll need it later inside the light barrier.
To exit, point the Mirror Shield at the large symbol of the spirit temple above the door. Behind the symbol there is another sun face. As soon as the light falls on it, the door opens.
Destroy Spirit Barrier
In the last room, the orange barrier core floats.
If necessary, break the jars on the sides. They contain arrows, hearts or magic and are a good opportunity to refill your Light Arrows.
Pull out the fairy bow, switch to Light Arrows and shoot directly at the barrier core.
The ball explodes. Nabooru appears and uses the power of the spirit’s amulet to destroy the corresponding energy beam.
Link is automatically transported back to the central hall.
Last Great Fairy – double defense
Before we deal with the remaining barriers, we leave Ganondorf’s Castle again.
Cross the Rainbow Bridge towards the ruined Hyrule City. Not far from the castle lies a huge black stone monolith that so far could not be moved, even with silver gloves.
Stand in front of it and grab it with the new Gold Gloves.
Link lifts the several-ton stone over his head and throws it to the side.
Enter the uncovered passageway.
The Great Fairy of Valor
You reach the last Great Fairy Spring of the game. Stand on the Triforce symbol and play Zelda’s Lullaby.
The Great Fairy appears and gives Link the double defense.
Last permanent upgrade: Double Defense
From now on, Link only takes about half of the normal damage. His hearts have a white border in the interface. Especially in Ocarina of Time 3D – Master Quest, this upgrade largely compensates for the basically doubled enemy damage there.
This means Link now has all of the game’s permanent equipment upgrades.
Equipment complete
20 hearts
100 Gold Skulltulas
Biggoron Sword
Gold gloves
Double magic bar
Double defense
Fire, ice and Light Arrows
All four bottles of
Then return to Ganondorf’s Castle via the Rainbow Bridge.
Forest Barrier – Master Quest
Enter the door with the Forest Temple symbol.
In the first room, two Stalfos immediately attack. Defeat both. With the Biggoron sword, just a few hits are enough.
During the fight you will probably already hear the large fan above the entrance door.
Look up. On the narrow ledge is a torch and a Small Key.
Pull yourself to the torch with the Longshot. Wait for the fan to stop briefly or equip the Iron Boots to avoid blowing Link off the platform.
Collect the Small Key.
Important:
We then need this key for the water barrier. So don’t forget him.
Go through the next door.
fans, beamos and time blocks
The next room consists of numerous small platforms over a deep chasm. Large fans create strong air currents in all four corners. There are also several Beamos on the platforms.
If possible, first eliminate all Beamos with bombs or Bombchus. This means you can then concentrate on the fans.
There is a frozen Eye Switch in one corner. A fire arrow unfreezes him and spawns an optional chest with bombs. Another Eye Switch can unlock a chest with arrows. Take supplies with you if you need them.
Then work your way to the platform immediately next to the locked exit door.
There is a blue Floor Switch nearby. The problem: As soon as Link leaves him, the door closes again.
On a position above is an Armos statue. Play the Song of Time multiple times. The blue time blocks change position and the Armos statue finally falls onto the Floor Switch.
The switch remains pressed permanently.
Go through the door.
Destroy forest barrier
The green barrier core is waiting in the next room.
If necessary, replenish magic and arrows from the jars and shoot a light arrow at the ball.
Saria appears and destroys the forest barrier.
Link is teleported back to the main hall.
Water Barrier – Master Quest
Go to the door with the Water Temple symbol. Although the test is named after Ruto, it is very reminiscent of our Ice Cavern – Master Quest.
Several Freezards are waiting in the first room. At the same time, large icicles fall from the ceiling at regular intervals.
Eliminate the Freezards as quickly as possible with the Longshot or fire arrows.
There is a fire in the center blue fire, but is surrounded by a powerful fountain of water. Right next to a pillar of ice, a single Dead Hand hand sticks out of the ground.
In or behind the column there is a Crystal Switch that is difficult to see. Hit or activate him. The water fountain disappears for a short time.
Immediately run to the blue fire and fill at least two bottles of.
Then melt the red ice in front of the locked door.
Use the Small Key from the forest barrier and go through.
Five silver rubies in the ice block room
The next room contains two large ice blocks, several Keese and five silver rubies.
First eliminate all Keese. At least one of them is difficult to see or invisible and is easier to detect with the Lens of Truth.
Then jump into the central depression and collect the first silver ruby.
The second Rupee is behind or beyond the depression. The Hover Boots make the jump easier.
A third Rupee is in a side alcove near the ice blocks.
You can reach the fourth via or between the two movable blocks.
For the last silver ruby, the ice blocks must be moved correctly. First push the block closer to the entrance towards the central pit and then push it in sideways. This creates space to move the second block into the narrow niche on the wall.
Climb the block.
The fifth silver ruby is in red ice. Use blue fire to reveal it and collect it.
The exit door is unlocked.
Reset ice block for output
Due to the previous movements, the ice blocks may be positioned awkwardly and the opened exit is too high. Therefore, leave the room briefly or let one of the blocks fall completely into a pit so that the puzzle is reset.
Then push a block of ice just below the exit ledge.
Climb up.
If red ice blocks the door itself, melt it with your second helping of blue fire.
Go through.
Destroy water barrier
Shoot a light arrow at the blue barrier core.
Princess Ruto appears and destroys the water barrier.
Link is teleported back to the main hall.
Shadow Barrier – Master Quest
Now enter the door with the Shadow Temple symbol. The Master Quest version consists of a single large chasm with multiple visible and invisible platforms.
First, eliminate the Green Bone Bubble right in front of Link.
There is a bomb flower on a small platform to the right. Shoot an arrow at it.
The explosion causes a Treasure Chest to appear on a distant platform.
Target the chest with the Longshot and pull yourself over. It contains additional arrows.
Five silver rubies over the abyss
Activate the Lens of Truth and equip the Hover Boots.
An invisible moving platform becomes visible. Wait for it to get close to Link and slide onto it.
During the journey or immediately next to it you will reach the first silver ruby.
Then glide to the former bomb flower platform and collect the second silver ruby.
Return to the central platform. There is a Beamos there. Destroy it with a bomb. Below him lies the third silver ruby .
In the middle or in the ground there is an unusually low-lying torch. Shoot a Fire Arrow into it.
A transparent platform appears.
Jump onto it and cross the next section.
Small Key in the shadow test
On the next platform, turn back to the central area. There is a Eye Switch, which is much more visible from this direction.
Shoot a normal arrow at it.
A Treasure Chest falls down.
Open it and take the Small Key.
This key will be needed later inside the light barrier.
The last two silver rubies
Activate the Lens of Truth again. An extremely narrow invisible path branches off to the left.
Carefully follow it to a single platform with another Beamos. Destroy the opponent. Below him lies the fourth silver ruby .
Return to the main path.
A second invisible path leads towards the exit. A guillotine swings or falls in the middle.
Wait for the right moment and cross the small gap immediately after the blade goes up.
You collect the fifth silver ruby.
The exit door opens.
Destroy Shadow Barrier
Go through the door and shoot a light arrow at the purple barrier core.
Impa appears and destroys the shadow barrier.
The only thing missing is fire and light.
Fire Barrier – Master Quest
Before entering, equip the Goron Tunic and if possible the Hover Boots.
The entire test consists of a massive lava chamber with moving, sinking and rising platforms. If you fall into the lava, the silver ruby puzzle is largely reset and Link ends up back at the entrance.
Our task is to collect five silver rubies.
Silver Ruby 1 – ascending platform
Jump onto the first moving platform. On one side you will see a group of four small platforms.
Jump onto the back or correspondingly rising plate.
She shoots Link up. The first silver ruby hangs slightly above the normal jump height.
Perform a backflip or jump at the highest point and collect the first silver ruby.
Silver Ruby 2 – first black monolith
Work your way to the platform with a Beamos and a huge black stone block.
First destroy the Beamos.
Then grab the massive monolith with the Gold Gloves.
Link throws him into the lava.
Under the stone lies the second silver ruby.
Collect it.
The thrown monolith also serves as an additional platform later.
Silver Ruby 3 – moving platform
Go to the second large monolith on the opposite side. Remove this too with the gold gloves.
Then jump onto the nearby moving platform.
During your journey you will pass the third silver ruby. Collect it and then pull yourself to a safe ledge as quickly as possible.
Silver Ruby 4 – Grappling Hook Target
Find the grappling hook target above the lava.
Pull yourself over and immediately climb onto the platform so Link doesn’t slip.
Nearby or on the adjacent narrow platform lies the fourth silver ruby.
Collect it.
Silver Ruby 5 – on the thrown monolith
The last silver ruby is floating above one of the large black blocks we threw into the lava earlier.
Use one of the platforms that throws Link up and jump from there onto the black stone.
The jump is relatively close. The Hover Boots give you a few extra moments in the air.
Collect the fifth silver ruby.
The door at the end of the lava chamber opens.
Pull yourself to the exit platform using the newly accessible grappling hook target.
Destroy fire barrier
Shoot a light arrow at the red barrier core.
Darunia appears and destroys the fire barrier.
Only the light protects the Ganondorf’s tower.
Light Barrier – Master Quest
In the central hall, look for the huge black monolith in front of the door with the light symbol.
Without the Gold Gloves, this entrance was completely blocked.
Grab the stone and throw it aside.
Enters the final trial.
Torch Slimes and Dinalfos
In the first room, several torch slimes and a Dinalfos attack.
Clear out the torch slimes first so that you have enough space for the faster Dinalfos. The Biggoron Sword ends the fight in just a few hits.
After all opponents have been defeated, the next door opens.
The False Lullaby Puzzle
In the following room there is a Triforce symbol on the floor. From the previous dungeons you might expect Zelda’s Lullaby to spawn a key here.
You can play the song – but only one heart appears as a reward.
The key needed to progress therefore comes from our previous barriers.
Open the locked door with one of your Small Key.
Rolling Rock and Beamos
In the next room, a large boulder or a massive trap is constantly rolling through the area. At the same time, a Beamos monitors the center and several fire walls block the normal path.
Wait until the Beamos is not directly targeting Link and destroy it with a bomb.
This makes a grappling hook target on the ceiling more accessible.
Pull yourself over the dangerous fire barriers or past the rolling obstacle at your destination.
At the other end is another locked door.
Use the second Small Key – which we took from the ghost or shadow test.
Go through.
The false light barrier
The next room looks at first glance as if the last barrier core should be floating here.
But the chamber is empty.
There is only a skull wandtula or a few torches on the wall.
In particular, examine the right torch. Hit it with your sword.
There is a Crystal Switch hidden in the torch.
The switch deactivates several invisible or transparent blocks.
Then activate the Lens of Truth.
The wall behind the seemingly empty barrier position is an illusion.
Just walk through.
Destroy light barrier
The real light barrier core is finally waiting in the hidden room.
Fill up arrows and magic again and shoot a light arrow at the ball.
Rauru appears and destroys the sixth and final barrier.
Link is teleported back to the central hall.
Ganondorf’s Protective shield drops
The six colored energy beams collapse at the same time. The massive magical barrier around the central tower disappears.
The path to Ganondorf is open.
Before you enter the tower, you can completely refill your supplies.
Secret storage room under the bridge
Jump to the lower level of the central hall and activate the Lens of Truth. There is an invisible wall under or near the bridge to the tower.
Run through it.
Several Business Scrubs and fairies are waiting in the hidden chamber. Here you can, among other things, buy arrows, bombs and red and green elixirs or capture free fairies in bottles.
Since money is practically unlimited at 100 Gold Skulltulas, you should replenish your supplies generously.
Several fairies are recommended for the final battles. Arrows and magic should also be fully filled.
Then return to the central hall and enter the tower.
Ganondorf’s Tower
Inside the tower, the atmosphere changes significantly. A quiet organ melody can be heard. The higher Link climbs, the louder the music becomes.
The first corridor contains several fire flutters. You can take them out with arrows or just run up the stairs.
Go through the door at the top.
Two Dinalfos
In the first large room, two Dinalfos attack at the same time.
They are faster than normal Lizalfos and often try to surround Link from both sides. Therefore, if possible, stand with your back against a wall or concentrate completely on an opponent.
With the Biggoron sword, just a few hits are enough.
After both Dinalfos are defeated, the door opens.
Keep climbing up.
Two Stalfos and the Boss Key
In the next room there is a large ornate Treasure Chest, which is initially surrounded by flames.
As soon as Link enters the room, two Stalfos will appear.
As in Forest Temple, you should defeat both of them relatively quickly one after the other. If you take too long, the already defeated Stalfos can get up again.
Therefore, concentrate completely on one opponent first and then immediately kill the second one.
The flames around the Treasure Chest disappear.
Open it.
You will receive the Boss Key from Ganondorf’s lock.
The Last Iron Princes
Climb the next set of stairs. Two particularly strong iron princes are waiting in the following room – a light knight and a dark knight.
Never fight both at the same time if you can avoid it.
Approach only one Iron Prince and wake him with a careful attack. Lure him into an open area while the second opponent stays in his original position if possible.
Provoke the slow ax attack as usual, dodge sideways and attack with the Biggoron sword.
Then kill the second Iron Prince in the same way.
After the victory, the last door opens.
The final climb
Open the big door with the Boss Key.
This is followed by a long, spiral staircase. The organ music gets louder with every step.
There are several jars in a small storage room near the top. Be sure to stock up on arrows, magic and health there.
If you still want to save, now is a good time.
Then go through the last door.
Final boss: Ganondorf
Link reaches the top of the tower. Princess Zelda continues to float trapped in a magical crystal. Ganondorf sits at a massive organ and plays the tune that Link has heard throughout the ascension.
Ganondorf rises and the three fragments of the Triforce react to each other.
The fight against the king of evil begins.
remains on the outer edge
The center of the arena consists of several floating stone slabs. Ganondorf can destroy individual parts of the ground with his attacks.
Therefore, stay on the wider outer platforms if possible. From there you can safely knock back his energy balls.
Equip the Master Sword or Biggoron Sword and have the Light Arrows ready.
Energy Ball Tennis vs. Ganondorf
Ganondorf gathers energy in his hand and then throws a glowing ball at Link.
Wait until the ball is just in front of you and hit it back with the sword.
Ganondorf reflects on the attack in turn. An increasingly quick exchange of blows begins, similar to the one against Phantom Ganon in the Forest Temple.
Stay calm and strike just before impact. After several reflections, Ganondorf reacts too slowly and is hit by his own magic.
He is momentarily stunned.
Light Arrow and Sword Attack
Immediately draw the fairy bow and shoot a light arrow at Ganondorf.
The holy attack breaks through his protective magic and sends him plummeting to the central platform.
Jump or glide over quickly. The Hover Boots can be helpful, but are not absolutely necessary during the actual fight.
Attack Ganondorf with the Biggoron Sword or Master Sword as many times as possible.
After a few seconds he rises again and flies back into the air.
Return to a safe outer platform and repeat the process.
Ganondorf’s large energy attack
As the damage increases, Ganondorf will occasionally use a significantly stronger attack. Several energy balls gather around him at the same time.
You can try to repel the magic with a charged whirl attack. However, it is much easier to hit Ganondorf directly with a Light Arrow during his long charging animation.
This interrupts the attack and Ganondorf falls to the ground again.
Supplies under the arena
If you run out of arrows, magic or hearts, you can drop down to the lower level.
There are several jars with supplies there. Roll just before landing to avoid fall damage.
With the Longshot you can then pull yourself back onto the upper platforms.
The double defense and multiple fairies also make the fight very safe.
Defeat Ganondorf
Repeat the energy ball tennis, the light arrow and the subsequent sword attacks several times.
After enough hits, Ganondorf can no longer maintain his position and collapses.
Zelda is freed from her crystal prison.
The battle seems to have been won.
But Ganondorf uses his last strength to bring the entire tower down.
Escape from Ganondorf’s Castle
Zelda warns Link that the tower is collapsing. A time limit of approximately three minutes begins.
Follow Zelda.
She opens several sealed doors during the escape. Don’t run too far ahead, as some grids won’t disappear until Zelda reaches the appropriate position.
Falling rocks and burning debris make the path difficult. Stay as close as possible behind Zelda and only dodge briefly if an obstacle lands directly in front of you.
Zelda is included
About halfway, Zelda is trapped by a fire barrier.
Two Stalfos appear.
The timer keeps running during the fight. Therefore, use the Biggoron sword immediately and kill both opponents as quickly as possible.
After their defeat, the fire barrier disappears.
Zelda gives Link several hearts or ensures that he can continue his escape.
Follow her further down.
From the collapsing castle
Go through the remaining corridors and stairs. Zelda reliably leads Link to the exit.
As soon as both reach the rainbow bridge or the safe outside area, a long cutscene begins.
Ganondorf’s Lock collapses completely.
Link and Zelda watch the ruins.
For a brief moment the fight seems to be finally over.
Then a huge thud sounds from the rubble.
Ganondorf is alive
Go to the ruins with Zelda.
Ganondorf rises from the rubble. The Triforce of power prevents his death.
His anger and the power of the Triforce transform him into a massive demonic monster.
In front of Link is Ganon.
A wall of fire encloses the arena.
With his first attack, Ganon knocks the Master Sword out of Link’s hands. The holy blade lands outside the fire barrier next to Zelda.
The final battle begins.
Final Boss: Ganon
Ganon carries two massive swords. Frontal attacks are almost ineffective. Its only clear weak point is its glowing tail.
Since the Master Sword is currently out of reach, we will first use the Biggoron Sword. If you don’t have the optional weapon, the Megaton Hammer will also work.
Phase 1 – without Master Sword
Do not constantly target Ganon, as this will make it a little harder for Link to move around when circling.
One option is to roll directly between or under Ganon’s legs. Once you’re behind him, turn around and hit the glowing tail.
With the Biggoron Sword, every hit causes high damage.
Afterwards, Ganon immediately turns to Link. Remove yourself and repeat the process.
Stun Ganon with light arrows
A safer alternative is to shoot Ganon head-on with a Light Arrow as soon as he opens his guard slightly.
The hit stuns him for a short time.
Immediately run behind him and attack the tail.
This method consumes magic but reduces the risk of being hit while rolling under his massive swords.
Supplies from the rubble
If Link needs health, arrows or magic, stand behind one of the large stone pillars at the edge of the arena.
Lure Ganon to attack.
His swords destroy the pillar, revealing various items – including hearts, magic, arrows and even fairies.
This means that it is practically impossible to lose the fight due to a lack of supplies, as long as you use the rubble in a targeted manner.
Retrieve the Master Sword
After several hits on Ganon’s tail, the monster briefly collapses.
The fire barrier disappears.
Immediately run to Zelda and pick up the Master Sword.
Equip the Holy Blade.
When Ganon gets back up, the fire barrier will appear again.
The second phase begins.
Phase 2 – Finally weaken Ganon
Ganon now moves a little faster. However, the basic strategy remains the same.
You can continue to stun him with light arrows or roll under his legs and then attack the tail.
The Biggoron Sword can continue to deal damage to Ganon and even weaken it faster. However, for the final conclusion of the fight, the Master Sword is required.
To avoid confusion, you can continue fighting directly with the Master Sword.
Stun Ganon, run behind him and attack the tail.
Repeat the process until he falls to the ground a second time.
The final blow
Zelda uses all her remaining power and holds Ganon down with magical light.
She tells Link to stop the fight.
Make sure the Master Sword is equipped.
Run to Ganon’s head and perform a sword slash.
Link delivers the decisive blow to Ganon.
The Master Sword penetrates the King of Evil and ends the fight.
The six wise men seal Ganondorf
Ganondorf is drawn into the Sacred Realm. Rauru and the five remaining sages join forces and seal him behind the closed gate.
But even during his banishment, Ganondorf vows revenge. As long as Link, Zelda and their descendants possess the fragments of the Triforce, his hatred shall continue.
This ends Ganondorf’s’s reign over Hyrule.
Zelda’s last wish
After Ganon’s sealing, Link and Zelda meet one last time in the skies above Hyrule.
Zelda apologizes for her choices growing up. Her attempt to stop Ganondorf had inadvertently triggered the very events she wanted to prevent.
She asks Link for the Ocarina of Time.
With her power, Zelda sends him back seven years to the past.
Link gets back the lost time of his childhood.
The Master Sword is resting again
Young Link appears in the Temple of Time.
He puts the Master Sword back in the Pedestal of Time. The door to the Sacred Realm is closing.
Navi leaves Link and flies away through one of the high windows.
Link then returns to the castle garden.
There he meets the young Princess Zelda – exactly at the place where their adventure together began.
This time, however, Link has the knowledge of what Ganondorf would do in the future.
If you followed our full Master Quest route, you have now completed Ocarina of Time – Master Quest with all important collectibles and permanent improvements.
| Category | Final score |
|---|---|
| Hearts | 20/20 |
| Pieces of Heart | 36/36 |
| Gold Skulltulas | 100/100 |
| bottles | 4/4 |
| Spiritual Stones | 3/3 |
| Amulets | 6/6 |
| Ocarina Songs | All Regular Songs + Scarecrow’s Song |
| Magic Spells | 3/3 |
| Magic Arrows | Fire, Ice and Light |
| Swords | Kokiri Sword, Master Sword, Biggoron Sword |
| Shields | Deku Shield, Hylian Shield, Mirror Shield |
| Armor | Kokiri, Goron and Zora Tunic |
| Boots | Kokiri, iron and Hover Boots |
| Force | Gold Gloves |
| Magic Bar | Double |
| Defense | Double |
| Arrows | 50 |
| Bombs | 40 |
| Rupees | 500 |
| Ice Arrows | Gerudo Training Ground Completed |
| Biggoron Sword | Get |
Frequently asked questions about Ganondorf’s Castle – Master Quest
In what order should I make the barriers?
For Master Quest we recommend the Spirit Barrier first because that’s where the gold gloves are. After that, you should immediately visit the last Great Fairy and get the double defense. Then forest, water, shadow, fire and light are available. The Forest Key is required for the Water Trial, while the Spirit and Shadow Keys can be used for the Light Trial.
Where are the Gold Gloves in Master Quest?
Unlike the normal Ocarina of Time, the Gold Gloves are in the Spirit Barrier. In the last large puzzle room, burn the spider web on the ceiling, reflect the incoming light with the Mirror Shield and activate the corresponding sun symbol. This will cause the large chest with the gold gloves to appear.
Where can I get double defense?
As soon as you have the gold gloves, you leave the Ganondorf’s castle again. Near the castle, a huge black monolith blocks access to the last Great Fairy Spring. Throw it away with the gold gloves and play lullaby in the source Zelda’s. The Great Fairy then halves the damage Link takes.
How many Gold Skulltulas are there in Ganondorf’s lock?
There are no Gold Skulltulas in the Ganondorf’s lock. For a complete 100% route, all 100 symbols should have been collected before entering the castle.
How do I destroy the six barriers?
Each trial ends in a small room with a colored barrier core. Shoot a Light Arrow directly at the floating energy ball. The corresponding sage appears and then destroys the energy beam to the central tower.
Where is the Boss Key?
After all six barriers are destroyed, enter Ganondorf’s Tower. First defeat two Dinalfos and then two Stalfos. After the Stalfos battle, the fire barrier around the large Treasure Chest disappears. Inside lies the Boss Key.
How to defeat Ganondorf?
Hit back his energy balls with the sword until Ganondorf is hit by his own attack. Then immediately shoot a light arrow at him. Ganondorf falls to the center platform and can be attacked with the Master Sword or Biggoron Sword. Repeat the process until his defeat.
How to defeat Ganon without Master Sword?
During the first phase, the Master Sword is outside the fire barrier. Use the Biggoron Sword or Megaton Hammer instead. Stun Ganon with a light arrow or roll between his legs and attack his glowing tail. After enough hits, the fire barrier disappears and you can retrieve the Master Sword.
Do I have to defeat Ganon with the Master Sword?
Yes. Other weapons can weaken Ganon during the fight, but the final blow must be delivered with the Master Sword. As soon as Zelda grabs him at the end, you must equip the holy blade.
Can I continue playing after the end?
Ocarina of Time does not have a classic post-game save after Ganon’s defeat. After the credits roll, reloading will take you back to your last saved state before the end. Therefore, all 100% tasks should be completed before the final battle.