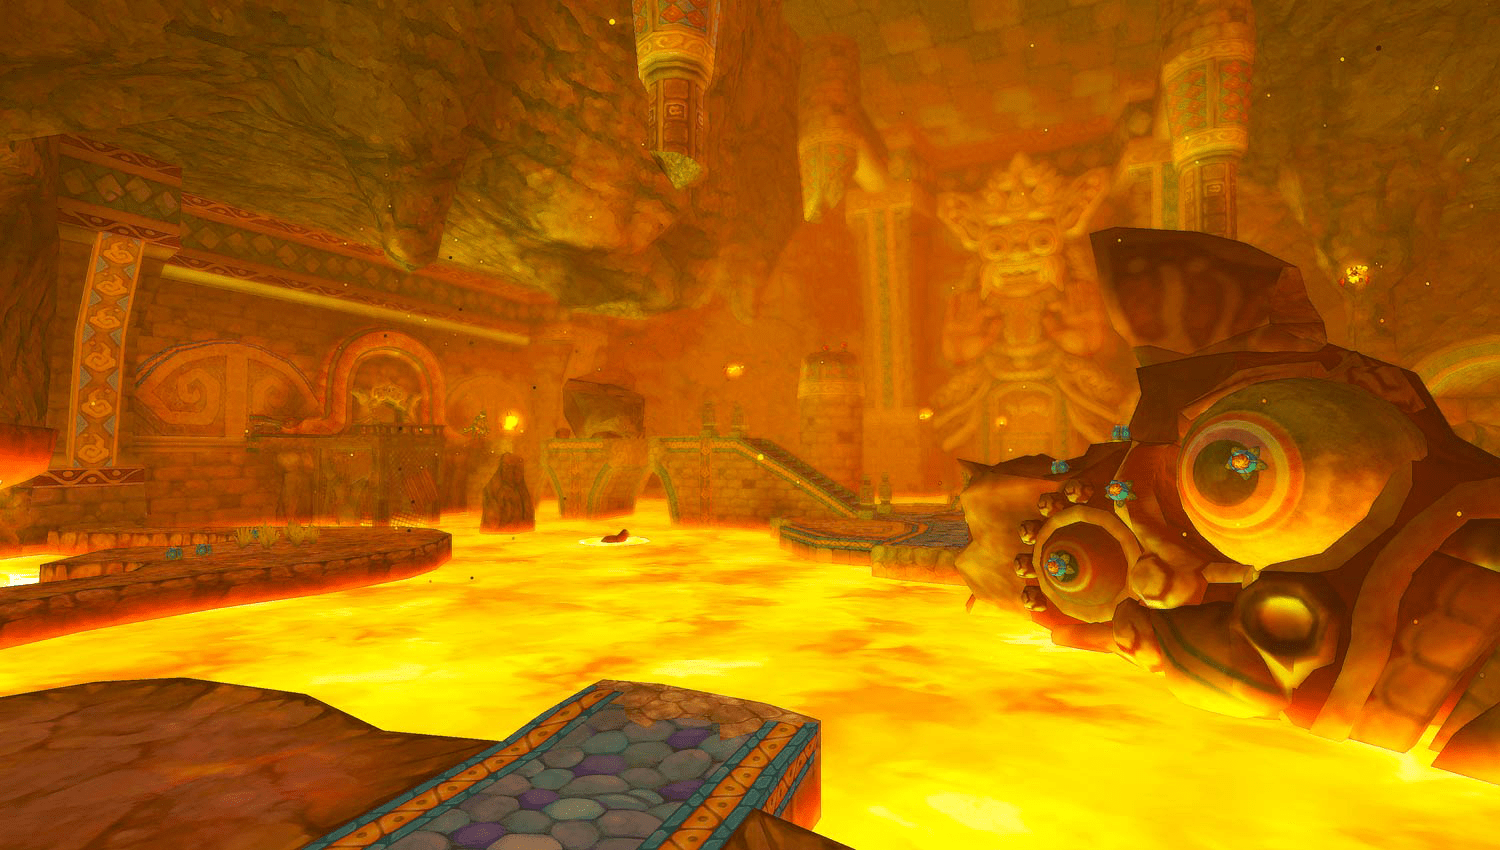

Enter Earth Temple after assembling its five key pieces. Obtain the Bomb Bag, use the stone ball to cross the lava and collect the Dragon Sculpture before fighting Scaldera.
The first Treasure Chest in the Earth Temple
After you have inserted the key plate made up of five fragments on the large gate, you enter the Earth Temple. Activate the bird statue or memory statue directly at the entrance.
Then follow the path straight ahead. Several Fire Keese fly through the room. Since you have an Iron Shield, you are significantly better protected against fire attacks than with the Wooden Shield. Nevertheless, if possible, you should eliminate the opponents from a distance using a Slingshot or targeted sword blows.
You can collect the first optional Treasure Chest in the first room. Stay on the right or east side and look for a marked grave site. Use the Digging Mitts.
A air stream appears underground. Open your Sailcloth and let yourself be carried up to the raised platform.
Open the small Treasure Chest there. It contains a red Rupee worth 20 Rupees.
This chest is completely optional for story progression and is therefore easily overlooked. We will of course take them with us straight away for our 100% route.
Across the lava to the drawbridge
There is a Mogma on the left side of the entrance area. Talk to him if you want. He reports of more Mogma being separated from each other in the temple.
There are additional grave sites behind him. Dig them up and take the Rupees or random materials with you. Since such treasures are available repeatedly, they are not part of the game’s limited collectibles.
Then follow the main stairs deeper into the temple.
In front of you are several small platforms above a lava lake. Some are raised by lava fountains at regular intervals. Wait for the right moment and jump from platform to platform until you reach the stairs opposite.
At the top you stand in front of a raised drawbridge.
There are two mechanisms to the left and right of the bridge, each held by a rope. Cut both ropes with your sword.
However, the bridge does not lower completely. The third rope is out of your reach to the right of the gate.
Start your Beetle, steer it to the third mechanism and cut the rope. Now the drawbridge will lower completely and you can cross it.


The first Lizalfos
Behind the bridge you will meet a Lizalfos for the first time. These enemies are much more mobile than the previous Bokoblins and have an armored arm with which they block your sword strikes.
Pay close attention to which side the Lizalfos is holding its armored arm. Attack from the opposite open direction.
A Shield Bash is particularly effective. Wait for the Lizalfos to strike itself or prepare its tail attack and parry at the right moment. The opponent is briefly staggered and can then be dealt with several sword hits.
After the fight you are standing in front of a huge lake of lava. There is no direct route to the other side.
Free the large stone ball from the lava
Look around the lava lake. Several Bomb Flowers grow on a stone structure or a dragon’s head.
Start the Beetle and fly into one of the bombs. The explosion releases a large stone ball from the structure, which then floats freely on the lava.
Jump on the ball.
Link can balance on it and move the ball in the desired direction by running. It works like a huge ball with which you can cross large parts of the temple over the lava.
First move to the southeast or right area of the large room. Ferri is waiting there, who has lost his Bomb Bag.
Ledd’s lost Bomb Bag
Talk to Ferri. His Bomb Bag is behind a buried door, but the boulders can only be cleared with a Thunder Flower.
Directly behind Ferri is a low passage under a fence. Crawl through it.
A Bokoblin is waiting on the other side. Defeat him and then look around carefully.
You can reach several grave sites via a ladder or an elevated path. There you can get additional Rupees. A Fairy can also appear in one of the grave sites or in this small area. If you have a free Empty Bottle, you can take it with you for the later boss fight.
Afterwards, go to the Bomb Flowers.
Pick up a bomb and roll it through the low opening that you just crawled through. Aim it so that it rolls against the rock block on the other side.
The explosion opens the door.
Intermediate fight: Two Lizalfos
A small fight awaits behind the blown-out door. This time you have to assert yourself against two Lizalfos at the same time.
Try to spatially separate the two opponents. Often only one will actively attack while the other keeps some distance.
Focus your attacks on one Lizalfos first. Watch his armored arm again and strike from the free direction. Shield attacks are also extremely effective here.
As soon as the first enemy is defeated, the second one no longer poses a major threat.
Treasure Chest: The Bomb Bag
After the victory, the room opens and a large Treasure Chest appears.
Inside is the Bomb Bag.
This means you can now take Bomb Flowers or bombs with you permanently and use them anywhere. The basic bag holds ten bombs.
Before you leave the room, you should also look around the corners. There may already be a Amber Relic or another upgrade material here.
Then return to Ferri.
Since Link got the bag back for him, Ferri gives it to you as a thank you. In addition, you will receive five bombs.
Crawl behind the grate again and completely fill your Bomb Bag using the Bomb Flowers growing there until you carry ten bombs.
Difference in Skyward Sword HD: Bombs can still be thrown or rolled across the ground. With motion controls, the gestures largely correspond to the Wii original. With button controls, throwing and rolling are carried out using the corresponding buttons and analog sticks. The puzzles themselves work identically.


Collect the Golden Skull
With the Bomb Bag we can now access several optional areas of the large lava room. Jump onto the big stone ball again.
First roll into the southwest area of the room. There is a small platform that is raised by the changing level of lava.
On the higher level, a boulder blocks access to a Treasure Chest. Throw or roll a bomb onto the platform in such a way that the blockage is destroyed.
Then use the stone ball or the rising platform and open the chest.
Inside is a Golden Skull.
Although this rare material can be obtained again later, it is significantly rarer than normal ornamental skulls and is required for various high-quality equipment upgrades. Since this solid chest is guaranteed to provide one, it should never be missed on a 100% route.
Find the Dungeon Map
Return towards the central platform with the stone ball.
On the western side a large boulder blocks the further path. Jump off the ball and throw a bomb at the blockade.
After the explosion you can jump over the gap. Defeat the Lizalfos on the other side and go through the western door.
In the following room you have to use several platforms above the lava again. Fire olms can attack you from a distance. Bombs are particularly effective against them.
Work your way to the back area. There, a platform is regularly raised by a lava fountain.
Get on the platform and wait for it to take you up. Defeat the Bokoblins waiting there.
Then open the large Treasure Chest and take the Dungeon Map.
The map is particularly important in this temple. Next to the rooms you can see conspicuous places where a path appears to lead behind a solid wall. This makes it possible to reliably discover some of the following secret paths.
Blue bird feather from the Treasure Chest
Return to the large lava room and jump onto the stone ball.
Before continuing with the main path, roll into the northwest area of the room. There is another small island or platform there.
Open the Treasure Chest there.
Inside is a Blue Bird Feather.
Blue bird feathers are one of the rarest early upgrade materials. Normally you only get them if you catch a rare blue bird with the Bug Net. The fixed chest in the temple therefore guarantees you a copy.
If you want to fully upgrade your equipment later, you should definitely take this find with you.


Completely raise the large bridge
In the central lava room there is a large bridge to the north. Two massive bolts or switches protrude from the construction on their sides.
With your stone ball you can first ram the accessible bolt. This causes part of the bridge to rise, but not far enough to be used.
The second switch is on the other side and initially seems inaccessible.
Now open the Dungeon Map. You’ll notice that there’s a hallway drawn to the east of the main room, even though the corresponding wall looks solid.
Roll your stone ball to this spot. If you look closely you will notice cracks on the wall.
Throw a bomb at the wall.
The explosion opens a hidden tunnel.
The secret lava flow
Behind the blown wall you will reach a narrower lava flow. Stay on your stone ball and follow the path.
There are several dragon statues on the walls that spew lava. Observe their rhythm and only roll past when the lava flow is briefly interrupted.
You can refill your bombs in a small side niche.
Continue following the lava flow. At what appears to be a dead end, you should check your map again. Here too, the path shown continues behind a wall.
Blast the cracked wall with a bomb and roll through the exposed side arm.
Hidden Silver Rupee with the Beetle
On this section you should pick up an optional treasure that is particularly easy to miss.
There is a large dragon head on the wall, with no lava flowing out of its mouth.
Launch the Beetle and fly directly through the opened mouth.
Follow the hidden passage inside. At the end there is a Silver Rupee worth 100 Rupees.
Fly against it and collect it with the Beetle.
This Rupee is not in a classic Treasure Chest and is therefore particularly easy to miss. It is a must for a complete exploration of the temple.


Open the large grille
Continue following the lava flow. Finally, a large metal grate blocks the path.
There is a rope on your side above the gate. Start the Beetle and cut it.
The gate moves but only partially opens.
The second rope is on the back of the grid. Start the Beetle again and fly through the narrow tunnel or the opening to the left above the gate.
Steer the Beetle to the other side and cut the second rope there.
The grille now moves completely up.
Roll through and then briefly go ashore. Activate the bird statue or memory statue there.
Reach The second bridge switch
Climb back onto the stone ball and continue following the lava flow.
Pass the next dragon statue during a brief pause in its lava flow and maneuver through the narrow passage.
You finally get back to the large central room on the opposite side.
Now you can roll the stone ball against the second large bolt of the northern bridge.
The mechanism is fully activated and the large bridge is finally aligned.
Final 20-rupee chest in lava room
Before you use the bridge, you should take another optional treasure with you.
A Lizalfos is waiting on a small platform in this area.
Defeat him and open the Treasure Chest he is guarding.
There are more 20 Rupees in there.
You have also collected this easily overlooked solid chest.


The long climb with the rolling rocks
Now cross the fully extended bridge and enter the northern area of the temple.
There is a long, steep path ahead of you. Large boulders roll down the slope at regular intervals.
First, sprint up and stay on the left side. Reach the first safe niche and wait there until the next rocks roll past you.
Regenerate your stamina completely and then run to the intermediate platform.
The path now makes a curve. Jump over the small lava flow and look to the right.
There is a low passage there. Crawl through it.
On the other side you will find a marked grave site. Dig it up and a Airstream will appear.
Let yourself be carried upstairs and follow the stairs. You reach an elevated viewing point from which you can see the next long slope.
Blasting the safe niche
Large boulders are also rolling down on the next slope. This time the only safe niche is blocked halfway by a rock.
You can reach the blockade from the elevated vantage point.
Take a bomb and throw or roll it diagonally to the opposite side of the slope. The goal is the boulder in the safe niche.
If the bomb lands correctly, the blockade will be destroyed.
Then return to the bottom of the slope.
Sprint up and first save yourself into the niche that has just been blown open. Wait there for the next group of rolling rocks and fully replenish your stamina.
Then sprint all the way to the top.
Treasure Chest: The Dragon Sculpture
At the top there is a bird statue or memory statue. Be sure to activate it. Before the upcoming boss fight, this is the best time to do a manual save.
Then continue up the long winding stairs or path.
At the end there is a large Treasure Chest.
Open it and you will receive the Dragon Sculpture, the Big Key of the Earth Temple.
As soon as you make your way back, a short escape sequence begins. Behind Link, a huge boulder comes loose and rolls down the narrow path.
Sprint away immediately. Take the stamina fruits with you on the go so that your Stamina Gauge doesn’t run out.
At the end of the path, jump from the edge to the lower level.
The boulder continues to roll and clogs the huge dragon head, from whose mouth lava has been continuously flowing on the way to the boss door.
This opens access to the boss room.


Insert the Dragon Sculpture into the boss door
Go back to the big boss door.
Like the Golden Carving of the First Temple, the Dragon Sculpture has a certain three-dimensional shape. You must therefore rotate it correctly before it fits into the recess.
Align the sculpture so that its shape exactly matches the lock. As soon as the right position is reached, you can use it.
Difference in Skyward Sword HD: On the Wii, the Dragon Sculpture is rotated using the movements of the Wii Remote. In Skyward Sword HD the operation depends on your chosen control scheme. When the button control is activated, you can easily align the key using the analog sticks.
Before you open the door, check your Bomb Bag again. For the boss fight you should have all ten bombs with you if possible. However, there are also supplies in the boss room itself.
Boss: Scaldera
Behind the boss door there is a long path leading up. Fi detects traces of Zelda.
Follow the path. Shortly afterwards Demon Lord Ghirahim appears again. Since Zelda has escaped him again, he takes out his frustration on Link and brings the massive boulder from the temple to life.
The chunk turns into the Glowing Hell Rock Scaldera.
Push Scaldera down the slope with bombs
The battle takes place on a long downhill path.
Scaldera first tries to run up the slope. Keep your distance and also move upwards.
Several Bomb Flowers grow along the path. You can use both these and the bombs from your own Bomb Bag.
Hit Scaldera with a bomb. The explosion unbalances the monster and sends it rolling back down the slope.
Run after him, but keep a little distance. When Scaldera comes to a stop, it straightens up and begins to suck in air in preparation for a powerful fire attack.
Right now is your opportunity.
Take a bomb and throw or roll it directly into Scaldera’s open mouth.
The bomb is sucked in and explodes inside the monster. This causes part of its stone armor to break and the large eye becomes visible.
Immediately sprint to the eye and attack it repeatedly with the sword.
After a short while, Scaldera stands up again.
Avoid Scaldera’s fireballs
If you don’t manage to throw a bomb into the mouth in time, Scaldera will fire several huge fireballs up the slope.
Move sideways to avoid the projectiles. At the top of the battle area you will also find hearts and new Bomb Flowers. You can retreat there briefly if you urgently need energy or bombs.
However, don’t stay at the top unnecessarily long, as Scaldera’s fireballs can also reach this area.
Scaldera’s second attack method
After several successful attacks, Scaldera loses more and more parts of its armor. At the same time the monster becomes faster.
It now stands on its legs and runs up the slope. When it reaches Link, it lifts its body and runs over you.
You can run directly under the opponent at this moment.
Then Scaldera rolls back down the slope. Stand as far to one side of the path as possible so that the rolling rock ball doesn’t hit you.
Below, Scaldera begins sucking in air again for the fire attack.
Throw a bomb into its mouth again and then attack the exposed eye.
Repeat this process until all of the outer armor is destroyed. The eye can then move much more freely, but is also permanently visible.
A few more targeted sword blows end the fight.


Don’t forget the Heart Container
After Scaldera’s defeat, a complete Heart Container appears.
Be sure to collect it before leaving the room. This causes Link’s maximum heart energy to permanently increase by one heart.
The Heart Container is the only permanent heart expansion within the Earth Temple. There is no normal Piece of Heart in the dungeon.
Then go through the door at the top of the boss room.
Zelda and the mysterious woman
In the Earth Spring we finally see Zelda again.
She stands with the mysterious woman in front of a large Gate. Zelda first wants to run to Link, but is held back.
The woman makes it clear to Link that he has always been one step behind Zelda and needs to take his task more seriously.
Zelda then disappears with her companion through the Gate.
Search Earth Spring
Before you activate the big bird symbol, you should take a quick look around the source.
There are several fairies here. If you have a free Empty Bottle, you can capture one of them. Especially before the next large area, a fairy is an excellent automatic emergency heal.
There is no Goddess Cube or Piece of Heart in this source. You can therefore complete the area without worry after collecting a desired fairy.
Obtain the Amber Tablet
Stand in front of the large bird symbol.
Hold the Goddess Sword up until it is fully charged, then unleash a Skyward Strike at the symbol.
After the following sequence, Link will receive the Amber Tablet.
It is the third large tablet and opens access to the Lanayru region.
Fi then takes Link back to the area in front of the temple.
Return to Faron Woods for a Piece of Heart
Before you use the amber tablet in Skyloft and set off for Lanayru, we can reach another Piece of Heart for the first time with the new Bomb Bag.
Use the bird statue and return to Sky. Then fly through the green Column of Light back to the Faron region.
Land in the Faron Woods, ideally at a bird statue near the southwest area.
Follow the path into the southwestern part of the forest. There is a noticeable cracked rock wall that you couldn’t do anything about on your first visit.
Place a bomb in front of it or throw a bomb against the wall.
The explosion opens a small cave.
Go inside and collect the Piece of Heart inside.
This Piece of Heart is available immediately upon receipt of the Bomb Bag and therefore belongs exactly at this point in our 100% route.
You can also find all Pieces of Heart in our guide to all Pieces of Heart in Skyward Sword.
Optional: Buy small Bomb Bag in the bazaar
By receiving the Bomb Bag, the equipment shop in the bazaar expands its range.
From now on you can for 150 Rupees a small Bomb Bag buy. She will be in the Adventure Pouch carried and increases your bomb capacity by another five bombs.
This Adventure Pouch Upgrade can be further improved later at Gondo.
For the pure 100% route, you don’t necessarily have to buy it straight away. Another copy can be obtained later via a Goddess Chest and additional bags are generally not missable. However, if you have enough Rupees and free bag slots, the additional bomb capacity for Lanayru comes in handy.
We also cover all pocket spaces and additional equipment in our guide to wallets and Adventure Pouch upgrades.
Insert the amber tablet in Skyloft
Return to Skyloft and enter the large statue of the goddess.
Go to the familiar altar and place the Amber Tablet in the last free slot.
Another column of light then appears in the Sky. It leads you to the extensive region Lanayru.
Before we reach the next big dungeon there, the Lanayru Mine, the desert of Lanayru, numerous time stones, new Goddess Cubes, several Treasure Chests and more Pieces of Heart are waiting.
Continue to Lanayru Desert
In the next section the journey first leads through the Lanayru Mine and then into the huge desert of Lanayru. There you will get to know the time stones and experience how long-gone areas are briefly transformed back into their original form.
We are again taking with us all the Goddess Cubes that were accessible on the first visit, Pieces of Heart, fixed Treasure Chests and useful side trips. Finally the path leads us to Lanayru Mining Facility, the third major dungeon in the game.