
Enter Skyview Temple with the Slingshot. Raise the water, obtain the Beetle and Golden Carving, then defeat Ghirahim to reach Skyview Spring and receive the Ruby Tablet.
The entrance to the Skyview Temple
After you hit the red Crystal Ball above the temple entrance with your Slingshot, the big door opens and you can enter the Skyview Temple.
There is a bird statue right in the entrance area. Be sure to activate it. In the Wii version you should save here at the same time. In Skyward Sword HD there is also an automatic save function, but a manual save before the first dungeon is still a good idea.
Then follow the stairs down. Several spider webs block the way. Smash them with your sword and kill the Keese that come your way.
Early treasures such as amber half moons may also lie between the roots and plants. If you have followed our previous 100% route and already have the Bug Net, you can easily use it to pick up hard-to-reach specimens. However, such materials are repeatable and are not unique collectibles in the temple.
At the bottom of the stairs you stand in front of a locked door. Cut back the small trees or plants on the nearby wall. Climbing tendrils appear behind it.
A Deku Baba is waiting at the top. You can first stun them with the Slingshot and then quickly climb up the vines. Defeat the plant and activate the red Crystal Switch. The locked door below opens.
Solve the first eye puzzle
In the following room there is a large eye above the next door. As soon as you draw your sword, the eye observes the tip of your blade.
Stand on the raised platform so that the eye can clearly see you. Then move the tip of the sword evenly in a circle. Don’t follow the circle with Link himself, just turn the sword.
After a few complete rotations, the eye becomes dizzy. It comes off the wall and the door opens.
Difference in Skyward Sword HD: With motion controls, the puzzle works similarly to the Wii. If you play with button controls, you control the direction of the sword using the right control stick. Move it in a clean circular motion until the eye gives up.


Reach the large main room
Behind the door the path takes you deeper into the temple. Several Deku Babas hang from the ceiling. Defeat them or eliminate them with targeted attacks.
You will eventually reach a much larger room with several doors and raised paths. This area forms the first central hub of the temple.
First turn around. Climbing vines grow on the wall behind you, with several Skullwandtulas sitting on them. Shoot the little spiders down with the Slingshot and then climb up.
There are several wooden barricades at the top. Smash them with the sword. This opens up a practical shortcut to the entrance area and you no longer have to take the complete detour on later routes.
Then return to the elevated path. A green Bokoblin waits on a cross-shaped platform. His fighting style hardly differs from the red variants. Continue to watch which side he is holding his sword on and attack from an open direction.
From here you can see three different doors. The middle or northern door is initially locked and will later require a Small Key. The two side rooms, however, can already be opened.
The switch of a door is visibly located above the entrance. Hit him with the Slingshot. The second Crystal Switch is much better hidden and is located underneath the bridge opposite.


Raise the water level for the first time
First go through the side room with the long bridge. Several Skulltulas block the direct path.
To the right or next to the bridge there are curled curly tendrils. Shoot the green seeds with your Slingshot to make the plants unfold. Swing yourself to the other side using the lianas and avoid the spiders first.
You can defeat the Skulltulas much more easily from behind. Make a hanging skulltula rotate with sword blows and wait until the sensitive side of the belly shows itself. A well-aimed stab will kill them.
There is another red Crystal Switch on the bridge or on a side wall. Hit him with the Slingshot. The water level in the temple then rises for the first time.
Nearby you will also find a stone tablet with a clue to the two hidden switches in this area. The statement boils down to the fact that one switch is above and one below a door.
Then go up the stairs and through the upper door. You return to the main room – this time on a raised platform.


Treasure Chest 1: Dungeon Map
There is a large chest on the raised platform in the main room. Open it and you will receive the Temple of Skygaze Dungeon Map.
Open the map directly. The rooms of the temple are now completely drawn and important Treasure Chests are also displayed.
There is no separate Compass in Skyward Sword. The Dungeon Map takes over its function and also shows you the locations of the Treasure Chests. It is therefore particularly helpful for our 100% route.
Increase the water level for the second time
Return to the other side room. There you will find a skulltula and a lower area.
Jump down and mow back the grass or plants on the wall. This will reveal a low passage. Crawl through it.
On the other side you stand in front of a large bird statue. On her head or above it there is another red Crystal Switch.
Hit him with the Slingshot. The water level rises a second time, changing both this room and the central area.
Go left past the statue and climb back up the vines that are now accessible. Crawl through the opening and then return to the main room.
The switch previously hidden under the opposite bridge can now also be easily identified if necessary. Swim under the bridge and activate it if you haven’t opened the corresponding side door yet.


Treasure Chest 2: The first Small Key
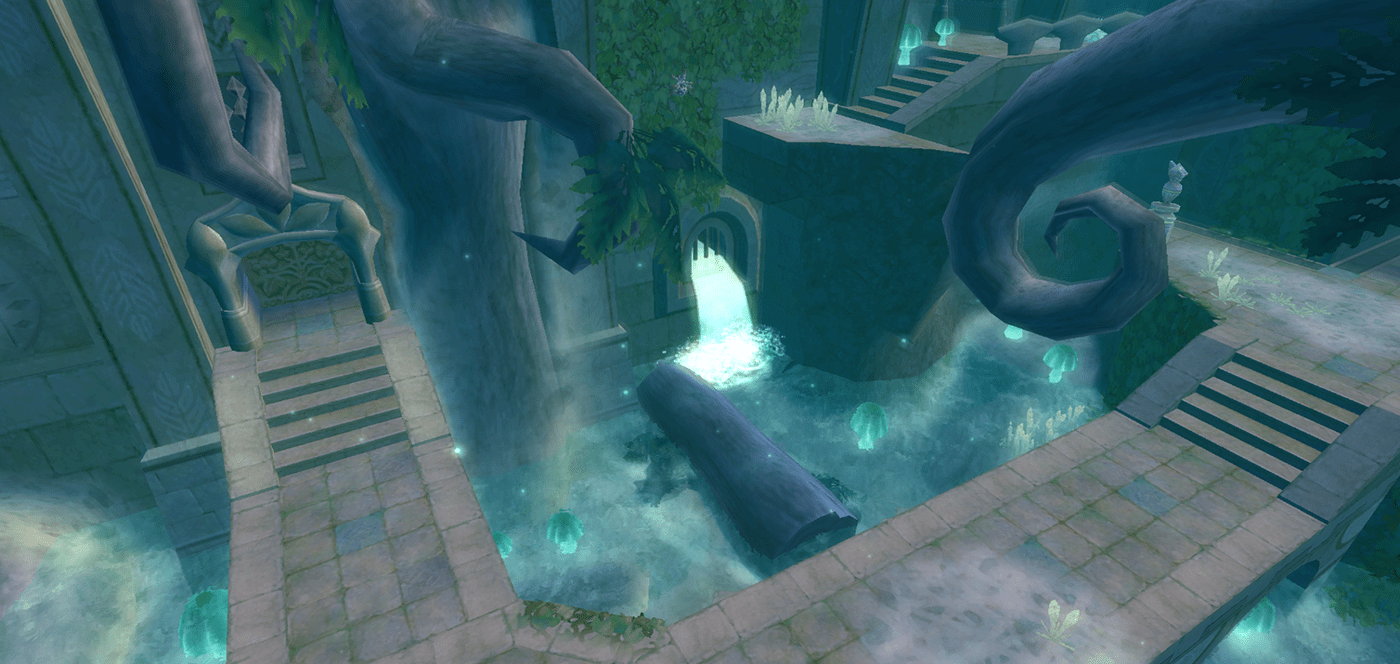
Due to the increased water level, a large tree trunk is now floating in the main room. Jump onto it and first eliminate the Skullwandtula on the vines of the eastern wall.
Jump to the vines, climb up and go through the door. You reach the room with the water mechanism again, but this time on a higher level.
First, defeat the Skulltula. They are in front of a locked grille two eyes.
Stand so far back or in the middle of the grid that both eyes look at your sword at the same time. Move the tip of the sword evenly in a circle again.
Both eyes must be dizzy at the same time. As soon as they disappear, the gate opens.
Open the chest behind it. Inside is your first Small Key.
Return to the main room and use the key on the locked door to the north. Behind it is the central circular room of the temple.


Miniboss Stalfos
In the large round room you can see a closed building in the middle. Above the door there is again a red Crystal Switch. Hit him with the Slingshot and go inside.
The door closes behind Link. The game’s first real miniboss rises from a pile of bones: a Stalfos.
The Stalfos wields two large swords and uses them to block certain blow directions. Look carefully at the position of his weapons. Always attack from a direction not covered by one of his swords.
A well-timed Shield Bash is particularly effective. If you parry its attack at the right moment, the Stalfos will briefly lose its cover and you can land several hits in a row.
Don’t try to force through his crossed swords. Your attacks will bounce off it, leaving you open for a counterattack.
After several successful hits, the Stalfos disintegrates.
Treasure Chest 3: Get the Beetle
After the victory, a large Treasure Chest will appear. Open it and you will receive the Beetle, the central dungeon item of the Skyview Temple.
The Beetle can fly through the air remotely controlled. He activates distant Crystal Switch, cuts ropes and cobwebs, and can collect smaller objects as well as Rupees. It can also be improved several times in the later game.
The door to the miniboss room remains closed for now. So start the Beetle and fly through one of the openings in the upper part of the room. Steer it around the outside to the red Crystal Switch above the door and ram it.
The door opens again.
Difference in Skyward Sword HD: With motion controls, you control the Beetle similarly to the Wii version by tilting the controller. With button control, you control the direction of flight with the analog sticks. The flight time of the simple beetle is limited, so plan routes as direct as possible.
Before you move on, you can let the Beetle fly through various niches in the upper area of the circular room. There are some Rupees there. These are not one-off collectibles, but will bring you extra money.
Also, some boxes are hanging on cobwebs. A fairy can deliver one of them to you. If you have a free Empty Bottle, you can take the fairy with you as an automatic or manually usable healing reserve.


Piece of Heart in Skyview Temple
Before you continue with the main path, let’s immediately get the most important optional collectible in the dungeon.
Go to the north side of the large circular room and look back at the central building where you just defeated the Stalfos. There is a Piece of Heart clearly visible behind a grille.
You cannot reach the switch with Link itself. Launch the Beetle and fly high over the roof of the central building. In one of the upper openings or at the tip there is a red Crystal Switch.
Fly against it with the Beetle. The grille in front of the Piece of Heart opens.
Go back to the floor of the circular room and collect the Piece of Heart.
If you followed our previous 100% route, this is your fourth Piece of Heart. The four fragments immediately assemble into a complete additional Heart Container, increasing Link’s maximum energy by one heart.
You can also find all other Locations in our guide to all Pieces of Heart in Skyward Sword.
Open the door to the west with the Beetle
Now go to the locked door near the bird statue in the western part of the circular room. You cannot reach the corresponding switch directly with the Slingshot.
There are narrow openings above the door. Launch the Beetle and fly through one of them. Avoid the plants and obstacles and steer the Beetle to the red Crystal Switch.
Hit him and the door will open.
Go through the hallway and then through the next door. The entrance closes behind Link.
The riddle with the three eyes
In the room, a Skulltula falls from the ceiling. Since she’s on the ground this time, another technique works particularly well. Hit her with side sword slashes until she falls on her back, then deliver a Fatal Blow to her sensitive underside.
Before the Treasure Chest are this time three eyes. Two of them can see you from the ground, but the top eye is too high.
Turn around and climb the vines onto the raised platform. There is a large metal box hanging on a spider thread.
Start the Beetle and cut the spider web. The box falls to the ground.
Jump back down and push the box in front of the three eyes. Place it so that Link standing on it can be seen by all three eyes at the same time.
Climb on the box, draw the sword and make a steady circular movement again. If all three eyes are fixed on the blade at the same time, they become dizzy together and disappear.
Treasure Chest 4: The second Small Key
The grate in front of the chest opens. Inside you will find the second Small Key of the temple.
Now return to the previous room. There is another Skulltula hanging in front of an area that was previously difficult to reach.
Start your Beetle and fly past the spider to the Crystal Switch behind it. The hit causes the water level to rise again.
You can now swim to the corresponding platform. Defeat the Skulltula, remove the plants and crawl through the low opening.
Through the next door you get back into the large, round main room.


Take the rope to the locked east door
Your next target is the previously locked door on the opposite side of the circular room.
In front of it, a taut rope leads over an abyss. Several hanging Deku Babas try to catch you balancing.
You now have a much more elegant solution than before: start the Beetle and fly to the plants. Cut or remove their stems before entering the rope.
Then balance undisturbed and open the door with your second Small Key.
Defeat Staldra
First, smash the wooden barricades behind the door. In the following area awaits a Staldra, a skeletal monster with three heads.
Cutting off individual heads won’t get you anywhere. As long as at least one head remains, the others regenerate.
Therefore, wait until all three heads are as aligned as possible. Then deliver a single sword stroke exactly along this line, hitting all three necks at the same time.
Depending on the position of the heads, a horizontal, vertical or diagonal cut is required. As soon as all three heads are hit with the same blow, the Staldra is defeated and the next door opens.
Difference in Skyward Sword HD: With button control, the required strike direction can be carried out precisely with the right stick. The basic principle of the opponent has not been changed compared to the Wii version.


The last large room before Ghirahim
In the next room, a wide ravine separates you from the boss door.
Follow the path along the edge until a Skulltula hangs over the abyss. Send out the Beetle and cut the thread she’s hanging by. The spider falls into the depths and the path is clear.
Take a running start and jump onto the opposite platform.
Then activate the red Crystal Switch on the side wall. This opens a shortcut back to the large circular room. If you want to leave the dungeon later, this switch will save you a considerable detour.
Afterwards another taut rope is waiting. A green Bokoblin is coming your way. You can use targeted movements to throw him off balance until he falls into the abyss. It is even more convenient to disturb it beforehand with the Beetle.
Treasure Chest 5: 20 Rupees
You shouldn’t immediately look for the Golden Carving in front of the big boss door. There is a small side room on one side.
Go in and open the small Treasure Chest. Inside is a red Rupee worth 20 Rupees.
This chest is not required for story progression and is therefore easily overlooked. However, it is essential for our 100% route. With this you have opened five of the six regular Treasure Chests of the temple.
Treasure Chest 6: Find the Golden Carving
Now go into the room on the other side of the boss door. Climbing vines grow on the wall. Climb up.
There is a rope hanging there. Cut its attachment and then grab the loose rope. In order for Link to swing in the right direction, you must first align yourself appropriately on the rope.
Swing onto the overgrown platform or to the branches of the large tree.
Climb further up and follow the branches. Two curled curly vines hang in front of you. Open it with the Slingshot or your Beetle.
Jump to the first vine, swing to the second and from there continue to the niche with the large chest.
Open it. Inside lies the Golden Carving, the great key of the Skyview Temple.
Climb up the vines behind the chest and jump over the wall back towards the boss door. Balance on the rope again.


Insert the Golden Carving
Unlike many older Zelda games, it is not enough to simply automatically insert the Big Key into the lock. The Big Key in Skyward Sword have a specific three-dimensional shape.
Pick up the Golden Carving and turn it until its shape fits exactly into the opening of the boss door. Once the correct alignment is achieved, it will begin to glow and can be used.
Difference in Skyward Sword HD: In the Wii original, the Golden Carving is rotated by moving the Wii Remote. In Skyward Sword HD the operation depends on your chosen control scheme. With button control, you can align the object without motion control.
Open the door and go through.
Boss: Demon Lord Ghirahim – Phase 1
In the next room, Link finally meets the mysterious man who has already been watching him in the forest. He introduces himself as Demon Lord Ghirahim and makes it clear that Zelda is his real target.
After the conversation, the first big boss fight of the game begins.
In the first phase, Ghirahim hardly takes Link seriously at first. He doesn’t use his own sword yet and instead tries to catch your blade with his bare hand.
The crucial trick is to lure Ghirahim’s gaze or his hand in one direction. For example, hold the sword clearly to Link’s right side and wait for Ghirahim’s hand to follow that position.
Then quickly move the blade to the opposite side and strike from a direction that his hand can no longer cover.
If you attack too predictably, Ghirahim will catch the sword between his fingers. React immediately and pull or knock the blade free again.
If he actually manages to take the sword from Link, the fight is not yet lost. Wait for his attack and, if possible, parry him with a Shield Bash. This will cause him to drop the sword and you can pick it up again.
Repeat the deception several times. After enough hits, Ghirahim becomes serious and summons his own sword.
Boss: Demon Lord Ghirahim – Phase 2
In the second phase the fight becomes significantly faster. Ghirahim teleports, attacks directly with his sword and also summons several magical blades.
When he teleports away and appears directly behind Link, turn to him immediately. After he appears, you have a brief moment in which he is vulnerable. Use this for multiple quick hits.
As he summons a series of magical blades, pay attention to their formation. The bullets form a straight line. Just before hitting, hit through the entire row in the same orientation. This allows you to deflect or even send back several projectiles at the same time.
His most dangerous melee attack is a quick dash. A perfectly timed Shield Bash throws Ghirahim off balance. This is an excellent opportunity for multiple sword strikes.
If you still feel unsafe with the Shield Bash, you can also sidestep many of his attacks and then counter them. However, avoid continuously hitting his guard.
Difference in Skyward Sword HD: The alternative button control is particularly noticeable in the fight against Ghirahim. Instead of using the Wii remote control or Joy-Con movements, you determine the direction of the sword attacks with button control using the right control stick. The principle of the fight remains completely identical: Ghirahim’s guard must be overcome with deliberately chosen blow directions.
After enough hits, Ghirahim has had enough. He retreats and the fight is won.


Collect the Heart Container
After Ghirahim’s withdrawal, a complete Heart Container appears.
Be sure to go and collect it. Unlike the four Pieces of Heart before, this item instantly increases Link’s maximum heart energy by one full heart.
If you followed our previous 100% route, Link received two additional hearts within this dungeon: one through the fourth Piece of Heart and one through the Heart Container to Ghirahim.
Then go through the newly opened door and enter the Skyview Spring.
Skyview Spring – first search the area
Still running not immediately to the large symbol in front of the statue. As soon as you do this with one Skyward Strike activate, the final sequence of the temple begins.
There are several things to do beforehand for our 100% route.
With the Beetle you can collect a red Rupee worth 20 Rupees on or on one of the high pillars in the entrance area. This Rupee is not a permanently numbered collector’s item, but it is right along the way and should therefore not be given away.
In the spring you will also find fairies and other small creatures. If you have a free Empty Bottle, this is a good time to take a fairy with you before the next area begins.
Activate Goddess Cube No. 3
Now comes the crucial find that is missing in the old section.
Go to the large statue or altar at the north end of the spring. Run behind the statue or behind the base.
The third Goddess Cube of our 100% route is hidden there.
Stand in front of it, hold the Goddess Sword up and wait for it to fully charge. Then unleash a Skyward Strike against the cube.
The artifact disappears in a beam of light and activates the associated Goddess Chest in Sky.
This chest is located on the Pumpkin Landing on or above the canopy of the Lumpy Pumpkin and contains a gold Rupee worth 300 Rupees.
You can also find all other dice and their rewards in our guide to all Goddess Cubes.
Obtain the Ruby Tablet
Only after the Goddess Cube has been activated do you return to the front of the statue.
Hold your sword up again and charge a Skyward Strike. Then hit the big bird symbol.
A cutscene begins. Link receives the Ruby Tablet.
Just like the previously preserved emerald tablet, it belongs in the base within the large goddess statue in Skyloft. Deploying it creates another opening in the cloud cover and unlocks access to the next large area: the Eldin Volcano.
After the sequence you will find yourself outside the temple in the deep forest again.
Goddess Chest No. 3 on Pumpkin Landing
Before you fly directly to Skyloft and use the Ruby Tablet, we’ll do the reward for the artifact you just activated.
Go to the bird statue and return to Sky. Then fly to Pumpkin Landing.
The new Goddess Chest is not on the ground like the first chest on this island. It is located on the roof or on the canopy above the entrance to the Lumpy Pumpkin.
You therefore have to fly your Loftwing over the Lumpy Pumpkin and drop as close as possible over the roof. Steer Link onto the canopy or raised platform as he falls.
If you miss it, simply jump off the island again, call your Loftwing and try again.
Open the Goddess Chest. Inside is a gold Rupee worth 300 Rupees.
If you followed our route so far, you already own at least one Extra Wallet and can carry enough Rupees. However, players with the original 300 ruby wallet should make sure they have enough space beforehand so that part of the reward is not lost.
Spend the 300 Rupees at Beedle’s Shop
Since you have just received a gold Rupee, it is now time to take another step in our 100% route.
Fly back to Skyloft and use Slingshot or Beetle to shoot the bell under Beedle’s flying shop. Climb up the lowered rope.
If you have not yet purchased the first commercial expansion of the Adventure Pouch for 300 Rupees, now is the ideal time to do so. Through our route so far, you already have the bag expansion from the first Goddess Chest. With Beedle’s expansion, your Adventure Pouch grows from the original four to a total of six places.
The later expansions for Beedle will be significantly more expensive and do not need to be enforced at this point. We will buy them further down the 100% route as soon as there are enough Rupees available without artificial farming.
You can also find all extensions in our guide to wallet and additional bags.
Insert
Ruby Tablet in Skyloft
Then go to the large statue of the goddess in Skyloft and enter the secret chamber in the base.
Go to the altar where you have already placed the emerald tablet. Now place the Ruby Tablet in the second free recess.
In Sky a new passage opens through the cloud cover. From now on, a red Column of Light marks the way to the Eldin Volcano.
This completes the Skyview Temple including its immediately unlocked 100% rewards.
Go to Eldin Volcano
In the next section we will first prepare Link completely for the journey in Skyloft. Then the red Column of Light leads to the Eldin Volcano. The Mogma, the Digging Mitts, several new Goddess Cubes, another Piece of Heart and the search for five key fragments for the Earth Temple await you there.