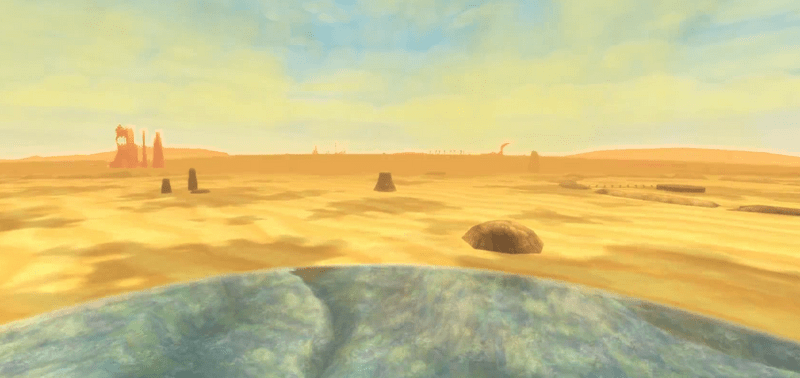

Learn Nayru’s Wisdom at the Isle of Songs and complete the Lanayru Silent Realm for the Clawshots. Meet Skipper, recover the Ancient Sea Chart and search the Sand Sea for the invisible Sandship.
Return to Isle of Songs
After you leave the Ancient Cistern, use the bird statue at the Floria waterfall and return to the Sky. If you followed our previous 100% route, the previously available Side Quests around Dodoh’s roulette wheel, Cawlin’s love letter, Pipit’s mother, Peatrice and the Lumpy Pumpkin have already been completed. We therefore do not have to process these tasks again. You can always find a complete overview of all rewards in our guide to all Gratitude Crystals.
Fly into the big Thunderhead and follow the known path to Isle of Songs. The bridge puzzle is already solved after your first visit, so you can go straight to the central building. Stand in front of the large bird symbol again, charge your Goddess Longsword with a Skyward Strike and hit the crest. The statue responds and Fi gives Link the second song for a divine test.
Learn Nayru’s Wisdom
Link learns Nayru’s Wisdom. This song leads him to the second Silent Realm test and thus to the divine treasure that opens the way to the next area. Fi automatically expands your Dowsing with the Trial Gate. This time the target is in the Lanayru Desert, more precisely in the northern area near the entrance to the Lanayru Mining Facility.
Before we head there, it’s worth a quick stop at Skyloft. Since the completion of the cave sanctuary, the longer-running Side Quest around Fledge can be continued.
Bring the second Stamina Potion to Fledge
Visit the bazaar and buy a Stamina Potion from the potion stand if you don’t have one left in your Adventure Pouch. Then return to the Knight Academy and sleep until night. In his room, Fledge continues to train doggedly. The first Stamina Potion has had an effect and his physical condition has already visibly improved, but for the next step he asks Link for another potion.
Give him the second Stamina Potion. You won’t receive an immediate reward yet. Fledge has to complete his training first. After the upcoming big dungeon, we can finish the Side Quest and receive more Gratitude Crystals in return. Since we can already hand over the second potion now, we will complete this step as soon as possible.
Prepare for Nayru’s Silent Realm
You don’t need any equipment for the Silent Realm itself, because Link loses all of his items when he enters. Nevertheless, it’s worth taking a look at Gondo. If you collected enough Dark Crescents during Farore’s Trial, several improvements may now be possible. The Sacred Shield, the Slingshot and the Bug Net in particular benefit from rare materials that we have specifically collected so far.
You can find out which treasures are needed for the individual levels in our detailed guide to all upgrades at Tinkerer Gondo. However, if you are missing a random material, you should still not force farming for a long time. All improvements remain available.
Find the Gate for the second test
Fly through the yellow Column of Light to Lanayru and select the bird statue Lanayru Desert North. From there you can already see the place where several Blessed Butterfly are floating above the ground. If necessary, activate the Dowsing for Nayru’s Wisdom and go directly to this point.
Bring out the Goddess’s Harp and play Nayru’s Wisdom to the rhythm of the glowing marker. The large symbol of a Silent Realm test then appears again on the floor. Stand in the middle and push your sword vertically into it.
The familiar desert disappears and Link enters Nayrus Silent Realm.
Nayru’s Trial – collect 15 tears again
The rules basically correspond to Farore’s test: Link has no weapons or items and must overall 15 tears of Nayru in his Spirit Vessel collect. As soon as you leave the safe starting circle, the Guardians awaken. Each tear collected returns her to her dormant state for approximately 90 seconds. Waking Water and the Guardians’ light cones activate the Guardians immediately.
The second test is more difficult than the first because the desert is much more open and there are several tears on walls or raised platforms. Some apparently dangerous quicksand areas also have the solid sunken paths within the Silent Realm that you already know from the normal desert. If you are unsure, light fruits can help enormously: after collecting them, they mark all the missing tears for a short time with bright pillars of light.
This time too there are several Dusk Relics in the area. They are among the most important materials for later upgrades. Therefore, try to take the specimens that are directly on our route. A complete collection in a single pass is not absolutely necessary because the materials can be found again later in the Silent Realm.
Tears 1 to 4 – first the eastern desert side
You should initially consciously leave behind the seemingly obvious tears around the entrance to the Lanayru Mining Facility. They are very easy to reach and make great emergency stations later on if the Guardians are activated unexpectedly. Instead, turn left from the starting point and walk east across the safe sandy area. The first tear Nayrus is waiting there. A Guardian is already dangerously close to you, but you can usually reach the tear much sooner and put all the Guardians back into their sleep state.
Follow the path further southeast. On a low wall remnant you will find teardrop number 2. There is also a Dusk Relic in the immediate vicinity. Then continue south along the eastern boundary. Northeast of the large storage building there is a small niche where you can collect another Dusk Relic.
Further south there is a minecart in an area that is periodically flooded by Waking Water. teardrop number 3 floats above or next to the minecart. Be sure to wait until the dangerous water recedes. Push the cart towards the tear piece by piece and retreat each time the Waking Water returns. When the cart is positioned correctly, climb up and jump to the teardrop.
Afterwards, continue along the southeast wall. A second cart can be pushed against the wall and serves as an climbing aid. Climb onto it and pull yourself onto the remains of the wall. tear number 4 is waiting there. Even further south, you can collect another Dusk Relic behind a resting Guardian if you feel safe enough.
Tears 5 to 8 – Cages and the Dangerous South
Then turn west. In the distance you can see the three cages where the old robot improved your Beetle during your first visit to the desert. On one of these cages is teardrop number 5. Push the nearby cart up to the cage and use it as a step.
You leave the seemingly obvious tear on the southern section of the wall for the moment. It is easy to reach and is ideal later if you need additional protection. Instead, run southwest past the large area with the patrolling guards. In the western corner you can collect another Dusk Relic.
In the far south there is a single large tree. Roll against it. Falls due to impact Tear number 6 from the crown. Collect them and then look east. There is located Tear number 7 at a low level. Jump off the wall and sprint straight to it. A Guardian will likely come very close to you, but the tear will immediately calm them as soon as you reach it.
There is also another Dusk Relic on the southernmost edge of the desert. If possible, take it with you now, because later there will be little reason to walk so far south again.
For tear number 8 we head north again. Stay as west as possible and avoid the heavily patrolled open areas. The teardrop lies on a transverse piece of wall that you can climb from the west. Once you reach the top, you will be completely safe again for a short time. You can also collect another Dusk Relic from a nearby tree.
tears 9 to 12 – back to the Lanayru Mining Facility
The most difficult part of the route is now behind you. Go to the large building in the central area and walk around it counterclockwise. On the way you reach Tear number 9. Then go to the piece of wall a little further east and take Tear number 10 with.
From there jump towards the large staircase of the Lanayru Mining Facility. Here we have deliberately saved several easily accessible tears for the second half. teardrop number 11 is waiting right at the stairs. If a guard has discovered you by now, this is the perfect rescue point.
From the stairs you jump to the western wall and climb up. On the raised platform lies teardrop number 12. Due to the great height, you can also clearly see many of the missing light columns from here.
Tears 13 to 15 – on the central building
Return to the central structure and circle it counterclockwise again. You can collect tear number 13 and a little later tear number 14. Now only the highest Location remains.
Climbing vines grow on the west side of the building. Climb up it and then run left to a second vine system. Climb to the top of the building. There lies the 15th and final teardrop Nayrus. There is also a Dusk Relic right next to it, which you should definitely take with you.
Once all 15 tears have been collected, the protection timer will no longer expire. Take advantage of this and, if necessary, take any Dark Crescents with you on the way back that you previously missed. You then return to the large, glowing starting circle.
Obtain the Clawshots
By entering the exit circle, Nayru’s test is passed. Link receives the Clawshot as the second divine treasure. Unlike the single Clawshots from older Zelda games, Link has two of them. This means you can not only hold on to marked gripping points, but also pull yourself directly to the next target while hanging. Climbing vines and some flying plants can also be used as anchor points.
The Clawshots significantly change our 100% route. Numerous positions in Faron, Lanayru and Skyloft that previously had to be intentionally left open are now accessible. Before we finally set off for the Lanayru Sand Sea, we are clearing out several of these finds.
Piece of Heart and jewel in Zelda’s room
First fly back to Skyloft and go to the roof of the Knight Academy. You will now see a clear grab point near the chimney. Pull yourself up with the Clawshots and drop Link down the chimney. Follow the narrow passage. You can take a quick look into Gaepora’s bathroom through a grille; Then continue crawling and at the end jump into Zelda’s room.
In the room at night lies one of the previously unreachable individual Gratitude Crystals. More important is Zelda’s cabinet. Open it and you will get another Piece of Heart. This find is independent of a Goddess Chest and should therefore be taken immediately after receiving the Clawshots.
Collect the Last Loose Gratitude Crystal above the Waterfall
Then go to the entrance to the waterfall cave on the east side of the Skyloft. A small island with hanging vines floats above the entrance. Pull yourself up with the Clawshots and then continue onto the large plateau above the waterfall.
If it’s night, you’ll find another single Gratitude Crystal at the top. If you followed our route from the beginning, together with the jewel in Zelda’s room, these are the last two of the 15 jewels freely distributed around the world.
50 Gratitude Crystals – Giant Wallet
If you have completed all of the previous Side Quests on our route, you should now reach the mark of 50 Gratitude Crystals thanks to the two new individual jewels. Visit Batreaux under Skyloft. As a reward, Link will receive the Giant Wallet, which alone can hold up to 5,000 Rupees. Together with the additional wallets from Beedle, the maximum capacity increases even further.
This expansion is particularly practical in the upcoming Lanayru Sand Sea, because several Goddess Chests and optional Treasure Chests contain large amounts of ruby. You can also find all wallets and pocket spaces in our guide to wallets and additional bags.
Two new Goddess Cubes in Faron
The Clawshots also enable two further detours to Faron. These can also be done later, but for a clean 100% route we activate the dice immediately. Fly through the green Column of Light and first select the Skyview Temple as the target.
Go right past the temple entrance and look up. Climbing vines grow on the wall that were previously inaccessible. Use the Clawshots to pull yourself up and climb to the roof of the temple. There is the next Goddess Cube. Activate it with a Skyward Strike. The corresponding Goddess Chest is located on Beedle’s Island and contains the Rupee Medal.
Then travel to Floria Waterfall. Directly above the bird statue there you can see tendrils again on a high ledge. Pull yourself up and follow the short path. Another Goddess Cube is waiting there. His chest is below the Fun Fun Island and contains a Golden Rupee worth 300 Rupees.
These two previously unreachable cubes are now activated. You can look up all Locations and rewards in parallel in our complete guide to all Goddess Cubes.
Activate Two More Goddess Cubes in Lanayru Desert
Now fly again through the yellow Column of Light to Lanayru. The first new find is in the northeast of the desert. We already opened the secret tunnel there with the Piece of Heart during our first visit. Run to the end of the tunnel again. Behind the heart part chest the path continues over a ravine, but only with the Clawshots can you use the anchor points attached to the rock walls. Pull yourself from one point to the next until you land on a high wall. The next Goddess Cube is there. His chest contains a Heart Medal.
The second artifact is located southeast of the Lanayru Mining Facility, near the cages where the Hook Beetle was originally upgraded. The cube was clearly visible before, but was located on an inaccessible high wall. There is a grab point to the right. Pull yourself up and activate the artifact. The accompanying Goddess Chest contains the Life Medal, which increases Link’s maximum heart energy as long as you carry it in your Adventure Pouch.
Open the new Goddess Chests
You could immediately fly the chests one by one, but we save ourselves several unnecessary trips. There are more artifacts waiting in the Lanayru Sand Sea. We first activate all the cubes that can be reached up to the pirate hideout and then take a single big tour through the Sky. This is how you get the Heart Medal, the Life Medal, the Ruby Medal, several Gold Rupees, the Potion Medal and another Piece of Heart in a single route.
If you need a certain reward immediately, there is of course nothing wrong with opening the chest in question earlier. The Locations are already marked on your sky map.
The entrance to Lanayru Caves
Our actual destination is in the west of the desert. Travel to the western bird statue and go to the large sandfall. You will see several grab points on the high rock face. Use the new Clawshots to pull yourself up little by little and enter the opening.
Link goes into the Lanayru Caves. A Goron is waiting here to investigate the old tunnels. Talk to him. He reports on the previously closed western exit and gives Link a Small Key that can be used to open the gate to the unknown area.
Before we use the key, we first explore the eastern part of the cave.
Detour back to Lanayru Mine
Go through the eastern passage. You cross a long gorge via several gripping points and finally reach a previously inaccessible upper entrance to the Lanayru Mine. At the end there is a solid Treasure Chest with a rare treasure. Take them with you before you go back to the Lanayru Caves.
There is also another chest in the cave itself. Inside is a Monster Horn. Since you have the whip, you can steal monster horns directly from certain Bokoblins, but the solid find is still very valuable for later equipment improvements.
Enter the Lanayru Sand Sea
Now use the Small Key on the western door of the cave. Behind her, one of the most impressive sights in the game opens up: in front of Link lies a huge sandy desert with old harbors, rocky islands and ship ruins. In the past there was a huge sea here – the Lanayru Sand Sea.
Use the grab points on the high pillars to pull yourself up to the harbor. Immediately activate the bird statue there. This position will be our central starting point for the entire Sand Sea in the coming sections.
Goddess Cube in the old port
Before you talk to the robot on the footbridge, examine the northern warehouse buildings. Climb onto the stacked containers and look to the northwest or the back of the warehouses. There is a grab point on a container. Pull yourself over and enter the large hall beyond.
Inside, numerous Minighads fall from the ceiling. Don’t be impressed by their quantity; A few quick sweeps are usually enough to push the little scorpions back. At the end of the room is another Goddess Cube. Activate it with a Skyward Strike.
The corresponding Goddess Chest is located in the Skyloft bazaar between the item management and Gondo. It contains a Golden Rupee worth 300 Rupees. We also pick this up on our bundled sightseeing flight.
Skipper and the missing ship
Now go down the long walkway. A Timeshift Stone lies on a small boat. Strike against it. Within his area of influence, the desert suddenly turns back into a glittering sea and an old robot with a captain’s hat awakens next to Link.
The robot is called Skipper and was once the captain of a large ship that carried Nayru’s sacred flame. However, pirates attacked and stole the galleon. Since then she has disappeared into the sea of sand.
Skipper is ready to help Link find it. Before the ship can be tracked down, however, he needs his old nautical chart. It lies in his former house on a distant rocky island. Get into the small boat. Skipper briefly explains the controls to you and marks his house on your map.
With the boat with a Timeshift Stone via the Lanayru Sand Sea
As long as Link is on the boat, the Timeshift Stone travels with him. This causes the sand area to turn back into water in a circular area around the boat. Outside this radius the area remains a dry desert. This effect makes all exploration of the Lanayru Sand Sea possible.
The boat also has a cannon. This allows you to destroy enemy ships, rock barriers and various enemies from a distance. Use it liberally – the cannon does not require limited ammunition.
Drive to the marked point and dock at Skipper’s Retreat.
Climb to Skipper’s house
First activate the bird statue on the dock. The path to the house leads high up over numerous rock platforms. Follow the path east and cross the first short section of quicksand. In the end, you take yourself to the next level with the Clawshots.
Defeat the Deku Babas and then look up. Several plant-like creatures, called killeranas, float through the air. In contrast to opponents, they primarily serve as mobile grab points. Pull yourself onto a Killerana with the Clawshots and aim for the next grab point while Link is hanging on it. This way you can overcome large gaps.
There is a large lightning slime waiting on the next platform. Defeat him and then blow up the cracked rock wall with a bomb. Follow the uncovered tunnel. At the other end the ascent continues over further killeranas and gripping points.
Defeat the Iron Shield Moblin
On a narrow bridge, a Moblin with a massive Iron Shield blocks the way. Unlike the wooden version, this shield cannot be destroyed with normal sword blows. Therefore, use his size against him. Sprint straight towards the shield and run up it. Link jumps over the Moblin and lands behind him.
Immediately turn around and attack his unprotected back. Repeat the maneuver when he turns towards you again. Link now causes significantly more damage with the goddess’s long sword, so the fight should be over quickly.
Goddess Cube at Skipper’s house
After the bridge you should not immediately follow the main path. On a distant stone pillar to the left or south of the route you can see another Goddess Cube. First, pull yourself onto the climbing vines of the nearby pillar. Climb around the side of the rock until the next grapple point becomes visible.
While Link is still hanging on the wall, you can use the Clawshots again. Pull yourself onto the second pillar and activate the Goddess Cube.
The Goddess Chest unlocked by this is located behind a grate on a small island northwest of Fun Fun Island. With the Clawshots you can access the climbing vines in the ceiling through the top opening and swing to the chest. Inside is the Potion Medal, which increases the duration of certain potions.
The last platforms for Skipper’s Retreat
Return to the bridge and move to the next platform to the north. A Furnix is waiting there. As in Ancient Cistern, pull him towards you with the whip on the tail ring and kill him on the ground.
On the west side, a striking plant grows out of the ground. Pull it with the whip. Another Killerana appears and immediately serves as a grab point. Swing to her and from there onto the next rock pillar.
Further up there is a grab point that is blocked by a Deku Baba. Send your Beetle and cut the stem of the plant. Then pull yourself to the now free anchor point and from there to the higher column. Two Furnix await you at the next level. Defeat both of them so that they don’t hit you from the air during the final climbing section.
Look south. Another Killerana hovers beyond the rock. Pull yourself up, wait until the next plant becomes visible and keep swinging. From there you finally reach Skipper’s house.
The Ancient Sea Chart
Enter the abandoned building. The interior is completely covered with sand. Pull out the Gust Bellows and systematically blow the debris off the floor, furniture, and walls. A Treasure Chest is uncovered to the left of the entrance.
Open it and you will get the Ancient Sea Chart. The ancient waters and important facilities of the Lanayru Sand Sea are marked on it. Skipper needs them to continue the search for his ship.
Before you leave the house, remove the remaining sand. Additional Rupees or smaller treasures may be hidden beneath some piles.
Hidden Silver Rupee on the way back
Leave the house. You have several options for the way back. The safe option is to take the cable car or the normal path down. For our 100% route, however, it is worth a controlled jump from the southern footbridge.
Look down. There is a Treasure Chest on a lower platform. Jump off and open the Sailcloth in time to land there. The chest contains a Silver Rupee worth 100 Rupees. You can then easily return to the dock via the gripping points.
Investigate the shipyard
Give Skipper the Ancient Sea Chart. It complements your map of the Sand Sea and marks the old shipyard as the next possible Location. Get back in the boat and head west to the marked point. You can sink enemy ships on the way with the on-board cannon.
At the pier you notice that direct access to the Lanayru Shipyard is blocked. Skipper refers to the old rail system that used to transport materials. Activate the bird statue and then follow the path east. After two Lizalfos you reach the Lorenbahnhof.
The first minecart ride
The Gorone Torogo is waiting in the building. First read the signs on the wall if you are not yet familiar with the cart control. When cornering, you have to shift your weight or control in the direction of the curve. This means the cart stays on the rails and gains speed at the same time. You are not allowed to slow down before big jumps.
Difference in Skyward Sword HD: With motion control, you tilt the controller similarly to the Wii original. With button control, the cart is steered using the analog stick. Many players find the stick control to be more precise, especially for the later time trial.
Get into the minecart and drive the first route to the intermediate station. Follow the path there to the second train.
Second minecart route to the shipyard
The second trip is much more demanding. Several junctions decide which path the minecart takes. On our route you take the right path at the first intersection and also the right path at the second junction. You take the third switch on the left, the fourth on the right again. At the last junction, both paths lead to your destination.
Actively stay in the respective direction of travel in all curves. You don’t have to maximize the speed as long as you just want to reach the section. For the later Piece of Heart mini-game, however, every second will count.
At the end you get out directly in front of the actual shipyard building. Activate the nearby bird statue and go inside.
Moldarach in the shipyard
Inside you will only find a huge basin full of sand. Jump down and use the Gust Bellows to clear the surface. After a short while, a large black object appears. To Link’s surprise, it’s another Moldarach, the same scorpion enemy you fought in Lanayru Mining Facility.
The fight works on exactly the same principle. First, attack the eyes in his two scissors according to their opening direction. Once both pincers are destroyed, Moldarach burrows into the sand. Use the Gust Bellows to reveal it again, then attack the large central eye with piercing attacks.
Thanks to the goddess’s long sword, which has been enhanced by Farore’s flame, Link is now doing significantly more damage than in the first fight. The argument should therefore be significantly shorter.
After Moldarach’s defeat, Fi investigates the area and comes to the conclusion that there is no useful evidence of the missing ship. Return to Skipper. As a last resort, he suggests the pirate hideout in the north of the Sand Sea.
Piece of Heart in the Rickety Coaster
Before you leave the Lanayru Shipyard, return to Torogo at Lorenbahnhof. After exploring the Lanayru Shipyard, his Rickety Coaster becomes available. The long “cardiac arrest” route is particularly interesting for a 100% score.
You must complete the route in less than 1 minute and 5 seconds. Take corners as aggressively as possible and lean significantly in each direction to build up speed. Do not brake unnecessarily on straight stretches. The junction in the later part of the route is particularly important: the right path is more difficult, but significantly faster and the better choice for a time under 1:05.
If you complete the target, you will receive another Piece of Heart as a one-time main reward. Further quick runs later bring rare treasures, but are not necessary for 100% collection.
To the pirate hideout
Ride Skipper north to the next marked destination. The pirate hideout already looks unusual from the outside: the entire complex is shaped like a huge stone shark.
First activate the bird statue. Before you look for the entrance on the lower east side, you should start your Beetle and let it fly through the two large nostrils of the shark’s head. Inside there are a total of three silver Rupees. Collect them with the Beetle and secure 300 Rupees before we enter the building.
Pirate Hideout – the Timeshift Orb
The actual entrance is on the lower level east of the shark head. In the first room, Fi draws your attention to an empty pedestal. We will return here later with a special item.
Go through the northern door and follow the hallway. Defeat the two Lizalfos and then the Blitzkoppa. In the next area you will find an unusual blue orb: the Timeshift Orb.
It basically works like a normal Timeshift Stone, but has one crucial advantage: Link can carry the ball. The sphere of influence of the past moves through the building together with you. It is precisely this principle that forms the basis of all puzzles in the Pirate Hideout.
Bypass Electric Barriers with the Timeshift Orb
Pick up the orb and carry it east. Once the past is active, two Teknobokblins awaken. If necessary, briefly place the ball in a safe place and defeat the enemies before moving on.
In the southern section a Beamos blocks the path. Cut its segments along the blue lines and end the fight with a stab attack to the eye. In the following area you will see a Treasure Chest behind an electrical barrier.
The trick is to carry the ball far enough away from the barrier. As soon as the mechanism is outside the time radius, the electrical lock disappears. Leave the ball, go back to the chest and open it. Inside is a Silver Rupee worth 100 Rupees.
Ancient Flowers and solid Treasure Chests
In the next room there would be a large area of quicksand in the present. However, through the sphere of time, the original complex with walls and solid floors appears. Look out especially for Ancient Flowers. The plants only exist in the past and are needed for several high-value improvements in Gondo.
Work your way across the western platform and walls to the northern exit. Place the ball in front of the next grid and walk around the barrier outside its radius. Pull the lever on the other side. The grid disappears and you can get the ball.
In the following room there is another Treasure Chest behind a time-dependent barrier in the southeast. Again, remove the ball far enough until the mechanism disappears. The chest contains a rare Treasure. Be sure to open it for our full exploration.
Position the ball cleverly
In the southern corridor, quicksand or a barrier is blocking the way again. Carry the ball into the southern niche. There is a movable metal box there. Position the sphere so that the Floor Switch works within its time radius, but the electrical barrier to the next room is not activated. Then push the box onto the switch.
In the following room, numerous boxes and several Beamos appear through the past. First, defeat all enemies. Then place the ball in the northeast corner and go to the western side room. There is another solid Treasure Chest waiting there with a rare treasure.
Then look back towards the ball. Leverage has become accessible through their position. Pull it to make the grille rise. Get the orb and fight the two Armos in the next area. Use the Gust Bellows to turn their heads until the crystals are exposed, then destroy both weak points.
Open the shark’s mouth
After the two Armos, the path surprisingly leads back to the first room of the pirate hideout. Place the Timeshift Orb on the pedestal that Fi examined at the beginning.
The entire system reacts. The huge shark mouth at the front opens and a new door becomes accessible. Go through and you’ll find yourself in the open mouth of the building.
Goddess Cube above the pirate hideout
Don’t leave the pirate hideout towards the boat yet. Immediately after the exit, turn around and look up. There is a grab point above the door. Pull yourself onto it and then over another point onto the upper platform of the shark head.
There is the next Goddess Cube. Activate it with a Skyward Strike. The corresponding Goddess Chest is located in Skyloft on the high island above the waterfall and contains another Piece of Heart. Thanks to the Clawshots we can easily reach this chest.
The Sandship as the target of the Dowsing
Then go over the long bridge towards the pier. Fi examines an old mast there that apparently once belonged to Skipper’s ship. Through the analysis, she can recognize the characteristic signature of the missing galleon and adds the Sandship as a new target to your Dowsing.
Before we chase the ship, we take the opportunity for the announced big 100% sightseeing flight. Since receiving the Clawshots, we have activated several new artifacts and can now efficiently collect their rewards in one turn.
Collect the Newly Available Goddess Chests
Start in Skyloft. In the bazaar, there is a new Goddess Chest between Gondo and the item management thanks to the artifact from the old port. Open it and take the Golden Rupee worth 300 Rupees.
Then go to the waterfall. Use the Clawshots to pull yourself onto the floating island and from there to the high plateau. The Goddess Chest from the pirate hideout is now here. It contains another Piece of Heart.
Then fly to Beedle’s island. The easiest way to get there at night is to sleep in Beedle’s shop at Skyloft. One of the chests activated by the new Faron artifacts contains the Rupee Medal.
For the next find you fly to the small island west of Beedle’s island. There is a water tunnel in the lower area. Dive through and open the Goddess Chest at the other end with the second Heart Medal.
On the rock northwest of Fun Fun Island, tendrils lead to the lower level. There is the chest with the Life Medal. There is another Goddess Chest behind a grate on the same rock formation. Pull yourself through the upper opening onto the tendrils of the ceiling and get inside. Inside is the Potion Medal.
Also, don’t forget the chest activated by the artifact at Floria Waterfall below Fun Fun Island. It contains a Golden Rupee worth 300 Rupees.
This means that all Goddess Chests currently activated and accessible from our route are open. You can find a compact cross-check at any time in our guide to all 27 Goddess Cubes and in the separate medal guide.
Track down the Sandship
Return to Skipper at the old port and get back on the boat with a Timeshift Stone. Now activate the Dowsing and select the Sandship as the target. The ship is hidden using technology that makes it invisible, but continues to move through the sea of sand. Therefore, follow the direction of the strongest signal.
If the Dowsing deflects significantly, aim the on-board cannon in the appropriate direction. Pay attention to the trajectory of the bullet: If there is a rock wall or other obstacle between you and the galleon, you must first look for a better position. Hit the invisible ship multiple times with the cannon.
After several successful hits, his camouflage collapses. A huge old galleon appears in front of Link in the middle of the sea.
Drive close, climb up the side and enter the Sandship. Not only is Nayru’s second holy flame waiting there, but also a new important item, several Timeshift Stone puzzles, a Piece of Heart and one of the most spectacular boss fights in the game.
Our walkthrough therefore continues directly on the Sandship page.