

Enter Lanayru Mining Facility after activating the main generator. Obtain the Gust Bellows and Dungeon Map, collect the Ancient Circuit and defeat Moldarach to reach the Temple of Time.
Enter the Lanayru Mining Facility
After activating the large generator, enter the Lanayru Mining Facility that has risen from the sand and follow the stairs down. Activate the bird statue right at the start. It not only serves as a save point, but also allows you to return to Sky in an emergency. In Skyward Sword HD, saving is also done automatically, but you should still use the bird statues regularly, especially before a longer dungeon.
In the first large room you will see numerous stone statues on the walls and several quicksand fields. Small Aracha and electrically charged Blitzkoppas are also waiting here. The statues have the basket-like openings already known from the desert. You can throw your own bombs in, but the Hook Beetle is much more convenient: let it pick up one of the Bomb Flowers and throw it into the respective statue from above. This saves you your own bomb supply and at the same time allows you to take out the Blitzkoppas from a safe distance. Behind some fallen statues there are Rupees or other small rewards that you should of course collect.
There is a raised wall lever on each of the two northern quicksand pits. First, throw a bomb into the basket-like statue in front of each area to make it fall over and make it easier for you to get across the sand. Then sprint across the quicksand, run up the wall and pull the lever down. One of the two switches opens the gate in front of the northern door, the other unlocks a small niche on the east side.
Treasure Chest 1 – 20 Rupees
Before you continue north through the now open door, you should examine the newly unlocked niche on the east side. Inside is the first Treasure Chest of the Lanayru Mining Facility. Open it and you will receive a red Rupee worth 20 Rupees. This chest is not necessary for actual dungeon progression and can therefore be easily overlooked. For our 100% route it will of course be collected immediately.
Afterwards, go through the northern door into the next room.


Two Staldras and the path to the Small Key
In the following room, paths lead in all four directions. Two Staldras attack you. You already know these three-headed skeletons from the Skyview Temple. Cutting off individual heads is of little use because they regenerate. Therefore, observe the three necks and wait until they are as aligned as possible. Then perform a horizontal, vertical, or diagonal sword slash that hits all three heads at once. Repeat the process with the second opponent and you can examine the room at your leisure.
The doors to the east and west are currently not usable. The northern door is significantly higher and is also not directly accessible from the ground. To the left of it are several wooden boxes. Push one of them against the raised wall and use it as a step. Pull yourself up and go through the door.
Treasure Chest 2 – Small Key
You will reach a huge central room that you will visit several times throughout the dungeon. A large part of the paths are currently blocked. Look east: there is a ladder leading to a raised platform, but several wooden crates block the access. A Thunder Flower grows on a nearby pillar. Start your Hook Beetle, pick up the bomb and drop it directly on the wooden crates. After the explosion the path is clear.
Jump over the small abyss, climb the ladder and kill the yellow slimes and Thunder Keese along the way. The second solid chest in the dungeon awaits at the top. Inside you will find a Small Key. You currently lack the necessary skills for the rest of the large room, so return to the room with the two Staldras and use the key to open the locked door to the east.
Cross the Conveyor Belts and Activate the Timeshift Stone
Behind the locked door is a large room full of quicksand and old conveyor systems. First, cross the nearest conveyor belt and climb up the wall at the other end. Go right to the ladder. A wooden box blocks their upper exit. Another thunderflower grows above the front door. Send out the Hook Beetle, pick up the bomb and blow up the box from a safe distance.
Then climb up the ladder and stand on the Floor Switch. This will raise a grate on the large stone structure in the middle of the room. A Timeshift Stone is hidden behind the grille. Send your Beetle at it or hit it with the Slingshot. The room is instantly transformed: the dilapidated conveyor belts start running again, old machines awaken and several jet cyclopes are activated.
Climb back down. The first Beamos guards the path. Its body consists of several segmented planes, each with a blue line running along it. Execute your sword strike exactly along this line to cut off a segment. As soon as the eye is lowered far enough, you end the fight with a stab attack directly into the eye. The Gust Bellows will later be able to briefly stun such enemies, but for now you still have to work with your sword and shield.
Treasure Chest 3 – another 20 Rupees
Work east and kill another Beam Cyclops. Then climb down the ladder. In front of you is a long conveyor belt that works in the opposite direction to your direction. Before you sprint over it, first climb up the ladder on the opposite side and pull the lever there. This will raise a grate at the other end of the room.
Jump back down and now run across the conveyor belt. Be sure to collect the green stamina fruits and avoid the heavy ore chunks that come your way. On the left at the other end a ladder leads to the niche that has just been opened. At the top is a small Treasure Chest with another red Rupee worth 20 Rupees.
Return downstairs and go up the stairs on the opposite side. Another door is still locked. Therefore, sprint across the second conveyor belt to the wall lever on the other side, pull it down and then return along the belt to the now open door.


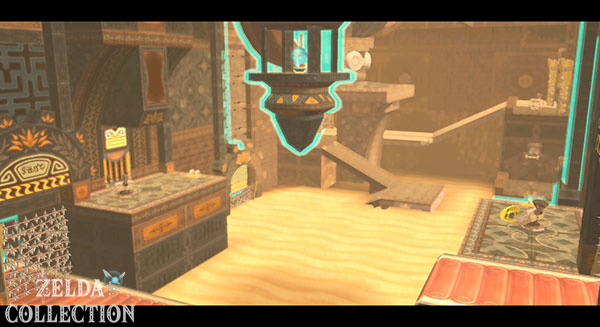
Use Froaks as a bomb substitute
In the next room there are numerous cube-shaped platforms above the abyss. Floating in between are pufferfish-like enemies called Froaks. As long as they float calmly, their spines are retracted. As soon as Link gets too close to them, they inflate and become dangerous. If you hit an unprotected Froak with the Slingshot, it will explode like a bomb. You can use these explosions specifically to destroy boulders.
First jump onto the platform in the southeast and shoot the Froak north of you. If you push it in the right direction, its explosion will simultaneously destroy the pile of rocks behind it. Otherwise you can use a normal bomb. Then work your way from cube to cube to the large northern platform and climb the ladder.
Treasure Chest 4 – the Gust Bellows
The most important chest in the entire dungeon is waiting at the top. Open it and you will receive the Gust Bellows. A constant, powerful stream of air flows out of the vessel. You can use it to clear mountains of sand, blow away small enemies, push Froaks through the air and, above all, drive wind turbines and moving platforms.
Unlike bombs, Deku Cores, or Slingshot ammo, the Gust Bellows has no limited energy or ammo. You can therefore use it for as long as you want. Not only is it required in Lanayru Mining Facility, but it remains part of Link’s equipment permanently and also plays a role in several puzzles and Side Quests later.
Difference in Skyward Sword HD: With motion control, you aim by positioning the controller like in the Wii original. With button controls, you can control the direction of the airflow with the right stick. The Gust Bellows itself works identically in both versions.
Treasure Chest 5 – Blue Bird Feather
Before you leave the room, jump back down from the upper platform and keep to the right or east. There is another blue Treasure Chest on the lower level. Open it and take the Blue Bird Feather. This rare material is one of the game’s more valuable early treasures and is required for several upgrades later on. Normally you have to catch a rarely appearing blue bird with the Bug Net – the fixed chest here guarantees you a copy.
Goddess Plume under the sand
In addition to the chest, you should now clear any large piles of sand on the platforms in this room with the Gust Bellows. On the western raised platform, near the metal box or the later shortcut, there is a particularly valuable find under a large pile of sand: a Goddess Plume. This rare material is lying freely in the sand and is therefore not one of the eleven Treasure Chests in the dungeon. This is exactly why it is overlooked in many quick walkthroughs.
The Goddess Plume is one of the rarest upgrade materials and is required, among other things, for high-quality equipment improvements. If you later want to completely upgrade the Beetle or other items, you will be happy with every copy. So be sure to take it with you.
Then push the metal crate off the edge on the western raised platform. This will open a permanent shortcut. Then blow away all the sand in front of the western door and leave the room.


Open new paths with the Gust Bellows
You will return to the huge central room. First, push aside the metal box blocking the top exit of the ladder. Climb down and exit the room to the south again. You can now use the Gust Bellows in the familiar room with the Staldras. To the northeast lies a large pile of sand, under which both a metal crate and a Floor Switch are hidden. Blow the sand away completely and push the box onto the switch. This will open the western door.
Go through and you will reach another large quicksand room. From the first solid platform, sprint west, then south, and finally east again. Distribute your sprints so that Link’s stamina can fully regenerate on each safe island.
There is an unusually large pile of sand on the eastern platform. Blow him away with the Gust Bellows. There is a Timeshift Stone underneath. Once you activate it, the area completely transforms and several previously seemingly solid platforms become movable.
Treasure Chest 6 – Monster Horn
Jump onto the moving platform west of the Timeshift Stone. There is a wind turbine-like drive on the top. Aim the Gust Bellows at it and blow in the appropriate direction to move the platform forward or backward on the tracks. First get the northern platform and use it as a bridge to the small middle island.
There is a Treasure Chest. Open it and you will receive a Monster Horn. These materials will be needed later for various upgrades and are relatively rare, especially at the beginning, which is why the fixed chest should definitely not be missed here.
Afterwards, return to the southern side. There is a large wind turbine above the next grate. Point the Magic Jug at it and maintain the airflow until the grate is fully raised.
Defeat Beamos and Sentrobe
A movable variant of the Beamos awaits behind the grille. The basic principle remains the same: cut off its body segments along the blue lines and then kill the eye with a piercing attack. With the Gust Bellows you can also briefly throw the opponent off balance, thereby giving you a larger window of opportunity for your attacks.
Then climb down the ladder. A new machine opponent awaits below: the Sentrobe. The flying device first fires a missile at Link. Wait until the bullet is almost at you and hit it back with your sword. A well-timed Shield Bash works even safer. After being hit, the Sentrobe releases two smaller missiles. A blue line runs along each of them; cut through both with an appropriately oriented sword stroke. The Sentrobe then fires a rocket again. Reflect this back and the opponent explodes.
The Sentrobe usually leaves several Rupees behind. Collect them and then focus on the moving platform north of the battle area. Use the Gust Bellows to move it far enough to the right so that you can ascend. Then take it back to the west, climb the ladder to the northern door and defeat the next Beamos. Finally, turn the pinwheel next to the door with the Gust Bellows until the grate is fully opened.


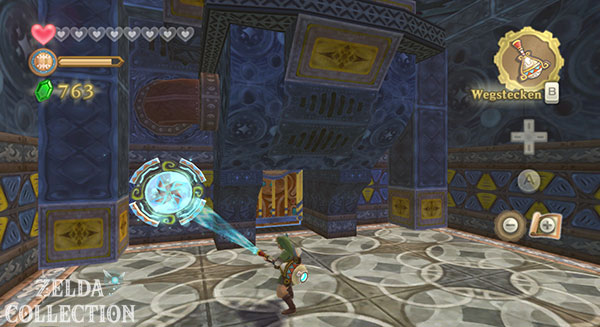
Defeat the first Armos
In the next room two Staldras attack again. Defeat them first so that you can then search undisturbed. To the north is a metal box whose rail is completely buried in sand. Remove the sand with the Gust Bellows and push the box to the end of the designated track. Climb it and pull yourself to the upper level.
First go left or west and jump over the narrow cube-shaped platforms. Blow away the piles of sand. Underneath one of them is a Amber Relic that you should collect.
Afterwards, return to the northern side. There is a large chest behind a grille. There are several sand mountains next to it. Remove them with the Gust Bellows until a Timeshift Stone appears. Activate it with the Slingshot. The previously motionless object next to the door then transforms into a Armos.
To defeat an Armos, aim the Gust Bellows at the pinwheel on its head. The airflow rotates its upper part and forces the robot to open one of its two sides. A Crystal Ball appears underneath. You can destroy one with a normal sword blow, the other must be hit with a piercing attack. After the first Crystal Ball is broken, the Armos jumps more aggressively. Keep your distance, turn it again with the Gust Bellows and finally destroy the second core.
Treasure Chest 7 – Dungeon Map
With the destruction of the armos, both the grille in front of the door and the grille in front of the large Treasure Chest are raised. First, climb to the chest and open it. Inside lies the Dungeon Map of the Lanayru Mining Facility.
Especially in this dungeon, the map is much more than just a guide. On it you can see several bright paths that seem to lead through large areas of quicksand. These are old roads and solid ground that are only hidden under a thin layer of sand. Link doesn’t sink there. This knowledge becomes essential for the next passage.
Then go through the eastern door back into the huge central room and step on the Floor Switch right next to you. The grate rises and opens another permanent shortcut.
The hidden paths beneath the quicksand
There is an area of quicksand in front of you that initially looks insurmountable. Open the Dungeon Map. You can see a bright, winding line under the sand. There is a fixed path right there. Walk slowly along this line. Although Link appears to be standing in the middle of quicksand, he does not sink into the marked areas.
On the map you can see two small labyrinth-like corridors on the western wall. Both entrances are completely covered by sand. First, blow away the northern pile of sand with the Gust Bellows. A low crawl space appears behind it. Follow the narrow passage to the chamber behind it.
Treasure Chest 8 – rare treasure
A blue Treasure Chest is waiting at the end of the first crawl space. Be sure to open it. Depending on the game version and documentation, a Blue Bird Feather or a rare treasure is listed here; What is crucial for our 100% route is that the chest is not left out. Such blue chests are among the best early sources of rare upgrade materials.
Also search the piles of sand in the small chamber. Among them may lie amber half moons and additional Rupees. Then return through the tunnel to the large quicksand room and look for the second buried entrance further south on the same western wall. Remove the sand and crawl through the much longer small maze.


Sand maze with hidden spikes
After the second crawl tunnel, drop into a room completely covered in sand. Numerous spike traps and small aracha are hidden beneath the surface. Use the Gust Bellows systematically and clear away the sand lane by lane. This not only opens up a safe path, but also allows you to discover Rupees and small treasures.
South of the base of the grand staircase is a Floor Switch under a layer of sand. Blow it free and step on it. This will unlock the room’s exit door.
Treasure Chest 9 – 20 Rupees
Don’t leave the room yet. There is a small chest in the northwest or in a corner of the sand labyrinth. You can also see their approximate position on the Dungeon Map. Blow away all the sand in this area and open the chest. Inside is another red Rupee worth 20 Rupees.
When all sand areas have been searched and the chest has been opened, go up the stairs and leave the room through the eastern door.
The movable minecart with Timeshift Stone
You are back in the huge main room of the Mining Facility. There is a large sand mountain right in front of you. Remove it with the Gust Bellows and a special Lore will appear. There is a Timeshift Stone in it. Activate the Crystal Ball with a piercing attack or from a distance. The cart begins to move automatically over the rails. Because the Timeshift Stone moves with it, its sphere of influence also moves through space and only ever allows the immediate section of the past to reappear.
Stay as close to the cart as possible. A Sentrobe is activated as soon as it enters the time range. As before, defeat him by repelling his missiles and cutting the two small missiles along the blue lines. Shortly afterwards the minecart is stopped by a grate. There is a wind turbine above the gate. Use the Gust Bellows to rotate it until the grate is fully opened.
Continue following the lore. Multiple Beam Cyclops will only become active as long as the Timeshift Stone is near them. If someone is out of your reach on the side, you can use the massive cart as a shield against his laser. A later Beamos is standing directly on the rails and must be completely defeated so that the minecart can continue moving.
At the end of the route, the minecart permanently pulls a large part of the main area into its area of influence. Use the Gust Bellows to open the southern grate to create another shortcut.

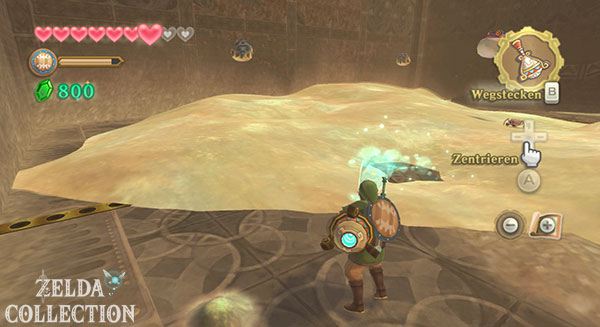


Second Timeshift Stone minecart and the grid to the east
Now go to the eastern section of the main room. There is another cart completely buried in the sand. Blow her free and activate the Timeshift Stone within her. The minecart automatically travels north, gradually allowing the old technical systems to reappear.
Defeat the activated Beamos. Shortly before the minecart reaches the end of the route, a wind turbine appears on the wall. You only have a limited time window as long as the mechanism is within the radius of the Timeshift Stone. Point the Gust Bellows at it and turn it fast enough to raise the grate in front of the eastern door.
If you miss the time, you don’t have to reload the room. Simply deactivate the Timeshift Stone in the lore and activate it again. This causes the cart to move again in the opposite direction and you get another try.
Finally, go through the opened door.
Cross the Conveyor Belts and Solve the Fan Puzzle
In the next room, several conveyor belts are waiting again, this time combined with large pipes from which strong blasts of air emerge at regular intervals. These can sweep Link off the belt and throw him back to the lower area. Observe the rhythm of the jets and only sprint further when the air flow is briefly interrupted.
Cross the first conveyor belt and climb the wall at the end. Go right and throw bombs into the two statues to clear the western path. There is a large pile of sand there. Blow it away and activate the Timeshift Stone underneath.
Now return to the east and sprint across the working conveyor belts to the wall lever. Pull it and a moving platform will come to you. Climb up and use the Magic Jug on the platform’s pinwheel to move to the opposite side. First defeat the Sentrobe there.
Several statues on the walls hide important clues and switches. First, blow up the statues on one side. Robot heads or symbols appear behind them. Note their arrangement or number. Then drive the moving platform to the opposite wall and bring down the three more statues there. Behind them are three Crystal Switch.
The switches must be activated in the order indicated by the robot heads on the opposite wall. From your current position, the correct order is left – right – center. Hit the crystals with the Slingshot or the Beetle. As soon as the combination is correct, the large northern grid moves up.
Two Armos in front of the Big Key
In the newly opened area, two Armos are guarding a large Treasure Chest. Be sure to try to activate the two enemies one after the other. At first, stay on the edge of the marked areas so that they don’t both jump at you at the same time.
For the first armos, point the Gust Bellows at the pinwheel on your head until one side opens. Destroy the visible Crystal Ball with the appropriate attack and repeat the process on the second side. Afterwards, take care of the second Armos in the same way. Two Armos active at the same time make the room unnecessarily chaotic, but they are easy to control individually.
Treasure Chest 10 – Ancient Circuit
After defeating both Armos, the grate in front of the large chest will be raised. Open it and you will receive the Ancient Circuit. This is the Big Key from the Lanayru Mining Facility. Like the Big Key of the previous dungeons, this object also has a three-dimensional shape that must later be correctly inserted into the boss door lock. The official German name is actually “Ancient Circuit”.
Collecting the key opens another door back into the central area.
Treasure Chest 11 – last red Rupee
You are back in the large main room. Don’t go to the boss door right away. To your left, a ladder leads to an elevated path. Climb up and follow the narrow passage. Several Thunder Keese attack you. Kill them and go to the end of the path.
There is the last regular Treasure Chest of the dungeon. Inside is another red Rupee worth 20 Rupees. If you have followed our route completely, you have opened all eleven relevant Treasure Chests of the Lanayru Mining Facility.
Also pull or push the metal box at the end of the corridor to the side. This frees up the ladder there and creates another shortcut.
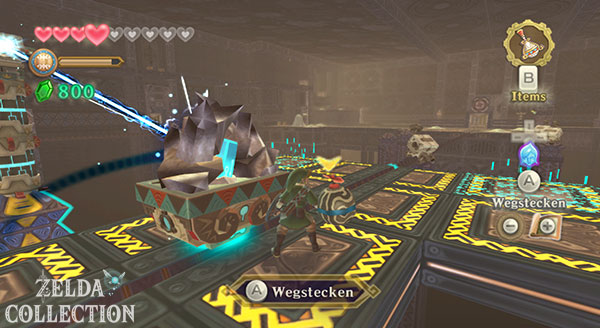


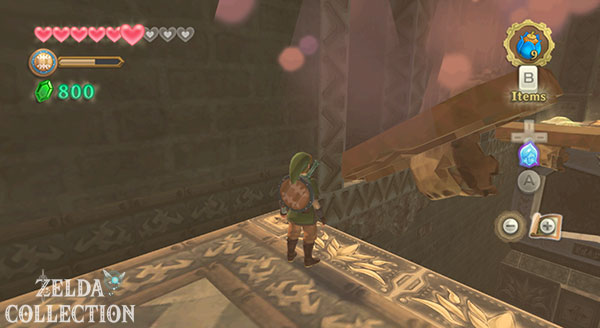


With the last Timeshift Stone minecart to the boss door
Return to the northeast area of the main room. There is another minecart there with a Timeshift Stone. Activate it and jump onto the moving platform next to it. The minecart travels on its own track towards the boss door while you travel parallel to it on your platform.
Aim the Gust Bellows at the wind turbine on your platform and, if possible, always stay within the area of effect of the lore. As soon as you leave the time realm, the rails and platform mechanisms of the past disappear. In addition, several wall nozzles blow powerful blasts of air across your path. If possible, position the cart between Link and the jets so that it serves as a protective shield, or adjust your speed so that you pass the danger spots during short breaks.
At the end of the route, the barrier in front of the boss door is deactivated by the nearby Timeshift Stone. There is another bird statue to the left or west. Activate it and save. Also smash the nearby jars or barrels if you still need hearts.
Insert the Ancient Circuit
Go to the big door. As with the previous large keys, the ancient structure must also be rotated three-dimensionally. Take your time and align it so that all the protrusions fit exactly into the recess in the lock. As soon as the correct orientation is achieved, the structure begins to glow and can be used.
Difference in Skyward Sword HD: On the Wii, you control the rotation of the big key with Wii MotionPlus. In Skyward Sword HD, this works similarly with the Joy-Con when controlling motion; With button control, the structure is aligned with the analog sticks instead.
Then open the door. The final boss of the Lanayru Mining Facility is waiting behind it.
Boss: Moldarach – Phase 1
The Moldarach is a huge, ancient scorpion and has two clearly separated combat phases. At the beginning you concentrate completely on his two powerful scissors. There is a large eye in each pair of scissors, which is only vulnerable when Moldarach holds the pliers open.
Target the boss and observe the position of the opened scissors. Moldarach tries to block your sword between his claws. Therefore, make your cuts exactly in the direction in which the scissors are open. If it is vertically open, you hit vertically; If it opens horizontally, use a horizontal punch. Several correct hits cause the eye to initially change color and then burst.
When the eye turns intense red, Moldarach is preparing to counterattack. Backflip away or dodge to the side. If you stand directly in front of him for too long, he will grab Link with the scissors or strike at high speed.
If possible, focus on one pair of scissors until it is completely destroyed. Then repeat the process on the second side. As soon as both scissors have been severed, Moldarach switches to the second phase of the fight.
Boss: Moldarach – Phase 2
After losing his pincers, Moldarach’s central eye becomes visible. However, the boss immediately burrows into the sand. You can tell its location by the bulge and movement beneath the surface of the sand. If you get too close, Moldarach will push his tail spike out of the ground and try to hit Link.
Now the Gust Bellows is used. Direct the air stream at the sand above Moldarach’s position and blow the surface away completely. You don’t have to clean the entire room; focus on the area under which the boss is currently moving. Once enough sand is gone, Moldarach will be forced out of hiding.
His central eye is now open. Lateral or horizontal sword strikes mostly bounce off the hard armor. Wait for a short opening and do a direct one Stabbing attack in the eye out of. Moldarach then retreats back to the sand.
As the game progresses, small Minighads appear. They can be annoying, but at the same time they are a good source of extra hearts. Eliminate them quickly with normal sword strikes and then focus on the bulge in the sand again. Use the Gust Bellows to clear Moldarach, dodge his attack, and hit the eye with a piercing attack.
After several successful hits, the Dark Aeon Scorpion finally collapses. The boss fight has not been fundamentally changed in Skyward Sword HD; The biggest practical difference is again the choice between motion and button controls.
Collect the Heart Container
After Moldarach’s defeat, the sand in the boss room disappears and a new door becomes visible. A complete Heart Container also appears in the middle. Be sure to collect it before moving on. Link’s maximum health permanently increases by one heart.
Although there is no regular Piece of Heart in the Lanayru Mining Facility itself, the Heart Container of the final boss is of course part of the complete progress and must not be left behind.


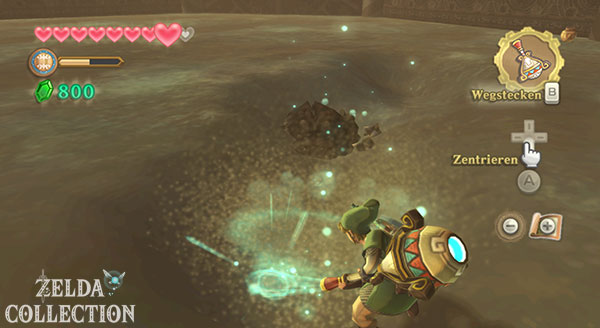


Ride the Minecart to the Temple of Time
After collecting the heart container, go through the newly revealed door. In the following long room there are numerous old statues and a wagon on the rails. However, the facility is currently out of operation. The Timeshift Stone you need is not in your immediate vicinity, but rather high up in a structure on the ceiling.
Start your Beetle and control it until the Timeshift Stone. A hit activates the area’s past and gets the lore running again. Get in and let yourself be automatically transported to the other side. There is a long staircase leading up.
You finally reach the previously buried Temple of Time.
Zelda and Impa meet again
Once at the top, Link meets Zelda again and her mysterious companion, whose name is now or in the course of the scene becomes known as Impa. In front of them is a large Gate of Time. Zelda prepares to leave the present and travel to another era through the Gate.
Before she can pass through, however, Demon Lord Ghirahim appears. Impa stands up to him and creates a magical barrier, but Ghirahim increasingly breaks through her protection. Zelda knows that Link can’t accompany her yet, but she gives him an item that will be crucial for the rest of the adventure.
Obtain the Goddess’s Harp
Zelda throws the Goddess’s Harp to Link. This instrument will remain in your possession permanently and will be needed for numerous important melodies and tests from now on. Unlike instruments from some older Zelda games, you don’t play complicated key sequences. Instead, you move the Goddess’s Harp to a given rhythm.
Difference in Skyward Sword HD: With motion control, the Goddess’s Harp is played like in the Wii original through smooth side-to-side movements. When controlling the buttons, the analog stick takes over this movement. The content of the songs and the puzzles associated with them remain identical.
While Ghirahim breaks through Impa’s defenses, Link intervenes from behind and gives the two women enough time to escape. Zelda and Impa disappear through the Gate. Immediately afterwards, Impa destroys the passageway so Ghirahim can’t follow them.
Ghirahim is outraged by Link’s intervention, but this time decides against another fight and disappears. Fi analyzes the situation and names the next target: Link must return to the Sealed Grounds.
Go to Sealed Grounds
After the scene, use the nearby bird statue to return to Sky. Your next main target is the green Column of Light after Faron and then the Sealed Temple in the Sealed Grounds. A new major section of history begins there.
However, our 100% route will also be after Lanayru Mining Facility Don’t just blindly follow the main story. Obtaining the Gust Bellows and Lyre will unlock additional collectibles,Side Quests and improvements available. We’ll reintegrate them at the earliest reasonable time, before Link permanently moves on to the next large area.