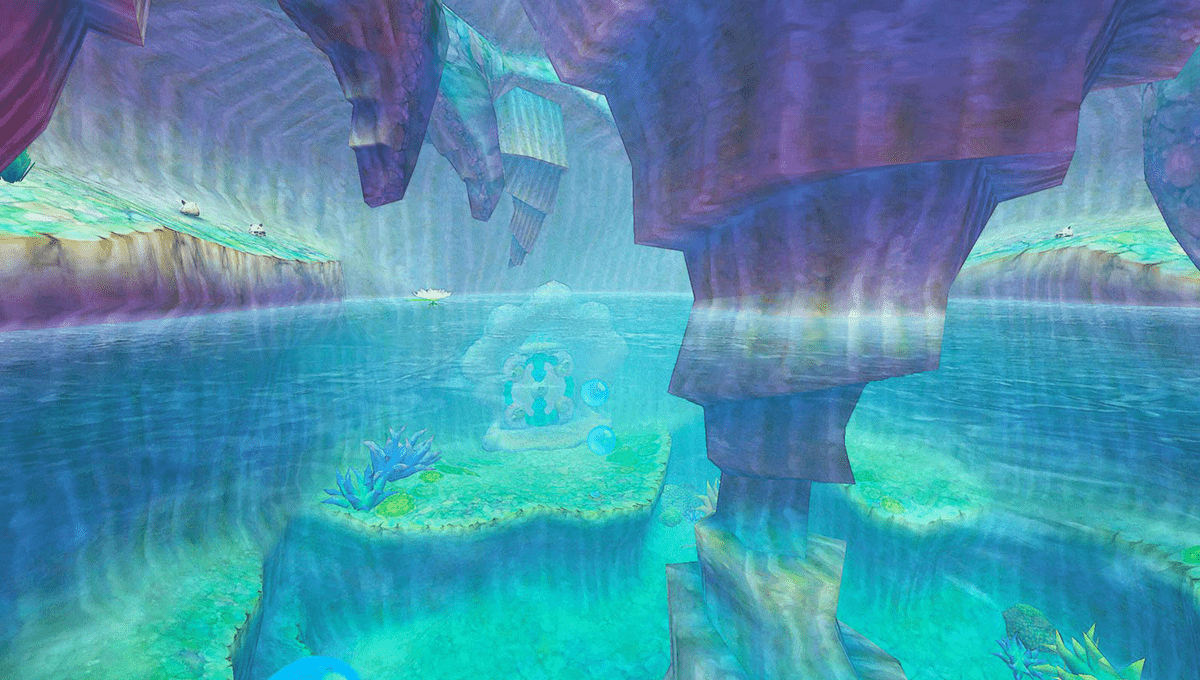

Complete Farore’s Silent Realm to obtain the Water Dragon’s Scale. Climb the Great Tree, speak to Yerbal and reach Lake Floria, then bring Sacred Water from Skyview Spring to Faron.
Back to Faron Woods
Leave the Isle of Songs and follow the blue beam of light out of the Thunderhead. If you followed our previous 100% route, you have already opened the previously available Goddess Chests and now do not need to take an additional detour through the Sky. Therefore fly directly to the green light beam to Faron and choose the bird statue Viewing Platform near the Great Tree as the landing spot.
After landing, activate your Dowsing and set Farore’s Courage as the target. The signal leads to the open area in front of the viewing platform just a few meters from the bird statue. There are several Blessed Butterfly floating on the bare ground. Stand in the middle and take out the Goddess’s Harp. Play Farore’s Courage at the given rhythm. A glowing symbol will gradually appear on the ground.
Place Link in the middle of the symbol and plunge the sword vertically into the ground. The real world disappears and Link enters it for the first time Silent Realm – a silent, unreal version of the forest of Faron.
Farore’s Silent Realm: Collect All 15 Tears
works
Fi cannot accompany Link in this world. More importantly, all weapons and normal items are not available to you during the test. You cannot use sword, shield, bombs, Beetle or potions. Instead you will receive the Spirit Vessel, in which a total of 15 Tears of Farores must be collected.
As long as Link stands in the glowing circle of the starting area, the great guardians remain motionless. As soon as you leave the circle, they wake up and start chasing you. Your salvation is the green tears of Farore. As soon as you collect a tear, the Guardians will be charged for approx 90 seconds returned to its sleeping state. The flower at the top of the soul vessel shows you how much protection time remains. Once their glow has completely disappeared, the Guardians awaken again.
Two additional hazards can immediately terminate protection. The shiny water surfaces within the Silent Realm are called Waking Water. As soon as Link touches them, all Guardians are immediately activated – regardless of how much time has passed since the last tear. Additionally, floating guards with lanterns patrol some areas. If Link comes into their beam of light, they sound the alarm and the Guardians also begin the hunt.
The light fruits distributed everywhere are an important help. If you collect one of them, glowing rays appear for a short time over all the tears that have not yet been picked up, which are visible from a great distance. Especially when it comes to your last tears, you should use these fruits specifically instead of running aimlessly through the forest.
Be sure to take Dusk Relics with you
Next to the tears there are several violet Dusk Relics in the Silent Realm. They are not numbered collectibles, but are among the rarest upgrade materials in the game and are later needed for better shields and other equipment, among other things. You’ll rarely find them during the normal the Surface adventure; the Silent Realm are their most important source.
Our route therefore leads past as many Dusk Relics as possible. If you miss one, your 100% score is not destroyed: Dark Crescents can be farmed in the Trials. However, for an efficient Walkthrough, we take all the specimens that are directly on our route.
Tears 1 to 5 – from the viewing platform to the big root
The first tear Farores is located immediately in front of the starting circle at the foot of the stairs. Run straight for it. This will give you your first 90 seconds of protection immediately. Then climb the stairs to the viewing platform. Shortly before the highest section you should look for the first Dusk Relic to the right of the stairs and collect it. At the top of the platform, the second tear awaits.
The elevated position is ideal for orientation. Many of the green light points can already be seen from here. Jump over the railing and continue on the western side. Right in front of a huge tree root you will find tear number 3. Then run up the root and use the vines on the wall to reach the raised platform. tear number 4 is waiting there.
Jump back down. Nearby you will see a ring-shaped area of Waking Water. In its center is a small safe island with teardrop number 5. Under no circumstances should you enter the glowing water, but use the fallen tree trunk or the safe access to the middle. There is also another Dusk Relic on the same island. First collect the treasure and then the tear or vice versa – the only important thing is that you don’t touch the Waking Water.
Tears 6 to 10 – crawl tunnel, rope and Waking Water
Leave the island again and continue south. Near the next passage is teardrop number 6. There is a low opening directly behind it. Crawl through and stay right on the other side. You can reach a higher level via several ledges, where tear number 7 awaits. There is also another Dusk Relic behind the single tree on this platform.
Next, go to the large root that extends to the southeast. From here you can see a taut rope. Balance carefully over it. At the other end or directly on the rope you reach teardrop number 8. Don’t turn around immediately after collecting it: there is another Dusk Relic below or near the root. Take him with you and then return over the rope.
Jump from the root to the deeper level. South of it lies teardrop number 9 on a small platform. From there you go west. A ring made of Waking Water moves rhythmically in and out around a tree. Watch the cycle and wait for the dangerous water to recede. Then sprint to the safe area on the tree and collect tear number 10. If the water still touches you, the guardians will immediately move. In this case, only speed counts: reach the tear before one of the guards hits you. Collecting them calms the Guardians again.
Tears 11 to 15 – end the exam
Continue to the southernmost section of the forest. There lies Tear number 11. You can then climb up the southern rock wall and another one Dusk Relic collect. Return to the main path and move northeast. Located on an ascending path Tear number 12. If necessary, use a light fruit in this area because the following tears are at different heights.
At the upper end of the path you walk under several large roots. There you will reach tear number 13. Also search the immediate area for another Dusk Relic. The route then heads north back to higher ground. There is another small area nearby with Waking Water. South of it is teardrop number 14. There is another Dusk Relic on or near the northern root of the smaller tree.
For the 15th and final tear you look east. Climb to the higher platform and collect it. As soon as the last tear is in the Spirit Vessel, the normal 90 second timer no longer expires. You still have to return to the starting circle, and a guard with a lantern can still raise the alarm. Therefore, take advantage of the now much more relaxed situation to pick up any missing Dusk Relics in the immediate area without having to walk unnecessarily through the Waking Water.
There is a large tree trunk right next to the last tear. Roll him off the edge. This creates a shortcut to the lower section of the forest. Jump down and run back to the glowing starting circle.
Obtain the Water Dragon’s Scale
Once Link enters the exit circle with all 15 tears, Farore’s test is passed. As a divine treasure you will receive the Water Dragon’s Scale. From now on, Link can not only swim on the surface, but also completely submerge. Underwater you also have access to the Spin maneuver or swimming stroke, which you can use to attack opponents, destroy obstacles and make high jumps out of the water.
Use the Water Dragon’s Scale to explore the newly accessible parts of Faron Woods and collect the available Goddess Chest rewards.
Dive into the Great Tree
Back in the real world, go to the small pool of water southeast of the Great Tree. Dive below the surface of the water and look for the underwater tunnel among the roots. Follow the narrow passage. Pay attention to Link’s air meter and, if necessary, swim through the rising bubbles to replenish your supply. At the end of the tunnel you will emerge inside the Great Tree.
Climb out of the water using the vines. In front of you there are several wooden platforms hanging on ropes. With the Magic Pitcher you can make them move like big swings. Direct a continuous stream of air at a platform until it has enough momentum and only jump to the highest point or to the next safe surface.
Hidden Chest in the Great Tree – 300 Rupees
Before you follow the obvious path to the exit, we make a crucial 100% detour. Instead of swinging the first platform directly to the next swing, swing it towards the raised edge on the side. Jump over at the right moment and follow the narrow path around the inside of the tree. Further up there is a Quadro Deku plant waiting. You can defeat them with the sword or, particularly conveniently, send the Beetle and cut their stem.
Behind her is a solid blue Treasure Chest. Open it and you will receive a Golden Rupee worth 300 Rupees. This chest is completely missing from the old solution section, although it is one of the fixed treasures of the forest of Faron. You should therefore definitely take them with you now on a 100% route.
Then return to the hanging platforms or use the upper path to get to the western exit of the tree.
Goddess Cube No. 13
As soon as you leave the Great Tree through the western exit, you should not climb up immediately. Look over the ledge below the exit. The next Goddess Cube is already on a root or lower platform. Lower yourself in a controlled manner with the Sailcloth and activate the cube with a Skyward Strike.
This artifact unlocks a Goddess Chest on a small island south of the Knight School in Skyloft. Inside are 100 Rupees. We open them after the other two cubes of the Great Tree together with the other new chests.
Climb the Great Tree from the outside
Now work your way up the outside of the tree. Several Skullwandtulas sit directly on the climbing vines. Shoot them down with the Slingshot before hanging on the wall. On a higher platform you can also get a beehive from the branch so that the insects don’t hinder you during the next climbing section.
After a few vines you get back inside the trunk. On a narrow path, a large Wooden Shield Moblin is blocking your passage. His shield initially takes up almost the entire path. You can destroy the shield piece by piece with sword blows, but you have to watch out for his counterattacks. Bombs also speed up the process. As soon as the shield is broken or thrown away, you attack the Moblin directly. Be sure to avoid his final fall – his massive body can still hit Link or knock him off the narrow path even if he dies.
Leave the tree on the other side and activate the bird statue there on the big tree. It is particularly important for our following collecting excursions.
Meet Yerbal at the Top of the Great Tree
Continue climbing up the trunk. Several Bokoblins and Keese are waiting on the upper levels, but with your current equipment they hardly pose a danger. Finally, further tendrils lead far into the crown. There Fi Link alerts you to an unusual noise.
An old Kikwi named Yerbal sleeps in the treetop. Hit him with the Slingshot or the Beetle to wake him up. Ask him about the divine flame. Yerbal doesn’t know their exact whereabouts, but directs Link to the water dragon who lives in Lake Floria south of the forest.
The gate there is sealed with an ancient symbol. Yerbal shows you the complete shape of the symbol: A simple circle is missing from the left crescent-shaped recess. Memorize the symbol. Before we run to the gate, however, we get the two remaining artifacts around the Great Tree.
Goddess Cube No. 14
From Bucha, go to the southeast side of the treetop and look down. On a deeper root you will see the second artifact. It’s best to mark the cube with a card light before jumping. Then drop down and steer Link straight towards the platform as you fall. Just before landing, open the Sailcloth.
Activate Goddess Cube No. 14. The associated Goddess Chest is on an island east of the yellow Column of Light after Lanayru and contains another Piece of Heart. The chest sits on a raised inner ledge. It can already be achieved through a precise dive; With the later Clawshots, access just becomes more convenient.
Goddess Cube No. 15
For the third cube you return to the treetop via the bird statue or the well-known climbing path. Near Bucha, a large platform protrudes from the trunk towards the viewing platform. Go south to the edge and hang on the edge. Below Link you will see a smaller platform with a taut rope.
Drop onto this platform with the Sailcloth and carefully balance on the rope. On the other side, Goddess Cube No. 15 is waiting. Activate it with a Skyward Strike. His Goddess Chest is located within the Thunderhead northeast of the Isle of Songs and contains the Ruby Medal. As long as it is in your Adventure Pouch, Rupees will appear more often.
Open the Goddess Chests with the Water Dragon’s Scale
We have now activated three new artifacts and also have the Water Dragon’s Scale. This is the ideal time for a short flight through the sky, because a total of four previously open rewards can now be collected without any later story progress. Use the bird statue on the Great Tree and return to Sky.
Goddess Chest #9 – Piece of Heart in Skyloft
Fly to Skyloft first. Jump into the large river on the eastern side of the main island and dive. At the foot of the windmill or below Kukiel’s house there is an underground water channel. Swim in and follow the tunnel until you emerge in a previously locked storage room.
Here are two Treasure Chests. The normal blue chest contains a Silver Rupee worth 100 Rupees. Right next to it is the Goddess Chest, which has already been activated in Eldin. Open it and you will receive the long reserved Piece of Heart. This room was previously not accessible without Water Dragon’s Scale.
Goddess Chest #13 – 100 Rupees
Stay in Skyloft and go south past the Knight Academy to one of the wooden jumping platforms. A small isolated island floats below the main island. Jump off the platform and control Link onto it with the Sailcloth. The Goddess Chest from artifact number 13 is freely accessible there.
Open it and you will receive another Silver Rupee worth 100 Rupees.
Goddess Chest #14 – another Piece of Heart
Now fly to the conspicuous island east of the yellow Column of Light to Lanayru. It has an outer ring and a deeper or inner area. The Goddess Chest sits on a raised ledge within this area. Without Clawshots you have to reach them by a precise dive.
Fly your Loftwing as high as possible over the island, jump off and align Link with the raised platform early on. Only brake immediately before landing with the Sailcloth. If the attempt fails, you call your Loftwing and simply start again. Open the chest and take the Piece of Heart.
Goddess Chest #15 – Rupee Medal
The last detour leads back into the Thunderhead. There is a very small island northeast of Isle of Songs. Land on the bottom surface. Several Skullwandtulas sit on vines on a wall. Shoot them down with the Slingshot before climbing up.
There is also a marked grave site on the island. Dig there with the Digging Mitts to reveal an airstream that can carry you to a regular Treasure Chest with an additional rare treasure. Then climb up the cleared vines. At the top is the Goddess Chest with the Ruby Medal. It increases the probability of Rupees appearing as long as it occupies a slot in your Adventure Pouch.
Optional: Improve Sacred Shield
Thanks to Farore’s test, you now have Dark Crescents for the first time. If you have also collected enough bird feathers and decorative skulls, it is worth visiting Gondo in the bazaar. The Sacred Shield can now be upgraded to the next level. Its greatest strength remains automatic regeneration and complete immunity to fire and electricity damage.
If you are missing a random material, you don’t have to force long farming. The upgrade remains available at all times. However, if you already have the necessary treasures in your bag, now is the perfect time to upgrade.
Open the gate to Lake Floria
Return to Faron. When you have completely completed the detour to Sky, it is best to choose the bird statue on the Great Tree or the viewing platform again and walk from there to the southern end of the forest.
In front of the large stone gate you will find the same incomplete symbol that Bucha described. Hold the sword up and load one Skyward Strike on. Then approach the wall and draw one with the tip of your sword as closed a circle as possible into the left crescent-shaped gap. The circle does not have to be completely geometric, but if possible it should not touch the surrounding lines.
Once the game recognizes the shape, the symbol transforms and the large doors open. Follow the long hallway to the edge and jump into the water. Link is pulled deep underground by the current and reaches Lake Floria.
Follow Jellyf through Lake Floria
First let the current carry you through the underwater tunnel. After a small waterfall, Link encounters a Jellyf. The shy water creature initially flees from you. Swim after it. When it disappears through a wooden grate, you actively use the Water Dragon’s Scale for the first time: Swim directly towards the grate and, just in front of it, perform a Spin maneuver. Link smashes the boards and can continue following.
The Jellyf realizes that Link is wearing the Water Dragon’s scales and begins to trust him. He explains that his ruler has been seriously injured in an attack and leads Link further through the underground waterways.
Froaks and the hidden silver Rupee
In the next large pool, several explosive Froaks or Froaks float in the water. The exits are partially blocked by fragile rocks. Swim towards one of the enemies and perform a Spin maneuver, knocking them into a boulder. After a short delay, the creature explodes and destroys the blockage.
For the direct route it is enough to blow up the northwestern rock wall. For our 100% route, however, we clear the entire space. Particularly important is the large boulder in the middle of the basin. Throw a Froak at it. After the explosion, a Silver Rupee worth 100 Rupees is revealed underneath. There may be additional Rupees and materials behind additional rocks.
Jump over bars with the Spin maneuver
Follow the Jellyf into the next tunnel. This time a tall metal grate blocks the path, but cannot be destroyed. Swim back a few meters, point Link diagonally upwards towards the surface of the water and accelerate towards the grate. Just before you surface, you run the Spin maneuver. Link jumps out of the water like a dolphin and flies over the obstacle.
This technique will often be needed later in the game. In Skyward Sword HD, the Spin maneuver is triggered using button control via the corresponding action button; With motion control, it works similarly to the Wii original via a quick controller movement.
Fixed Chest – Goddess Plume
A little further you will reach a dry platform with a bird statue. Be sure to activate it. From here a small path leads to a large blue Treasure Chest. Open it. Inside lies a Goddess Plume, one of the rarest upgrade materials in the game. This solid find is particularly valuable because otherwise gifts from the goddess rarely come from random treasure sources.
Goddess Cube No. 16
Don’t leave the area with the Treasure Chest yet. From the bird statue you go over the dry path or the small coral bridge to the opposite side of the cave. Goddess Cube No. 16 is clearly visible there. Activate the cube with a Skyward Strike.
The accompanying Goddess Chest contains a Golden Rupee worth 300 Rupees. It is located on a small island in Skyloft area, but can currently only be reliably reached with the later Clawshots. We therefore activate the cube immediately, but deliberately leave the chest reserved for the next possible time.
Defeat the Cranioc
Jump back into the water and follow your Jellyf guide. After another dolphin jump, a huge armored fish swims across the next room. The Cranioc has a clearly marked weak point on its forehead and attacks Link with frontal ramming attacks.
Swim directly towards him and perform a Spin maneuver on his head. The first hit stuns or weakens it; another targeted attack on the forehead defeats the monster. The Jellyf then swims to the large gate at the end of the pool and opens access for Link.
Meet Faron, the Water Dragon
Behind the door you enter a huge underground hall. Swim to the central platform and catapult yourself out of the water with a Spin maneuver. In the large bowl is the water dragon Faron. Despite its small current size, it is the guardian of the entire region.
Ask him about the divine flame. However, Faron is not ready to show Link the way right away. Demon Lord Ghirahim has seriously injured him, and the water in his healing pool no longer has enough strength for a full recovery. Link should therefore get a fresh portion of Sacred Water. Fi expands the Dowsing with the corresponding target.
For the task you need a free Empty Bottle. If you followed our route, you already have three bottles and should be able to empty one of them without any problem.
Two Treasure Chests at the water dragon
Before you leave Faron’s hall, we will empty it completely. Jump into the water and first swim to the west or left side. Water screw up to get to the raised edge and follow the narrow path. There is a Treasure Chest with a Silver Rupee worth 100 Rupees.
There is a second raised platform on the opposite eastern side. You can also reach them by jumping out of the water. The blue chest there contains a rare treasure; In many versions this is a dark crystal, and in general the chest is one of the valuable treasure sources in this area. What is crucial for our 100% pass is that both fixed chests have been opened.
Floria waterfall and shortcut to forest
Leave the hall via the northwest tunnel. You reach the open area at Floria Waterfall. Immediately activate the bird statue. It will later become our quickest way back to the Water Dragon and finally to the next dungeon.
Floating nearby again is Blessed Butterfly. Play the Goddess’s Harp to make a Gossip Stone appear and take its treasure. The path next to the bird statue leads back to the southern Faron Woods. Push the large tree trunk off the edge there. This creates a permanent shortcut between the Floria waterfall and the well-known forest area.
You can also see climbing tendrils and another area above the bird statue. You can’t reach him yet. Another Goddess Cube will be waiting there later, for which the Clawshots is required. It is deliberately not yet part of our current collection.
The Sacred Water is in the Skyview Temple
Activate your Dowsing for the Sacred Water. The signal points clearly north to Skyview Temple. You can walk the entire way back through the forest and the deep forests. However, the bird statue at the Floria waterfall is much faster: Return to Sky, fly straight back through the green Column of Light and choose the landing spot at Skyview Temple.
Enter the dungeon. Even though you have already completed it, some enemies and doors have changed since your first visit.
Goddess Wall in Skyview Temple
Follow the familiar path through the entrance area. You will soon meet a Mogma who is also looking for treasure. Near him, several Blessed Butterfly are floating in front of a seemingly normal wall. Get out the Goddess’s Harp and play a few notes. A Goddess Wall then appears on the rock surface.
Charge your sword with a Skyward Strike and then draw a symbol on the glowing surface with the tip of your sword. Different shapes produce different rewards: for example, a heart can produce hearts, a circle can produce bombs, and a ruby drawing can produce corresponding money. For 100% progress, it is not important which reward you choose; The crucial thing is to use the new mechanics once and not to overlook the discovery.
Find the lost Small Key
Continue north. A door that was open on your first visit is locked this time. The Mogma lost his Small Key somewhere in the temple. Therefore, enter the eastern side room and follow the familiar path to the place with the stone tablet.
Jump into the water. Thanks to the Water Dragon’s Scale, you no longer have to just swim on the surface. Dive through the low opening into the side area where you activated a water level switch when you first visited the temple. Then climb up the vines.
There is a marked area of earth on the upper path. Dig them up with the Digging Mitts and Link will find the lost Small Key. Return to the locked door and use it.
Catch-up chance for the Piece of Heart in the temple
If you have followed our 100% route since the first visit, you have long since collected the Piece of Heart in the central circular room. However, if you started the guide later or missed the discovery back then, you now have another easy opportunity.
The Piece of Heart is located behind a grille on the north side of the circular main room. Send your Beetle to the top of the central structure and activate the red Crystal Switch there. The gate opens and you can collect the Piece of Heart.
Defeat the Bokoblins before the Former Boss Room
Work your way into the large room in front of the previous boss area. At the other end of the gorge, several Bokoblins have taken up positions and would throw missiles down Link as he balances on the rope. You should therefore avoid a direct fight.
Start the Hook Beetle instead. Several thunderflowers grow on the opposite side. Pick up a bomb with the gripper arms, fly over the Bokoblins and drop it directly on the enemies. Repeat the process until the path is clear. Then balance over the rope.
Three Stalfos in the former boss room
This time, wait in the room where you fought Ghirahim on your first visit three Stalfos. The enemies are individually significantly stronger than normal ones Bokoblins, together they can quickly surround Link. Therefore, don’t try to blindly join the group. Stick to the outer edge of the room and lure one Stalfos away from the others at a time.
Watch his two swords and attack from a direction that won’t be blocked. A well-timed Shield Bash also opens an excellent window for multiple hits. If two or three Stalfos are close together, a spin attack can knock back several enemies at once, but should only be used if there is enough space.
After the victory, the path to Skyview Spring opens.
Bottle the Sacred Water
In the source you activate the Dowsing again. Several waterfalls look nearly identical, but only one carries the required Sacred Water. Follow the strongest signal and stand directly under or in front of the corresponding source.
Open your bottle inventory and fill a Empty Bottle with the water. Then briefly check the inventory: The bottle must be expressly labeled as Sacred Water. Normal water from another area will not accept Faron.
Behind the large statue is also the Goddess Cube, which we activated immediately after the first defeat of Ghirahim. If you followed our route, there is nothing left to do there. If you forgot back then, be sure to activate the cube now with a Skyward Strike.
Back to the water dragon
You don’t have to walk backwards out of the entire temple. Return to the next bird statue or leave the dungeon and travel via the Sky directly to the bird statue Floria Waterfall. Jump into the water there and swim back to Faron’s Hall.
Talk to the water dragon and hand over the Empty Bottle with the Sacred Water. The effect is immediate: Faron returns to its full size and power. Impressed that Link has successfully completed his task, the water dragon keeps his promise and opens the huge waterfall that has previously blocked the way to the sanctuary.
Prepare to Enter the Ancient Cistern
Before you enter the next dungeon, Farore’s Trial should be completely completed and the Water Dragon’s Scale should be in your possession. All 15 Tears were collected and several Dark Crescents were recovered along our route. The scale now allows Link to permanently dive and use the Spin maneuver.
In the Great Tree was the solid one Treasure Chest with the Golden Rupee worth 300 Rupees open. In addition, all three were at the second Faron-Visit accessible artifacts of the Goddess activated. This increases our ongoing status from twelve to twelve 15 activated artifacts.
The subsequent sightseeing flight revealed the newly accessible Goddess Chests with a silver Rupee, the Ruby Medal and the same two Pieces of Heart open. In addition, the regular chest with another 100 was found in the hidden storage room of the Skyloft Rupees emptied.
At Lake Floria you have collected the solid silver Rupee under the large rock, the Goddess Plume at the bird statue and both Treasure Chests in the hall of the water dragon. In addition, Goddess Cube No. 16 was activated. However, his associated Goddess Chest still requires the Clawshots and is therefore deliberately reserved for the next suitable section. Lake Floria itself does not have a regular Piece of Heart.
Finally, the Skyview Temple was crossed a second time, the lost Small Key was dug up and the Sacred Water was bottled from the spring. The Piece of Heart and the Goddess Cube from the first visit were only made up if they were previously missing.
Continue to Ancient Cistern
After Faron’s recovery, jump back into the water and swim to the now open passage behind the large waterfall. Behind it rises the Ancient Cistern, the fourth major dungeon of Skyward Sword.
One of the most important pieces of equipment in the entire game awaits you in the Ancient Cistern: the Clawshots or the whip opens new paths and at the same time changes which collectibles are accessible in regions you have already visited. We also play this dungeon completely at 100 percent – with all fixed Treasure Chests, the Dungeon Map, the Big Key, all rare materials and the Heart Container after the boss fight.