
This Walkthrough uses The Legend of Zelda: Ocarina of Time – Master Quest for the GameCube as a basis. It can also be used for Ocarina of Time 3D – Master Quest. However, the entire game world is mirrored on the Nintendo 3DS. All information such as left and right must be rethought accordingly. Additionally, enemies in the 3DS Master Quest deal double damage.
Master Quest or normal version?
The overworld, storyline, and most optional collectibles outside of the dungeons are basically the same as the normal Ocarina of Time. The dungeons in Master Quest, on the other hand, have been completely reworked: enemies, switches, puzzles, chests and the Gold Skulltulas are sometimes in completely different positions. For the normal dungeons you should therefore use our regular Ocarina of Time walkthrough.
Our Master Quest journey begins as usual in Kokiri Forest. Link is the only Kokiri without a fairy of his own and is therefore often viewed as an outsider by the other inhabitants of the forest. One morning the Great Deku Tree sends the fairy Navi to Link. The guardian spirit of the forest has been afflicted by a curse and urgently needs his help. However, before Mido lets us through to Great Deku Tree, we first have to get a sword and a shield.
Quick Overview: Kokiri Forest and Great Deku Tree
| Item or task | Location |
|---|---|
| Kokiri Sword | Kokiri Forest Training Grounds |
| Deku Shield | Kokiri store for 40 Rupees |
| Deku Sticks | Deku plants in front of the Great Deku Tree |
| Deku Staff Upgrade – optional | Lost Woods, Dealer Deku – 40 Rupees |
| Dungeon Map | Great Deku Tree – upper main room |
| Gold Skulltula 1/4 | Great Deku Tree – Box next to the Dungeon Map |
| Fairy Slingshot | Great Deku Tree – upper side room |
| Compass | Great Deku Tree – upper side room |
| Gold Skulltulas 2–4/4 | Only fully accessible on a later visit |
| Heart Container | After Queen Gohma |
| Kokiri’s Emerald | From Great Deku Tree after the dungeon |
| Gold Skulltula in Kokiri Forest | After the Great Deku Tree at night behind the house of the All-Knowing Brothers |
| Ammo bag for 40 Deku cores – optional | Lost Woods after receiving the fairy slingshot |
The Kokiri Forest
After the opening sequence, Navi wakes Link in his treehouse. Leave the house and climb down the ladder. Saria welcomes you right in front of the entrance. You can now move freely in the Kokiri Forest, but the direct path to Great Deku Tree is blocked by Mido. He won’t let Link pass until he’s equipped with a sword and a shield.
We can find the sword for free. For the Deku Shield, however, we need 40 Rupees. We get the sword first because we can use it to smash bushes and collect more Rupees more quickly.
The Kokiri Sword
From Link’s treehouse, head towards the training grounds. Climb the small hill and walk between the wooden fences. There is a low tunnel on the back rock wall. Stand in front of it and crawl through.
On the other side you will enter a small labyrinth. A large boulder rolls continuously through the corridors along a set route. First, wait until he rolls past Link and follow him with enough distance. Use the niches on the side if the boulder comes closer again.
Work your way through the narrow passages to the large Treasure Chest on the tree stump. Open it and you will receive the Kokiri Sword. Equip it directly in the equipment menu. The Kokiri Sword is Link’s most important weapon during his childhood and remains relevant until he later obtains the Master Sword or during all future trips into the past.
New weapon: Kokiri Sword
The Kokiri Sword can only be used by young Link. Take the opportunity on the training ground to try out horizontal punches, stabbing attacks, jumping attacks, backward jumps and side jumps.
Before you leave the area, you can collect the blue Rupees lying around. Wait until the rolling boulder has passed and then return to Kokiri Forest through the crawl tunnel.
40 Rupees for the Deku shield
Next we need at least 40 Rupees. There are enough solid ruby finds in the Kokiri Forest right from the start, so you don’t have to randomly mow grass for long. Mido’s house is particularly productive. Open all the small Treasure Chests there. You can find more Rupees behind several houses, under stones, in bushes and on the raised wooden walkways.
Another easy option is at the small pond in front of the Kokiri shop. Jump over the stepping stones lying in the water one after the other without falling in. For a successful crossing you will receive a blue Rupee. Additionally, you can use the freshly obtained Kokiri Sword to smash the bushes throughout the village and collect the Rupees hidden there.
Once you have at least 40 Rupees, you enter the Kokiri shop with the red roof. For 40 Rupees, purchase the Deku Shield and equip it in the equipment menu.
New Equipment: Deku Shield
The Deku Shield is the only normal shield that young Link can actively hold in front of him. Be careful with fire: Burning Keese or other fire attacks can completely destroy the shield. In this case, you will have to buy a new one or find a replacement later.
Optional: Deku Staff upgrade to 20
For the main plot you can now go directly to Mido. However, for our full 100% route there is already an optional improvement in the Lost Woods. It’s not absolutely necessary, but it makes Master Quest easier because Deku staffs are particularly often needed for fire puzzles in the first dungeon.
If you want to buy the upgrade now, collect more 40 Rupees. Then enter the Lost Woods and go left twice from the entrance. At the bridge, jump to the lower level and look for the merchant Deku below the transition.
Hold up the Deku Shield and reflect the spit out Deku Nut back at the merchant. After being hit, he leaves his flower and offers Link an upgrade. Pay 40 Rupees. Link can then instead of ten in total 20 Deku Sticks carry.
Optional Upgrade: 20 Deku Sticks
This improvement is already available now, but does not necessarily have to be purchased before the Great Deku Tree. If you don’t want to collect the additional 40 Rupees, we will do the upgrade on a later visit to the Lost Woods.
Then return to Kokiri Forest.
The path to Great Deku Tree
Now go to Mido, who continues to block the narrow path in the eastern part of the village. With Kokiri Sword and Deku Shield equipped, he reluctantly acknowledges that Link meets the requirements and allows passage.
Several Deku plants grow in the narrow corridor behind it. Defeat them with the Kokiri Sword. If you attack them while they are fully upright, they will often drop Deku Sticks. Collect as many of them as possible, as we need them for several fire puzzles in Great Deku Tree.
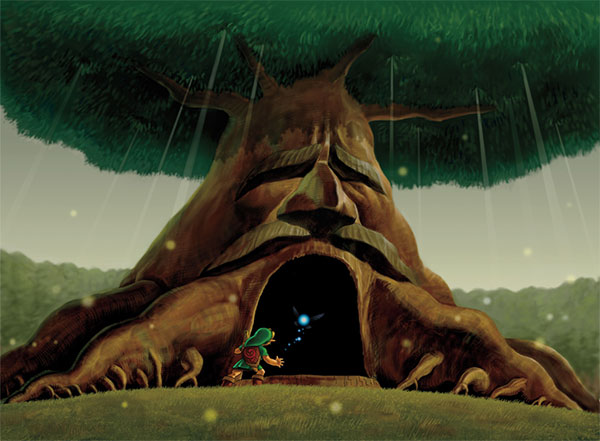
At the end of the path you reach the Great Deku Tree. He reports a curse that is affecting him from within and asks Link for help. Confirm that you are ready. The Great Deku Tree opens its enormous mouth and reveals the entrance to the first dungeon.
The Great Deku Tree – Master Quest
Immediately after entering it becomes clear that Master Quest is significantly different from the normal version. While the basic architecture of the Deku Tree is familiar, enemies, switches, chests, and puzzles have been redistributed. Particularly noticeable are the numerous Gohma eggs, from which small larvae hatch when Link gets too close to them.
3DS Master Quest:
The entire dungeon is mirrored compared to the GameCube version described here. So for example, if this solution says “right”, the corresponding target on the 3DS is usually on the left. The puzzles themselves and the items required are otherwise the same.
Skulltula note:
In the Master Quest Deku Tree there are a total of four Gold Skulltulas. However, on the first visit we can only one collect from it. The remaining three will later require, among other things, Boomerang, the anthem of the times and a way to blast rocks. We mark their positions now and return specifically later.
The Dungeon Map
In the large main room you will see the familiar spider web above the opening in the floor. It later leads to the basement, but is not our destination at the moment. Eliminate the Deku Plants on the ground and initially ignore the vines covered in Skullwandtulas.
Instead, use the ladder on the side of the room and follow the raised wooden path. Automatically jump over the smaller gaps and look out for the Gohma eggs. If you approach an egg, a larva may pop out. With the Kokiri sword, just a few hits are enough.
At the end of the path there is a large Treasure Chest. First, eliminate the Gohma egg right next to it and watch out for another larva that can fall from above. Then open the chest. You will receive the Dungeon Map of the Deku Tree.
Gold Skulltula 1/4
There is a wooden box right next to the chest with the Dungeon Map. Roll it with Link to break it. The first Gold Skulltula of our Master Quest solution is hidden under the boards.
Defeat the spider with the Kokiri Sword and collect the remaining symbol. This Skulltula is the only one of the four dungeon spiders that we can reach during our first visit.
Age: young link
Requires: Kokiri Sword
time: any time
For the fairy slingshot
Behind the map chest there is an overgrown wall leading up. Climb the vines and follow the upper loop counterclockwise. Defeat the Deku Plant guarding the path, then step on the yellow Floor Switch.
The switch lights several torches in the main room. At the same time, cobwebs that previously blocked a side entrance burn. Go through the now accessible door.
In the next room there are several Gohma larvae and Deku plants waiting. First eliminate all enemies on the ground. After that, light a Deku Stick on the already lit torch and jump to the lower level. You can use the burning stick to light another torch there. This will cause a small Treasure Chest to appear.
Then climb back to the entrance side and step on the Floor Switch. Three moving platforms rise from the depths. Jump from platform to platform onto the opposite ledges. After you have eliminated all enemies there, a large Treasure Chest will appear.
Open it and you will receive the fairy slingshot. The smaller chest only contains a blue Rupee.
New weapon: Fairy Slingshot
The fairy slingshot shoots Deku cores and is young Link’s most important ranged weapon. She can activate Eye Switch, defeat Keese and Skullwandtulas from a safe distance, and destroy Gohma eggs before the larvae hatch.
The path to Compass
Return to the main room and drop down one level until you reach the area surrounding the Dungeon Map again. One of the previously lit torches continues to burn. Light a Deku Stick from it and carefully jump across the gap to the door blocked by a spider web.
Touch the net with the burning stick. Once it’s completely burned down, go through the door. In the next room there are two Gohma eggs and a particularly large Deku plant. It’s best to destroy the eggs from a distance with the fairy slingshot. Then stun the large plant with a Deku Core and attack it with the sword.
There is a golden eye above the next door. Shoot it with the fairy slingshot. The eye reacts to the hit and the door opens.
In the following room you should first take out all the Gohma eggs, Skullwandtulas and the normal Skulltula hanging from the ceiling with the fairy slingshot. Then jump over the gap to the large Treasure Chest and open it. Inside is the Compass.
Gold Skulltula 2/4 – only available later
This room already contains the second Gold Skulltula of the Deku Tree. From the compass chest, look up at the vines. An area blocked by rocks currently prevents access.
On your first visit you cannot meaningfully remove these rocks and then you cannot collect the Skulltula symbol from a distance. So we’ll return later. It’s most convenient to kill all three remaining Skulltulas together as soon as Link has the Boomerang, bombs or Bombchus and the Song of Time.
Remember for later:
Gold Skulltula 2/4 is in the room with the Compass above the vines behind rocks. Bombchus can reach the rocks directly. Alternatively, the area can be opened up later using the Song of Time and Bombs. The Boomerang is particularly practical for the removed symbol.
Then turn back to the entrance and use the fairy slingshot to shoot the folded-up ladder above the door. It falls down and gives you an easy way back.
Down to the basement
Return to the large main room and drop down to the lowest level. Light a Deku Stick on the torch and run to the large spider web in the middle of the floor. Touch it with the flame or roll the burning stick over it. The net catches fire and reveals the deep shaft below.
Jump through the opening. Link falls down several stories and lands safely in a pool of water in the basement of the Deku Tree.
Climb onto the raised platform nearby. There are several Deku plants growing there and a Floor Switch on the ground. Defeat the plants and step on the switch. A torch is lit on the opposite side.
Swim or jump to the torch, light a Deku Stick and use it to burn the nearby spider web. There is another switch behind the net. Operate it. On the previous platform, a small Treasure Chest appears with a blue Rupee.
Above the door on this level is a Eye Switch. Hit him with the fairy slingshot and go through the opened door.
Gohma Larvae and Trader Deku
A Trader Deku lurks in the next room, while several Gohma Eggs are scattered around. A particularly safe Master Quest tactic is to target the Trader Deku and use the shield to throw back the Deku core he has shot. The reflected shot can hit one of the Gohma eggs at the same time.
Destroy all the eggs and then hit the merchant himself with his own missile. As soon as he escapes from his flower, you can also hit him with the fairy slingshot if necessary. Also check the ceiling as there is another egg hanging there.
After all enemies have been eliminated, the door opens back to the previous room. However, the second door remains locked. Therefore, briefly return to the burning torch in the previous area and light a Deku Staff.
Carry the flame into the enemy room and light the two extinguished torches there. As soon as both burn at the same time, the further path opens.
The moving platform and the spike trap
Directly behind the next door is a small Treasure Chest with a heart. Collect it when Link has lost health. Then look up and destroy the Gohma egg on the ceiling with the fairy slingshot before it becomes a larva.
In this room, a platform moves under a horizontal spike trap. First comes the Floor Switch. This will light a torch. Ignite a Deku Staff and immediately jump onto the moving platform.
When Link approaches the spiked roller, hold the shield or crouch on the platform so that the spikes pass over his head. Jump off to the other side and light the two extinguished torches there. Once both are burning, the grate opens to the next section.
Later find:
There is also a Treasure Chest in this area, which we cannot reach on the first visit. It does not contain any item necessary to complete the dungeon and will be taken into account in our later 100% return.
Then remove the normal Skulltula and climb the raised ledge to the next door.
The room with the tombstones
In the next section you should hardly move at all at first. Several Gohma eggs hang from the ceiling and can fall at the same time if Link walks too far into the room. So shoot as many eggs as possible from the entrance with the fairy slingshot. Also eliminate the Keese.
Afterwards, continue into the next large room. Several torches and stone tombs give this area the appearance of a small underground burial chamber. Keese are on the torches here too. Shoot them first before handling a burning Deku Staff.
There are two Gold Skulltulas in this room, which we can locate on the first visit but cannot yet collect.
Gold Skulltula 3/4 – Song of Time required
A Gold Skulltula sits high up on the ceiling. There is currently no way to reach their location and reliably collect the symbol. Later we play the Song of Time in several places between the tombs. This causes blue time blocks to appear, which together form a kind of staircase.
Using these blocks we can get high enough to defeat the Skulltula. We then link the removed symbol with the Boomerang.
Gold Skulltula 4/4 – Boomerang requires
Another side room is blocked by a spider web. There is a large Deku plant waiting behind this net and the fourth Gold Skulltula sits on the back wall. We can burn the cobweb now, but the symbol of the Skulltula will then be out of our safe reach.
Since we have to go back for the previous spider with Song of Time and Boomerang anyway, we’ll do both finds together later. For the current main path, instead take the other passage blocked with cobwebs back to the previous basement area.
100% return to Great Deku Tree:
After receiving the boomerang and the Song of Time, we return here again. Then we collect Skulltula 2/4 in the compass room, Skulltula 3/4 on the ceiling of the burial chamber and Skulltula 4/4 in the side room behind the cobweb in a single round.
The path to the lowest level
After you get back through the low crawl tunnel into the large basement room, you find yourself on a previously inaccessible raised ledge. To the left or nearby is a merchant Deku, from whom you can buy a new Deku shield in an emergency if your original shield was destroyed by fire.
Eliminate the enemies on the platform and then push the large block over the edge into the water. The block now serves as a permanent step between the lower and upper levels.
Jump down and light a Deku Staff on the torch on the low platform. Climb back up using the block you just moved and run to the spider web in the ground. Touch them with the burning stick. The net burns and Link can jump through the opening into the deepest level of the Deku Tree.
The Mystery of the Three Deku
At the bottom you will land again in a small pool of water. There are three Deku traders waiting in front of the boss door that must be met in a specific order. Everyone fires Deku Cores at Link. Hold up your Deku Shield and reflect the projectiles at their owners.
In the GameCube Master Quest, the order is:
left → right → center
or counted as positions from left to right: 1 → 3 → 2.
If you play the completely mirrored 3DS Master Quest, the corresponding pages will be mirrored. There the spatial order is right → left → middle.
The last Deku gives up after the hit and reveals to Link the crucial clue for Queen Gohma: her big eye is also her weak point. The boss door will then open.
Boss: Queen Gohma
Enter the dark boss room and walk a few steps to the center. Queen Gohma initially hangs from the ceiling. Look up with the camera until you see her big red eye. Once it notices Link, the giant armored spider jumps to the ground and Master Quest’s first boss fight begins.
The basic combat is the same as the normal version of Ocarina of Time. Gohma’s only truly vulnerable spot is her eye. Once it lights up red, you can stun her with the Fairy Slingshot or a Deku Nut. The fairy slingshot is usually more reliable because you can react from a greater distance.
When Gohma runs towards Link on the ground, keep enough distance and watch her eye. Just before an attack it glows red. Immediately shoot a Deku Core into it. Gohma falls to the ground and remains immobile for a few seconds. Run to her eye and attack with the Kokiri Sword. Jump attacks are particularly effective.
After a few hits, Gohma retreats to the ceiling and begins to lay several eggs. Now there are two options. You can shoot the eggs with the fairy slingshot before they fall to the ground and larvae hatch. It’s even better to hit Gohma’s red eye already on the ceiling. A successful shot causes them to crash immediately and opens up a particularly long attack phase.
Master Quest Tip:
Deku staffs deal significantly more damage than the Kokiri sword. If you have a sufficient supply, you can drain a lot of health from Gohma after stunning him with a jumping attack from the Deku Staff. The staff usually breaks, but the enormous damage can shorten the fight significantly.
Repeat the sequence of stunning and sword strikes or Deku staff attacks. After a few successful phases, Queen Gohma is defeated.
3DS Master Quest:
Gohma’s attack pattern is basically the same, but her hits are significantly more dangerous due to the general Master Quest damage multiplier. With only three hearts, mistakes can quickly become fatal.
Heart Container and Kokiri’s Emerald
After Gohma’s defeat, a Heart Container remains in the boss arena. Be sure to collect it. Link’s maximum health increases from three to four hearts.
Then enter the blue teleporter. Link is brought back before the Great Deku Tree. Although the parasite has been defeated, the curse itself cannot be lifted. The Great Deku Tree tells Link about Ganondorf, the man from the desert who seeks a holy power, and gives him the Kokiri’s Emerald.
New item: Kokiri’s Emerald
The Kokiri’s Emerald is the first of the three Sacred Stones. To access the Pedestal of Time we will also need the Goron’s Ruby and the Zora’s Sapphire later.
After his last words, the Great Great Deku Tree dies. Leave the area and return to Kokiri Forest. Mido initially blames Link for the guardian spirit’s death. Saria is waiting at the western exit of the forest. She says goodbye to her friend and gives him the Fairy Ocarina before Link leaves his home for the first time.
Optional before the trip to Hyrule: Ammo bag for 40 Deku cores
Since you now have the fairy slingshot, we can already get another permanent improvement in the Lost Woods. This task is optional, but is part of our 100% route and can now be reached without detours.
Enter Lost Woods from Kokiri Forest and take the right passage from the entrance. In the next area there is a round target hanging from a tree. Stand in front of it at a suitable distance and shoot the fairy slingshot exactly in the middle.
Hit the middle three times in a row. After the third direct hit, a Deku appears and improves your ammunition bag. Link can then carry up to 40 Deku Cores for the Fairy Slingshot.
Optional upgrade: 40 Deku cores
The larger ammunition bag makes the more combat-heavy Master Quest dungeons particularly easier. We can get a further upgrade to 50 Deku Cores later in Hyrule City.
Gold Skulltula in Kokiri Forest
We can collect another Skulltula immediately after the Great Deku Tree. Previously she was unreachable because there was no normal night phase in the Kokiri Forest. Therefore, first leave the forest towards the Hyrule Field. Once Link leaves his home, the normal day-night cycle begins.
Wait on the Hyrule Field until nightfall and then return to Kokiri Forest. Go to the house of the Omniscient Brothers in the western or GameCube-side corresponding area of the village. A Gold Skulltula sits at the back of the house at night.
Shoot them with the fairy slingshot. The symbol hangs relatively high on the wall. Stand directly below it, aim at it and perform a jump attack or jump onto the wall so that Link touches the symbol.
Age: young link
Time: Night
Requires: Fairy Slingshot and Kokiri’s Emerald or ability to leave the forest
Collectibles not yet available in Kokiri Forest
Two more 100% tasks in Kokiri Forest remain open for now. There is a soft ground spot right next to the Kokiri shop. Inside is a Gold Skulltula, which only comes out when the young Link places beetles from a bottle of on the ground. Since we don’t currently own a bottle, we’ll mark this find for later.
Another Gold Skulltula will only appear in the future. At night she sits at or behind the twins’ house and is collected by the adult Link with the Hookshot or Longshot.
Open 100% tasks in Kokiri Forest:
• Skulltula in the soft ground next to the shop – Young Link + Beetle Bottle
• Skulltula at the Twins’ House – adult link + Hookshot, at night
Return later to the Great Deku Tree: Skulltulas 2-4/4
The Great Deku Tree is also not yet completely completed after Gohma’s defeat. Three of the four Gold Skulltulas require items that Link only receives much later. We therefore have to enter the dungeon again.
The best time to return is after receiving the Boomerang and the Song of Time. At this point we also have bombs and can use Bombchus if necessary. This means that all three missing spiders can be collected in a single tour.
Gold Skulltula 2/4 – Compass Room
Return to the room where you found the Compass on your first visit. Above the vines, rocks block access to a small niche. Destroy them with a Bombchu. Alternatively, the area can be reached later with the Song of Time and a cleverly used bomb.
Then climb over the vines into the uncovered niche. The second Gold Skulltula is waiting there. Defeat them and, if necessary, get the symbol with the Boomerang.
Gold Skulltula 3/4 – burial chamber
Then climb into the basement and return to the room with the four torches and the tombs. Play the Song of Time at the points where Navi reacts green. Several blue time blocks appear or change their position.
Use the blocks as stairs and work your way up step by step. The Gold Skulltula sits on the ceiling. Defeat them from a distance and then throw the Boomerang at the symbol.
Gold Skulltula 4/4 – Space behind the spider web
Stay in the burial chamber and light a Deku Staff on one of the torches. Burn the cobweb in front of the corresponding side room and go through it. Eliminate the Gohma eggs and the large Deku plant.
On the back wall sits the fourth and final Gold Skulltula of the Master Quest Deku Tree. Defeat them and get the symbol with the Boomerang. This means that the first dungeon is finally 100 percent complete.
Continue to Hyrule
With the Kokiri’s Emerald Link has the first Holy Stone. The Great Deku Tree warned him about Ganondorf and told him to find Princess Zelda in Hyrule Castle. Leave the Kokiri Forest via the long bridge and enter the for the first time Hyrule Field.
In the next chapter of our Ocarina of Time Master Quest Walkthrough we visit Hyrule City, Hyrule Castle and Princess Zelda. For our 100% route, we take the first Gold Skulltulas of the upper world with us, visit the Lon Lon Ranch, learn new songs and then prepare the way to Death Mountain and Dodongo’s Cavern – Master Quest.
Frequently asked questions about the Great Deku Tree – Master Quest
How many Gold Skulltulas are there in the Master Quest Deku tree?
There are a total of four Gold Skulltulas in the Master Quest Deku Tree. On the first pass, only the Skulltula next to the Dungeon Map can be reached regularly. For the remaining three, you will need to return later with additional equipment.
When should I return for the remaining three Skulltulas?
The most sensible time is after receiving the Boomerang and the Song of Time. Also take bombs or Bombchus with you. Then all three remaining Skulltulas can be collected in a single return trip.
Where is the fairy slingshot in Master Quest?
The Fairy Slingshot is located in a side room on the upper level of the Deku Tree. You have to eliminate the enemies there and activate several moving platforms using a Floor Switch. You will then appear or reach the large Treasure Chest with the fairy slingshot.
Where is the Compass?
After you get the fairy slingshot, return down one level and burn the cobweb in front of a side door. Defeat the Gohma Eggs and the Large Deku Plant, open the next door via the Eye Switch and cross the following room. The Compass is located in the large Treasure Chest.
What order are the three Deku in front of Gohma?
On the GameCube version you meet the three Deku spatially in the order left → right → middle, i.e. 1 → 3 → 2. Since the 3DS master quest is mirrored, left and right are swapped there accordingly.
How to defeat Queen Gohma?
Hit her glowing red eye with the Fairy Slingshot or a Deku Nut. Once Gohma is stunned on the ground, attack her eye with the Kokiri Sword. A jumping attack with a Deku staff causes a particularly high amount of damage. When Gohma climbs to the ceiling, you can hit her eye with the slingshot and bring her right back down.
Is the 3DS Master Quest different than the GameCube version?
The changed dungeon puzzles basically correspond to the GameCube Master Quest. However, on the Nintendo 3DS it is entire game world mirrored, so that left and right are swapped. Additionally, enemies in the 3DS Master Quest cause the double damage.
Which collectibles in Kokiri Forest can’t I get yet?
The Gold Skulltula in the soft ground next to the Kokiri Shop requires Beetle in a Bottle. Another Skulltula at the Twins’ House only appears at night in the future and is collected with the Hookshot. Both will be automatically incorporated into our 100% route later.