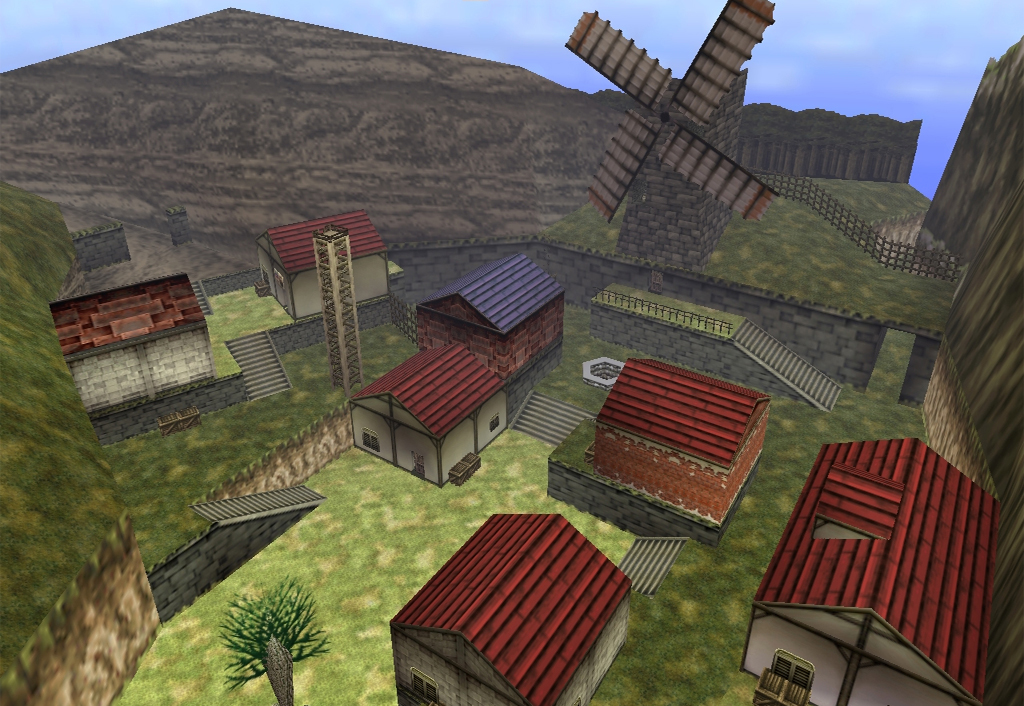

With the Kokiri’s Emerald in his pocket, Link leaves his home for the first time. The Great Deku Tree told you to find Princess Zelda. The path therefore leads across the Hyrule Field to Hyrule City and the castle. We then visit the Lon Lon Ranch, clear out Kakariko and the cemetery as completely as possible, look for Saria in the Lost Woods and finally travel along the Death Mountain Trail to Goron City.
This stage is significantly more extensive than the pure story path suggests. On our 100% route we pick up, among other things, two bottles, four new ocarina songs, both early upgrades for the Deku Core bag, the Hylian Shield, the Goron’s Bracelet, up to eight Pieces of Heart and 15 new Gold Skulltulas.
This solution applies to the normal version of The Legend of Zelda: Ocarina of Time on Nintendo 64 and to Ocarina of Time 3D. The Master Quest version partially has other dungeon puzzles and Locations and is not mixed with this solution.
Requirements and current score
This chapter follows directly on from our solution to the Kokiri’s Emerald and the Great Deku Tree. You should have at least the Kokiri Sword, Deku Shield, Fairy Slingshot, and Kokiri’s Emerald.
If you followed our 100% path, you have also already collected the Gold Skulltulas that were accessible on the first visit in the Great Deku Tree. The one behind the blastable wall in the basement remains open: we will need both bombs and the Boomerang for it later.
Farewell to Kokiri Forest


Exit Kokiri Forest through the western exit. Saria is already waiting for you on the bridge. After saying goodbye, she gives Link the Fairy Ocarina.
The small ocarina will now become one of the most important items in the game. In this chapter you will learn four melodies: Zelda’s Lullaby, Epona’s Song, Saria’s Song and the Sun’s Song.
After the conversation, follow the bridge to the Hyrule Field.
The Hyrule Field


The steppe forms the center of Hyrule. From here, paths lead to Hyrule City, Kakariko, Lon Lon Ranch, Kokiri Forest, Zora’s River, Lake Hylia and Gerudo Valley, among others.
For the first time, the time of day now visibly continues. After sunset, the drawbridge to Hyrule City is raised and Bonewalkers appear on the steppes. If you don’t make it over the bridge in time the first time around, keep moving and wait for the sunrise.
For later: There are several secret caves and collectibles on the steppe that require bombs, the Boomerang, the Golden Scale or other later items. We clear these Locations on appropriate return routes instead of making unnecessary detours now.
Hyrule City and the Marketplace


Cross the drawbridge and enter Hyrule City. Before you reach the actual market square, it’s worth visiting the guard house directly behind the city gate.
Gold Skulltula 1 – in the guardhouse
Go all the way to the back of the guardhouse and roll against the wooden box there. There is a Gold Skulltula hidden inside. Defeat them with the sword and collect the symbol directly.
There are also numerous Rupees in the pots and other boxes. Since several mini-games in this chapter cost money, the guardhouse is a good place to replenish your wallet. The containers will reappear after you re-enter the building.
Shooting gallery and first Deku core upgrade
The shooting gallery on the market square is open during the day. One round costs 20 Rupees. You have to hit ten ruby-shaped targets with the fairy slingshot; You have a total of 15 shots available for this.
If you hit all ten targets, you will receive the first upgrade to your Deku Core Bag. Since you can currently carry 30 Deku Cores, the limit increases 40 Deku Cores.
If you hit eight or nine times you get a free retry. We’ll get the second upgrade later in this chapter Lost Woods. After that you can do the maximum 50 Deku Cores carry.
Note: The two upgrades can also be won in reverse order. The first achievement increases the capacity to 40, the second to 50.
Piece of Heart 1 – Bring Richard home
Open
This Piece of Heart is only available on the nightly marketplace. Since time stands still on the market square itself, you can go to the castle grounds, wait for nightfall and then return to the market.
Look for the little white dog near the empty or blue market stall not far from the southern exit. Touch him to make him follow Link. Then run into the side alley and enter the owner’s house, which is open at night.
If you brought the right dog named Richard, you will receive a Piece of Heart.
If another dog accidentally follows you, leave the area and try again.
Treasure Chest Shop – let’s do
later
The treasure chest shop is also open at night and can already be played as a young Link. In several rooms you have to choose between two chests. One contains a key, the other Rupees. Without tools, every decision is pure luck.
We are therefore saving this Piece of Heart for a later return trip when Link has the Lens of Truth. Then you can recognize the contents of the chests and reliably win the mini-game.
To Hyrule Castle


Leave the market square north towards the castle. When you first enter the castle path, you will be introduced to the area. Then return to the market square and enter the castle path again. Now Malon is standing by the vines.
Gold Skulltula 2 – Tree on Schlossweg
Before you talk to Malon, roll into the single large tree on the castle path. A Gold Skulltula falls out of the branches. Defeat them and collect the symbol.
The Strange Egg of Malon
Talk to Malon. Her father Talon was supposed to deliver milk to the castle, but didn’t return. Malon will therefore give you a Strange Egg.
The egg hatches automatically after a change of day. He’ll turn into a chicken, which we’ll need right away.
The guards in front of the castle bypass


Climb up the vines next to Malon. On the Nintendo 64, the further route leads, among other things, over visible masonry; In Ocarina of Time 3D, some climbing areas are visually more clearly designed as vines. However, the basic path is identical.
Cross the archway and jump down the other side. Don’t just follow the road. There are several soldiers patrolling there who immediately throw Link out as soon as he comes into their sight.
Instead, stay left over the grass and use the hills as a privacy screen. Further back you will reach a climbable wall. Climb up, jump into the moat on the other side and let the water carry you to the far bank.
There you can get out of the water again over the flat slope.
Wake up Talon with the chicken


Talon lies by the milk crates and sleeps. If the Strange Egg hasn’t hatched yet, wait for the next sunrise. Then stand right next to Talon and use the chicken.
The crowing wakes him up immediately. Talk to Talon and he will run back to Lon Lon Ranch in shock.
The milk crates and the secret entrance


Now you can move the large milk crates. Push the first box into the water channel at the designated location. Then push the second one onto the first one so that you get a two-tier platform.
Climb up and jump to the small water drain in the castle wall. Crawl through the opening.
Important: The following castle garden must be crossed during the day. At night, guards stand directly at the entrance and prevent intrusion. If it is night, wait for sunrise on the castle grounds.
Sneaking through the castle garden


In the castle garden, several guards follow fixed routes. If Link is discovered, he is put back in front of the crawlspace. You don’t lose anything.
First observe each soldier briefly. Only start running when his back is turned and use hedges, stone walls, wells and other obstacles as a privacy screen. Especially with the last guards, it’s worth waiting for a complete tour instead of sprinting between two patrols.
Once you have passed the last soldier, you will reach the inner courtyard.
Meeting Princess Zelda


Talk to Princess Zelda. She tells Link about her dream, the three Sacred Stones and her suspicion that Ganondorf wants to take control of the Triforce.
When Zelda tells you to, look through the window. There you will see Ganondorf with the King of Hyrule. Then talk to Zelda again and listen to her story in full.
As a sign of her trust, she gives you Zelda’s letter. This allows you to identify yourself as an envoy of the royal family to certain people.
Zelda’s Lullaby


As you leave the courtyard, Impa is waiting. She takes Link out of the castle and teaches him beforehand Zelda’s Lullaby.
This melody is always needed in places associated with the royal family. Triforce symbols on the floor or walls are particularly noticeable.
Impa recommends you travel to Kakariko and Death Mountain. Before that, however, we visit the Lon Lon Ranch.
Later return to castle
Two important secrets remain open at the castle for the time being. A rock near the entrance can only be blown up with bombs; behind it there is a Great Fairy waiting with Din’s Din’s Fire. Another Gold Skulltula is in a secret cave by the moat. To access it you will later need the Song of Storms and bombs for the wall inside.
Lon Lon Ranch – Bottle, Epona’s Song and Collectibles
Lon Lon Ranch is located pretty much in the center of the Hyrule Field. After your encounter with Zelda, Talon and Malon are here again.
We do everything now that is possible without later equipment. Two more Gold Skulltulas remain open until the boomerang is received.
Super Chicken Game – First Bottle


Enter the apartment building to the left of the entrance and talk to Talon. For 10 Rupees you can start his super chicken game. Talon throws three special chickens among the ordinary animals. You have 30 seconds to find all three.
A simple trick makes the game much clearer: Before talking to Talon, pick up as many normal chickens as possible and throw them behind the table or in a secluded corner. When the game begins, the three newly thrown super chickens are much more conspicuous in the room.
If you find all three in time, you will receive a bottle of Lon-Lon milk. The milk has two portions and each portion restores five hearts. If it is empty, the bottle stays with you permanently.
Learn Epona’s Song


Go to the large paddock and talk to Malon. Talk to her until she talks about her mother’s song. Then stand directly in front of Malon and take out the Fairy Ocarina.
She teaches you Epona’s song. Then play the melody near the young foal Epona so that she loses her fear of Link.
The song later becomes crucial to attract and summon Epona as an adult Link. You can also play Epona’s Song in front of cows to fill an Empty Bottle with Lon-Lon milk for free.
Piece of Heart 2 – in warehouse


At the back of the ranch there is a small stone warehouse or silo. Enter it and move the large crates so that you reveal the low opening in a corner of the wall.
Open
Crawl through. Behind it lies a Piece of Heart in the straw.
Gold Skulltula 3 – Tree at the ranch


There is a single tree near the first buildings. Wait until night or play the anthem of the sun. Then roll against it as a young link. A Gold Skulltula falls down.
Time: Night
Equipment: no special
Symbol: Collect immediately after defeating
Gold Skulltula 4 – Rear of shelter

Wait until night. Walk around the outside of the paddock to the small wooden shelter on the southeast side. Crawling on its back is another Gold Skulltula.
Shoot them with the fairy slingshot and collect the symbol.
Time: exclusively at night
Age: young link
Equipment: Fairy Slingshot
Available on the first visit: yes
Two Ranch Skulltulas remain for later
There are a total of four Gold Skulltulas on Lon Lon Ranch. The two missing specimens also appear at night: one sits high on a window of the farmhouse, the other high up on the border near the silo. You can shoot both of them early, but you can’t reach their symbols. For this we need the Boomerang from Lord Jabu-Jabu’s belly.
We come back specifically after the third dungeon.
Kakariko – Zelda’s Letter and the seven chickens
Leave Lon Lon Ranch and follow the northeast path to Kakariko on the Hyrule Field.
We deliberately visit Kakariko before the Lost Woods. So we pick up an Empty Bottle, Beetle and the Anthem of the Sun before returning to Kokiri Forest. This saves several later journeys and makes finding the Skulltula locations there much easier.
Zelda’s Show letter to guard

Climb the stairs in the north of the village. A soldier stands in front of the locked gate to the Death Mountain Trail. Talk to him and show him Zelda’s letter.
He opens the gate to the Death Mountain. At the same time he asks you to get him the Keaton Mask from the Happy Mask Salesman. The Mask Vendor in Hyrule City Marketplace is now open.
You can also now buy the Hylian Shield cheaper in the bazaar. However, this is not necessary on our route because we get one for free at the cemetery.
We’ll start the mask swap quest later
The mask swap quest is now available. However, it forces you back and forth between Hyrule City, Kakariko and the Lost Woods several times. In order to avoid unnecessary walking, we will combine the mask sales on a later tour.
All seven chickens in Kakariko


The chicken lady stands in front of the small enclosure near the cemetery path during the day. She is allergic to her animals and asks Link to bring back all seven escaped chickens.
We need some chickens as gliders at the same time. Therefore, do not throw every animal into the enclosure immediately.
Chicken 1 – with the chicken lady
The first chicken runs around right next to the chicken lady. Take it with you first instead of giving it away immediately.
Chicken 2 – Village Entrance
A chicken runs around in the lower village area near the entrance to the Hyrule Field.
Chicken 3 – wooden box
There is a wooden box by the steps near the big tree. Roll against it to free the chicken hidden inside.
Chicken 4 – at the gate to Death Mountain
You can find another animal on the upper village level near the guard to whom you just showed Zelda’s letter.
Chicken 5 – behind the high fence
There is a chicken behind a raised fence near the Skulltula House. You can use another chicken as a glider and glide over from the construction site or a higher ledge.
Alternatively, you can scare the chicken with the fairy slingshot or a Deku Nut. It then runs down from the ledge and can be collected at the bottom.
Chicken 6 – below the windmill
For the last two animals you have to get into the cordoned off area behind the high fence near the windmill. Take a chicken onto the raised platform and glide over the fence.
Then throw the chicken you brought with you back over the fence. Go down the steps. There, Chicken 6 is walking around near a small hole. Throw this animal over the fence too.
Chicken 7 – above the cordoned off area
Climb up the long ladder in the same area. The seventh chicken is running around upstairs. Take it with you and glide back to the normal village area.
Then bring all the animals that were previously thrown over the fence to the enclosure.
Reward – an Empty Bottle

As soon as all seven chickens are in the enclosure, talk to the chicken lady again. She gives you a Empty Bottle.
This bottle is immediately useful for our 100% route: we use it to catch beetles to lure Gold Skulltulas out of soft soil.
Piece of Heart 3 – in the house behind the chicken run
Open
This early detour is optional and requires an accurate jump with the chicken. The easier route follows to Dodongo’s Cavern: Then the owl takes you from the top of Death Mountain to Impa’s roof. If you want to save yourself the jump, leave the Piece of Heart until this return journey.
Take a chicken and bring it to the raised walls or beams of the construction site. Then use the chicken as a glider to the narrow ledge above the chicken run behind Impa’s house.
There is an opening in the house wall. Crawl or go in. Link ends up in a separate area of the house where there is a cow. Next to it is a Piece of Heart.
If the jump is too fiddly for you, you can postpone this Piece of Heart until later without any loss: After Dodongo’s Cavern, the owl will take you from the top of Death Mountain directly to Impa’s roof. From there access is very easy.
Kakariko Cemetery
Go through the eastern passage behind the windmill into the cemetery. Here we do several tasks at once.
Gold Skulltula 5 – soft earth in the cemetery
There is a good source of beetles under a small stone right outside the cemetery gate. Lift the stone and catch a beetle with your empty bottle.
In the cemetery, walk along the left wall. Behind the first row of graves you will find a field of soft earth. Release the bugs from the bottle there.
Shortly afterwards a Gold Skulltula jumps out of the ground. Defeat them and collect the symbol.
Time: Day or Night
Age: young link
Requirement: Empty Bottle and Beetle
Available on the first visit to Kakariko: yes
Tip for the other holes in the ground: You can find beetles under various stones and bushes in Hyrule. On some versions, you can quickly catch one of the beetles again after releasing it; However, for the 100% route, don’t rely on it and just catch fresh specimens if necessary.
Plant a Magic Bean here later
The same hole in the ground will be important again later. As soon as we can buy Magic Beans at the Zora’s River, we will return here and plant one. As an adult link, the mature plant takes us to another Piece of Heart.
Dampé’ Grave Horror Tour – Piece of Heart 4
The gravedigger Dampé only organizes his grave horror tour as a young link between 6:00 p.m. and 9:00 p.m.. A dig costs 10 Rupees.
Since the Anthem of the Sun later jumps directly to a different phase of the day and does not specifically set the early evening, the safest method is: Leave Kakariko towards the Hyrule Field, wait there for the wolf howl at sunset and enter Kakariko immediately. In Kakariko itself the clock stops.
Open
Follow Dampé through the cemetery and talk to him whenever he stands right on the edge of a soft area of earth. What he digs up is determined at random. A Piece of Heart can appear next to Rupees.
There is no fixed “real” pile of earth. Have Dampé dig until the Piece of Heart appears.
Important for the original N64 version: If Dampé has dug up the Piece of Heart, collect it immediately and do not leave the area beforehand. In the original version there is a known error related to the found flag being set. In Ocarina of Time 3D, this behavior has been changed.
Free Hylian Shield
Wait until night. In the front row of graves, find the gravestone with flowers in front of it and drag it back. Jump into the hole.
Open the Treasure Chest below. Inside is a Hylian Shield. If you already have one, the chest will contain Rupees instead.
The shield is particularly useful for Dodongo’s Cavern. However, the young Link is too small to hold in front of his body as he would later do. If you press the save button with the Hylian Shield equipped, Link will duck underneath it.
The Royal Family’s Tomb and the Sun’s Song
Go to the large Royal Family’s Tomb at the back of the cemetery. Stand on the Triforce symbol and play Zelda’s Lullaby. Lightning strikes and opens the tomb.
Jump down. Defeat all the bats in the first room to open the locked door.
There are several ReDeads waiting in the next area. Her screams can briefly immobilize Link. You don’t have to fight every opponent. Keep your distance, walk between them and avoid the harmful liquid on the ground.
In the back room you will find a large stone tablet. Examine them to learn the Anthem of the Sun.
With this song you can instantly switch between day and night in many areas. The melody also paralyzes ReDeads and Gibdos for a short time.
Piece of Heart 5 – secret tomb with the Sun’s Song
Leave the Royal Family’s Tomb and make sure it is night. In the back or upper row of graves, look for the fourth grave from the right and pull the gravestone back.
Open
Jump down and defeat the ReDead. Then play the Sun’s Song that you just learned. A Treasure Chest appears. Therein lies the next Piece of Heart.
Gold Skulltula on the cemetery wall – not yet accessible
On the right cemetery wall near the king’s grave another Gold Skulltula appears at night. You can defeat her with the slingshot, but her symbol hangs out of your reach.
We return to Lord Jabu-Jabu’s belly with the Boomerang. The symbol can then be used without any problems.
Five Gold Skulltulas in Kakariko
Play the Anthem of the Sun to create night. Five Gold Skulltulas now appear in the village. All five are accessible as a young Link without any later equipment.
Gold Skulltula 6 – Tree at the village entrance
Roll against the large tree in the lower village area. The Skulltula falls out. Defeat them and collect the symbol.
Gold Skulltula 7 – Construction site
Go to the unfinished construction site in the center of the village. A Gold Skulltula crawls on the stack of bricks or walls at night. Defeat them and collect the symbol.
Gold Skulltula 8 – Skulltula House
The next specimen appears on the outside wall of the Skulltula House at night. Defeat it and take the symbol.
View Skulltula 33 in the checklist.
Gold Skulltula 9 – observation tower
Views of the high observation tower. There is a Gold Skulltula on the ladder or high up on the tower.
Shoot it with the fairy slingshot and then climb the ladder to collect the symbol.
Gold Skulltula 10 – House at the gate to Death Mountain
The fifth nocturnal village Skulltula sits on the wall of the house immediately next to or to the left of the gate to the Death Mountain Trail.
Defeat them and collect the symbol.
Skulltula House Reward – Large Wallet
Once your total counter reaches 10 Gold Skulltulas, go into the Skulltula House. A member of the cursed family is redeemed and gives you the Large Purse.
This increases your ruby limit to 200 Rupees. On our route you should have safely exceeded the ten symbol mark after the Kakariko locations at the latest.
The other reward levels are 20, 30, 40, 50 and 100 Skulltula symbols. For a complete overview, use our guide to the Gold Skulltulas.
Return to Kokiri Forest and Lost Woods


For Darunia we need Saria’s song. Now is the ideal time to return to Kokiri Forest: We have the Anthem of the Sun, at least one Empty Bottle and can therefore take several collectibles with us.
Before you leave Kakariko, you can secure beetles under the stone at the cemetery again as a precaution.
Gold Skulltula 11 – behind the house of the omniscient brothers
Enter the Kokiri Forest at night or play the Anthem of the Sun there. Go to the omniscient brothers’ house in the southwestern part of the village and run to the back.
A Gold Skulltula appears there at night. Shoot them with the fairy slingshot and collect the symbol.
Time: Night
Age: young link
Equipment: Fairy Slingshot
Gold Skulltula 12 – soft earth behind Kokiri shop
Go behind the shop where you bought the Deku Shield at the start of the game. There is a field of soft earth there.
Release bugs from a bottle on it. The Gold Skulltula jumps out of the ground and can be defeated straight away.
Lost Woods – Upgrades, Pieces of Heart and Skulltula’s
Enter the Lost Woods through the raised passage in Kokiri Forest. Before we run straight to Saria, we clear the Side Quests that are already accessible.
Second Deku Core Upgrade – Target
From the entrance of Lost Woods, turn right to . A target hangs on a tree.
Hit exactly the middle with the fairy slingshot three times in a row and score 100 points each time.. A Deku will then appear and upgrade your Deku Core Bag.
Since we have already won the first upgrade in the shooting gallery, you can now do the maximum 50 Deku Cores carry.
Piece of Heart 6 – music game by the two horror kids
In the same area, a ladder or path leads down to a small tree stump. Stand on it and take out the Fairy Ocarina.
Two horror kids appear and play you short sound sequences. Repeat the melodies correctly. The game consists of several rounds and the episodes become progressively longer.
Open
If you win all three rounds, you will receive a Piece of Heart.
Gold Skulltula 13 – Earth near the bridge
Return to the Lost Woods entrance and go left, then left again. You will reach the area near the bridge, which lies between Kokiri Forest and Hyrule Field.
There is another field of soft earth here. Release beetles on it, defeat the Gold Skulltula that appears and collect the symbol.
Deku Staff Upgrade
There is also a leaf guy hiding in the area below or near the bridge. Fight back his Deku Nut with the shield and then talk to him.
For 40 Rupees he sells you an upgrade for your Deku sticks. This allows you to carry more rods at the same time.
The further Deku staff upgrade via the masked ball in the Lost Woods requires the skull mask and is completed as part of the mask exchange quest.
The path to the Sacred Glade
The following sequence applies for the direct route from the entrance of Lost Woods to the Holy Clearing:
- right
- left
- right
- left
- straight ahead
- left
- right
You can also orientate yourself on the sound of the music. At the right passage the melody is significantly louder.
Gold Skulltula 14 – Detour to the Forest Stage
After the first four directions – right, left, right, left – the main route actually continues straight ahead. Beforehand, take a short detour to left into the area with the Laubkerlen and the forest stage.
There is another field of soft earth there. Release beetles on it, defeat the Gold Skulltula and collect its symbol.
We’ll do the actual forest stage and its mask rewards later when the required masks are available.
Then return to the main path and continue the route with straight ahead, left, right.
The Sacred Glade
A Wolfos appears at the entrance to the Sacred Glade. Target him and have your shield ready. If possible, attack when he has just struck or has his back turned to you.
After his death, the gate to the labyrinth opens.
Follow the narrow paths to the back. Several leafies shoot deku nuts at you. With the Deku Shield you can reflect their projectiles and thus defeat your opponents.
At the end of the labyrinth, steps lead to the back clearing.
Saria’s song
Saria sits on a tree stump at the end of the clearing. Approach her and talk to her. She teaches you Saria’s song.
You can contact Saria via the melody. However, what is crucial for our immediate path is that Darunia wants to hear this song.
Fairy Spring in the Sacred Glade
On the way back through the labyrinth, you can climb a ladder and cross part of the walls from above. In this area there is a hole in the ground that leads to a small fairy spring.
If you have a free bottle, you can capture a fairy. If Link dies with a fairy in the bottle, she will automatically revive him. You can find more Locations in our guide to the Great Fairies and fairy springs.
Piece of Heart 7 – Saria’s song for the Skull Kid
Return to the entrance of Lost Woods and from there turn left to . A single Skull Kid stands on a higher tree stump.
Stand on the low stump and play Saria’s song. The Skull Kid recognizes Link as a friend and gives you a Piece of Heart.
If you later own the skull mask, this Skull Kid will also be the buyer for the second mask in the exchange quest.
Before you leave: take the Beetle with you
For the last ground skulltula of this chapter we need beetles again on the Death Mountain Trail. Therefore, before returning to Kakariko, catch a fresh specimen in a free bottle.
Back to Kakariko and the Death Mountain Trail
With Saria’s song we return across the Hyrule Field to Kakariko. The gate to the Death Mountain Trail is already open because we showed the guard Zelda’s letter.
Go through the gate and follow the Death Mountain Trail up. Along the way, red Tektites pop out of the ground. Keep moving, target them after landing and attack with the sword.
Half way up you can see the entrance to Dodongo’s Cavern. A large rock still blocks it. We can’t get rid of him from down here without bombs. So follow the path further to Goron City.
Gold Skulltula behind the blastable wall – later
At the bottom of the Death Mountain Trail you can hear a Gold Skulltula behind a suspicious rock wall. This wall requires real bombs. Thunderflowers cannot be meaningfully transported here from their current location.
We get the Skulltula right after finding the bomb bag in Dodongo’s Cavern.
Goron City
Goron City consists of several ring-shaped levels. Many paths are currently blocked by rocks. Run over the ramps or carefully jump down to the lowest level.
There is the large Goron vase in the middle. On the wall is an ornate door with a carpet and a Triforce symbol in front of it. Behind it lives the Goron chief Darunia.
Open Darunia’s door
Stand on the carpet in front of the door and play Zelda’s Lullaby. The door opens.
Enter Darunia’s chamber and talk to the bad-tempered Goron. He is anything but enthusiastic about the situation of his people.
Then bring out the ocarina and play Saria’s song right in front of him.
The Goron’s Bracelet
Saria’s music makes Darunia dance and lifts his mood. He then tells you that Ganondorf blocked the entrance to Dodongo’s Cavern with a rock. This means the Gorons can no longer reach the rocks in their most important source of food.
Darunia asks Link to eliminate the monsters in the cave and in return gives him the Goron’s Bracelet.
With the bracelet, young Link can now pull Bomb Flowers out of the ground and throw them like bombs.
The four torches light
Torches burn in Darunia’s chamber. Light a Deku Staff from one of these flames and run into the main room.
On the lowest level there are four extinguished torches around the large vase. If possible, light them in a continuous round. Use already lit torches to relight your Deku Staff if necessary.
As soon as all four burn at the same time, the large vase begins to rotate.
Goron shop and shortcut to the Lost Woods
With the permanently lit torches you now have several fire sources at your disposal. You can also use it to light Bomb Flowers that grow behind certain rock barriers using a Deku Stick.
This is how you can access the Goron Shop. The passage to a higher level is even more important: blow up the disturbing rocks there or trigger the Bomb Flowers that are present. Behind the passage there is a direct connection to the Lost Woods.
This shortcut is very useful for later travel between Goron City and Kokiri Forest.
Piece of Heart 8 – the rotating Goron vase
After the four torches burn, the large vase on the lowest level rotates. Go up one level and look for a Bomb Flower, which you can pull out with the Goron’s Bracelet.
Throw the Bomb Flower into the open vase from above. After the explosion, the vase comes to a stop, revealing one of its three faces.
Open
If the happily laughing face remains at the front, a Piece of Heart is thrown out.
If you have a different face, you will receive Rupees or other items instead. Simply draw another Bomb Flower and repeat until the Piece of Heart appears.
Gold Skulltula in Goron City – after the bomb bag
There is also already a Gold Skulltula for the young Link in Goron City. It’s in a wooden box deep in the rock-blocked labyrinth.
For a reliable route through the rock barriers we need the bomb bag. That’s why we pick up this specimen immediately after Dodongo’s Cavern.
Open Dodongo’s Cavern
Exit Goron City again via the upper exit to the Death Mountain Trail. A Bomb Flower grows near the ledge above Dodongo’s Cavern.
Thanks to the Goron’s Bracelet you can now pull them out of the ground. Walk the plant to the edge and throw it towards the large rock blocking the cave entrance.
If the Bomb Flower lands close enough to the rock, the explosion will blow the entrance clear.
Then carefully jump down over the ledges.
Gold Skulltula 15 – Earth in front of Dodongo’s Cavern
Directly in front of the now open entrance is another field of soft earth. For this we brought the beetles from the Lost Woods.
Release the bugs on earth. A Gold Skulltula pops out. Defeat them and collect the symbol.
Time: Day or Night
Age: young link
Requirement: Goron’s Bracelet to open the cave entrance, bottle of bugs
Available on the first visit: yes


Continue with Dodongo’s Cavern
With the Goron’s Bracelet, Link now has the power necessary to use Bomb Flowers. The entrance to the second dungeon is open and preparations are complete.
In the next chapter we enter Dodongo’s Cavern and get the Goron’s Ruby. There we find, among other things, the bomb bag, several Gold Skulltulas, the Dungeon Map, the Compass and face King Dodongo.