

All eight Triforce fragments open the path to the finale. Before entering, prepare a red potion, a filled bomb bag and enough Rupees for arrow shots. The Magical Sword, the Magical Key and the blue ring should be part of the equipment. If you are still missing an overworld heart, get it using the heart container list: C1, A7, D11, C16 and F16, together with the boss finds, make up the 16 hearts of this route.
The entrance is on A1 in the northwest corner Hyrule’s. From the upper cemetery C1 you go north along the western mountain paths and blow up the northern rock wall on A1. This is a different entrance than the Spectacle Rock from the first quest. Enter the cave and go north. The old man will only let you pass with all eight fragments.
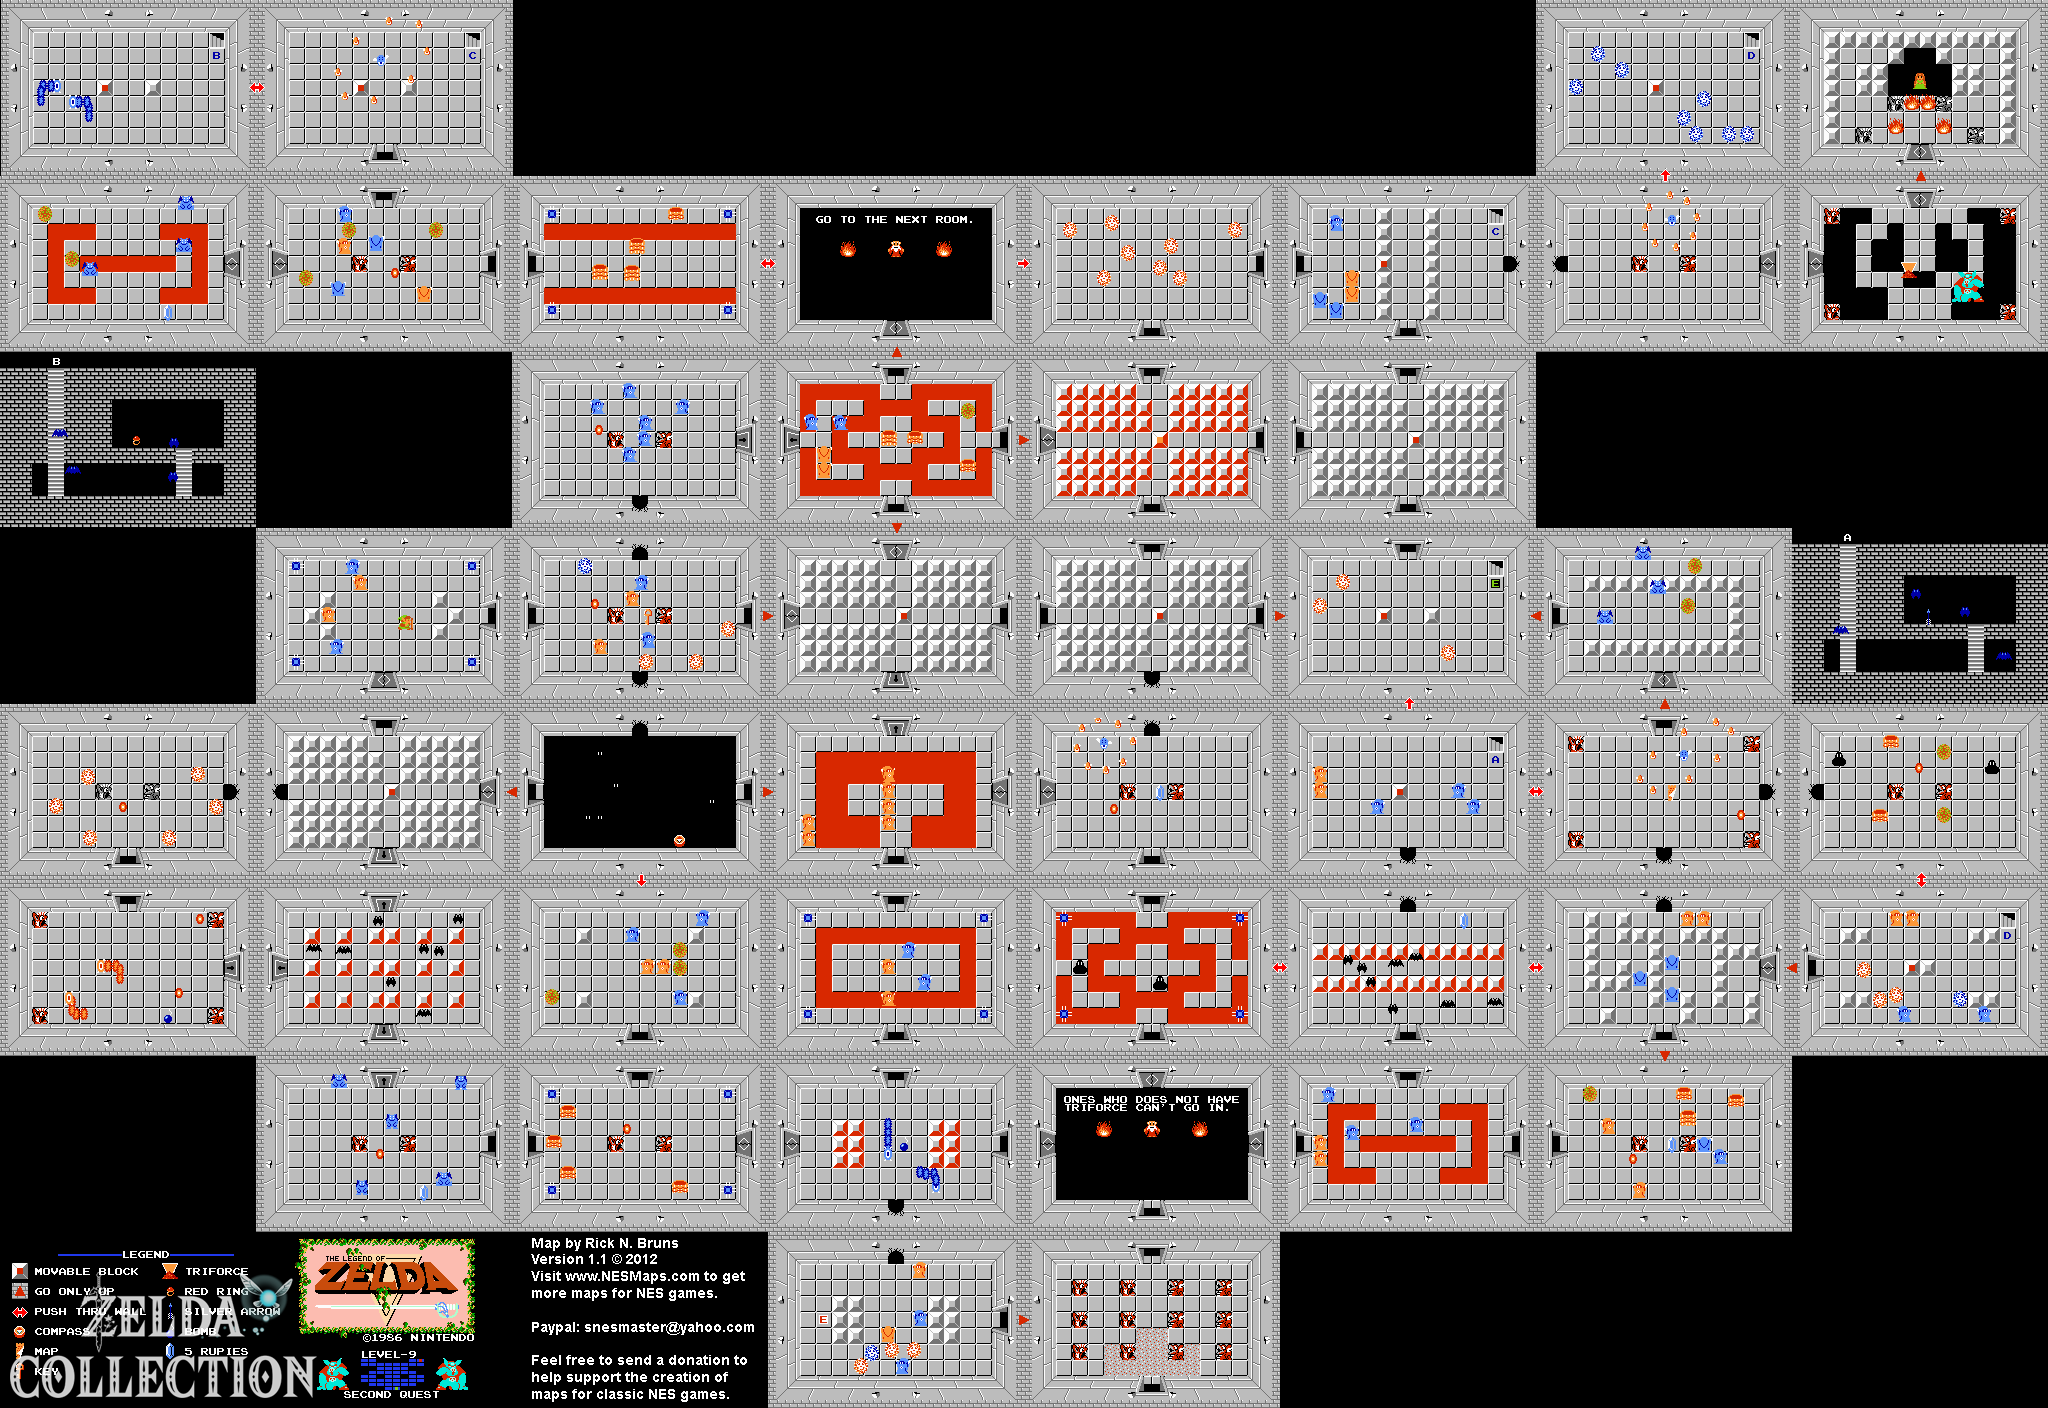
Silver Arrows and Dungeon Map in the east
From the room with the old man, go north and then through the eastern false walls twice. You will reach a room with Wizzrobes and the entrance of the connection pair A. Blow up the north wall. Patra is waiting in the room above. Go through the western false wall into the Wizzrobe room to the left.
Defeat all the Wizzrobes and move the middle block to open the stairs A. The Silver Arrows are located in the separated cellar on the far right of the dungeon map. Collect them. Without this item, Ganon cannot be finally defeated after the sword hits. The usual purchase of arrows alone is not enough.
Return from the Item Cellar and head east to Patra. First destroy the small surrounding enemies and then the eye in the middle. Their orbit changes; stand a little distance away and strike when a small eye passes close to your safe side. After winning you will receive the Dungeon Map. Take them with you and return to the room directly north of the entrance hall: from the map room to the south, twice through the western false walls and south to the old man.
Open up the western part
Go west from the old man. Defeat the two blue Lanmolas to open the next door. Attack their appendages as they appear from the ground and keep running as they dive. The blue animals move quickly; Save space next to where they appear instead of getting caught between both rows. Then go further west twice.
Go north twice. In the room with the movable middle block, open the west wall with a bomb. Walk through and back briefly to reset the block position. Move the block again for the north exit and go north. This short change of room prevents you from getting stuck in a block position that has already been moved inappropriately.
Go east. Blast the south wall and defeat the black Zols in the dark room beyond for the Compass. Light it with the red candle. Return north and now blow up the north wall. Go north through the new passage, then east and north again to the clue giver. You only have to fight the Wizzrobes on the way when a door or a required item requires it; the Magical Key replaces normal key finds.
Get the red ring
At the clue giver, go through the western false wall, then one room further west and north. You get to Patra in the northern area. For the ring the path leads through the western false wall. In the room beyond, defeat the two blue Lanmolas and move the western block. Staircase B takes you to the red ring.
The red ring reduces damage taken to a quarter of the original value. It replaces the protection of the blue ring and works automatically. You don’t need to select it on the B button. Get him before the final stage, even if you already feel strong enough for Ganon: the patras, statues and narrow paths before the final battle can cost a lot of health.
Return from the basement and go through the eastern false wall back to Patra. Defeat him and move the block for the stairs C. The connecting cellar leads to an eastern room near the boss chamber. Blow up the east wall there and defeat the other Patra in the next room. Behind it, the path to the east opens to Ganon.
Defeat Ganon with sword and silver arrow
Ganon disappears at the start of the fight and shoots fireballs. Run between the projectiles and use the Magical Sword to hit the areas where the attacks come from. One hit makes Ganon briefly visible. Then realign yourself instead of staying in the same spot and taking every fireball with you.
After four hits with the Magical Sword, Ganon changes color and remains visible for a short time. Select the Silver Arrows on the B button beforehand. Now shoot the decisive arrow at the visible enemy. Reserve at least one Rupee for this shot. If you miss the time window, you will have to use the sword to bring Ganon into the vulnerable phase again.
Pick up the Triforce of Strength and go north to Zelda. Use the sword to knock the flames aside and go to the princess. This also completes the second quest. The overview of the second round takes you back to the remaining chapters; You can check off the latest equipment finds in the interactive map.
To the Walkthrough of the second quest. Open second quest on the interactive map.