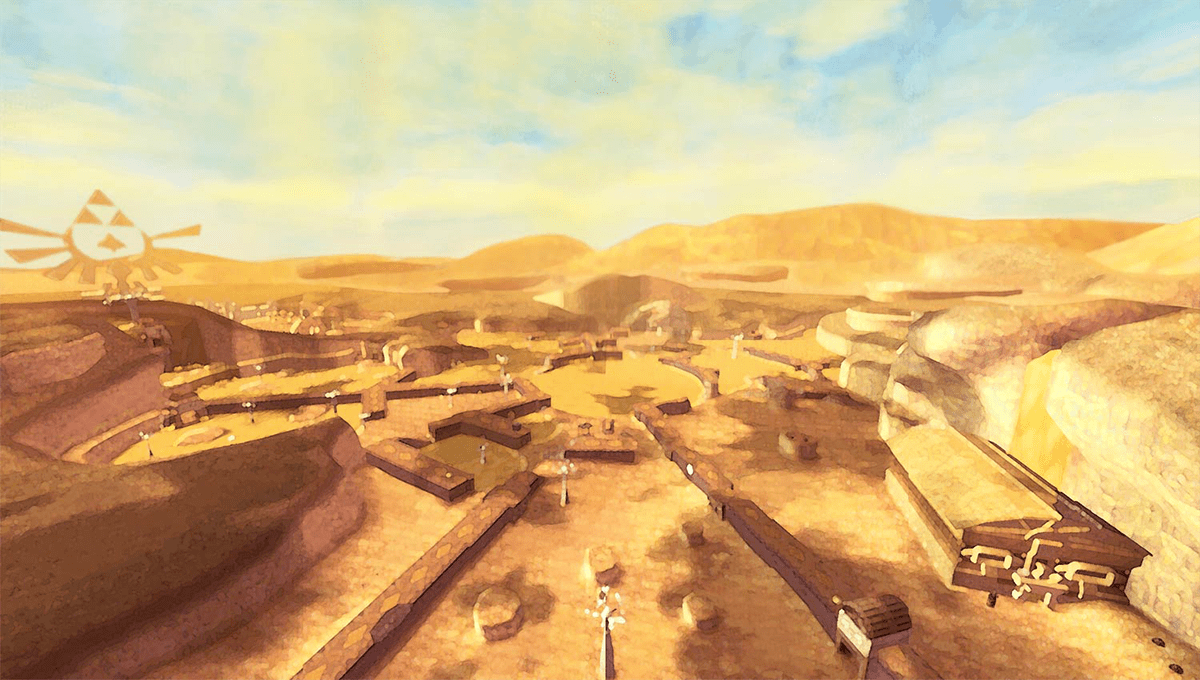

The Amber Tablet opens Lanayru Desert. Use Timeshift Stones to restore ancient machinery, obtain the Hook Beetle and activate the three power nodes that open Lanayru Mining Facility.
Preparation for the Lanayru Desert
If you followed our previous 100% route, you have already opened the Goddess Chests that were already accessible during the first Eldin visit. You therefore do not have to search the entire Sky again. Two of the chests that were activated at that time remain out of reach because Link will later need access to the large Thunderhead for one of them and a swimming ability for another. They are marked in our route and will be picked up at the earliest possible date.
Before you set off for Lanayru, you should check your equipment in the bazaar. The Iron Shield, which was particularly useful on the Eldin Volcano, is not a good choice in Lanayru. Many opponents of the new region are fighting with electricity. If you block an electrical attack with a metal shield, the electrical charge will be transferred to Link. Therefore, get your Wooden Shield from the item management and ideally already use the Hard Wooden Shield if you have upgraded it at Gondo. A Wooden Shield is safe against electricity as long as it is not destroyed by other attacks.
Also fill at least one Empty Bottle with a heart potion and replenish your bomb supply. The small bomb bags offered in the equipment store increase your maximum bomb count, but require a space in the Adventure Pouch. So you don’t necessarily have to buy them now. If your ruby supplies are well stocked, you can invest the money more sensibly in additional bag slots, additional wallets or permanent equipment improvements.
If you haven’t completed the Side Quest about Parrow and his sister Orielle in our previous route, you should complete it now at the latest. Orielle sits with her injured Loftwing on a small island towards the Fun Fun Island. After you get the medicine from Parrow and bring it to his sister, you will receive five Gratitude Crystals from both of them and you can now keep them Empty Bottle. This gives Link his third bottle. If you have completely followed our previous path, this task is already completed and Batreaux has already handed you its early Piece of Heart.
Finally, go into the large statue of the goddess and place the amber tablet in the last free recess of the altar, if you have not already done so immediately after Earth Temple. A yellow Column of Light appears in the southwest Sky. It marks the entrance to the Lanayru region.


Lanayru Mine – Goddess Cube No. 10
Fly through the yellow Column of Light and Link will land on a tall stone structure at the southern end of the Lanayru Mine. Before you even go into the actual mineshaft, you should turn around and jump to the lower level behind the landing point. Run around the base of the tower. The next Goddess Cube is clearly visible on its south side. Fully charge your Goddess Sword and activate the cube with a Skyward Strike. This is artifact number 10 of our ongoing 100% route.
The Goddess Chest unlocked in this way is located on a small island in the northeast Sky southeast of Beedle’s island. The actual access to the chest is blocked by a blastable rock wall, but thanks to your Bomb Bag you can open it on the next return flight. Inside is a Silver Rupee worth 100 Rupees. Don’t let older guides confuse you: A Silver Rupee in Skyward Sword is worth 100 Rupees, while the Gold Rupee is worth 300 Rupees.
Then activate the bird statue at the landing point. If you have the Bug Net, you should also observe the rock walls and the area behind the tower. sand cicadas, a new insect species from Lanayru, can already appear here. They will later be needed for various improvements and can be captured with the net.
Move the First Minecart and Activate the Timeshift Stone
Now enter the mine to the north. After just a few meters an old wagon blocks the path. Slide it along the rails until it falls off the edge into the pit below. Jump after it and defeat the yellow slimes. These enemies can become electrically charged; Therefore, only attack them when their electrical energy has just disappeared. If you then push the cart up to the opposite wall, you can use it as an improvised step. Climb onto the cart, pull yourself up to the higher ledge and continue following the tunnel.
You reach a larger clearing with a dark, crystal-like rock. Hit it once with your sword. The supposedly black stone begins to glow blue-violet and the entire area around it changes. Dried earth turns green, dilapidated technology suddenly works again and the frozen mechanical creatures come to life. You have activated your first Timeshift Stone.
Timeshift Stones only move a limited radius into the past. If an object leaves this radius, it returns to its current state. It is precisely this interplay between past and present that forms one of the most important puzzle principles of the entire region. In the future, always pay attention to where the area of effect of a Timeshift Stone ends and which objects you can move in or out.
Also search the green area thoroughly. Ancient Flowers can grow here. These rare purple flowers only exist in areas transported back in time by a Timeshift Stone. Collect every Ancient Flower you see. They are needed for several equipment upgrades and are even needed once for story progression.


First Treasure Chest – 20 Rupees
The now functioning cart on the north side of the clearing can transport you through the closed gate. Get in and let yourself be automatically driven into a small side chamber. A small Treasure Chest with a red Rupee worth 20 Rupees is waiting there. Take it with you and then drive back to the clearing with the same cart.
There is a second minecart on the south side. If it is outside the Timeshift Stone’s area of effect, you must first push it by hand onto the active section of the track. Once inside the past, she begins to float and is functional again. Before you get in, look for more Ancient Flowers along these tracks too. Especially for our later 100% upgrade of the Beetle, it is worth taking as many copies as possible from the start in Lanayru.
How to cross quicksand correctly
The minecart takes you to a new tunnel, the exit of which is blocked by a huge statue. The figure holds a basket-like opening in front of him. Throw a bomb in there. The explosion causes the statue to tip over, exposing the path behind it.
You now reach the first large quicksand area. You can move easily on normal sand, but in quicksand Link begins to sink very quickly and his stamina drops dramatically. You can therefore only cross such areas by sprinting. Always plan your route from one fixed platform to the next and use stamina fruits as soon as they are reachable. If you stay standing in the sand for too long or your stamina is completely used up, Link will sink and lose a heart.
Several large statues are scattered throughout this section. Throw bombs into their basket-like openings to cause them to tip over and serve as additional platforms in the quicksand. There is also a low tunnel behind one of the statues on the right. Crawl through and open the small chest in the cave beyond. Another red Rupee worth 20 Rupees is waiting inside.
Rare Treasure Chest in the Lanayru Mine
At the end of the first quicksand area you will reach a significantly larger chamber. Work your way northeast across the solid islands in the sand. In the northern part there is a narrow sand channel on the left, at the end of which there are several boulders. Roll bombs one after the other over the sand until the furthest pile of stones has been destroyed. Another Timeshift Stone appears underneath. Activate it from a distance with another bomb, the Slingshot, or another suitable object.
The quicksand in the area of effect instantly turns into a green landscape. At the same time, plants and enemies from the past awaken. Defeat the Quadro Baba and collect all visible Ancient Flowers here too. Then follow the side tunnel to the elevated level. There is a large Treasure Chest with a rare treasure. The exact contents of such rare chests can vary; For example, a Goddess Plume, a Blue Bird Feather or a Golden Skull are possible. For our 100% route, the most important thing is that the chest is opened, because all possible contents are valuable upgrade materials.
Then return downstairs, clear the pile of stones from the tracks and push the next cart into the area of effect of the Timeshift Stone. Get in and let yourself be transported outside through the gate. In front of you is now the actual Lanayru Desert.


Lanayru Desert – the lost past
After leaving the mine you will reach a vast open desert landscape. Fi immediately alerts you to the quicksand that covers large parts of the area. Start by blowing up the smaller boulders near the entrance. Beneath it lies another Timeshift Stone. As soon as you activate it, the immediate area turns into its previous green form and climbing vines that have long since died in the present appear on the rock wall.
Climb the vines and follow the raised path. At one point you have to shimmy along a narrow ledge. At the end you will find an eye-catching colorful disc. This is the lost Dodoh roulette wheel from the Fun Fun Island. You can’t take it with you at the moment because you don’t have a helper who can transport large objects from land to heaven. Remember the Location or leave it marked on your map. We will get the corresponding Side Quest later at the earliest possible date.
In the area there is also a hidden small cave or low passage with a Treasure Chest, which contains a rare treasure. Since you want to take every solid treasure with you for a 100% route, you shouldn’t skip this short detour.
Ampilus and Tumbleweed
Shortly afterwards you meet the first Ampilus. These armored enemies roll towards Link at high speeds. You can provoke their attack and dodge at the last moment, sending them crashing into a wall or obstacle and leaving them dazed for a moment. A much more convenient method is to use bombs: If an explosion hits the Ampilus, only its empty shell remains. This tank will soon become an important tool because it does not sink into quicksand and can therefore be used as a moving platform.
At the same time, keep an eye out for dry balls of plants being blown across the desert by the wind. These are Tumbleweed. Pull out your Bug Net and catch the bushes rolling ahead. Tumbleweed is an important upgrade material needed for subsequent improvements to the butterfly net, shield, and bow, among other things. Therefore, take every copy with you that passes you without a major detour.


Free the robot and get the Hook Beetle
Follow the path further north. Behind a low wall you will see three large cages. Sprint up the wall and first open the Treasure Chest standing there. There is guaranteed to be a bale Tumbleweed in there. Then jump onto one of the cages. One of the neighboring cages has an opening at the top under which lies a pile of stones. Throw a bomb in to destroy the stones, then a second bomb to activate the exposed Timeshift Stone.
The entire area jumps back in time. Several Teknobokblins appear and an ancient robot comes back to life in its cage. Defeat all enemies. With the Teknobokblins, pay particular attention to their electrical weapons: do not hit the active electricity barrier head-on. A Wooden Shield or a well-timed Shield Bash is significantly safer than an Iron Shield.
After the fight, talk to the freed WR-301. As a thank you, he will upgrade your current Beetle to Hook Beetle free of charge. The new variant has two gripping arms and can pick up objects. For example, if you fly into a thunder flower, the Beetle carries it with you. You can then look down and drop the bomb specifically over an enemy, a switch or an opening. This ability is essential for almost all upcoming puzzles in the desert.
Difference in Skyward Sword HD: With motion controls, the Hook Beetle is controlled by tilting the controller, similar to the Wii version. With button control, the flight is controlled via the analog sticks. Depending on your personal preference, longer flight paths and the precise dropping of bombs can be carried out much more smoothly with the button control.
Reach Goddess Cube No. 11
To the west of the freed robot is a larger area of quicksand with several statues. A thunderflower grows in a withered tree. Send the new Hook Beetle there, pick up the bomb and throw it into the openings of the statues. This causes the figures to tip over and form safe platforms. You can also safely eliminate the electrically charged Electro Spume from a distance with a dropped bomb.
On the next large sandy area, several crabs move through the quicksand. Kill the first one with a bomb that you drop over him with the Hook Beetle. Then jump onto his remaining tank. As long as you stand on it, you can fully regenerate your stamina and let yourself drift from the quicksand. In the same way, use a second Ampilus to reach the small southern platform.
It says Goddess Cube No. 11. Charge the sword and activate the cube with a Skyward Strike. The unlocked Goddess Chest is on an island in Sky, east of the yellow Column of Light. Inside lies the Heart Medal. As long as you carry them in your Adventure Pouch, hearts will appear more often. The medal is particularly valuable in hero mode because heart flowers and normal heart drops are otherwise largely deactivated there.
Then wait until the required Ampilus appears again and use his tank to leave the sand area again.


With Ampilus shells through the quicksand
The following sand area is even more dangerous because the quicksand is moving. Defeat a Ampilus again and immediately jump onto its empty shell. The sand stream automatically carries the shell with it. Use the ride to reach the northern platform and get off in time before the tank disintegrates.
On the next island you repeat the principle with another Ampilus. This time let yourself be transported to the northeast and then work your way across the last solid surfaces to the northern cave entrance. Such passages seem hectic at first, but they become much easier if you wait a moment after each landing and let Link’s stamina fully regenerate before sprinting to the next tank.


West area and Temple of Time
After the cave you reach the western area of the desert. A huge gorge divides the landscape. First go north to the Lore. There is a Timeshift Stone on a high rock formation, which you can activate with a Slingshot or Beetle. This will make the first minecart functional again and several Teknobokblins will awaken. Defeat the opponents and then drive the cart across the first section of the gorge.
The next Lore is outside the area of effect of the first Timeshift Stone. So look for the big tree on the central rocky island. There is an opening in its crown. Drop a bomb inside with the Hook Beetle. The explosion exposes or activates another Timeshift Stone. There is also a switch below the tree that you have to hit with the Beetle so that the grate opens on the next route.
Then continue west. A massive Triforce symbol and a buried entrance appear in front of you: the Temple of Time. Gorko is waiting again in front of the ruins. The direct route to Zelda is blocked, which is why Link has to find another way.
Update the desert map
Go north from Gorko. There are boulders on several stone pillars. Use the Hook Beetle to pick up a bomb and drop it on the piles of stones until another Timeshift Stone is revealed. Activate it. A WR-301 and several Teknobokblins appear. Defeat the enemies and then talk to the robot.
The robot explains to you that there is an alternative access to the Temple of Time through the Lanayru Mining Facility. Even more important for further exploration: It corrects your map. The desert is currently covered by sand, but on the updated map you can now see the old roads and paved paths that are still hidden under the quicksand. You can cross these lines safely, even though the surface looks like normal quicksand.
This map information is particularly important for our 100% route. It not only gives you access to the main generator, but also access to a hidden Piece of Heart, which you can collect before the next dungeon.
Activate Goddess Cube No. 12 beside the Temple of Time
minecart journey
Activate the next Timeshift Stone along the tracks and get into the minecart. While driving you will immediately pass another Goddess Cube. The car doesn’t stop next to it. Therefore, hold your sword up before you set off or start charging a Skyward Strike in good time. As soon as the cart passes the cube, align yourself with it and fire the beam.
This activates Goddess Cube No. 12. If you miss the hit, nothing is lost: you can use the cart again and try again.
The associated Goddess Chest is on Beedle’s Island. It contains another Piece of Heart. After completing our work in the desert, a particularly worthwhile return flight to Sky awaits us.
Also examine the green areas activated by the Time Stones along this path. More Ancient Flowers grow here and Gerudo dragonflies may appear. With the Bug Net you can catch the insects. You should collect Eon Flowers in particular consistently because the later Beetle upgrades require several copies.


Piece of Heart in the Lanayru Desert
After updating your map, you should definitely not run to the large generator immediately. In the northeast of the desert there is already an optionally accessible Piece of Heart, which is easily overlooked in the old solution. Open your map and look for the narrow old path that appears to lead into the rock face on the northeastern edge. In the real landscape you only see quicksand and a cracked wall.
Orient yourself using the marked underground road and sprint across the safe area in the sand to the wall. Place a bomb on the crack. After the explosion, a narrow passage opens. Follow it to the end and open the Treasure Chest. Therein lies the Piece of Heart and the Lanayru Desert.
The further section of this secret path cannot be fully explored on the first visit because you are missing the Clawshots. However, the Piece of Heart itself can already be reached with the Bomb Bag and therefore belongs at this point on our 100% route. You can find all other fragments in our guide to all Pieces of Heart in Skyward Sword.
Find the large generator
Then return to the main desert area. A large Hrok tries to bombard you with boulders. The easiest way to eliminate it is to pick up a bomb with the Hook Beetle and drop it directly above the bird. Then you use the now familiar map of the old roads to walk through the quicksand from safe section to safe section.
Fi expands the number of your map markings at this point so that you can set several signal lights at the same time. Mark the corners of the streets underneath the sand. In this way, a clearly visible route of light points is created over the desert and you don’t have to open the map again every time you sprint.
Follow the underground path to the location marked with an X. There is a large, dilapidated mechanism there. Blast the boulders in the immediate area and activate the Timeshift Stone underneath. Several Teknoboblins appear. After defeating them, talk to the WR-301 next to the machine. He explains to you that it is the main generator of the Lanayru Mining Facility. Before the system can be activated, three smaller energy switches in the area must be switched on.


Lightning switch in the northern warehouse
Activate Phais Dowsing for the three power switches. The strongest signal in the north leads to a seemingly closed rock face. A building is clearly marked there on the map. Examine the wall more closely and you will see a crack. Blow it up with a bomb and go to the northern warehouse.
Inside there is a large area of quicksand. Roll a bomb at the small pile of rocks in the middle of the room. A Timeshift Stone appears underneath. As soon as you activate it, the sand disappears and the original storage room appears. First defeat all the Teknoboblins and then search the rows of crates thoroughly. On the lower level you will find a small chest with a red Rupee worth 20 Rupees and another with a blue Rupee worth 5 Rupees.
For the 100% route there is an easy-to-miss third treasure here. In the northern part of the building there is an additional chest with a rare treasure on or between the high crates. To reach them, you may have to deactivate the Timeshift Stone with the Hook Beetle or specifically change the sand level and use the boxes as an elevated platform. Be sure to take this treasure with you before leaving the warehouse.
The Ampilus of the current quicksand area have transformed back into electric Ampilus eggs within the past. You need exactly one of these for the mechanism on the rear gate. Pick up an egg with the Hook Beetle and fly it to the device. Then stand on the Floor Switch so that the small opening opens. As soon as the egg is not electrically charged, you push it into the generator with the sword. The grid moves up.
Go to the back room and activate the lightning switch. Stick your sword into the opening, turn the mechanism 90 degrees counterclockwise and push it in. The lightning symbol on the generator lights up. This means that the first of three energy switches is active.
Collect Blue Bird Feather and Goddess Plume
Before you finally leave the northern camp, you should use the time mechanic to make two particularly valuable finds. There are additional platforms in the elevated areas around the generator, the accessibility of which depends on whether the Timeshift Stone is currently active or deactivated. From a suitable position you can switch the Timeshift Stone with the Hook Beetle and then quickly run to the respective platform.
One of the chests contains a Blue Bird Feather. On the opposite platform you can also collect a Goddess Plume or a particularly rare treasure. Both materials are extremely useful for high-quality upgrades. The blue bird feather in particular will later be used for shield, bag and beetle improvements, among other things.
If you have also collected enough Ancient Flowers, you will have most of the materials for the later Beetle upgrades. We use this on the return flight before the Lanayru Mining Facility.
Activate the Water Power Node in the West
Leave the warehouse and orient yourself with the Dowsing to the west. The next signal leads to three large statues at the edge of the quicksand. The old path under the sand surface is marked on your map, so you can get there safely Dashing can.
The next generator is behind or between the statues, but it is currently completely dilapidated. Look for a cracked wall to the left and blow it up with a bomb. Behind it lies a Timeshift Stone. As soon as you activate it, the entire area is restored and the mechanism works again.
Go to the generator, stab the sword into it and turn the mechanism counterclockwise as before. Then press it in. The drop symbol lights up. Two of the three required switches are now activated.


Activate the Fire Power Node in the Southeast
The last signal of the Dowsing leads to the southeast of the desert. Use the underground roads shown again to get safely across the quicksand. There is a bird statue in front of the building. Be sure to activate it, because it will be the most convenient starting point for getting to Lanayru Mining Facility later.
Enter the building and first blow up the pile of rocks in the middle of the quicksand pool. Underneath lies another Timeshift Stone. Before you activate it, you should climb onto the boxes in the northern and western areas. On the raised platform is a solid Treasure Chest with Eldin Ore. Now take it with you and push the small metal block down to open a shortcut at the same time.
Then activate the Timeshift Stone and defeat the Teknobokblins. Search the bottom area completely. Several small Treasure Chests contain blue Rupees. Since they are permanently placed and we are completely exploring the room anyway, we naturally take them with us.
The middle part of the room remains interrupted by a ravine. Climb the crates and deactivate the Timeshift Stone again. This causes the quicksand to return and a Ampilus to appear. Kill him, jump onto his shell and let the sand stream carry you to the opposite side. Activate the Timeshift Stone there again.
Now you again need an electric Ampilus egg. Take on the Hook Beetle and transport it across the ravine to the generator. Insert it into the electrical device like in the first warehouse and use it to open the grate to the back room.
Monster Horn and all chests in the southeastern camp
Behind the grid there is not only the last generator. First open all Treasure Chests. One contains a Monster Horn, an important material for later upgrades. Another chest brings you another blue Rupee. Together with the previous two chests and the Eldin ore, you have collected all of the solid treasures in this storage building.
Then activate the fire switch in the same way as the previous two generators: insert the sword, turn the mechanism and push it in. This means that all three power switches are switched on.


Activate the main generator of the Lanayru Mining Facility
Now return to the large generator in the center of the desert. You can walk the entire way through the sunken streets. If you have activated the bird statue at the southeastern camp, traveling across the sky is also a convenient shortcut: return from the statue to the Sky, immediately jump back through the yellow Column of Light and select the bird statue at the main generator or the nearest landing point.
Activate the Timeshift Stone next to the large mechanism. Now you can put your sword into the central opening. The three rings must be aligned according to the position of their respective generators on the map. The drop symbol belongs to the left or west, the fire symbol to the bottom right or southeast and the lightning symbol to the top or north. Rotate each ring into the correct position and press them in one at a time.
As soon as all three symbols are correctly aligned, the massive system comes to life. In the middle of the desert, a huge structure rises from the sand. This is the Lanayru Mining Facility, the third major dungeon in the game.


Collect the newly available rewards
Use the nearby bird statue to return to the sky and open the three Goddess Chests activated during the first Lanayru visit.
Goddess Chest #10 – Silver Rupee
First fly to the northeastern area of the Sky to the small island southeast of Beedle’s home island. Land on the lower level. A cracked rock wall blocks access to the chest. Place a bomb in front of it and blow up the entrance.
The Goddess Chest activated by artifact number 10 is in the cave. Open it and you will receive a Silver Rupee worth 100 Rupees.
Goddess Chest #11 – Heart Medal
The second new chest is on a volcano-like small island east of the yellow Column of Light. Fly there and land on the outer ledge of the island. The Heart Medal is in the Goddess Chest.
It increases the chance that defeated enemies and destroyed objects will drop hearts while it is in your Adventure Pouch. In normal game mode it is particularly useful in longer dungeons. In hero mode it has even greater utility.
Goddess Chest #12 – another Piece of Heart
Then fly to Beedle’s Island. The Goddess Chest associated with Artifact Number 12 is located on the elevated area above the cave. Open it and take the Piece of Heart.
This means that all three artifacts activated during the first Lanayru visit were immediately redeemed. You can also find a complete overview of all 27 dice and their rewards in our guide to all Goddess Cubes.
Improve Hook Beetle at Gondo
Before you return to the desert, you should make a stop at Gondo in the bazaar. By traveling through Lanayru you have now collected Ancient Flowers and probably already have Hornet Larvae from Faron and at least one Golden Skull. With two Eon Flowers, two Hornet Larvae and a Golden Skull as well as 50 Rupees, Gondo can get your Hook Beetle to Quick Beetle improve. This variant moves significantly faster and can therefore reach more distant targets before its flight energy is used up.
If you also have enough Ancient Flowers, Amber Half Moons, a Blue Bird Feather and a Goddess Plume, the next improvement to the Tough Beetle may even be possible. We deliberately collected the rare materials required for this along our route. However, if you are only missing a random material, you should not force farming for a long time. The upgrade remains available at all times and will be made available at the next appropriate bazaar visit at the latest.
You can also find out which materials are needed for all improvements in our guide to the upgrade at Tinkerer Gondo.
Continue in Lanayru Mining Facility
Return to Lanayru through the yellow Column of Light and select the bird statue right at the entrance to the Mining Facility. The third dungeon of the game begins behind the large door. There, Link receives the Magic Jug, which can be used to blow away huge amounts of sand and open up new paths. You can also expect new machine opponents, conveyor belts, more Timeshift Stone puzzles and finally the boss Moldarach.
We also play the Lanayru Mining Facility as a complete 100% route. Every solid Treasure Chest, all rare materials, the Dungeon Map, the Gust Bellows, the Ancient Circuit and the Heart Container after the boss are collected before the journey then leads back to the Temple of Time and Zelda.