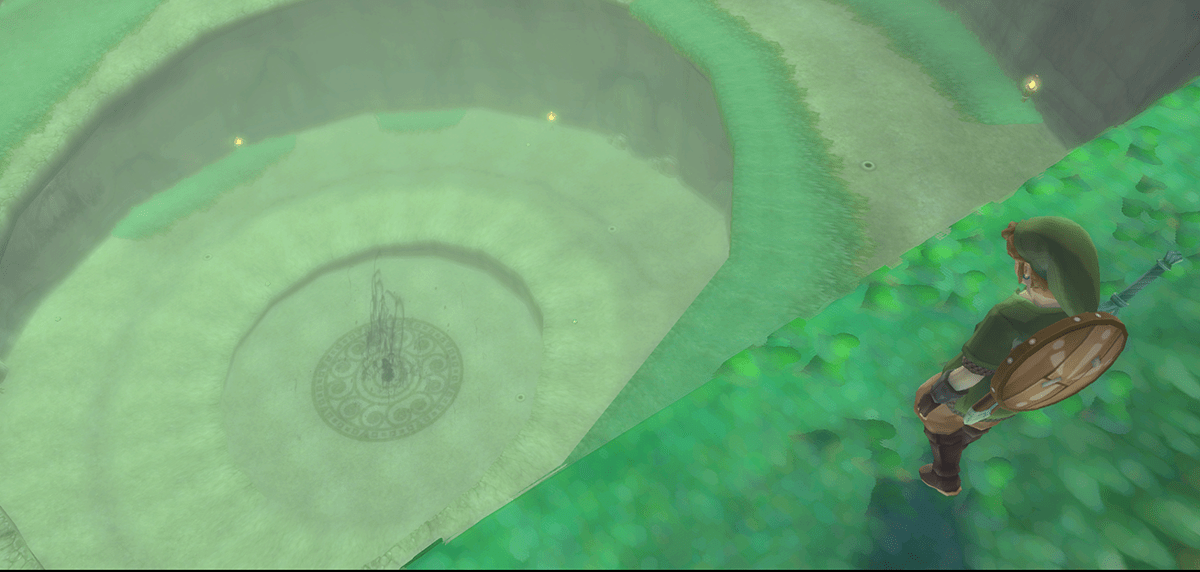

Return to the Sealed Grounds with the Master Sword, stop the Imprisoned and open the Gate of Time. After meeting Zelda in the past, return to Skyloft and seek Levias inside the Thunderhead.
Directly to Sealed Grounds
After completing the Fire Sanctuary, you climb up to Sky at the next bird statue. The old solution calls for several Goddess Chests at this point, but in our consistent 100% route we picked up these rewards at the earliest possible point. The golden Rupee below the Fun Fun Island, the Piece of Heart on Beetle Island and the small Bomb Bag on the tower of the Isle of Songs are already in your possession. You no longer have to plan an unnecessary sightseeing flight. You can compare your complete status at any time with our guide to all Goddess Cubes.
Instead, fly directly through the green Column of Light to Faron and land in the Sealed Grounds. As soon as you approach, you notice that the surroundings have changed. Groose made good on his announcement and built rails and a massive machine around the crater.
Enters the Sealed Temple. The large Gate of Time is still in the known location. Stand in front of it, hold the Master Sword up and charge a Skyward Strike. Just as you are about to transfer the energy to the Gate, a violent earthquake shakes the entire temple.
Groose runs outside. Follow him immediately.
The Imprisoned – second fight
Jump back into the large crater and approach the seal stone. The Cloud Barrier departs and the Exile rises for the second time. The basic task is unchanged: The monster tries to reach the Sealed Temple via the spiral path. If it gets to the top, the fight is lost.
However, The Imprisoned has evolved since the first encounter. He has grown two powerful arms that allow him to cling to the walls of the crater and jump over large parts of the normal path. Groose built its new weapon precisely for this case.
Use Groose’s catapult correctly
During the fight, Groose’s call appears regularly as soon as his cannon or the Groose firecracker is ready for use again. Switch to Groose and aim the crosshairs at the Imprisoned. The bomb explodes upon impact, stunning the monster for a short time.
The cannon is particularly important as soon as The Imprisoned tries to pull himself up the rock wall with his arms. If you let him climb undisturbed, he will skip a significant part of the spiral path. A direct bomb hit causes him to fall back to the ground.
You can also use Groose’s cannon independently to give yourself a larger window of opportunity when attacking the feet. The ammunition recharges automatically.
Destroy the Imprisoned’s Toes
If you want to play the fight the intended way, focus on the toes again. If possible, destroy all of the toes on one foot first. As soon as one foot is completely damaged, The Imprisoned becomes significantly slower, which means you can work on the second foot much more relaxed.
Again, pay attention to the powerful shockwaves created by his steps. His arms and higher speed make it more difficult to stay close to him permanently than in the first fight. Therefore, use Groose’s bombs to stun him regularly.
As soon as all the toes are destroyed, The Imprisoned tips backwards. This time, however, his body is much flatter on the spiral path, so you often can’t walk straight to his head. Use the air currents at the edge of the crater to quickly reach higher ground, then glide to the seal stone.
Hit the large stone three times deeper into his forehead with strong upward blows. The Imprisoned then stands up again and his toes regenerate.
Simpler strategy – straight to the head
As with the first fight, there is a significantly faster alternative. Use the large airflow in the middle or the side wind shafts and let yourself be carried to a level above the Imprisoned. Then jump directly onto his head.
If you land directly at the seal stone, you don’t have to destroy its toes at all. Stand over the stone and deliver quick downward blows to drive it deeper into the head. As soon as The Imprisoned shakes Link off or moves on, use airflow again and repeat the process.
Groose’s cannon makes this method even easier. Briefly stun the Imprisoned before jumping on him. This means he doesn’t move for a few seconds and the jump onto his head is much easier to control.
Reseal the Imprisoned
In total you have to drive the seal stone all the way in three times. After the third pass, The Imprisoned loses its strength and is pulled back into the ground.
Immediately head to the center of the crater. Charge up a Skyward Strike and fire it at the large seal stone. You then have to trace the given symbol again with directed sword movements. Once all lines have been completed correctly, The Imprisoned is resealed.
Difference in Skyward Sword HD: With button control, you enter the corresponding strike directions using the right stick. With motion control or on Wii, the sword movements are carried out directly with the controller.
Activate the Gate of Time
After the fight, return to the Sealed Temple. Nothing can interrupt you now. Stand in front of the big Gate of Time and fully charge the Master Sword with a Skyward Strike. Meet the Gate.
The holy energy of the three flames reacts and the stone gate begins to move. After centuries of stagnation, the Gate of Time is fully awakening. Enter the glowing area and Link will be transported far into the past.
The Sealed Temple still bears its original name in this era: Temple of Hylia. The building is completely preserved and the great battle against the Demon King is not yet far enough behind for its consequences to disappear.
Impa in the past
Immediately after Link’s arrival, the younger Impa is waiting for him. She successfully guided Zelda through time and completed her task. Talk to her and then go through the large door at the back of the temple.
Zelda is finally waiting there.
Zelda’s true identity
The following scene is one of the most important moments in the entire story. Zelda explains to Link why she was drawn to the Surface and why Impa had to protect her. She is not just an ordinary girl from Skyloft, but the mortal reincarnation of the goddess Hylia.
In the distant past, Hylia fought against the Demon King and his army. In order to protect the people and the Triforce, she let part of the land and its inhabitants rise into the sky. The Demon King could be sealed, but Hylia knew that the Cloud Barrier would not last forever.
Therefore, she gave up her divine form and allowed herself to be reborn as a human. This meant she could one day use the Triforce or ensure that a worthy hero would find it – because the power of the Triforce cannot be used by a deity himself.
Link is this hero chosen by Hylia.
The Master Sword receives Hylia’s blessing
Zelda asks Link to hold the Master Sword in front of her. She transfers her holy power to the blade, completing the work of the three divine flames.
The sword changes appearance again. The gemstone and wings of the crossguard shine more powerfully and the power against evil is fully awakened. Only through Zelda’s blessing does Link now have the fully awakened Master Sword.
The difference is also noticeable in play: the sword causes even more damage and the Skyward Strike charges significantly faster. This gives Link his final sword form.
Zelda’s long sleep
The price of Hylia Plan becomes clear immediately after. The Imprisoned is just the sealed form of the original Demon King. In order to preserve the Cloud Barrier through the millennia, Zelda must remain in this era and permanently transfer her holy power to the Cloud Barrier.
She steps into a large orange Crystal Ball and puts herself into a deep sleep. Zelda will remain there until Link finally destroys the Demon King in his own time.
Link can’t do anything else for you at the moment. Therefore, return to the present through the Gate of Time.
Back in Sealed Temple
When you return, talk to the old woman. Groose also speaks out. He has now accepted that Link must fulfill a task that goes far beyond his own capabilities. Instead of returning to Skyloft, he wants to stay in the Sealed Grounds and support the old woman.
His decision is still extremely important for the coming events.
Gorko’s Goddess Wall – already done
If you leave the temple through the eastern exit, you will find Gorko continuing his research. The original solution section uses the Piece of Heart from his Goddess Wall task.
In our 100% route we have this Piece of Heart but already after first Collected battle against the Imprisoned. Gorko only gives the reward once. You don’t have to do the task again.
The wall itself can still be used if you need hearts, bombs, arrows, Rupees or a fairy. You can also find all unique health expansions in our guide to all Pieces of Heart.
Back to Skyloft – new Side Quests
Before we ask Gaepora about the Triforce, let’s use the story progress for two new Side Quests. If you followed our route so far, you currently own 60 Gratitude Crystals. Both new orders bring five more copies each, increasing our total to 70.
Side Quest: Sparrot’s Crystal Ball
First go to the bazaar. The fortune teller Sparrot is no longer sitting in his usual place. Talk to the other visitors or go directly to his house in the eastern residential area of the Skyloft.
Sparrot is completely dejected. His crystal ball is shattered and without it he can no longer predict the future. He remembers that his original sphere came from the Surface. Fi adds a replacement crystal ball to the Dowsing.
Fly to Eldin and land at the bird statue in front of the Earth Temple. There is a grappling point high up to the left of the temple entrance. First use the airflow or climb onto the raised platform and then pull yourself onto the rock wall with the Clawshots.
There is actually a large crystal ball above the temple entrance, which is almost exactly the same as Sparrot’s old copy. Examine them and call Scrapper. The robot transports the ball into the sky.
Return to Sparrot’s house. Scrapper places the crystal ball on his table and Sparrot can work again. As a reward you will receive five Gratitude Crystals. In addition, his fortune telling becomes permanently cheaper.
Side Quest: A plowman for Kina
Then fly to Pumpkin Landing and talk to Kina outside on the field. After we have long since completed Lumpy Pumpkin’s entire series of tasks, she is now looking for someone who can permanently dig up the large field.
Promise her to look for a suitable helper. Fi adds the desired plowman to the Dowsing. The signal leads to Eldin Volcano.
Fly through the red Column of Light and land at the bird statue Volcano – East. Use the air currents and jump from the upper ledge into the large cave. As you fall, you should land on one of the raised pillars.
Goldo, the old Mogma leader from the Fire Sanctuary, is waiting there. Talk to him and tell him about Kina’s Field. Goldo is currently unemployed anyway and finally agrees to take on the work.
Call Scrapper. The robot actually transports the Mogma all the way to the sky. Return to Pumpkin Landing and approach Kina. After a short scene, Goldo begins his new job.
Kina thanks you with another five Gratitude Crystals.
70 Gratitude Crystals – Two Gold Rupees
If you followed our route completely, you now own exactly 70 Gratitude Crystals. Visit Batreaux below Skyloft.
For this level you will receive two Golden Rupees for a total of 600 Rupees. There is no new wallet at 70 Jewels yet. The final reward awaits at all 80 crystals.
You can find the complete order of all tasks and rewards in our Guide to all Gratitude Crystals.
Prepare to Buy Beedle’s Piece of Heart
Before you go to the Knight Academy, you should also briefly visit Beedle’s flying shop. In our optimal 100% route, we save the one-time 50 percent discount from his later Beetle side task for the most expensive product still missing: the purchasable Piece of Heart.
This only appears regularly after you have purchased the previously offered Life Medal. Therefore, if Beedle is still selling this medal, buy it now for 800 Rupees. The Piece of Heart will then appear in the range and normally costs 1,600 Rupees. We deliberately leave it until we bring Beedle’s Beetle back – then it will only cost 800 Rupees.
Ask Gaepora about the Triforce
Now go to the Knight Academy and visit Gaepora in his room. Link needs the Triforce, but even the headmaster doesn’t know where the holy power is.
However,
Gaepora remembers an ancient being who might know more: the Great Celestial Spirit Levias. He refers Link to Master Owlan, who is particularly interested in Loftwings and old legends.
Speak to Owlan about Levias
Owlan is located in the adjacent room of the Knight School. Talk to him and ask for Levias. The Great Celestial Spirit lives within the Thunderhead and was once considered the protector of the sea of clouds.
However, he has been behaving completely differently for some time now. Levias has become aggressive and attacks everything around him. Owlan suspects something is wrong with him.
In order to be able to survive against such a huge flying creature, Owlan teaches Link a new technique for his Loftwing: the tornado blast.
Learn Tornado Strike
Mount your red Loftwing and begin Owlan’ trial. Several large targets appear above Skyloft. You have to destroy them with the new Tornado Blast.
Aim your Loftwing at a target as early as possible and only accelerate when the disc is approximately in the middle in front of you. The Tornado Strike has a significantly longer attack movement than the standard flying attack. This means you can hit targets even though you are still a long way away.
For the test you have to destroy ten targets within two minutes. If you lose sight of a target, you first climb a little higher and search the surroundings. A failed attempt has no consequences and can be repeated as many times as desired.
After successful completion, Owlan allows you to use Tornado Blast permanently. This technology is required immediately for Levias and remains available afterwards during all flight segments.
Pumpkin soup for Levias
Owlan explains that Levias has a particular weakness for Biskur’s famous pumpkin soup. If Link wants to get him out of his aggressive state, a large portion of the soup might help.
So fly to Pumpkin Landing and talk to Biskur in the bar. He actually knows Levias and used to regularly bring pumpkin soup to the Great Celestial Spirit. Offer to make the next delivery yourself.
However, no normal Empty Bottle is enough for Levias’s huge appetite. Biskur provides a complete soup kettle. Fi calls Scrapper, who transports the heavy vessel.
Biskur points you to a small island within the Thunderhead. A striking rainbow appears above her. This is exactly where the soup should be placed.
Open the ancient Goddess Chests are already
The original solution section recommends two Goddess Chests within the Thunderhead: the small Bomb Bag on the Isle of Songs and the Piece of Heart on Beetle Island. We have already collected both rewards immediately after activating the corresponding Goddess Cubes.
You can therefore fly directly to Rainbow Island without planning another collection detour.
Levias – first phase
Land on the small island below the rainbow. Scrapper puts down the large soup kettle and withdraws. As soon as the pumpkin soup is ready, Levias appears.
The huge whale, however, has changed significantly. Four large, eye-like parasite appendages protrude from its body. Get on your Loftwing immediately.
Your goal is to destroy all four eyes with the newly learned Tornado Strike. First fly a little further away and align yourself with one eye. Accelerate and trigger the tornado blast a few meters from the target. The attack takes your Loftwing through the eye and destroys it with a clean hit.
Don’t try to ram Levias’s body directly. His massive skin just pushes you back. Concentrate exclusively on the four large eyes and correct your altitude after each attack before starting the next approach.
Once the fourth eye is destroyed, the actual cause of his condition appears on Levias’s back.
Boss: Bilocyte
Jump from your Loftwing and land on Levias’s broad back. The Lazy-Eyed Giant Parasite Bilocyte rises from its blowhole.
The parasite has a large central eye, but initially protects it with two lateral appendages. At the same time, he spits large green balls of energy at Link.
These bullets are the key to the fight. Wait for a bullet to fly towards you and knock it back with a aimed sword strike. In order to first destroy the two side protective extensions, you have to deflect the projectiles back to the left or right.
If you hit the ball back with a sideways blow, its direction of flight changes. Hit both side eyes or outgrowths one after the other until they are destroyed.
Hit Bilocyte’s Central Eye
Once both side protection areas are removed, Bilocyte opens his large central eye. Now he throws more green balls directly at Link.
This time, hit straight or in the required direction so that the bullet flies straight back to the parasite’s head. After a hit, Bilocyte sinks down and his eye is within reach.
Immediately run forward and attack the weak spot with as many sword strikes as possible. With the Master Sword fully awakened, you are now causing enormous damage.
After a short time, Bilocyte retreats again and builds up his defense again.
Bilocyte – second round
First repeat the knocking back of the green projectiles. However, the parasite begins to move its head to the side and tries to avoid the bullets thrown back.
Therefore, observe his movement and adjust your sword strike so that the ball flies to the position in which his head is currently moving. Often you have to consciously knock the projectile back a little to the side instead of just straight ahead.
As soon as a hit is achieved, Bilocyte falls forward again. Run to the eye and hit as often as possible.
After several successful runs, the parasite finally breaks away from Levias and is destroyed.
Levias and the Song of the Hero
After Bilocyte is defeated, Levias returns to his peaceful nature. Speak to the Great Celestial Spirit.
Levias actually knows more about the Triforce. The holy power is located in Skyloft, but can only be achieved by a hero who has passed another great test.
For this Link needs the Song of the Hero. However, Levias only knows a part or cannot convey the entire song on her own. The remaining sections are guarded by the three great dragons of the Surface:
The water dragon Faron lives in Faron Woods, the fire dragon Eldin lives at the volcano and the thunder dragon Lanayru in the region of the same name. Link must seek out all three and obtain their respective parts of the Hero’s Song.
This begins the next big story section.
Bug Rock and Beedle’s Missing Beetle
Before we begin our search for the three dragons, there are several new 100% activities. Since Levias was freed from the parasite, the Thunderhead has calmed down significantly and Strich has discovered the beetle island for himself.
Leave the Thunderhead once and then fly back in. Head to Beetle Island and talk to Strich there. He has turned the place into a paradise for insects and now offers the Beetle mini-game.
If your Bug Net has not yet been fully upgraded, it is worth visiting Gondo first. With the large Bug Net, the upcoming time trial is much easier.
Beedle’s lost Beetle
After speaking to Strich at least once on Beetle Island, return to Skyloft and enter Beedle’s flying shop. Beedle seems unusually depressed and asks you to talk to him at night.
Sleep in his bed until night and leave the shop on Beedle’s Island. The dealer tells you about his most valuable possession: a rare Horned Colossus Beetle, which has disappeared along with its cage.
Sleep again until daylight and fly back to Beetle Island. Speak to stroke. He happened to find exactly this extremely rare Beetle and actually wants to keep it. However, if Link passes his Expert Beetle Catching test, Strich returns the animal.
Catch All Ten Bugs in under Three Minutes
In the expert course you have to catch ten specified insects within three minutes. The types and Locations are fixed. The key is not to chase after every single insect, but to keep a clean route across the island.
With the large net, a single well-placed swing is often enough. Don’t run straight into rare insects or they will fly away. In particular, approach sandhoppers and Gerudo dragonflies a little more slowly and only strike when they are in the larger catching area.
If you complete the task within the time, Strich Link will give Terris Beetle and the cage.
Five Gratitude Crystals and Beedle’s 50 percent discount
Return to Skyloft, enter Beedle’s shop and sleep until night again. Return the Beetle to him outside on his island.
Beedle is completely overwhelmed and gives Link five Gratitude Crystals. In addition, you will receive a one-time discount of 50 percent off your next purchase in his shop.
If you followed our route and consciously saved up the Piece of Heart for sale, now is the perfect time to redeem the discount.
Piece of Heart at Beedle for only 800 Rupees
Sleep again until morning. The Piece of Heart should now be available in the store at the regular price of 1,600 Rupees. Thanks to Beedle’s thank you, your next purchase will only cost half.
Buy the Piece of Heart for 800 Rupees. This saves us 800 Rupees and at the same time secures one of the last regular Pieces of Heart from Skyward Sword.
If you have already purchased the Piece of Heart at full price previously, you can of course use the discount for the most expensive outstanding bag space or the Beetle medal.
Master Owlan is looking for a rare plant
After talking to Levias, there is also another jewel task available. Return to the Knight School and speak to Master Owlan again. He has been studying the plants of the Sky for years and now knows practically every species that occurs there.
However, Link was in places that are inaccessible to Owlan. That’s why he asks you to look for an extraordinary plant in the Surface. Fi includes the target in the Dowsing.
Fly into Faron Woods and activate the Dowsing. We’re not looking for an ordinary plant, but rather the Kikwi Olo, whose plant-like body is obviously exotic enough for Owlan.
Talk to Olo. He would like to get to know a safe and completely new place anyway. Call Scrapper and have the Kikwi transported to the sky.
Return to the Knight School and talk to Owlan. The teacher is excited about his new research object and rewards Link five Gratitude Crystals.
All 80 Gratitude Crystals
If you have followed our 100% route completely, you have now collected all of the 80 Gratitude Crystals. Visit Batreaux one last time in his house below the Skyloft.
The accumulated gratitude fulfills his greatest wish. Batreaux transforms into a human and can now live without fear of the inhabitants of the cloud lair.
As a final reward, Link will also receive the Luxury Wallet, which can hold up to 9,000 Rupees. Together with the three additional wallets from Beedle’s shop, the absolute maximum increases to 9,900 Rupees.
This concludes the complete collection of Gratitude Crystals before we visit the first dragon for the Song of the Hero.
Continue with the Song of the Hero
For the complete Song of the Hero, Link must now revisit the three regions of the Surface. Each dragon holds a portion of the melody, but none will hand it over easily.
A completely changed landscape awaits you in Faron Woods, the Eldin Volcano has one of the most unusual equipment passages in the entire game and in Lanayru we have to save a long-gone dragon. The last Goddess Cubes, the fifth Empty Bottle and finally the last regular Piece of Heart can also be reached in this way.
The order of the three dragons is largely free. For our optimized 100% route, we choose a sequence that creates as few backtracks as possible and takes the last collectibles with us exactly when they become reachable.