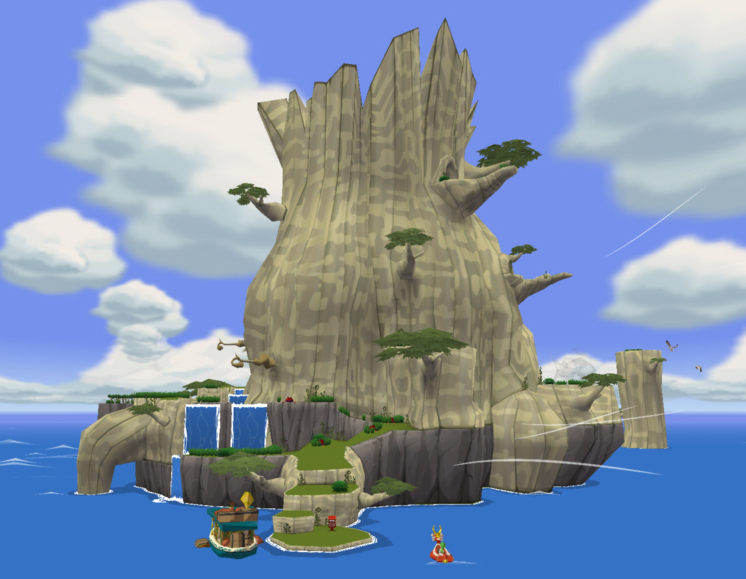

The Nintendo Gallery is one of the most extensive Side Quests in The Legend of Zelda: The Wind Waker for Nintendo GameCube. Overall can 134 figures of characters, enemies and bosses.
For this you need the Deluxe Picto Box. Photograph a valid subject and bring the image to Carlov. If he accepts the photo, he creates a figure from it, which is then exhibited in one of the seven halls.
The gallery will be taken over in a second playthrough. So you don’t necessarily have to collect all the figures in the first round. For a real 100% pass, it still makes sense to take as many photos as possible from the first game.
Difference to the Wii U version: In The Wind Waker HD, the Picto Box can store significantly more images and the production of the figures has been accelerated. In addition, the Game Boy Advance requirements for Knuckle are no longer applicable. The solution described here applies exclusively to the GameCube version.
Open Nintendo Gallery
Location: Forest Haven (F6)
Requires: Deku Leaf and Putput Fruit
Climb up the Plantahumpas in the interior of Forest Haven to the top. Take the exit that leads you to a raised ledge outside the Deku Tree.
From there you can see a small island north or northwest of Forest Haven. Aim the wind accordingly and glide over with the Deku Leaf.
On the small island you meet a man who points out a hidden switch high up on the cliff face of Forest Haven.
Use a Hyoi Pear to take control of a Seagull. Fly with her to the switch on the rock wall and touch it.
This opens access to the Nintendo Gallery and at the same time a ladder is lowered. From now on you can easily access the island from the sea.
Inside you will meet Carlov and Manny A.C.
How to Submit Pictographs for Figurines
gallery works
For a figure, Carlov usually needs a color photo from the Deluxe Picto Box.
A good image should:
- show the motif as completely as possible,
- should not be taken too far away,
- make the head or face clearly visible,
- cannot be covered by other figures or objects.
For people, Rito and Koroks, the direction of view is particularly important. A back photo is often rejected.
With large enemies and bosses, not every part of the body has to be completely visible. What is crucial is that Carlov clearly recognizes the motive.
On GameCube you can only three photos at the same time save in the Picto Box. So plan your route so that you return to the gallery regularly.
After Carlov accepts a photo, it usually takes him until the next day to complete it. Leave the gallery and let a day pass. The Song of Passing speeds up this process significantly.
Find Picto Box
The normal Picto Box is on Windfall Island in the prison where Tingle is initially imprisoned.
Free Tingle and then return to his cell. There is a small crawling tunnel behind the large wooden box.
Push the box away and crawl inside.
There are several trap doors triggered by rats in the labyrinth. If you step on it, Link will fall out of the underground area and you have to start again.
The right path ultimately leads into a small chamber with a Treasure Chest. Inside is the Picto Box.
Obtain Deluxe Picto Box
With the normal Picto Box you cannot yet have figures made for the Nintendo Gallery. For this you need the Deluxe Picto Box, which takes color photos.
Visit Lenzo on Windfall Island and first complete his three photo tasks.
Task 1 – Garrickson’s Love Letter
Stand at a sufficient distance from the mailbox and watch Garrickson.
Photographs him at the exact moment he posts his letter. If Link gets too close, Garrickson will interrupt his path.
Task 2 – The Scaredy Cat
Goes to the coffee bar.
Throw a vase or dishes on the floor. The guest sitting there is frightened and begins to tremble.
Photograph him during this reaction.
Task 3 – Linda and Anton
Position yourself outside the photo shop so that you have a good shot of Linda.
Wait until Anton passes her. They both glance at each other for a brief moment.
This is exactly the moment you have to photograph.
If you have passed all three tasks, Kogfa will recognize Link as his assistant.
Tann fireflies
Then travel to Forest Haven and take an Empty Bottle with you.
Inside the Deku Tree, normal fireflies and individual bright Tann fireflies fly around. You can recognize the right animal by its particularly intense glow.
Catch one of them with a bottle and bring it to Lenzo.
He uses the firefly to upgrade your camera to the Deluxe Picto Box.
From now on you can take color photos and fully use the Nintendo Gallery.
Difference to the Wii U version: The Tann firefly is no longer required for the Deluxe Picto Box in The Wind Waker HD.
Permanently missable photos
If you want to make the gallery as complete as possible in the first round, you should definitely photograph certain motifs in good time.
Particularly important are:
- Cyclos: before defeating him with arrows and learning the canon of the storm.
- Mask King: during the boss fight on the second visit to the Enchanted Bastion.
- Tetra: in Hyrule at the latest before her true identity is revealed.
- Kogoli: on Dragon Roost Island before Medli awakens as the Sage of the Earth Temple.
- Large Big Octo: before you defeat all six copies on the sea.
- special Wizzrobe: the Miniboss of the Wind Temple only appears once.
- Phantom Ganon: at the latest during the encounters in Ganon’s Tower.
- Puppet Ganon: during the fight in Ganon’s Tower.
- Knuckle: requires the Tingle receiver and a Game Boy Advance on GameCube.
The four main bosses Gohma, Carniphora, Jalhalla and Mantara are less critical: you can fight them again later in Ganon’s tower and take photos there.
Quartoxuma also remains visible as a head on the wall after the fight in Tower of the Gods and can be photographed later.
Tetra – especially important
Tetra’s photo is particularly valuable.
If you give Carlov a valid picture of Tetra, the figures of your entire pirate crew will be made at the same time:
- Tetra
- Mocha
- Niko
- Zuko
- Nudge
- Senza
- Gonzo
So you don’t need seven individual images.
In the first round, the safest time is immediately after the Mask King, when you return to Hyrule with Tetra and she follows Link through the castle.
Be sure to photograph her before you reach the crucial area under the castle with it.
Legendary photographs by Lenzo
You cannot photograph six required subjects in the normal way. Lenzo sells her pictures at night on Windfall Island as Legendary Light Pictures.
Each costs 50 Rupees. The motif offered depends on the current moon phase.
The six relevant motifs are:
- Great Fairy
- Jabun
- Fairy Queen
- Fodo
- Laruto
- King of Hyrule
Additionally, Kogfa offers a photograph of Ganondorf.
With the small day and night music you can quickly change the phases of the moon.
Hall A – Forest Haven
In this hall there are a total of 14 figures.
1. Makar
After completing the Wind Temple you will find Makar in the boss room area. Photograph him from the front with his violin.
2. Fodo
Fodo cannot be photographed normally.
Buy his Legendary Light Image at night from Lenzo on Windfall Island.
3. Great Deku Tree
Photographs the large face of the Deku Tree inside Forest Haven. Make sure his face is fully visible.
4. Elma
After the ceremony, Elma leaves Forest Haven and stands by the withered tree on Needle Rock Island (A5).
5. Hollo
Hollo can still be found inside Forest Haven in the Forest Pharmacy.
6. Olivio
After the Forbidden Woods you will find Olivio by the withered tree on the Eastern Fae Cordial (E3).
7. Drona
After the ceremony, Drona is on Private Oasis or later Links Land (E5).
8. Rown
Rown is on the small outer Mother and Child Isles (B2).
9. Irch
You can find Irch on Shark Island (C6).
10. Linder
Linder is standing by the withered tree on Greatfish Isle (B4).
11. Aldo
Aldo is located on Plateau Cliff Island (F7).
12. Oakin
You can find Oakin on the Island of Stardust (B1).
13th Carlov
Photograph the figure maker directly in his gallery.
14. Manny A.C.
Manny A.C. is also in the gallery and can be photographed there at any time.
Hall B – Dragon Roost Island
This hall contains 18 figures.
- Medli: Take a photo of in the boss room after the Earth Temple at the latest.
- Laruto: Legendary photograph from Kogfa.
- Komali: on Dragon Roost Island after his story developed further.
- Tribe Leader: in the upper area of the main hall.
- Kogoli: Be sure to take photos of before Medli leaves for the Earth Temple.
- Pashli: to Dragon Roost Island.
- Skett and Akoot: a photo of one of the two is enough.
- Koboli: at the post office counter.
- Post: after successfully completing the mail sorting side quest as a new employee.
- Hoskit: collects Golden Feathers.
- Quill: is made together with another matching Rito figure and does not require its own photo.
- Valoo: photographs his head on the summit of Dragon Roost Island.
- Zephos and Cyclos: Be sure to photograph Cyclos before learning the Storm Canon.
- Ilari: outside on Dragon Roost Island.
- Namali: also found under the Rito.
- Basht and Bisht: a photo of one of the two is sufficient.
- Obli: on the Vogelmann platform.
- Willi: also on the Vogelmann platform.
Don’t miss Cyclos
Cyclos disappears permanently after you use arrows to get him out of his whirlwind and learn the storm canon.
Therefore, equip the Deluxe Picto Box beforehand.
Allow yourself to be captured by one of his whirlwinds and photograph Cyclos while he circles on his cloud above you. Only then should you use the bow.
Hall C – Monster
In the monster hall there are 19 figures.
- Death Groper
- Magtail
- Keese
- Bokoblin
- Red Death / Blue Death
- rat / crawling rat
- Boko Baba
- Miniblin
- slime
- Killerana
- Gyorg
- Octorok
- Seahat
- Kargaroc
- Armos
- Armos Knight
- Morth
- Poe
- ReDead
For several groups, a single photo is sufficient:
Red Death and Blue Death share a figure, as does Rat and Crawling Rat. For the slimes, an accepted picture of a suitable type of slime is also sufficient.
Most of these enemies are not permanently missable and can be found again later in caves, temples or the Savage Labyrinth.
Hall D – intermediate and final opponent
This hall contains 18 figures and contains most of the critical motifs.
- Shadow Guard with sword
- Quartoxuma
- Shadow Guard with sword and shield
- special Wizzrobe of the Wind Temple
- Shadow Guard with sword, shield and cloak
- Moblin
- Phantom Ganon
- normal Wizzrobe
- Stalfos
- Jalhalla
- Ganondorf
- Mask King
- Mothula
- Puppet Ganon
- Mantara
- Carniphora
- Gohma
- Big Octo
Shade Garden
The three equipment variants each have their own figure:
- only sword
- sword and shield
- Sword, shield and sheath
Therefore, make sure to photograph each variant separately.
Quartoxuma
Quartoxuma is not permanently missable. After the victory, his head remains in the boss room of the Tower of the Gods and can be photographed there later.
Special Wizzrobe
The Miniboss in the Wind Temple has its own figure and is not identical to the normal Wizzrobe.
Photographs him before the victory. This is one of the most important missable characters in the game.
Mask King
Photograph the Mask King during the boss fight on the second visit to the Enchanted Bastion.
After his death, there is no further opportunity in this playthrough.
Big Octo
There are a total of six Great Big Octo on the Great Sea.
Photograph one of the animals before defeating all six. If all Big Octo have disappeared, you will no longer be able to take a new photo during the current playthrough.
The four dungeon bosses
Gohma, Carniphora, Jalhalla and Mantara can be fought again later in Ganon’s Tower.
If you missed any of these bosses in the original dungeon, you can catch up on the photo during the replay battle.
Phantom Ganon and Puppet Ganon
Photographs Phantom Ganon at the latest during the encounters in Ganon’s Tower.
Puppet Ganon also needs to be photographed before the corresponding battle is finally completed.
Hall E – Outset Island
The Prelude Hall contains 14 figures.
- Crab: on the beach.
- Mesa: the man who constantly cuts grass.
- Jabun: Legendary photograph from Kogfa.
- Orca: Swordmaster on the lower floor.
- Sturgeon: on the upper floor of the same house.
- Sue-Belle: the woman with the vessel on her head.
- Seagull: on Outset Island and many other islands.
- Aryll: You get her figure together with your grandmother.
- Grandmother: in Link’s house.
- Wild Boar: any normal pig will work.
- Rose: at the pig pen.
- Abe: on Outset Island.
- Joel: Boy near the bridge.
- Zill: the boy with the runny nose.
Aryll doesn’t need her own photo. An accepted photo of the grandmother unlocks both characters.
Hall F – Windfall Island
With 27 figures, Windfall Island is the largest single group.
- Minenco
- Anton
- Missy
- Kreeb
- Garrickson
- Pompie and Vera
- Zunari
- Tott
- Lenzo
- Killer Bees
- Madame Marie
- Joanna and Potova
- Maggie’ father
- Maggie
- Mila
- Mila’ father
- Gorm
- Estorik
- Eberhart
- Kjaskar
- Linda
- Sam
- Gillian
- Gossack
- Howitzer
- Doc Emmett
- Kamo
For several groups of people, one photo is sufficient:
- Pompie or Vera
- one of the four killer bee children
- Joanna or Potova
Maggie and Mila
After being rescued from the Enchanted Bastion, the living conditions of the two girls and their families change.
Some figures are therefore particularly easy to photograph in different phases.
For a complete walkthrough, it makes sense to photograph the residents of Windfall Island early on and check them again after the second visit to the Enchanted Bastion.
Hall G – The Great Sea
In the last hall there are 24 figures.
- Fairy
- Great Fairy
- Fairy Queen
- Flying dealer
- Gugl
- Mocha
- Niko
- Zuko
- Nudge
- Senza
- Gonzo
- Tetra
- Neptuno’s
- King of Hyrule
- Link and the King of Red Lions
- Princess Zelda
- Diving & Co.
- Salvatore
- Geronissimo
- Beedle
- Tingle
- Ankle
- David Jr.
- Knuckle
Flying dealer
Photograph one of the Goron traders on Greatfish Isle, Bomb Island, or Mother and Child Isles.
A single photo is enough for the figure.
Fishman
Fishman can be photographed from the King of Red Lions.
Approach slowly enough so that it doesn’t immediately fly away or continue swimming, and take as complete a picture as possible.
Link and the King of Red Lions
You don’t need a photo for this figure.
After the rest of the gallery has been completed, you will automatically receive the final figure of Link and the King of Red Lions.
Knuckle – only on GameCube
Knuckle is the most problematic character for the GameCube version.
You need:
- a Game Boy Advance,
- a GameCube GBA connection cable,
- the tingle receiver.
Use the Tingle receiver on Outset Island and complete the corresponding Tingle event there. Knuckle then appears on Tingle’s Island and can be photographed.
Very important: Get Knuckle or his figure before Carlov has otherwise completely completed the gallery. Once Carlov disappears after completing the gallery, he will no longer be able to process Knuckle photos.
Difference to the Wii U version: The tingle receiver and the connection to a Game Boy Advance have been removed. This eliminates this hardware requirement in The Wind Waker HD.
Recommended order for a 100% pass
You can catch up on most of the figures at any time. Instead of randomly photographing every person immediately, you should concentrate primarily on time-critical motifs.
Before the canon of the storm
- Cyclos photograph
In front of the Earth Temple
- Kogoli on Dragon Roost Island photograph
Second visit to the Enchanted Bastion
- Phantom Ganon photograph
- Mask King photograph
- then photograph Tetra before her true identity is revealed
Wind Temple
- Be sure to photograph the special Wizzrobe Miniboss
Great Sea
- photograph a large one Big Octo before all six were defeated
Ganon’s Tower
- Take photos of missing main bosses in the repeat battles
- Phantom Ganon take a photo here at the latest
- Puppet Ganon photograph
Before completing gallery
- Unlock Knuckle and photograph
- buy all legendary lights
- check whether all seven halls are complete
Second round
After playing through, you can start a second round with the same score.
The progress of Nintendo Gallery remains. This allows you to add missing figures in a new round.
Link also starts with the Deluxe Picto Box in the second round. This allows you to photograph subjects that are before the normal activation of the deluxe camera on the first pass.
This is particularly practical for players who don’t want to focus on the gallery the first time through.
All halls at a glance
| Hall | Topic | figures |
|---|---|---|
| A | Forest Haven | 14 |
| B | Dragon Roost Island | 18 |
| C | Monster | 19 |
| D | intermediate and final boss | 18 |
| E | Outset Island | 14 |
| F | Windfall Island | 27 |
| G | Great Sea and other figures | 24 |
| Total | 134 | |