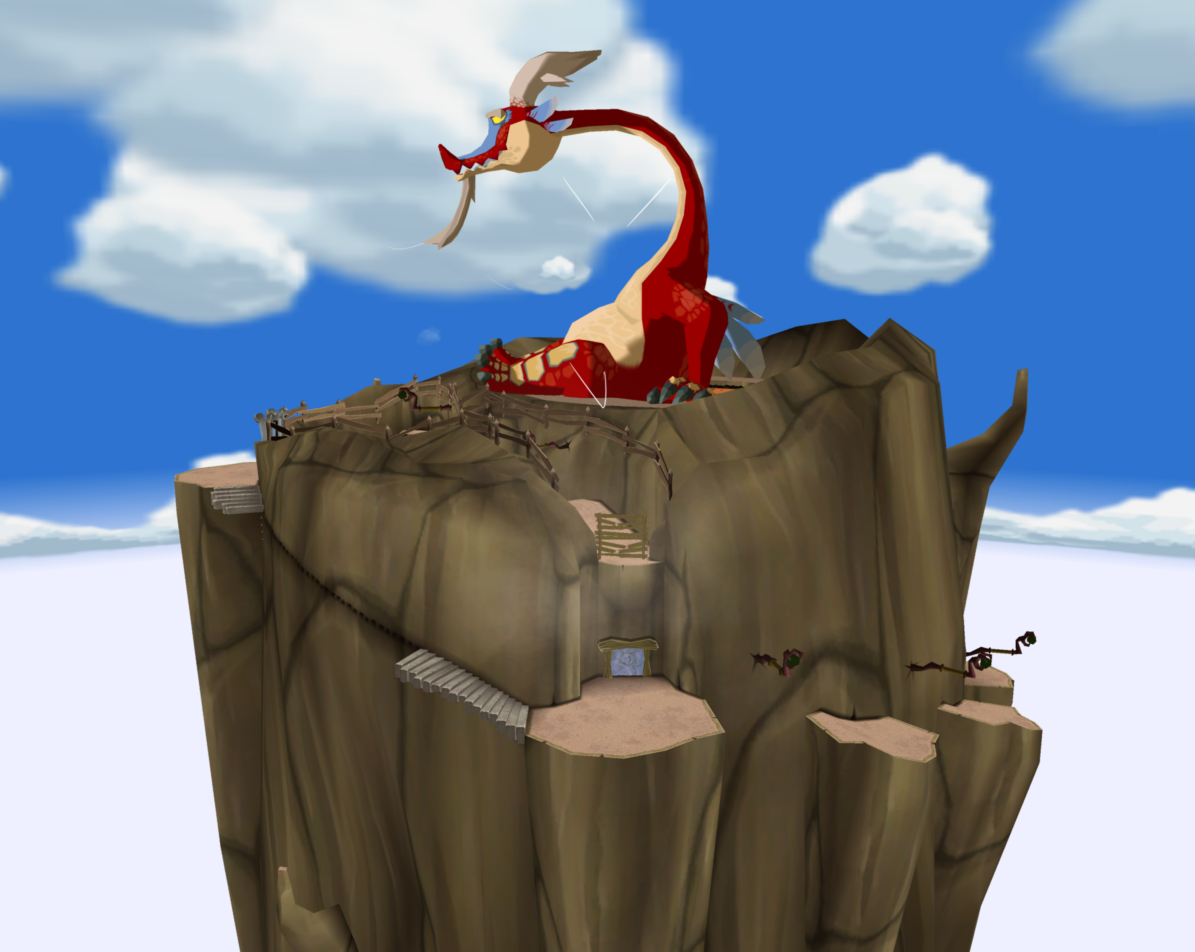

With the sail we can leave Windfall Island and sail independently across the Great Sea for the first time. Our actual destination is Dragon Roost Island (F2), but on the direct route to the east is the Tapsen Island (E2). Since two permanent rewards can already be achieved there, we’ll take a quick stop.
Tapsen Island – Piece of Heart and Treasure Chart No. 34
Drive up to the large dome-shaped island and look for a small opening at the bottom that Link can crawl through. Once inside, jump into the underground cave and follow the short passage. Several red slimes attack you; defeats them and ends up opening the Treasure Chest with a Piece of Heart. The first important reward on the island has already been collected.
Back on the surface you will see a small platform east of Tapsen Island with the men from Salvage Corp. or the rescue team. Ride over and speak to their leader. He thinks Link is a colleague and gives you Treasure Chart No. 34. The associated treasure is located on the Eastern Triangle Island and contains a Silver Rupee worth 200 Rupees. We can recover it as soon as we have the Grappling Hook.
This completes everything that can be reasonably reached on Tapsen Island at the moment. Set the course one grid square further to the east.
Dragon Roost Island (F2)
When you arrive at Dragon Roost Island, the King of Red Lions will give you the Wind Waker. After a short introduction, you can use it to conduct melodies in three, four or six meter. Then go through the tunnel to the other side of the island. There is a small shrine with two stone monuments in the water. Stand in front of the remaining stone and use the baton.
Follow the melody displayed there and you will learn the Wind’s Requiem. This means you can change the wind direction on the Great Sea at any time. You can find an overview of all later melodies on our page for the songs in The Wind Waker.
Then return to the pier. The way up is blocked by several large rocks, but bomb plants grow everywhere. Pick them and throw them on the boulders. Work your way up step by step, finally blow up the rock that blocks the two stone platforms and follow the path to the entrance to the Rito settlement.


Rito settlement and mailbag
Shortly before the entrance you will meet the Rito postman again. He takes you to the chief, who explains the situation: The dragon Valoo is out of control, which is why the young Rito cannot maintain their wings. His son Komali is particularly affected. Link should try to encourage him and at the same time find out what made Valoo angry.
The chief gives you the Delivery Bag. Then go to the upper floor and look for Medli in one of the side rooms. She gives you a letter for Komali. Run back to the lower level, enter his room and give him Medli’s letter. Komali initially remains dismissive, but the action can now continue.


letter sorting and Baito
Before we meet Medli outside, we’ll take care of them Side Quest in the post office. Go to the sorting facility on the upper floor and talk to him Rito at the switch. Within 30 seconds you have to throw letters into the six matching compartments based on their symbols. First do at least 10, then 20 and finally 25 letters in one round.
After the round of 25, the postal worker announces a new temporary worker. Leave the room briefly and enter it again. Now Baito is behind the counter. Sort at least 25 letters for him too. Impressed by Link’s performance, he gives you a letter to his mother.
Throw the letter in a mailbox outside. Postage is 5 Rupees. Baito’s mother will later send Link a reply, which will include a Piece of Heart. As soon as a mailbox shakes during one of the following island visits, we will collect this reward.
Also speak to the Rito Guardian near the Chief’s room who is interested in Golden Feathers. Later, you can get another Piece of Heart for 20 pieces via a letter from his girlfriend. From now on we will therefore consistently collect the feathers with the Grappling Hook as soon as we own it.
Help Medli and Receive the First Bottle
Take the remaining exit on the lower floor and follow the path into the dry area behind the mountain. Medli is already waiting there. Pick it up and stand on the elevated spot. Observe the direction of the wind based on the particles in the air and throw Medli towards the opposite entrance at the right moment. The updraft carries them safely across.
As a thank you she gives you your first Empty Bottle.
Run back to the small water hole at the foot of the mountain and fill the bottle with water. Return to the dried bomb plants and water one of them. Pick the revived bomb and blow up the rock blocking the geyser. The pool fills with water and you can swim to the other side.
There are two statues with bomb baskets there. Throw a bomb plant into the opening at a time so that the statues fall over and form a bridge. Cross it and enter the Dragon Roost Cavern.


HD Difference: The bottle, mailbag and Baito’s side quest work the same way in The Wind Waker HD. The main version differences in this chapter concern the hidden Tingle statue in the dungeon.
Dragon Roost Cavern
In the first room, pull the left statue forward and push the middle statue to the side to create a passage. In the next room you defeat the two Bokoblins. Then take one of their wooden sticks, light it on the burning torch and use it to light the remaining torches. A Treasure Chest appears and contains the first Small Key.
This opens the door to the large central lava hall. Follow the wooden path to the left and drop down at the broken point. Pull the block out of the wall, climb up and continue along the path. After the bridge, blow up the offending rock with a bomb plant. In the following lava room, throw water jugs into the lava. Fixed platforms will be created for a short time at the meeting points. First use it to reach the chest with the Dungeon Map.


More Small Keys and the way up
Then use another lava platform to get to the ladder. In the next section you will find numerous wooden barricades. Defeat the Bokoblins, pick up their weapons and throw them against the boards. Behind one of the barriers lies the second Small Keys. The further path leads back to the central hall. Throw a stone or skull at the bomb plant on the wall to blow up the large rock, then use the key to open the previously locked door.
Burn the wooden barricades and follow the path outside. Only climb the ladder during breaks in fire and then push yourself along the narrow edge of the wall. Don’t immediately hang up on the wooden ledge, but shimmy to the left, where you can use a bomb plant to remove the next boulder. In the adjoining block room, first pull out the middle block and move the other stones so that Link reaches the top. Get a wooden stick from the jug, light it and throw it across the room against the wooden barrier. Behind it is the third Small Keys.


Compass and Treasure Chart No. 39
Follow the path to the Kargaroc, which is guarding another Small Key in its nest. Defeat him and take the key. Later, once we have the Grappling Hook, we can steal Golden Feathers directly from Gargoracks; You have to fight these specimens normally for now.
Open the locked door and take a wooden stick from a jug in the dark room. Use it to light the torches and open the chest that appears with the Compass. In the next room there are three Bokoblins waiting, two of which are hiding in jars. Therefore, smash all suspicious vessels and defeat all three opponents.
Don’t leave the room yet. One of the two torches is already burning, the second has gone out. Take a wooden stick, light it and use it to set the second torch on fire. An additional chest appears and contains Treasure Chart #39. Your treasure is right in front of Dragon Roost Island and contains a Silver Rupee worth 200 Rupees.
Save
Medli and get the Grappling Hook
In the next room you will encounter a Magtail. Wait for him to stand up, attack him, and repeat the process until he is defeated. Then throw a jug of water onto the spot where a column of lava regularly rises and stand on the resulting platform. The lava throws you upwards.
Blow up the two large rocks in the next room. In doing so, you also activate another warp vase that is connected to the other warp pots in the dungeon. Follow the path outside again and immediately run up the collapsing stairs. Above you can see Medli being held captive by two Bokoblins and a Moblin. Defeat all three enemies. As soon as you meet more Moblins later, use the new Grappling Hook on them before killing them; This will give you skull chains for later Side Quests.
After the battle, Medli gives Link the Grappling Hook. You can use it to swing over abysses using certain brackets. Even more important for our complete route is its second function: For many enemies, you can use the Grappling Hook to steal a loot item before defeating them.


Treasure Chart No. 11
Try the Grappling Hook on the brackets above the stairs and follow the new path. Before we go deeper into the dungeon, let’s get the second Treasure Chart from the Dragon Roost Cavern. To do this, return to the large central lava room near the entrance and take the western passage. Directly behind the door to the right is a larger chasm with a grappling hook mount hanging above it.
Swing over, break the wooden boards and open the chest with Treasure Chart #11. Your treasure will later be at the Shimmering Crescent (E1) and contains a Piece of Heart. We now own both Treasure Charts of the dungeon.
Drako Tingle Statue
On GameCube we can now also get the first of the five Tingle statues. On the way to Big Key you will come to a northern room where a grappling hook holder hangs from the ceiling. Don’t immediately swing to the regular exit, instead let Link fall onto the small, lower platform in front of you.
Open the Tingle receiver and have Tingle place a Tingle bomb at this point. A hidden Treasure Chest appears and contains the Drako Tingle Statue. Later on Tingle’s Island you will receive 50 Rupees for each statue found and an additional 500 Rupees after all five.
HD Difference: The Drako Tingle statue also exists in The Wind Waker HD, but cannot be collected here on the first visit. The Tingle Tuner and Tingle Bombs have been removed, instead a regular bomb will open the hidden chest. Since Link doesn’t get his own bombs until later, we have to briefly return to the Dragon Roost Cavern in HD. With the later Tingle statues, normal bombs can be used directly.
Big Key
Then follow the regular route. In the room with the wooden bridge, eliminate both enemies and cut the ropes of the bridge with your sword. Link falls to the lower level. In the next room, stand in the middle of the suspended platform and perform a spin attack so that all three ropes break at the same time. The cage sinks down and opens the next path.
Work your way through the corridor with the Grappling Hook until you reach a Treasure Chest, which is surrounded by a ring of flames. Attack the Magtail until it rolls up into a ball, pick it up and place it on the Floor Switch. The flames disappear and you can open the chest with the Big Key.
Then return via the warp vase towards the boss chamber. In the last room, swing to the opposite side with the Grappling Hook and defeat the Magtail. Open the accessible chests and break the top jars; There you will find, among other things, fairies. Catch at least one of them with your bottle.


Boss: Gohma
Enter the boss chamber and you will face the giant fire spider Gohma. The fight consists of two clearly separated phases. During the first phase, Gohma’s eye is protected by a hard shell. Don’t target the boss itself, but rather Valoo’s dangling tail on the ceiling. As soon as Gohma attacks with his claw and you have dodged, use the Grappling Hook on the tail and swing across the arena once. This causes the massive rock slab on the ceiling to be torn down and falls onto Gohma’s tank.
Repeat this process three times in total. Make sure to move away from the boss quickly after jumping, because the ceiling plate will rise again under a shower of sparks and can injure Link in the process. After the third hit, Gohma’s shell breaks completely.
In the second phase the eye is exposed. Target it and use the Grappling Hook to pull Gohma’s head towards Link. The boss falls to the ground in front of you, dazed. Immediately attack the eye with several sword strikes and then retreat again. After a few repetitions, Gohma is defeated.
If you want to complete the Nintendo Gallery, you don’t have to photograph Gohma at this point. Later in Ganon’s Tower there is another fight against the boss. This is particularly practical for the GameCube version, as we don’t yet have the Deluxe Picto Box at this point.
After winning, pick up the Heart Container and step into the wind circle.


Din’s Pearl and Treasure Chart No. 39 recover
Back on the beach, Valoo and the Rito have calmed down. Komali has finally received his wings and gives Link Din’s Pearl as a sign of his trust. You now have the first of the three sacred stones.
Before you leave Dragon Roost Island, we open Treasure Chart No. 39. Sail in the grid square of Dragon Roost Island to the point marked on it and use the Grappling Hook as a recovery crane. The sunken chest contains a Silver Rupee worth 200 Rupees.
Treasure Chart No. 34 from Salvage Corp. We can also already use it, but its treasure is located on the Eastern Triangle Island and will be collected automatically later on our route. Treasure Chart #11 leads to the Shimmering Crescent and thus to a Piece of Heart. We will also take this Location with us on a later trip through the northern part of the Great Sea.
The next main target is far to the south: Forest Haven and the Forbidden Woods.