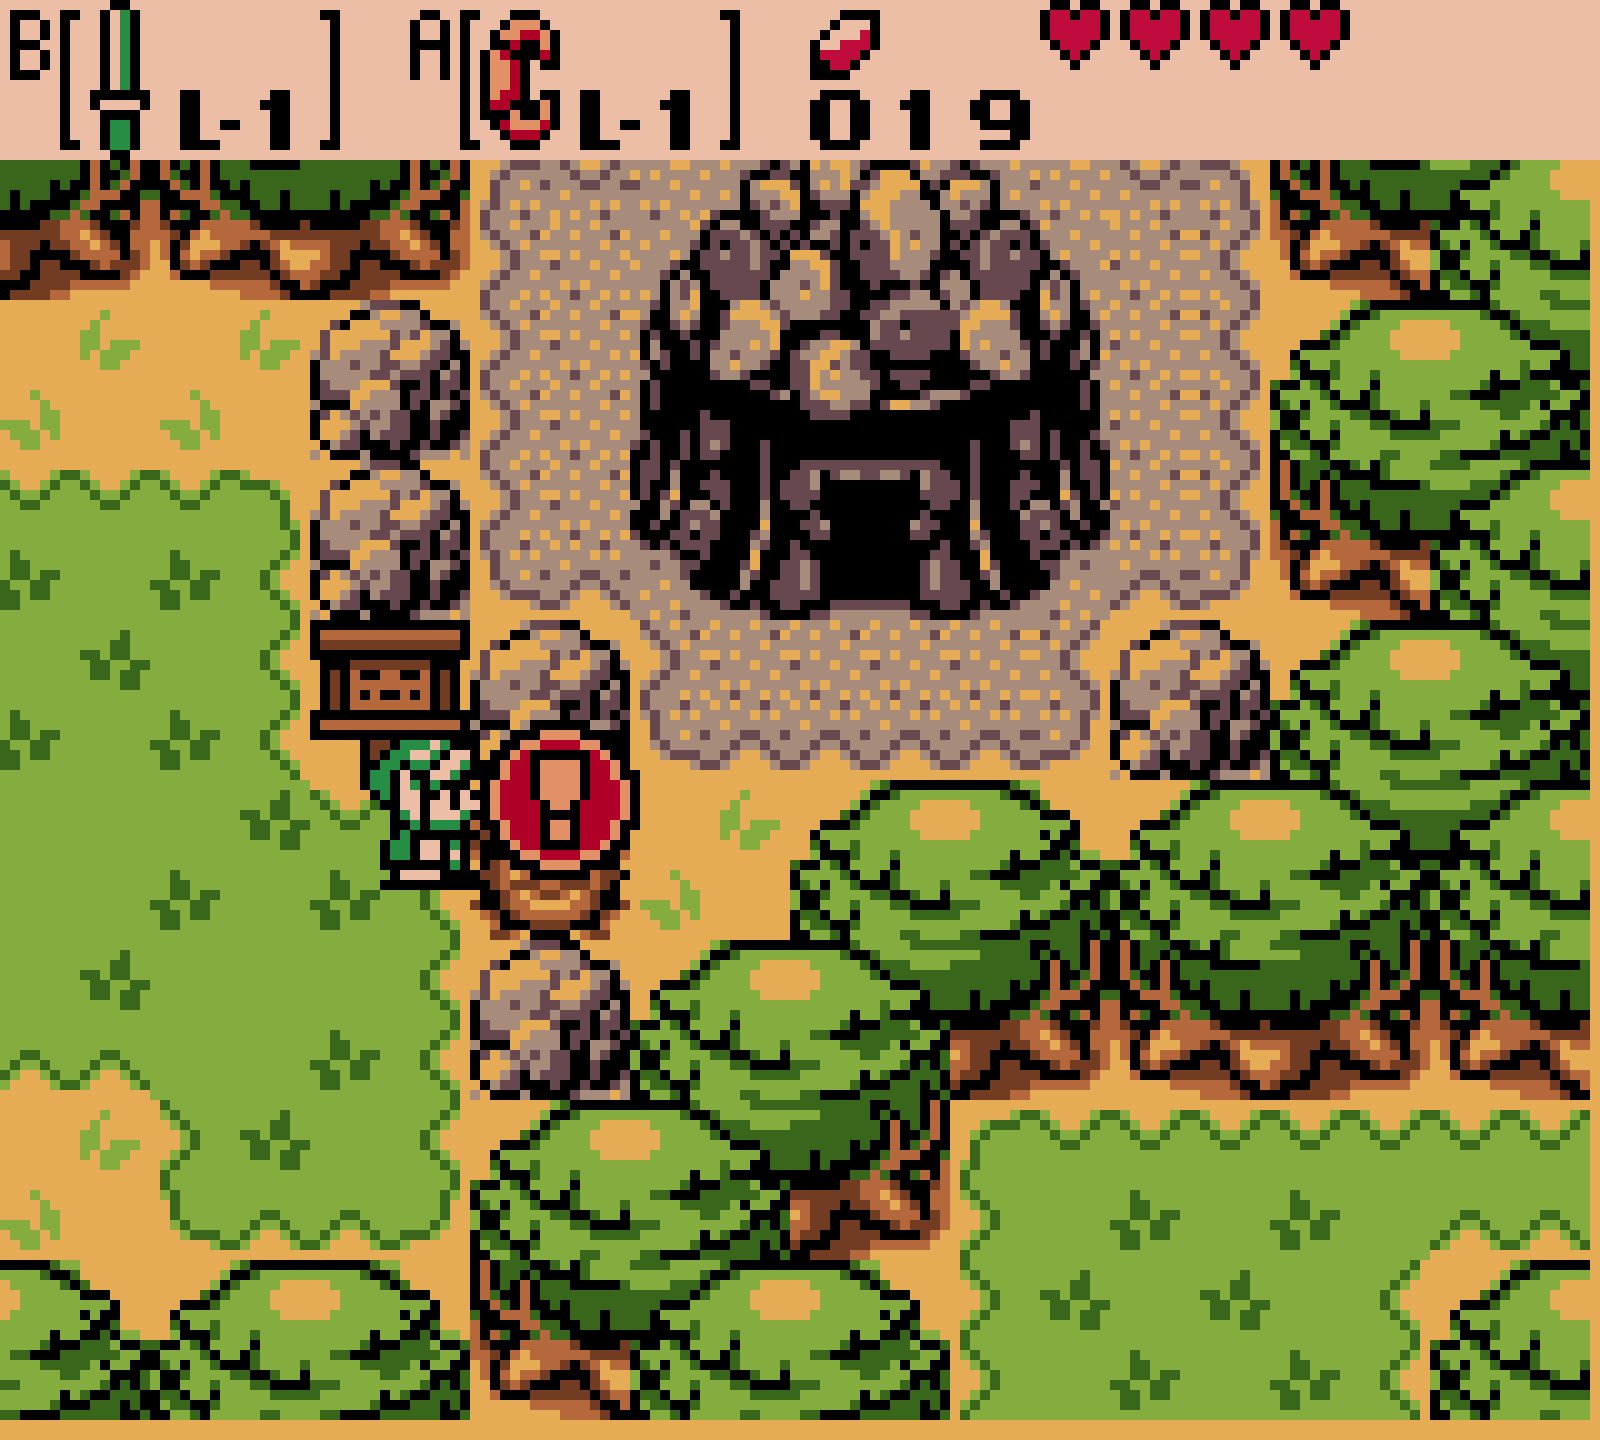

After you are in the Crown Dungeon the fifth essence of time, the Holy earth, the Maku Tree reports and surprisingly still senses another essence on the sphere comb. In front of the dungeon, a Goron speaks to you and tells you that his friends have now dug a new tunnel in the eastern part of the mountains. From the Crown Dungeon entrance, go right and enter the newly opened right cave entrance. Follow the corridor, climb the stairs at the end and solve the simple rock puzzle: For the first pair, push the top stone to the right and the bottom one down into the hole, for the second pair push the right stone down and the left one to the left. Leave the cave and then go right and north. This will take you to the previously inaccessible eastern spherical ridge.
Before you take care of the actual Goron task, prepare several collectibles here. From the cave exit, go one space to the left to the three rocks, lift the middle one and activate the time portal underneath with the Melody of Echo. Travel back in time and enter the cave directly above. The Goron digging there offers you to fight 20 Ember Cores and 20 Bombs to look for treasure. Feel free to pay him; After enough time or enough screen changes have passed, you can come back and take a magic ring from one of his two chests. With Vasu it becomes the Divis ring red, which halves the damage from spiked floors. There are also three bushes in a striking formation a field west of this cave. Dig right in the middle with the shovel and you will discover another one Gasha bed.
Brother sign and Goron dance
Return to the present via the time portal, continue east through the caves and then to the base of the Orb Ridge. After you have extended a bridge over a Floor Switch and left the cave on the other side, go south twice, east twice and then north into the right cave entrance. You are now in the Goron Dance Hall. In the northern room, talk to the blue Graceful Goron and take part in the Goron Dance for 10 Rupees. The process consists of short sequences of left and right steps and the final posing; Always remember the entire sequence first and only then repeat it. For the brother sign you have to pass the normal test and can only mess up a few sequences at most. Once you receive it, Link will officially be considered a brother of the Gorons and the previously closed areas of the Orb Crest will become accessible.
You shouldn’t leave the dance hall yet for our complete ring collection. After the first exam you can choose between bronze, silver and gold. If you complete the gold class without a single mistake, you will receive a magic ring, which will become the armor ring with Vasu. This ring prevents damage from your own bombs. An almost perfect lap can earn you a Gasha Seed instead, which is why further attempts are worthwhile anyway. Then go back to the southern room and show your brother sign to the Goron in front of the stairs. He clears the way and at the same time mentions that he is very hungry – a reference to the chain of items that we are about to need.
Two more Gasha Seeds
Climb the now released stairs and use the exchange hook to pull yourself over the abyss to the diamond blocks. On the upper level you will first reach a chest with 10 bombs. Then go back one room, swap with the diamond block on the left, go up the stairs and continue along the path to the bomb game area. There, climb the right stairs one level higher and jump down from the landing to the right side. There is a solid Gasha Seed in the chest. Then jump further down to the right and work your way back to the exit via the left stairs.
Then travel back in time at the time portal west of the dance hall. In the northwestern area of the Goron Caves there you will find another cave with several cracked blocks. Blow it up with bombs and open the chest behind it for a second solid one Gasha Seed. Nearby you can also burn a single small tree with an ember core and visit an old man who will give you generous gifts 200 Rupees gives. Since there are several paid Goron games ahead of us, you should Rupees definitely take it with you.
Piece of Heart 9 on the eastern spherical ridge
Then work your way through the caves to the northeast of the sphere ridge. There you will reach an elevated outdoor area with several bushes. Cut away the five bushes on the right and stand as far into the southeast corner of the field as possible. Play the Song of the Timestream. In the present, you appear on an otherwise unattainable plateau; go a little bit north and collect Piece of Heart 9 of 12. This means we are only missing three of the twelve fixed Pieces of Heart. Return directly to the past via the time portal that has been created.
The way to Lorenschuss
Return to the dance hall and show your brother sign to the Goron in front of the stairs in the past. He steps aside. Blow away the bushes on the left, replenish your supply of Pegasus Cores and then combine them with the Roc’s Feather to jump over the wide chasms. At the end, climb the stairs and exit the cave. Go one space south and defeat the enemies. There is a small plant sprout there that you have to place on the bare spot directly below the indentation in the right rock wall using the exchange hook. Then play the Song of the Timestream; In the present, the seedling has grown into a strong climbing plant.
Before you climb up, you can uncover another Gasha bed under the rocks in this area. Then climb up the new vine and go right into the Goron game Lorenschuss. For 10 Rupees you drive a cart through a course and have to hit as many of the big Rupees as possible with the blowpipe. Aim Link in the right direction before each target and only fire when there is a clear line of fire. For the main prize you have to hit all the targets. If you complete a perfect round, you will receive the rock fillet. Later perfect rounds can also bring in a Gasha Seed, a Boomerang or Rupees, but we absolutely need the rock fillet for the rest of the way.
Lava Juice and Boomerang
There is another time portal under a rock right next to Lorenschuss. Activate it and travel back in time. Instead of Lorenschuss, there is now the Goronian shooting gallery, which works similarly to the shooting gallery in Lynna Village. Pay 20 Rupees and hit the targets or balls that appear in the desired direction at the right moment. Be sure to avoid the wrong targets because they deduct points. With more than 100 points you will receive the lava juice required for the story.
Since we are aiming for a complete run, you play again and try to achieve at least 400 points. For this you get a Boomerang. This item is not absolutely necessary for the main story, but is part of the complete equipment and should therefore be taken with you now. Also, replenish your Arcanum Cores at the Core Tree immediately south of the shooting gallery; In the future you will be able to reach this area directly with storm cores.
Rock Fillet vs Goron Vase
Travel back to the present and return to the Goron Dance Hall. Talk to the hungry Goron next to the stairs and give him the Rock Fillet you just won. The Goron is thrilled and in return gives you his valuable Goron vase. Then use the nearby time portal and travel back in time again.
In the dance hall of the past, there is another Goron standing at the same stairs who is immediately impressed by your Goron vase. Swap it for his Goronade. The strengthening drink makes you feel alert again with just a single sip and the operator of another Goron game is looking for exactly such a pick-me-up.
Bomb fun and the old mermaid key
Use a Storm Core to quickly return to the eastern Orb Ridge, then play Timestream Song to enter the present. Go to Bomb Fun on the upper level of the Goron Caverns. The operator is completely exhausted and can barely manage his game. Hand him the Goronade and he will immediately be wide awake again. As a thank you, you can play the first round for free.
In Bomb Fun, you have to survive in a room for a set amount of time while bombs continuously fall from above and the ground moves you in different directions at the same time. Even a single explosion ends the attempt. Use a Pegasus Seed immediately, stay on the edges if possible and use the Roc’s Feather to jump over dangerous bomb groups at the last moment. Don’t try to pick up or throw away every bomb; Permanent avoidance is much safer. If you survive the entire round, you will receive the Old Mermaid Key. This key opens the mermaid’s cave in the present.
Lava Juice and Introduction Letter
Leave the bomb game, go down the stairs on the left and go back to the time portal near Lorenschuss. Travel back in time, jump down from the upper ledge and take the western path to a small cave. There’s a Goron living in there who’s… Graceful Gorons is a friend and would like to drink his energetic lava juice. Give him yours Lava juice. He will write you one to thank you Introduction letter, in which he specifically asks the Graceful Goron to give you his mermaid key.
The mermaid key
Use a Storm Core and return to the Dance Hall of the Past. In the northern room, talk to the first Graceful Goron and give him the letter of introduction. However, he doesn’t want to part with his precious key that easily: for 20 Rupees you have to dance against him again. The sequences are more difficult than those of his descendant in the present, but the principle remains identical. First observe the entire sequence, note every left and right step as well as the pauses and then repeat it in the same rhythm. As soon as you pass the test, he will give you the Mermaid Key.
Here too it is worth another round to get a 100% score. After receiving the key, you can choose between silver, gold and platinum. If you complete the platinum class perfectly, you will receive a magic ring, which Vasu turns out to be the bombom ring. With it you can plant two bombs at the same time. With this we have collected both of the special ring rewards from the Goron Dances.
To the Mermaid’s Cave
Leave the dance hall and swim west through the river. One field further to the left, a large waterfall cascades down from the spherical ridge. Swim directly into the waterfall and you will discover a hidden cave entrance behind it. Use the Mermaid Key on the gate and use it to open the Mermaid’s Cave in the past. The special trick of this labyrinth is that the same cave exists in both the past and the present, and changes in the past can open new paths in the present. The Old Mermaid Key later opens the second version of the dungeon. Map, Compass and multiple keys are also spread across both time periods.
Level 6 – The Mermaid’s Cave in the Past
Right in the entrance room, blow up the cracked wall on the right and go through. Defeat the red and green mages who constantly teleport around the room; They can quickly remove storm cores from the blowpipe. Once all enemies have disappeared, a chest appears in the middle with a Gasha Seed. Then go to the right and shoot the candle opponents running around there with Ember Cores from the blowpipe. Ignited, they run around the room for a few seconds and finally explode. Once everyone has been eliminated, the path to the north opens.
Go up one room and then to the right. There are four torches in the water that must be lit in a specific order: first the left torch, then the rear torch immediately to the right, then the front torch and finally the far right one. For the rear middle torch, stand in front of the two middle flames and shoot an ember core against the right wall so that it bounces off at the right angle. If all four torches burn in the correct order, a secret passage to deep water opens on the right. You can’t go any further there yet, but this path will become important after you receive the mermaid suit.
card and Compass of the past
Swim left from the torch room. At the western edge of the next pool of water there is a chest with the Dungeon Map of the past. Then return to the entrance to the Mermaid’s Cave, go north and then left. In the next room, several small slimes are camouflaged in the color of the floor. Jump over the middle color field with the Roc’s Feather, causing the floor to change color and the enemies to become visible. Defeat them quickly before they adapt again. Once everyone is gone, the chest containing the Compass of the past will appear.
Small Key 1
From the entrance, go north twice, take the stairs on the right and go up one more room. Defeat all candle enemies and bats so that the eastern door opens. In the next room there are two armored Stalfos on the other side of a chasm. Since you can’t reach them with the sword, you use the blowpipe and shoot cores across the gap. If both are defeated, a chest with small key 1 will appear in the middle of the room.
Return one room to the left and then south. Use the key to open the western door. Defeat the blue mage, create a block with the Cane of Somaria on the right Floor Switch and smash all the jars on the left except the middle one. Push this remaining jar down twice and right three times onto the second switch. As soon as both switches are weighted at the same time, the northern door opens.
Exploding a wall for the future
Go north, eliminate the floormasters and the mage and blast your way through the cracked blocks to the upper half of the room. Then scan the northern wall with the sword. A little to the right of center there is a spot that sounds hollow. Place a bomb there and blow up an additional passage in the wall. You cannot use this path sensibly in the past, but the opening remains throughout the centuries and is needed in the present. Then return to the entrance and leave the Mermaid’s Cave.
Mermaid’s Cave in the present
Swim to the other side of the waterfall or go to the dry area next to it and play the Song of the Time Stream. In the present, the waterfall has disappeared, but the Mermaid’s Cave is still locked in front of you. This time use the Old Mermaid Key and open the second gate. Although you are geographically in the same dungeon, its structure has changed significantly over the centuries.
From the entrance, go north twice and then left. Use the barter hook on the diamond block on the other side of the chasm and open the chest with the Dungeon Map of the present. Return to the previous room. Go into the water using the right stairs and swim north. In the next room there is a blue Crystal Switch that changes the colored floor areas. Shoot him, go to the northeast corner via the newly connected path and hit the switch again to open the next connection.
Small Key 2
Go right. There are several snakes running around on the other side of the barrier that you can’t reach directly at first. Place a scented seed from the seed bag on the ground. The snakes try to get to the scent, run into the holes and disappear. Once everyone is defeated, a chest will appear with small key 2. Return to the Crystal Switch, change the ground formation again and go to the southwest section.
Small Key 3 – the cube puzzle
Detonate a bomb between the two red blocks on the southern wall and go through the newly created passage. Use the barter hook to cross the chasm in the next room and blow up another weak wall at the bottom. Behind it there is a colored cube and three target fields. The cube must touch all colors correctly one after the other. First roll it one space down and twice to the left onto the red space. Then move it twice to the right, once up, once to the left, once down, once to the right, once up, once to the left, once down and three times to the right to activate the yellow field. Finally, roll it to the left twice, up once, left once, up again, right once and up again onto the blue field. If all three colors are activated, a chest with small key 3 will appear.
Small Key 4 and the turnstiles
Return north, cross the chasm again and go through the passage we blasted into the wall centuries ago in the past. Behind it begins a larger section with several turnstiles. Enter the first turnstile and follow the cleared path up. To change direction later, you must complete a complete circuit through the adjacent rooms and re-enter the turnstile. Work your way through the labyrinth step by step until you reach the upper western area. There a short staircase leads to a chest with small key 4.
Then jump down from the right ledge, run through the surrounding rooms again and use the turnstiles so that you finally reach the eastern exit. Use a key to open the locked door to the north. The Miniboss of the mermaid’s cave is waiting behind it.
Vire – Miniboss of the Mermaid’s Cave
Vire, one of Veran’s minions, constantly flies around the room outside of your normal sword range and fires blue and red energy balls at Link. During his ranged attacks, stay moving and dodge sideways. After several projectiles, Vire flies straight towards you; at that exact moment you can hit him with your sword. With the noble sword you have already received, the fight requires significantly fewer hits than with the original wooden sword. Alternatively, you can throw bombs in front of his flight path and have them explode just before he arrives.
After several hits, Vire splits into two smaller bat creatures. Both initially hover briefly above the ground and then fall directly towards Link. Wait for the attack and hit them with the sword as they fly up. Once both are dealt with, a warp field appears back to the dungeon entrance and the eastern door opens.
The mermaid suit
Go right from the Miniboss. Behind a yellow barrier lies a cracked block. Throw a bomb over the barrier, timing the throw so that it explodes right next to the block. Then use the swap hook on the diamond block in the middle and work your way to the upper platform. Open the large chest and take the Mermaid Suit.
The mermaid suit completely replaces Zora fins. Link can now dive and move freely in deep water and the sea. The swimming controls change: You move by repeatedly pressing the control pad, you use the dive button to switch between the surface and underwater areas and can also use the sword and the swap hook underwater. This item opens up numerous new areas throughout Labrynna.
Compass and Big Key of the present
Use the warp field and return to the entrance. Go right and light all three candle enemies with Ember Cores so that the eastern door opens. In the next hallway, two large blade traps race towards you; jump over them with the Roc’s Feather or lure them out of their position one after the other. Then open the locked door to the north, exchange with the jugs on the raised ledge and follow it to the right. At the end there is the chest with the Compass of the present.
Jump down from the landing and take the stairs to the lower section. You can get back up using moving platforms and the Cane of Somaria. From there, follow the northern path to a room with two large levers. One just causes snakes to fall from the ceiling, the other makes a chest appear. Which lever is the right one is randomly determined for each trial. Therefore, pull out one of the two levers with the Power Bracelet completely; If enemies appear, defeat them and try again. Once the chest appears next to the owl statue, open it and receive the Big Key.
Catapult ring before the last part of the dungeon
Leave the Mermaid’s Cave again in the present. There is deep water directly to the left of the entrance. Dive down with the new mermaid suit and open the chest in the underwater area. Inside there is a magic ring, which when Vasu turns it into the catapult ring. This increases Link’s throwing distance and is a solid ring find that we don’t leave out for our complete ring collection.
Then activate the time portal southwest of the entrance and travel back in time. Swim through the waterfall and enter the Mermaid’s Cave there again. Now, thanks to the mermaid suit, we can finally reach the deep underwater areas that were initially impassable.
Small Key 5 underwater
From the entrance, go right twice, defeat the candle enemies and then go north to the torch room. Dive down into the deep water on the right. In the basement, swim to the left, then take the lower passage back to the right and follow the underwater stairs further down. Stay right in the next streams and work your way into a room with two snakes. Underwater you can only use the item that is on the corresponding action button; Therefore, put the sword there or use the exchange hook offensively. Defeat both enemies and a chest with small key 5 will appear.
Then swim back, use the currents and emerge from the western part of the basement back to the upper floor.
Small Key 6
Return to the western area where we previously positioned Somaria Block and Jar on two floor switches. Place a Somaria block on the right switch again and push the middle jar onto the left one. Head north and use the turnstile repeatedly until you can reach the deep water area on the left. Dive down.
In the basement, swim through the upper passages and fight the current. A room further east, arrows attack from the walls; Stick close to the purple blocks and use the barter hook against the snakes there if necessary. In the next room there are six diamond blocks and six yellow fields above them. Use the swap hook to move each diamond to one of the yellow spaces. Once all six positions are occupied, a chest with small key 6 will appear in the middle. You now have all six Small Key of the Mermaid’s Cave.
The final path to the final boss
Swim back to the southwestern part of the basement and dive up to the blue floor tiles on the upper level. First open the locked door to the left and then open the key block in the next room. Above you is a Floor Switch. Step on it once, then use the Cane of Somaria to create a block on the switch and thereby align the red reflectors with the blue Crystal Switch. Position yourself so that you can hit the second to last vertical red block on the left side with the blowpipe. The core bounces off the block, flies through the red reflectors and hits the Crystal Switch. A bridge extends.
Cross it and use the Big Key to open the boss door to the north. The ruler of the mermaid’s cave is waiting behind her.
Octopus – final boss of the Mermaid’s Cave
Octopus constantly swims around the central platform of the room, repeatedly turning towards Link to fire rock projectiles. First stay on the platform or on the edge and equip the blowpipe. As soon as Octopus turns his face towards you, you shoot a core directly at him. Its back is protected against normal hits; However, with a little practice you can bounce cores off the back wall and hit him in the face from awkward angles.
After several hits, Octopus will completely submerge underwater. Jump after it and dive with the mermaid suit. Underwater, he aggressively pursues Link and shoots large bubbles that can trap you. Keep swimming and fire at his face with the blowpipe or other suitable object as soon as a safe opportunity arises. The fight then returns to the surface. Switch between the two levels, avoid his projectiles and use every free line of fire. If you run out of cores, you will appear briefly; the jars on the middle platform reappear and contain more scent cores.
After enough hits, Octopus is defeated. A Heart Container appears on the central platform, which permanently increases your maximum health. Then go through the door to the right to the altar and take the sixth of the eight Essences of Time: the Lonely Peak. His proud, lonely spirit remains undeterred even in times of temptation.
After the Mermaid’s Cave
With the mermaid suit we now have one of the last major movement upgrades in the game. This will make the previously unreachable Piece of Heart in the underwater labyrinth of the crescent island, other rings and several areas in the Southern Ocean accessible. However, immediately after the Lonely Peak, the Maku Tree reports with an even more urgent message: Queen Ambi has left her palace. This finally presents an opportunity to break into the castle and free Nayru from Veran’s control.
Before we set off for the seventh essence, we first use the new possibilities of the mermaid suit and then infiltrate Ambi’s palace. We continue with our Walkthrough about Queen Ambi and Jabu-Jabu’s belly.
Additional secrets in Linked Game
If you play a linked Linked Game, more secrets are available on the eastern sphere ridge. A Goron reports of a giant Goron in Holodrum and relays the Biggoron Secret, which can ultimately be used to unlock the Biggoron Sword. In another area, a Subrosian is waiting with the blacksmith secret, which leads to a shield improvement, and another Subrosian uses his secret to obtain the Bombchus. After the Mermaid’s Cave, the Hero’s Cave can also be completely completed, as its underwater areas can now also be passed through with the mermaid suit.