

As Wolf Link, collect the Tears of Light in Faron Woods. Once the province is restored, buy Coro’s bottle and follow the monkey to the Forest Temple. Rescue all eight monkeys, obtain the Gale Boomerang and defeat Diababa.
Game version: The route and screenshots follow the GameCube version. The normal mode of Twilight Princess HD has the same orientation; on Wii and in HD Hero Mode, left/right and east/west are swapped. HD deviations are at the affected step.
Faron Woods – enter the shadow realm
Leave Ordon and follow the familiar path over the bridge towards Faron Woods. Shortly afterwards, Wolf-Link reaches the impenetrable wall of twilight again. Enter it and follow the path further north.
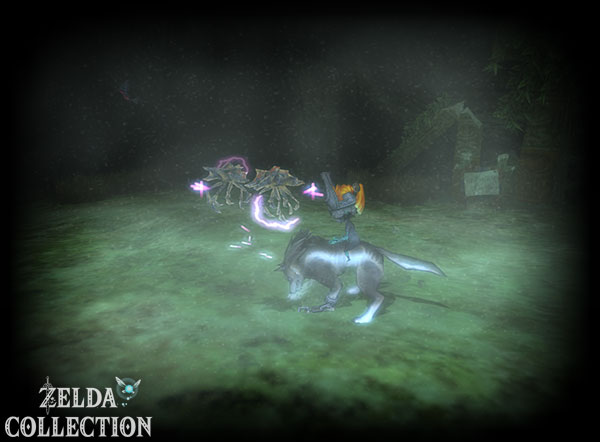
After a short time, three creatures of darkness appear. The fight differs from the individual creature at the Ordon Spring: When only one of the Shadow Beasts remains, it lets out a scream and revives its already defeated fellow creatures. You therefore have to eliminate several opponents almost at the same time.
First, defeat one of the three creatures individually. For the remaining two, hold down Midna’s energy field and move so that both enemies are within the circle. Release the attack. Wolf-Link automatically jumps from one target to another and destroys both Shadow Beasts at the same time.
After the fight, the path to the source becomes clear.
Light Spirit Faron and the Vessel of Light
Go to source. There Link meets the light spirit Faron, who explains that the shadow beings have stolen the light from this region. To free the forest from the twilight, we must bring back the stolen drops of light.
Faron gives it to Wolf-Link Vessel of Light. In the GameCube and Wii versions, a total of 16 drops of Tears of Light be collected. The associated shadow beetles are marked on the map. Nevertheless, some of the insects are well hidden and can only be made visible with Link’s instinct.
New item: Vessel of Light
Regularly activate the sense from Wolf-Link. Shadow beetles appear in the normal world only as small sparks of light or remain completely hidden. With the sense they become clearly visible and can be attacked.
Tears of Light 1 and 2 – directly behind the source
Twilight Princess HD: Twelve Tears of Light drops are required here, sixteen on GameCube and Wii. The following numbers describe the original route. In HD, use the bug markers on your map and the Vessel of Light counter; There are no additional beetles hidden in the omitted original locations.
Exit the source via the only available path. Shortly afterwards you see two small points of light moving through the grass. Activate the feeling. Two shadow beetles become visible.
First defeat the Deku Baba so that it doesn’t interfere with the fight, then attack both insects. After their defeat, the first two Tears of Light drops remain. Collect both with the Vessel of Light.
Tears of Light 3 to 5 – at Coro’s house
Follow the path to Coro, the forest manager from whom Link previously received the lamp. Run past the campfire to the wall of the house and activate your sense again. A shadow beetle is hiding on the outside wall.
Target the insect and jump against the wall as a wolf. The beetle falls down and can then be defeated on the ground. This means you have Tears of Light 3.
Then go around the house and jump in. Activate your sense and listen to Coro. Two more shadow beetles become visible. Eliminate both and collect Tears of Light 4 and 5.
Tears of Light 6 and 7 – under the locked gate
Return to the fork in the road and follow the path to the large locked gate. As humans, we still had to open this gate with a key on our first visit. Wolf-Link has a much more direct option.
Activate your sense and look for a loose spot in the ground right next to the gate. Dig under it.
Two more shadow beetles are waiting on the other side. Defeat them and collect Tears of Light 6 and 7.


Tears of Light 8 and 9 – behind cave
Enter the familiar cave. There are no shadow beetles within the tunnel, so you can simply walk through it. Some normal enemies hardly pose a threat in wolf form.
Immediately after exiting the cave you activate the sense. There are two more shadow insects on the rock wall on the right. Jump against the wall or attack it as soon as it comes away.
Collect Tears of Light 8 and 9.
Tears of Light 10 to 12 – above the toxic fog
The next section is still covered in thick purple fog. Don’t enter it directly, as Wolf-Link will quickly get lost in it. Instead, move to the edge of the fog field and wait for Midna’s clue.
With their help you can perform several consecutive jumps. Follow the given route over branches and tree trunks until you reach safe ground again. Then run along the raised passage and use Midna’s jump sequence again to get to the large tree stump in the middle of the fog field.
There are three shadow beetles waiting there. Two move on the ground, the third flies and actively attacks Wolf-Link. If you have trouble hitting it, charge Midna’s energy field and capture the flying beetle within the circle.
After the fight you have Tears of Light 10, 11 and 12.
Tears of Light 13 and 14 – underground
Follow the further jump passages through the fog field. After several climbs and jumps, you finally reach solid ground again on the opposite side.
Activate the sense there. Two shadow beetles have burrowed into the ground. Look for the clearly visible areas and use Burrow to bring the insects out of their hiding place.
Defeat both and collect Tears of Light 13 and 14.
Tears of Light 15 and 16 – in front of the Forest Temple
Follow the path towards the Forest Temple. Shortly before the temple, three creatures of darkness appear again. First defeat one of the creatures individually and then kill the remaining two opponents at the same time with Midna’s energy field.
You will find the last two shadow beetles right in front of the entrance to the Forest Temple. The monkey, which Link has already met and saved several times, is also waiting here.
Defeat the insects and collect Tears of Light 15 and 16. The Vessel of Light is completely filled.
Faron’s light returns instantly. The twilight disappears from the entire forest and Link regains his human form. The light spirit now tells him in more detail about the Fused Shadow and points him to the Forest Temple.




Faron Woods – back in the world of light
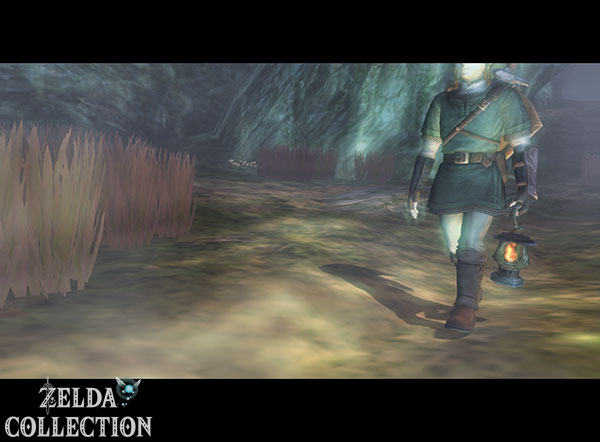
After Faron drives out the Twilight, Link should go to the Forest Temple. First return to Coro. The gate to the northern forest is locked again, so you need to speak to the forest manager.
Buy the second bottle
Coro offers Link a bottle of lamp oil. Definitely buy them. The actual oil filling is less important than the bottle itself, as empty bottles are among the most valuable optional items in the game.
New equipment: Bottle 2
Link now has two of the four bottles. Later you can use it to transport healing potions, fairies, lamp oil and other useful contents. You can find all Locations under All bottles in Twilight Princess.
Then open the gate and go through the cave again.
Follow the monkey through the fog
Behind the cave, the forest is once again filled with Faron’s light, but the purple field of mist still blocks the direct path to the Forest Temple.
Pull the lamp. Before Link can even make his way through the fog, the familiar monkey appears and snatches the lamp from him. This time, however, it’s not a case of theft: the monkey wants to guide Link safely through the fog.
Follow him closely through the purple area. The monkey constantly swings the lamp around itself, thereby driving away the fog in its immediate surroundings. Stay as close behind him as possible. When enemies appear, you should eliminate them quickly, otherwise the monkey will remain standing.
At the other end he puts the lamp down again. Your oil is now practically completely used up. At the bird shop you can refill your supplies before moving on.




First Hidden Skill: Ending Blow
Shortly before the Forest Temple, a mysterious golden wolf sits in the middle of the path. As soon as Link approaches, the animal jumps at him and transports him to a strange place. The ghost of an old warrior appears there.
He explains to Link that mere strength is not enough and that a true swordsman must master special techniques. The first of these Hidden Skills is the Ending Blow.
First knock the warrior down. As soon as he is lying defenseless, you target him and carry out the action shown. Link jumps up and pushes the sword straight down onto the lying opponent.
New Hidden Skill: Ending Blow
The catch ends many fights immediately as soon as an opponent is on the ground. It is the first of a total of seven Hidden Skills and at the same time the only technique that Link has to learn in the course of the main story.
After training, Link returns to the forest. Continue running to the entrance of the Forest Temple and burn the large spider web with the lamp.
Forest Temple – the first dungeon
Enter Forest Temple. Already in the first rooms it becomes clear what this temple is about: several monkeys have been captured and must be freed one by one. The animals then help Link cross large chasms.
Total wait eight monkeys in the Forest Temple. We first need four to reach the Miniboss. After receiving the Gale Boomerang, the remaining four can be rescued.
Monkey 1 and the Dungeon Map
Run straight from the entrance and defeat the bats. On the right you can climb up the ivy and open a chest with 10 Rupees on the small platform.
Then move on. In the next area, the first monkey is hanging in a wooden cage. Destroy the cage with the sword.
Follow him into the next room and first use the slingshot to remove the Skulltulas on the ivy walls. There is also a larger spider waiting on the central platform. After the fight, light the four torches with the lamp.
This causes the central staircase to rise and the path to the north becomes clear.
Before you leave the room, open the Treasure Chest with the Dungeon Map to the right of the door.
Dungeon Map:
The map shows all rooms and floors of the Forest Temple. However, the positions of unopened Treasure Chests only become visible after the compass has been found.
The destroyed bridge and Ooccoo
Missable letter: Take Ooccoo with you, but don’t use her to warp out in the Forest Temple. Defeat Diababa and collect her first message from the postman. Only then do you use it in the Goron Mines. The letter overview explains the triggers.
In the next outdoor area we meet the monkey with the Boomerang for the first time. He turns the bridge and destroys the direct path.
Return to the previous hall and follow your freed monkey. He hangs on the rope over the abyss. Jump to him and let yourself swing to the opposite side.
Defeat the Bombling there. His explosive ball also blows up a damaged wall or can be used specifically for this purpose.
Behind the opening you will find one of the jars Ooccoo. She can teleport Link out of the dungeon at any time and return him to the same spot later. This item is extremely useful, especially when you run out of healing potions or lamp oil.
Then burn the spider web on the other side. However, the door that the monkey wants to go to is still locked. So first take the opposite exit.
The first Small Key
Cross the windy chasm outside and enter the next room. Immediately on the right is a Treasure Chest.
Open it and take the Small Key.
We can’t go any further in this area at the moment. Therefore, return to the large main hall and use the key on the previously locked door.


Monkey 2 – Push Cage Off Post
Behind the key door is the second monkey. His cage hangs on a high post.
Roll firmly against the post several times. The cage begins to sway and eventually falls down. Destroy it and then eliminate the enemies that appear.
Also examine the grass in the room. There is a small Treasure Chest hidden there with some Rupees.
Then leave the room with the help of the two monkeys.
The Bombling and the next path
Return to the room with the central platform and four torches. The two freed monkeys will help you get to the opposite side.
Burn the spider web there and go through the door.
In the next area, a large carnivorous plant blocks the path. First, beat the Bombling on the stairs. Once its body transforms into an explosive ball, pick it up and throw it from the elevated area into the plant’s open maw.
The explosion destroys the plant.
Before you cross the gap, get another Bombling and use it to blow up the boulder on the opposite side. This will open the way to an optional area that we will use right away.
Monkey 3 and another Small Key
In the next large room, first run down the stairs to the right and roll hard against the first pillar. The shock causes a Treasure Chest to fall down.
Open it and take the next Small Key.
You should carefully cross the areas covered with tiles. Enemies lurk under some plates and throw Link into the air. If possible, stick to the edge or remove the dangerous areas later with the Gale Boomerang.
Climb up the ivy on the left. In a Treasure Chest you will find 20 Rupees.
Then light all the torches and defeat the big spider. The upper area becomes accessible. Open the cage and free the third monkey.
To return, you can drop into the water and leave the area on the lower level.






Piece of Heart 2 – hidden niche under the abyss
Return to the previous area and look for the ivy wall on the right. First eliminate the spiders with the slingshot and then climb up.
Before you go through the door, get a Bombling. Throw the explosive ball into the abyss on the left. At the bottom there is another carnivorous plant that swallows the bomb and is destroyed.
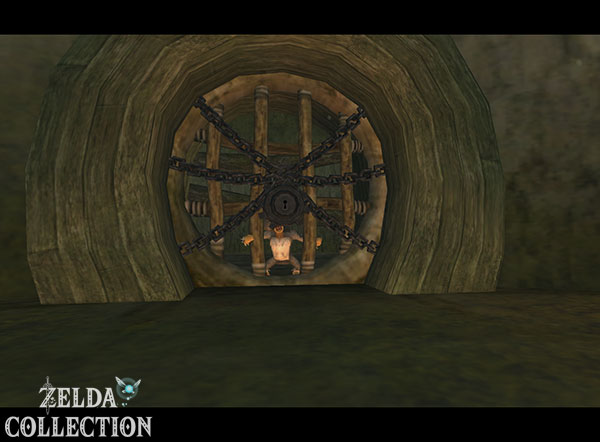
Then jump down yourself and enter the small niche that has become available.
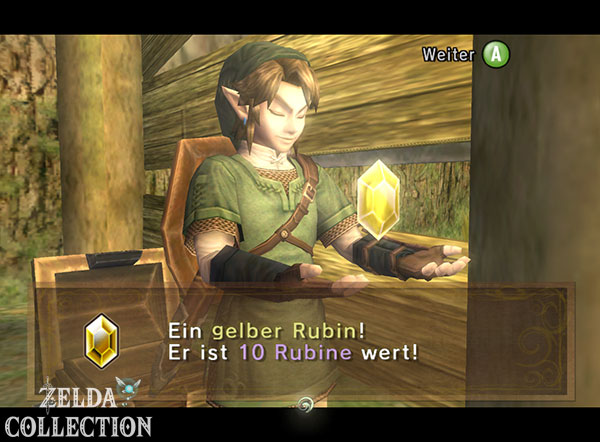
Open the Treasure Chest.
Therein lies our second Piece of Heart.
Piece of Heart 2
This is the first of two Pieces of Heart in the Forest Temple. For an additional Heart Container, Link needs a total of five Pieces of Heart in Twilight Princess. You can find all 45 Locations on our page All Pieces of Heart.
Monkey 4 and the Miniboss
Return up the stairs, jump over the abyss again and climb up the ivy wall. This time you go through the door.
Before the fourth monkey can be freed, a larger enemy is waiting. Target him and watch his attacks. As soon as his heavy head hits the ground, dodge to the side and attack the vulnerable area with your sword.
After several hits, only the actual plant body remains. Get a Bombling and throw the explosive ball directly into the opened maw.
After the explosion you can free the fourth monkey.


Four monkeys open the way to Ook
Return two rooms to the large hall with the platform and four torches. All four freed monkeys now gather on the opposite side.
Follow them north. The four animals hang one behind the other on the rope and form a long swinging chain. Wait for the bottom monkey to approach Link, jump to him and let him carry you over the huge abyss.
The Miniboss is waiting on the opposite side.
Miniboss: Ook
Ook is the monkey who has repeatedly sabotaged our paths with his Boomerang. During the fight, he jumps from one post to the next and throws the Boomerang at Link. In addition, smaller enemies appear that you should eliminate as early as possible.
Target Ook and wait for him to throw his Boomerang. Then roll firmly against the post it is currently standing on. The pole begins to sway and Ook loses his balance.
His own Boomerang hits him as he returns, knocking him to the ground.
Immediately run to him and attack with the sword several times.
Repeat this process a few times. Finally, a dark insect falls off Ook and the monkey comes to.
The reward is the Gale Boomerang.
New item: Gale Boomerang
With the Gale Boomerang you can create wind, pull objects to Link from a distance and mark up to five targets in a row. It can also be used to operate wind turbines, movable bridges and numerous special switches.
Immediately try out the new item on the wind turbine above the door. The mechanism rotates and opens the exit.


Monkey 5 – Open cage with the Gale Boomerang
Exit Ook’s Arena. On the right you will find the next captured monkey. His cage hangs on a rope.
Target the rope with the Gale Boomerang. The wind cuts or loosens the attachment and the cage falls down.
The fifth monkey is free.
Then use the Boomerang to turn the moving platforms on the other side and work your way back into the temple.
Piece of Heart 3 – extinguish the four torches
Return to the room with the dangerous floor tiles. Thanks to the Gale Boomerang, you can now easily bring out the enemies hidden underneath and eliminate them with your sword.
There are four torches burning in this room. Previously we had to light them to raise the stairs. Now we’re doing exactly the opposite.
Extinguish all torches with the Gale Boomerang’s wind.
The platforms or stairs lower and reveal a previously hidden Treasure Chest.
Open it.
Therein lies the third Piece of Heart of our adventure.
Piece of Heart 3
With that we collected both Pieces of Heart from the Forest Temple. A total of 45 Pieces of Heart are waiting in Twilight Princess. You can find the complete overview at Pieces of Heart.
The Compass
Return to the central hall. Above the platform in the middle is a Treasure Chest hanging on a spider web.
Target the rope with the Gale Boomerang.
The chest falls down.
Open it and take the Compass. From now on, all unopened Treasure Chests will be marked on the Dungeon Map. Additionally, the remaining captured monkeys are easier to locate.
In the same hall you can also extinguish one of the torches with the Gale Boomerang to lower the platform. There is an additional chest behind a small rock. Pull a Bombling with the Gale Boomerang and use it to blow up the obstacle.
The Big Key
Follow the already freed monkey and climb up the ivy wall in the next area. First remove all spiders with a slingshot or Boomerang.
In the following room there is a large Treasure Chest behind a grille. Four wind turbines control the mechanism.
The correct order is marked on the floor. Use the Gale Boomerang to mark:
top left → top right → bottom left → bottom right
The Boomerang hits all four wind turbines in the specified order. The gate opens.
Open the large Treasure Chest and take the Big Key.


Monkey 6 – Get Bombling over the abyss
From the room with the Big Key, go north and follow the monkey. If the bridge is misaligned, use the Gale Boomerang on the wind turbine and rotate it to the required position.
In the next room there is a Bombling waiting on a small island in the water. Thanks to the Gale Boomerang, you don’t have to reach him directly.
Mark the Bombling first and then the carnivorous plant. The Boomerang takes the explosive ball and delivers it directly into the opened maw. After the explosion, the next Small Key appears or becomes accessible.
Continue forward to the boulder blocking the ivy. Get another Bombling with the Boomerang and blow up the rock.
Climb up and repeat the principle one more time.
This allows you to free the sixth monkey.
Monkey 7 – the two wind turbines
With the Small Key you return to the room with the large rotating bridge. Stand on the platform and reorient it with the Gale Boomerang.
Go through the previously locked or unvisited door.
First eliminate the enemies. In the back area is the cage of the seventh monkey. Two wind turbines control the grid.
Target both with a single boomerang throw.
The gate opens and the seventh monkey is free.
Monkey 8 – through the right spider web
Leave the area via the opposite path. You will come to a room with several holes in the floor. Some of them are covered with thick spider webs.
Eliminate the large Skulltulas first.
The correct hole is on the corresponding right side from the entrance in the GameCube version. Burn the spider web with the lamp and jump down.
There is the cage of the eighth and final monkey . Smash him with the sword.
Then climb back up over the ivy and return to the large monkey room.


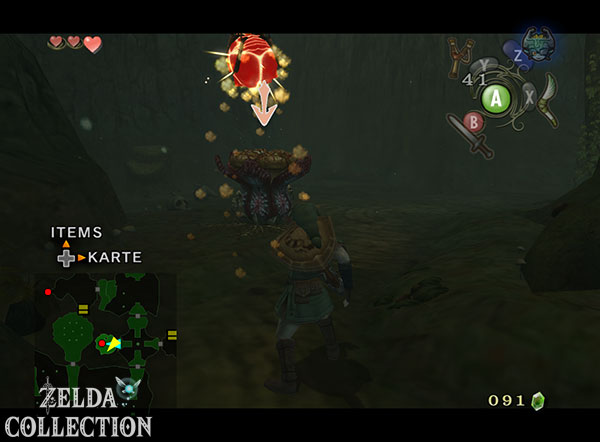


All eight monkeys – the path to the boss chamber
The rescue operation is complete with the eighth monkey. Return to the large room in front of the boss chamber.
All eight monkeys now hang together in a long chain. The unusual monkey pendulum extends over the entire abyss.
Jump to the lowest animal, swing forward and let go at the right moment.
There are several jars in front of the big boss door. In one of them there is a Fairy. Since Link now has two bottles, you should definitely capture them if there is a bottle available.
Then open the door with the Big Key.


Final boss: Twilit Parasite Diababa
Diababa is the first major dungeon boss of Twilight Princess and consists of several giant plant heads. The mechanics of the fight are based entirely on the Gale Boomerang you just received.
Phase 1 – the two outer heads
At the beginning two large plant heads appear. Several bomb beetles grow in the middle of the arena.
Pull out the Gale Boomerang and first mark a Bombling and then one of the two plant heads. The Boomerang takes the explosive ball and delivers it directly into the opened throat.
The explosion temporarily destroys the head.
Repeat the process for the second plant head.
After both have been hit, the fight initially seems to be over. Shortly afterwards, however, the actual main body of Diababa rises from the water.
Phase 2 – Ook helps Link
The bomb beetles on the ground are now no longer accessible. Instead, Ook suddenly appears, who has now been freed from the dark force.
He swings above the arena, carrying a Bombling in his hands.
Use the assault boomerang to first target Ook’s bomb and then target Diababa’s main head.
The Boomerang transports the explosive ball into the monster’s open jaws.
Diababa becomes stunned and the central head falls forward. Immediately run to the big eye and attack with the Ordon Sword as often as possible.
Then retreat. Diababa stands up again and spits acid or poisonous liquid across the arena.
Dodge the attacks and repeat the process: pick up the bomb from Ook, mark the main head, trigger the explosion and then hit the eye with the sword.
The two outer heads can be largely ignored after the main body emerges.
Diababa defeated – first Fused Shadow
After several hits, Diababa collapses. The dark energy breaks away from the parasite and Midna receives the object she was looking for: the first fragment of the Fused Shadow.
Before you leave the dungeon, be sure to collect the complete Heart Container that appears after the fight.
Heart Container 1
A full Heart Container instantly increases Link’s maximum health by one whole heart. In addition to the dungeon heart containers, additional hearts can be built using the total of 45 Pieces of Heart.
Then talk to Midna and leave the Forest Temple.


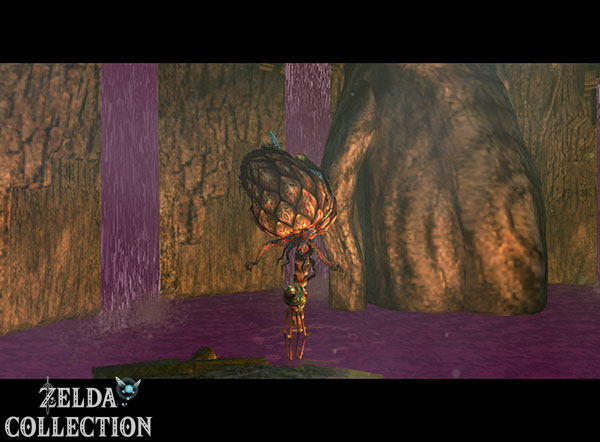


Continue to Kakariko
With Diababa’s defeat, Midna possesses the first fragment of the Fused Shadow. Faron’s area is completely free of twilight, Link has the Gale Boomerang and we have also learned the first Hidden Skill with the Ending Blow.
The next Fused Shadow is further north. Our journey now leads across the Hylian Steppes towards Eldin. There Kakariko was also swallowed up by the twilight.
In the next chapter of our Twilight Princess Walkthrough we continue to Kakariko. We’re looking for Tears of Light drops again, meeting the missing children from Ordon again, exploring the Death Mountain and preparing for the Goron Mines.