

Enter Lakebed Temple with the Zora Armor, Iron Boots and Water Bombs. Redirect water through the central staircase, obtain the Clawshot and defeat Morpheel.
Game version: The route and screenshots follow the GameCube version. The normal mode of Twilight Princess HD has the same orientation; on Wii and in HD Hero Mode, left/right and east/west are swapped. HD deviations are at the affected step.
Lakebed Temple – the third major dungeon
After rescuing Prince Ralis and obtaining the Zora Armor, Link is finally able to breathe permanently underwater. We also used the water bombs to blow open the blocked entrance at the bottom of Lake Hylia. This now begins the third major dungeon of Twilight Princess: the Lakebed Temple.
The ancient temple of Zora is significantly different from the Forest Temple and the Goron Mines. Almost the entire dungeon revolves around a complex water system. Two large reservoirs need to be opened so that water is channeled through various channels into the central hall. A rotating staircase then decides in which direction the water flows and which doors or mechanisms can be reached.
During our 100% route we collect the Dungeon Map, three Small Key, the Compass and the Big Key. After the Miniboss Deku Toad, we also get the Clawshot, one of the most important items in the entire game. With it we can reach both Pieces of Heart of the Lakebed Temple and several previously inaccessible areas. At the end, the huge Twilit Aquatic Morpheel awaits with the third and final Fused Shadow.
Requirements and current score
This chapter follows directly on from our Lanayru Walkthrough. Link should have the Zora Armor, the Iron Boots, water bombs, the Hero’s Bow, the Gale Boomerang and, if possible, several bottles.
Bomb Arrows and Water Bombs are regularly required for the Lakebed Temple. If you followed our previous 100% route, you already have several bomb bags and increased bomb capacity, so ammo shouldn’t be a major problem.
We also assume that Link has collected 18 Pieces of Heart so far. Two more are added in the Lakebed Temple.
The entrance to the Lakebed Temple
After blowing open the underwater entrance, swim through the long tunnel. Several electric jellyfish and shell enemies patrol here, but at the moment it’s hardly worth fighting. Simply swim past them and follow the linear passage until Link can reappear.
In the first dry room, several Chus fall from the ceiling. Red and blue Chus are particularly interesting. If you have an Empty Bottle with you, you can collect red or blue jelly. Blue jelly works like a complete healing potion and is correspondingly valuable.
Use the first ceiling lever
At the opposite end of the room there is a large lever hanging from the ceiling. Jump to it from the raised platform.
Link’s weight pulls the lever down and opens the gate in front of the next door.
Go through.
Stalactites as platforms
In the following room, several massive stalactites hang from the ceiling. Midna already points out that the rocks don’t seem particularly stable.
Combine bombs and hero bows into bomb arrows and shoot at the stalactites. They break off and remain on the ground as large stone cones.
Use the fallen rocks as platforms and work your way up the rock terraces.
You don’t necessarily have to fight the armored Helmasaurs at the moment. Your armor can be removed much easier later with the Clawshot.
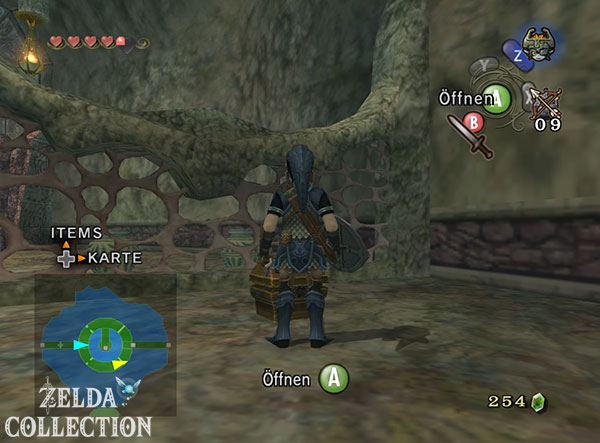
There is also a Treasure Chest with 10 depth charges on a side terrace. Take it with you and then go through the upper door.


The central hall and the rotating staircase
After a short bridge you reach the most important room in the entire dungeon. A huge staircase hangs in the middle of the circular hall, the orientation of which can be changed.
Large levers hang at various points on the upper and lower levels. If you pull such a lever down, the stairs rotate so that the corresponding end points directly to Link.
This mechanic is initially only important for navigation. As soon as water later flows into the central hall, the staircase also determines in which direction the water flow is directed.
Central staircase basic rule:
If you pull a lever on the upper level , the upper end of the stairs turns to Link. If you pull a lever on the lower level, the lower end aligns itself with Link. Later, the grappling hook targets work on the same principle.
Collect Ooccoo
First go down the stairs and move on the lower level to the corresponding lever. Pull it to realign the stairs and climb back up.
On the upper level, near the locked eastern door, there is a jar of Ooccoo. Break it and take her with you.
Ooccoo:
With Ooccoo, Link can leave the dungeon at any time and return to that exact spot later. This option is particularly useful in the long Lakebed Temple if you run out of water bombs or medicines.
The Dungeon Map
On the upper level, go to the opposite side of the hall and pull the large lever there again. The stairs rotate.
Then run back down. There is a large Treasure Chest right next to the bottom of the stairs.
Open it and take the Dungeon Map.
Dungeon Map:
The map is particularly helpful in the Lakebed Temple because many rooms are connected to each other on several levels and new paths are later created by the rising water level.
Then go through the door on the lower east side of the hall.



Small Key 1 – Stalactites and water geyser
Cross the bridge and go through the next door. In the following room, turn into the small side passage and follow the path down.
A small stone bridge is partially destroyed. A stalactite hangs directly above the gap.
Shoot him down with a bomb arrow. The rock falls right into the break and forms a new platform.
Then climb the vines around the large stone pillar.
Use the geyser as an elevator
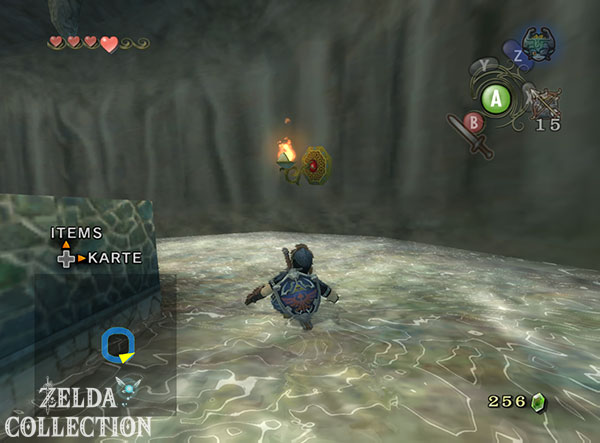
A second stalactite hangs above a regularly erupting water geyser.
Shoot him down too.
The stalactite falls onto the geyser and is now regularly raised and lowered again by the water jet. Climb the rock and wait for the geyser to carry it up.
Jump onto the accessible ledge and open the Treasure Chest there.
Inside is the first Small Key.
Other paths in this room are currently not accessible. Therefore return across the bridge to the central hall.
Go to the upper level and use the key to open the previously locked door.


Small Key 2 – on the way to the first water reservoir
Behind the locked door you reach a new room with more stalactites. Shoot the required rocks from the ceiling and use them to reach the higher vines.
Climb along the wall until you find yourself above a narrow archway. Fall onto it and then jump onto the hanging lever.
A grate opens beneath you.
Jump down and follow the hallway. You blow up a large boulder with a bomb.
The Chu Worms in their water bubbles
In the next room you will first encounter an unusual slime worm that is enclosed in a large water bubble. You can hardly reach him with normal sword attacks.
You can currently destroy the bubble with bomb arrows and then defeat the exposed enemy with your sword. Later, the Clawshot makes these opponents much easier.
First go through the side door and follow the dry water channel down. At the foot of the stationary waterwheel there is a Treasure Chest.
Open it and take the second Small Key.
Then leave the area via the next door, cross the gear room and return to the room with the slime worm.
Open the locked door there with the Small Key.


Open the first water reservoir
A long spiral staircase begins in the next large room. First jump to the lower level and climb the vines back up. Then follow the winding ramp all the way to the top.
Several water enemies attack along the way. Move them out of the way as quickly as possible so that they don’t bother you later on the water slide.
At the top you will find a small Treasure Chest with more depth charges.
Then climb one of the ladders onto the archway and jump to the large lever.
Link’s weight opens the first flood gate.
Water begins to flow down the spiral ramp with great force.
The ramp becomes the water slide
Let the water carry you down. The entire ramp turns into a fast slide.
Once at the bottom, the previously dry pool is filled. Swim to the island in the middle and jump to the second lever there.
Another floodgate opens.
The water now flows from this area into the neighboring rooms and sets several water wheels in motion.
Small Key 3 – the rotating gears
Return through the room with the slime worm and go to the area with the large water wheel. As water now flows, the wheel rotates, allowing passage.
Several platforms are now rotating in the adjacent gear room.
Jump on one of the small gears and let yourself be transported through the room. As soon as you reach the northern door, jump off and go through it.
Directly in the next area, a short path leads to a Treasure Chest.
Inside is the third Small Key.
Return to the gears and then use another rotating platform to reach the next locked door.
Underwater passage to Deku Toad
Behind the door you jump into the water. Swim or walk through the tunnel with the iron boots.
You should avoid electric jellyfish if possible. The only thing that helps against her electric aura at the moment is distance.
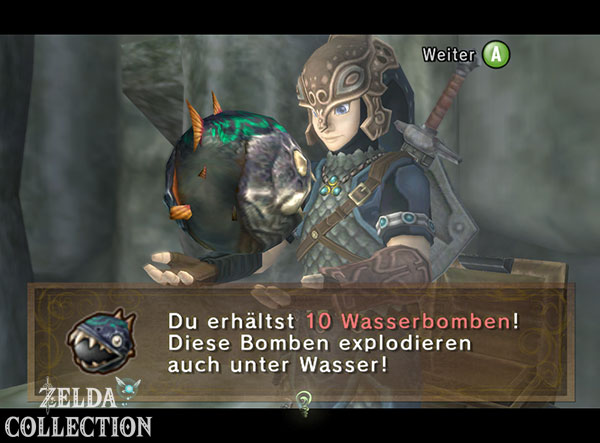
A boulder is blocking the underwater tunnel. Place a water bomb next to it.
After the explosion you can continue swimming. Watch out for the shell enemies that can surprise Link with a single powerful bite.
At the end of the tunnel you reappear and enter the next room.




Miniboss: Deku Toad
When you enter the next room, the hatch closes behind Link. At first the arena appears to be empty. Then numerous small tadpoles fall from the ceiling.
Look up.
The actual Miniboss hangs directly above Link: the huge Deku toad.
Eliminate the tadpoles
The Deku toad first lets its brood fall to the ground. Eliminate the little tadpoles as quickly as possible with normal sword strikes or a spin attack.
You don’t have to target them individually. A well-placed spin attack often takes out several animals at once.
Dodge the jump attack
After the brood is eliminated, the giant toad jumps high into the air.
Watch the shadow on the ground. As soon as he gets bigger and approaches Link, you quickly roll to the side.
The Deku Toad hits the ground with full force.
Her long tongue is exposed for a short time.
Immediately run up and attack the tongue several times with the sword.
Shoot a Bomb Arrow into Deku Toad’s Mouth
After several rounds of attacks, the Deku toad begins to open its mouth wide and spit out new brood.
When a good opportunity presents itself, shoot a bomb arrow directly into its open mouth. The explosion stuns the opponent and exposes the tongue again.
Keep attacking them with the sword.
After several hits, the Deku Toad is defeated.
The Clawshot
After the fight, a large Treasure Chest remains.
Open it.
Inside is the Clawshot.
New item: Clawshot
The Clawshot can draw link to red targets, vines and certain grid areas. In addition, objects and enemies can be drawn to Link. In the Lakebed Temple, the Clawshot opens up numerous new paths and is later necessary outside the dungeon for several Pieces of Heart and other collectibles.
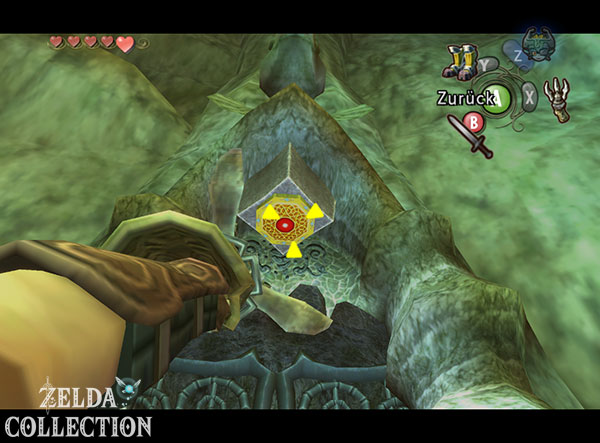
Immediately test the item on the red and gold target on the ceiling.
Pull yourself up with the Clawshot. This will open the exit door at the same time.


With the Clawshot back to the central hall
Cross the next rooms back towards the central hall. The Clawshot makes the way back much easier.
The armored Helmasaurs lose their armor if you target them with the Clawshot and drag the armor to Link. They are then quickly defeated with normal sword attacks.
Chu Worms can now also be pulled directly from their water bladders without having to waste bomb arrows.
Piece of Heart 19 – on the chandelier
Back in the central hall, the water level has already risen through the first reservoir.
Before we tackle the second half of the dungeon, let’s take the first Piece of Heart.
Climb the rotating stairs to the upper level and look at the huge chandelier in the middle of the ceiling.
There are several grappling hook targets on its construction.
Target one of them and pull yourself onto the chandelier.
There is a large Treasure Chest.
Open it and take Piece of Heart 19.
Piece of Heart 19
This is the first of two Pieces of Heart in the Lakebed Temple. Both can be collected during the first complete playthrough.Use


Direct the water to the western half of the temple
Jump from the chandelier back to the stairs or into the water and work your way back to the upper level.
Go to the western side of the central hall. There is no normally accessible lever hanging there, but there is now a grappling hook target above the staircase.
Pull yourself into it.
The stairs automatically rotate towards Link and at the same time create a channel for the water.
The water now flows down the stairs and through the lower western exit.
Follow the stream of water through the door.
The water wheel is now active
In the next room, the large water wheel that previously blocked the path is turning.
Cross the room and go into the next area.
Several large gears are standing still here. First, jump onto the accessible platform and look up.
There is a grappling hook target above a side platform. Pull yourself over and open the chest there with more water bombs.
Then use the vines on the high stone pillars. With the Clawshot you can pull yourself directly onto the plants and get from one column to the next.
Work your way to the upper hallway and go through the door.




To the second water reservoir
In the next room another stalactite hangs over a water geyser.
Shoot it down with a bomb arrow, climb onto the resulting platform and let the geyser carry you up.
Jump through the opening in the wall.
A higher door cannot be reached without Clawshot. Sight on the target above and pull yourself up.
In the next room you can now pull the Chu Worms directly out of their water bubbles with the Clawshot.
Then overcome the fence with a grappling hook target and enter the next large room.
Open the second water reservoir
This area basically corresponds to the first reservoir, but is a little more complex due to the now available grappling hook targets.
Follow the long spiral ramp up. Several gaps interrupt the path. Instead of jumping, you aim at the targets on the opposite side and pull yourself over with the Clawshot.
The water geysers can also be avoided in this way. Wait for a geyser to descend, then swing to the next target.
The Compass
At the top of the spiral ramp there is a small chest with water bombs.
There is another hard-to-reach Treasure Chest nearby. Look for the grappling hook target behind or above the ledge.
Pull yourself over and open the large chest.
Inside is the Compass.
Compass:
From now on, all unopened Treasure Chests will be displayed on the Dungeon Map. This is particularly helpful because after opening the second water reservoir, several optional areas become accessible.
Twilight Princess HD – Stamp Y
If you play Twilight Princess HD, this part of the Lakebed Temple also contains the Hylian “Y” stamp.
After the water is already flowing, you have to climb part of the spiral ramp again. With the iron boots you can run against the current. Use the Clawshot to pull yourself to the target behind the previously unreachable Treasure Chest.
In the HD version it contains the stamp Y.
You can also find all stamps in our overview Stamps – Twilight Princess HD.
Open the second flood gate
Then climb onto the archway and jump to the large lever.
The second water reservoir is opened.
Slide back down the now flooded spiral ramp.
Swim to the middle island again and pull the second lever. This also opens the lower water channel and the water flows to the remaining areas of the temple.


The path to the Big Key
Slide back down and follow the now flowing water back towards the gear area.
The previously stationary mechanisms are now moving. Cross the two large gears and pull yourself onto the platform at the back end with the Clawshot.
From there you can get back to the lower level of the room via tendrils and other grappling hook targets.
Next, jump onto the small rotating gears and use the targets under the large gear to reach the far exit.
Underwater maze
Behind the next door begins one of the most confusing areas of the Lakebed Temple.
Jump into the water, put on the Zora Armor and dive down.
Several aisles are at different heights. First, head to the deeper section and look for the boulder blocking a side passage.
If you are missing water bombs, you can use the bomb fish floating around. If you attack them, they turn into a sharp water bomb.
Blast the first rock and swim through the opening.
On the other side you will find a chest with more water bombs.
Then sink to the bottom with the iron boots and look for the second blastable rock. Place a water bomb here too.
Swim through the newly created opening and emerge.
The Big Key
Behind the next door there is another slime worm waiting in its water bladder. Pull him out with the Clawshot and defeat him.
Then look at the ceiling. There is a large red and gold target there.
Pull yourself up with the Clawshot.
A hole opens in the ground under Link.
Now slowly let the grappling hook chain become longer again instead of just letting yourself fall. If you sink down in a controlled manner, the opening stays open long enough.
On the small platform below there is a large Treasure Chest.
Open it and take the Big Key.
Big Key:
The path to the Morpheel Chamber is now basically clear. For our 100% route, however, we first get the second Piece of Heart and the last useful treasures from the Lakebed Temple.






Piece of Heart 20 – both watercourses combine
Return to the central hall. Since both water reservoirs are now open, the water is significantly higher than at the beginning of the dungeon.
For the second Piece of Heart we have to direct the water flow specifically to the lower eastern side area.
Use the grappling hook targets or levers on the central staircase so that the water flows down the stairs and through the corresponding lower exit.
Follow the water.
In the well-known room with the stalactites, a bridge has now been raised due to the increased water level. This allows you to enter the previously inaccessible rear area.
Eliminate the Tektites and stand on the heavy Floor Switch.
A grate opens in front of you.
Stand on the Floor Switch and aim at the target behind the goal with the Clawshot.
Pull yourself through before the gate closes again.
Open the big Treasure Chest and take Piece of Heart 20.
Piece of Heart 20
This means that both Pieces of Heart from the Lakebed Temple have been collected. We don’t have to return to this dungeon later for the Pieces of Heart.
To leave the area again, pull yourself to the target on the ceiling with the Clawshot.
Twilight Princess HD – Stamp K
A second exclusive stamp awaits in Twilight Princess HD.
Return to the central hall and drop into the large pool of water.
Below the platform with the boss door is a deeper circular ledge. Put on the Zora Armor and the Iron Boots and walk around the middle tower once on this level.
Open the Treasure Chest there.
In Twilight Princess HD, it contains the stamp Hylian “K”.
To the boss door
The dungeon is now fully completed. In the central hall, swim to the middle platform.
On the upper level is the large door with the master lock.
Open it with the Big Key.
There are several jugs in the anteroom. Smash them to refill hearts and ammo. There is also a Fairy in one of the jars.
If one of your bottles is empty, you should definitely catch it.
Then jump into the large hole in the ground.


Final boss: Twilit Aquatic Morpheel
After jumping into the huge underwater arena, put on the Iron Boots and let Link sink to the bottom.
In the middle of the tank, initially only a strange eye moves within several large tentacles.
Then the fight against the Twilit Aquatic Morpheel begins.
The Clawshot is the decisive weapon in both phases.
Phase 1 – pull the eye out of the tentacles
Leave the Iron Boots on and keep enough distance from the large tentacles. You can grab Link and drag him straight to the boss’s giant mouth.
Watch the tentacles closely. The large eye constantly moves from one tentacle to the next.
As soon as the eye is within range, aim at it and use the Clawshot.
Link pulls the eye out of the tentacle directly towards himself.
Immediately attack it multiple times with the sword.
After a few hits, the eye retracts again and appears a short time later in another tentacle.
If possible, ignore bombfish
After the first successful attack, Morpheel releases several Bombfish.
As long as they don’t block Link’s targeting, you can largely ignore them. It’s better to stay out of their reach and concentrate on the eye.
If too many bombfish become a nuisance, you can eliminate some of them with your sword or cause them to explode.
Pull out the eye again with the Clawshot and attack it with the sword.
After several successful attacks, the second phase begins.


Phase 2 – pull on Morpheel’s back
Now the prehistoric fish shows its true size. His massive body separates completely from the bottom and swims across the vast arena.
Take off the Iron Boots immediately. Link must be able to swim freely to keep up with the boss.
The weak point is still the big eye. This is now on Morpheel’s back or directly behind his head.
If possible, swim to the side or above the monster.
Important:
Never swim directly in front of Morpheel’s huge mouth. If Link gets into his trajectory, he will be sucked in and suffer significant damage.
As soon as you are close enough to the boss, aim at the eye and use the Clawshot.
Link pulls himself directly onto Morpheel’s back.
A short moment of attack automatically begins there. Hit the eye with the sword as often as possible.
After a few hits, Morpheel throws Link off again.
Swim behind or over the boss again, aim at the eye and pull yourself in again with the Clawshot.
Repeat this process several times.
Eventually, Morpheel loses control, racing through the arena and breaking through the outer wall.
All the water in the pool drains out.
Third Fused Shadow and Heart Container
Morpheel is defeated. The third and final fragment of the Fused Shadow is created from the monster’s remains.
Midna now has all three parts that she has been looking for since the beginning of the adventure.
Before you leave the dungeon, be sure to pick up the complete Heart Container.
Heart Container 3
The Heart Container increases Link’s maximum health by one full heart. Together with the 20 Pieces of Heart that have now been collected, Link is significantly more resilient than at the beginning of the journey.
Then talk to Midna and leave the Lakebed Temple.


Zant’s Attack
After leaving the Lakebed Temple, Link and Midna return to the source of the light spirit Lanayru. Actually, her original goal seems to have been achieved: all three Fused Shadows are in Midna’s possession.
But before the two can plan their next step, Zant appears.
The King of Shadows takes the three Fused Shadows from Midna and directly demonstrates his enormous power for the first time. Even light spirit Lanayru can’t stop him.
Zant permanently forces Link into his wolf form and attacks Midna with the power of light. For a being from the shadow realm, this energy is devastating.
After the attack, Midna lies seriously injured on Wolf-Link’s back.
From this moment on, the entire starting point of the adventure changes. The three Fused Shadows are lost, Midna’s life is in danger and Link can no longer transform back into his human form.
Go to Master Sword
The Lakebed Temple is completed and Link has one of the most important items in the game, the Clawshot. At the same time, we collected both Pieces of Heart, all three Small Key, card, Compass and Big Key and finally defeated Morpheel.
But the victory is immediately overshadowed by Zant’s attack. Our next task is no longer to look for another Fused Shadow. Instead, we must save Midna and find a way to break Link’s wolf curse.
The trail initially leads back to Castle Town and Princess Zelda. We will then have to return deep into the Faron Woods and search for a legendary weapon that can drive away evil.
We continue in our Twilight Princess Walkthrough with the chapter Master Sword. There we accompany the seriously injured Midna to Zelda, return to the Sacred Grove as a wolf and finally look for the sword that can permanently free Link from Zant’s curse.
To Morpheel
Don’t forget the Heart Container before leaving the boss chamber. The Clawshot opens the first STAR course for 60 arrows after the following story events. For 100 arrows you will later need the Double Clawshots. If you are now traveling as a wolf again, the main route first leads to Zelda and to Master Sword.