

Buy the Bomb Bag from Barnes after Goron Mines and collect the available rewards around Kakariko. Cross the Bridge of Eldin, reach Lake Hylia and restore Zora’s Domain before completing Lanayru’s Tears of Light hunt.
Game version: The route and screenshots follow the GameCube version. The normal mode of Twilight Princess HD has the same orientation; on Wii and in HD Hero Mode, left/right and east/west are swapped. HD deviations are at the affected step.
From Kakariko to Zora’s Domain
After defeating Fyrus in the Goron Mines, Midna already has two of the three Fused Shadows. Link is taken back to Kakariko, where Light Spirit Eldin shows the way to the next major province. Our next destination is Lanayru, the extensive north and west Hyrule’s. Not only do we suspect the last Fused Shadow is there, but we can finally continue to follow Ilia’s trail.
Before we leave Kakariko, however, the Hero’s Bow opens up numerous new possibilities for us. Barnes can now finally sell bombs, giving us access to bomb arrows. In addition, several new Pieces of Heart, the falcon eye and other Golden Bugs are waiting. Since these items can now be reached without major detours, we are integrating them directly into our 100% route.
The journey then leads over the bridge of Eldin into the next shadow realm. We trace Ilia’s scent to Castle Town, discover the almost completely dried out Lake Hylia and finally reach the completely frozen Zora’s Domain. Only when we have got the water flowing again can we devote ourselves to the light spirit Lanayru and collect Tears of Light for the last time.
Requirements and current score
This chapter follows directly on from the Goron Mines. Link now has the Hero’s Bow, the Iron Boots, the Gale Boomerang and his previous melee weapons. If you followed our route, you will also have collected both Pieces of Heart from the Goron Mines and have the Hylian Shield.
The Hero’s Bow is particularly important now. Together with bombs, we can use them to make bomb arrows and use them to blow up rocks from a long distance. It is precisely this combination that opens several new paths in and around Kakariko.
Kakariko after the Goron Mines
After returning from the Goron Mines, you first talk to the residents of the village. Colin has recovered from his injuries and Renado continues to care for the children. Our actual goal is in Lanayru, but with Hero Bows and Bombs we can now collect several permanently important rewards.
The first bomb bag for 120 Rupees
Go to Barnes Bomb Shop. After relations between the Gorons and the humans have been restored, Barnes finally has enough explosives again.
Since Link doesn’t have a bomb bag yet, Barnes offers a unique starter package: For 120 Rupees you will receive a bomb bag with 30 normal bombs.
New Equipment: Bomb Bag 1
With the bomb bag, Link can transport normal bombs for the first time. Together with the Hero’s Bow, they can also be combined to form bomb arrows. Additional bomb bags and other bomb types can be unlocked later.
Piece of Heart 9 – Taros bow training
Since we have the Hero’s Bow, it’s worth visiting Talo now. The boy has now declared the high observation tower of Kakariko his guard post.
Work your way across the upper buildings of the village to the tower. The Gorons help Link get to higher balconies and rooftops. In one of the accessible rooms there is also a Treasure Chest with a larger Rupee, which you can take with you straight away.
Talk to Talo at the top of the tower. He’s excited about the Hero’s Bow and wants to see how well Link can handle it. A short bow training session then begins.
Link is near Eldin’s spring again. First hit the easy target nearby and then hit the target on the roof of the Malo store. Talo then challenges Link from the distant observation tower.
Sight at the post directly next to Talo and draw the bow fully. The distance is long, but with a slightly steady hand you can hit the post without additional help.
After the successful shot, Link receives a Piece of Heart.
Piece of Heart 9
Bow training is completely optional, but should be completed immediately after the Goron Mines for a 100% score.
The Hawkeye in the Malo Shop
The Hawkeye is now also for sale in the Malo store for 100 Rupees. The unusual device works like binoculars and can also be combined with the Hero’s Bow.
This gives Link a magnified view when aiming, which is particularly useful for distant enemies and targets. The Hawkeye isn’t essential for the main storyline, but we’ll buy it now for a full save game.
New equipment: Hawkeye
The Hawkeye serves as a telescope and can be combined with the Hero’s Bow. It makes precise shooting easier, especially at very distant targets.
Make Bomb Arrows
Open the item menu and combine the Hero’s Bow with your bombs. Link then shoots bomb arrows, which explode on impact.
The combination combines the range of the bow with the explosive power of a bomb and is required repeatedly throughout the rest of the game.
Piece of Heart 10 – via Eldin’s source
Go to the southern side of Kakariko towards Eldin’s Spring and look far up at the rock wall. There you will see two large boulders blocking a small ledge.
You cannot reach this height with normal bombs. Therefore, aim at the rocks with a bomb arrow and blow them up from a distance.
A Piece of Heart appears behind the destroyed stones.
Switch to the Gale Boomerang, target the Piece of Heart and drag it to Link.
Piece of Heart 10
Bomb arrows and storm boomerangs are directly combined here: First you blow up the rocks, then you bring the Piece of Heart over the long distance to you.
Piece of Heart 11 – at the bottom of the spring
Below the rocks that were just destroyed there is another large stone directly in the rock wall. Blow him up with a normal bomb.
A hidden cave passage opens behind it. Follow the tunnel until you emerge on a previously unreachable ledge above Eldin’s spring.
Jump into the water and put on the Iron Boots. Link sinks to the bottom.
There is a large Treasure Chest. Open it and take Piece of Heart 11.
Then immediately take off the Iron Boots and swim to the surface. Please note the limited air display on the left.


Piece of Heart 12 – back at Death Mountain
Before we finally leave Kakariko, it’s worth taking a short walk back to Death Mountain. Since the Goron Mines was completed, the Gorons have behaved in a friendly manner and can specifically hurl Link onto higher platforms.
Take the familiar path to Death Mountain and let the first Goron catapult you up. Run to the next Goron, but this time don’t use the normal uphill route. Instead, aim Link towards the higher side ledge and let yourself be thrown there.
Follow the raised rock path. Even before you reach the young Goron at the end of the path, you will find an opening in the rock to the side. Jump in or drop onto the platform below.
In a Treasure Chest, Piece of Heart 12 is waiting.
If you visit this area at night, you can already see a striking ghost light. However, we can’t do anything with that at the moment. The Poe Souls can only be collected later.
Kakariko Gorge – hidden cave
For our 100% route, we take a short detour to the Kakariko Gorge before continuing our journey. Ride with Epona out of the village and cross the familiar bridge.
In the southern section of the canyon, a large rock blocks a cave entrance. Blow it up with a bomb and enter the dark cave.
Piece of Heart 13 – Torch puzzle in cave
The cave is significantly larger than initially expected and contains several branches. Have the lamp ready, as spider webs and dark hallways make the path difficult.
From the cave entrance, the route in the GameCube orientation is:
right → right → left → right
At the end you will reach a room with two extinguished torches. Light them both with the lamp.
A Treasure Chest then appears with Piece of Heart 13.
Wii version:
Since the entire Wii game world is mirrored, the left/right indications within the cave must be reversed accordingly.
Twilight Princess HD – Stamp O
If you play Twilight Princess HD, inside this cave there is also the stamp Hylian “O”. From the entrance, follow the corresponding side route and open the Treasure Chest there.
You can also find all HD-exclusive stamps on our page Stamps – Twilight Princess HD.
Important for later:
There is also a Poe Soul in the same cave. We’re leaving these behind at the moment because Link can’t yet freely transform between human and wolf. We’ll do it later in a much more convenient way.
Hyrule Field north of Kakariko
Return to Kakariko, mount Epona and jump over the northern gate. You return to the part of the Hyrule Field where the cavalry fight against King Bulblin previously took place.
The postman will give Link more letters on the way. We then focus on the last optional finds before entering Lanayru.
Piece of Heart 14 – Rock path above the plain
Near the entrance to Kakariko there are several large blastable rocks at the base of a long rocky path. Destroy it with a bomb and follow the ramp up.
Jump over the small gap and climb up the ivy wall. On the next level, a narrow ledge leads further across the path.
In front of the next ivy wall there is another boulder above. Blast it from a safe distance with a bomb arrow and then jump to the ivy.
After the climb you look at the lower ledge. There is a Treasure Chest.
Drop down and open it for Piece of Heart 14.
Golden Bugs – the grasshopper pair
In the same large plain live two more Golden Bugs. Both jump across the ground and are relatively easy to miss in daylight.
Golden Bug – Male Grasshopper
Look for an open earthy area south or southwest of the path to the Bridge of Eldin. There the male grasshopper hops over the ground between the leevers.
Approach slowly or use the Gale Boomerang to pull the animal towards Link.
Golden Bug – Female Grasshopper
The female counterpart is further in the northeastern part of the plain. The female grasshopper also jumps freely across the ground.
The Gale Boomerang is again the safest method, especially because the Leevers that keep appearing can interfere with Link’s collection.
Golden Bugs – the two stick insects
Continue riding towards the Great Bridge of Eldin.
Golden Bug – Male Stick Insect
Directly at the southern entrance to the bridge, the male stick insect sits relatively high on the stone archway.
Target it with the Gale Boomerang and drag the insect to Link.
Golden Bug – Female Stick Insect
Then cross the entire bridge. On the northern side you look at the raised rock wall near the end of the bridge.
The female specimen sits there. Get as close as possible and use the Gale Boomerang again to collect the Female Stick Insect.
Golden Bugs 10/24
If you followed our previous route, Link now already has ten of the 24 Golden Bugs. You can find the complete overview in our guide All Golden Bugs.


The Bridge of Eldin is destroyed
North of the bridge, three large rocks block the further path. Blow them up with bombs.
Immediately afterwards, a shadow portal opens over the bridge. A huge part of the bridge structure is torn into the shadow realm and disappears completely. Three creatures of darkness remain.
Since Link is currently human, we cannot use Midna’s energy field. First, defeat a Shadow Beast one at a time. Then wait until the two remaining enemies are close together and, if possible, kill them at the same time with a charged spin attack.
Her death creates the warp portal Bridge of Eldin. This will become extremely important later, because the missing bridge cannot be replaced in the normal way.
Then climb back onto Epona and follow the rocky path further north. You can either take out the bulblin archers along the way with the Hero’s Bow or simply pass them at a gallop.
At the end, another black wall of twilight awaits.
Lanayru in the Shadow Realm – Ilia’s scent
Rise from Epona and enter the Twilight. Midna turns Link into Wolf-Link again.
A few steps further there is a small bag on the ground. Sniff it.
The bag belongs to Ilia.
Forget the children’s previous scent trail and save Ilia’s scent instead.
New scent track: Ilia’s scent
Activate Wolf-Link’s sense to make Ilia’s scent visible as a colored trail. She leads us directly to her current location.
Follow the scent trail across the vast Hyrule Field. Numerous Shadow Beasts patrol the twilight, including archers with fire arrows. Since the sense darkens normal vision, you should only activate it when you actually need to check the trail.
Finally, the massive Hyrule Castle appears on the horizon. Continue following Ilia’s scent to the entrance to Castle Town.


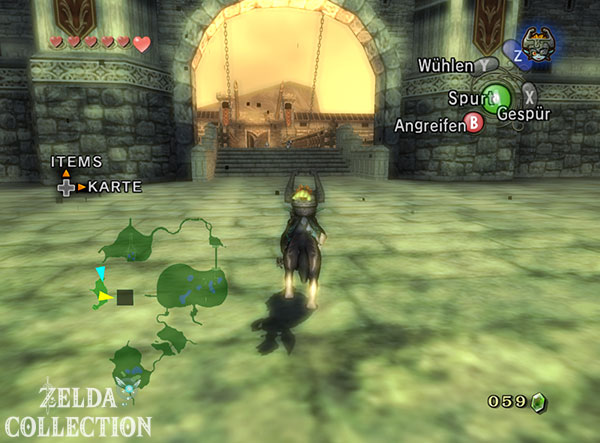

Castle Town in Twilight
Castle Town still seems full of life despite the twilight. To Wolf-Link, however, the residents only appear as ghostly silhouettes. You cannot see or speak to Link directly.
With your intuition activated, you can listen to numerous conversations and learn more about the situation in the city. However, for the main plot, we continue to follow Ilia’s scent.
Ilia in Telma’s Tavern
The trail finally leads to the southern district and from there into a backyard. The door to Telma’s Tavern is open.
Enter the building and activate the sense.
You will actually find Ilia there. Together with Telma, she looks after a seriously injured young Zora. Ilia appears to be physically unharmed, but still has no memory of her past.
The injured Zora is Prince Ralis, the son of the Zora Queen.
Then listen to the soldiers or examine the map on the table. There is a point marked on it at Lake Hylia. Apparently the severe water shortage in Lanayru is related to the events there.
Leave the tavern and then Castle Town again via the same entrance.
The Great Bridge of Hylia
Follow the rocky path towards Lake Hylia. You will soon reach the huge Great Bridge of Hylia.
The lake far below you is almost completely dry.
A short sequence begins around the middle of the bridge: A shadow bulblin ignites the bridge prepared with oil and the fire spreads towards Wolf-Link from both sides.
A normal return route is impossible.
Push one of the wooden boxes onto the railing, jump onto it and then over the railing.
Wolf-Link falls deep into the rest of Lake Hylia.


Lake Hylia – why did the water disappear?
The once huge Lake Hylia currently only consists of a few flat areas of water. Listen to the ghosts of Zora and the conspicuously dressed man at the lake. It quickly becomes clear that the problem did not arise here: water no longer flows into the upper reaches of the Zora River.
There is a Shadow Bulblin nearby. Approach him.
The opponent uses a blade of grass to summon a huge shadow bird.
Intermediate battle against the shadow bird
The Bulblin stays on the bird’s back and shoots Wolf-Link with arrows. Constantly move sideways and wait until the shadow bird flies low enough.
Target him and jump on the animal. Bite several times until Link is thrown back down.
Repeat the attack. Once the bird has taken enough damage, the Bulblin will fall down. Then eliminate him like a normal enemy.
Midna then takes control of the Shadow Bird.
Up the Zora River with the Shadow Bird
This is followed by a flight passage through the narrow gorge of the Zora River. If possible, keep the bird in the upper and middle areas of the tunnel and avoid rocky ledges, falling stones and obstacles early on.
Don’t accelerate constantly. A slower speed gives you significantly more time to react to tight turns and suddenly appearing obstacles.
At the end of the gorge, the shadow bird drops off Wolf-Link at the upper reaches of the Zora River.
Jump into the riverbed. Instead of water, however, you will only find ice there.
Continue following the frozen river towards Zora’s Domain.


Zora’s Domain is completely frozen
The large waterfall of Zora’s Domain has solidified into a massive wall of ice. Wolf-Link can’t just walk up, but Midna sees a route over the icy ledges.
Stand on the lower snow ledge and call Midna. Follow their jumps upwards bit by bit. Several platforms are very narrow, which is why you should not interrupt the jumping sequences unnecessarily.
As we continue along the path, large icicles fall down. Wait until they are stuck in the ground and then move on.
After several more Midna jumps you finally reach the inner area of the Zora Cave.
Shadow Beasts in Zora’s Cave
Three creatures of darkness wait in the upper area.
Defeat one enemy individually and kill the two remaining Shadow Beasts together with Midna’s energy field.
This creates a new warp portal directly in Zora’s Domain.
Midna then notices that the Zora themselves are trapped under a huge layer of ice.
We need something hot enough to thaw the entire cave.
The hot rock from Death Mountain
Open the map and warp to the portal at Death Mountain.
There still lies the huge glowing boulder that fell from the volcano during our earlier trip.
Approach the rock and call Midna.
Then select the new portal in Zora’s Domain.
Midna not only transports Wolf-Link, but also the entire glowing rock. The boulder falls into the middle of the ice surface of the Zora Cave.
The enormous heat melts the ice. Within a few moments, the water begins to flow again throughout the cave and the Zora River.
This also fills the Lake Hylia again.
The ghost of Queen Rutela
If you want to leave Zora’s Domain again, the spirit of the deceased Queen Rutela will appear.
She explains that her son, Prince Ralis, was able to escape during the invasion, but is now lying seriously injured in Castle Town. We have already seen exactly this young Zora with Ilia and Telma.
Rutela asks Link to save her son.
In return, she promises him a special gift that will allow him to move and breathe underwater like a Zora.
However, we are currently unable to complete this task as Lanayru remains in the Twilight.
Jump into the Zora River, which is flowing again, and let the current take you up to Lake Hylia.


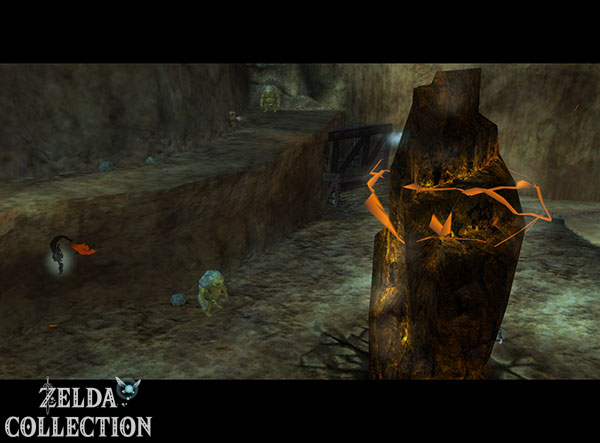


Light Spirit Lanayru and the Final Vessel of Light
The current carries Wolf-Link directly back to the now filled Lake Hylia. The source of the light spirit is now located directly on the water and can finally be reached.
Enter the grotto.
There the Light Spirit Lanayru appears and presents Link with the third and final Vessel of Light.
Last Tears of Light search:
On GameCube and Wii you have to play Lanayru in total 16 drops of Tears of Light be collected. Twilight Princess HD reduces the number to twelve. The numbering below describes the full GameCube/Wii route.
Tears of Light 1 to 4 – Lake Hylia
Twilight Princess HD: Twelve Tears of Light drops are required here, sixteen on GameCube and Wii. The following numbers describe the original route. In HD, use the bug markers on your map and the Vessel of Light counter; There are no additional beetles hidden in the omitted original locations.
Tears of Light 1 – Island in the western lake
Leave Lanayru’s Grotto and open the map. The first Shadow Beetle can be found on a small island in the western part of Lake Hylia.
Swim over, activate the sense and defeat the insect.
Collect Tears of Light 1.
Strahltau 2 – Wooden bridge at Ranelles Quelle
Swim towards the Light Spirit Grotto again and follow the wooden bridge or footbridge on the corresponding side.
With activated sense you can recognize the next shadow beetle there.
Defeat him for Tears of Light 2.
Warp portal on Lake Hylia
Continue following the path. Three creatures of darkness appear and include Wolf-Link.
As usual, first defeat one of the creatures individually and kill the other two together with Midna’s energy field.
This creates the important warp portal Lake Hylia.
Tears of Light 3 – southern ledge
From the battle site, head towards the southern rock platforms. Jump over the gaps and follow the winding path up.
Activate the sense on the upper ledge.
Shadow Beetle 3 is waiting there.
Strahltau 4 – behind the building by the lake
Head down and follow the walkways to the prominent building at Lake Hylia. Go around the building.
The fourth shadow beetle buzzes in the air and regularly charges itself electrically. Only attack him when the electric aura is gone.
After his defeat you will receive Tears of Light 4.


Tears of Light 5 to 8 – Flight through the Zora River
Return to the area where you previously defeated the Shadow Bird. You can summon the bird again at the grass or howling point there.
This time four shadow beetles have to be collected during the flight.
Activate your sense and look for the glowing insects in front of you. Target each animal and accelerate straight into it. The respective drop of Tears of Light is automatically collected.
This way you will receive:
during the flight
Tears of Light 5, 6, 7 and 8.
If you miss a shadow beetle, that’s no problem. At the upper reaches you can speak to Midna, warp back to Lake Hylia and start the flight again.
Tears of Light 9 – Upper reaches of the Zora River
After the flight you land back at the upper reaches of the Zora River.
Go to the building by the river and approach the ghost of the young woman in front of it. As soon as you approach her with activated sense, she reacts in shock to something invisible.
Activate the sense and defeat the shadow beetle near them.
This will give you Tears of Light 9.
Second Howling Stone – Preparation for the next Hidden Skill
Cross the bridge at the upper reaches of the Zora River and follow the path up the raised cliff.
There is the second howling stone.
Examine him and repeat the given melody with Wolf-Link’s howl. After the successful first round, Link is transported back to the mysterious place of the heroic spirit.
Repeat the song there one more time.
The Golden Wolf now marks a new point on the map in the Hyrule Field outside of Castle Town.
Hidden Skill for later:
We can’t address the heroic spirit at the moment because Link is still trapped in the twilight. As soon as Lanayru lies in the light again, we return to him and learn the third Hidden Skill.


Tears of Light 10 – Castle Town
From the upper reaches of the Zora River you follow the Zora spirits or the river path back towards the Hyrule Field and Castle Town.
Three creatures of darkness appear shortly before the city gate. Defeat them according to the familiar principle to open another warp portal.
The golden wolf is already waiting nearby. However, we can’t learn his technique yet.
Enter Castle Town.
The next Shadow Beetle is in the southern part of town near Telma’s Tavern. Activate your sense and examine the wooden boxes in the backyard.
Destroy the crates. The insect appears underneath.
Defeat it and collect Tears of Light 10.
Then warp with Midna directly to Zora’s Domain.
Tears of Light 11 to 15 – Zora’s Domain
Tears of Light 11 – on the high wall
Immediately after the warp, the map shows a Shadow Beetle in the upper area of Zora’s Cave.
Activate your sense and look at the high rock wall. The insect sits far above Wolf-Link.
Run hard into the wall.
The beetle detaches itself and begins to fly through the air. Wait until he gets low enough, jump at him and defeat him for Tears of Light 11.
Tears of Light 12 and 13 – for the water lilies
Then jump down the waterfall to the lower area of Zora’s Domain.
Swim to the middle of the large pool where several lily pads are floating on the water.
Climb on one of the leaves and activate the sense.
There are two shadow beetles here.
Defeat both and collect Tears of Light 12 and 13.
Strahltau 14 – western bank side
Swim to the western side of the pool and go ashore. Follow the path up a bit.
The next shadow beetle has burrowed into the ground.
Activate your instinct, stand directly on the glowing spot and pick out the insect.
Defeat it for Tears of Light 14.
Strahltau 15 – high above the waterfall
Then swim to the opposite side and use Midna’s jumps to work your way up. Several sequences of jumps lead over narrow rocks and behind the large waterfall.
Take your time and pay particular attention to the narrow sections. A fall puts Wolf-Link back into the water and you have to repeat part of the climb.
On the high eastern path you will finally find the last normal shadow beetle in the region.
Defeat him and collect Tears of Light 15.
Midna then answers in surprise. Although fifteen drops were collected, no other insect was initially visible on the map.
Shortly afterwards, a new white dot suddenly appears on the Lake Hylia.


Tears of Light 16 – the Twilit Bloat
Warp with Midna to Lake Hylia and swim to the newly appeared white dot on the map.
A short sequence shows that the last shadow beetle is significantly larger than all previous specimens.
Activate the sense.
The huge Twilit Bloat appears in front of Wolf-Link.
First phase – dodge electrical attacks
The Twilit Bloat hovers over the water and dive attacks Wolf-Link.
Pay attention to her body. As long as it is surrounded by electrical energy, you are not allowed to touch it. Instead, dodge sideways.
As soon as the electric aura disappears, target the queen, jump to her and bite several times.
After a successful attack, it briefly falls into the water and then begins to fly again.
Repeat this process three times in total.
Second phase – destroy all legs at the same time
After the third successful attack, the queen falls on her back and floats motionless on the water.
You can see several large legs or tentacles on her stomach.
Jump onto her body.
Fully charge Midna’s energy field and move the circle so that all of her legs are captured at the same time.
Release the attack.
Wolf-Link automatically jumps from one target to the next, destroying all limbs at once.
The Twilit Bloat is defeated.
Collect the remaining 16. Tears of Light Drop.


Lanayru returns to the light
The Vessel of Light is completely filled with the last drop of Tears of Light. Link will automatically be taken back to the Source of the Light Spirit.
Lanayru regains her full power and drives out the Twilight from the entire province. Link returns to his human form.
The light spirit then tells more about the Fused Shadows and the dark power that once reached for the Holy Realm. At the same time, it confirms that the third and final Fused Shadow is deep below the Lake Hylia.
Our next big dungeon is now known: the Lakebed Temple.
However, Link cannot enter it at the moment. The temple is deep under water and without special equipment we would drown on the way there.
This makes Queen Rutela’s request crucial. If we save her son Ralis, she wants to give Link the ability to move underwater like a Zora.
Continue by Lanayru
Lanayru is now completely in the light and this opens up a large part of Hyrule’s for optional exploration. We can enter Castle Town for the first time as humans, hand in Golden Bugs to Agitha, collect more Pieces of Heart, get a new bottle and learn the next Hidden Skill.
Most importantly, we must return to Castle Town and help Prince Ralis. Together with Ilia and Telma we take him on a dangerous escort to Kakariko. As a reward we then receive the Zora armor and with it the ability to breathe permanently underwater.
So we continue in the next chapter of our Twilight Princess Walkthrough with Lanayru. There we collect the optional items that are now available, save Prince Ralis and fully prepare Link for the Lakebed Temple.
After the Tears of Light search
The Twilit Bloat ends the Lanayru search. You don’t have the Zora Armor at this point. So first return to the city to Telma and Ralis. Underwater caves and the Lakebed Temple wait until after the escort.