

Enter Arbiter’s Grounds from the Bulblin camp. Follow the four Poes to restore the stolen flames, defeat Death Sword for the Spinner and fight Stallord to reach the Mirror Chamber.
Game version: The route and screenshots follow the GameCube version. The normal mode of Twilight Princess HD has the same orientation; on Wii and in HD Hero Mode, left/right and east/west are swapped. HD deviations are at the affected step.
Requirements for the Arbiter’s Grounds
If you have followed our Twilight Princess walkthrough chronologically, you already have everything you need for the dungeon. Particularly important are the Clawshot, the Lantern, bombs or bomb arrows and of course the possibility of being in at any time Transform Wolf-Link. The Clawshot is needed just a few meters after the entrance, while Wolf-Link’s instinct for the four ghosts and several hidden mechanisms is essential.
It is also advisable to fill up your lamp supply and have some bombs or bomb arrows with you before entering the Arbiter’s Grounds. You can use it to take out several undead from a safe distance, and with the Stalfos you need an explosion to finally destroy their bones. If you have collected ghosts so far, you can find the complete overview in our guide to the Poe Souls in Twilight Princess.
The entrance of the Arbiter’s Grounds: quicksand and the first Small Key
The first room already makes it clear what danger will accompany you through large parts of the Arbiter’s Grounds: Quicksand. Although you can access individual sand areas for a short time, Link becomes increasingly slow and eventually begins to sink. The clearly visible sand whirlpools are particularly dangerous. Therefore, try to cross small distances by jumping or somersaulting and only enter longer sand fields if the path is clear. You can pull the worm-like enemies in the sand out of their element with the Clawshot and then kill them safely.
Immediately after the entrance sequence you will see a target for the Clawshot on a side wall. In the GameCube version and in normal HD mode, it is on the left side; on Wii and in HD Hero Mode the entire room is mirrored. Pull yourself over and then work your way across the solid stone islands to the back of the hall. The scattered skulls here serve much the same function as jars in other dungeons, occasionally containing hearts, Rupees, or ammunition.
In the back area you will reach a closed grille. To the side of it is a chain over the quicksand. Don’t try to wade through the sand for a long time: instead, aim the Clawshot at the chain, pull it towards you and hold it back until the grate rises completely. Then run onto the raised platform behind the gate.
Small Key 1
The first locked door of the Arbiter’s Grounds is now in front of you. Before we can open it, we get the appropriate key. In a niche on the side you will first find a large container with lamp oil. Refill your lamp when the supply is no longer full, because just behind it there is an almost completely dark room waiting.
Then follow the other side passage. Break or cross the wooden barriers and move quickly across the piece of sand infested with small beetles. If the animals attach themselves to Link and slow him down, the quickest way to eliminate them is with a spin attack. At the end there is a chest with the first Small Key. With it, return to the locked door and open it.


The dark chamber and the four stolen flames
It gets pitch black behind the key door. Take out the Lantern and carefully work your way through the small skeletons and sand areas to the other end of the room. There are two extinguished torches right next to the exit. Ignite both of them to open the door, then enter the large central hall of the Arbiter’s Grounds.
In a short sequence, four large spirits appear here and steal the four flames from the middle of the hall. This locks the large passage in the rear area. Before we can reach the second half of the dungeon, we must track down all four spirits, defeat them and bring back their flames. This works similarly to the four Poes in the Forest Temple from Ocarina of Time, only this time Wolf-Link’s intuition plays a central role.
Poe Soul 1: The first ghost in the main hall
The first ghost remains right in the main hall. Transform yourself into Wolf-Link and activate the sense. This makes the ghost visible, but cannot be permanently attacked. Keep your sights on him and wait until his body glows bright purple or blue and he starts to attack. In this brief moment you jump at him and bite hard. After a few successful attacks he falls to the ground and you can snatch the Poe Soul from him.
With this victory, the first flame returns to its place. Then examine the trail left behind using Wolf-Link’s Sense. Link picks up the smell of the ghost and can now follow the violet trails of the three escaped ghosts. This makes searching in the branched side chambers much easier.
100% hint: The four spirits of the Arbiter’s Grounds are not just part of the dungeon puzzle. Each of them actually leaves a Poe Soul for Jovani’s Side Quest. To complete the game, all four must be collected.
Dungeon Map in the main hall
Before you follow any of the tracks, we clear the two important chests in the main hall. The Dungeon Map is on a side platform behind a sand field. In the GameCube version and in normal HD mode it is on the west and left side of the large staircase; Wii and HD Hero Mode mirror this position. Cross the fixed platforms, eliminate the flying enemies and open the chest.
New item: Dungeon Map
The map now shows you the structure and floors of the Arbiter’s Grounds. It is particularly helpful in the second half with its round mechanical rooms and glider routes.
Piece of Heart 1: On the opposite side of the main hall
The first of the dungeon’s two Pieces of Heart waits on the opposite side of the main stairs. Cross the small sand field and use the Clawshot or the clearly visible target point on the wall to get safely to the chest and then back again. In the GameCube version and HD Normal mode, this Piece of Heart is on the eastern side; on Wii and in HD hero mode accordingly on the western one.
Shortly after entering the main hall, we collected the Dungeon Map, the first Piece of Heart and the first of four Poe Souls. Now we follow the first trail into the side wing.


The Second Flame: Hidden Staircase and Rotating Chamber
In the main hall, activate Wolf-Link’s sense and follow the purple ghost trail to the small sand field next to a side wall. The trail seemingly disappears in the sand. Dig right here and you will uncover a chain. Pull it out all the way until the hidden stairs open. Climb down and enter the chamber below.
In the middle there is a massive lever or a rotating column. If you press it, part of the room shifts and reveals a niche with an undead swordsman. These Mummy Knights are particularly dangerous because their scream immobilizes Link for a short period of time. As soon as you can move again, a powerful sword blow usually follows. Bomb arrows are a safe solution here, otherwise back flips, all-round slashes and the sword techniques you have already learned help.
Small Key 2
After defeating the undead, open the chest behind him and get the second Small Key. Leave the mechanism in this position for now. Look up from the chest. You can see a grappling hook point through the opening in the ceiling. Pull yourself up to the floor above and go through the door that is now accessible.
Poe Soul 2: Between the False Lanterns
In the next room there are numerous blue lanterns floating around, but only one belongs to the ghost you are looking for. Transform into Wolf-Link again and activate the sense. This means you can easily recognize the real opponent. As with the first ghost, wait for the moment when his body lights up powerfully, jump at him and repeat the attack until he falls to the ground. Then tear the second Poe Soul out of him. The second flame then makes its way back to the main hall.
Return to the room with the rotating mechanism, jump down to the basement and return the mechanism to its original position. This opens the way back to the main hall. There you will see the second of the four torches being lit again.


The third flame: chandelier, Compass and two more keys
With the second key in your inventory, continue from the main hall via the upper side corridor. In GameCube and HD Normal mode, this section is on the eastern side; Wii and HD Hero Mode mirror the path. Open the key door and move across the small stone islands in the sand. Spiked barriers keep popping up out of the ground and force you to follow a certain path. Wait a moment until you recognize the pattern and cross the gaps immediately after retracting the spikes.
Finally, pull the square stone block down from its elevated position and push it into the designated recess next to the stairs. Then climb up, grab the long chain and pull it back as far as possible. This will raise the huge chandelier. Once it’s high enough, let go of the chain, jump down and quickly run under the chandelier before it falls back down.
Compass the Arbiter’s Grounds
Climb the stairs on the other side. In a niche is the chest with the Compass. Be sure to open it before continuing to turn the central mechanism. Together with the Dungeon Map that has already been found, Treasure Chests that has not yet been opened and the boss room are now also displayed on the map.
New item: Compass
The Compass marks the Treasure Chests of the Arbiter’s Grounds. This is particularly practical for the 100% route, as there are several optional chests on the glider rails later.
Small Key 3
Go back to the rotating statue or pillar in the middle of the room and turn the mechanism until a new side passage opens. Smash the wooden barriers there and kill the mummy knight. Behind him you will find the chest with the third Small Key. Then run to the opposite side of the mechanism and use it to open the key door.
Poe Soul 3: The Chain Under the Sand
The following hallway is filled with small skeletons and two particularly unpleasant mummy knights. Don’t go unprepared between both enemies, as their screams can paralyze you in turn. Bomb arrows quickly eliminate dangerous opponents. Once you reach the section behind them, transform into Wolf-Link and activate the sense. The purple ghost trail disappears into the sand again.
Dig at this point until a chain appears. Pull it back and the neighboring stone wall moves aside. The third spirit waits behind it. Attack him in wolf form as soon as he becomes visible and vulnerable, and after the fight, snatch the third Poe Soul from him. This means that only one of the four flame thieves is missing.
Small Key 4
Then follow the corridor to the next chamber and jump down to the lower level. In the southern part there is a chest with the fourth Small Key. If Link suddenly runs slowly even though nothing is visibly attached to him, switch to Wolf-Link and activate the sense. This makes the invisible Ghoul Rats visible. A whirl attack immediately removes the pests.
Then climb back to the upper level and jump over the small gap to the locked door. Use the key you just found. You return to the upper level of the main hall and watch the third flame being relit. Via the large chandelier in the middle you can now reach the opposite side wing and thus the path to the fourth spirit.
The Fourth Spirit: Chandelier Trick and Torch Puzzle
In the next large room, first push the square stone block down and into the intended position. Behind its original location, a short hallway leads to an optional chest containing Rupees. Then you climb onto the block and grab the long chain. Pull it back completely so that the massive chandelier rises.
HD Stamp: Midna surprises
Only in Twilight Princess HD: Before you leave the room, get the first of the two stamps of the Arbiter’s Grounds. After you have pulled the chandelier up with the chain, run past it to the chest at the other end of the path. Inside is the stamp Midna – surprised. In the original GameCube and Wii versions, the corresponding chest contains Rupees instead. For a complete overview, see our guide to the stamps in Twilight Princess HD.
To then move on, return to the chain and pull the chandelier all the way up again. This time, don’t run past him, but instead stand exactly on the conspicuous square floor area directly under his round opening. Let go of the chain. The chandelier falls, but Link stands safely in its center. Climb to the edge of the chandelier and jump from there to the higher platform with the next door.
Stalfos: Finally destroy bones with bombs
Behind the wooden barriers a Stalfos awakens. You can reduce it to a pile of bones with normal sword attacks, but it will reassemble itself after a short time. As soon as the bones are on the ground, place a bomb next to them or hit them directly with a bomb arrow. The explosion finally destroys the skeleton. The two chests in the room provide you with appropriate bomb ammunition; Depending on the version, these are normal bombs or depth charges.
The torch puzzle before the fourth spirit
In the following room there are several torches in front of a large statue. Only two of them need to be lit, and the order is important. First light the single or front torch. Then light the outermost torch in the back row on the appropriate side. In the GameCube version and in HD normal mode it is on one side, in the mirrored Wii version and in HD hero mode it is on the opposite side. Once you have lit the two correct torches in this order, the stone wall moves to the side and reveals the door. If you get the wrong combination, only additional small skeletons will appear; The puzzle can then be tried again.


Poe Soul 4: Which of the four ghosts is real?
The last of the four ghosts is waiting in the next room. Combat works a little differently than its predecessors. Transform yourself into Wolf-Link and activate your sense. The mind divides into four images that circle around you and then stop at the same time. Don’t attack blindly. Three copies become transparent or paler, while the real copy glows a bright violet-blue. This is exactly the spirit you target and immediately jump on.
After a few successful hits he repeats the trick. Stay calm, observe the four images and wait again for the clearly glowing original. After the last attack you can pick up the fourth Poe Soul. You now have all four souls from the Arbiter’s Grounds, and the last stolen flame also returns to the main hall.
Then use the nearby door and the grappling hook point to return to the central hall as quickly as possible. Once the fourth torch Barnes, the large gate at the top of the main staircase finally opens. The ghost hunt is now over, but the actual dungeon is now just beginning.
The second half of the Arbiter’s Grounds: For the fifth Small Key
Go through the now opened main gate. In the next area you will reach a high, cylindrical room with a central turning mechanism. In several places you will see grappling hook targets that you can use to switch between levels. First let yourself fall all the way down or pull yourself down in a controlled manner over the target points.
Activate the mechanism below and turn it several times, causing the levels of the room to shift relative to each other. After two matching spins, a chest becomes accessible, which initially appears to be behind spikes. Walk around the obstacle instead of heading straight for it.
Small Key 5
Open the chest that can now be reached and take the fifth and last Small Key of the Arbiter’s Grounds. You have now found all of the regular keys for the dungeon. Then turn the central mechanism back so far that the passage to the locked door on the lowest level opens and insert the key there.
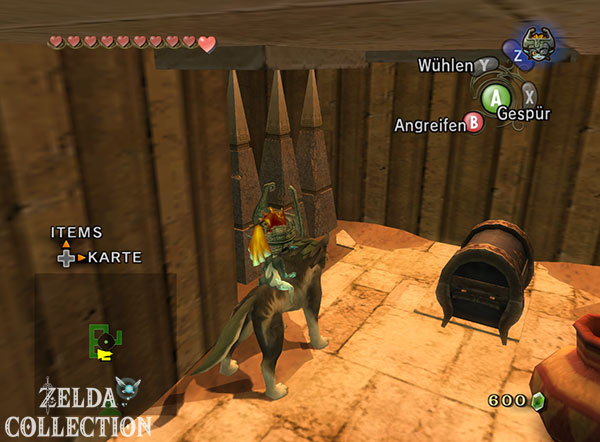


Spike Traps, Ooccoo and three Stalfos
Behind the last key door is a chamber whose floor is crossed by extending spiked bars. Feel free to activate Wolf-Link’s sense to better see the obstacles and work your way to the chain in the corner. Pull them back as far as possible. This opens the path on the opposite side for a short time. Let go of the chain and immediately run through the now free passage before the mechanism snaps back again.
The subsequent passage combines quicksand with small enemies that attach themselves to Link. Roll quickly over the sandy areas and, if necessary, shake off the annoying animals with a whirling attack. There is an eye-catching jug in one corner. Lift it up or smash it and you will find the Ooccoo. From now on you can use them to teleport yourself out of the Arbiter’s Grounds and return to this spot later – particularly useful if you are missing any remedies before the intermediate or final boss.
Found: Ooccoo
The Ooccoo can take you out of the dungeon and then put you back again. If you want to buy potions, bombs or lamp oil before Stallord, this is your most convenient way to return.
In the next room, large spiked clubs move through the hallway. Dodge them and kill them altogether three Stalfos. As before, sword attacks only temporarily inflict bone damage; an explosion ends the fight permanently. Once all three have been eliminated, the previously locked gate opens.
Go through the opened passage and cross the last wide quicksand field. Use the solid islands and grappling hook targets instead of standing in the sand for an unnecessarily long time. The Miniboss of the Arbiter’s Grounds is waiting behind the door.


Miniboss: Death Sword
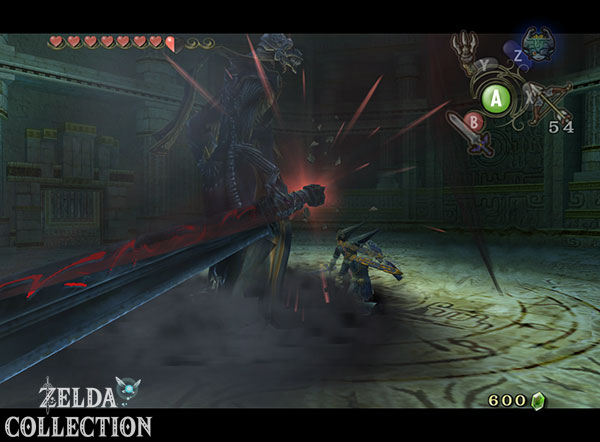
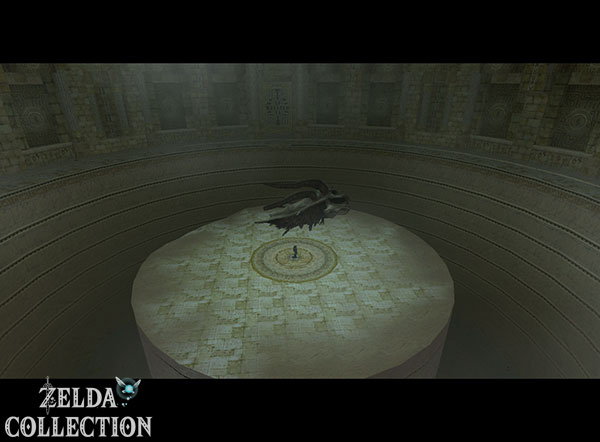
In the center of the great hall hangs a massive cursed sword, held in place by several sealed ropes. Cut one of the ropes with your sword to trigger the fight against Death Sword. The opponent has two distinctly different combat phases, which is why you have to switch between wolf and human form.
Death Sword – Phase 1: Detect the invisible opponent with flair
Immediately after the fight begins, Death Sword is virtually invisible to the human Link. Therefore, transform yourself immediately into Wolf-Link and activate your instinct. Keep your distance from the huge sword and move sideways when the opponent swings to strike. After his attack or while he opens briefly, his body glows bright purple. This is your window of opportunity: target him and jump at him with Wolf Link.
Don’t stand directly in front of him while he raises the sword. His strike has a long range and can cost a lot of health, especially in HD hero mode. A clean jump attack at the right moment is enough to end the first phase.
Death Sword – Phase 2: Arrow and Sword Combine
After the hit, Death Sword becomes visible and floats through the hall. Transform yourself back into human. Keep your sights on the enemy and avoid his projectiles or his falling sword. As soon as you have a clear field of fire, hit him with a Arrow. This causes Death Sword to briefly lose control and move frantically through the room.
When he approaches you or comes into range after an attack, you follow up with your sword. Several hits knock him to the ground, where you can immediately land more blows. If Death Sword becomes invisible again, switch to Wolf-Link again and repeat the first phase. After a few rounds the Miniboss is defeated.
The Spinner – Dungeon item of the Arbiter’s Grounds
After the victory, the entrance to the large chest at the end of the hall opens. Inside is the Spinner, one of the most unusual items in Twilight Princess. On normal ground you can use it like a large top and hit enemies with a spinning motion. However, its real strength is shown by the toothed rails that you have already seen everywhere in the Arbiter’s Grounds.
New item: Spinner
The Spinner can hook onto special toothed rails, ride along walls and jump from one parallel rail to another. It also fits into certain round recesses in the floor and drives large mechanisms there. From now on, all previously inaccessible areas of the Arbiter’s Grounds will be opened.
Try out the Spinner directly on the rails of the Miniboss hall. Hook yourself into the wall and ride the rail back to the door. In the adjacent room you can use the new item to reach the previously inaccessible side of the sand field.



The large gliding course
Now follows one of the most striking rooms in the entire Arbiter’s Grounds. Several levels, ring-shaped toothed rails and movable spiked rollers form a large course. Immediately after entering you will find several optional chests with bombs and Rupees. Since they are directly on our route, you can take them with you, but more important are the second Piece of Heart, the HD stamp and the Big Key.
Hook the Spinner into the rails and move along the wall. As soon as a spiked roller blocks your track, you jump onto the parallel rail. If the ends are open, you also have to jump off in time and land on the opposite rail. If you fall down, simply take the next accessible rail and work your way up again.
Piece of Heart 2: On the middle level of the glider room
First follow the rails to the middle level of the room. There you will reach an area with another Stalfos or several enemies. Eliminate the undead and open the conspicuous chest. Inside is the second Piece of Heart of the Arbiter’s Grounds. You have now collected both Pieces of Heart of this dungeon.
100% progress: With this find you own both Pieces of Heart and Arbiter’s Grounds. There is no more Piece of Heart in the dungeon after this point.
We then continue along the northern tracks. Hook up, drive past the large rotating spike trap and jump back and forth between the parallel tracks several times. The route initially takes you back to a lower level. Make sure to place the Spinner on the circular rail in the right direction so that you can then be transported back up.
HD Stamp: Hylian Letter D
Only in Twilight Princess HD: On the upper level you reach a platform guarded by two Stalfos. Defeat both enemies and open the chest. Inside lies the stamp with the Hylian letter D. In GameCube and Wii there is a ruby reward at this location instead. Together with the previously collected Midna stamp, you now have both HD stamps of the Arbiter’s Grounds.
Big Key the Arbiter’s Grounds
From the upper level, a particularly dangerous double rail leads to the next door. Several spike gliders come towards you. Start on a clear track and jump to the parallel track whenever a spiked roller cuts you off. Don’t rush the transition: an early jump can send you straight into the next obstacle.
Once you have reached the door at the end, there is a large decorated chest with the Big Key in the small next room. Open it and then return to the central mechanical room via the glider rails.
New item: Big Key
With the Big Key you can open the big door to the final boss. There are no more Small Key missing and all of the dungeon’s permanent collectibles have already been collected.
With the Spinner to the boss door
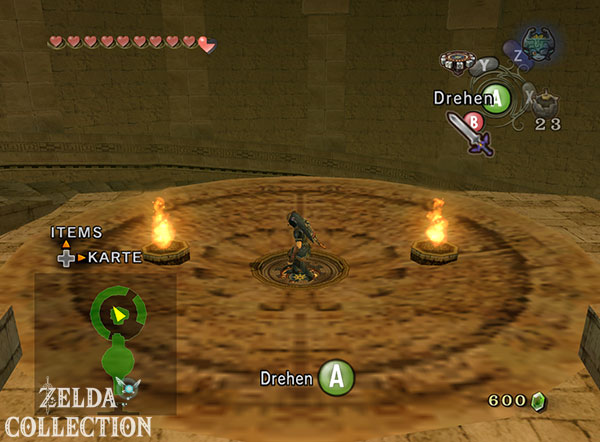
In the middle of the large room there is a round recess that is intended exactly for the Spinner. Stand over it, insert the Spinner and bring it up to speed with repeated rotations. This causes it to engage the gears under the floor and rotate a large portion of the wall. Keep turning until the passage to the next section has completely opened.
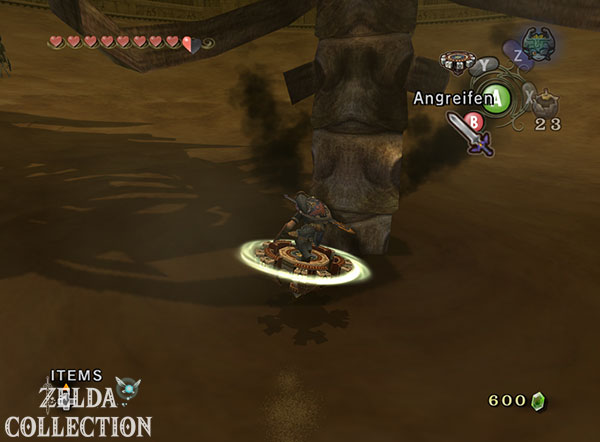
Behind it you come to a former stairwell, the steps of which have mostly been destroyed. However, there are still slider rails running along the outer walls. Hook up and spiral upwards. At the appropriate height, jump from the outside wall onto the large platform or pillar in the middle of the room.
There is also a slider recess there. Insert the Spinner and rotate the mechanism fully. A long spiral-shaped rail then rises from the ground. Hook up and ride all the way to the top. The big door is waiting right there, which you can now open with the Big Key.


Boss: Twilit Fossil Stallord
In the boss room, the only thing that initially appears to be lying in the sand is the huge skeleton of a long-dead creature. For a moment it actually looks like someone has already killed the final boss for you. However, then Zant appears, rams his weapon into the fossil and brings the beast back to life. The battle against the Twilit Fossil Stallord begins.
The entire battle is built around the Spinner that we just received. In the first phase you have to destroy Stallord’s spine in the sand, while in the second phase you have to track his floating skull on a system of vertical tracks.
Stallord – Phase 1: Hit the spine three times
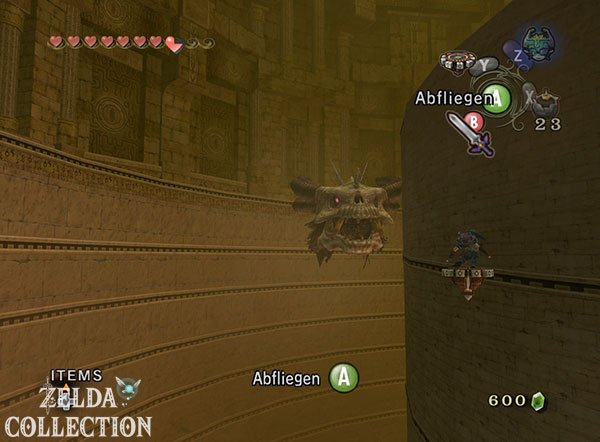
First hook the Spinner into the ring-shaped rail on the outer wall and let Link pick up speed. When you’re about level with Stallord’s exposed spine, jump off the rail and ride the Spinner straight through the sand towards the vertebrae. Shortly before the target you perform the glider attack. A clean hit destroys a section of the spine and throws Link back outwards.
On the second pass, Stallord summons additional undead from the sand. These Staltroops create obstacles between you and the spine. You can hit and eliminate them with the Spinner, but you shouldn’t lose your line to the boss unnecessarily. At the same time, spiked rollers appear on the outer rail. Therefore, don’t stay on the circuit forever, but jump off as soon as you have reached a favorable attack position.
During the third attack, there are even more undead standing directly in front of the spine. Don’t drive head-on into a closed wall of enemies. Approach at a slight angle and use it to eliminate individual skeletons Spinner and then correct your direction of travel to the open section of the spine. Overall, this phase requires three successful glider hits. After the third hit, Stallord’s body collapses and the arena’s sand flows away.
Stallord – Phase 2: Dodge fireballs on the rails
After the short break, go to the round depression in the middle of the arena and use the Spinner. Turn the mechanism until the central pillar rises high up. Stallord’s skull awakens again and the second phase begins.
Hook the Spinner into the rail of the central pillar and move up. Stallord appears next to you and fires a large fireball. Wait for the projectile to travel, then use the Spinner to jump from the inner rail to the outer rail. On the next floor you switch back again. In this way, you continue to climb up and avoid his attacks at the same time.
As soon as Stallord’s head floats close enough to the rail, jump into him head-on with the Spinner. A successful hit knocks the skull to the ground. Immediately run to him and attack the large sword or the vulnerable area on his forehead with as many normal sword strikes as possible.
The process is then repeated, but additional spiked rollers now appear on the rails. This not only allows you to react to Stallord’s fireballs, but at the same time you have to check whether the target rail is even clear. If in doubt, change a bit earlier and stick to the inner lane if you want to shorten the distance to the boss. Hit his head again with the Spinner and attack him on the ground with the sword. After several successful passes, Stallord finally breaks.
Heart Container to Stallord
After the victory, the obligatory Heart Container appears. Be sure to record it before you leave the room. This permanently increases your maximum health by one full heart. This completes the combat part of the Arbiter’s Grounds.






The mirror chamber: The Mirror of Twilight is broken
After Stallord’s defeat, exit the boss room. You get to the top of the Arbiter’s Grounds and thus into the mysterious mirror chamber. Follow the path to the massive statue and monumental chains. Before you can activate the actual mirror mechanism, several Shadow Beasts appear and create a barrier. Defeat the group as usual: First reduce their numbers and then kill the last two opponents at the same time, if possible, with Midna’s energy field so that they don’t revive each other.
After the fight, a new warp point remains in the mirror chamber. This will be extremely convenient later because we will have to return to this place. Now go to the big statue. Rails for the Spinner run along her body. Hook up and ride to the top of the statue. There is again a suitable recess for the dungeon item.
Put that Spinner and turn the mechanism fully. The statue then lowers, while the actual one is behind it Mirror of Twilight and raise the massive stone execution site. But Midna’s hope is only partially fulfilled: there is only a mirror a quarter left over. The remaining three parts were removed.
The Wise Men and Ganondorf’s Return
Now the old wise men appear and explain what happened in this place. Long before Link’s arrival, Ganondorf was brought to execution in the Chamber of Mirrors for his crimes. However, the attempt failed when the power of the Triforce was revealed in him. Ganondorf killed one of the wise men, whereupon the others, as a last resort, banished him to the realm of shadows using the Mirror of Twilight.
There his power finally met Zant. Ganondorf gave the supposed King of Shadows the powers he could use to subjugate Hyrule and Midna’s people. Zant later attempted to destroy the Mirror of Twilight. However, he was unable to completely destroy the artifact; instead it broke into four pieces. One fragment is still here in the Mirror Chamber, the remaining three have been scattered across Hyrule.
The wise men give you three clues to their whereabouts: one shard is on snowy peaks, another in an ancient grove and the last high in the clouds. This begins a new major section of the plot. The direct route to Zant is blocked for the time being until we return all three missing mirror shards.


Arbiter’s Grounds completed – continue to the Snowpeak
With Stallord’s defeat, the Arbiter’s Grounds is completely completed. Link now has the Spinner, both of the dungeon’s Pieces of Heart and an additional Heart Container. We also used all five Small Key, found the Dungeon Map and the Compass, defeated all four spirits of the Arbiter’s Grounds and collected their Poe Souls. In Twilight Princess HD, both stamps of the dungeon are already in our collection.
Much more important to the plot, however, is the discovery in the mirror chamber. The Mirror of Twilight is broken, Ganondorf is behind Zant’s new power and three mirror shards need to be searched for across Hyrule. The first trail leads us to the icy peaks in the north. Before we enter the next dungeon there, however, there are a few new collectibles and Side Quests waiting, which can be done particularly cheaply after the Arbiter’s Grounds.
The next section of our Twilight Princess Walkthrough continues with the Snowpeak and the search for the first missing mirror shard.
With the Spinner to the Snowpeak
Get Skeletulors Heart Container and read the clues in the mirror chamber. With the Spinner, the rail heart parts are now accessible on the Hyrule level. Then go via Telma’s tavern to Ashei’s clue, show the drawing to Prince Ralis and first catch the Reekfish with the coral earring.