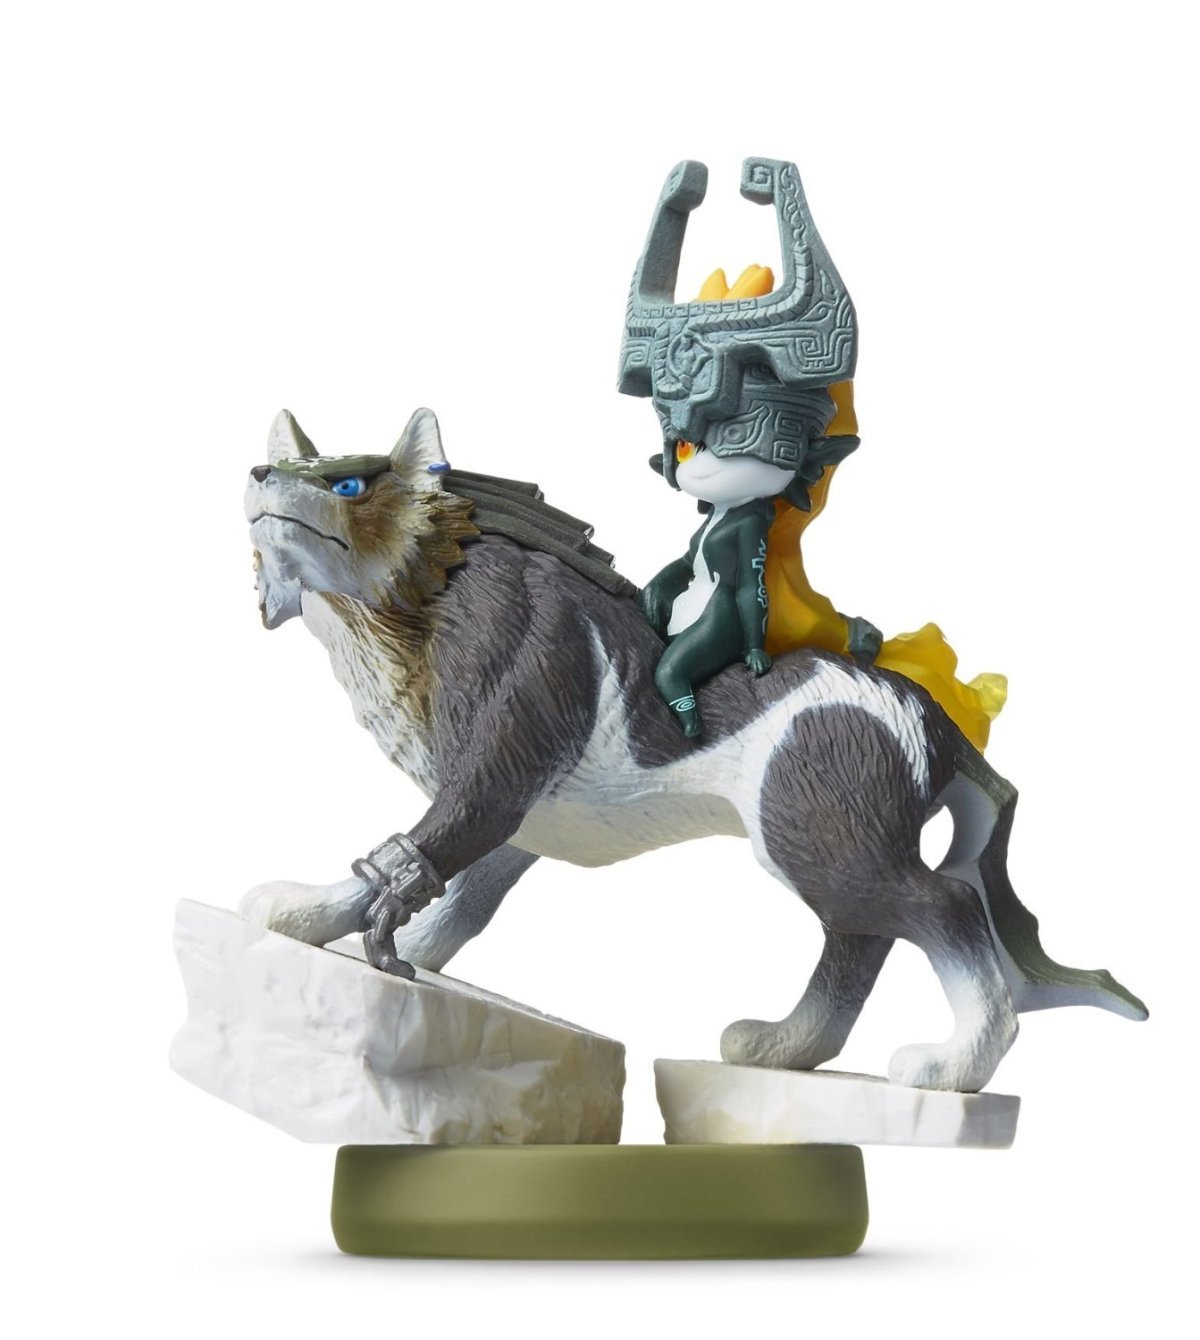

The Cave of Shadows is the amiibo additional trial for Twilight Princess HD. You need a compatible Wolf Link amiibo and play the entire challenge as a wolf. Human form, bows and bottles are not available here.
The test grows as the story progresses up to 40 levels. To complete the passage, the Sol section of the Shadow Palace must also be completed. Get Agitha’s Largest Regular Wallet beforehand if you want to get the Bottomless Wallet with 9,999 Rupees. The ordinary Cave of Ordeals is a different challenge, also present in the original versions.
Important: The Cave of Shadows exists exclusively in Twilight Princess HD for Wii U. In the original GameCube and Wii versions there is only the normal Cave of Ordeals. A Wolf Link amiibo is required to enter the Cave of Shadows.
Cave of Shadows – all important data at a glance
| Feature | Cave of Shadows |
|---|---|
| version | Twilight Princess HD for Wii U only |
| Prerequisite | Wolf Link amiibo |
| Number of levels | 40 |
| Playable form | Exclusively Wolf-Link |
| sections | 3 |
| Healing through normal items | Not possible |
| Buried Hearts | levels 6, 9, 13, 20, 27, 32 and 38 |
| Main Reward | Bottomless Wallet – Maximum 9,999 Rupees |
| More Rewards | Red Rupee, Violet Rupee, Silver Ruby, Orange Rupee |
How to start the Cave of Shadows?
The amiibo feature is unlocked in Twilight Princess HD once you have completed the first major shadow section of the game and freed Faron from the Twilight. From this point on, the amiibo function will appear in the collection or equipment screen. Open this screen and place the Wolf Link amiibo on the NFC area of the Wii U GamePad. The game recognizes the figure and then offers you to enter the Cave of Shadows.
The Cave of Shadows has no physical entrance anywhere in Hyrule. Unlike the Cave of Ordeals, you don’t have to go to a cave in the game world. Scanning the amiibo will immediately teleport Wolf-Link to the first room of the challenge. Before starting, the game also asks if you want to save your current progress. You should always use this option, otherwise failure in the later levels can be extremely annoying.
Why aren’t all 40 levels available immediately?
The Cave of Shadows is divided into three sections, which gradually open up as the main story progresses. Even if you wait until you reach the Palace of Twilight to challenge yourself, you can’t just skip the previous tests. Each stage must be completed successfully at least once before the game releases the next one.
| Section | levels | Activation |
|---|---|---|
| Section 1 | 1–6 | After liberating the light spirit from Faron |
| Section 2 | 1–20 | After completing the Arbiter’s Grounds and Ganondorf’s execution sequence |
| Section 3 | 1–40 | After the Master Sword was strengthened in the Palace of Twilight with the two Solas |
In the first round you fight through levels 1 to 5 and reach the first reward room on level 6. You will then be released from the Cave of Shadows. As soon as section 2 is unlocked, you have to start again at level 1, cross the already familiar rooms and this time you can continue playing until level 20. For the final round, the challenge begins again at level 1 and ends at level 40.
This means: Until you complete the course for the first time, you will visit levels 1 to 6 at least three times and levels 7 to 20 at least twice. Only on the third complete pass will you reach levels 21 to 40.
When should you play the Cave of Shadows?
You can complete each stage as soon as it is unlocked. For our 100% route, this is actually the most varied option because the three runs are spread over the adventure. However, if you want the Cave of Shadows to be as easy as possible, you can deliberately postpone the first two sections. Wolf Link uses the same health as Link in human form, so each additional Piece of Heart and each Heart Container increases your chances of survival.
The final 40-level passage should ideally only be started when you already have almost the maximum heart bar. Since weapons and armor do not play a role, additional health is the most important direct preparation. The seven Hidden Skills also do nothing for you as a wolf. Instead, what matters is your experience with Wolf-Link’s combat system and the best possible supply of hearts stored on the amiibo.
No Bottles, No Fairies – Healing in the Cave of Shadows
The biggest difficulty of the Cave of Shadows is the extremely limited healing. Normal enemies generally do not leave hearts and links bottles inventory is not available as a wolf link. This also means that brought Fairies Link cannot automatically revive and cannot be released manually from the bottle. Great Fairy’s Tears, red potions and other remedies also remain useless.
Instead, there are individual hearts in the ground on exactly seven levels. Activate Wolf-Link’s Sense and examine the center of the rooms on levels 6, 9, 13, 20, 27, 32 and 38. There you can dig up one heart at a time. You shouldn’t overlook any of them, especially in the final round. A single heart doesn’t seem like much at first, but in the final levels it can mean the difference between a successful run and a restart.
Watch list for healing hearts:
Level 6 → Heart
Level 9 → Heart
Level 13 → Heart
Level 20 → Heart
Level 27 → Heart
Level 32 → Heart
Level 38 → Heart
Wolf Link amiibo as heart storage
After completing a Cave of Shadows stage, you can save the remaining health on the Wolf Link amiibo. No classic save point is created within the cave. Only the number of hearts that Link still has at the end of the successful round is saved. This value can be retrieved again during a later visit to the Cave of Shadows.
If you scan the Wolf Link amiibo during a future playthrough, the game will fill Link’s heart bar up to the value stored on the figure. This healing can be used once per visit to the Cave of Shadows. For example, if you have saved 17 hearts after a previous successful run and only have four hearts left in a later run, you can scan the amiibo and heal yourself back up to 17 hearts.
That’s exactly why it’s worth playing the early sections as cleanly as possible. If you end the first or second run with an almost full heart bar and save this value, you essentially have an additional large amount of healing for the difficult final run.
Zelda and Sheik amiibo as additional healing
In addition to Wolf-Link, several other Zelda amiibo also work in Twilight Princess HD. Zelda and Sheik are particularly interesting, because both completely replenish Link’s health and can also be used within the Cave of Shadows. However, each of these amiibo can generally only be used once per day. Anyone who owns both figures has up to two additional complete heals in addition to the Wolf Link heart storage.
The Ganondorf amiibo does the exact opposite and doubles incoming damage. In hero mode, where Link already suffers double damage, the combination even results in quadruple damage. This is only of interest to players who are looking for an additional extreme challenge after completing the normal Cave of Shadows.
The most important fighting techniques for Wolf-Link
Since Link cannot use any equipment during all 40 levels, you should master the few available wolf techniques as confidently as possible. The normal jump bite is often the best choice against individual opponents. Target an enemy, jump towards him and follow up with several bites. Against small and weak opponents, you can move through the arena extremely quickly without standing in one place for long.
Midna’s energy field, on the other hand, is your most important weapon against larger groups. Hold down the corresponding button until the energy circle has expanded, and then try to surround as many enemies as possible at the same time. This method is particularly effective against shadow beasts, Ghoul Rats, Keese, White Wolfos, and groups of small gohmas. However, the loading time is dangerous against strong individual opponents or opponents with quick ranged attacks. Direct jump attacks are usually safer there.
Another extremely important point is the target priority. If there are ranged fighters in a room with slow melee fighters, you should almost always eliminate the archers first. Enemies such as ReDead Knights, armos or Chilfos are comparatively easy to keep at a distance, while a single fire arrow from the background can ruin an otherwise perfect fight.
Before every staircase: Inspect the floor with sensitivity
Get into the habit of not immediately jumping to the next level after defeating the last enemy. First activate Wolf-Link’s sense and examine the ground. In this way you will find the buried hearts on the seven specified healing levels. In addition, Rupees can be hidden in individual rooms. Since the bottomless wallet later holds 9,999 Rupees, even smaller finds are interesting at least on a complete walkthrough.
This habit is particularly important at levels 27, 32 and 38. At this point, Link is already deep into the most difficult section and every additional life point is valuable.
Section 1 – Levels 1 to 6
The first section becomes accessible immediately after Faron is freed and essentially serves as an introduction to the Cave of Shadows. The enemies mostly come from the first shadow areas of the game and are hardly dangerous individually. Nevertheless, you should try to take as little damage as possible here. The remaining hearts from this run can ultimately be saved on the Wolf Link amiibo and used as a healing reserve later.
Level 1 – 3 Shadow Beasts
Three Shadow Beasts open the challenge. The well-known resurrection principle also applies here: If you defeat the last opponent too late after his companions, demons that have already fallen can get up again. Therefore, first weaken one or two enemies with normal bites and then capture the remaining beasts together with Midna’s energy field. Since there are only three enemies, this level is a great place to practice timing again.
Level 2 – 4 Shadow Beasts
The second level increases the number to four demons. Keep moving and avoid standing in the middle of all four enemies. Weaken individual beasts until several are close together, and end the fight again with Midna’s energy field. If possible, try to complete these first levels without any damage.
Level 3 – 3 Shadow Deku Babas & 4 Shadow Vermin
The small Shadow Vermin can be eliminated very quickly with jump bites. Get them out of the way first so they don’t interrupt Link during the fight against the larger Deku Babas. You then attack the plants individually. Don’t stand directly in front of its open mouth, but jump in from the side after an attack.
Level 4 – 4 Shadow Keese & 4 Shadow Vermin
On this level, all enemies are in constant movement. First run through the room so that Keese and pests gather near you, and then charge Midna’s energy field. If you capture a large part of the group at the same time, the room will be cleared within a few seconds.
Level 5 – 4 Shadow Beasts & 4 Shadow Vermin
Focus on the four small Shadow Vermin first, without letting yourself drift too far between the demons. You then fight against the shadow beasts according to the well-known principle. Precisely because the reward space is imminent, you should not take any unnecessary risks here.
Level 6 – Red Rupee and first hidden heart
There are no more enemies waiting on level 6. Open the Treasure Chest and you will receive a red Rupee worth 20 Rupees. Before you leave the section, be sure to activate Wolf-Link’s sense and examine the floor in the middle of the room. The first buried heart of the Cave of Shadows is hidden here.
After completion, your result will be evaluated. If you arrived with a lot of hearts remaining, you should save this value to the Wolf Link amiibo. You then automatically leave the Cave of Shadows. The first section is done.
Section 2 – Levels 7 to 20
The second part is unlocked after completing the Arbiter’s Grounds and the subsequent sequence around Ganondorf’s execution. The next time you start, you start again at level 1, fight your way through the familiar first six rooms and this time you can continue playing until level 20. The variety of enemies now increases significantly and, for the first time, ranged fighters, armored opponents and monsters appear that Wolf-Link rarely has to fight alone in normal play.
Level 7 – 4 blue Bokoblins
Four blue Bokoblins are hardly a threat to Wolf-Link. Target an enemy, jump at him and immediately follow up with bites. Stay constantly moving and switch to the next one after defeating one enemy. Midna’s energy field is possible, but not necessary for this small group.
Level 8 – 8 Keese
Walk around the room for a few seconds so that the Keese come down and gather around Link. Then charge Midna’s energy field and capture as many as possible at the same time. You can eliminate any remaining bats with targeted jumping attacks.
Level 9 – 6 Baba Serpents
The Red Serpent Decuranhas have a longer range than their normal counterparts and can hit Link from surprising distances. Therefore, do not attack several plants at the same time. Approach a single one Deku Baba, provoke her bite, dodge sideways and then jump on her. After the fight, in the middle of the floor lies this second buried heart.
Level 10 – 4 Helmasaur
Helmasaurs are more unpleasant as a wolf than as a human Link because you can’t easily remove their shells with the Clawshot. Run around the sides of the opponents and consistently attack the unprotected back. Avoid frontal attacks on their armor, as you will hardly cause any damage there and will only waste time unnecessarily.
Level 11 – 9 Torch Slug
The nine Torch Slugs are weak individually, but can quickly surround Link as a group. Keep moving and use Midna’s energy field as soon as several are in range at the same time. Don’t try to get stuck between all nine opponents.
Level 12 – 6 Tektite
The Tektite or small spiders are fast and constantly change their direction. Jump bites work great as long as you target one enemy at a time. If several spiders gather around Link, Midna’s energy field ends the fight much faster.
Level 13 – 3 Bulblin Archers with Fire Arrows
Despite the small number of enemies, this level is more dangerous than the previous rooms. The three Bulblin Riflemen spread out across the room and fire incendiary arrows at Wolf-Link. Never stand still. Immediately run in a wide arc to the first shooter, jump at him and eliminate him if possible without interruption. Then you go directly to the second and third opponents. Midna’s energy field is usually too slow here, making Link an easy target while charging. After the fight you should go to the middle of the room with your sense activated third buried heart seek.
Level 14 – 3 Dodongos
Dodongos are largely protected from the front. Run around an enemy and attack their glowing tail or back. Try to only fight one Dodongo at a time and keep an eye on the others’ fire blasts. As soon as someone starts breathing fire, you change your position.
Level 15 – 20 to 30 Chus
The arena fills with red, blue, yellow and purple Chus. The crowd looks threatening at first, but is ideal for Wolf-Link. Run into the middle of the group, charge Midna’s energy field and destroy as many Chus as possible at the same time. Repeat the process until there are no more small specimens left.
Level 16 – around 20 Ghoul Rats
Ghoul Rats are invisible and attach themselves to Wolf Link. As soon as his movements slow down, you activate the sense. Now the rats are visible. Midna’s energy field is by far the best method because there are usually several around Link at the same time. Don’t try to track each animal individually.
Level 17 – 15 Bubbles
The flying bone monsters attack in a large group. If possible, stay in the center so that you are not pushed against the wall, and let several enemies come towards you. As soon as a larger group is within range, use Midna’s energy field. You can take individual remaining enemies out of the air with jump bites.
Level 18 – Stalchild
The Bonewalkers are slow, but have an awkward reach. Use Wolf-Link’s speed. Run past them to the side, immediately turn around and attack from a safe direction. Since there are no fast ranged fighters, you should play the room patiently and without unnecessary damage.
Level 19 – Parasites & 2 ReDead Knights
The two ReDead Knights are the biggest problem on this level. Her scream can immobilize Wolf-Link for a short time while the smaller parasites attack at the same time. Therefore, first clear the small opponents from a safe distance or with quick jump bites. Then you concentrate on one ReDead Knight at a time. After his scream, immediately run up and attack during his recovery period.
Level 20 – Violet Rupee and fourth heart
The second reward room contains a purple Rupee worth 50 Rupees. Activate the sense again and examine the middle of the floor, because the fourth buried heart is also hidden here. Then save your new record or remaining health on the Wolf Link amiibo. Afterwards you have to leave the Cave of Shadows again.
Section 3 – Levels 21 to 40
The final section will only be unlocked during the Shadow Palace. After Link has returned both Solas and the Master Sword has received the power of light, the Cave of Shadows can be fully completed. On the third compulsory pass, you start again on level 1, cross all previous rooms and then continue your path from level 21.
From here you should consciously plan your healing. If your heart pool stored on the Wolf Link amiibo is high, do not use it on the first small damage. If possible, try to reach at least the thirties. Rooms 27, 32 and 38 each also have a buried heart. You should also only use Zelda or Sheik amiibo when the health becomes really critical.
Level 21 – 3 Skulltulas & 5 Deku Babas
First, keep moving and lure the Deku Babas out of their advantageous positions one at a time. The skulltulas are particularly uncomfortable at the front. After their attacks, attack them from the side or from behind. Try not to get trapped between spiders and plants.
Level 22 – 3 Helmasaur & 10 Ghoul Rats
Immediately activate the sense so you can see the Ghoul Rats. Clear out as many of them as possible with Midna’s energy field before dealing with the Helmasaurs. You then circle around the armored opponents and attack their unprotected backs.
Level 23 – 2 Lizalfos, 4 Armos & 6 Bokoblins
This combination is significantly more dangerous. First concentrate on the mobile Bokoblins and Lizalfos without running too close to the Armos. The large statues only become active when Link gets close to them. This allows you to artificially divide the fight into several small encounters. Once the normal enemies have been dealt with, you activate and defeat the armos one by one.
Level 24 – 4 ReDead Knights & 8 Deku Babas
Stay away from the ReDead Knights and first clear out the Deku Babas in the outer areas of the room. If you stay out of its range during a ReDead Knight scream, you can immediately jump in and land multiple bites. If possible, only fight one ReDead Knight at a time.
Level 25 – 2 Dodongos, 14 Torch Slugs & 6 Fire Keese
Here you also have to pay attention to lava fountains that shoot out of the ground. So keep moving constantly. First, eliminate the Ember Creepers and Fire Keese with quick jumps and Midna’s energy field, respectively. As soon as there are only the two Dodongos left, the arena becomes much clearer. Walk around them and attack from behind as usual.
Level 26 – 5 Keese, 5 Blue Bokoblins & 10 Ghoul Rats
Activate the sense directly again. Use Midna’s energy field first against Ghoul Rats and Keese. If only the Bokoblins remain, you can kill them one by one with jump bites. The real danger here comes from the large number of small enemies active at the same time.
Level 27 – 2 Bulblin Archers & 3 ReDead Knights
The ranged fighters have absolute priority. Immediately run in a wide arc to the first archer so that the ReDead Knights are not directly in your path. Eliminate both shooters as quickly as possible while keeping enough distance from the ReDead Knights. Only then do you take care of the undead individually. After the fight, activate the sense: In the middle of the room is the fifth buried heart.
Level 28 – 6 Ice Keese & 8 White Wolfos
The White Wolfos only appear after you go to the arena floor. If possible, try not to be immediately surrounded by all eight. As soon as several Wolfos rush in, you charge Midna’s energy field and capture as large a part of the group as possible at the same time. The Ice Keese can then also be eliminated with jump attacks or another energy field.
Level 29 – 12 Chus & Ghoul Rats
Activate your sense so you can recognize the Ghoul Rats at any time. The combination is ideal for Midna’s area attack. Run into the enemy group, charge the energy field and capture Chus and rats together. Then use your instincts to check whether there are any invisible rats left.
Floor 30: 1 Chilfos, 5 Mini Freezards and 7 Ice Keese
One of the most dangerous ice arenas. Use against them Mini Freezards no large-scale vortex movement or uncontrolled energy field, when several people are close together. Their shattered remains can quickly deal additional damage to Link. If possible, eliminate the small ice opponents one after the other with targeted jumping attacks. Then you take care of the Ice Keese and finally the the Chilfos.
Level 31 – 4 Armos with hidden enemy groups
The four Armos statues on this level also function as triggers for further enemies. Therefore, never approach all four at the same time. Instead, work your way from one side of the room to the other, activating each Armos individually. Six Gohma babies appear on the left Armos, three rats and six Keese on the second from the left, six rats on the second from the right, and four Gohma babies on the far right Armos.
After each activation, defeat the additional small enemies first and then deal with the Armos. This turns a potentially chaotic arena into four manageable one-on-one battles.
Level 32 – 1 Lizalfos, 1 Dinolfos & 2 Blue Bokoblins
First get the two Bokoblins out of the way. Then you concentrate on the Lizalfos and finally on the stronger Dinolfos. Both have quick melee attacks, which is why you shouldn’t stand head-on. Use Wolf-Link’s speed and jump in sideways after her missed attacks. After the fight, the sixth buried heart awaits in the middle of the floor.
Floor 33: 2 Chilfos, 4 Mini Freezards and 7 Ice Keese
First, get the Ice Keese out of the way so they don’t bother you during the more difficult fights. Then remove the four Mini Freezards individually if possible. Save the two Chilfos for last. Don’t get caught between them and keep moving after each attack.
Level 34 – Chus, 3 Lizalfos & 1 Dinolfos
The Chus are primarily a distraction and should first be eliminated with Midna’s energy field. You can then lure out the three Lizalfos individually. The Dinolfos is the strongest opponent and should remain until the last. This way you prevent several fast swordsmen from harassing you at the same time.
Level 35 – 2 Helmasaur, 5 Deku Babas & 10 Keese
First stay at the edge of the room and let the Keese come to you. Eliminate as many as possible with Midna’s energy field. Then you devote yourself to the Deku Babas. Only when the room is largely clear should you attack the two Helmasaurs and attack each from behind.
Level 36 – 2 Shadow Bulblin Archers & 6 Shadow Bulblins
As on level 27, archers have top priority. Keep moving and jump straight to one of the two ranged fighters. If both are switched off, you can eliminate the six normal shadow bulblins relatively safely with jump attacks or a well-placed energy field.
Floor 37: 4 Zant Masks and 4 Shadow Keese
This level can quickly become chaotic because the four Zant masks are constantly changing positions. First, get the five Keese out of the way so you can fully concentrate on the masks. Afterwards, keep moving and jump onto a mask as soon as it appears in range after a teleportation. Don’t try to wait for them in one place for a long time.
Level 38 – 3 Bulblin Archers & 4 Purple Bokoblins
The three archers with fire arrows are again the main problem. Immediately run and eliminate them one by one. Don’t let the four purple Bokoblins hold you down. Once the ranged attackers are taken out, the rest of the room is comparatively easy. Before you go any further, be sure to activate your sense and dig up the seventh and final hidden heart of the Cave of Shadows in the middle.
Level 39 – the big final exam
Level 39 is the actual final boss of the Cave of Shadows. Instead of a single powerful monster, several successive waves of enemies await you. There is no automatic healing between phases. Therefore, play in a controlled manner and take a moment after each group before activating the next switch or wave.
Phase 1 – 2 Dodongos & 4 Baba Serpents
First clear out the Baba Serpents. They can hit you from a greater distance and make it difficult to circle around the Dodongos. Once the plants have been eliminated, concentrate on one Dodongo at a time, avoid its fire and attack the back.
Phase 2 – 2 Fire Bubbles, 2 Ice Bubbles & Stalchild
The second wave is significantly more hectic. Stay constantly moving and prevent multiple enemies from surrounding you at the same time. First eliminate the faster or more disruptive opponents and then use the free arena against the bone walkers. Patience is more important than speed here.
Phase 3 – 3 Zant Masks
The three masks constantly teleport through the room. Keep Wolf-Link moving and always attack the one that appears closest. Don’t try to chase a specific mask across the arena. As soon as it disappears, you immediately move on to the next accessible goal.
Phase 4 – four switches and four enemy chambers
For the final phase, four switches appear that release additional groups of enemies. You can decide the order yourself. Since the groups are triggered individually, you should never activate several switches in a row. Always defeat all enemies in the current chamber first and only then start the next one.
| switch | opponent |
|---|---|
| Southeast | 1 Dinolfos, 2 Helmasaur, 4 Keese |
| Southwest | 1 Lizalfos, 2 Dinolfos |
| Northeast | 2 green bulblins, 3 purple Bokoblins |
| Northwest | 2 Skulltulas, 6 Gohma Babies |
The group with Lizalfos and two Dinolfos is usually the most dangerous melee encounter. Don’t necessarily save it until the very end if you’re already fighting with little health. The Gohma babies and Skulltulas, on the other hand, can be eliminated in a comparatively controlled manner. As soon as the last enemy in the fourth chamber has fallen, the path to the final level finally opens.
Level 40 – Great Fairy and Bottomless Wallet
After 39 levels full of enemies, there is no further fight waiting on level 40. Instead, Wolf-Link encounters a Great Fairy. It rewards you with the next wallet upgrade that is still missing. If you have already handed in all 24 Golden Bugs to Agitha as part of our 100% route and thereby received the maxi wallet, you will now directly receive the exclusive bottomless wallet.
New Wallet: Bottomless Wallet
Maximum Capacity: 9,999 Rupees. It is only available in Twilight Princess HD and is the largest wallet in the game.
If you have not yet received all of Agitha’s wallet upgrades, you will first receive the next missing level instead. The order of the wallets can therefore vary, but the bottomless wallet is not lost: the last missing upgrade will then become a later reward in Agitha’s Golden Bug quest.
Secret room with the Wolf Link amiibo statue
After the reward, the Great Fairy opens another door. Behind it there is a special room that no longer contains any enemies. As soon as you enter, you’ll notice the huge stone statue of Wolf-Link and Midna, whose pose is based directly on the Wolf-Link amiibo.
In front of the statue there are several floor plates that allow you to view the monument from different camera angles. There is also a silver ruby worth 200 Rupees in a Treasure Chest. However, the room has not yet been completely searched.
Orange Rupee on Wolf-Links head
Stand on the corresponding floor plate in front of the statue and pay attention to Midna’s reaction. She can help Wolf-Link up the statue. Jump up to the head of the huge stone wolf and activate your sense there.
A hidden grave point becomes visible on the head of the statue. Dig and you will find a orange Rupee worth 100 Rupees.
Together with the silver ruby from the chest, you can use it to lighten the last room by another 300 Rupees – and thanks to the bottomless wallet you just received, there is hardly any risk that the money won’t fit in Link’s wallet.
High score and data on the Wolf Link amiibo
After each successfully completed section, the Cave of Shadows creates an evaluation of the passage. Among other things, the remaining health, your required time, the highest series or combo and the amiibo used during the run are taken into account. This means that you can repeat the Cave of Shadows as often as you like, even after receiving the Bottomless wallet, in order to improve your own record.
The Wolf Link amiibo also stores the remaining heart count of a successful run. This value has another function outside of Twilight Princess HD: If the same amiibo is used in The Legend of Zelda: Breath of the Wild, Wolf-Link appears there as a companion. His maximum health is based on the Cave of Shadows result stored on the amiibo.
All 40 levels – compact checklist
| level | Opponent / Reward | Completed |
|---|---|---|
| 01 | 3 Shadow Beasts | ☐ |
| 02 | 4 Shadow Beasts | ☐ |
| 03 | 3 shade decuranhas, 4 shade pests | ☐ |
| 04 | 4 Shadow Keese, 4 Shadow Vermin | ☐ |
| 05 | 4 Shadow Beasts, 4 Shadow Vermin | ☐ |
| 06 | Red Rupee, buried heart, output | ☐ |
| 07 | 4 blue Bokoblins | ☐ |
| 08 | 8 Keese | ☐ |
| 09 | 6 Serpent Decuranhas, Buried Heart | ☐ |
| 10 | 4 Helmasaur | ☐ |
| 11 | 9 Torch Slug | ☐ |
| 12 | 6 Tektite | ☐ |
| 13 | 3 Bulblin Archers, Buried Heart | ☐ |
| 14 | 3 Dodongos | ☐ |
| 15 | 20-30 Chus | ☐ |
| 16 | approx. 20 Ghoul Rats | ☐ |
| 17 | 15 bone faces | ☐ |
| 18 | Bone Ganger | ☐ |
| 19 | parasites, 2 ReDead Knights | ☐ |
| 20 | Purple Rupee, buried heart, output | ☐ |
| 21 | 3 Skulltulas, 5 Deku Babas | ☐ |
| 22 | 3 Helmasaur, 10 Ghoul Rats | ☐ |
| 23 | 2 Skull Lizalfos, 4 Armos, 6 Bokoblins | ☐ |
| 24 | 4 ReDead Knights, 8 Deku Babas | ☐ |
| 25 | 2 Dodongos, 14 Torch Slugs, 6 Fire Keese | ☐ |
| 26 | 5 Keese, 5 blue Bokoblins, 10 Ghoul Rats | ☐ |
| 27 | 2 Bulblin Archers, 3 ReDead Knights, Buried Heart | ☐ |
| 28 | 6 Ice Keese, 8 White Wolfos | ☐ |
| 29 | 12 Chus, Ghoul Rats | ☐ |
| 30 | 1 Chilfos, 5 Mini Freezards and 7 Ice Keese | ☐ |
| 31 | 4 Armos plus triggered enemy groups | ☐ |
| 32 | 1 Lizalfos, 1 Dinolfos, 2 blue Bokoblins, buried heart | ☐ |
| 33 | 2 Chilfos, 4 Mini Freezards and 7 Ice Keese | ☐ |
| 34 | Chus, 3 Lizalfos, 1 Dinolfos | ☐ |
| 35 | 2 Helmasaur, 5 Deku Babas, 10 Keese | ☐ |
| 36 | 2 Shadow Bulblin Archers, 6 Shadow Bulblins | ☐ |
| 37 | 4 Zant Masks and 4 Shadow Keese | ☐ |
| 38 | 3 Bulblin Archers, 4 Purple Bokoblins, Buried Heart | ☐ |
| 39 | Multiple waves of enemies and four switch chambers | ☐ |
| 40 | Great Fairy Wallet Upgrade Wolf Link Statue | ☐ |
The most difficult levels of the Cave of Shadows
The pure strength of the enemy does not always determine which rooms are the most dangerous. Levels where ranged fighters are combined with slow but dangerous melee fighters are particularly problematic. Level 27 is a good example of this: the ReDead Knights would hardly pose a threat on their own, but they force Link to take breaks with their screams, while the bulblin shooters can fire unhindered. The shooters must therefore always fall first.
Level 30 is dangerous because of the ice enemies. An uncontrolled energy field can hit multiple enemies at once, but will often leave Link standing in the middle of ice projectiles and shattering Mini Freezards. A slow one-on-one fight pays off here. Level 31, on the other hand, only looks chaotic if you activate all the armos at the same time. If you go statue by statue, the room becomes surprisingly simple.
The biggest test is, as expected, level 39. Since several waves follow one another and four more enemy chambers are then activated, you should enter this room with as many hearts as possible. If you haven’t used up the Wolf Link heart storage by then, the ideal time to do so is just before or during this level.
Cave of Shadows in Hero Mode
If you play Twilight Princess HD in hero mode, you won’t get a grace period in the Cave of Shadows either. Link also suffers the increased damage of hero mode here. Since normal enemies don’t leave hearts anyway and bottles aren’t available, this makes the Cave of Shadows significantly more difficult than in normal mode.
For an extreme challenge, you can also scan the Ganondorf amiibo. This doubles the incoming damage again. In hero mode this means a total of four times the damage. Even small opponents can then destroy several hearts with just a few hits. Of course, this combination is not necessary for the actual 100% completion.
Can you skip the first sections?
No. Even if you only start the Cave of Shadows very late in the game and theoretically already meet the requirements for all 40 levels, the game first requires you to complete the first section up to level 6. You then have to enter the cave again and master it up to level 20. Only in the following passage does the path to level 40 open.
As a result, the Cave of Shadows is deliberately designed so that Wolf-Link’s challenge increases step by step. At the same time, you can ensure a better heart rate on the amiibo after each successful run, which will benefit you the next time you try.
Can you leave the Cave of Shadows and continue later?
There is no normal intermediate save point within a section from which you can later continue on the same level. If you leave a current round or are defeated, you have to start again at level 1 the next time you enter. The Wolf Link amiibo only saves your heart count from a successfully completed stage – not your current level.
The only real interruption occurs after the designated reward rooms on Level 6 and Level 20. The respective section ends there automatically. For the final run, this means: Levels 1 to 40 must be completed in a single run.
What happens if you lose?
If Wolf-Link’s health drops to zero, the current attempt ends. Since fairies and bottles are disabled in the Cave of Shadows, there is no automatic resurrection. You will return to normal play and must re-enter the Cave of Shadows using the Wolf Link amiibo. Progress to the level reached is not saved.
This is precisely why it makes sense not to use up the heart supply stored on the Wolf Link amiibo too early. Anyone who heals for two lost hearts at level 10 no longer has this important reserve available at levels 30 to 39.
Bottomless wallet without all the Golden Bugs?
Yes. The Cave of Shadows and Agitha rewards work as consecutive wallet upgrades. If Link does not already have the Giant Wallet when completing the Cave of Shadows, he will first receive the next missing wallet. The bottomless wallet does not disappear. Instead, the outstanding highest upgrade will be awarded later by Agitha as soon as you fulfill the corresponding conditions of her Golden Bug quest.
On our 100% route, we still recommend collecting all 24 Golden Bugs first and getting Agitha’s Maxi Wallet with 2,000 Rupees. Then on level 40 of the Cave of Shadows you will immediately get the Bottomless Wallet with 9,999 Rupees and the reward order remains clear.
Cave of Shadows or Cave of Ordeals – which is more difficult?
Although the Cave of Ordeals is longer with 50 levels, the Cave of Shadows can subjectively be significantly more difficult. In the Cave of Ordeals, Link can use his full arsenal. Bomb Arrows, Ball and Chain, Magical Armor, Hidden Skills, Great Fairy’s Tears and multiple Bottles allow for numerous safe strategies. In the Cave of Shadows, almost all of these options are eliminated.
Wolf-Link has excellent mobility and Midna’s powerful energy field, but he lacks the comfortable tools of human Link against armored opponents, ranged attackers and certain combinations. At the same time, healing is more restricted. The Cave of Shadows is therefore shorter, but requires much more consistent, clean dodging and good target prioritization.
With the defeat of all enemies on level 39 and the reward of the Great Fairy on level 40, the Cave of Shadows is completely completed. You have completed all three stages of the test, led Wolf-Link through a total of 40 different levels and unlocked the largest wallet in Twilight Princess HD. Thanks to the Bottomless wallet, Link can now carry up to 9,999 Rupees – more than enough for the Magical Armor and any remaining purchases in Hyrule.
If you want to go further, you can repeat the Cave of Shadows as often as you like and try to improve your own record. A run without healing amiibo, in hero mode or even in combination with the Ganondorf amiibo becomes particularly challenging. For the actual 100% score, however, it is enough to complete all 40 levels and receive the last wallet upgrade.
For more optional challenges and collection tasks, check out our Twilight Princess HD walkthrough. Our guides to the Cave of Ordeals with all 50 levels, to the 24 Golden Bugs and to the 60 Poe Souls are particularly suitable.