

Follow Yeto into Snowpeak Ruins and help Yeta search for the Bedroom Key. Return the pumpkin and cheese to the kitchen, obtain the Ball and Chain from Darkhammer and defeat Blizzeta.
Game version: The route and screenshots follow the GameCube version. The normal mode of Twilight Princess HD has the same orientation; on Wii and in HD Hero Mode, left/right and east/west are swapped. HD deviations are at the affected step.
Requirements for the Snowpeak Ruins
If you have followed our Twilight Princess walkthrough this far, you already have everything needed for the Snowpeak Ruins. We particularly often need the Clawshot, bombs or bomb arrows and Wolf-Link’s sense. The new dungeon item will later clear a large portion of the previously indestructible ice blocks.
An additional bottle of medicine is usually not necessary. Yeto cooks a soup in the property’s kitchen, which you can fill into empty bottles for free. During the dungeon, this soup even improves twice, making it one of the best healing sources available to you here.
Entrance hall of the Snowpeak Ruins
Enter the massive mansion. The entrance hall already makes it clear that the Snowpeak Ruins is structured differently than the previous dungeons. Instead of temple rooms, you can expect living rooms, old armor, chandeliers, cannons and a large snow-covered courtyard. Nevertheless, behind the unusual backdrop there is a full-fledged dungeon.
Before you go through the central door, you immediately transform into Wolf-Link. The first ghost is already floating in the middle of the entrance hall. Unlike the ghosts out in Hyrule, you don’t have to wait for night to arrive – ghosts within dungeons are present regardless of the time of day.
Poe Soul 1 – directly in the entrance hall
Activate Wolf-Link’s sense and target the ghost. Wait until his body glows brightly and he starts to attack. Back away briefly or jump at him at the right moment. After a few bites he falls to the ground and you can snatch the first Poe Soul of the Snowpeak Ruins from him.
We have now completed the first permanent collectible just a few seconds after entering the dungeon. Then transform back into Link and go through the large door at the back of the entrance hall.
Yeta and the map of the estate
You enter a surprisingly cozy living room. The sick Yeta, Yeto’s wife, lies on a sofa. Talk to her and ask for the mirror shard. Yeta explains that the mirror is in the bedroom. The only problem is that the bedroom door is locked and the key is lost somewhere in the house.
Yeta apparently remembers the Location and marks it on a map. At the same time she gives you the Mansion Map. Unlike most other dungeons, the Snowpeak Ruins map is not in a Treasure Chest.
New item: Map of the estate
The map shows you the rooms and floors of the Snowpeak Ruins. The red dot marks the place where Yeta thinks the bedroom key is.
However, your memory is not entirely reliable. We will notice this with the first supposed key.
Yeto, his soup and Ooccoo
From Yeta, go through the side door into the kitchen. There Yeto stands in front of a huge cooking pot and prepares fish soup for his sick wife. At the moment it is still the simplest option. If you have an Empty Bottle, you can use it for free. One serving of the simple soup regenerates two hearts.
In the southern area of the kitchen you will also find the Ooccoo. Talk to her or take her with you. As in the previous dungeons, you can use them to teleport yourself out of Snowpeak Ruins at any time and then return to this spot.
Found: Ooccoo
Since Yeto offers healing soup for free, leaving Snowpeak Ruins is usually not necessary. Still, it’s worth taking your Ooccoo with you.
Then go through the back door of the kitchen.
First ice block puzzle
The first larger sliding puzzle awaits in the next room. There are two large stone blocks on the icy ground. A Floor Switch in the back opens the next door as soon as a block stands on it. Since the blocks on the ice always slide to the next obstacle, you can’t just push them directly onto the switch.
Proceed as follows: First, push the block near the entrance across the room. Then move the second block around the obstacles so that it finally comes to a stop on the Floor Switch. The key is to use the existing walls and the first block as a stopper. As soon as the switch is pressed, the door to the outside area opens.
courtyard and Small Key 1
When you arrive outside you are first faced with a high wall. The direct route is blocked. Therefore, transform yourself into Wolf-Link, activate your sense if necessary and dig under the loose spot in the snow. On the other side you end up in the large central courtyard of the Snowpeak Ruins.
Several White Wolfos keep emerging from the ground here. Since they can respawn after a while, you don’t have to fight each one permanently. A nearby chest contains Rupees, but more important is the Treasure Chest further back, buried in the snow.
Small Key 1 – buried under the snow
Transform into Wolf-Link and activate the sense. In the northern area of the courtyard you will see a buried chest. Dig away the snow and open them. Inside is the first Small Key.
Then go to the side door of the courtyard. There are several small ice enemies waiting behind her, who slide uncontrollably across the ground when the sword hits her for the first time. If possible, stay on the edge of the ice and don’t let them collide with Link as they will freeze him for a short time.
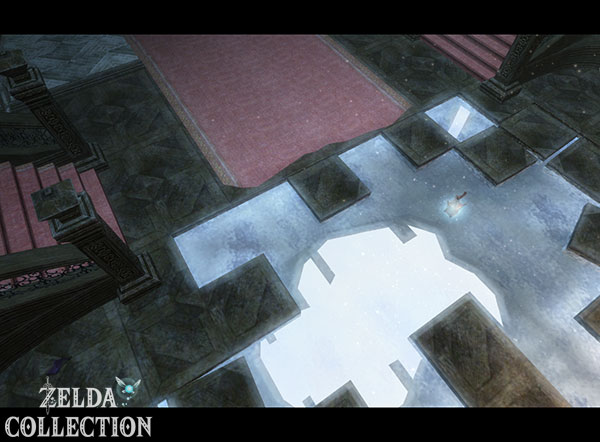


Ice Breather and the first false treasure
Use the first Small Key on the locked door. In the next room you have to eliminate three of the little Freezards before the exit opens. Two sword hits are enough, but the enemies quickly slide across the icy ground after the first blow. Therefore, if possible, attack from a position in which they slide backwards away from you.
A new type of enemy awaits behind the next door: the tall Ice Stalfos. They fight with ice spears and often dodge normal frontal attacks. Use sidesteps, the all-round attack, or one of your Hidden Skills to get behind their cover. Bomb arrows also work great.
After both are defeated, the next door opens. Behind it is finally the large chest that Yeta marked on our map.
Ordon pumpkin instead of bedroom key
Open the chest – and instead of the bedroom key you will receive a Ordon Pumpkin. Yeta was obviously wrong. At least the find is not completely useless. Return to the living room via the shortcut that has now opened and then to Yeto’s kitchen.
Yeto immediately recognizes the pumpkin and throws it into his cooking pot. This turns the simple soup into the good soup. One portion now regenerates four hearts. If necessary, empty the old soup from a bottle and fill yourself with the improved version.
Soup improved: With the Ordon Pumpkin, Yeto’s soup now heals four hearts per serving.
Afterwards, talk to Yeta again. She apologizes and marks a new supposed Location bedroom key on the map.


The path to Compass
Yeta now opens another passage on the opposite side of the house. Follow him to the other part of the courtyard. A large icy enemy blocks the direct path. It’s difficult to defeat him head-on with your current weapons. So go around it first and climb through the open window into the adjacent room.
Here you will get to know the cannon mechanics of the Snowpeak Ruins. There are heavy cannonballs on the ground. Pick one up and carry it to the cannon. First put the ball in and then throw a bomb after it. The explosion fires the cannonball in the direction the gun is pointing.
First, shoot away the ice barrier in front of the chest. Behind it you get additional bombs and another bullet. Load the cannon again and then rotate it to destroy the next ice wall. This opens the way to the next door.
Twilight Princess HD: Stamp with the Hylian B
In the following destroyed room you have to jump over narrow beams and icy surfaces. If possible, shoot the ice bats with your bow beforehand. You can also use arrows to eliminate the small Freezards on distant platforms before you venture near them.
Only in Twilight Princess HD: On one of the middle platforms is a chest stamped with the Hylian letter B. In GameCube and Wii there is no stamp or other treasure reward at this point.
Compass the Snowpeak Ruins
Work your way to the large chest at the edge of the room. Inside is the Compass. From now on, unopened Treasure Chests will appear on the map. This is particularly valuable in the Snowpeak Ruins, as several chests are hidden under snow, behind ice or behind destructible armor.
New item: Compass
The Compass marks unopened Treasure Chests of the Snowpeak Ruins. We can only reach some of them after receiving the Morning Star.


Small Key 2 in the courtyard
Return to the large courtyard. Thanks to the compass, you can now see another Treasure Chest that is hidden under the snow. Transform into Wolf-Link and dig at the marked location. Open the revealed chest and take the second Small Key.
Use it to open the corresponding side door. Behind it you will find several cannonballs and a mechanism in the wall that can be used to transport heavy balls from one room to the next. Place a ball in the device and pull the lever. Go back into the courtyard and pull the lever opposite so that the ball rolls out on your side.
Carry the ball to the cannon. You can first use it to destroy an ice barrier with an optional chest. Then point the cannon at the large ice enemy guarding the northern passage and fire. A direct cannon hit eliminates him immediately.


Miniboss: Darkhammer
Go through the now clear passage. There are two large suits of armor in the long, narrow hallway. One of them comes to life and destroys the other with its powerful weapon. The Darkhammer is the Miniboss of the Snowpeak Ruins and guards the dungeon item.
The arena is deliberately kept very narrow. The knight slowly moves towards you, swinging a heavy ball on a long chain. You can hardly get past him head on. Its weak point is on its unprotected back.
Darkhammer – Wait for the attack and get behind him
Keep enough distance while the knight circles his Ball and Chain. At some point he throws the ball at Link. Dodge immediately to the side. The heavy ball remains at the end of the chain for a brief moment, causing the knight to lose his cover.
Now run behind him as quickly as possible and attack his unprotected back with several sword strikes. As soon as he turns around again, you pull away again.
If the corridor becomes too narrow and the opponent pushes you into a corner, you look up. There are Grappling Hook Targets on the ceiling. Pull yourself over the knight to the other side of the corridor. This gives you enough space to wait for his next throw.
Repeat the process: Dodge the throw, run behind the knight, attack from the back. After a few successful passes, the heavy armor collapses.
Ball and Chain – Dungeon item of the Snowpeak Ruins
After the fight, the knight’s powerful weapon remains. Pick it up and Link will receive the Ball and Chain. Even though the ball looks extremely heavy, Link can use it without any problems. It is slow, but has enormous destructive power and a surprisingly long range.
New item: Ball and Chain
The Ball and Chain destroys massive ice blocks, armor, and certain walls. It can also make chandeliers and other heavy objects move. A single hit is enough against many armored opponents.
The Ball and Chain fundamentally changes the Snowpeak Ruins. Numerous ice barriers that previously blocked our way can now be smashed directly.
Ordon goat cheese behind the ice wall
Go through the northern door and smash the massive ice wall with the Ball and Chain. Another large Treasure Chest is waiting behind it. Maybe this time it’s finally the bedroom key – but Yeta’s second memory also leads us astray.
Inside the chest is Ordon Goat Cheese.
Use this to return to Yeto. He recognizes the cheese immediately and throws this ingredient into his cooking pot. The good soup now becomes the deluxe soup or the strongest soup variant. One serving regenerates a full eight hearts.
Soup improved to the maximum: With pumpkin and goat cheese, Yeto’s soup now heals eight hearts. Feel free to fill one or more bottles with it before the final boss.
With the Ball and Chain back to the entrance hall
Before we pursue Yeta’s third clue, we clear away several collectibles that only became accessible with the Ball and Chain. Go back to the large entrance hall.
The heavy knight armor on the walls is not just decoration. Hit each of them multiple times with the Ball and Chain until they break completely. Behind some are Treasure Chests, while another suit of armor hides a particularly important find.
Twilight Princess HD: Stamp with the Hylian Q
Only in Twilight Princess HD: Behind one of the destructible armor is a chest stamped with the Hylian letter Q. Together with the previously collected B stamp, you now own both HD stamps of the Snowpeak Ruins.
In the original GameCube and Wii versions, you will receive a Ruby reward at this point instead.
Poe Soul 2 – behind a knight’s armor
Then smash the middle one of the corresponding armors on the other side of the hall. A ghost lantern appears behind it. Transform into Wolf-Link, activate the sense and defeat the ghost.
This will give you the second Poe Soul of the Snowpeak Ruins. This spirit cannot be reached before receiving the morning star, which is why our current return journey is the earliest possible and at the same time most sensible time.

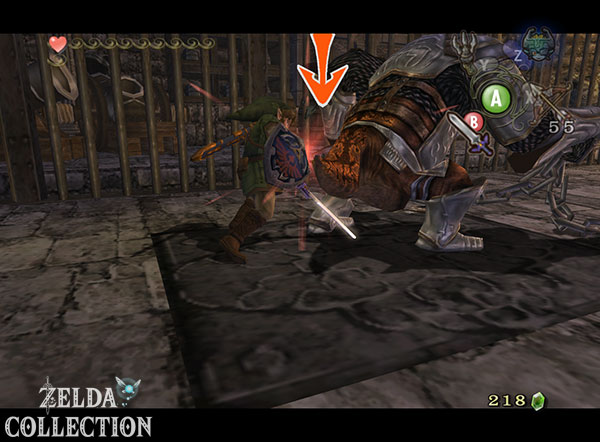


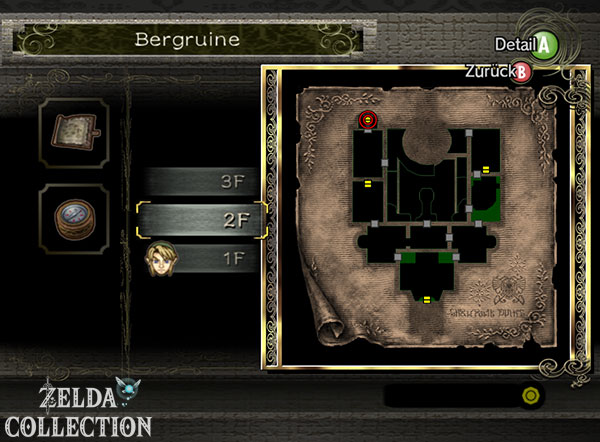


Upper floor: Transport cannonball through the spiral tower
Speak to Yeta again. Your third clue leads to the upper floor. Enter the newly opened side passage and first go into the room with the cannonball transport mechanism. Get a ball from the already known area and transport it through the device into the next room.
In the spiral tower, several large Freezards block the spiral ascent. The Ball and Chain takes down these enemies much more easily than our previous weapons. You can even hit some of them through the bars without exposing yourself to their ice breath.
Transport the cannonball upwards bit by bit. We’ll need them later for the cannon outside.
Small Key 3 above the chandelier
Once at the top you enter a side room with a large chandelier. Hit the chandelier with the Ball and Chain. The heavy ball causes him to swing. Wait until it moves far enough towards you and jump on it.
When the chandelier swings to the opposite side, jump onto the ledge there and open the chest. Inside is the third Small Key.
Piece of Heart 1 – through the destructible floor
Return to the previous room. In the southern area you will see an unusual spot in the ground. Place a Bomb. The explosion tears a hole in the ceiling of the room below.
Jump down and open the chest. Inside is the first Piece of Heart the Snowpeak Ruins. Then look up and use the Clawshot at the target point to return to the upper floor.
Piece of Heart 1 of 2: This Piece of Heart is easy to miss because the chest is hidden under the floor of the upper floor.
Piece of Heart 2 – about the swinging chandeliers
Use the third key on the locked door and use the Ball and Chain to destroy the ice barrier behind it. This simultaneously exposes a grappling hook target, which significantly shortens later return journeys.
In front of you, several large chandeliers hang over the entrance hall. Hit the first one with the Ball and Chain and wait for it to swing towards you. Jump on it. From there you get the next chandelier moving and keep changing.
Ice Stalfos and Ice Bats wait on the narrow platforms. If an enemy is standing dangerously close to a jump point, it’s best to kill him with the Ball and Chain or a bomb arrow before moving on.
At the end of the chandelier chain you will reach a chest with the second Piece of Heart of the Snowpeak Ruins. This means that both Pieces of Heart of this dungeon have already been collected.
100% progress: In the Snowpeak Ruins there are exactly two Pieces of Heart. After this find, nothing else is missing from the dungeon.
Poe Soul 3 – behind the ice wall
Then return to the upper side wing. In a room with several small Freezards you will see a massive ice barrier. Smash them with the Ball and Chain. A ghost’s lantern appears behind it.
Transform into Wolf-Link and activate the sense. Defeat the ghost and collect the third Poe Soul of the Snowpeak Ruins.
We have now found all three Poe Souls in this dungeon. There are no other ghosts within the mansion.


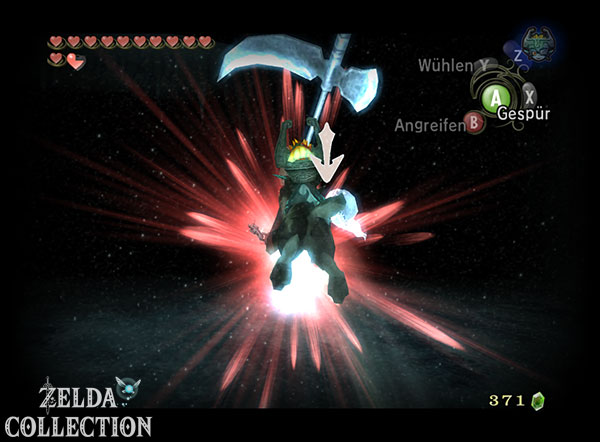


Second ice block puzzle
In the familiar sliding room we can finally destroy the frozen obstacles. First, smash the large ice block in the middle with the Ball and Chain. Then you also free the previously frozen movable block.
You now have three movable blocks at your disposal. The goal is again to bring one of them to a standstill on the central Floor Switch. The additional blocks change the solution completely.
Proceed systematically: First, push the southern block north. Then move the block you just freed from the ice to the south, then to the east and finally to the north. This means it serves as a stopper for the other block. Now push the northern block that was moved first to the west, then to the south, then to the east and finally to the north again. It lands on the Floor Switch.
As soon as the switch is pressed continuously, the door on the upper floor opens. Climb back up over the boxes or the familiar ledges and go through the now open door.
Upper Courtyard and Small Key 4
You are now on the upper level of the large courtyard. Several Ice Stalfos guard the narrow path. With the Ball and Chain, these opponents are now significantly less dangerous: a clean hit causes enormous damage and can often knock them out immediately.
Work your way forward over the remains of the wall. Behind a destroyed wall you can see a grappling hook target point. Pull yourself over and enter the next room.
Small Key 4 – last Small Key
First smash the ice barrier and then hit the big chandelier with the Ball and Chain. Jump onto the swinging platform and let it carry you to the opposite side.
Open the chest there. You will receive the fourth and final Small Key of the Snowpeak Ruins.
This means that all of the regular Small Key in the dungeon have been collected. The only key still missing is the special bedroom key.
Take the cannonball to the upper floor
Use the last Small Key to go back to the room with the Freezards and open the previously locked door. Eliminate the two large ice opponents with the Ball and Chain and then knock the moving stone blocks in the wall aside. This creates a connection to the former cannon area.
Get the cannonball there that we transported through the dungeon before. If it is no longer in the expected position, you can use the wall mechanism to get a new ball at any time.
Carry the heavy ball up the spiral ramp. Destroy the large ice barrier at the top and place the ball in the cannon. Aim the gun at the opening to the next room and detonate it with a bomb. The bullet is shot through the wall into the adjacent section.
Follow it and put it in the transport device there again. When you arrive in the inner courtyard, use the counter lever to bring it to you and insert it into the cannon there.
Aim the gun at the large ice breather that is blocking the last path to the northern part of the building. A cannon shot destroys it and opens access to the chapel.


The chapel and bedroom key
Jump to the lower level in the courtyard and go through the side passage that is now accessible. Climb the ladder. Behind the next door you enter a large room that looks like an old chapel.
Several Ice Stalfos or Chilfos are waiting here. If you’re particularly careful, you can take down some of the large icicles on the ceiling with the Ball and Chain before you run into the middle of the room. Otherwise, the opponents appear and attack together.
The Ball and Chain is by far the most effective weapon here. Keep your distance, target an opponent and throw the ball. Once the first one is defeated, you have significantly more freedom of movement for the remaining opponents.
As soon as the chapel is completely cleared, the large chest opens.
The bedroom key
This time it is actually the item you are looking for. Open the chest and take the Bedroom Key.
New item: Bedroom Key
It replaces the usual Big Key in the Snowpeak Ruins. You can use it to open the door to Yeto and Yeta’s bedroom – and thus reach the room where the mirror shard is kept.
When you leave the chapel, Yeta is already waiting for you. She wants to take you to the bedroom personally. Follow her across the courtyard to the large locked door on the upper floor.
The bedroom and the mirror shard
Use the bedroom key and enter the room with Yeta. In fact, the desired Mirror Shard is located here. For a brief moment our search seems to be over.
But the wise men in the Mirror Chamber have already warned that the fragments of the Mirror of Twilight have strong dark power. Yeta looks more and more intently at the shard and increasingly loses control of herself. Eventually she is completely overwhelmed by their power.
The bedroom freezes, the windows shatter and Yeta transforms into the final boss of the Snowpeak Ruins.
Final boss: Twilit Ice Mass Blizzeta
Blizzeta fights in two distinct phases. Both revolve entirely around the Ball and Chain. The floor of the room is icy, causing Link to slip easily as he runs and dodges. So plan your movements early and keep as much distance as possible.
Blizzeta – Phase 1: Shatter the Ice Shell
In the first phase, Yeta is completely enclosed in a gigantic block of ice. Blizzeta slides across the frozen ground and tries to run over Link. Don’t walk directly in front of her, but keep a distance to the side.
Pull the Ball and Chain and throw it against the large ice body. Each direct hit breaks off part of the shell. At the same time, the remaining ice block becomes smaller and therefore faster.
After a few hits, small Freezards are created that glide across the arena. You don’t have to specifically eliminate them all. Keep focusing on the big chunk of ice and keep moving. If one of the small enemies blocks your path, one morning star hit is enough.
Keep hitting Blizzeta’s ice shell until it breaks completely. Yeta then rises into the air and surrounds herself with a new ring of giant icicles.


Blizzeta – Phase 2: Creating a gap in the icicles
The second phase is more dangerous. Blizzeta now floats above Link while several gigantic icicles are arranged in a circle around her. Pay attention to the ground or the reflection in the ice. This tells you where the tenons are about to hit.
Keep running or rolling as long as the icicles fall to the ground one after the other. If you stop, you will be slightly frozen and then hit by more cones.
As soon as all the pegs are on the ground, you pull it Ball and Chain and destroy at least as quickly as possible a of that. Breaking several is even better, but a single sufficiently wide gap is enough.
After a short time, the remaining cones rise again and arrange themselves in a ring around Link. Now the entire circle descends and tries to enclose you. Run purposefully to the gap you previously made in the ring and roll out.
Blizzeta herself immediately falls into the middle of the ring. As soon as she reaches the ground, turn around and hit her with the Ball and Chain.
After the hit, the phase begins again. Blizzeta creates new icicles, so you dodge again, destroying at least one gap and escaping the ring. According to total three direct Ball and Chain hits the fight is over.
Mirror Shard and Heart Container
After Blizzeta’s defeat, the dark transformation breaks and Yeta returns to her normal form. Midna takes the Mirror Shard. In addition to the fragment in the mirror chamber, we now also have the first of the three shards scattered across Hyrule.
Yeto storms into the room and tends to his exhausted wife. The two fall into each other’s arms – and their joy ultimately gives rise to numerous little hearts and the obligatory Heart Container.
Be sure to pick it up. Your maximum health permanently increases by one full heart.
Snowpeak Ruins completed: You now have the Ball and Chain, the Heart Container and another mirror shard. Of the three scattered fragments, two are still missing.
After the Snowpeak Ruins: Once again briefly into the Snowpeak
Before we fully devote ourselves to the next story goal, the Ball and Chain opens up an important discovery from the previous chapter. In the cave at the Snowpeak we had to leave a Poe Soul behind a massive ice barrier. We can now destroy exactly this barrier.
Therefore, after leaving the Snowpeak Ruins, warp again to the Snowpeak and go back into the cave. Smash the solid ice with the Ball and Chain and defeat the ghost waiting behind it. This means that the Poe Soul that was previously deliberately postponed can be collected without having to climb all the way through the Snowpeak again.
Additionally, Yeto and Yeta can be challenged to snowboard races at the summit after completing the dungeon. If you first defeat Yeto and then the much faster Yeta, you will receive another Piece of Heart. We also take this short detour with us on our 100% route before we move on to the next big story section.
Snowpeak Ruins completed – find the second mirror shard
The Snowpeak Ruins is therefore completely completed. We have all four Small Key used, the property card and the Compass found, all three Poe Souls of the dungeon collected and both Pieces of Heart recovered. In Twilight Princess HD The two stamps with the Hylian letters B and Q are also part of our collection.
With the Ball and Chain, Link also has another powerful weapon that is not only useful in the dungeon. Massive ice blocks and certain destructible obstacles in the open world can now be removed. The bedroom key finally led us to Blizzeta and thus to the next mirror shard.
Of the three fragments, the Zant distributed in Hyrule, two are still missing. The wise men’s next clue takes us back to a familiar, ancient forest. There we will see an already familiar enemy again and finally enter a place that is important for the story Hyrule’s is of very particular importance.
We continue in the next section of our Twilight Princess walkthrough with the return to the Sacred Grove and the search for access to the next dungeon.
To Blizzeta: Races and Morning Star Returns
Take Heart Container and Mirror Shard. At the ice summit you can now challenge Yeto and then Yeta to a race; Her winning prize is a Piece of Heart. The Ball and Chain also opens the icy log cave north of Castle Town. The soup in the Snowpeak Ruins remains a cheap refill point for free bottles.