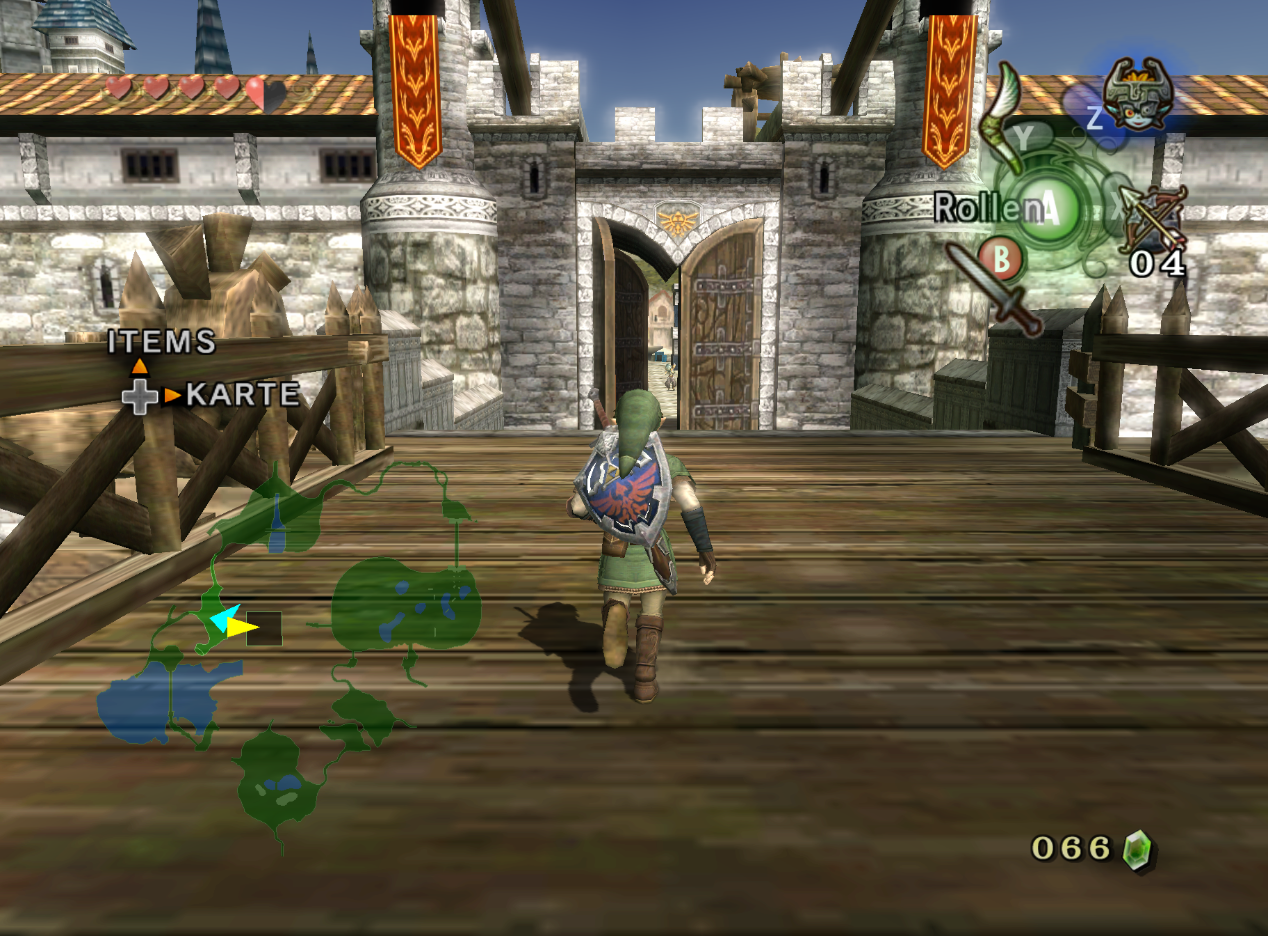

With Lanayru restored, return to Castle Town and escort Telma’s carriage to Kakariko. Protect Prince Ralis on the road, then follow Rutela to obtain the Zora Armor and prepare to enter Lakebed Temple.
Game version: The route and screenshots follow the GameCube version. The normal mode of Twilight Princess HD has the same orientation; on Wii and in HD Hero Mode, left/right and east/west are swapped. HD deviations are at the affected step.
Lanayru in the Light – Preparing for the Lakebed Temple
After Link collected the last drop of Tears of Light and defeated the Twilit Bloat on Lake Hylia, Lanayru is now completely freed from the twilight. For the first time in a long time, all of Hyrule is in the light again. Our next big target is already known: The third Fused Shadow is in the Lakebed Temple deep beneath the Lake Hylia.
However, we can’t just dive down to the temple yet. Although Link can walk on the bottom of a body of water with the iron boots, he only has a limited supply of air. Queen Rutela has therefore promised us that she will reward Link with special Zora equipment if we save her seriously injured son, Prince Ralis. That’s exactly why our path initially leads back to Castle Town.
However, for a 100% pass, it is worth making this stage much more extensive. After Lanayru is freed from the Twilight, large parts of the Hyrule Field are normally accessible for the first time. We collect more Golden Bugs, learn the third Hidden Skill, visit Agitha, expand Link’s wallet and get several Pieces of Heart. After rescuing Prince Ralis, we receive the Zora Armor and water bombs and can then collect several permanent equipment upgrades before entering the Lakebed Temple.
Requirements and current score
This chapter follows directly on from our solution to Zora’s Domain and Lanayru in the Twilight. Link now has the Hero’s Bow, Bombs, Bomb Arrows, the Gale Boomerang, the Iron Boots and at least two bottles. We also activated the second Howling Stone at the upper reaches of the Zora River.
If you followed our previous 100% route, Link at this point has 14 Pieces of Heart and ten of the total 24 Golden Bugs. This is exactly where a larger round of collecting begins, which is particularly worthwhile because many of the Locations are on the way between Lake Hylia, Castle Town and Zora’s Domain anyway.
From Lake Hylia back to the Hyrule Field
After Lanayru’s recovery you are initially at Lake Hylia. To reach the higher level of Hyrule, follow the floating wooden bridges to the eye-catching building in the middle of the water. There the clown Fyer operates his huge cannon.
Pay 10 Rupees and get in. Fyer fires Link upwards at tremendous speed. After landing, enter the adjacent building, climb down the ladder and exit on the other side. This brings you back to the Hyrule Field above the lake.
On the way you will meet the postman again. Be sure to read his new letters as they will, among other things, point out new attractions and shops that are now available in Lanayru.
Golden Bugs at the Great Bridge of Hylia
Before we ride to Castle Town, we systematically take the newly accessible Golden Bugs with us. Call Epona and first ride towards the Great Bridge of Hylia.
Golden Bug 11 – Female Praying Mantis
Cross the small wooden bridge on the way to the Great Bridge of Hylia, then examine the raised rock wall at the edge of the route. The female praying mantis sits there.
The insect is too high for Link. So target it with the Gale Boomerang and pull it towards you.
Golden Bug 12 – Male Praying Mantis
The male specimen is located directly in the area of the Great Bridge of Hylia. Look at the stone archway on the opposite side.
The male praying mantis flies or crawls in the upper area of the construction. Use the Gale Boomerang here too.
Third Hidden Skill – Back Slice
Then continue riding towards Castle Town. Since we activated the Howling Stone the last time we visited the upper reaches of the Zora River, the golden wolf is now waiting in the Hyrule Field west of Castle Town.
Get off Epona, climb to the raised ledge and approach the wolf.
The old warrior first demands proof that Link has mastered the shield attack he previously learned. Do them correctly.
He then teaches Link the third Hidden Skill: the Back Slice.
Target an enemy and jump sideways around them twice. Link rolls past the defense. If you carry out a sword attack immediately afterwards, it will hit the opponent from behind.
New Hidden Skill: Round Slash
The all-round slash is particularly effective against opponents with a strong front defense. Link bypasses her shield or armor and attacks the unprotected back.
Golden Bugs at Castle Town
Golden Bug 13 – Female Butterfly
On the same level, there is a group of flowers on a higher ledge near the path to the Great Bridge of Hylia. The female butterfly flies there.
If Link can’t reach the insect directly, pull it down with the Gale Boomerang.
Golden Bug 14 – Male Butterfly
Follow the path further into the southern area of the same level. In another cluster of flowers you will find the male butterfly.
Collect it too and then ride on to the northern part of the Hyrule Field.
Golden Bug 15 – Male Stag Beetle
In the northern section of the Hyrule Field, follow the main path to the large fork in the road. There is a conspicuous tree stump directly ahead.
The male stag beetle sits on it. Use the Gale Boomerang to drag him to Link.
Golden Bug 16 – Female Stag Beetle
Continue riding into the mountainous northern section. At a fork, stick to the lower path and follow it until you see a large blastable rock.
The cave behind it is not completely interesting at the moment, but just above the rock flies the female stag beetle.
Target him with the Gale Boomerang and collect him.
Twilight Princess HD – Stamp F:
There is also a sunken Treasure Chest in the water in the northern part of the Hyrule Field. Put on the Iron Boots and open it. In Twilight Princess HD, it contains the stamp Hylian “F”. All HD exclusive Locations can be found at stamps – Twilight Princess HD.
Castle Town in the light for the first time
Now enter Castle Town. After the dark visits to the Shadow Realm, the capital appears completely changed this time. Merchants, citizens and soldiers walk the streets and Link can finally speak to them normally.
Before we go to Telma’s Tavern and continue the main plot, we complete several important optional tasks.
Golden Bug 17 – Female Ladybird
First leave Castle Town through the southern exit. Cross the small bridge and go down the stairs on the side.
Flying between the three trees in this area is the female ladybird.
If he gets too far away, the Gale Boomerang will help as usual.
Golden Bug 18 – Male Ladybird
Then go to the other edge of the same layer. Several flowers grow near a large stone pillar or pillar.
Here the male ladybird flies.
This means that Link already has 18 of the 24 Golden Bugs on our route.
Agitha and the Big Wallet
Return to the city and look in the southern or southwestern part for the conspicuous house of Agitha, the self-proclaimed princess of the insect kingdom.
Talk to her several times. As soon as you give her the first Golden Bug, she will reward Link with the Large wallet.
New Equipment: Large Wallet
On GameCube and Wii, the Grand Wallet increases Link’s ruby limit from 300 to 600 Rupees. In Twilight Princess HD, on the other hand, it does 1.000 Rupees. Link will receive the final wallet later for all 24 Golden Bugs.
You can then release more insects. Agitha pays 50 Rupees for the first animal of a pair, and 100 Rupees for the second animal. A complete pair brings a total of 150 Rupees.
Don’t blindly give away all the insects when your wallet is almost full. Non-recordable Rupees would be wasted. However, we need a larger amount right away, which is why the exchange is particularly worthwhile now.
Twilight Princess HD:
After you have given Agitha a total of twelve Golden Bugs, you will also receive her own stamp.
Piece of Heart 15 – 1,000 Rupees for Charlo
Near the western city entrance sits the older man Charlo collecting donations for peace in Hyrule.
He accepts 30 or 50 Rupees at a time. Use only the 50 ruby donation to make the process go faster.
A total of 1,000 Rupees must be donated. The sum does not have to be paid all at once and remains saved even after you leave the city.
With Agitha’s rewards you should already have a large portion of the money you need. Once Charlo has received a total of 1,000 Rupees, he will give Link a Piece of Heart.
Piece of Heart 15
This Piece of Heart is one of the most expensive in the game. However, the Golden Bugs that have already been collected almost completely finance the donation.
Ilia and Prince Ralis in Telma’s Tavern
Now we continue the main plot. Head to the South District of Castle Town and enter Telma’s Tavern.
Link finally meets Ilia in person again. Although she survived the events of the kidnapping, she suffers from complete memory loss. However, the condition of the young Zora, whom she looks after together with Telma, is even more urgent.
He is Prince Ralis, the son of the late Queen Rutela.
Telma only knows one person who can probably help him: Priest Renado in Kakariko. However, the soldiers in the tavern do not want to take on the dangerous escort and leave the room.
Link is left as the only suitable protector.


The escort of Prince Ralis
Telma drives the carriage in which Prince Ralis and Ilia sit, while Link on Epona is responsible for protecting the carriage. The entire route leads from Castle Town over the Great Bridge of Hylia and the southern Hyrule Field to Kakariko.
During the escort, the carriage has its own danger mechanic. If it is hit frequently by fire arrows, it will begin to burn. In this case, you immediately target the carriage with the Gale Boomerang. The wind generated extinguishes the flames.
Important:
Stay as close to the carriage as possible during the escort. If you ride too far ahead, you won’t be able to extinguish burning spots in time or eliminate the enemies that lead the car off its intended path.
King Bulblin on the Great Bridge of Hylia
Even before the actual chariot defense begins, an old acquaintance is waiting on the Great Bridge of Hylia: King Bulblin.
Since our last cavalry duel, he has equipped himself with two massive shields. Normal sword attacks while riding past therefore bounce back without any effect.
Use the Hero’s Bow
Ride head-on towards King Bulblin and draw the Hero’s Bow. Aim at his body and shoot a normal arrow.
Then dodge his Bullbo sideways. A direct collision can throw Link from his horse or even off the bridge.
Turn Epona at the other end, ride towards King Bulblin again and hit him with an arrow a second time.
Two successful hits are enough. King Bulblin loses control and falls off the edge of the bridge with his mount.
What remains is a gate key.
Tip:
Bomb arrows also work, but they provide no advantage in this fight. They fly slower, use up extra bombs and King Bulblin still needs two hits.
Protect the carriage from the Bulblins
After the bridge fight, the actual escort begins. Several Bulblin archers pursue the carriage and shoot Fire Arrows at it.
Eliminate the riders with your sword or bow, but don’t lose sight of the carriage. As soon as the car Barnes, you immediately use the Gale Boomerang.
At the first locked gate, get off Epona and use the gate key you just received.
The carriage then travels to the southern Hyrule Field.
The Kargaroks have priority
In the next section, the normal Bulblins become significantly less problematic than the flying Kargaroks. Some of these birds carry bombs and drop them right in front of the carriage.
If a bomb explodes directly in front of the wagon, the horses are frightened and Telma drives a large additional lap through the area. This lengthens the escort unnecessarily.
Therefore, at forks in the road, concentrate on the Kargaroks first. Shoot them with the Hero’s Bow or take them out of the air with the Gale Boomerang before they can drop their bombs.
The same principle then applies in the Kakariko Gorge. Stay close to the car, eliminate the bomb carriers and put out any fires immediately.
At the last gate you get off again, open it with the key and ride together in the carriage to Kakariko.


Prince Ralis is rescued
In Kakariko, Telma brings the seriously injured prince directly to Renado. After the examination, it is clear that Ralis will survive as long as he rests first.
Ilia also stays in Kakariko. However, her memory is still missing and another important action is already beginning in the background, which we will follow later.
Telma also tells Link about a group that is organizing against the dark forces in Hyrule. Their inn serves as a meeting point for this resistance movement and later becomes important in several ways.
Queen Rutela and the Tomb of the Zora King
After you leave the sanctuary, the ghost of Queen Rutela will appear again.
Follow her through Kakariko to the cemetery. She leads Link to the farthest area and causes a large stone to disappear.
A narrow tunnel becomes visible behind the stone.
Crawl through and swim through the water area beyond. At the end you will reach a secret burial site that is usually hidden from the people of Kakariko.
This is where the grave of the late Zora King is located.
The Zora Armor
As thanks for Link saving Prince Ralis, Queen Rutela gives him her late husband’s treasure: the Zora Armor.
New Equipment: Zora Armor
The Zora Armor allows Link to breathe and move freely underwater indefinitely. Combined with the Iron Boots, he can permanently walk on the bottom of lakes and rivers. However, the robe has a significant disadvantage: Fire and ice attacks cause significantly more damage. Therefore, only wear it when its underwater capabilities are actually needed.
This means that Link basically has the most important equipment for the Lakebed Temple. However, a second requirement is still missing: explosives that also work underwater.
Buy Water Bombs at Barnes
Return to Barnes Bomb Shop. Since Lanayru’s restoration, Barnes has introduced a new type of bomb in its range: depth charges.
Normal bombs do not work underwater. Depth bombs, on the other hand, can also be detonated on the bottom and are therefore needed to reveal the entrance to the Lakebed Temple.
If you currently only have one bomb bag, you must first sell the normal bombs it contains at the purchase counter. Then fill the bag with Water Bombs.
New ammunition: depth charges
Depth bombs work both on land and underwater. A normal bomb bag holds fewer depth charges than regular bombs. Since we get two more bomb bags on our 100% route, this problem is solved very quickly.


Collect the New Rewards in Zora’s Domain
Bomb Bag 2 – the Goron in the hot rock
Make your way to the throne room of Zora’s Domain. If you don’t want to climb the entire rocky path, you can talk to a Zora down by the water and be transported to the upper area.
In the throne room, put on the Zora Armor and then the Iron Boots. Jump into the water and sink to the bottom.
The huge glowing rock with which we previously thawed the frozen empire still lies there.
Place a water bomb right next to it.
The explosion shatters the rock and surprisingly frees a Goron who has been trapped inside the entire time.
As a thank you, he gives Link another bomb bag.
New equipment: Bomb Bag 2
Link can now carry two different types of bombs at the same time. It’s a good idea to fill one bag with regular bombs and one with water bombs.
Golden Bug 19 – Male Dragonfly
Return to the surface of the water and go to the eastern bank of Zora’s Domain, or the GameCube orientation.
Flying on an elevated grassy area is the male dragonfly.
Approach and collect them. If she dodges over the water, use the Gale Boomerang.
Then swim downstream to the upper reaches of the Zora River.
Piece of Heart 16 – Hena’s fishing pond
At the upper reaches you will find access to Hena’s fishing pond. If you would like to try out all types of fish and bait later, you can find more information on our page Fish & Bait. For the 100% route we are currently particularly interested in a Piece of Heart and an Empty Bottle.
Enter the building and talk to Hena. Pay 20 Rupees for a boat ride on the fishing pond.
Shortly after the start you see a Piece of Heart on an elevated rock formation.
Row close and use the fishing rod. Cast the bait so that the line touches the Piece of Heart. Then reel in the fishing rod.
Alternatively, the Piece of Heart can also be reached from a suitable position with the Gale Boomerang.
Piece of Heart 16
The Piece of Heart is clearly visible at the fishing pond and can be collected on the first visit.
Bottle 3 – Fishing trash from the fishing pond
Finish boat fishing and don’t fully leave Hena’s building yet. Instead, go to the smaller water area next to the bridge with the sign.
Use Left’s normal fishing rod here.
Throw the string into the small pond to the right of the bridge. After just a few attempts, or usually right after the first catch, Link doesn’t pull a fish out of the water, but rather a Empty Bottle.
New equipment: Bottle 3
Link now has three of the four bottles. You can find all Locations on our page All bottles in Twilight Princess.
Golden Bug 20 – Female Dragonfly
Return to the upper reaches of the Zora River and go to Iza, the owner of the boat rental shop.
The female dragonfly flies directly near the water.
Use the Gale Boomerang to drag them to Link.
Golden Bugs 20/24
This means that only four of the 24 Golden Bugs are missing from our route. The remaining copies only become meaningfully accessible in later areas.
Bomb Bag 3 – Teenas Boat Rental
Then talk to Iza. Before she can explain her actual mission to Link, three creatures of darkness appear.
Defeat them. Since Link cannot currently freely switch to wolf form, you kill the opponents with normal sword attacks and a well-placed spin attack.
After the fight, Iza explains her problem: several huge boulders are blocking the Zora River and preventing her boat rental from operating.
She temporarily gives Link a bomb bag and some arrows.
Blasting the Zora River
Combine bombs and hero bows into bomb arrows and shoot at the first big rock. After two hits, the obstacle breaks and the river can flow again.
Then Link automatically sits in a boat.
Don’t try to row constantly. The current almost carries the boat through the river by itself. Just correct your direction carefully to avoid hitting rocks.
Further downstream you will meet a Zora employee of Iza. Another large rock blocks the path.
Shoot two bomb arrows at it again.
After the destruction, the Zora River is completely free. Drive to Lake Hylia.
As a reward, Link gets to keep the temporarily borrowed bomb bag.
New equipment: Bomb Bag 3
Link now has all three normal bomb bags. This means you can transport different types of bombs at the same time and no longer have to constantly change ammunition.
Giant Bomb Bag – Iza’s Boat Minigame
For a complete score it is worth returning directly to Iza. Your boat rental is now open and offering a mini game.
Pay 20 Rupees. During the journey, numerous clay pots float or hang along the river.
Shoot them with bomb arrows. Yellow vessels bring one point, red two points. Every collision between the boat and a wall deducts one point.
The current does most of the navigation. Therefore, control as little as possible and concentrate on aiming.
You can achieve at least 25 points, Link gets the at the end Giant bomb bag.
Upgrade: Giant Bomb Bag
This upgrade doubles the capacity of all bomb bags. The improvement affects all three pockets at the same time.
Return to Lake Hylia
After Iza’s boat trip you end up back at Lake Hylia anyway. This puts us in the perfect position for the last two Pieces of Heart before the Lakebed Temple.
Piece of Heart 17 – Falbi’ flying game
Go to Fyer’s Cannon and pay 10 Rupees again to fly up. This time you don’t leave the building towards the Hyrule level, but climb down the ladder and go to the other side.
Falbi is waiting there with his mini-game.
Pay 20 Rupees and take one of the chickens.
Jump off the cliff with the chicken. As long as Link holds it, he slowly glides through the air.
Below you you can see a large platform in the Lake Hylia, which is built like a multi-story pyramid.
Landing on the second highest platform is
The Piece of Heart is not on the rotating tip, but on the second highest fixed level.
Control the chicken carefully and brake early so that Link doesn’t fly over the platform.
Open the Treasure Chest there and take Piece of Heart 17.
If you accidentally land on the highest rotating platform, the attempt is not lost. Open the chest there, then hang down the edge and drop to the level below.
Twilight Princess HD:
On one of the deeper levels there is also the Cucco stamp. The tip itself contains a large Rupee.


Piece of Heart 18 – Cave at Lake Hylia
Before we finally dive to the Lakebed Temple, there is a larger, optional cave waiting. Make sure you have enough bombs and lamp oil.
Swim or walk to the southwest elevated area of Lake Hylia. There a ladder leads to a ledge.
Climb up and look for a large boulder in the wall. Blow him up with a bomb.
There is a long cave behind it.
Through the cave
The route is mostly linear, although each larger room branches into several passages blocked by rocks. Basically, blow up every boulder you pass. Some only hide Rupees or ammunition, others open the actual further path.
Use the lamp regularly as many areas are completely dark. Yellow Chus leave behind yellow jelly, which can be used to refill the lamp if necessary.
Halfway there is a beam of light that teleports Link back to the cave entrance. Don’t use it yet until you’ve reached the end.
In the last section there is finally a large Treasure Chest with Piece of Heart 18.
Piece of Heart 18
We have now collected all four Pieces of Heart, which are usefully available between freeing Lanayru and entering the Lakebed Temple.
Twilight Princess HD:
The cave also contains several stamps. In the fifth larger room is the Hylian “J” stamp, and in the tenth room is the treasure chest stamp. There is also a chest underwater in the southern area of Lake Hylia with the stamp Hylian “W”.
To the entrance of the Lakebed Temple
Now all reasonable preparations have been completed. Link has the Zora Armor, water bombs, three bomb bags, the increased bomb capacity and an additional bottle. At the same time, we collected several Pieces of Heart and Golden Bugs.
Put on the Zora Armor and swim to the deepest region of Lake Hylia. Press the appropriate action while swimming to help Link move faster.
The entrance to the Lakebed Temple is located deep at the bottom of the lake. As soon as you are directly above it, you also put on the Iron Boots.
Link sinks down and can stay underwater indefinitely thanks to the Zora Armor.
Blow up the underwater entrance
In front of the actual entrance you can see a round floor plate or depression.
Place a Water Bomb there.
The explosion opens a powerful stream of air that rises from the ground.
Now place a second water bomb directly into this rising stream.
The bomb is carried upwards and lands directly on the large boulder blocking the entrance to the temple.
After the explosion, the rock shatters.
Swim through the exposed tunnel.


Continue to Lakebed Temple
Link is now fully prepared for the third major dungeon. With the Zora Armor he can stay underwater indefinitely, the Iron Boots allows him to walk on the bottom and water bombs can also be used to blow up submerged rock barriers.
On our 100% route we also collected the Large wallet, the Sweep, numerous other Golden Bugs, Bottle 3, two additional Bomb Bags, the Giant Bomb Bag and Pieces of Heart 15 to 18.
The next chapter of our Twilight Princess Walkthrough goes completely through the Lakebed Temple. A complex water control system awaits us there, the Clawshot, two more Pieces of Heart and finally the huge final boss Morpheel.
Ready for Lakebed Temple
Prepare Zora’s Robe, Iron Boots and Water Bombs. You can get two more bomb bags independently from the Gorons in the Rock and from Iza’s first river trip; their order is free. The points trip from 25 points improves the capacity. If you have a free bottle, you can also fish the bottle from the small side pool at the fishing pond.