

After Zant’s attack, take Midna to Princess Zelda in Hyrule Castle. Return to Faron Woods, follow Skull Kid through the Sacred Grove and solve the guardian statue puzzle to obtain the Master Sword.
Game version: The route and screenshots follow the GameCube version. The normal mode of Twilight Princess HD has the same orientation; on Wii and in HD Hero Mode, left/right and east/west are swapped. HD deviations are at the affected step.
Midna’s rescue and the search for the Master Sword
The victory over Morpheel in the Lakebed Temple should have been a decisive turning point. After the battle, Midna has all three Fused Shadows and Link has completely freed the three major regions of Faron, Eldin and Lanayru from the Twilight. But immediately afterwards, Zant personally intervenes. He snatches the Fused Shadows from Midna, forces Link permanently into his wolf form using a dark crystal, and exposes Midna to Lanayru’s light, which is life-threatening for a creature of the shadow realm.
Light Spirit Lanayru is able to save Link and the seriously injured Midna at the last moment and transfers both of them to the northern part of the Hyrule Field. This is where one of the game’s darkest chapters begins. Link is stuck in his wolf form, Midna lies almost motionless on his back and her usual powers are barely available. Our only hope is Princess Zelda, which is why we must once again find a secret way to Hyrule Castle.
On the way there, one of Twilight Princess’ biggest collecting tasks begins. In Castle Town we meet the cursed Jovani and receive the first of a total of 60 Poe Souls. We then return to the Faron Woods, enter the Sacred Grove for the first time, pursue the Skull Kid through the forest labyrinth and solve the puzzle of the two stone guardians. At the end, the legendary blade that can break Zant’s curse awaits: the Master Sword.
For our 100% route, however, the chapter does not end immediately with the sword. As soon as Link can control the night crystal, we collect another Piece of Heart, the male snail and a second Poe Soul directly in the Sacred Grove. We also pick up the next Hidden Skill that has already been prepared.
Requirements and current score
This chapter follows directly on from our solution to the Lakebed Temple. Link has the Clawshot, the Zora Armor, the Iron Boots, the Hero’s Bow, Bomb Arrows and the Gale Boomerang. This equipment only plays a minor role during the actual path to Master Sword, but becomes important for numerous new collectibles immediately afterwards.
If you followed our previous 100% route, Link also has 20 Pieces of Heart and 20 of the 24 Golden Bugs. We haven’t been able to collect Poe Souls permanently yet because Link couldn’t freely use his wolf form outside of the twilight. That’s exactly what changes in this chapter.
With the injured Midna to Castle Town
After Zant’s attack, you find yourself as Wolf-Link in the northern part of the Hyrule Field. Midna lies seriously injured on Link’s back. Her normally confident voice is barely audible and many of her abilities cannot be used at the moment.
Lanayru only has one piece of advice: go find Princess Zelda.
Therefore, follow the direct route back to Castle Town. You should avoid enemies on the way if possible. There are currently no meaningful optional tasks that are more important than rescuing Midna.
In the city, the residents understandably react with panic to Wolf-Link. But you can now understand the cats and dogs roaming around. Follow the familiar path towards Telma’s Tavern.
Telma’s Tavern – Wolf Link must stay outside
Try to enter the tavern through the normal entrance. Wolf-Link is immediately thrown out.
Don’t move on immediately. Telma’s cat is waiting for Link nearby. She recognizes him despite his wolf form and explains that there is another way through the building.
Push the nearby wooden box against the wall and climb up. You can enter the interior of the tavern through the upper opening.
Cross the Rafters beneath the Roof
tavern
Wolf-Link is now above the guest room. Below you sit Telma and several members of her resistance group. We will get to know these people in more detail later.
Several narrow ropes run across the room.
Carefully balance from one bar to the next. The jugs that stand directly under or next to some ropes are particularly important. Don’t push her down. The resulting noise alerts the guests and Wolf-Link is thrown out of the tavern.
Cross all three ropes and slip through the opening in the wall at the opposite end.


Jovani and the first Poe Soul
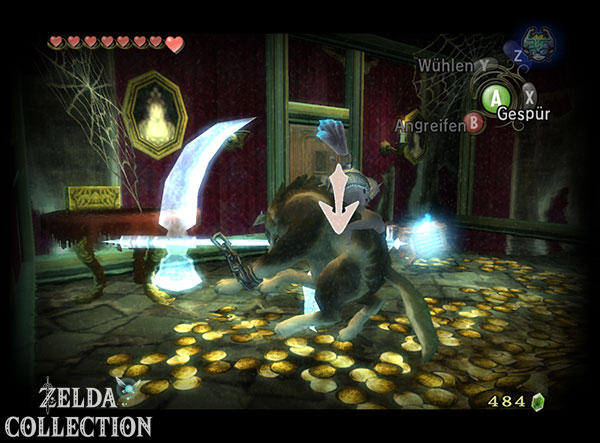
Behind the opening you enter a strange room full of gold and treasure. Particularly striking is a lantern that appears to float freely through the air.
Activate Wolf Links Sense.
Now you recognize the spirit that goes with it. These enemies differ significantly from normal monsters: only Wolf-Link can recognize their true form and finally destroy their soul.
Poe Soul 1 – Jovani’s House
Target the ghost and jump at it several times. As soon as he falls to the ground, weakened, the opportunity to use the wolf catch kick appears.
Run it.
Wolf-Link rips a glowing ball out of the spirit’s body.
This will give you your first Poe Soul.
New collection task: 60 Poe Souls
In Twilight Princess are a total 60 Poe Souls spread across Hyrule. Most ghosts only appear outdoors at night. Wolf-Link must defeat them with activated sense and then snatch their souls with the Wolf Ending Blow. All Locations can be found in our complete overview All Poe Souls.
Jovani’s Curse
After the fight, the completely gold-plated man reports to the room. His name is Jovani. He tells Link that he made a deal with dark forces out of greed. He was granted the wealth he wanted, but at the same time the curse turned his body into immovable gold.
Jovani asks Link to bring him a total of 20 Poe Souls. Since we already have one, we still need 19 for the first reward.
After 20 Poe Souls, Link receives another Empty Bottle from Jovani, which is initially filled with Great Fairy’s Tears. In Twilight Princess HD, the ghost lamp is also added, which shows whether there is still an uncollected Poe Soul in the current area.
All 60 souls will be needed later to completely lift Jovani’s curse.
100% note:
After receiving the Master Sword, we can freely transform into Wolf-Link. This means that a large number of Poe Souls can be reached in one fell swoop in regions that have already been visited. As part of the Walkthrough, we take those that make sense on our route. For a targeted complete collection, use our page on the Poe Souls.
After you talk to Jovani, he opens the secret path to the sewers of Hyrule Castle.


Through the sewers of Hyrule Castle
Jump through the opened secret passage. Wolf-Link ends up in the underground sewer system that we crossed at the very beginning of the game. At that time, all of Hyrule was still in twilight. This time the environment is brighter, but most of the familiar obstacles are still there.
Open the floodgates
Go to the north end of the first area and jump onto the hanging chain.
This will open the flood gate. Then let the current carry you through the opening.
Climb back onto land on the other side.
Spider webs burn
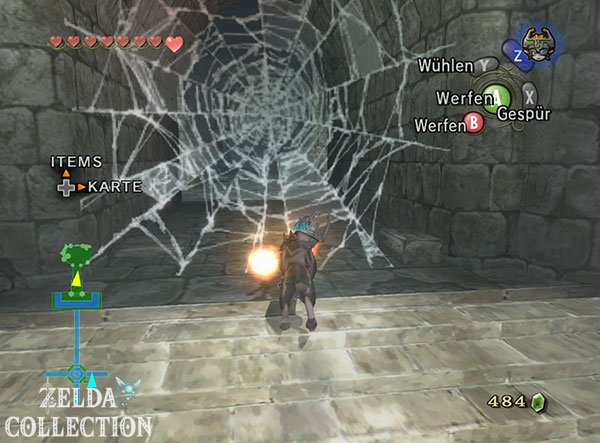
Defeat the Skulltulas in the next room. There are several wooden sticks on the floor.
Put a stick in your mouth or move it to the burning torch and light it. You can use the burning wood to destroy the large spider web before the next passage.
Behind the net you first follow the corridor and work your way to the higher level. There a second spider web blocks the way.
Light a wooden stick again and burn this net down too.
Back to the old castle sewers
Several opponents are waiting behind the second net. Then follow the path to the round area at the end.
Activate the sense.
In the middle of the room you can see a place with loose earth. Dig your way through.
Wolf-Link falls into the older section of the sewers that we know from our first visit to Hyrule Castle.
The climb to Hyrule Castle
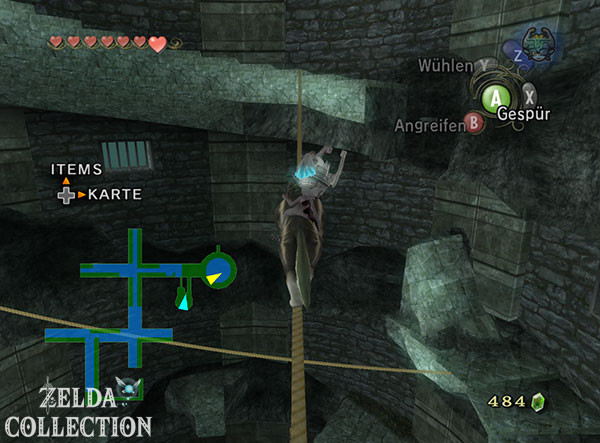
Follow the familiar path to the large round staircase. Since our first visit, several bulblin archers have spread out in this area.
Defeat all enemies you can reach from the ground or solid platforms before venturing onto the narrow ropes. An arrow hit while balancing can easily throw Link into the depths.
Then climb the round stairs bit by bit.
At the top you leave the sewer back into the open.
Across the roofs to the tower
Bulblins are now also patrolling the roofs of Hyrule Castle. However, the basic path corresponds to Link’s first visit.
Since Midna is seriously injured, her normal jump sequences cannot be used. You therefore have to wait at the destroyed bridge until the strong wind moves the structure into the correct position.
Cross it once the path is open.
Then follow the linear roof path to the high tower and climb the stairs.
At the end, Princess Zelda is waiting again.



Zelda’s Sacrifice for Midna
In Zelda’s chambers, the princess immediately realizes what Zant has done. The dark crystal in Link’s body forces him into his wolf form even outside of the Twilight. Things are even worse for Midna: Lanayru’s light has almost wiped out her existence in the realm of light.
Midna initially puts her own rescue on hold and instead asks Zelda for information about the Mirror of Twilight – the artifact that could open a path to Zant and the Shadow Realm.
However, Zelda realizes that Midna will die without immediate help.
The princess transfers her own power to Midna and disappears from the room. Midna becomes completely stable again and can now exist in the realm of light.
However, Link’s curse remains.
Zelda leaves him only a clue to a power that can expel Zant’s dark crystal from his body: the holy blade, the Master Sword.
The sword rests deep in the Faron Woods.
The shadow barrier around Hyrule Castle
After the scene, Link and Midna are transported out of the castle.
As soon as they are outside the city, Zant erects a gigantic dark barrier around the entire Hyrule Castle. The central part of the kingdom is thus completely sealed.
There is currently no way to break this barrier.
Our only target therefore remains the Master Sword.
Back to the forest by Faron
Midna regains enough strength to use her normal abilities. Open the map and warp to the portal in Northern Faron Woods.
Follow the known path towards Forest Temple.
Shortly afterwards you will encounter the monkey from the early game again. Several new wooden puppets follow the animal.
Defeat the dolls. They can only withstand a few hits and individually do not pose much of a threat.
The monkey then points to a previously inaccessible area beyond a deep ravine.
With Midna across the gorge
Go to the raised platform at the edge of the chasm.
Midna appears via Wolf-Link.
Use her jump sequence to get from ledge to ledge across the ravine.
A completely new section of the forest begins on the other side.
The movable wind bridges
Follow the narrow rocky path until you reach two large wooden bridges.
Strong gusts of wind regularly rotate the bridges around their axis. As Wolf Link, we cannot currently use the Gale Boomerang, which is why we cannot influence the movement ourselves.
Wait until the first bridge is aligned correctly and walk across.
On the second bridge you wait again for the next gust of wind. As soon as it turns to the rocky path opposite, you cross the remaining section.
Pendulum over the ropes
Immediately afterwards, two taut ropes wait over an abyss.
Heavy wooden pendulums swing above them.
Wait for the right rhythm and balance over the rope whenever the pendulum swings away from your path.
After both ropes you reach solid ground.
Howling Stone 3 – Cantata of Light
At the end of the path there is another real howling stone.
Examine him.
The melody corresponds to the Cantata of Light from Ocarina of Time. Follow the high, middle and low notes as usual and repeat the song with Wolf-Link’s howl.
Link will then be transferred to the Golden Wolf. Howl the tune a second time.
Afterwards, a new meeting point appears on the map: The Golden Wolf is waiting south of Castle Town.
Next Hidden Skill:
After obtaining the Master Sword, we can visit the Golden Wolf as a human. He teaches Link the fourth Hidden Skill: the Helm Splitter.
Now follow the only remaining path and enter the entrance to the Sacred Grove.


The Sacred Grove
The Sacred Grove’s atmosphere corresponds to the Lost Woods from previous Zelda games. Winding paths, waterfalls and numerous almost identical passages make orientation deliberately difficult.
Right at the entrance there is another musical stone with a Triforce symbol.
Stand in front of it and howl the melody shown.
This time it is Zelda’s Lullaby.
After a successful repetition, the entrance opens deeper into the forest.
At the same time, an unexpected leader appears: the Skull Kid.
Pursue Horrorkid through the Sacred Grove
The Skull Kid apparently sees Link’s arrival as an invitation to a game. It disappears into the forest and summons numerous marionettes or wooden puppets.
These dolls are released practically indefinitely. It is therefore not worth pursuing each opponent individually. Only move out of the way those who hinder your search or jumping.
The most important aid is your hearing. The closer you get to the Skull Kid, the more clearly you can hear his characteristic trumpet playing alongside the background music.
First hiding place of the Skull Kid
From the entrance, follow the tunnel into the next section of forest.
Stay on the main path until you hear the trumpet clearly. The Skull Kid is on an elevated platform, partially hidden by tall grass.
Jump up and attack it.
A single hit is enough. Horrorkid immediately disappears deeper into the forest.
Second hiding place – behind the waterfall
Follow the opened path back to the area with shallow water.
A previously blocked passage between two waterfalls is now open.
Go through and follow the path into the next water area.
Stick along the rock wall there and swim through the clear waterfall into the cave behind it.
Climb the steps all the way up.
The Skull Kid is already waiting on the upper platform.
Jump to it and hit it a second time.
Third hiding place – above the first forest section
Follow Horrorkid through the opened tunnel again and return to the area with shallow water.
The previous path between the waterfalls is now closed again, but a new passage has opened.
Follow this path. In one of the following rooms you will see the Skull Kid already on a high platform, but you cannot reach him from below.
Take the lower passage and return to the elevated level via the neighboring forest sections.
Climb the rock steps, cross the tree trunk and attack Horrorkid for the third time.
A new passage will then open between the torches.
Jump down and follow him.


Miniboss: Horrorkid
The new area consists of an old ruin and serves as a small battle arena. Horrorkid has had enough of the chase and now faces Link directly – at least as directly as suits his fighting style.
It first summons four puppets.
The Skull Kid himself is constantly teleporting from one platform to the next and can hardly be reached during this time.
The puppets reduce
First concentrate on the wooden dolls.
You don’t necessarily have to destroy every single one immediately. What matters is that enough dolls disappear so that Horrorkid has to summon new ones.
It is precisely during this summoning that your chance to attack arises.
Horrorkid stops and plays his trumpet.
Immediately jump to him and attack.
After the first hit it increases the number of its puppets. Later, up to six or eight dolls appear at the same time.
However, the basic principle does not change:
Eliminate puppets → wait for horror kids to play trumpets → attack.
After the third successful hit, Horrorkid gives up and disappears.
A new passage opens.
The Mystery of the Guardians of the Sacred Grove
Follow the newly opened path to a secluded clearing. There is a large Triforce symbol on the ground. Two massive stone guards stand on raised platforms.
Place Wolf-Link on the Triforce and howl again Zelda’s Lullaby.
The two guards awaken.
They demand that Link return them to their original positions.
This is how the guard puzzle
works
Wolf-Link moves from platform to platform on a checkerboard-like field.
With every jump, both guards move at the same time. One follows Link’s direction of movement, the other moves in a mirror image.
If one of the statues lands on Wolf-Link’s field, Link is crushed and the puzzle begins again.
The goal is to move both guards to their marked starting positions at the same time.
Walkthrough to the Guardian puzzle
For the GameCube version or the normal Wii U HD orientation, the following order works reliably:
Left → Bottom → Right → Right → Top → Left → Top → Top → Left → Bottom → Bottom → Right → Top
Execute each movement individually and briefly check the position of the guards after each jump.
Wii version and HD Hero Mode:
Since the game world is mirrored, left and right may appear swapped compared to the GameCube orientation. The principle of the puzzle remains the same: one statue copies Link’s movement, the other mirrors it.
When both guards are back on their designated spaces, they retreat and reveal the stone stairs behind them.
The Master Sword
Climb the newly uncovered stairs and follow the path through the ancient ruins.
After a short time you will reach an overgrown clearing, the architecture of which will immediately seem familiar to Zelda veterans. Here are the remains of the Temple of Time.
In the center of the ruins there is a sword in an old stone base.
The legendary Master Sword.
Approach the Time Rock and examine the blade.
Wolf-Link touches the holy sword.
The power of the Master Sword responds immediately to Zant’s curse. The dark crystal is ripped out of Link’s body and Link finally returns to his human form.
He then pulls the Master Sword out of the base.
New weapon: Master Sword
The Master Sword now replaces the Ordon Sword as Link’s main melee weapon. The holy blade is stronger and has the power to break dark curses. Later it is also needed to open access to the Temple of Time and receives additional light power in the Palace of Twilight.
The Night Crystal – switch between human and wolf at any time
The crystal inserted by Zant did not disappear after touching the Master Sword. Midna takes him.
This turns Zant’s curse into a huge advantage.
From now on, Link can switch between his human form and Wolf Link at almost any time using the Night Crystal.
To do this, talk to Midna and choose the transformation. However, if there are normal people nearby, Midna prevents the change so that no one discovers Link’s secret.
New ability: free transformation
The Night Crystal is one of the most important advances in the entire game. Wolf-Link can now also be used in the Light Realm. This makes Poe Souls, wolf senses, grave sites, Midna jumps and warp portals available at all times.
Traveling will also be much more comfortable. Transform into Wolf-Link and Midna can transport you from almost any suitable location to an already opened warp portal.


Collectibles in the Sacred Grove
Golden Bug 21 – Male Snail
Return from Master Sword to the area with the two stone guards.
Near the destroyed stairs or the side opening, a narrow passage leads into the ruins.
Enter it a bit and then turn around.
High on the wall you see a golden glow.
The male snail sits there.
Use the Gale Boomerang or Clawshot to drag them to Link and collect them.
Golden Bugs 21/24
This leaves only three Golden Bugs missing. The snail’s female counterpart is also in the Sacred Grove, but cannot be reached on this first visit. We’ll pick it up later on the way to the Temple of Time. The last two insects are the Gerudo Desert mayflies.
Poe Soul 2 – Horrorkids Arena
Then return to the ruins where the final fight against Horrorkid took place.
There is a large boulder in the middle of the arena.
Blow him up with a bomb.
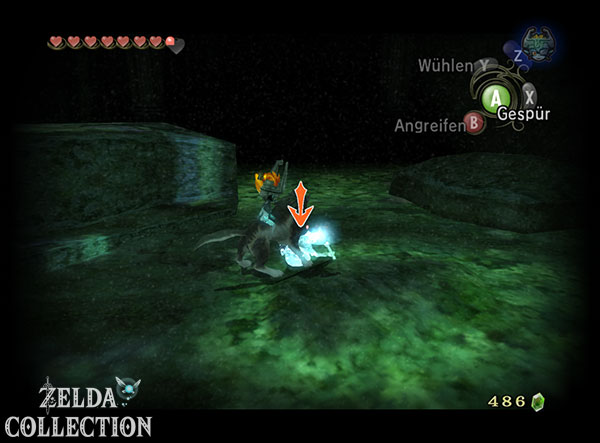
A ghost appears under the stone. This Poe Soul has a special feature: it can also be fought during the day.
Transform into Wolf-Link, activate the sense and attack the mind.
As soon as he is on the ground, perform the wolf catch strike.
This will give you Poe Soul 2.
Piece of Heart 21 – under the Horrorkid Arena
Stay in wolf form and activate sense again.
Where the large boulder previously lay, you can now see a grave site in the ground.
Dig through.
Wolf-Link falls into a hidden underground cave full of Deku Babas or Deku-Babas.
Defeat all plant enemies in the room. Pay particular attention to the enemy hanging from the ceiling. If necessary, pull him down with the Gale Boomerang after transforming back into Link, or take out the enemies one at a time using the appropriate form.
Once all enemies are defeated, a large Treasure Chest will appear.
Open it and take Piece of Heart 21.
Piece of Heart 21
This Piece of Heart can only be reached after the Master Sword when you first visit the Holy Grove, as we need Wolf Link for the grave site. You can find all other Locations under Pieces of Heart.
Fourth Hidden Skill – Helm Splitter
Before we move on with the main action towards the Gerudo Desert, it is worth taking a last short detour. The Howling Stone in front of the Sacred Grove caused the golden wolf to appear south of Castle Town.
Transform into Wolf-Link and warp to a nearby portal. Then travel to the marked wolf symbol south of the city and approach the golden wolf in human form.
The heroic spirit first checks whether Link has mastered the technique he has learned so far.
He then teaches him the Helm Splitter.
First perform a shield attack against a targeted enemy. If his defenses are open, you then jump over him and hit his head or back from above while jumping.
New Hidden Skill: Helm Splitter
The Helm Splitter is the fourth of the seven Hidden Skills and is particularly effective against armored opponents. The technique combines the shield attack with a jump over the enemy and a powerful blow from above.
It’s now useful to collect Poe Souls with
With the Nachtkristall the 100% route has changed fundamentally. In many regions we have already visited, ghosts appear at night that we either did not see before or were unable to permanently defeat.
However, it would be inefficient to visit each region again just for individual ghosts. That’s why we’re increasingly integrating the Poe Souls into our other routes from this point onwards. For example, if we return to Kakariko, Zora’s Domain or Lake Hylia, we take the spirits there directly with us.
If you want to complete the Jovani task as early as possible and get the fourth bottle immediately, you can start a big collection round now. After a total of 20 Poe Souls, Jovani rewards Link with a bottle full of Great Fairy’s Tears. In Twilight Princess HD you also get the Ghost Lamp.
For this targeted collection round you use our complete overview All 60 Poe Souls in Twilight Princess.
Continue into the Gerudo Desert
With the Master Sword, Link now not only has a much more powerful weapon, but above all control over the night crystal. Humans and wolves are no longer separate states – we can use both forms specifically for puzzles, combat, collectibles and warp travel.
Midna also has a new target after Zelda’s Sacrifice. The three Fused Shadows are lost, but the Mirror of Twilight could open a path to Zant and the shadow realm. To find out more about this artifact, we need to reconnect with Telma’s resistance group.
Our next big path leads to a region that Link has not yet been able to enter: the Gerudo Desert. There are not only the last two mayflies for our Golden Bug collection, but also numerous Poe Souls, the Cave of Ordeals and finally a dark prison ruin deep in the sand.
We continue in our Twilight Princess Walkthrough with the Gerudo Desert. The search for the Mirror of Twilight and the path to the Arbiter’s Grounds begins there.
collection round after the Master Sword
Return to Horror-Kids battle arena, blow up the rock and take the visible grave site as a wolf. Defeat the plants in the cave to make the heart part chest appear. Search for the ghost in the arena with your sense activated. On the following journey you can also visit the Golden Wolf for the Helm Splitter before setting off into the desert at Lake Hylia.