

After Arbiter’s Grounds, speak to Ashei at Snowpeak and show her sketch to Prince Ralis. Catch a Reekfish with the Coral Earring, follow its scent as Wolf Link and meet Yeto on the mountain.
Game version: The route and screenshots follow the GameCube version. The normal mode of Twilight Princess HD has the same orientation; on Wii and in HD Hero Mode, left/right and east/west are swapped. HD deviations are at the affected step.
Requirements for the Snowpeak
For the actual path through the Snowpeak you need above all the Master Sword, the Fused Shadow for the free transformation into Wolf-Link, the fishing rod and later the Coral Earring. The Spinner from the Arbiter’s Grounds is not required for story progression in the Snowpeak, but now opens up several Pieces of Heart and additional stamps in Twilight Princess HD, which is why we make sense to do these finds before setting off.
You should also have some hearts for the fights on the mountain. The icy water causes damage, snow wolves attack from underground and Ice Keese can be particularly annoying on narrow climbing areas. While remedies aren’t essential, a bottle with a fairy or Great Fairy’s Tears on it won’t do any harm.
After the Arbiter’s Grounds: Two Pieces of Heart with the Spinner
The Spinner is not just the dungeon item of the Arbiter’s Grounds. In several places in Hyrule you have already seen toothed rails that you couldn’t do with before. Two of them now lead directly to Pieces of Heart and are convenient enough that we collect them before the trip to the Snowpeak.
Piece of Heart: Glider rails near the Great Bridge of Hylia
Warp around Castle Town and head to the area connecting the northern Hyrule Field to the Great Bridge of Hylia. If the boulders are still there on the path, blow them up with bombs. On the high rock wall you will find a long glider rail. Insert the Spinner and follow her. The rail ends briefly several times, so you have to jump off at the right moment and land on the opposite section of rail.
Stay on the Spinner until you reach a secluded platform at the end of the course. Open the chest there and take the next Piece of Heart. The find is possible immediately after receiving the glider and is therefore ideal for our current route.
Piece of Heart: Hidden cave north of Bridge of Eldin
Then warp to Bridge of Eldin and follow the path north. Behind a small wooden bridge you will find toothed rails on the rock face again. Go down with the Spinner. At the end you will reach a small grassy area. Transform yourself into Wolf-Link, activate your sense and dig into the underground cave at the conspicuous place.
Three Stalfos are waiting there. Normal sword attacks only temporarily dismantle their bodies. As soon as one is lying on the ground in a pile of bones, place a bomb next to it or use a bomb arrow. Only the explosion finally destroys him. After all three Stalfos are defeated, a chest will appear with another Piece of Heart.
Twilight Princess HD: “Zelda – Surprised” stamp
Only in Twilight Princess HD can we also get another stamp with the Spinner. Return to Castle Town and exit the city through the south gate. On the wide stairs or near the fountain area you will find a grappling hook point on one of the stone arches. Pull yourself over and then lower yourself in a controlled manner until you reach the glider rails below.
Ride the Spinner over the rail and jump onto the platform by the fountain about halfway. In the chest there is the stamp “Zelda – surprised”. No stamps exist in the GameCube and Wii versions. You can find more HD locations in our overview of the stamps in Twilight Princess HD.
Castle Town: Piece of Heart for 1,000 Rupees
If you have enough Rupees, we will now do a particularly expensive but easy heart part find. In Castle Town, find the old man Charlo near the western exit. He asks Link for donations. You can always hand over smaller amounts; The only thing that matters is the total.
As soon as you total 1.000 Rupees If you donated, Charlo thanks you with one Piece of Heart. The older version of our solution stated 2,000 at this point Rupees; actually 1,000 is enough. If you are short on cash, you can return items that have not been handed in before Golden Bugs deliver to Agitha.
Piece of Heart received: Charlo will give you the Piece of Heart once your total donations have reached 1,000 Rupees. You don’t have to pay the amount all at once.
Hena’s fishing pond: Piece of Heart and third bottle
Our next destination is Hena’s fishing pond at the upper reaches of the Zora River. There are two permanent collectibles waiting here. If you have already picked them up on a previous visit, simply skip this section.
Piece of Heart on the rock in the fishing pond
Speak to Hena and pay for a round of bait fishing from the boat. Paddle towards the large rock in the middle area of the pond. A Piece of Heart is clearly visible on its top. You don’t have to catch a fish: throw the bait so that the hook catches the Piece of Heart, and then crank it towards the boat like a catch.
If you have trouble hitting the right distance, position the boat a few meters from the rock and cast slightly beyond the Piece of Heart. When retrieving, the hook then pulls directly over it.
Bottle fish from the fishing pond
The next reward is even more important. Go to the western side of the fishing pond to the small jetty or the place that says not to throw garbage into the water. Use your normal fishing rod here. In addition to catching fish, you can actually hook a Empty Bottle.
It may take a few casts before it gets stuck. So don’t give up after a failed attempt. Once you have pulled out the bottle, it is permanently part of your inventory. There are a total of four bottles in Twilight Princess; You can also find all Locations in our guide to the bottles.
New Bottle: The Bottle from Hena’s Fishing Pond is a permanent inventory upgrade and should definitely be collected on a 100% route.
Iza’s Canoe Adventure: Giant Bomb Bag
If you don’t have the upgrade yet, we will then return to Iza at the upper reaches of the Zora River. After the river has already been cleared of boulders in a previous task, you can start a canoe trip again. This time it’s no longer about blowing away obstacles, but rather destroying as many of the jars set up on the river as possible with bomb arrows.
Yellow jugs score one point, red jugs score two points. If you collide with a wall or a larger obstacle, one point is deducted. For the maximum reward you need at least 25 points at the end. Focus primarily on the red jugs and only correct the canoe as much as necessary so that you don’t lose points due to constant wall contact.
If you achieve at least 25 points, you will receive the Giant Bomb Bag. This is not an additional bag, but a permanent upgrade: the capacity of your existing and future bomb bags is doubled.
New Upgrade: Giant Bomb Bag
The maximum bomb quantity of all bomb bags is permanently doubled.
Lake Hylia: Piece of Heart at Plumm’s flying game
then warp to Lake Hylia. In wolf form you can meet the talking bird Plumm on the bank near the corresponding hawk grass spot. He offers you a flight mini-game in which you fly again on a huge shadow bird through the gorge of the Zora River and collect fruits or balloons along the way.
For the Piece of Heart you have to score at least 10,000 points. What’s more important is less about taking everything at random than about building up as long a series as possible of the same type of fruit. Therefore, follow a clean line through the course and avoid constantly switching between different fruits, as a long series significantly increases the point value.
If you exceed the required number of points, Plumm will give you another Piece of Heart.
Jovani: The Fourth Bottle and Great Fairy’s Tears
If you have followed our 100% route this far, you should already have at least 20 Poe Souls. Now it’s worth visiting Jovani in Castle Town again. Enter the city as Wolf-Link and dig in via the familiar spot near his house.
Give Jovani at least 20 Poe Souls. As a reward you will receive a bottle of Great Fairy’s Tears. The contents fully heal Link and temporarily increase his attack power until he takes damage. Even more important is the bottle itself: If you have collected the three previous bottles, you now have all four.
Twilight Princess HD: You will also receive the ghost lamp. It lights up if there is still an uncollected Poe Soul in the area you are in. This is an extremely practical tool for the remaining 100% route.




Telma’s Tavern: Ashei searches the Snowpeak
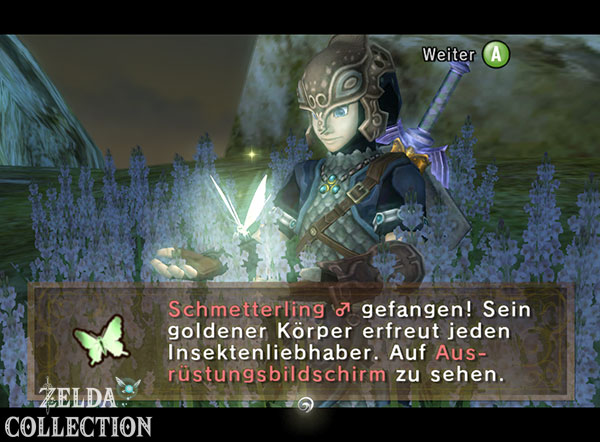
Now we continue with the main plot. Visit Telma’s Tavern in Castle Town and look at the map on the resistance group table. The next member not at the table is Ashei. Your location will be marked in the area east of Zora’s Domain.
Warp to the Zora cave and jump from the throne room down into the pool of water. Swim toward the entrance that was previously blocked by ice. Through the now open tunnel you reach the snowy region at the foot of the Snowpeak. Ashei is waiting there.
Ashei and the snowman drawing
Talk to Ashei. She reports that an unusual creature lives in the Snowpeak, which apparently regularly comes close to Zora’s Domain. However, Ashei cannot go straight to the summit because a heavy snowstorm makes orientation practically impossible.
However, she observed the snowman and made a drawing. What is particularly striking is the red fish that the creature carries with it. Ashei gives you the drawing of the snowman. It is precisely this fish that becomes the key to our further journey.
New quest item: Ashei’s drawing
Show the drawing to people who know about the fish around Zora’s Domain. The red fish is the key clue to finding your way through the snowstorm.
If you show the drawing to different Zora, they will recognize the fish as a rare Reekfish. At the same time, they refer to Prince Ralis, who is particularly familiar with this type of fish.
Prince Ralis and the coral earring
Warp to Kakariko and go to the graveyard. In the back area near the Zora family grave you will find Prince Ralis. Show him Ashei’s drawing. He immediately recognizes the red fish as a Reekfish and explains that this rare species is attracted to a special coral.
As a thank you for everything Link has already done for him and his people, Ralis gives you his Coral Earring. This is automatically attached to your fishing rod and from then on serves as a special bait for Reekfish.
New item: Coral Earring
The coral earring expands your fishing line and allows you to catch the rare Reekfish in Zora’s Domain.
If you haven’t yet collected the two ghosts available at night in the Kakariko Cemetery after receiving the Master Sword, you can do this short detour now. However, on a consistent 100% route they should already come from an earlier chapter.




Zora’s Domain: Catch up on two Poe Souls
Before we catch the Reekfish, we briefly check the two Poe Souls in Zora’s Domain. Both have been accessible since obtaining the Master Sword. If you have already collected them in our previous route, you can jump straight to the next section.
Poe Soul behind the waterfall
One of the Poe Souls is located on an elevated area behind or to the side of the large waterfall. Transform into Wolf-Link at night and use Midna’s jump points to move up the ledges. The ghost waits behind the waterfall or on the hidden ledge.
Activate your sense, dodge his attack and jump at him at the vulnerable moment. After the victory, you snatch the Poe Soul from him.
Poe Soul on the raised bank
The second soul floats on a raised ledge in the waterfall pool. It is located near the entrance to the Snowpeak. Use Wolf-Link and the accessible ledges to get to the higher level. This ghost also regularly appears at night.
If you have already found both of them earlier, of course we no longer have to collect anything here. They are not among the four spirits of the actual Snowpeak.
Catching the Reekfish at the Mother and Child Rocks
From the top of Zora’s Domain, jump down into the large waterfall pool and look for the two prominent rocks sticking out of the water. Prince Ralis refers to them as the Mother and Child Rocks. It is precisely in this area that the red Reekfish swim.
Stand on the bank and cast the normal fishing rod. Thanks to the coral earring, the Reekfish are now interested in your bait. Wait until the float is pulled well below the surface of the water, then pull the rod up. Once you have caught a Reekfish, it will be placed on the ground in front of Link.
Now you have to act quickly. Transform yourself into Wolf Link, activate the sense and sniff the fish before it disappears. Wolf-Link learns this Smell of Reekfish. From now on, a colored scent trail will become visible when you activate your sense.
New track: smell of Reekfish
This trail takes you through the thick snowstorm to the snowman Ashei observed.
Snowpeak: Follow the Reekfish trail
Go back to the Snowpeak through the eastern tunnel from Zora’s Domain. Ashei has since left her post. Transform yourself into Wolf-Link, activate your sense and look for the clearly visible scent trail of the Reekfish. It first leads over the icy water and then deeper and deeper into the snowstorm.
You should be careful when crossing the ice. If you collapse or land in the icy water, Link will lose health. So jump from ice floe to ice floe or follow the trail as closely as possible. Behind it, White Wolfos appear for the first time. They repeatedly disappear into the deep snow and attack from a short distance. The route doesn’t require you to defeat them; It’s often quicker to just keep walking.
Poe Soul 1 in the Snowpeak
Follow the Reekfish trail until you reach an area with several closely packed rocks. Shortly before the trail leads up a rock face and you have to continue climbing over small ledges, there is a ghost right on the route at night.
Activate Wolf-Link’s sense and defeat him for the first Poe Soul of the Snowpeak. Since the find is almost directly on our main path, there is no reason to save it for later.
Poe Soul 2 on the lonely tree
Before you climb the small rock steps, we take a short detour. Move away from the Reekfish trail to the side and look for a single tree on a cliff where you can look back at the ice surfaces you crossed earlier.
At night the next ghost floats next to this tree. Defeat him as Wolf-Link and take the second Poe Soul of the Snowpeak with you. The detour is short and saves us from having to climb again later through the snowstorm.
Return later: In this part of the Snowpeak or in one of the caves there are additional icy obstacles that we cannot destroy at the moment. After the Snowpeak Ruins we have the Ball and Chain. Then we briefly return via the new warp point and get another Poe Soul that has been trapped so far.
Out of the blizzard to the higher ground
Return to the Reekfish Trail and follow it up the rocky steps. The higher you go, the better the view becomes. The trail takes you through further deep snow areas and past several snow wolves. Especially in wolf form, you can move quickly through this area and don’t have to deal with every enemy.
After a while you reach a higher level where trees grow again. Here the normal day-night cycle is clearly visible again. This is important for the next spirit.
Poe Soul 3 at the two trees
In this higher section, two striking trees stand close together. At night the third spirit floats on one of them. Activate your instinct and kill him as usual.
With this you have the third Poe Soul of the Snowpeak. If it is daytime, you can either postpone the discovery for a moment or wait in this open area until it gets dark. Since we can return later via a warp point, catching up would be uncomplicated, but on the 100% route we take the soul with us as soon as possible.


Collapse snow wall
Continue following the scent trail. At some point it appears to end in front of a high wall of snow. There is no normal climbing path. Now transform yourself back into Wolf-Link and run at full speed against the loose snow mass.
The impact triggers a small avalanche. Some of the snow collapses and forms a ramp that takes you to the next level. Follow the Reekfish trail there again.
Howling Stone in the Snowpeak
Shortly afterwards a short detour leads to another Heulstein. Since this point is directly on our route, you shouldn’t miss it. If the stone is difficult to see in the drifting snow, turn off your senses, stand in front of it and transform into Wolf-Link.
Listen to the given tone sequence and then howl correctly. After a successful repetition, the Golden Wolf or the spirit of the old sword master appears again. It marks a new meeting point on your map – this time in the Kakariko Cemetery.
We could warp there immediately, but just a little later we get a new warp point right at the ice summit. That’s why we initially continue to follow the Reekfish trail. This saves an additional climb through the mountain.
The snow cave and the warp point at Snowpeak
The track ends a little later again in front of a rock face or deep snowdrift. Activate Wolf-Link’s sense. A place will appear on the ground where you can dig under the obstacle. Behind it you end up in a cave.
Transform back into the human Link. Climb the ladder and then up the accessible vines or ledges. Several Ice Keese attack on the way. It’s best to eliminate them early with the bow, because a hit during a climbing passage can knock Link back.
At the other end of the cave you step out into the snow again. Shortly afterwards, three Shadow Beasts appear. First weaken the opponents individually and, if possible, kill the last two at the same time with Midna’s energy field. After the battle, the warp point is created at the Snowpeak.
New warp point: Snowpeak
From now on you can teleport directly to the upper area of the Snowpeak. This means we can get the new sword technique immediately and then return here without having to ascend again.
Hidden Skill: Jump Strike
Use the new warp point and teleport to Kakariko. Go to the cemetery. The Golden Wolf is now waiting there, provided you have correctly activated the Howling Stone in the Snowpeak.
Approach him with your sword drawn and begin training with the old warrior. Before he shows you the new technique, he checks again whether you have mastered Mortal Draw. You then learn the sixth Hidden Skill: the Jump Strike.
Target an enemy and hold down the normal jump attack button instead of releasing immediately. Link charges the attack and after a short time jumps forward with significantly greater force. The hit causes more damage and has a much larger radius of effect than the normal jump attack, meaning that multiple enemies can be hit at the same time.
New Hidden Skill: Jump Strike
Hold Jump Attack until the attack fully charges. The enhanced attack hits harder and covers a larger area.
Then warp straight back to the Snowpeak.
Yeto and the first mirror shard
From the warp point, follow the remaining path through the snow. Shortly afterwards you finally meet the huge snowman Yeto, whose trail we have been following the whole time. Despite his intimidating appearance, he is extremely friendly.
Speak to him as human Link and explain that you are looking for something. Yeto understands that you are interested in the unusual piece of mirror he found. In fact, he apparently has the Mirror Shard mirror shard we’re looking for. He promptly invites you into his house and even promises a warm meal.
However, his home is not right next door, but deep down in the valley. Yeto doesn’t make a problem of this: he shakes a large frozen leaf off a tree and uses it as an improvised snowboard.
Snowboarding to Snowpeak Ruins
Also roll against the tree until another large leaf falls into the snow and stand on it. This begins the rapid descent to Snowpeak Ruins. The path is basically linear and you can therefore fully concentrate on the obstacles.
While driving, hold down the corresponding button to duck or build up speed, and release it to jump over obstacles or small gaps. Avoid trees, boulders and the deep ravines on the edge. You shouldn’t go too far out, especially in the last section, as a fall will set you back significantly.
This first descent is not yet an actual race. Later, after completing Snowpeak Ruins, we can face Yeto and then Yeta. Defeating both is important for 100% because Yeta awards another Piece of Heart as a reward. But we only get this find after the dungeon, when the race becomes available.
Poe Soul 4 in front of the Snowpeak Ruins
At the end of the descent you end up in front of a huge, half-ruined mansion: the Snowpeak Ruins. Don’t enter the building yet. The fourth currently accessible Poe Soul of the Schneeberge is located on the snowy area in front of the entrance.
Transform into Wolf-Link and go back into the snow from the entrance stairs. To the side, a narrow, spiraling snow path leads to an elevated area. Follow him all the way to the top. A ghost floats there at night.
Activate your sense, defeat him and snatch the fourth Poe Soul of the Snowpeak from him. We have now collected all the ghosts that can be reasonably reached before entering the Snowpeak Ruins.
Not yet available: Another Poe Soul is in the cave at the Snowpeak behind solid ice. For this we need the Ball and Chain, which the link only receives in the Snowpeak Ruins. Immediately after completing the dungeon, we return via the Snowpeak Warp and pick up this soul without much of a detour.


Snowpeak completed – move on to Snowpeak Ruins
This completes our first climb through the Snowpeak. On the way to the first mirror shard, we received Ashei’s drawing, mounted Prince Ralis’ Coral Earring on our fishing rod and found a scent trail with the Reekfish that led us safely through the snowstorm. At the same time, we collected all four currently accessible Poe Souls in the mountains and learned the Jump Strike using the howling stone.
The larger optional improvements before the actual climb are also taken care of: With the Spinner we were able to achieve new Pieces of Heart, another Piece of Heart and a bottle were waiting at the fishing pond, Iza’s canoe adventure brought us the Giant Bomb Bag and Jovani rewarded at least 20 Poe Souls with another bottle including Great Fairy’s Tears. This means we are excellently prepared for the upcoming dungeon.
Yeto has actually found one of the three missing mirror shards and is keeping it in his home. What initially sounds like a surprisingly simple task turns out to be significantly more complicated as soon as you enter the old manor house. Our Twilight Princess Walkthrough continues with the Snowpeak Ruins, the fifth major dungeon of the game.