

Cross Hyrule Field to Eldin Province, restore the bridge in Kakariko Gorge and enter Kakariko Village as Wolf Link. Collect the Tears of Light, then return to Ordon to learn sumo wrestling and obtain the Iron Boots.
Game version: The route and screenshots follow the GameCube version. The normal mode of Twilight Princess HD has the same orientation; on Wii and in HD Hero Mode, left/right and east/west are swapped. HD deviations are at the affected step.
Kakariko, Eldin and the path to Death Mountain
After defeating Diababa in the Forest Temple, Midna possesses the first fragment of the Fused Shadow. Faron is freed from the twilight, but further north the next province is already in complete darkness. Link therefore makes his way to Kakariko, where, according to the light spirit’s instructions, the children kidnapped from Ordon are also supposed to be.
This stage is much more extensive than it initially seems. We cross a larger part of the Hyrule Field for the first time, collect the first Golden Bugs, get another Piece of Heart and then enter Eldin’s Shadow Realm. In Kakariko and Death Mountain, a total of 16 shadow beetles must be eliminated on GameCube before Eldin’s light returns.
Afterwards we return to Ordon, learn the second Hidden Skill, receive the Iron Boots from Mayor Bo, get another Piece of Heart from the pasture and ride back to Kakariko. There, King Bulblin kidnaps Colin and forces Link to fight his first big battle on Epona. Only then do we clear Kakariko completely, get the Hylian Shield and two more Golden Bugs and finally head to the entrance to the Goron Mines.
Requirements and current score
This chapter follows directly on from our solution to the Forest Temple. Link should have the Ordon Sword, Ordon Shield, Slingshot, Lamp, and at least two bottles. In the Forest Temple we also received the Gale Boomerang and learned the first Hidden Skill, the Ending Blow.
If you followed our 100% route, Link also already has three Pieces of Heart at the start of this chapter. The Gale Boomerang is now particularly important because immediately after leaving the forest we reach another Piece of Heart and the first two Golden Bugs.
You can also find the complete collection overviews on our pages for the Pieces of Heart and Golden Bugs.
From Faron to the Hyrule Field
After the Forest Temple, leave the Faron Woods via the now opened gate behind Coro’s campsite. For the first time, Link reaches a larger, connected section of the Hyrule Field. The actual story path leads to the dark wall of twilight on the opposite edge of the area, but before that we pick up three permanently important collectibles.
Piece of Heart 4 – in the tree in front of the bridge
From the entrance, first follow the clearly visible dirt path towards the bridge. Shortly before you reach it, there is a large tree on the side of the path. Look up into its branches. A Piece of Heart is clearly visible there.
It can’t be reached with normal jumps, but that’s exactly why we got the Gale Boomerang in the Forest Temple. Target the Piece of Heart and throw the Boomerang. The wind pulls it out of the tree and brings it straight to Link.
Piece of Heart 4
This means that only one more Piece of Heart is missing for the first additional Heart Container. Twilight Princess has a total of 45 Pieces of Heart; Five of them each make a complete additional heart. You can find all Locations in our overview of the Pieces of Heart.
Golden Bug – Male Beetle
Return a bit towards the forest entrance and leave the main path into the open part of the plain. You can see a clear golden glow on one of the free-standing trees. Approach carefully and collect the male beetle.
Golden Bugs also produce a characteristic sound. If you don’t immediately recognize the animal between the grass and the tree trunk, pay attention to the golden sparkle and the sound.
Golden Bug – Female Beetle
The female counterpart is further on the edge of the same area. Follow the path towards the raised group of trees and look up at the tree trunks from the lower level. The female beetle insect sits on a tree that Link cannot reach directly.
Target the animal with the Gale Boomerang. The wind loosens it from the tree and pulls it towards Link.
Golden Bugs 2/24
In Twilight Princess there are twelve species of insects, each with a male and a female specimen. There are therefore 24 Golden Bugs in total. Later they can be exchanged with Agitha in Castle Town for Rupees and wallet upgrades. You can find all Locations under Golden Bugs.
The first letter from the postman
Continue your journey towards the Twilight. On the Hyrule Field, Link is suddenly intercepted by the postman. He explains the postal system to you and hands over the first letter.
As the story progresses, the postman appears again and again at fixed points. The letters sometimes contain references to new businesses, Side Quests or people that Link should visit. It is therefore worthwhile to read newly received letters at least once.


Eldin in the twilight – the trail of the children
Enter the black wall at the edge of the Hyrule Field. Midna pulls Link into the Shadow Realm again and he automatically transforms into Wolf-Link.
Follow the path for a short distance. On the ground lies the Wooden Sword, which Link had previously given to Talo. Activate your sense and sniff it. Wolf-Link picks up the scent of the kidnapped children.
With activated sense, a clear scent trail appears from now on. Follow her through the dark landscape.
The missing bridge in Kakariko Valley
After a short time, three creatures of darkness stand in the way. First defeat one enemy individually and then capture the remaining two at the same time with Midna’s energy field. Once all three are destroyed, a new warp portal will be created.
The rest of the path ends immediately afterwards at a huge gorge. The large wooden bridge that was supposed to connect both sides of the Kakariko Valley was completely ripped out.
Midna remembers that we have already seen a suitable bridge in Faron Woods. Open the map and warp to the portal in the northern Faron Woods as a wolf.
The huge bridge section is located directly in the area. Approach him and talk to Midna. It lifts the entire structure. Then select the portal in Kakariko Valley. The bridge is transported there and placed back in its original position.
Also return to Kakariko Valley and cross the restored bridge.
Under the gate
Follow the smell of the children again. At the end of the valley, a locked wooden gate blocks access to the next region. However, as Wolf-Link we do not need a key.
Activate sense and examine the ground next to the gate. In one place the earth is loose. Dig under and defeat the waiting Bokoblins on the other side.
A few steps later, Wolf-Link finally reaches Kakariko.


Kakariko in the Shadow Realm
When entering Kakariko, three creatures of darkness appear again. Destroy this group too and use Midna’s energy field on the last two opponents so that none of the creatures can revive their fellows. After the fight, another warp portal will appear above the village.
Then go to the nearby spring. The light spirit Eldin reports there. Like Faron, he was robbed of his power by the Shadow Beasts. Eldin gives Wolf-Link another Vessel of Light and marks the region’s Shadow Beetles on the map.
Version difference for Tears of Light:
On GameCube and Wii are located in Eldin as a whole 16 shadow beetles. In Twilight Princess HD This search was shortened to 12 necessary Tears of Light drops. The following route completely describes the GameCube version.


The 16 Tears of Light drops in Kakariko and at Death Mountain
Twilight Princess HD: Twelve Tears of Light drops are required here, sixteen on GameCube and Wii. The following numbers describe the original route. In HD, use the bug markers on your map and the Vessel of Light counter; There are no additional beetles hidden in the omitted original locations.
The first large group of shadow beetles is hiding right in Kakariko. Some animals sit freely on walls or in the floor, others are hidden in houses, chimneys and storage buildings. Therefore, activate the sense regularly throughout the entire search.
Tears of Light 1 to 3 – under the sanctuary
The children’s scent trail leads to the sanctuary near Eldin’s spring. The normal door is locked. Therefore, go along the outside wall and look for the place where Midna appears. Use her jump aid to get to the roof.
In the middle of the roof there is a circular area of straw. Put Wolf Link on it. The structure collapses and you fall directly into the building.
Activate the sense. Link now sees Renado, his daughter Luda, Barnes as well as Colin, Talo, Malo and Beth. Listen to the conversation. Renado mentions a hidden cellar beneath the building.
After the scene, take one of the wooden sticks and light it on the existing fire. Run around the room with the burning stick and light all the candlesticks around the central statue. Once all the flames are burning, the statue will move and reveal a shaft.
Jump down and activate the sense. There are three shadow beetles in the basement. Defeat all three and collect Tears of Light 1, 2 and 3.
Since the original path up is no longer accessible, you follow the cellar to the wooden scaffolding. Climb up and use Midna’s jump aid. This takes Wolf-Link directly to the cemetery.
Tears of Light 4 – Cemetery
In the cemetery, activate the sense and follow the marker on the map. The next shadow beetle has burrowed into the ground. Pick him out and attack immediately before he runs away again.
After his death you will receive Tears of Light 4. Then leave the cemetery again towards Kakariko.
Tears of Light 5 – Abandoned Shop
Back in the village, go to the abandoned building near the path from the cemetery. There is a low opening on the side of the house. First, eliminate the Shadow Kargarok in the area and then crawl inside.
Wolf-Link ends up behind the counter of an abandoned shop. Climb up the shelves and activate the sense. The next shadow beetle sits in one of the upper corners.
Defeat him and collect Tears of Light 5. Then leave the building again through the same opening.
Tears of Light 6 and 7 – Eldin Inn
Climb the village’s elevated path. At one point a sign warns of an abyss. Anyway, jump over the gap and enter the large inn.
Inside, drop down to the lower level. The sixth shadow beetle is located above or inside the chimney. Take a wooden stick, jump to the burning torch and light it. Then hold the stick to the fireplace.
The shadow beetle escapes. Defeat him and collect Tears of Light 6.
Then go through the adjacent door. Eliminate the Bokoblins and, if necessary, take the Rupees from the Treasure Chest. Climb the stairs and platforms to the upper part of the building. With activated sense you can recognize the next beetle on the wall. Defeat him for Tears of Light 7.
Then return to the main room, climb back up and leave the inn via the upper exit.


Tears of Light 8 – House with the damaged roof
Leave the inn via the balcony and jump onto the buildings opposite. Start with the low house and work your way across several roofs. One of the roofs has been visibly repaired and is significantly weaker than the others.
Stand on the damaged area. The roof collapses and Wolf-Link falls into the building.
Activate your instinct and move or push the small box to the side. A shadow beetle is hiding underneath. Defeat him and collect Tears of Light 8.
Then call Midna and jump over the furniture back to the roof.
Tears of Light 9 – Barnes Bomb Shop
Jump back to the street and go to Burn’s bomb shop. There is a small shed next to the large building. Climb it and jump through the window to the upper part of the shop.
Climb the stairs and activate the sense. The shadow beetle is behind a shelf. As a wolf, run hard against it so that the piece of furniture falls over.
Defeat the exposed insect and collect Tears of Light 9. Climb over the fallen shelf and exit the store through the upper exit.
Tears of Light 10 to 12 – exploding bomb cache
From Burn’s bomb shop you can reach the elevated village area. There you see a shadow beetle that disappears into a small storage building. Look for the low opening on the outside wall and crawl inside.
There are three shadow beetles hiding in the building. As before in the inn, they sit near the fireplace. Take the wooden stick, light it and set the fireplace on fire.
This time, however, it’s not just the shadow beetle that reacts: the entire bomb cache begins to burn.
Do not try to control the insects in the building. Leave the camp immediately through the opening before Wolf-Link takes any damage. A few moments later the entire building explodes.
There are three drops of light between the rubble. Collect Tears of Light 10, 11 and 12.
Strahltau 13 – tallest building in Kakariko
Now go to the highest point of the village. Follow the narrow paths and platforms further uphill until you reach the free-standing building at the top.
Activate the sense. On one side of the house, Wolf-Link recognizes a place where he can dig under the wall.
Inside you destroy the barrels or boxes in a corner. The next shadow beetle sits behind it. Defeat him and collect Tears of Light 13.
Then dig your way back out the same way.


The last three drops of Tears of Light on Death Mountain
In the village itself, all the shadow beetles have now been killed. On the GameCube version there are still three copies missing that are hiding on Death Mountain.
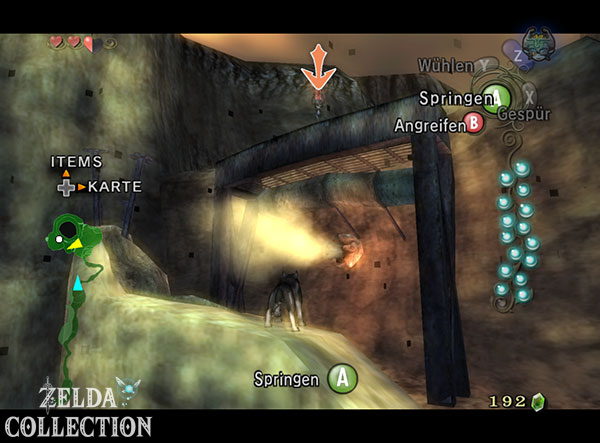
Take the northern exit out of Kakariko and head to the steep mountain path. Wolf-Link cannot climb the wall normally. So use the low ledges and Midna’s jumping aid to get up.
Tears of Light 14 – between the hot gas fountains
Follow the mountain path until you reach a section with hot gas fountains. The escaping fumes cause damage and can knock Wolf-Link back. Therefore, wait until a fountain stops briefly and then walk past it.
Activate the sense. The 14th Shadow Beetle is in this area and will burrow into the ground as you approach.
Pick out the insect and defeat it for Tears of Light 14.
Howling stone at Death Mountain
Directly near the 14th Shadow Beetle is the first Howling Stone of the game. Examine it and listen to the given melody. Then you have to recreate the high, medium and low tones with Wolf Link’s howl.
After a successful replay, Wolf-Link is transported to a mysterious place and encounters the golden wolf again. Repeat the melody there one more time. The wolf then marks a meeting point at the Ordon spring.
Once Link regains his human form, we can learn the second Hidden Skill there.
Four creatures of darkness
Follow the winding mountain path further up. For the first time, four creatures of darkness attack simultaneously on a larger plateau.
One of the creatures is separated from the others by a barrier or the shape of the terrain. Defeat this Shadow Beast one at a time first.
Then position yourself between the three remaining opponents so that they are all in Midna’s energy field at the same time. Release the attack and destroy the group together. This creates another warp portal on Death Mountain.
Strahltau 15 – at the large gate
After the fight, go to the large gate or the rock barrier at the edge of the plateau and activate the sense. The next shadow beetle sits on the construction.
Run hard against the gate as a wolf. The insect detaches itself and flies down. Pursue it and defeat it for Tears of Light 15.
Tears of Light 16 – at the hot spring
There is a small ledge right next to the gate. Stand on it and use Midna’s jump aid to reach the higher area of the Death Mountain.
Follow the narrow path and cross the sections with the gas fountains whenever the steam briefly subsides. At the end you reach a much higher area with a hot spring.
First defeat the smaller Shadow Beasts and then activate the sense. Here you will find the 16th Shadow Beetle.
After his death, you absorb the last drop of Tears of Light. The Vessel of Light is completely filled and Link is automatically returned to Eldin.
The light spirit regains its power and the twilight disappears from the entire province. Link returns to his human form. Eldin also explains that the next piece of the Fused Shadow is with the Gorons.




Kakariko after the return of the light
Back in bright Kakariko, Link finally meets Renado, Luda and the four kidnapped children Colin, Talo, Malo and Beth in person. They survived the attack and are currently safe in the sanctuary. However, Ilia is still not with them.
Renado also reports a new problem. The Gorons of Death Mountain have severed their ties with humans and no longer allow anyone into their mine. Since Eldin says that’s where the next Fused Shadow is, we need to find a way to overcome their blockage.
First attempt at Death Mountain
Leave Kakariko via the Death Mountain entrance and climb the first steep wall. A Goron immediately confronts Link at the top.
The Goron rolls towards you at high speed. Even though a grab action appears, Link doesn’t yet have enough weight to stop him. Each attempt ends with the Goron throwing him back.
There is no way to move forward at this point. Therefore, return to Kakariko.
Renado is already waiting for Link. He explains that the Gorons only respect physical strength and that he knows a person who used to be able to stand up to them: Mayor Bo of Ordon.
Recover Epona
Even before Link can leave for Ordon, Epona suddenly races through Kakariko. The horse is completely out of control.
Link automatically jumps onto her back. Now follow the directions shown and pull the reins in the opposite direction to Epona’s movement. React quickly if she swerves left or right.
After several successful corrections, Epona rears up. Complete the final action in time. Link calms his horse and gets Epona back permanently.
From now on we can traverse large parts of the Hyrule Field much more quickly. In addition, low obstacles and gates can be jumped over with sufficient running.


Kakariko Valley – Golden Bugs and Piece of Heart 5
The next main target is Ordon Village. Since we are crossing the Kakariko Valley on the way anyway, we take three more collectibles with us there.
Golden Bug – Male Woodlouse
Ride from Kakariko towards the restored wooden bridge. Cross it and descend from Epona immediately afterwards. It crawls on the edge between the grassy area and the bridge male woodlice across the floor.
In daylight, the small animal can easily be overlooked. Therefore, pay particular attention to its golden sparkle and the typical sound of the Golden Bugs.
Golden Bug – Female Woodlouse
For the female specimen, look for the part of the Kakariko Valley with three trees close together and tall grass. The female woodlice is located within or immediately next to this group of trees.
Cut away the tall grass with the sword if you cannot immediately recognize the animal. Approach and collect it.
Piece of Heart 5 – on the high rock pillar
In the Kakariko Valley, several massive rock formations jut out of the gorge. A Piece of Heart is clearly visible on the top of the larger rock pillar.
You don’t have to look for a way up. Place Link at the edge of the ravine until the Piece of Heart can be targeted with the Gale Boomerang. The Boomerang goes straight to you.
Piece of Heart 5
With this find, Link owns a total of five Pieces of Heart. They automatically connect to a complete additional Heart Container.
Second Hidden Skill – Shield Attack
Ride on to Ordon. Because we previously activated the Howling Stone on Death Mountain, the golden wolf is now waiting at the Ordon Source.
Get off Epona and approach the animal. Link is once again transferred to the old warrior.
First you have to prove that you can continue to master the catching kick you learned in the last chapter. Knock the warrior down and perform the technique.
He then teaches Link the second Hidden Skill: the Shield Attack.
Aim at the opponent and push the shield forward powerfully at the right moment. The attack unbalances many enemies and opens their defenses for a direct sword attack. It can also be used to repel certain projectiles.
New Hidden Skill: Shield Attack
The shield attack is the second of the seven Hidden Skills. It not only serves as an independent attack, but also forms the basis for other sword techniques later on.


Mayor Bo and sumo wrestling
Ride to Ordon and visit Mayor Bo at the southern end of the village. Link tells him that the kidnapped children are safe in Kakariko, but Ilia is still missing. The conversation then turns to the Gorons.
Bo reveals that he has faced Gorons himself in the past and was able to overcome their enormous power. However, he doesn’t want to simply explain his secret to Link. First, Link must learn to compete in traditional sumo wrestling.
The basics of sumo wrestling
There are three actions available in the ring behind Bo’s house. You can grab the opponent and push them back, hit them with the palm of your hand or dodge sideways.
The mechanics work similarly to a simple rock-paper-scissors system. If Bo avoids a grab, you can hit him with one punch. If he grabs Link himself, you dodge to the side and then grab him immediately. After every successful counterattack, you should follow up as quickly as possible and push Bo towards the edge of the ring.
The first round is mainly an introduction. The second is a little more difficult, but works on the same principle. Try to keep as much space behind Link as possible while pushing Bo closer and closer to the edge.
The Iron Boots
After Link pushes Mayor Bo out of the ring twice, he reveals his secret. Open the Treasure Chest in the training area.
Inside are the Iron Boots.
New equipment: Iron Boots
The Iron Boots increase Link’s weight enormously. This allows him to hold onto rolling Gorons, resist strong wind currents, and walk on magnetic surfaces. These features are among the most important mechanics of the upcoming Goron Mines.
Piece of Heart 6 – Goat herding on the Ordon pasture
Before we start the long way back to Kakariko, we ride again to the Ordon pasture. Talk to Fado there. If he only talks about the rescued children at first, talk to him a second time while sitting on Epona.
He asks Link again to drive the goats into the stable. This time the total number of is 20 goats and the task must be completed within three minutes.
Don’t just ride through the herd. Work from the outside in and position Epona so that several goats are walking towards the stable entrance at the same time. Use the call especially when the animals are already looking roughly in the right direction.
If you manage to get all 20 goats on time, Link will receive another Piece of Heart as a reward.
Piece of Heart 6
This Piece of Heart is optional, but is directly on our current route and should therefore be taken with us now.


Return to Kakariko
Get back on Epona and ride across the Hyrule Field and Kakariko Valley back to Kakariko. Since Link cannot travel through Midna’s portals in human form, the route is entirely overland.
Shortly after returning to the village, a cutscene will begin. King Bulblin and his riders charge through Kakariko. When Beth freezes in fear, Colin throws himself protectively in front of her and is kidnapped by King Bulblin.
Immediately jump onto Epona and give chase.
Miniboss: King Bulblin
The chase takes Link through the Hyrule Field. King Bulblin sits on a huge Bullbo and keeps calling for more Bulblin riders. Many of them shoot Link with bows.
You don’t have to defeat every little enemy. Focus on King Bulblin and use Epona’s Acceleration to catch up to him. Don’t try to ride exclusively directly behind him. Cut his curves and approach from the side so you can land multiple sword hits in a row.
After enough hits, King Bulblin retreats to the bridge of Eldin.
Duel on the Bridge of Eldin
On the bridge the fight becomes a direct cavalry duel. King Bulblin races head-on at Link with his lance raised. Also ride towards him at full speed, but initially stay on one side of the bridge.
Shortly before the collision, you move to the other side and strike with your sword as you ride past. Epona and King Bulblin’s Bullbo turn automatically at the other end.
Repeat the process a second time.
After two successful hits, King Bulblin loses his balance and falls off the bridge with his mount. Link rescues Colin and brings him back to Kakariko.


Fully Explore Kakariko
After Colin’s rescue, we can finally take our time and take care of the optional content that is still available in Kakariko. This round is particularly worthwhile because the Death Mountain and the Goron Mines contain several fire hazards. There are also two more Golden Bugs waiting.
Golden Bug – Male Ant in Cemetery
Go to Kakariko Cemetery. Run to the back area with the trees. At the foot of a tree, the male ant crawls across the ground.
If you miss it between the grass and stones, pay attention to the golden glow. The Gale Boomerang can also easily pull the insect to Link.
In the cemetery you can also examine two movable gravestones. Behind or below one of them is a yellow Rupee. In the same area, a beehive hangs in a tree. If you want, you can take it down with a slingshot and then pick up bee larvae with an empty bottle. They later serve as bait when fishing; You can find further information in our guide Fish & Bait.
Purple Rupee in the cemetery
Below the trees there are two extinguished torches. Light them both with the lamp. A Treasure Chest then appears.
Open it and take the purple Rupee with you. This reward is very helpful, especially if you still don’t have enough money for the Hylian Shield.
The Hylian Shield in the Malo store
Return to the village and enter Malo’s newly opened shop. Among other things, the Hylian Shield is offered there for 200 Rupees.
If you own the 200 Rupees, you should definitely buy the shield now. The previous Ordon shield is made of wood and can burn completely if it comes into contact with fire. The Goron Mines contains numerous fire attacks and lava fields, so a metal shield is significantly safer.
New equipment: Hylian Shield
The Hylian Shield is fireproof and cannot burn. It remains Link’s best normal shield for much of the game and is a particularly worthwhile investment before the Goron Mines.
Golden Bug – Female Ant
Leave Malo’s shop and go to the row of abandoned houses in the village. Several buildings are barricaded, but Link can enter one of them.
Inside, the female ant crawls through the middle of the room. Collect them.
We now have the complete pair of ants.


With the iron boots on the mountain of fire
Now all currently useful tasks have been completed. Leave Kakariko again via the northern path to Death Mountain and climb up the first steep section.
The Goron, who easily knocked Link back on the first attempt, rolls towards you again. This time, put on the Iron Boots in time.
As soon as the grab action appears, grab the Goron. The additional weight means Link remains firmly on the ground and can throw the rolling opponent to the side.
Then take the Iron Boots off again so that Link can move normally. As you continue your climb you will encounter several more Gorons. For rolling attacks, equip the Iron Boots and throw it out of the way.
Use Gorons as a jumping platform
Further up, the Gorons change their attack tactics. Defeat one of the standing fighters with a few sword hits or block his attacks until he curls up into a ball.
Then jump onto his back. As soon as the Goron gets back up, he throws Link high into the air. This way you reach the next level of the mountain.
Repeat this principle on the following Gorons. If there is strong gas or wind fountains, briefly pull on the Iron Boots so that Link is not blown off the narrow path.
At the upper end of the Death Mountain you finally reach the cave of the Gorons.
Sumo wrestling against Gor Coron
Inside, Link faces the Goron Elder Gor Coron. He is willing to let Link through to the mine – but only if he can prove his strength.
The first attempt at sumo is hopeless. Gor Coron is significantly heavier than Link and immediately pushes him out of the ring.
So put on the Iron Boots and challenge him again.
The rules correspond to the training with Mayor Bo. Use holds, punches and side steps. It is particularly effective to attack immediately after a successful evasive maneuver and to push Gor Coron to the edge little by little.
After Link’s victory, the Elder accepts his strength and opens the entrance to the Goron Mines. At the same time, we learn that the Goron patriarch Darbus has been changed by a dark force and is trapped deep in the mine.
Continue to Goron Mines
Link has restored Eldin’s light, reclaimed Epona, and unlocked the next major portion Hyrule’s. On our 100% route we also collected several Golden Bugs, three more Pieces of Heart, the second Hidden Skill, the Iron Boots and the fireproof Hylian Shield.
This means we are optimally prepared for the second big dungeon. In the Goron Mines the Iron Boots are used intensively for the first time: Link runs on magnetic walls and ceilings, frees the Goron elders, receives the Hero’s Bow and collects more Pieces of Heart. At the end, Darbus, another resident Hyrule’s, who was transformed by the power of the Fused Shadow, is waiting.
We continue in our Twilight Princess Walkthrough with the complete 100% solution of the Goron Mines.
With the iron boots back to Death Mountain
Get the shield attack at Ordon Spring if you have activated the Howling Stone at Death Mountain. At Fado, drive the 20 goats for the Piece of Heart into the stable in time. Then bring Epona and the Iron Boots back to Kakariko; The boots make the difference when intercepting the Gorons and in sumo duels.