

Climb Death Mountain with the Iron Boots and defeat Gor Coron at sumo wrestling. In Goron Mines, collect the three Key Shards, obtain the Hero’s Bow and defeat Fyrus.
Game version: The route and screenshots follow the GameCube version. The normal mode of Twilight Princess HD has the same orientation; on Wii and in HD Hero Mode, left/right and east/west are swapped. HD deviations are at the affected step.
Death Mountain and Goron Mines – the second major dungeon
After link in Kakariko Eldin’s light restored, Epona reclaimed and by Mayor Bo the Iron Boots received, we can finally face the mountain of fire again. The Gorons have so far repelled every human, but with the heavy boots, Link can now intercept their rolling attacks and fight his way to the mountain people’s homeland.
There we learn more about the fate of their leader Darbus. After a Fused Shadow appeared on Death Mountain, Darbus was overwhelmed by its power and transformed into a massive beast. The Goron Elders were forced to imprison their own leader deep within the mine and split the key to his chamber into three fragments. We have to put these three fragments back together on our way through the Goron Mines.
The Mine is the second major dungeon of Twilight Princess and also introduces one of the game’s most unusual mechanics. In addition to increasing his weight, the Iron Boots allow Link to walk on magnetic walls and even ceilings. In addition, with the Hero’s Bow we get one of the most important long-range weapons of the entire adventure. On our 100% route we also take both Pieces of Heart of the dungeon, the Dungeon Map, the Compass, Ooccoo and all three key fragments directly with us.
Requirements and current score
This chapter follows directly from our Kakariko Walkthrough. Link should have the Ordon sword, if possible the fireproof Hylian Shield, the Gale Boomerang, the lamp, at least two bottles and especially the Iron Boots. We have also already learned the catch kick and the shield attack as the first two Hidden Skills.
The Hylian Shield is not absolutely necessary, but highly recommended for the Death Mountain and the mine. The Bulblins on the mountain shoot Fire Arrows and there are also numerous fire opponents waiting inside the mine. The wooden Ordon shield can burn from such hits, while the Hylian Shield remains permanently protected.
The Death Mountain – with the iron boots upwards
Leave Kakariko via the northern entrance to Death Mountain and climb the first steep section. Already waiting on the next level is the same Goron who effortlessly threw Link back during the previous visit. This time we are prepared.
As soon as the Goron rolls up and rushes towards Link, put on the Iron Boots. Wait until the grapple action appears, grab the enemy and hold them. The extra weight allows Link to withstand the impact and then throw the Goron to the side.
Then immediately take off the Iron Boots. Although they make Link heavy, they significantly reduce his mobility. Therefore, only use it if a Goron is rolling towards you or the environment specifically requires additional weight.
Bulblin archers on the mountain trail
Follow the path uphill. On the way you will be shot at with fire arrows by several Bulblins. With the Hylian Shield you can safely fend off their projectiles. If you still have the Ordon Shield, you should avoid the arrows instead because the wooden shield can catch fire and be completely destroyed.
Hawkgrass grows in some places. Whistle on it to call the hawk. You can send it specifically to distant Bulblin archers, making further ascent much safer.
Use Gorons as a catapult
Further up you watch as a Goron throws another onto a higher platform. We have to use exactly the same technology.
Attack a standing Goron a few times with the sword or use the previously learned Shield Attack. After enough hits it contracts into a ball.
Jump onto his back and stand in the middle of the curled up figure. A few moments later, the Goron suddenly stands up and catapults Link to the next level.
This principle is repeated several times throughout the climb. Whenever a platform appears to be too high, look for a Goron, make him curl up, and use him as a jumping platform.
Stone hail and hot geysers
The higher Link gets, the more dangerous the environment becomes. Large boulders regularly rain down from the mountain. Don’t stay unnecessarily long in open areas and move from cover to cover.
As soon as you notice steaming cracks in the floor or on the walls, you should have the Iron Boots ready. Strong geysers erupt from these cracks, which can otherwise throw Link off the narrow platforms.
Put on the Iron Boots, wait for the gas surge and then slowly walk through the dangerous area. As soon as you have solid ground under your feet again, take your boots off again.


Sumo wrestling against Gor Coron
At the summit, Link enters the large Goron hall. There he is surrounded by several Gorons, but their deputy leader Gor Coron realizes that Link has not taken the dangerous path without reason.
Gor Coron reports on Darbus’s fate. Their leader was changed by the power of the Fused Shadow and had to be trapped in the mine by the elders. Still, Gor Coron doesn’t just let Link pass. First he has to prove that he is physically equal to the Gorons.
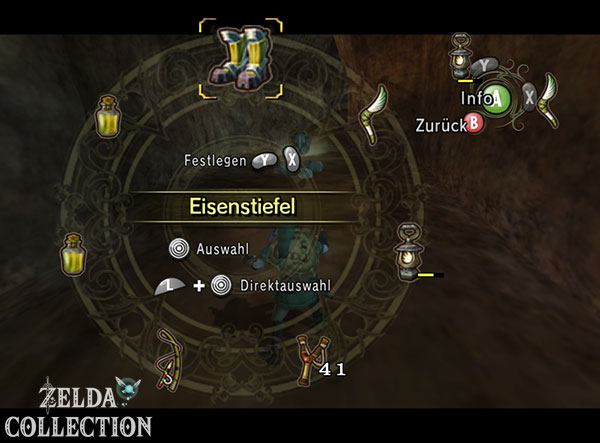
The same rules apply to sumo wrestling as to training with Mayor Bo. However, Gor Coron is far too heavy without additional help. Therefore, put on the Iron Boots before the start or immediately at the start of the fight.
Dodge his attacks sideways as he grabs Link, then grab it yourself right after. If Gor Coron tries to avoid it, you can knock him out of rhythm with one hit. Push him step by step towards the edge of the ring.
If you have pushed Gor Coron out of the circle, he will accept Link’s strength and open access to the mine.
Shortcut between Kakariko and the Gorons
Before you enter the mine, you should unlock the shortcut in the Goron Sanctuary. Try to leave the area via the corresponding exit or talk to the Goron at the elevator.
The elevator connects the upper areas of Death Mountain to a lower level, making subsequent visits much easier.
Afterwards you enter the second major dungeon of the game: the Goron Mines.
Goron Mines – through the first lava fields
The first room immediately makes it clear what dangers await us. Large parts of the ground are made of lava, fire fountains block narrow paths and heavy metal structures react to the Iron Boots.
First, jump across the safe platforms of the lava pool. Watch out for the lava fountains that regularly erupt and only move forward when they have disappeared back into the ground.
At the far end of the first section, a simple wooden wall blocks the path. Smash them with the sword.
The timed fire jets
A few steps later, a large jet of fire blocks the passage. There is a Floor Switch nearby. Put on the Iron Boots and stand on it. Only the additional weight pushes the mechanism completely down.
This only switches off the fire jet temporarily. Take off your boots again and walk quickly through the passage.
Shortly afterwards you reach a second switch. Activate him too with the iron boots. Instead of just continuing straight ahead, follow the path behind the gate to the higher level and climb the ladder.
From there you get to the other side of the firing mechanism.
With the magnetic plate to the door
First eliminate the fire enemies in the next area. Then stand on the Floor Switch with the iron boots and watch as the fire beam temporarily goes out.
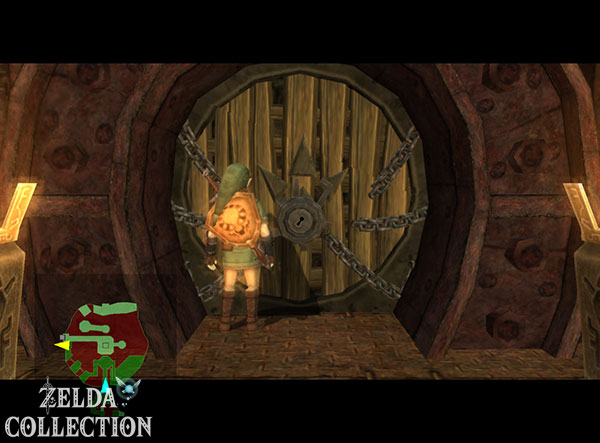
Run immediately and cross the now safe section. At the end there is a large metal plate sticking out of the wall.
Put on the Iron Boots and step on the magnetic surface. Link sticks to it and can move the plate down or into the correct position. This clears the way to the next door.


Small Key 1: Search the Outdoor Area
mine
Behind the door you will reach an open area of the Goron Mines for the first time. Follow the path first up and then down to the lower platform.
Two Bulblins are waiting there. Defeat both and then examine the nearby Treasure Chest.
Inside is the first Small Key.
Go to the locked door with the key. On the way you have to cross several rotating platforms. Watch their movements and only jump when there is a safe surface facing Left’s direction. A fall leads directly into the lava and costs health accordingly.
Through the room of the fire lizards
There are several fire lizards waiting in the next room. Their bodies are largely protected, but the tail remains vulnerable. Target an enemy, dodge their attacks and move sideways behind them. A few quick sword hits are enough.
Then jump from platform to platform through the lava room. Wait for a short break at each lava fountain.
At the end of the room there is a massive chain hanging on a heavy wall. Put on the Iron Boots, grab the chain and walk backwards. Link’s additional weight allows the construction to be slowly pulled out of the wall.
Pull it out as far as possible. Let go of the chain, immediately pull out the Iron Boots and run through the opened lock before the wall slides back again.
Under water and on the magnetic ceiling
Behind the next door you come to an unusually cool area with a deep pool of water.
Jump in and put on the Iron Boots underwater. Link sinks to the bottom and can walk normally there.
Look for the opening at the bottom of the grate and go through it. On the other side is a heavy Floor Switch. Stand on it with your iron boots on.
A huge magnet then activates over Link and pulls him and his iron boots to the ceiling.
Run headfirst across the magnetic surface to the door.
Gor Amoto – first key fragment and Dungeon Map
If you have already picked up Ooccoo’s first letter after the Forest Temple, use it here once to leave the mine and return with Ooccoo. After the dungeon, your second message can then be delivered. If you haven’t received your first letter yet, first clarify the conditions in the letter overview.
The first Goron Elder is waiting in the next room: Gor Amoto. He explains to Link that the Gorons have trapped their transformed leader Darbus deep in the mine. The key to the chamber has been divided into three fragments so that no one can accidentally free the beast.
However, Gor Amoto recognizes Link’s intention and gives him the first key fragment.
Key Fragment 1/3
The Goron Mines does not have a normal Big Key in a single Treasure Chest. Instead, the three fragments of Gor Amoto, Gor Ebizo and Gor Liggs must be collected. Once all three parts are in place, they automatically assemble into the Big Key.
Then open the large Treasure Chest in the back of the room. Inside lies the Dungeon Map of the Goron Mines.
Afterwards, climb the ladder to the upper level. In one of the jars you will find Ooccoo. As in the Forest Temple, she can take Link out of the dungeon and then back to the same point.


Piece of Heart 7 – on the magnetic ceiling
Leave Gor Amoto’s room via the upper door. You are now on the upper level of the water room.
Put on the Iron Boots and enter the magnetic wall. Link can walk along it and reach the next passage.
In the following large room there is another heavy Floor Switch. Stand on it. The magnet above the room activates, pulling Link to the ceiling.
Here the actual main path leads to a distant door. For the 100% route we first take the branch to the isolated platform. With your iron boots on, walk across the magnetic ceiling to the appropriate corner of the room.
If you stand directly above the small platform with the Treasure Chest, you pull out the Iron Boots.
Link falls down and lands next to the chest.
Open it and take Piece of Heart 7.
Piece of Heart 7
This is the first of two Pieces of Heart within the Goron Mines. Both can be collected on the first complete run. You can also find all the Pieces of Heart of the game on our page Pieces of Heart.
Then activate the magnet again and follow the magnetic blanket to the actual exit. You can easily recognize the door by the two torches below the corresponding section.
Large outdoor area with bulblins
Behind the door opens one of the largest rooms in the Goron Mines. Several Bulblin Archers stand on raised wooden platforms and fire at Link from a distance.
At the moment we don’t have a suitable ranged attack for the distant shooters. Therefore, move from cover to cover and initially only defeat the enemies that block the direct path.
Climb on the heavy Floor Switch and use the iron boots to activate the first magnetic crane. Then jump onto the platform provided or into the magnetic beam. With his iron boots on, Link is pulled up and transported across the room.
Small Key 2 – underwater
Several Arachnos or water enemies are waiting in the adjacent water area. Eliminate them and then jump into the pool.
Pull on the Iron Boots and sink to the bottom.
There is a Treasure Chest with the second Small Key.
Stay underwater at first. A large block can be moved nearby. Push it to the side so that the opening behind the grille becomes clear.
Go through, take out the Iron Boots and resurface.
Via the magnets to the upper platform
On land you will find another heavy Floor Switch. Put on the Iron Boots and activate it. The magnet pulls Link to the ceiling again.
Walk across the magnetic surface until you reach another switch. This activates the next magnet.
Jump into the magnetic beam with your iron boots on. Once Link is hanging on the wall, run to the end of the magnetic surface and drop down to the platform below.
Open the Treasure Chest there and then activate the Crystal Switch. The mechanism opens a temporary passage.
Immediately jump off the platform, run through the opening and pass the door before the mechanism springs back again.


Piece of Heart 8 – above the bulblin area
In the next large room there are again numerous Bulblins. You can eliminate them, but you don’t have to reach every single enemy at the moment.
Instead, find the magnetic wall at the edge of the room. Put on the Iron Boots and run upstairs.
On the upper level you continue to follow the narrow ledge. Watch out for enemies who can knock Link off the wall.
A rope or a structure blocks the way at the appropriate point. Break the rope and follow the ledge further down to the isolated platform.
There is a large Treasure Chest.
Open it and take Piece of Heart 8.
Piece of Heart 8
This means that both Pieces of Heart from the Goron Mines have been collected. We don’t have to return to this dungeon later for the Pieces of Heart.
Twilight Princess HD – Stamp H
If you play Twilight Princess HD, you can also collect the Hylian “H” stamp with the bulblin archers in the large northern area. Jump into the water on the corresponding side of the area, put on the Iron Boots and sink under the wooden structure. Remove or break through the obstacles in front of the Treasure Chest there.
In the HD version it contains the stamp H; in the original GameCube and Wii versions there is a Rupee in this location instead. You can find all HD exclusive Locations on our page Stamps – Twilight Princess HD.
Important for later:
A second HD stamp in the Goron Mines – Hylian “U” – cannot be achieved at this time. For this we need the Clawshot from the Lakebed Temple. We’ll catch up with him on a later visit.
Small Key 3 – with the Beamos
Follow the main path to the next door. In the following section, several Bulblin Archers stand on raised platforms. Use the large wooden boxes as cover so that their Fire Arrows Don’t hit link.
Work your way through the area until you reach a locked door.
The key you need is not far away. On the other side, look for the Beamos, which is standing next to a large wooden box or construction. The Beamos itself cannot currently be permanently destroyed, but the Treasure Chest near it can be reached.
Open it and take the third Small Key.
Return to the locked door and open it.
Rotating Magnetic Platforms
In the next room you will find several huge platforms that rotate regularly. The first can still be crossed with a normal jump.
The second has several magnetic surfaces. Wait until one of them is horizontal in front of Link and step on it with your iron boots on.
When the platform rotates, Link stays stuck thanks to magnetism. Only run to the next magnetic surface when both sections have aligned so that you don’t fall into the lava.
Repeat the process until you reach the opposite side.
Gor Ebizo – second key fragment
Waiting behind the door is the second Goron Elder, Gor Ebizo.
He gives Link the second key fragment without a fight.
Key Fragment 2/3
All that’s missing is the fragment of Gor Liggs. The complete Big Key for Darbus’s Chamber is then automatically assembled.
If necessary, examine the chest in the room and then climb the ladder.
Leave the room via the upper door. With the iron boots you run along the magnetic wall again and finally reach a large round platform above the lava.


Miniboss: Dangoro
As soon as Link steps onto the large magnetic platform, the Goron Guardian Dangoro appears. He still thinks Link is an intruder and also jumps onto the platform. Due to its enormous weight, the brackets break and the entire arena sinks towards lava.
Dangoro has massive stone armor and can hardly be injured with normal sword hits. His weak point is his softer stomach.
Dangoros belly hit
Target Dangoro and initially move without Iron Boots. This keeps Link agile enough to avoid his heavy blows.
When Dangoro raises both arms and throws a powerful punch, dodge sideways and immediately attack his unprotected stomach with your sword.
After several hits, he retracts his arms and legs and rolls up into a large stone ball.
Throw Dangoro into the lava
Now the Iron Boots are required. Put them on and stand as close to the edge of the platform as possible.
Dangoro rolls directly towards Link. As soon as the grab action appears, grab him and throw him sideways off the platform.
He falls into the lava, but jumps back shortly afterwards.
Take off the Iron Boots again for the normal combat phase and repeat the entire process.
After being thrown into the lava three times, Dangoro acknowledges Link’s strength and ends the fight.
The Hero’s Bow
After Dangoro’s defeat, the entrance to the treasury opens.
The Hero’s Bow is in the large chest.
New item: Hero’s Bow
The Hero’s Bow enables precise long-distance attacks at great distances. This can be used to eliminate enemies, activate Crystal Switch, destroy beamos and cut ropes. Later it can also be combined with bombs to form bomb arrows.
Try out the new weapon immediately. There are several ropes over the nearby suspension bridge. Shoot them with arrows.
The bridge falls down and opens the further path.



Destroy Beamos with the Hero’s Bow
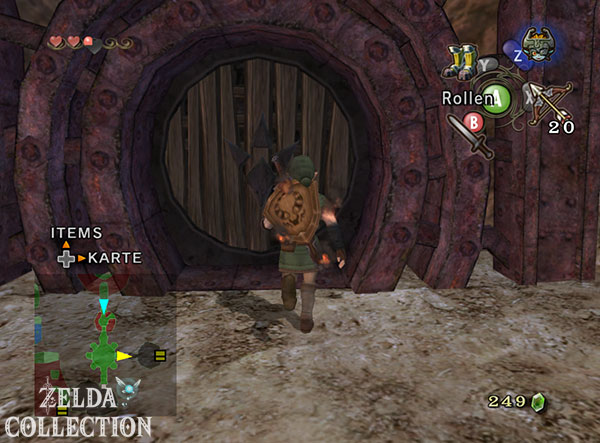
In the next room there are numerous Beamos statues. Before we had to avoid them. With the Hero’s Bow we can now finally eliminate them.
Sight at the red eye and shoot an arrow into it. The Beamos is deactivated.
Several of the statues stand on movable bases. After destroying it, you can grab the entire statue and pull it aside. There are new passages behind it.
First examine the entrance to the small round side room.
Gor Liggs – third key fragment
Behind the corresponding Beamos statue you reach the last Goron elder: Gor Liggs.
He gives Link the third and final key fragment.
The three parts automatically combine to form the complete Big Key.
Big Key received
With the fragments of Gor Amoto, Gor Ebizo and Gor Liggs, the key to the Chamber of Darbus is complete. We already have access to the final boss, but we still have to cross several rooms.
Then leave Gor Liggs’s room and return to the Beamos.
The Compass
In the large Beamos room, destroy the statue directly opposite or the Beamos that is blocking access to the corresponding Treasure Chest.
After destroying it, pull its base aside and open the chest.
Inside is the Compass.
Compass:
All unopened Treasure Chests and the position of the final boss are now displayed on the Dungeon Map.
Back through the mine with the Hero’s Bow
Now destroy the Beamos that is blocking the further path and also pull this statue aside.
In the next room you can take out many enemies from a long distance with the Hero’s Bow. Take the opportunity before entering the narrow platforms.
Roll firmly against the grille or the corresponding structure to open the passage. Then jump from platform to platform to the opposite end of the room.
There is a heavy Floor Switch there. Activate it with the Iron Boots.
A magnet pulls Link to the ceiling. Walk across the magnetic surface to where you can see the Crystal Switch.
Pull out the Hero’s Bow and shoot the switch.
The passage under Link opens. Take off the Iron Boots, drop down and go through the door.


The large bridge mechanisms
In the next area you will see a large raised bridge. Your ropes are now easily accessible with the Hero’s Bow.
Shoot the brackets. The bridge falls down and can be crossed.
On the other side you activate a heavy Floor Switch again with the iron boots. A large magnetic crane pulls Link up.
Wait until the structure has rotated into the correct position and then pull out the Iron Boots. Link falls onto the platform next to the next door.
Familiar spaces with new possibilities
You have already crossed several of the following areas on the way there. Thanks to the Hero’s Bow, however, they can now be solved much more easily and, in some cases, in new ways.
First defeat the enemies from a safe distance. Then jump to the opposite side and shoot the Crystal Switch with an arrow. This opens the next passage.
In the large area with the numerous Bulblin archers, you should now take the time to systematically eliminate the archers with your bow. This makes the later magnetic path significantly safer.
Beamos as a door opener
Find the Beamos blocking another passage. Shoot his eye and then drag the deactivated statue out of position.
Behind the Beamos, a previously hidden path appears.
Follow it to the next heavy Floor Switch and activate it with the Iron Boots. The large magnet above the room starts moving.
Stand at the opening in the railing and jump into the magnetic beam with your iron boots on.
As soon as Link is hanging on the construction, you pull out the hero’s bow and shoot through the ropes of the bridge below.
Wait until you are directly above the lowered bridge and pull out the Iron Boots.
The final path to the boss chamber
In the next room, several Bulblin Archers attack again. Since Link now has the Hero’s Bow himself, you can take them out from a distance.
Follow the path to the large metal plate or bridge on the wall. Their brackets are again made of ropes.
Shoot all the ropes with the bow.
The structure falls down, revealing the final section of the mine.
Now a larger group of Bulblins appears. Keep a little distance and first thin out the opponents with arrows. As soon as they get closer, switch to the sword.
Finally behind them lies the large master door.
Since all three key fragments have already been assembled, you can open them immediately.


Boss: Twilit Igniter Fyrus
Behind the master door, Link finally finds the missing Goron leader Darbus. The Fused Shadow completely changed it. Fire envelops his body, huge chains hang from his legs and a large crystal shines on his forehead.
Darbus has become Twilit Igniter Fyrus.
The fight combines the two most important items in this dungeon: the Hero’s Bow and the Iron Boots.
Phase 1 – Hit crystal on the forehead
First keep your distance from Fyrus and aim at the glowing crystal on his forehead with the Hero’s Bow.
The biggest challenge is finding a quiet moment to aim. Fyrus moves quickly through the arena, swinging his heavy chains around him.
If an arrow hits the crystal, the beast will be dazed. Fyrus staggers around the room disoriented for a few moments.
Switch to Iron Boots right now.
Phase 2 – Use the chain to bring down Fyrus
Run behind Fyrus and grab one of the long chains he is dragging behind him.
Tighten the Iron Boots and hold the chain firmly. Without the extra weight, Link would simply be dragged along the ground.
Move against Fyrus’s direction and tension the chain as much as possible.
After a short time, the beast loses its balance and falls to the ground.
Phase 3 – attack the crystal with the sword
As soon as Fyrus falls, take off the Iron Boots again and run to his head.
The crystal on the forehead is now directly accessible for a short time.
Attack him with the sword as often as possible. Use quick normal slashes or a spin attack while Fyrus is defenseless on the ground.
After a few seconds the boss gets up again and the next round begins.
Fyrus’s attacks
During later rounds, Fyrus becomes more aggressive. The heavy chains are particularly dangerous. When he swings it, you should move away to the side and not try to aim the bow at the same time.
In addition, the beast can send large fire attacks across the room. If necessary, take shelter behind the massive pillars of the arena and wait for the flames to pass.
Then repeat the familiar pattern:
Hit the crystal with an arrow → run behind Fyrus → put on Iron Boots → grab the chain → bring it down → attack the crystal with the sword.
After several successful runs, Fyrus finally collapses.
Second Fused Shadow and Heart Container
After Fyrus’s defeat, the dark force breaks away from Darbus. The Goron leader returns to his original form and is finally freed from the effects of the Fused Shadow.
Midna receives the second fragment of the Fused Shadow.
Before you leave the mine, be sure to collect the complete Heart Container that appears after the boss fight.
Heart Container 2
The Heart Container immediately increases Link’s maximum health by one full heart. Together with the additional hearts from the 45 Pieces of Heart, we are continually expanding Link’s energy bar on our 100% route.
After talking to Darbus, Link can leave the Goron Mines.
Go to Zora’s Domain
With the defeat of Fyrus, the second major dungeon is also completed. Link now has the Hero’s Bow, has collected both Pieces of Heart from the Goron Mines and recovered the second Fused Shadow for Midna. At the same time, the arch outside the mine opens up numerous new opportunities for us.
Next, the search begins for the third and final Fused Shadow. The path takes Link further north into the province of Lanayru. The realm of the Zora, the Lake Hylia and a much larger section Hyrule’s await there.
In the next chapter of our Twilight Princess Walkthrough we continue to Zora’s Domain. Before we reach the next dungeon, we use the Hero’s Bow to get more collectibles, get the bomb bag and face the spreading twilight again.
To Fyrus: Bombs and a later return route
Get the Heart Container and then buy the first bomb bag from Barnes. Both Pieces of Heart of the mine can be reached during this visit. Only in HD there is a later return route available for Stamp U with the Clawshot; don’t try to reach this chest with your bow yet.