

Follow Rusl’s lead back to the Sacred Grove after Snowpeak Ruins. Enter the Temple of Time, retrieve the Dominion Rod and guide the missing statue down through the dungeon before fighting Armogohma.
Game version: The route and screenshots follow the GameCube version. The normal mode of Twilight Princess HD has the same orientation; on Wii and in HD Hero Mode, left/right and east/west are swapped. HD deviations are at the affected step.
After the Snowpeak Ruins: With the Ball and Chain back to the ice summit
In our previous chapter we deliberately left a Poe Soul behind because it was trapped behind solid ice. Now Link has the Ball and Chain and can finally destroy this obstacle.
Warp to Snowpeak and re-enter the cave we came through on the first climb. Work your way to the area with the large ice blocks and smash them with the Ball and Chain. A ghost is waiting behind one of them. Transform into Wolf-Link, activate the sense and defeat him to collect the previously postponed Poe Soul.
If you also light the two torches in this area, a chest will appear with an orange Rupee. The Rupee is not required for 100% score, but it is now right on our path.
Piece of Heart in the block cave north of Castle Town
The Ball and Chain opens up yet another useful find for us. Warp to Castle Town and exit the city towards the northern Hyrule Field. Follow the rocky path until you reach the higher section with a small cave in the rock face.
Inside, several sliding puzzles with large stone blocks await you. Since the blocks slide on the smooth surface to the next obstacle, you have to use other blocks and walls as stoppers.
In the last room, a safe solution works like this:
- Push the northeast block north, west, south, east and north again.
- Then push the northern block to the west.
- Finally, move the southeast block west, north and then east.
The path to the northern niche is now clear. Open the chest there and take the next Piece of Heart.
Snowboard Race: Defeat Yeto and Yeta
After completing the Snowpeak Ruins, Yeto and Yeta can be challenged to snowboard races at the Snowpeak. We should also complete this mini-game now because Yeta awards another Piece of Heart.
Warp to the Snowpeak again and first talk to Yeto. For him, a clean descent is usually enough. Maintain as much speed as possible and avoid collisions with trees, rocks and Yeto itself.
After your victory, warp to the summit again and this time talk to Yeta. It is considerably faster. In about the last third of the route there is a shortcut. You should definitely use these, because Yeta also takes them. Jump cleanly onto the narrower path and keep as direct a line as possible until you reach Snowpeak Ruins.
If you beat Yeta, she will give you another Piece of Heart.
100% hint: The race against Yeta is only available after you beat Yeto first.
Telma’s Tavern: Rusl is in the Faron Woods
If you activated the Howling Stone in the Snowpeak, you can learn the Jump Strike in the Kakariko cemetery. If the technique has already been learned, go directly to Telma’s tavern and check the resistance group’s map there.
Visit Telma’s Tavern in Castle Town. On the resistance group map you can see that the masked fighter is no longer sitting at the table. Its location is marked in the Northern Faron Woods.
Warp to the northern Faron Woods and follow the familiar path towards the Forest Temple. Rusl is waiting on the raised ledge. He has also heard of the ancient ruins deep in the forest and suspects the power of a long-gone people there.
However, the route across the gorge is no longer as easy for Link as it was on our first visit. Rusl therefore summons an unusual helper: a Golden Cucco.
With the Golden Cucco across the gorge
Pick up the Golden Cucco and jump over the first gap with it. As long as Link carries the animal, he falls very slowly and can therefore cover significantly greater distances.
The moving wooden platforms, which were rotated by the strong wind during our first visit, are standing still this time. Place the rooster on safe ground and use the Gale Boomerang to rotate the first platform. Pick up the bird again and glide over.
You place it briefly on the platform again, turn the structure again with the Gale Boomerang and then glide to the next spot.
In the last section, large tree trunks or wooden pendulums swing over the abyss. Wait until one has just swung past you and then jump off with the rooster. Behind the traps you finally reach the entrance to the Sacred Grove again.


The Skull Kid is back
Enter the Sacred Grove and after just a few meters the Skull Kid appears again. As with our first encounter, it summons several wooden dolls and then disappears into the winding forest paths.
The second round is a little more difficult because additional paths are now open. The main landmark is the Skull Kid glowing lantern. In the dark sections you can usually see from a distance which tunnel its light has disappeared into.
First hiding place of the Skull Kid
Follow the Skull Kid first straight ahead and then into the side tunnel where you can see his lantern. In the next section it sits on an elevated ledge behind or next to a tree.
Climb up and hit it once with the sword. The Skull Kid immediately disappears, opening another path.
Poe Soul in Skull Kid maze
Follow the next tunnel. In the area with the waterfall, you shouldn’t just pay attention to the Skull Kid’s lantern. Further up, a second lamp floats – this time it belongs to a ghost.
Go behind or under the waterfall and climb over the roots onto the raised ledge. Transform into Wolf-Link, activate the sense and defeat the ghost. Then take the Poe Soul with you.
This find is directly on our route and should not be saved for a later visit.
Second and third hiding places
Jump back down and follow the light of the lantern again. In the large central area, several tunnels lead in different directions. Always look for the passage in the depths of which the Skull Kid’s red or orange light can be seen.
There are two extinguished torches in one place. Ignite both of them with the lamp to make a chest appear with 30 bombs. The ammunition is optional, but is directly on our route.
In the area with the pillars and water, the Skull Kid sits on a platform out of your normal sword range. Therefore, draw the Hero’s Bow and hit it with an arrow.
Continue pursuing the imp through the newly opened tunnels. Later you will come to an area with several waterfalls again. Run through the passage between the two smaller waterfalls and continue following the lantern.
Finally you hear the Skull Kid’s flute melody, but you can’t see it at first. Climb up over the large tree stumps and look into the treetops. There it sits on a high branch. Another arrow ends the chase.


Skull Kid – second fight
Follow the Skull Kid into the stone arena. The fight is basically the same as our first encounter. The Skull Kid teleports around the arena and constantly summons new wooden puppets.
The dolls are not your actual target. Only eliminate enough so that you have enough freedom of movement. As soon as the Skull Kid appears in a free place and starts his flute, aim at him with the bow.
One arrow is enough to make it disappear again. Repeat the process several times. After the last hit, the Skull Kid gives up and opens the path to the ancient ruins.
Back at Master Sword
You will now reach the ruins again where we received the Master Sword. This time you will arrive on a raised platform. Push the large stone block down to create a permanent shortcut.
Poe Soul at Temple of Time
Go down to the base of the Master Sword. At night another ghost hovers in this area. Transform into Wolf-Link, activate the sense and snatch the Poe Soul from him after the fight.
Since we later get a warp point directly in the Sacred Grove, you could theoretically get the soul later. However, we take them with us for our 100% route.
Control male golden snail
If you have fully followed our previous chapter on the Master Sword, you already own the male gold snail. If not, now is the last opportunity to take them with you without having to return later.
Find the small alcove by the ruins. The snail sits on the wall or in an upper corner and can be pulled to Link with the Gale Boomerang if necessary.
The Master Sword opens the hidden access
Stand in front of the time rock from which you pulled the Master Sword. Draw the blade and perform the indicated action. Link holds the Master Sword in the base.
One of the large stone guardian statues in the southern part of the ruins then disappears. Behind her, a previously blocked door appears.
Before we reach this, several Shadow Beasts appear and create a barrier. First defeat individual enemies and kill the last two at the same time with Midna’s energy field. After the battle, a new warp point will be created in the Sacred Grove.
Return to the block you pushed down earlier, climb onto the raised level and go through the now revealed door.
The Temple of Time in its past
On the other hand, the environment changes suddenly. The crumbling ruins are gone. Instead, Link stands in a completely preserved, magnificent hall. We are apparently in the same place, but in a time long past.
Go down the wide stairs.
Female golden snail – last Golden Bug
At the bottom of the stairs, turn towards the side wall. The female golden snail sits there. If necessary, pull them towards you with the Gale Boomerang and collect them.
If you followed our 100% route, this is your 24th and final Golden Bug. Agitha’s entire collection is now available.
Golden Bugs complete: With both gold snails you have all twelve pairs or all 24 Golden Bugs in Twilight Princess.
Agitha and the largest wallet
Now that we all have Golden Bugs, the short detour is immediately worth it. Leave the hall again, warp to Castle Town and visit Agitha. Give her any insects that have not yet been handed in.
For the complete collection you get the largest wallet. In GameCube and Wii, Link can carry a maximum of 1,000 Rupees. In Twilight Princess HD, the capacity has been increased to 2,000 Rupees.
Then warp back to the Sacred Grove.
Twilight Princess HD: Stamp X in the Sacred Grove
Only in Twilight Princess HD: Before we enter the dungeon, we get the stamp with the Hylian letter X.
From the warp point, go back to the area where you fought the Skull Kid on a previous visit. Behind the ruins a long wall of vines leads upwards. Pull yourself up with the Clawshot. A glider rail begins there.
Use the Spinner and follow the rail to the remote chest. Inside is the stamp X.
Open the entrance to the Temple of Time
Return to the intact Temple of Time and go past the two large guardian statues to the base of the Master Sword.
Put the Master Sword into the time rock again. A glowing staircase appears in front of you, seemingly leading directly into a large window. The Ooccoo appears and runs ahead.
Climb the magical steps. As soon as you approach the window, a passage opens behind it. Follow the hallway and enter the actual Temple of Time.


The missing guardian statue
The central mystery of the time shrine becomes clear in the entrance hall. There are two pedestals in front of the large golden door – but only one has a huge guardian statue on it. If you transform into Wolf-Link and activate your sense, you can even see the shadow of the missing statue on the empty base.
Our goal is therefore clear: we have to find the counterpart somewhere in the Temple of Time and bring it back here.
There is a Floor Switch on one of the small platforms next to the stairs. Place one of the jars standing around on top. This causes a small platform to rise out of the ground and allow you to climb up.
At the top you will meet Ooccoo again. She is noticeably interested in the ancient technology of this place. Take them with you so that you can leave and re-enter the Temple of Time at any time if necessary.
Small Key 1 – light two torches
Go down the side steps a little again. There are two extinguished torches there. Light both with your lamp. A Treasure Chest appears and contains the first Small Key.
Then climb back up and use it to open the locked door.


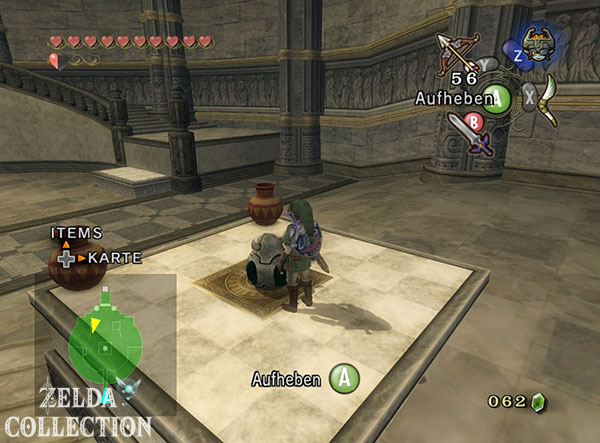


Jug Switch and Young Gohmas
The first small spider enemies in the dungeon are waiting in the next room. Defeat them and then take one of the jars standing around.
Place it on the Floor Switch in the middle of the room. Both golden grilles open. Go through the first grate and stand behind the barrier. Now the jug has to disappear from the switch again so that the rear grille opens.
Shoot him from a distance with an arrow or the Clawshot. The front grille closes while the rear one opens. Follow the path up.
Lizalfos, Armos and the Dungeon Map
Several Lizalfos attack on the stairs. Shield Attack and Helm Splitter work great against her defenses. Further up, a large Armos statue awakens for the first time.
Armos initially appear like normal statues, but begin to move as soon as Link gets close to them. Their front is heavily armored. Attack the crystal or the weak point on the back. The Ball and Chain is also extremely effective.
After the last hit, back away, because a defeated Armos will jump around uncontrollably for a few seconds and then explode.
Dungeon Map
Defeat all enemies in this section. A chest will then appear in the side area. Open it and take the Dungeon Map.
New item: Dungeon Map
The Temple of Time has eight floors. The map makes it much easier to transport the guardian statue back later.
There are also two small statues nearby. Place one on each of the two Floor Switch in front of the next grid. Once both switches are loaded, the path to the large central hall opens.


The large round room and Small Key 2
In the next large room, a wide staircase leads upwards in a spiral. Several Lizalfos block the way. Work your way up the stairs counterclockwise.
At one point a piece of the path is missing. There is a toothed rail running along the wall. Insert the Spinner and drive over the gap.
Further up you reach a central platform around which two large spiked arms rotate. Wait until the outside trap has just passed and follow it at a safe distance.
There is a small statue on a side corridor. Carry it to the southern area and place it on one of the two Floor Switch.
Return to the center. There is a handle on the central structure. Push it counterclockwise to lower the entire platform to the bottom floor.
Below you will find a second small statue. Carry them onto the central platform and turn the mechanism clockwise once to go back up. Place the second statue on the free Floor Switch. A nearby platform rises and takes you to the southern door.
Small Key 2
Two Armos awaken in the next room. Defeat both. Afterwards a chest will appear with the second Small Key.
Twilight Princess HD: Stamp L
Only in Twilight Princess HD: Before leaving the room, go to the southern end. There is another chest stamped with the Hylian letter L.
Then return to the large circular room and open the locked door in the north with the second Small Key.
Crystal Switch and Compass
In the following section, a Crystal Switch controls several movable stone walls. First hit the green crystal or hit it with an arrow. It changes color and changes the position of the walls.
Go through the newly opened passage and shoot the Laser Guard in the red eye. This will deactivate it.
In the center you can see several golden rings or small openings in the movable walls. This means you can continue to hit the Crystal Switch with arrows.
Shoot through the first ring to move the walls again. Move forward, eliminate the next laser guard and open the chest in the side alcove.
Compass
In the chest lies the Compass of the time shrine. From now on, unopened Treasure Chests will be displayed on the map.
New item: Compass
Since some of the most important chests can only be reached with the Dominion Rod on the way back, the Compass is particularly helpful in this dungeon.
Then shoot through the golden rings at the crystal again until the northwest or mirrored passage to the next staircase is open.


Further up: Dynalfos and spiders
In the next section you have to hit the Crystal Switch several times from a distance so that the movable walls open up the next passage.
In addition to normal Lizalfos, more heavily armored Dynalfos are now appearing for the first time. They block many common sword attacks. It’s best to wait for her attack, dodge to the side and counter immediately afterwards. Your Hidden Skills are also very effective.
Numerous young Gohmas and smaller spiders await you in the next large room. A whirl attack, the Spinner or the Clawshot quickly clears out the small opponents.
The scale puzzle
Climb the stairs and you will reach a huge stone scale with two platforms. As soon as Link enters a page, it sinks under his weight.
There are small statues on the scales. Throw a statue onto the higher bowl to balance the weight. The principle will become important later when we transport the much heavier guardian statue back.
As soon as you reach the opposite side, leave the scales and go through the next door.
Small Key 3 – last Small Key
In the next room there is a laser guard. Disable him with an arrow in the eye. Then work your way up the stairs past the rotating spike traps.
Further up, large spiked rollers roll over the narrow paths and a huge pendulum ax swings over the passage. Wait until the trap has passed you and then start running immediately afterwards.
Behind the pendulum hatchet is the chest with the third and final Small Key of the time shrine.
Return a little and carry the nearby small statue to the Floor Switch behind the spiked rollers. This deactivates the electrical barrier.
Then follow the path through more Gohmas and Armos. With the third key you finally open the door to the Miniboss’s chamber.
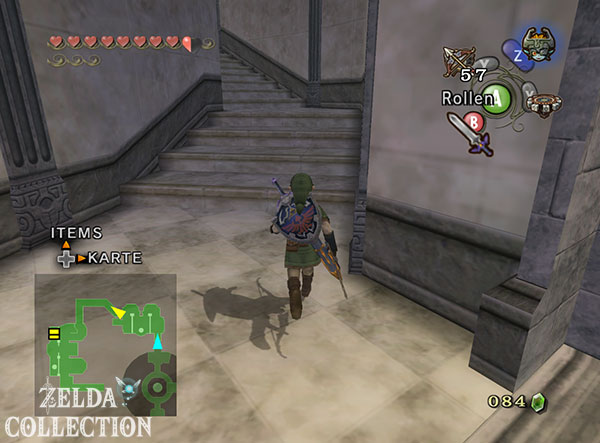


Miniboss: Darknut
You can already see the missing guardian statue above the arena. Before we can reach them, however, a heavily armored Darknut confronts us.
This knight is one of the more challenging intermediate enemies in the game and is capable of various sword maneuvers. Wild frontal attacks are therefore of little use.
Phase 1 – knock off the armor
Keep the Darknut targeted and constantly move sideways. Her large sword has enormous range, but the heavy attacks leave the opponent briefly unprotected after a miss.
Wait for a sword strike, dodge with a side jump and counter immediately. Shield attack, helmet splitter and especially the backhand also work, but you won’t get through on every attempt.
With each successful hit, the knight loses more pieces of his heavy armor. Stay patient and only attack after his own attacks.
Phase 2 – Fast Sword Fight
Once the armor is completely destroyed, the Darknut throws away the large sword and draws a much lighter blade. This makes it significantly faster.
The basic principle remains the same: let the opponent attack, dodge at the right moment and use the short recovery phase for a combination. The backhand is particularly effective. Even if the Darknut blocks the first strike, they are often left open to more hits immediately afterward.
After several successful attacks the fight is over.
The Dominion Rod
The grate behind the arena opens. The central dungeon item lies in the large chest: the Dominion Rod.
New item: Dominion Rod
You can use the Dominion Rod to activate certain statues. As long as a statue is under your control, it will mimic Link’s movements. Large guardian statues also deliver a powerful hammer blow when you use the Dominion Rod again.
Directly above or behind the chest is the exact guardian statue that is missing in the entrance room. Aim at them with the Dominion Rod. Once activated, it follows your movements.
Have her come down from her raised pedestal and lead her to the large bell at the edge of the room. Place it on the symbol under the bell. The structure lowers and only teleports the statue to the previous room.


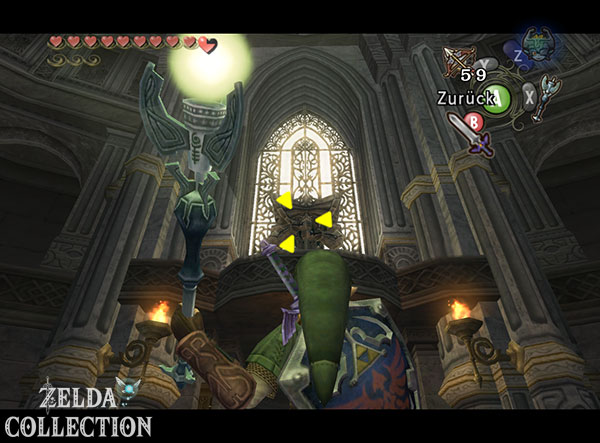


Return the guardian statue to the ground floor
From now on we are walking backwards for a large part of the previous path. The bells serve as teleporters for the large statue. Link himself cannot use it.
After each transport, activate the statue again with the Dominion Rod.
Golden bars and electrical barriers destroy
In the first room, the statue is on the other side of a golden grille. Activate it and walk it right in front of it. Use the Dominion Rod again to make the statue swing its giant hammer and smash the grate.
Then lead them to the moving platform. Place Link on the Floor Switch to make the platform lower and at the same time activate the statue so that it runs onto the platform. Then move Link further and the statue will go up with you.
In the next area, an electrical barrier separates Link and the statue. The statue can cross the stream safely. Use the Dominion Rod to place it on the Floor Switch behind the barrier. This will turn off the power and allow Link to follow.
Then use the statue’s hammer against the rolling spike traps, the small ground spikes and the deactivated laser guard. Almost everything breaks under a single blow.
Libra with the large guardian statue
The scale room shows how heavy our stone companion actually is. Guide the guardian statue onto the first scale pan. This immediately drops completely.
Throw the existing small statue onto the opposite bowl. That’s still not enough. So run to the higher level and use the Dominion Rod to take down more small statues from the wall bases.
Place as many on the opposite dish until both sides are roughly even. Then guide the large statue over the scales and down to the next bell.
Don’t send them on their way yet, because there are two particularly important collectibles waiting here.
Poe Soul 1 in Temple of Time
Climb back to the higher side of the scale. Since there are enough small statues on the opposite bowl, your side stays up.
Look at the ceiling in the middle of the room and use the Clawshot to pull yourself to the target point. Fall onto the central structure.
A glider rail runs along the wall. Insert the Spinner and drive to the upper level. A ghost floats there.
Transform into Wolf-Link, defeat him with activated sense and take the first Poe Soul of the actual time shrine.
Twilight Princess HD: Stamp T
Only in Twilight Princess HD: There is another chest right next to the Poe Soul. Inside lies the stamp of the Hylian letter T.
We have now found both HD stamps of the time shrine: L and T.
Activate Big Key – four switches
Go through the nearby door. Several armored enemies and an Armos are waiting below. Get them out of the way.
There is a closed grate in front of the large chest. Four Floor Switch must be loaded at the same time.
Two small statues are already in the room. Place one on each of two switches. A third small statue is elevated. Activate it with the Dominion Rod and move it to the third switch.
We don’t need another cairn for the fourth switch. Defeat one of the armored Helmasaurs and drag its abandoned shell to you with the Clawshot. Place it on the last Floor Switch.
The grid opens. Jump down and open the big chest.
New item: Big Key
The door to Armogohma can now be opened. However, we are far from finished with the dungeon, because the guardian statue has to go back to the ground floor first.
Piece of Heart 1 in Temple of Time
Return to the area with the crystal switches and sliding walls. Use the Dominion Rod to guide the large guardian statue across the room.
Place it on the central Floor Switch. Their enormous weight holds the switch down and deactivates the electrical barrier.
Go into the side niche that can now be reached and open the chest with the first Piece of Heart of the time shrine.
Then move the statue forward. You no longer have to laboriously move many of the movable stone walls with the Crystal Switch – the giant hammer of the guardian statue can easily destroy them.
Piece of Heart 2 – two small statues on hidden switches
In the southern room with the many Gohmas and spiderlings, you first clear out all the enemies. You then examine the two raised side passages.
There is already a small statue on one side. Activate it with the Dominion Rod and guide it along the raised path to the Floor Switch there.
A statue is missing on the opposite side. Therefore, take one of the small figures from the central area and throw it over the low barrier onto the raised side aisle. Then activate it with the Dominion Rod and guide it to the second switch.
Once both Floor Switch are pressed at the same time, a chest will appear. Inside lies the second Piece of Heart of the time shrine.
100% progress: So we have both Pieces of Heart from the actual dungeon.


Move the guardian statue further down
Return to the circular room with the large statue. Use the central elevator and turn the mechanism so that you and the statue go down level by level.
Wherever bars, broken laser guards or spiked rollers block the way, you use the statue’s hammer. Almost all obstacles break immediately.
Poe Soul 2 in Temple of Time
Numerous small Gohmas appear again in one of the lower round rooms. Eliminate them. This causes the electrical barrier to disappear in the side aisle.
Then activate the guardian statue and lead it to the western area or, in the mirrored version, the eastern area. There is a golden grille there.
Break the grate with the statue’s hammer. The second ghost of the actual dungeon waits behind it.
Transform into Wolf-Link, activate the sense and after the fight take the second Poe Soul of the time shrine.
The statue returns to the entrance hall
Then lead the guardian statue to the next bell. In the next room, use the Clawshot to pull yourself over the closed grate and get the statue out of its bell.
Lead her down the stairs. Golden grids and other obstacles are destroyed again with the hammer. Finally, place the statue under the last bell.
Go through the door and you will return to the entrance hall where our long journey began.
Activate the statue one last time and move it to the empty pedestal next to the large golden door.
As soon as she stands there, both guardian statues react with each other and the previously blocked passage opens.


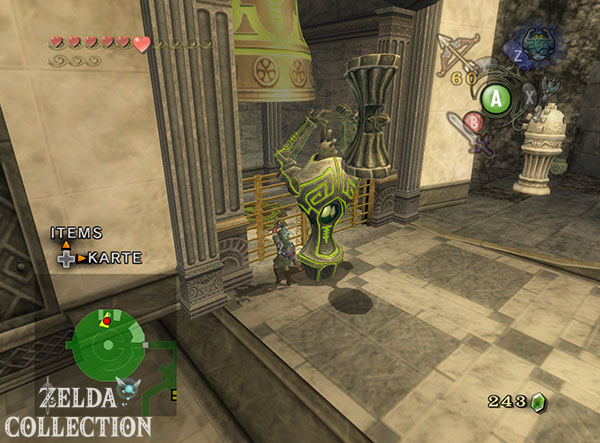


The last trap before Armogohma
A long corridor full of traps awaits behind the guard door. Spiked rollers move across the ground, huge hatchets swing across the path and several laser guards control the narrow passages.
First turn off the laser guards with arrows in the eye. Then run immediately behind a spiked roller and only avoid the pendulum axes when they have just swung past you.
There is a small Floor Switch on a grid. Place one of the small statues on it. The first gate opens, while another further back remains closed.
Go through the first grate, turn around and use the Dominion Rod on the statue. Move it off the Floor Switch. The gate behind you closes, and at the same time the next one opens.
There are still a few spider enemies waiting in the last room. Break the jars to get arrows, hearts, and a fairy if needed. When you are prepared, open the big boss door with the Big Key.
Final Boss: Twilit Arachnid Armogohma
The huge room seems empty at first. Link then looks up and spots the Twilit Arachnid Armogohma on the ceiling.
For this fight you need two items: the Hero’s Bow and the Dominion Rod. In the four side areas of the fighting area there are huge stone statues that we immediately use as weapons.
Phase 1 – Hit the eye with the bow
Armogohma crawls along the ceiling. Keep your distance and watch the huge eye on her back. As soon as it opens, she begins to prepare a powerful laser attack.
Just then you draw the bow and shoot an arrow directly into the open eye.
The hit causes Armogohma to fall from the ceiling. She always lands near one of the four large statues.
Don’t run to the spider yourself. Instead, aim the Dominion Rod at the nearest statue and activate it. Use the staff a second time. The statue’s giant fist comes down on Armogohma.
After being hit, she runs back to the ceiling.
Spiderlings between attacks
After the first hit, Armogohma lays several eggs or summons small Gohmas. At the same time, she continues to crawl on the ceiling and prepares her laser again.
Don’t let each little spider stop you individually. A spin attack quickly eliminates larger groups. More importantly, keep an eye on Armogohma’s eye.
As soon as it opens again, shoot an arrow into it, activate the statue next to its landing spot and bring your fist down again.
Repeat the process a total of three times.
The surprising final phase
After the third punch, Armogohma seems to have been finally defeated. The huge body falls apart – but the big eye lives on.
It is now sitting on a tiny spider and flees through the arena together with numerous small Gohmas.
This final phase is more of a little joke than a real battle. Chase the eye and hit it with the sword, arrow, or other weapon. Just one successful attack ends Armogohma for good.


Third mirror shard and Heart Container
After Armogohma’s final defeat, the next Mirror Shard appears. Together with the fragment from the mirror chamber and the shard from the Snowpeak Ruins, we now have three of the four parts of the Mirror of Twilight.
The obligatory Heart Container also appears. Pick it up to permanently increase Link’s maximum health by one full heart.
Only a single shard of mirror is missing. According to the wise men’s instructions, she should… high in the clouds condition. However, we still don’t know how to reach this legendary kingdom.
To Armogohma: Don’t leave the citadel yet
After the boss fight you will return to the large historical vestibule of the Temple of Time. Don’t leave the area yet. The Dominion Rod continues to work here and opens two permanent collectibles that we can take with us immediately.
Additional Piece of Heart behind the guardian statue
Go to the southeast area of the hall or, in the mirrored Wii version, to the corresponding opposite side. There is a large statue in front of a niche.
Use the Dominion Rod on the statue and move it from its position. Behind her a hidden passage or a chest becomes accessible.
Open the chest and take another Piece of Heart.
This Piece of Heart is not in the actual dungeon, but can be reached immediately after completing it. On our 100% route it would therefore make no sense to save it for later.
Additional Poe Soul behind the second statue
Then go to the opposite side of the large staircase. There, too, a statue blocks a niche.
Activate it with the Dominion Rod and move it out. A ghost’s lantern appears behind it.
Transform into Wolf-Link, activate the sense and defeat him. This will give you another Poe Soul.
Only now have we taken all the collectibles that have become available directly in this area thanks to the Dominion Rod.
The Dominion Rod loses its power
Then leave the citadel through the time portal and return to the Sacred Grove of the present. The Ooccoo appears again and immediately reacts to the Dominion Rod.
Apparently she explored the various dungeons Hyrule’s partly because she was looking for this ancient technology. The copying staff seems to be connected to her people and the kingdom above the clouds.
Outside the time shrine, however, a problem becomes apparent: the staff has lost much of its power. The large owl statues that are scattered all over Hyrule do not yet respond to him.
Our next goal is clear. We must find out how to restore the power of the copying staff and what the mysterious owl statues have to do with the people above the clouds.
Temple of Time completed – the final mirror shard awaits in City in the Sky
The Temple of Time is now completely complete. We used all three Small Key, found Dungeon Map and Compass, collected both Pieces of Heart of the actual dungeon and defeated the two ghosts there. In Twilight Princess HD the stamps L and T are also part of our collection.
With the Dominion Rod, Link has the crucial item for the next big story section. After Armogohma, we also collected the Heart Container, the third mirror shard as well as the additional Piece of Heart and the additional Poe Soul in the vestibule.
Of the four parts of the Mirror of Twilight, only the shard is missing from the legendary realm City in the Sky. Before we can reach the city above the clouds, however, we must bring the Dominion Rod back to life, continue piecing together Ilia’s lost memories, and solve the mystery of the owl statues.
We continue in our Twilight Princess Walkthrough with the search for the way to City in the Sky.
Recharge Dominion Rod after dungeon
Before returning to the present, you can use the still active staff to move the guardian statues in the entrance hall and retrieve the finds behind them. Outside, the staff initially loses its power. For the owl statues on the overworld, you first have to pursue Ilia’s Memory, the Hidden Village and Shad’s Sky Book.