
In Ocarina of Time wait 100 Gold Skulltulas on you. Defeat each spider and collect its golden symbol; only then do you set the hook. The search also searches through items and requirements; if you wish, the filter will only show you open ones Locations.
The areas and dungeons have separate progress bars. child and adult are different states of the world: a find that can be reached at night is not automatically present in both age groups. In dungeons, the time of day doesn’t matter. When the ground is soft, as a child you release beetles from a bottle; You don’t have to plant a Magic Bean.
Version: N64 original and its re-releases. Master Quest’s dungeon locations differ. The interactive Ocarina of Time map helps with orientation; You can find items and paths in the Walkthrough.
Zora’s River – 4 Gold Skulltulas
Location and view solution
Roll as young Link against the first tree you reach after entering the Zora’s River. The Gold Skulltula falls out of the crown and can be defeated straight away.
Read more about the solution: Tree at the entrance

Location and view solution
As young Link, go to the small ladder below the large waterfall in front of Zora’s Domain at night. Defeat the Skulltula with the Fairy Slingshot. Then climb the ladder to the remaining symbol; You don’t need the Boomerang for this find.
Read more in the solution: Ladder below the waterfall

Location and view solution
Enter the Zora’s River as adult Link at night and go to the large plateau in the middle of the area. Climb up the ladder, go left and look at the high rock wall. There you can reach the Skulltula with the Hookshot.
Read more about the solution: Rock wall on the middle plateau

Location and view solution
As adult Link, follow the river to the wooden suspension bridge in front of the large waterfall. After you have crossed it, look up at the left rock wall. Stand on the fence to reach the Skulltula with the Hookshot.
Read more about the solution: Behind the suspension bridge

Zora’s Domain – 1 Gold Skulltula
Location and view solution
As an adult Link, climb up to the place where you received the Silver Scale in childhood. At night, look left over the edge to the icy rock face. The Gold Skulltula is located on the nearby rock wall below the ledge. Defeat her with the Hookshot and use it to get her symbol. The longer Longshot is not necessary.
Read more about the solution: At the frozen waterfall

Zora’s Fountain – 3 Gold Skulltulas
Location and view solution
As young Link, swim to the small island to the southeast of the spring. It is near the entrance to the Fairy Spring. Roll against the single tree so that the Gold Skulltula falls down.
Read more in the solution: Tree on the southeastern island
Location and view solution
Wait until night and swim to the fallen log in the water. From there you can see the Gold Skulltula high on the western outer wall. Defeat them with the fairy slingshot and get the symbol with the Boomerang.
Read more in the solution: Western rock face near the tree trunk
Location and view solution
Use the Silver Gauntlets to lift the large gray rock at the entrance to the fairy spring and use a bomb to open the entrance underneath. Follow the hidden passage. With the Lens of Truth you can recognize the invisible normal Skulltulas on the way. At the end, climb up to the raised outer edge. There you can reach the Gold Skulltula at night with the Longshot.
Continue reading in the walkthrough: Hidden passage at the fairy spring
Lord Jabu-Jabu’s Belly – 4 Gold Skulltulas
You can find the connected path through Jabu-Jabu’s belly in the corresponding chapter of Walkthrough.
Location and view solution
After falling through one of the holes in the room with Princess Ruto, you will land on the lower level. The first Gold Skulltula is crawling on one of the walls. Defeat them and get the symbol with the Boomerang.
Read more about the solution: First Skulltula in the fall room

Location and view solution
In the same lower area there is another Gold Skulltula on the opposite wall. Your symbol can also only be safely accessed with the Boomerang.
Read more about the solution: Second Skulltula in the fall room
Location and view solution
In the room with the switch that raises the water level, a Gold Skulltula is crawling high on the overgrown wall. Raise the water level, defeat the spider with the fairy slingshot and climb up to its symbol.
Read more about the solution: Climbing wall in the water room

Location and view solution
In the room immediately before Barinade you have to press a switch to make a platform move and open the exit door. Hanging on the overgrown wall in this area is the final Gold Skulltula of the labyrinth.
Continue reading in the walkthrough: Before the final boss

Ice Cavern – 3 Gold Skulltulas
You can find the connected path through the Ice Cavern in the corresponding chapter of Walkthrough.
Location and view solution
In the large room where you have to collect five silver Rupees, a Gold Skulltula is crawling high on the wall. Defeat them and drag the symbol with the Hookshot to you.
Read more in the walkthrough: Room with the rotating ice blade

Location and view solution
Enter the room with the large ice block and look to the left immediately after the entrance. The second Skulltula is high on the wall.
Read more about the solution: Room with the movable ice block

Location and view solution
In the room, melt the red ice wall with the rotating ice blade and enter the side chamber with the blue fire. The Skulltula is crawling on the pillar next to the frozen Piece of Heart.
Read more about the solution: Room with the Compass

Kokiri Village – 3 Gold Skulltulas
Location and view solution
Go behind the omniscient brothers’ house at night. The Gold Skulltula is crawling on the back wall. Defeat her with the sword or fairy slingshot and jump from the raised edge to her symbol. If you already have the Boomerang, you can easily get it with you.
Read more in the solution: Behind the house of the all-knowing brothers
Location and view solution
Return to Kokiri Village at night as adult Link. A Gold Skulltula sits on one of the two wooden roof corners of the twins’ house. Pull yourself up with the Longshot.
Read more about the solution: On the twins’ house
Location and view solution
Catch bugs in a bottle and let them crawl into the soft area next to the Kokiri shop as young Link. Shortly afterwards the Gold Skulltula comes out of the ground.
Read more in the solution: Magic Bean hole at the Kokiri shop

In Great Deku Tree – 4 Gold Skulltulas
You can find the connected path through the Great Deku Tree in the corresponding chapter of the Walkthrough.
Location and view solution
Climb to the upper floor in the Great Deku Tree and enter the room where you will find the Compass. Activate the platforms and jump into the niche on the side. The Gold Skulltula is hanging there. Defeat her with the fairy slingshot and jump to her symbol.
Read more about the solution: Niche on the third floor

Location and view solution
In the basement’s large room, overgrown walls lead back to the upper level. There is a Gold Skulltula hanging on the climbing plants, which you defeat with the fairy slingshot.
Read more about the solution: Climbing plants in the basement

Location and view solution
Another Gold Skulltula is crawling on the bars above the water in the large basement. Defeat her with the fairy slingshot and swim or jump to her symbol.
Read more about the solution: bars in the water space

Location and view solution
After getting the bombs, return to the Great Deku Tree. In the room with the Gohma larvae there is a wall that you can open with a bomb. Behind it is the last Gold Skulltula of the labyrinth. You can reach your symbol with the Boomerang.
Read more about the solution: Behind the blow-up wall


Lost Woods – 3 Gold Skulltulas
Location and view solution
From the entrance, follow the path right, left, right, left and left again. In the clearing you will find a soft spot on the ground. Have bugs run in to lure out a Gold Skulltula.
Read more about the solution: Magic Bean hole at the Forest Stage
Location and view solution
From the entrance, go left twice. There is another area of soft ground near the bridge. Have bugs crawl in and defeat the Skulltula that appears.
Read more in the solution: Magic Bean hole at the forest bridge
Location and view solution
As a child, plant a Magic Bean in the clearing with the two leaves and access to the forest stage; From the forest entrance the path is right, left, right, left, left. Return at night as adult Link. The plant will take you to the raised ledge with the skulltula. This refers to the ground area near the forest stage, not the second planting area near the forest bridge.
Read more about the solution: Raised platform at the forest stage
Sacred Glade – 1 Gold Skulltula
Location and view solution
As adult Link, cross the Sacred Clearing and climb the ladder at the end of the Moblin Maze. At night, turn to the left and look at the high rock face. There you can reach the Skulltula with the Longshot.
Continue reading in the walkthrough: Above the maze
Forest Temple – 5 Gold Skulltulas
You can find the connected path through the Forest Temple in the corresponding chapter of the Walkthrough.
Location and view solution
In the first room, climb up the vines to the right of the tree. The Gold Skulltula is hanging on the overgrown wall and can be defeated with the Hookshot.
Read more about the solution: Climbing plants in the entrance room

Location and view solution
After the four forest spirits have stolen the flames, run to the northern stairs. To the right of her is a Gold Skulltula crawling on the wall.
Read more about the solution: Large entrance hall

Location and view solution
In the courtyard with the drained well there is a small Treasure Chest on a raised ledge. Pull yourself up on the chest and go around the corner. The Skulltula hangs on the wall there.
Read more about the solution: First courtyard

Location and view solution
Enter the other courtyard garden via the upper balcony. The Gold Skulltula hangs high on the wall near the pillars and can be reached with the Hookshot.
Read more about the solution: Second courtyard

Location and view solution
In the rotating room below the entrance hall you have to move the walls and press several Floor Switch. In one of the open side passages, the last Gold Skulltula of the temple is crawling on the wall.
Continue reading in the walkthrough: Anteroom of the final boss

Kakariko – 6 Gold Skulltulas
Location and view solution
Enter Kakariko as young Link at night and roll against the large tree near the entrance gate. The Skulltula falls to the ground directly in front of you.
Read more about the solution: Tree at the village entrance

Location and view solution
Go to the back or southern outside wall of the Skulltula’s house at night. The Gold Skulltula is clearly visible on the wall there.
Continue reading in the walkthrough: House of Skulltula

Location and view solution
Visit the construction site in the middle of Kakariko at night. The Skulltula crawls on the unfinished masonry or bricks.
Read more about the solution: Construction site in the village

Location and view solution
Find the small house next to the gate to the Death Mountain Trail. A Gold Skulltula appears on its northern or rear outer wall at night.
Read more in the solution: House by the Death Mountain Trail

Location and view solution
From the ground at night, use the fairy slingshot to shoot the Skulltula on the observation tower ladder. Only climb up when the path is clear and collect the symbol on the ladder.
Read more about the solution: Observation tower

Location and view solution
Return as adult Link at night. Pull yourself over the neighboring roofs or directly onto Impa’s house with the Longshot. The Skulltula is located on the roof or on the upper wall of the house.
Read more about the solution: Roof of Impa’s house
Kakariko Cemetery – 2 Gold Skulltulas
Location and view solution
Go to the cemetery at night as a child. Look on the right rock wall next to the rows of tombs as you look from the entrance to the Royal Family’s Tomb. The Gold Skulltula sits too high for the sword. Defeat them with the fairy slingshot and get the symbol with the Boomerang.
Read more about the solution: Rock wall on the right side of the cemetery

Location and view solution
To the left behind the entrance to the cemetery there is a soft area of ground. Make bugs run in from a bottle and defeat the Skulltula that emerges.
Read more about the solution: Magic Bean hole at the entrance

Bottom of the well – 3 Gold Skulltulas
You can find the connected path through the bottom of the well in the corresponding chapter of Walkthrough.
Location and view solution
On the upper main floor, go to the central room with the wooden cross. The locked door on the right leads to the room with the invisible pits. Check the floor with the Lens of Truth, go over the safe areas and get the symbol from the back wall with the Boomerang.
Read more about the solution: Room with the invisible floor

Location and view solution
In the central room with the wooden cross, go through the locked door on the left. Defeat the Deku Baba and the Gold Skulltula in the chamber. You can reach your symbol with the Boomerang. This room is a separate find and not the chamber with the invisible pits opposite.
Read more about the solution: Locked room with the Deku Baba

Location and view solution
On the upper main floor, search the crawl tunnel on the northeast side. Open the locked door behind it. The path through the cell area leads past hidden holes in the floor and a predatory slime. Check the safe areas with the Lens of Truth and get the Skulltula symbol in the back chamber with the Boomerang.
Read more about the solution: Cell with the predatory mucus
Shadow Temple – 5 Gold Skulltulas
You can find the connected path through the Shadow Temple in the corresponding chapter of the Walkthrough.
Location and view solution
In the large guillotine cave, invisible platforms lead to a side room. Use the Lens of Truth, defeat the enemies and open the grate to the niche with the first Gold Skulltula.
Read more in the solution: Room with the invisible blade

Location and view solution
Use the Lens of Truth to find the invisible block on the wall of the spiked plate room. Pull it out and push it under the falling plates until you can safely pass to the side. The skulltula hangs in the left cell. Defeat them and get their symbol with the Fang or Longshot.
Read more in the walkthrough: Room with the falling spiked plates

Location and view solution
In the room with the huge skull surrounded by blue flames, the Skulltula is on the back wall. Defeat them before throwing a bomb into the skull.
Read more about the solution: Behind the big skull

Location and view solution
In the room of the ghost ship, the Skulltula lies on a high ledge. Play the Scarecrow’s Song and pull yourself up to Balzac. Depending on the position, it can also be reached from the bow of the ship with the Longshot.
Continue reading the solution: Above the ghost ship

Location and view solution
In the invisible labyrinth after the ghost ship ride, a door leads to a room with three floating skulls. The last Skulltula hangs on the back wall behind the heads.
Read more about the solution: Room with the three skulls

Death Mountain Trail – 4 Gold Skulltulas
Location and view solution
Shortly after the Kakariko gate there is a crumbling wall. Blow it up with a bomb and enter the small cave. The Gold Skulltula is waiting there.
Read more in the walkthrough: Blow-up wall on the lower Death Mountain Trail

Location and view solution
Have bugs crawl into the soft area of ground right in front of the entrance to Dodongo’s Cavern. The Gold Skulltula appears immediately afterwards.
Continue reading in the walkthrough: Magic Bean hole in front of Dodongo’s Cavern


Location and view solution
As adult Link, return at night to the place where you opened the entrance to the cave with a bomb flower. Destroy the red rock with the Megaton Hammer. There is a skulltula hidden underneath.
Read more in the walkthrough: Red rock above Dodongo’s Cavern

Location and view solution
In the upper area of the Death Mountain Trail where rocks from the volcano flew towards you as a child, there is another red rock. Smash it with the Megaton Hammer at night.
Read more in the solution: Red rock on the way to the summit

Goron City – 2 Gold Skulltulas
Location and view solution
On the top floor, go to the northwest room with the numerous rocks. Blast your way through the small labyrinth. At the end there is a wooden box in which the Gold Skulltula is hidden.
Read more about the solution: Wooden box in the rock labyrinth

Location and view solution
Go to Goron City’s top level as an adult Link. Balance across the ropes to the hanging central platform and look at the back. The Gold Skulltula is located there. Defeat them and get the symbol with the Hookshot. You don’t have to wait until night to find this find in Goron City.
Read more about the solution: Under the central platform

Dodongo’s Cavern – 5 Gold Skulltulas
You can find the connected path through Dodongo’s Cavern in the corresponding chapter of Walkthrough.
Location and view solution
In the long hallway on the right side of the entrance hall there is a wall that can be blown open. Open it with a bomb and defeat the Gold Skulltula in the small side room.
Read more about the solution: Side room of the Baby Dodongo corridor
Location and view solution
After lowering the massive staircase, you climb to the upper level. There is a Gold Skulltula hanging on the overgrown wall near the exit.
Read more about the solution: Climbing plants above the stone stairs

Location and view solution
In the room where you push a block onto the Floor Switch there is a wall that can be blown open. Behind it, an Armos statue guards the Gold Skulltula.
Read more about the solution: Side room in front of King Dodongo

Location and view solution
Return as adult Link and play Scarecrow’s Song in the long hallway. Pull yourself towards Balzac and then onto the high ledge with the Skulltula.
Read more about the solution: Raised niche in the Baby Dodongo aisle
Location and view solution
Return to Dodongo’s Cavern with the Boomerang after unlocking the elevator in the entrance hall. The big thunderflower staircase still needs to go up. Take the elevator to the upper floor and walk backwards through the upper rooms until you reach the stairwell through the upper door. Jump onto the raised staircase and reach the niche using the tendrils on the side. Defeat the spider and get its symbol with the Boomerang. As an adult you can use the same route with the Hookshot; With the longer Longshot, the symbol can also be reached from a greater distance. If you have already blown up the stairs, leave the dungeon and re-enter it before taking the upper way back.
Read more in the solution: Niche above the large staircase
Death Crater – 2 Gold Skulltulas
Location and view solution
As young Link, play the Bolero of Fire and let Beetle run into the soft area in front of the Fire Temple. Collect the Skulltula quickly before the heat time limit ends.
Continue reading in the walkthrough: Magic Bean hole on the warp pedestal

Location and view solution
Enter Death Crater as a child from Death Mountain Peak. There is a wooden box right at the top entrance. Destroy it with a scroll, defeat the Skulltula that comes out and take the symbol with you. Then leave the crater again before the heat time limit expires.
Continue reading in the walkthrough: Wooden box in the death crater

Fire Temple – 5 Gold Skulltulas
You can find the connected path through the Fire Temple in the corresponding chapter of the Walkthrough.
Location and view solution
Play the Song of Time in front of the left side corridor of the large lava hall. Climb the offset time block and enter the higher door. Defend the flying floor tiles and defeat the predatory slime. The Skulltula hangs on the back wall.
Read more about the solution: Above the corridor at the lava lake

Location and view solution
In the room with the rolling rocks, follow the outer wall and listen for the scratching sound. Hit the suspicious wall and blow it open with a bomb.
Read more about the solution: Blow-up wall in the rock labyrinth
Location and view solution
On the upper level of the rock maze, play the Scarecrow’s Song and move towards Balzac. Then use the moving platform and follow the hidden path. The Skulltula hangs on the high wall of the tower.
Read more in the walkthrough: Hidden tower above the rock labyrinth
Location and view solution
After the previous Skulltula, continue climbing up and go through the next door. In the large round room, another Gold Skulltula is crawling on the wall next to the deep shaft.
Read more in the walkthrough: Top floor of the hidden tower
Location and view solution
In the entrance hall, smash the Goron statue with the Megaton Hammer. Follow the rooms behind and fend off the flying floor tiles. After the robbery slime you will find the last Gold Skulltula on the wall.
Read more about the solution: On the way to Boss Key
Hyrule Field – 2 Gold Skulltulas
Location and view solution
Search the lone tree west of the small bridge before climbing to Kakariko. Use a bomb to open the cave on the trunk. Inside, the Gold Skulltula hangs high on the wall. After defeating them, also get their symbol with Boomerang or Hookshot.
Read more in the walkthrough: Secret cave near Kakariko
Location and view solution
Search the stone circle before the path to Gerudo Valley. Open the hidden cave with a bomb; the adult Link can also use the Megaton Hammer for access. Inside you burn the spider web with Din’s Din’s Fire. Behind it there is a cow and the Gold Skulltula waiting. Collect the symbol with Boomerang or Hookshot.
Read more in the solution: Stone circle near the Gerudo Valley
Hyrule Marketplace – 1 Gold Skulltula
Location and view solution
As young Link, enter the guardhouse right next to the drawbridge. Roll against the wooden crate on the back wall to reveal the marketplace’s only Gold Skulltula.
Read more about the solution: Guardian house at the city gate

Hyrule Castle and Ganon’s Castle – 3 Gold Skulltulas
Location and view solution
After you leave the market square, you roll against the first tree on the way to the castle. The Gold Skulltula falls out of the crown.
Read more about the solution: Tree on Schlossweg

Location and view solution
As young Link, play Anthem of the Storm by the tree near the castle moat and where Talon slept. Jump into the hole that appears and blow up the crumbling wall. The Skulltula is waiting behind it.
Read more about the solution: Cave at the castle moat


Location and view solution
As adult Link, go from the destroyed market square to the former castle grounds. In front of Ganon’s castle there is a collapsed stone archway on the edge of the lava. Look for the Gold Skulltula at the back and get the symbol with the catch or Longshot.
Continue reading in the walkthrough: Ruins in front of Ganon’s castle
Lon Lon Ranch – 4 Gold Skulltulas
Location and view solution
As a child, go to the single tree near the Lon Lon Ranch home at night. Roll against the trunk and defeat the Skulltula that falls out. Then pick up her symbol from the ground.
Read more about the solution: Tree behind the house

Location and view solution
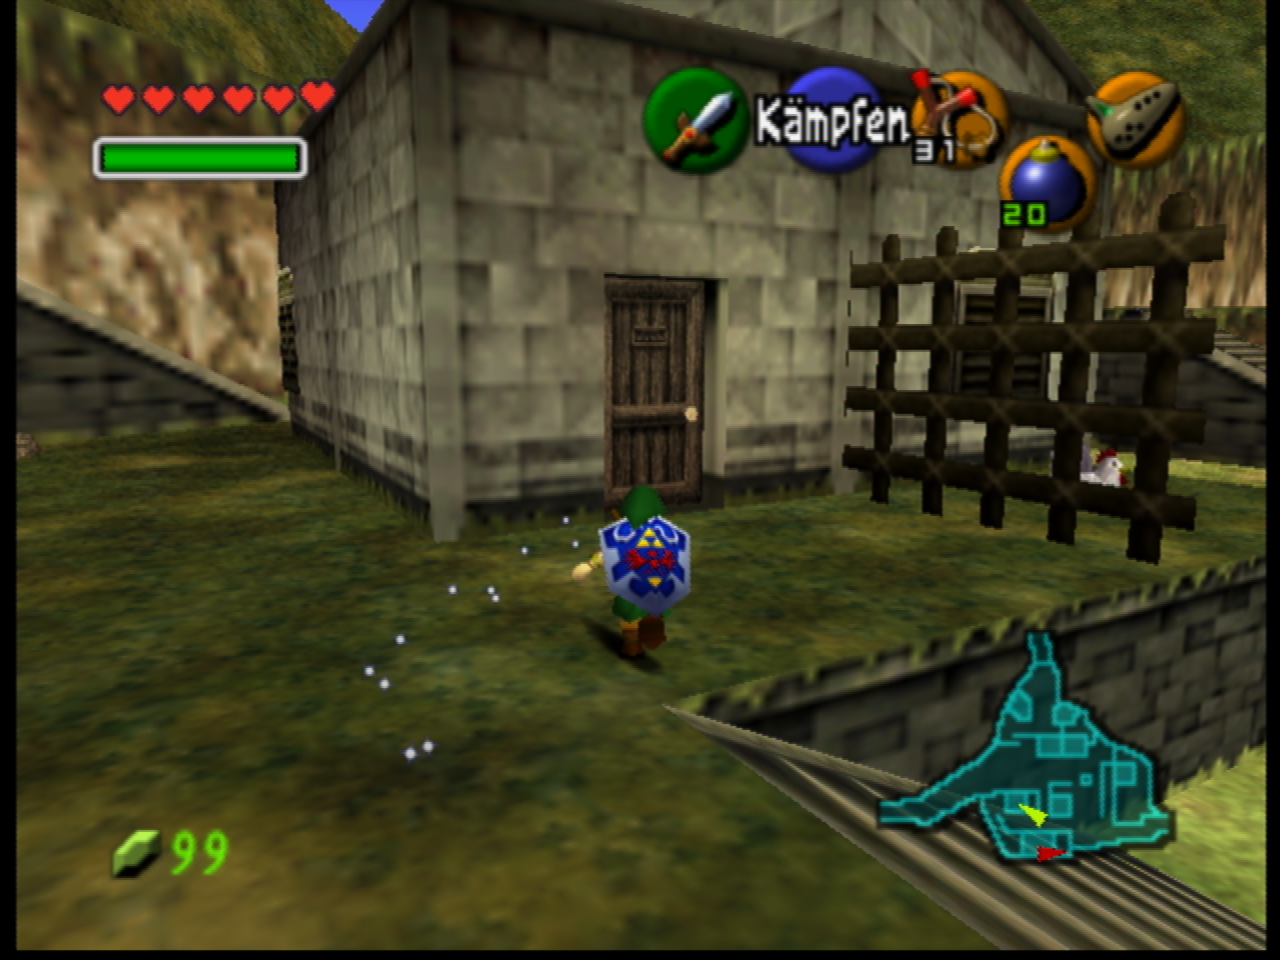
Run to the back of the shed in the paddock at night. The Gold Skulltula is crawling on the outside wall.
Read more about the solution: Behind the shed

Location and view solution
Follow the outer fence of the paddock at night. There is a Skulltula hanging on the high rock wall, which you defeat with the fairy slingshot and collect with the Boomerang.
Read more about the solution: Rock wall at the paddock
Location and view solution
Look at the upper floor of the apartment building at night. The last Gold Skulltula on the farm sits in one of the windows. Defeat them with the fairy slingshot and get the symbol with the Boomerang.
Read more about the solution: Window of the residential building
Lake Hylia – 5 Gold Skulltulas
Location and view solution
As young Link, swim at night to the small island with the two stone pillars. The Gold Skulltula is crawling on one of the pillars or the small island wall.
Read more about the solution: Island of the Fire Arrows

Location and view solution
As young Link, go to the back of the research institute at night. Defeat the Skulltula with the Fairy Slingshot and get its symbol with the Boomerang.
Continue reading in the solution: Back of the laboratory
Location and view solution
Have bugs crawl into the soft area of ground directly in front of the research institute. A Gold Skulltula comes out of the ground.
Read more about the solution: Magic Bean hole in front of the laboratory

Location and view solution
As adult Link, return to the island with the warp pedestal at night. The Skulltula sits high up on the dead tree and must be reached with the Longshot.
Continue reading in the walkthrough: Dried tree on the island

Location and view solution
Put on the Zora Tunic and the Iron Boots and sink to the bottom of the laboratory tank. Roll against the wooden box to make the Gold Skulltula appear. Defeat and collect them with the Hookshot.
Read more about the solution: Pool in the research institute

Water Temple – 5 Gold Skulltulas
You can find the connected path through the Water Temple in the corresponding chapter of the Walkthrough.
Location and view solution
Lower the water level completely and go to the southern hallway of the main hall. Blast the fragile floor plate and follow the path into the chamber with the grate. Activate the Crystal Switch through the grate with a spin attack. Get the Skulltula symbol from the opened niche.
Read more in the walkthrough: Behind the grate in the southern underwater room

Location and view solution
After you receive the Longshot, play the Song of Time behind the chest. In the following underground river, a Gold Skulltula hangs on the wall between the whirlpools.
Read more in the solution: Vortex room behind shadow link

Location and view solution
Bring the water level to the middle level and enter the tower in the center of the main hall. The Skulltula hangs high up on the inner wall and can only be reached with the Longshot.
Read more about the solution: Middle tower

Location and view solution
In the large room with the waterfall and descending platforms, there is a Skulltula hanging high on the right wall. Pull them to you with the Longshot.
Read more about the solution: Room with the moving platforms

Location and view solution
On the way to Boss Key you will enter an underwater passage through which large rocks roll. Wait for a rock to pass and get the Skulltula from the side wall with the Longshot.
Read more in the walkthrough: Passage with the rolling rocks

Gerudo Valley – 4 Gold Skulltulas
Location and view solution
Enter Gerudo Valley as young Link at night. Right at the beginning there is a Gold Skulltula crawling on the rock face to the right of the small wooden bridge. Defeat them and get the symbol with the Boomerang.
Read more about the solution: Rock wall at the wooden bridge
Location and view solution
As adult Link, cross the destroyed bridge and go behind the carpenters’ tent at night. There is a Gold Skulltula hanging on the rock wall.
Read more about the solution: Rock wall behind the carpenter’s tent
Location and view solution
Near the carpenter’s tent, a natural rock arch spans the path. Look at its underside at night and take down the Skulltula with the Longshot.
Read more in the solution: Underside of the rock arch

Location and view solution
As young Link, jump into the ravine with the chicken and glide to the ledge with the Gerudo and the cow. Allow beetles to crawl into the soil there.
Read more in the solution: Magic Bean hole in the gorge

Gerudo Fortress – 2 Gold Skulltulas
Location and view solution
Head to the upper rooftops of the fortress at night. Near the large Treasure Chest with the Piece of Heart, a Gold Skulltula is crawling on the high outer wall.
Continue reading in the walkthrough: Wall near the heart part chest
Location and view solution
Go to the archery range at night as adult Link. Look for the Skulltula at the large target at the back of the track. The Longshot achieves both the spider and its symbol. This find is located at the firing range and is independent of the Skulltula on the fortress wall.
Read more about the solution: Target at the archery range
Haunted Desert – 1 Gold Skulltula
Location and view solution
Follow the flags through the first part of the Haunted Desert. In the small building from whose roof you later follow the desert spirit, a Gold Skulltula is crawling on the inside wall.
Continue reading in the walkthrough: Stone Shelter
Desert Colossus – 3 Gold Skulltulas
Location and view solution
As adult Link, wait until night and look for the palm trees next to the dry pond. There is a Gold Skulltula hanging on one of the palm trees.
Read more about the solution: Palm tree on the dry pond

Location and view solution
Play Requiem of the Spirits as young Link and let bugs crawl into the soft ground in front of the temple.
Read more about the solution: Magic Bean hole in front of the Spirit Temple
Location and view solution
Plant a Magic Bean in the same spot. Return at night as adult Link and ride the floating plant to the high rocky plateau. Jump off there and defeat the Skulltula.
Read more in the solution: Rock plateau above the desert
Spirit Temple – 5 Gold Skulltulas
You can find the connected path through the Spirit Temple in the corresponding chapter of the Walkthrough.
Location and view solution
In the children’s section you have to collect five silver Rupees and lower a grate. After crossing, turn around. The Gold Skulltula hangs on the grid or the wall behind it.
Continue reading in the walkthrough: Room with the five silver rubies
Location and view solution
Open the locked door behind the crawl tunnel and climb up the wall guarded by normal Skulltulas. When you reach the top, you turn around. The second Gold Skulltula hangs above the entrance.
Read more about the solution: Above the climbing wall
Location and view solution
After you have pushed the sun block into the beam of light, you enter the adjoining staircase. Turn around and look over the front door. The third Gold Skulltula is located there.
Continue reading the solution: Staircase in front of the first Iron Prince
Location and view solution
As adult Link, enter the room with the rolling rocks and the five silver rubies. Play the Song of Time in front of the blue time block. A skulltula is hidden behind its original position.
Continue reading in the walkthrough: Behind the time block in the rock room
Location and view solution
As adult Link, go to the upper level of the hall with the great desert goddess. On a distant ledge, Navi marks a point in green. Play the Scarecrow’s Song and move to Balzac with the Longshot. The fifth Skulltula of the Spirit Temple hangs on the wall near the ledge.
Read more in the solution: High above the great desert goddess
Rewards in House of Skulltula
Visit the cursed family in Kakariko and talk to the newly redeemed resident after each level reached. The rewards are not awarded automatically upon collecting the symbols.
- 10: Large wallet for 200 Rupees.
- 20: Stone of Agony in the N64 original; it requires a supported rumble function.
- 30: Giant exchange for 500 Rupees.
- 40: Bombchus.
- 50: A Piece of Heart.
- 100: The head of the family gives you 200 Rupees. You can pick them up again after leaving and re-entering the house.
If there are only a few symbols left, check the Skulltula symbols in the game’s map menu: they will help you narrow down areas and dungeons that have already been completed. Don’t forget the Ice Cavern and the bottom of the well.