

Seven years have passed since Link pulled the Master Sword from the Pedestal of Time. While he slept in the Hall of the Sages, Ganondorf was able to spread his power across Hyrule. The once bustling market square is in ruins, numerous residents have fled and even the familiar forests have changed. Link is now an adult and must find the remaining wise men to stop Ganondorf.
Before we enter the first temple of the adult Link, our 100% route takes us through several already familiar areas. In the Kakariko cemetery we get the Hookshot and collect three Pieces of Heart. Afterwards we take care of other secrets of the village, win Epona at the Lon Lon Ranch and begin the extensive exchange quest for the Biggoron sword. We also visit the Lake Hylia, get the Piece of Heart on the roof of the laboratory and activate the Scarecrow’s Song for the adult Link.
Finally, we travel through the Kokiri Forest to the Lost Woods, collect the first new Gold Skulltulas of our adult adventure and cross the Sacred Glade guarded by Moblins. There we encounter Sheik again, learn the Minuet of Forest and finally enter the Forest Temple. The solution applies to the normal version of The Legend of Zelda: Ocarina of Time on Nintendo 64 and to Ocarina of Time 3D.
Seven years later – Rauru and the Light Medallion
After Link draws the Master Sword, he awakens in the Hall of the Sages. Before him stands Rauru, the Sage of Light. He explains that Link slept in the Sacred Realm for seven years because when he drew the Master Sword, he was still too young to use its power as a Hero of Time. Meanwhile, Ganondorf has entered the Sacred Realm, seized part of the Triforce and taken Hyrule under his control. To stop him, Link must awaken the remaining Sages, whose forces together have the power to seal Ganondorf again.
Rauru gives Link the Light Medallion and tells him that he should first find the Sage of the Forest. He then takes Link back to the Temple of Time. Here we meet the mysterious Sheik for the first time, who apparently knows more about the wise men and the situation Hyrule’s. He explains that a new disaster has arisen in the forest and Link first needs a special weapon before he can enter the Forest Temple. This weapon is the Hookshot, which can be found in the Kakariko Cemetery.
Then leave the Temple of Time. A completely different picture awaits you on the former market square: the shops have disappeared, numerous buildings have been destroyed and several undead roam between the ruins. If you get too close to one of these enemies, they can immobilize Link with their stare. However, you don’t have to fight here. Run past the undead and head towards the former city gate. If one of the opponents holds you, you can free yourself by moving quickly. Alternatively, Sun’s Song temporarily stuns the undead.
Pass through the destroyed city gate and walk over the remains of the drawbridge to the Hyrule Field. Here the day-night cycle continues to work as usual. Our first destination is Kakariko, which has welcomed numerous refugees from Hyrule City over the past seven years. Follow the familiar road east and cross the bridge to the village.
Kakariko as adult Link
Kakariko has changed significantly since Link’s last visit. Several buildings have been expanded and numerous former residents of Hyrule City have found refuge here. Some of the shops also have new offers. This time we don’t have to explore the village from scratch because we have already completed most of the tasks from Link’s childhood. Particularly important now are the windmill, the cemetery and the upper roof area, which we can reach later with the Hookshot.
If you have already handed in 50 Gold Skulltulas at the Skulltula House, you can also pick up another Piece of Heart there. If you have not yet reached the limit, we will save this reward for a later collection round. The first new Pieces of Heart of this chapter are waiting in the cemetery.
Learn the Anthem of the Storm
First go to the windmill in the northeastern part of Kakariko. The musician who takes care of the large wind turbine is still standing inside. However, he is in an extremely bad mood. Talk to him and listen to his story. He remembers a little boy with an ocarina who is said to have played a strange tune seven years ago, confusing the entire windmill. Link doesn’t know anything about this yet, because this event will only take place during a later trip into his childhood.
Stand in front of the musicians and take out the Ocarina of Time. He then plays the Anthem of the Storm to Link. Repeat the melody on your ocarina to learn it permanently. The song causes rain and activates hidden mechanisms in certain places in Hyrule. It can also open special secret caves. It is particularly important for our full route as we will have to play it later as young Link in this windmill to drain the water from Kakariko’s well.
The Song of Storms also enables one of the two still open Pieces of Heart with the frogs on the Zora’s River. To do this, however, we have to go back to Link’s childhood. We only get this option after the Forest Temple. We therefore combine the later visit with the rest of our childhood tasks instead of planning an unnecessary detour now.


Kakariko Cemetery – the fully grown Magic Bean
Exit the windmill and go to Kakariko Cemetery. As a young Link, we have already planted a field of soft soil with a Magic Bean. After the past seven years, it has become a large, mobile plant. It floats across the ground in a fixed pattern and can transport Link to a ledge that was unreachable in his childhood. Before we open the grave of the gravedigger Dampé, we get the first new Piece of Heart.
Piece of Heart on the high lead
Open
Go to the full-grown magic pea on the left edge of the graveyard. Wait for the large leaf to reach its lowest position and jump onto it. The plant then lifts Link up and moves to a small ledge on the rock wall. Jump off in time before it goes back down. There is an eye-catching wooden box on the ledge. Roll it with Link to break it. Therein lies the first Piece of Heart of this chapter.
If you didn’t plant the Magic Bean as a child, you can Piece of Heart catch up later. As soon as we can switch between Link’s childhood and adulthood, we return to the cemetery and plant the pea afterwards. The plant then also appears in adulthood. Since we already prepared all eight early planting sites before the first timeskip, we can do this Piece of Heart However, collect them immediately on our route.
Dampé’ grave – get the Hookshot
Then go back to the left row of graves in the cemetery. There is a gravestone there, in front of it fresh flowers grow. This tombstone belongs to the now deceased gravedigger Dampé. Place Link in front of the stone and pull him back. Behind it, a hole opens in the ground that leads into an underground crypt. Jump in and follow the narrow passage until you meet the gravedigger’s ghost.
Dampé realizes that Link is interested in his special treasure and challenges him to a race through the underground passages. Unlike a normal race, however, you don’t have to overtake him. Your task is to follow him through the branching labyrinth and reach the goal before the doors close between you. Dampé immediately begins to float and disappears around the first bend. So run directly behind him and try to keep an eye on his path as closely as possible.
First race against Dampé
The route consists of several long corridors, tight curves and small intersections. Dampé regularly leaves flames on the ground along the way. If Link touches one of them, he loses health and is thrown back for a short time. So don’t try to run after him straight away, but keep a little distance. On long straight stretches you can gain some time with a rolling attack. In the tight corners, however, you should walk normally so that Link doesn’t hit the walls or accidentally take the wrong gear.
Pay particular attention to Dampé’s branches. If you lose sight of it for a moment, you can orient yourself by the flames left behind. The correct route always leads in the direction in which the ghost last disappeared. Avoid long stays and unnecessary fights. On your first attempt, the exact time doesn’t play a decisive role as long as you can follow Dampé to the last room. Therefore, use this run to memorize the course of the route. We’re about to cross it a second time.
At the end of the crypt, Dampé is waiting for Link in a small room. After you reach him, he disappears and a large Treasure Chest appears in the middle of the room. Open it and you will get the Hookshot. This tool shoots a long chain with a hook for Link to hold on to. If you hit certain wooden surfaces, wooden beams, Treasure Chests or special target markings, Link will automatically pull over to them. Smaller enemies can also be stunned or defeated from a distance with the Hookshot.
The Hookshot is one of the most important items in adult adventure. We need it immediately to access the Forest Temple, but later also for several Gold Skulltulas and hidden ledges. In the Water Temple we finally get an improved version with a significantly longer range, the Longshot.
Piece of Heart in the windmill
After finding the hook, go through the corridor behind the Treasure Chest. At the end, a large blue time block blocks the output. Stand in front of it and play the Song of Time. The block then disappears and opens the way. Climb the stairs and you will reach an elevated entrance to the Kakariko Windmill. From here you stand significantly higher than on your first visit and can reach the moving platforms inside the mill.
Open
In front of you, several narrow beams rotate around the large axis of the windmill. Wait for one of these beams to pass by at about your height and jump onto it. If possible, stay in the middle of the platform as it slowly transports you to the opposite side. There is a small protrusion with a Piece of Heart. Jump off at the right moment and collect it. This means you already have the second new Piece of Heart in this chapter.
If you fall while jumping, you don’t have to fight Dampé again. You can exit the windmill via the normal entrance and re-enter the crypt to reach the upper entrance again. Alternatively, the Piece of Heart can be collected from the rotating platforms with precise timing. Once you have it, you leave the windmill and return to the cemetery.
Second race against Dampé – another Piece of Heart
Open
For the third Piece of Heart we have to challenge Dampé a second time. Go to the tombstone with the flowers again, pull it back and jump into the crypt. Dampé is waiting again at the start of his race track. This time the real challenge is to reach the goal in 1:00 minute or faster. The path through the labyrinth is the same as before, but now we must avoid any unnecessary delay.
As soon as the race starts, you follow Dampé as closely as possible. Use the roll attack on long straights to gain some time, and switch back to normal running on tight corners. Be sure to avoid the flames, because each hit not only costs health, but also valuable seconds. Especially at the last two junctions, you should already know the route so that you don’t have to stop and look for Dampé.
With the Hookshot you just received, you won’t reach the torch shortcut at the end of the route yet. Therefore, run the last climb on the normal route and cut the curves tightly without getting stuck on the walls. You can achieve the required time without taking shortcuts. If you want to catch up on the race later, the Longshot from the Water Temple makes the final section easier for you: With its greater reach, you can pull yourself up on the torch and skip the long arc.
If you reach the goal with a time of a maximum of 60 seconds, Dampé will give you another Piece of Heart. If you narrowly miss the time limit on the first attempt, you can repeat the race as many times as you like. Pay particular attention to the last two corners and only use the roll attack where there is enough space. We have thus collected a total of two new Pieces of Heart in the cemetery and also received the Piece of Heart in the windmill.




Kakariko – Piece of Heart on the roof and Gold Skulltula
With the Hookshot we can still complete two secrets in Kakariko that were difficult to reach on the first visit as an adult Link. One of them is a Piece of Heart on a man on a high roof, the other a Gold Skulltula on a neighboring house. Both finds can be done with the normal Hookshot. The later Longshot offers more range, but is not absolutely necessary.
Piece of Heart with the man on the roof
First, go to the potion shop near the Death Mountain Trail. Enter the shop and follow the passage behind the sales counter to the back of Kakariko. There you will reach a raised ledge from which several roofs are within reach of the hook. Look for the blue-roofed house with the climbing plants, with a man sitting on the roof. Position yourself so that you can aim at a suitable wooden roof edge or an accessible target point and use the Hookshot to pull yourself onto the roof.
Open
If the first attempt fails because of the range, you can work your way closer via the neighboring ledges and roofs. As soon as you get to the man, talk to him. He is surprised that Link visited him in his high seat and in return gives him a Piece of Heart. You don’t have to win a mini-game or defeat an opponent. The only important thing is that you actually get to his roof and talk to him.
Gold Skulltula on Impa’s house
Then wait until night falls or play the Anthem of the Sun. In Kakariko, as an adult Link, an additional Gold Skulltula appears at night on the roof of Impa’s house. The building is located near the chicken run and is accessible via several neighboring roofs. First, go near the Skulltula house and use the Hookshot to get to one of the higher ledges. From there you can move on to the roof of Impa’s house.
The Gold Skulltula sits on the roof or at its upper edge. You can hit her directly with the Hookshot and then collect her symbol with it too. If the angle is unfavorable, move to an adjacent section of roof and try again. Since this spider only appears at night as an adult Link, it could not yet be collected during our first visit to Link’s childhood.
We have now completed the most important immediately accessible secrets of Kakariko. You will receive another interesting reward later in the Skulltula House: As soon as your total reaches 50 Gold Skulltulas, one of the freed family members will give you another Piece of Heart. If you have reached this limit by now, you can collect it now. Otherwise we will combine the visit with a later collection round.
Start the Biggoron Exchange Quest – Pocket Cucco from Anju
Before we leave Kakariko, let’s start the big exchange quest for the Biggoron sword. This task later takes us through almost all of Hyrule and ends with a particularly powerful two-handed weapon. The Biggoron Sword deals significantly more damage than the Master Sword and, unlike the regular Goron Sword, does not break. However, Link cannot use a shield while wielding the two-handed weapon. It is still an excellent alternative for many boss fights.
The exchange quest begins with Anju, who you already know from Link’s childhood. She stands in the village near the chicken run. Talk to her as adult Link and she will give you a special egg, the Pocket Egg. A little chicken named Pocket Cucco is supposed to hatch from this. You can speed up the process by heading to the Hyrule Field and playing the Anthem of the Sun there. As soon as a new morning begins, the egg transforms into the pocket chicken Pocket Cucco.
Wake up Talon with Pocket Cucco
Go with the hatched chicken into the house near the entrance to the Death Mountain Trail. There, Talon, the former owner of Lon Lon Ranch, lies fast asleep on a bed. Since Ganondorf’s coming to power, he has lost his farm to Ingo and retreated to Kakariko. Place Link right next to Talon and use the Pocket Chicken on an item button. Pocket Cucco crows loudly, finally waking Talon up. After the short conversation, Talon leaves the house and makes his way back to his farm.
Then bring Pocket Cucco back to Anju. She is pleased that the chicken has served its purpose and asks Link to take care of an even more unusual animal. As a reward you will receive the rare blue chicken Cojiro. It used to belong to her brother and only crows near him. This is exactly what we need for the next section of the exchange quest. Before we take Cojiro to his former owner, we get Epona. This means that subsequent time-dependent deliveries can be carried out much more quickly and safely.
Epona at Lon Lon Ranch win
Leave Kakariko and travel to Lon Lon Ranch in the middle of the Hyrule Field. During Link’s seven-year absence, Ingo has taken control of the farm. Malon continues to work there, while Talon initially had to leave the property. On the farm you will quickly notice that the horses are now managed by Ingo. However, Epona is still in the large enclosure and can be summoned back to Link using her song.
Talk to Ingo and pay 10 Rupees so that he will let you into the horse enclosure for a short time. Once you enter the paddock, take out the ocarina and play Epona’s Song. Epona recognizes the melody and immediately runs to Link. Climb on her back and use the remaining training time to get used to the controls. You can use the carrots to speed up Epona in the short term. However, the animals only have a limited number of these bursts of speed, which regenerate after a short break.
First horse race against Ingo
When you are sitting on Epona, ride to Ingo and talk to him. For a bet of 50 Rupees he challenges you to a horse race. The route consists of two laps along the inner fence of the paddock. Your goal is to reach the end of the second round before Ingo. When starting, stand as close as possible to the inner fence, because the route is shortest there. Accelerate with a carrot or two and try to overtake Ingo early.
However, you should not use all of the carrots in one go. If the gauge is completely empty, it will take more time to fill up again. Therefore, if possible, leave at least one carrot left and only use further bursts of speed when Ingo gets closer again or wants to overtake you. Also try to keep him behind you by clever positioning on the inner fence. His horse route often goes a little further out, so you gain additional meters with a clean inside line.
After two successful laps you reach the finish line before Ingo. He is upset about the defeat, but immediately offers you another race. This time the stakes are much higher: Epona herself.
Second horse race – Epona as winner
In the second race, Ingo rides noticeably faster and tries more often to push Link away from the inside fence. Still, stay as far in as possible and only use Epona’s carrots on the long, straight sections. Immediately before a curve, it’s better to continue riding normally so that you don’t accidentally go too far out. It’s important to take the lead early because Ingo will be difficult to overtake later if he blocks the inside track.
Again, try to build up a small speed advantage and then maintain it. As soon as Ingo gets closer, you use another carrot boost. Make sure that your display does not run completely empty. If you lose the second race, you will have to start the challenge again. However, with the right inside line and well-spaced bursts of speed, this race can also be won.
After your second victory, Ingo reluctantly declares Epona your property. However, he refuses to let Link ride the horse away from the farm and locks the large entrance gate. The paddock is now completely cordoned off. You therefore have to find a way out yourself with Epona.
Jump over the fence with Epona
First ride to the opposite side of the paddock and then turn Epona towards the large outer fence. You can either jump over the locked entrance gate or over a suitable lower-looking section of the perimeter. For both options you need enough speed. Therefore, ride as straight as possible towards the obstacle and use one or two carrots just before it to give Epona additional speed.
As soon as Epona has enough speed, she automatically jumps over the fence. Link and his horse land on the other side, leaving Lon Lon Ranch. From now on, you can summon Epona at any time in the Hyrule Field and in several other open areas using Epona’s Song. This makes long journeys through Hyrule much faster. We’ll also need Epona later for the Gerudo riding bow challenges and several time-dependent sections of the Biggoron exchange quest.
Optional: Malon’s obstacle course and a cow for Link’s house
To ensure that the game is as complete as possible, we then return to the Lon Lon Ranch. After Ingo is defeated and Link escapes with Epona, Talon is able to return to the farm. Speak up Malon, while sitting on Epona. She offers you an additional challenge: one Obstacle course over two laps, in which you have to jump over several low and high fences in a set order.
Ride as close to the intended route as possible and keep enough speed in front of the high fences. Small obstacles can sometimes be overcome without additional carrots, while it is better to accelerate beforehand for higher jumps. If you finish the race in less than 50 seconds When you complete it, Malon will give you a special prize. However, it is too big to take with you straight away: she leaves one Cow in Link’s treehouse in Kokiri Forest accommodate. There you can later play Epona’s song to her and thus become one Empty Bottle Fill with Lon-Lon milk for free.
The cow is not an essential item for the story. However, since we take into account all permanently achievable rewards on our 100% route, it is worth completing the obstacle course now. We then leave the farm and continue the exchange quest with the blue chicken Cojiro.


Lake Hylia – Piece of Heart on the laboratory and Scarecrow’s Song
With Epona we first travel to Lake Hylia. Here, as young Link, we planted a Magic Bean right in front of the laboratory and played an eight-note ocarina melody of our own choice to Bonooru. Both become important now. The lake’s water has receded significantly over the past seven years, leaving large parts of the lake’s former bed exposed. However, we can still use the corresponding paths to the laboratory and the scarecrows.
Reach the Lakeside Laboratory Roof
laboratory
Go to the lab on the northwest bank. The large Magic Bean that we planted as a young Link is now growing directly in front of the building. Wait for the leaf to reach its lowest position and jump onto it. The plant now begins a longer flight over the ground and slowly rises upwards. Stay standing on it until you have reached approximately the height of the laboratory roof. Then jump off in time and land on the roof.
Open
From there you climb a little further up using the existing ladder at the observation tower. On the highest platform is the next Piece of Heart. Collect it and then carefully fall back to the ground. If you miss the roof on the first try, you can simply wait for the Magic Bean again. She repeats her flight round as often as she wants.
Alternatively, the roof can be reached using the Scarecrow’s Song and the catch hook. Since we have already planted the Magic Bean on our previous route, the route via the leaf platform is the easiest.
Activate the Scarecrow’s Song as an adult
Then go to the two scarecrows in the field at Lake Hylia. During Link’s childhood, we played Bonooru a self-selected melody made up of eight ocarina notes. He promised to remember this melody. Now we have to talk to him again so that the Scarecrow’s Song is activated for the adult Link too.
Stand directly in front of Bonooru, take out the ocarina and play the exact same melody that you taught him as a child. As soon as Bonooru recognizes them, he explains that his friend Pierre is now traveling through Hyrule. This activates the Scarecrow’s Song. However, it does not appear as a normal song in the ocarina overview. So you still have to remember the eight tones yourself.
At certain points in Hyrule, Navi later flies to an unusual point and glows green . If you play the Scarecrow’s Song there, Pierre will appear. With the Hookshot you can target him and pull yourself to his position. This makes several hidden ledges and shortcuts accessible, including in Dodongo’s Cavern, the Sacred Glade and later in other dungeons. Without reactivating Bonooru, Pierre would not appear in these locations.
We leave the two remaining major collection tasks from Lake Hylia – in particular the Golden Scale and a Piece of Heart from the laboratory’s diving pool – open for now. For this we have to meet further requirements later. We now have everything we need to access the Forest Temple.
Biggoron exchange quest – Cojiro in the Lost Woods
After the detour to Lake Hylia we continue the exchange quest with the blue chicken Cojiro. Return to the Kokiri Forest across the Hyrule Field and enter the Lost Woods. From the entrance you just have to go once to the left. You reach the area with the tree stump that the Skull Kid sat on during Link’s childhood. There is now an exhausted man sitting there who has obviously been wandering through the forest for a long time.
Stand directly in front of him and use Cojiro. The blue chicken immediately starts crowing loudly. The man recognizes the animal and explains that it used to belong to him. He also reports that his health is not going well and that he urgently needs help. He then gives Link a strange one Odd Mushroom, which he is supposed to take to an old woman in Kakariko. As soon as you receive the mushroom, a countdown begins. You just have three minutes Time to deliver it on time.
Bring mold to Kakariko in three minutes
Immediately leave the Lost Woods and walk through the Kokiri Forest back to the Hyrule Field. Call your horse there with Epona’s song and mount. Now ride straight to Kakariko. Use Epona’s carrots on long straight sections to make progress as quickly as possible. Since the carrots will respawn after a short break, you can increase the speed regularly. Avoid fights and avoid unnecessary dismounts if possible.
You should during this delivery no teleportation songs use. The time-dependent items in the Biggoron exchange quest are intended for normal transport across the game world. A warp song can cause the remaining time to be drastically reduced and the delivery to fail. So ride straight across the Hyrule Field to Kakariko.
When you arrive in the village, go to the normal potion shop on the way to the Death Mountain Trail. Enter the building and walk past the sales counter to the back exit. There you come to a small inner courtyard. Follow the narrow path or the steps to the house with the blue roof, where an old witch lives. Enter her shop and show her the mold before the three minutes are up.
The old woman recognizes the mushroom and agrees to use it to make a special medicine. As long as you arrived in time, she will accept the mushroom and process it into the next exchange item. If the transport fails, you have to return to the Lost Woods and have the man give you a new mold. You can repeat the experiment as often as you like.
Odd Poultice and the way back into the forest
After the handover you will receive the Odd Poultice from the witch. Unlike mold, there is no time limit for return . So you can refill your supplies in peace, do more tasks in the village or travel straight back to the Kokiri Forest. The witch also offers the blue elixir in her shop from now on. It restores both Link’s health and his entire magic bar, making it one of the most useful healing items in the game.
Then leave Kakariko and travel back to Kokiri Forest. Enter the Lost Woods and go again immediately after left to the tree stump where the exhausted man was sitting. However, this has disappeared. A Kokiri girl named Fado is now waiting in his place. Talk to her and then show her the musty potion. She explains that the man has left the forest and apparently will not return.
Fado accepts the Odd Poultice and gives Link a saw in return. This tool belonged to the missing man and is being sought by a carpenter in the Gerudo Valley. This ends the first major section of the Biggoron exchange quest. The saw itself has no use in combat, but is necessary to obtain the next exchange item.


Gerudo Valley – swap the saw for the Broken Goron’s Sword
We then travel with the saw to Gerudo Valley in the west of the Hyrule Field. Thanks to Epona, we can now cross the great gorge much faster than during Link’s childhood. Ride to the destroyed bridge at the beginning of the area. A large part of the connection to the opposite side is missing. Link couldn’t cross this chasm with a normal jump, but Epona has enough strength to jump over the wide gap.
Take a little distance from the bridge, ride straight towards the abyss and accelerate just before the edge with a carrot or two. When Epona has gained enough speed, she will automatically jump over the destroyed area and land safely on the other side. Don’t try to steer hard just before the edge. Stay as close to the middle of the bridge as possible so that Epona can jump straight ahead.
On the opposite side is a Carpenters’ tent. There you will find the foreman looking for his missing workers. Get off Epona and talk to him. Then show him that saw, which you just received from Fado. The foreman recognizes the tool and gratefully accepts it. In return he gives Link a Broken Goron’s Sword that he can no longer use.
The sword cannot be used in combat in its damaged state. However, the foreman recommends that you take it to Biggoron, a particularly large Goron who lives at the top of Death Mountain and can make high-quality swords. The exchange quest takes us back to the region that we visited during Link’s childhood.
Biggoron at the top of Death Mountain
Leave Gerudo Valley and travel with Epona across the Hyrule Field back to Kakariko. Drop Epona off at the village entrance and follow the Death Mountain Trail up. We can easily eliminate the boulders and enemies on the way with our existing weapons. At the upper end you climb up the long rock face, as you did during Link’s childhood, and finally reach the summit of Death Mountain.
Near the Fairy Spring sits a massive Goron, so large that it barely fits all the way onto the summit. He is Biggoron, a well-known swordsmith. Stand in front of him and show him the Broken Goron’s Sword. Biggoron explains that he could not only repair the weapon, but even use it to make a particularly high-quality sword. However, he currently has a serious problem: his eyes are very irritated and water constantly, so he can hardly see properly.
That’s why Biggoron asks Link to get a special medicine for him. He gives you a recipe that you should show to King Zora. He obviously knows someone who can produce a suitable remedy. This unlocks the next section of the exchange quest.
Why we are interrupting the exchange quest for now
The further path leads to Zora’s Domain. However, a new problem awaits there: the entire area is now frozen and King Zora is stuck in a huge block of red ice. To free him we need blue fire. We can find this later in the Ice Cavern. Alternatively, you can purchase a portion in advance at the potion shop, but this additional purchase is not worth it for our planned route.
We will therefore keep Biggoron’s recipe in our inventory for the time being and continue the exchange quest as soon as we explore the path to the Ice Cavern. Then we have to free King Zora, complete the time-dependent deliveries to the Hylian laboratory and finally bring Biggoron the eye drops he needs. After another wait, we then receive the complete Biggoron sword.
The level achieved so far remains permanently saved. We can therefore start the next story section without any problems without the exchange quest failing.



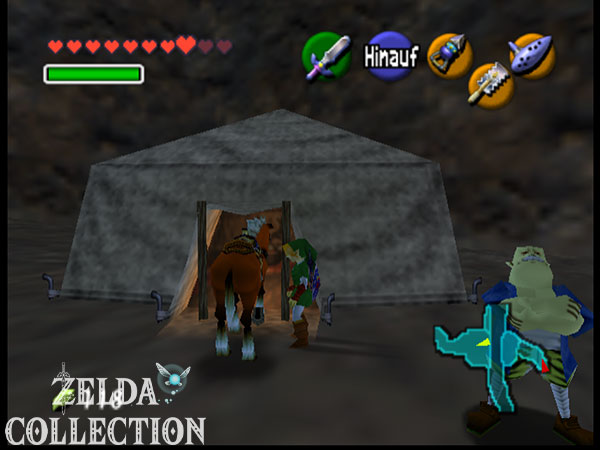


More Gold Skulltulas on the way to the Forest Temple
Before entering the Forest Temple, we can collect several new Gold Skulltulas that are exclusively for the adult link. Especially in the Kokiri Forest and in the Lost Woods, new Locations have opened up as a result of the time jump. Since we have to travel to this region anyway, we kill the spiders directly on the way to the temple. Most just need the Hookshot and night time. For another Skulltula, we use a Magic Bean that we planted during Link’s childhood.
Gold Skulltula at the twins’ house
First, return to Kokiri Forest. Many Kokiri no longer recognize Link due to his changed form, but their houses are still in the same places. Play the Sun’s Song to make it night and go to the Twins’ House in the southeast village area. A Gold Skulltula sits high on the outer wall or near the roof. Target them with the Hookshot and defeat them. You can then pull her golden symbol towards you with a second shot. With this you have also collected the last Gold Skulltula of the Kokiri village.
If you have already successfully completed Malon’s obstacle course, you can also use this opportunity to visit Link’s own tree house. The cow that Malon had delivered as a reward is now standing there. If you have an Empty Bottle with you, you can play Epona’s Song to her and get Lon-Lon Milk for free.
Gold Skulltula above the forest stage
Then enters the Lost Woods. From the entrance you follow the route right → left → right → left → left to the small clearing with the single tree and the access to the forest stage. As a young Link, we planted a Magic Bean here, which has now grown into a large, mobile plant. Wait for her leaf to pass at ground level and jump onto it. The plant then lifts Link to a high ledge above the entrance to the forest stage.
Appears on the ledge one at night Gold Skulltula. If you have just arrived in the day, you can play the Anthem of the Sun before climbing the plant. Once you’re up, aim at the Skulltula Hookshot and collect their symbol. This is also the last one Gold Skulltula the Lost Woods Done if you have already collected the two sinkhole skulltulas during Link’s childhood.
Another advantage of the plant is that it allows you to reach the high ledge without the need for awkward jumps or additional equipment. Then jump back down and follow the normal path back to the central junction of Lost Woods.
The way to the Forest Temple – getting Mido out of the way
Our next destination is the Sacred Forest Meadow, where Link learned Saria’s song as a child. From the entrance of the Lost Woods, first go right → left → right → left. You reach the area where Mido is blocking the path to the Sacred Glade. He doesn’t recognize Link, who is now an adult, and refuses to let him pass. Violence doesn’t help here. Instead, we need a melody that connects Mido with Saria.
Stand directly in front of Mido, take out the Ocarina of Time and play Saria’s song. As soon as he recognizes the melody, he becomes thoughtful and explains that only a friend of Saria could know this song. He then steps aside and opens the door. You can now continue towards the Sacred Glade.
Behind Mido, follow the path straight ahead → left → right to the entrance to the forest labyrinth. We have now traversed the familiar route from Link’s childhood again. The entrance itself still looks familiar, but much more dangerous opponents now await you inside the Holy Clearing.
The Sacred Glade – Moblins and new dangers
The Sacred Forest Meadow has changed significantly in the past seven years. During Link’s childhood, mostly harmless or smaller buggers patrolled here, but now there are several larger ones on guard Moblins the narrow corridors. These enemies carry heavy weapons and rush towards Link as soon as they spot him. Since the walls only leave narrow passages, you shouldn’t just go straight onto one Moblin run to. First, observe his patrol route and use the walls as cover.
Wait until the first Moblin turns his back on Link and move carefully behind him. Once you are close enough, you can target and attack him with the Hookshot. A well-placed hit reliably eliminates the usual Moblins. Alternatively, you can approach from behind and attack with the Master Sword. It is crucial that you do not stop directly in front of a Moblin, because its charge attack can throw Link back several meters and cause significant damage.
Gold Skulltula on the high labyrinth wall
Before we fully traverse the Moblin maze, we get another one Gold Skulltula. She appears at night as an adult Link on one of the high walls inside the Sacred Glade. If necessary, play the Anthem of the Sun first. There are several places in the labyrinth where you can climb up a ladder or a higher ledge Top of the stone walls can reach. From there you can see one on the eastern wall Gold Skulltula below the treetops.
Target the spider with the Hookshot and defeat it. You can then collect the golden symbol with another hook shot. You don’t have to walk all the way to the wall to do this. This completes the only Gold Skulltula in the Sacred Forest Meadow. The find can be easily combined with our first visit as an adult Link, because we need the Hookshot for the Forest Temple anyway.
Shortcut with the Scarecrow’s Song
If you have now activated the Scarecrow’s Song on Lake Hylia on Bonooru, you can also use a shortcut through the Moblin maze. Stand in the entrance area of the Holy Clearing and watch Navi. At a certain point she flies to a raised ledge and glows green. There, play the Scarecrow’s Song, which you already defined as a child and now confirmed as an adult.
Pierre then appears on the high wall. Target him with the Hookshot and shoot him. Link automatically pulls himself up to his position, reaching the top of the maze. From there you can bypass a large part of the usual Moblins. This shortcut is particularly useful if you want to return to the Sacred Glade later. It also offers convenient access for the night Gold Skulltula on the upper wall.
Large Moblin at the end of the labyrinth
Just before the long stairs to the Forest Temple a particularly large one awaits Club Moblin. Different from the usual ones Moblins He doesn’t patrol the corridors, but stands firmly on an elevated section and hits the ground with his heavy club. Each hit creates one Shockwave, which spreads along the floor. If you run towards it head-on, the wave can hit you from a greater distance.
First observe the rhythm of his attacks and stand on the side of one of the walls. As soon as the Moblin raises its club, you dodge to the left or right. After the impact, he needs a brief moment to pick up his weapon again. Use this break to approach him. If you get close enough to him, you can run past him to the side and attack him with the Master Sword. Avoid standing directly in front of him for a long time.
You don’t necessarily have to defeat the Club Moblin to reach the stairs. If you cleverly avoid his attacks, you can also run past him and go straight to the staircase. However, to fully explore it, it is worth defeating him at least once and completing his entry in the enemy album or your knowledge of his attack patterns. Then you climb the large stairs to the back of the Holy Clearing.
Learn the Minuet of Forest
At the end of the long stairs you reach the place where Saria sat on her tree stump as a child and taught Link Saria’s song. But Saria has disappeared. Instead, the mysterious Sheik is waiting there. He explains that Saria is now trapped deep within the Forest Temple and Link must save her. He also talks about the importance of the forest and its connection to the wise.
After the conversation, Sheik teaches Link the Minuet of Forest. This song is one of Adult Link’s special teleportation tunes. As soon as you play it on the ocarina, you can be transported directly to the Holy Clearing in front of the Forest Temple. This eliminates the long route through the Kokiri Forest and the corridors guarded by Moblins on later visits.
The Minuet of Forest is the first of the new warp songs that we learn as the game progresses. It is particularly practical for our later collection round in the Lost Woods and for possible return visits in the Forest Temple. If you are missing an item or want to return to the dungeon after a break, you can play the song again at any time.
Enter the Forest Temple
After Sheik’s disappearance you are standing directly in front of the Forest Temple. However, the entrance is on a raised ledge that Link cannot reach with a normal jump. So look up and look for the strong branch above the temple entrance. Equip the Hookshot, aim at the branch and fire. Once the hook is secured, Link will automatically pull himself up to the higher ledge.
Then go through the large entrance and you will reach the first temple of the adult Link. In the Forest Temple you can expect four Poes, several winding courtyards, rotating corridors and numerous puzzles that can only be completely solved with the fairy bow. There are also a total of five Gold Skulltulas in the dungeon, which we collect on our 100% route on the first visit. At the end, Phantom Ganon, the first big boss of the adult adventure, awaits you.


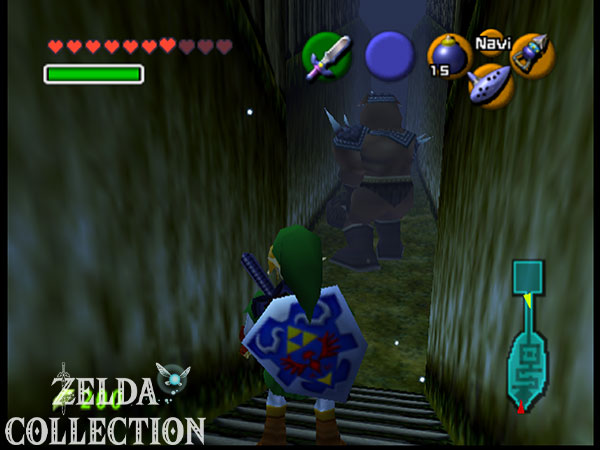


Continue in Forest Temple
With the Master Sword, Hookshot and Minuet of Forest, Link now has all the requirements for his first major temple as an adult. In the Walkthrough to the Forest Temple we first explore the two large inner courtyards and the winding corridors of the temple. We then look for the four missing Poes, find the fairy bow and solve several puzzles with rotating gears and movable blocks.
Of course we take all five Gold Skulltulas of the forest temple with us on the first run. At the end Phantom Ganon awaits us, the first big boss of the adult Link. After his defeat, we will learn what role Saria actually plays in the fight against Ganondorf.