
This solution applies to the normal version of The Legend of Zelda: Ocarina of Time on Nintendo 64 and to Ocarina of Time 3D. The Master Quest version has a significantly different structure and is not mixed with this solution.
The Fire Temple is the second major temple that Link visits as an adult. After meeting Darunia’s son in the previous chapter on the Death Mountain Trail and in Goron City, obtaining the Goron Tunic and learning the Bolero of Fire from Sheik, the path takes us deep into the Death Mountain. Ganondorf has captured almost the entire Goron people and wants to throw the prisoners to the resurrected fire dragon Volvagia. Darunia has already preceded, although he lacks his ancestors’ legendary weapon.
The Fire Temple is one of the largest dungeons in Ocarina of Time. Instead of a single, straight path, we work our way up over several floors, freeing a total of nine captured Gorons and collecting along the way eight Small Keys. On our 100% route we also take the Dungeon Map, the Compass, the Boss Key and all five Gold Skulltulas with. The most important object of the temple is the Megaton Hammer, which allows Link to smash heavy statues, operate rusty switches, and ultimately defeat Volvagia.
Requirements for the Fire Temple
For the normal solution you need the Goron Tunic, the Hookshot, bombs, the fairy bow and the Song of Time. If you followed our route, you already own all of these items. We received the Goron Tunic from Darunia’s son just before; Without it, Link can only stay in the particularly hot areas of Death Crater and the Fire Temple for a limited time. The fairy bow from the Forest Temple is needed for several Eye Switch, while bombs and Hookshot help especially with secret rooms and some enemies.
For a complete 100% pass, the Scarecrow’s Song should also be enabled. Two of the five Gold Skulltulas are in a hidden tower above the rock labyrinth, which you can only reach via Pierre or Balzac. To do this, you as a young Link must have prepared your own eight-note melody on the Lake Hylia and later played the same melody again to the scarecrow as an adult Link. If you have skipped this second step so far, you can travel to the Temple of Time via the Cantata of Light, go to the Lake Hylia, activate the song and then return directly to the Death Crater with the Bolero of Fire.
A fairy in a bottle is also recommended. Although there are several hearts in the temple and even another opportunity to capture a fairy, Volvagia’s attacks cause significant damage. Additionally, if you already have Farore’s Wind, you can use the spell as a return point before particularly long or risky sections.
Quick overview of the Fire Temple
| Found item | Location |
|---|---|
| Small Keys | 8 pieces with the captured Gorons |
| Dungeon Map | Above the rock labyrinth behind a Eye Switch |
| Compass | In the labyrinth of invisible fire walls |
| Megaton Hammer | At the highest level after the first Flaming Dervish |
| Boss Key | After the second Flaming Dervish at the last captured Goron |
| Gold Skulltulas | 5 pieces – all reachable during this run |
| Heart Container | After defeating Volvagia |
| Fire Medallion | From Darunia in the Hall of the Sages |
Darunia in Fire Temple
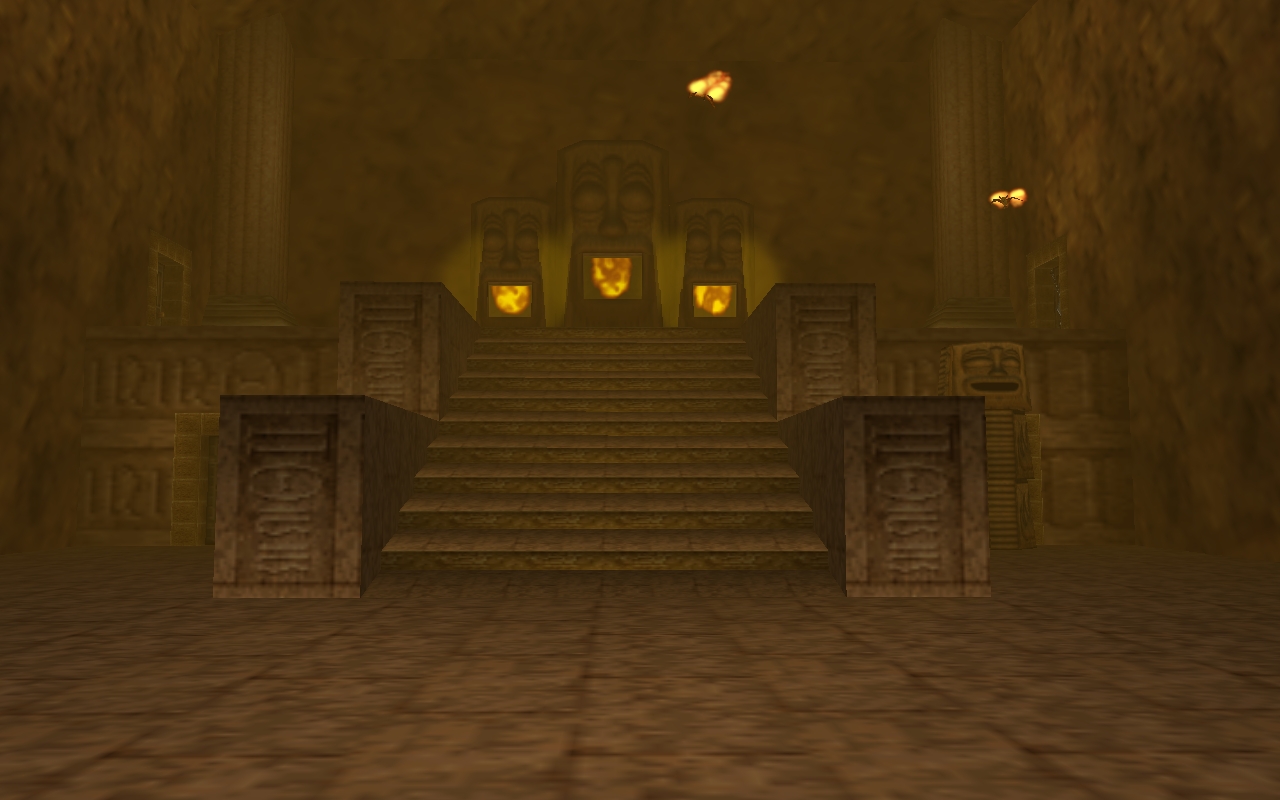
Enter the Fire Temple and climb the wide stairs in the entrance hall. Several fire flutters circle above the room; You can eliminate them from a safe distance using the Hookshot or the Fairy Bow. The door on the right side or behind the large Goron statue is currently not accessible. So go through the open door on the left at the top.
In the next large lava room you finally meet Darunia again after seven years. He explains that Ganondorf has resurrected the ancient dragon Volvagia. In order to intimidate the Gorons and at the same time create a deterrent example for all of Hyrule, the captured inhabitants of Goron City are to be gradually sacrificed to the dragon. Darunia wanted to find the legendary weapon of his ancestors that once defeated Volvagia, but was unsuccessful. Nevertheless, he doesn’t want to wait any longer and faces the dragon alone. Before he disappears through the big boss door, he asks Link to save the captured Gorons.
We can’t follow Darunia yet. The door is on the opposite side of a wide lava pool and can only be reached much later. Instead, we jump over the small rock platforms on the left side of the room to the far corner. There is a Floor Switch in front of a prison cell. Step on it to open the grate and talk to the first Goron. Each freed person gives you a clue to a mystery of the temple; However, even more important is the small Treasure Chest in its cell. Open it and take the Small Key 1/8.
There are also several jars in the opposite corner of the room. A fairy is hiding in one of them. If you still have a free bottle of, you can capture it as insurance for the long dungeon or the later fight against Volvagia. Then return to the entrance hall.
The large lava room
Now use your first key to open the locked door opposite the entrance door. Behind it lies a huge hall, the floor of which is almost entirely made of lava. A long suspension bridge runs through the middle, but we don’t fully cross it yet. More Gorons are locked up on both sides of the room, and the first Gold Skulltula of the Fire Temple is already waiting here.
First move from the entrance door to the left. Jump from the suspension bridge onto the rock platforms or follow the narrow edge along the outer wall. Although the lava damages Link if he steps into it, the Goron Tunic does not prevent direct lava damage. Therefore, avoid unnecessary jumps into the glowing pool and use the existing platforms.
Small Key 2/8
On the left side of the lava room you will reach a door under a raised ledge. Enter the corridor beyond and follow it to the next prison. Step on the Floor Switch to make the bars open and talk to the Goron. In the small Treasure Chest of his cell lies the Small Keys 2/8.
Then go back to the corridor you just used, but don’t leave the area yet. Navi or the characteristic green glow points you to a place above the entrance. This is where the first optional 100% section of the temple is hidden.
Gold Skulltula 1/5 – above the side aisle
Stand in front of the side corridor so that the navigation system or the reference to the blue time block is visible, and play the Song of Time. The large blue block changes position and now forms a platform that you can use to reach the higher passage. Climb up and enter the door.
In the small room behind, several floor tiles begin to fly towards Link one after the other. Simply hold up the Hylian Shield and let the plates smash against it. Afterwards, a predatory slime or Like Like remains. Keep your distance, because if the monster swallows you, it can steal the Hylian Shield or even the Goron Tunic. The opponent can be safely eliminated with arrows, Hookshot or careful sword attacks. If he actually steals a piece of equipment from you, you will have to defeat him quickly so that the item appears again.
The Gold Skulltula 1/5 is then located on the rear wall. Defeat them with the Hookshot and also drag the icon to Link. This hidden room is now completely cleared and you can return to the lava room. All five temple spiders are also listed in our guide to the Gold Skulltulas.


Small Key 3/8 – the blastable wall
Return to the suspension bridge and now move to the opposite side of the large lava room. Follow the small rock islands and wooden walkways along the wall. At one point a platform regularly moves over the lava. Wait for it to reach your side, jump onto it and let it carry you to the next section. You finally reach an elevated path on the outer wall via further platforms.
Examine the stone wall there. A particular section differs only very slightly from its surroundings. If you hit it with your sword, you will hear a much duller sound than if you hit a solid wall. Place a bomb in front of it. The explosion tears open a passageway and reveals a hidden door. Follow the corridor behind it to the next prison, step on the switch and free the Goron. The Treasure Chest in its cell contains the Small Key 3/8.
Then return to the long suspension bridge, cross it completely and open the locked door at the northern end with one of your keys.


The lava elevator
In the next room, a wooden ramp leads down to a large metal grate. Slide or run to the lower level and climb up the grate. Several fire flutters attack from the air. If possible, eliminate them from a distance with the Hookshot or fairy bow, because one hit can knock Link off the narrow platforms into the lava.
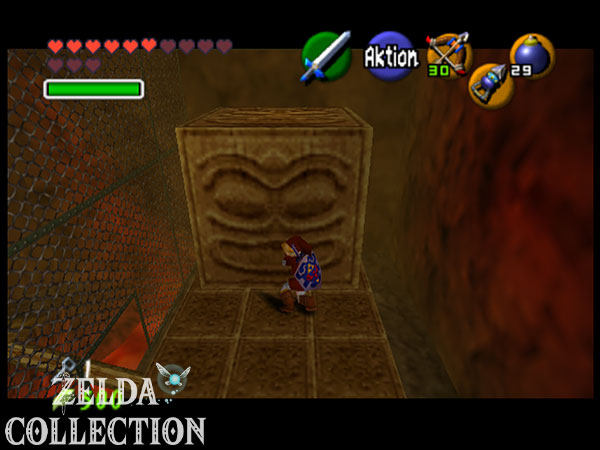
There is a large stone block on the upper level. Push it over the edge onto the opening from which a powerful fountain of lava shoots out at regular intervals. The easiest way is to wait until the fountain has just sunk and then push the block over the edge. Then jump down yourself and stand on the block. During the next eruption it will be carried like an elevator up to the floor above. Jump to the safe ground in time and go through the locked door there.
block and Crystal Switch
In the following room you will see another captured Goron behind a bar, but you cannot open his cell yet. Instead, jump onto the raised platforms on the left and eliminate the two Torch Slugs. As long as their bodies are burning, direct sword blows are unpleasant; After a hit or with the Hookshot they lose their flames and can then be dealt with normally.
On the opposite side there is a large sliding block next to a Crystal Switch. First, push the block down from the upper platform. Jump after it and then pull it into the designated position until you can climb over it to the next ledges. Above there is a lattice wall, access to which is blocked by flames. The Crystal Switch below only extinguishes the flames for a few seconds.
So stand on the middle platform above the switch and throw or let a bomb fall over the edge so that it lands right next to the crystal. Already run towards the burning grid wall while the fuse burns down. As soon as the explosion activates the switch and the flames disappear, you climb up without stopping. If you reach the top in time, you can go through the next door into one of the largest rooms in the temple.
The rock labyrinth with the rolling balls
You enter a large semicircular hall with numerous narrow corridors. Several huge rock balls roll through the labyrinth and change direction at certain points. They follow fixed routes, but initially appear unpredictable due to the narrow corridors. Stay as close to the walls as possible and use the small niches when a bullet approaches. If you can’t see a turn, it’s better to wait a moment and watch the path.
In this area we find two more Small Keys as well as the second Gold Skulltula. First orientate yourself on the outer wall and turn right from the entrance.
Small Key 4/8
Follow the right outer edge of the maze through several curves. After a short while you will reach a Floor Switch next to a prison cell. Step on it to open the bars and talk to the Goron. In his cell is the next small Treasure Chest with the Small Key 4/8. The Goron’s note makes you aware that some walls in the temple reveal themselves with an unusual sound – that’s exactly what we need for the next Skulltula.
Gold Skulltula 2/5 – behind the false wall
Leave the cell and continue along the outer wall of the rock labyrinth. In addition to the sound of the rolling rocks, pay attention to the typical scratching sound of a Gold Skulltula. In a covered niche there is a wall that looks almost exactly the same as the other stone surfaces. Hit it with the sword. If the hit sounds duller than on the neighboring walls, you have found the right spot.
Place a bomb in front of it. Behind the destroyed wall sits the Gold Skulltula 2/5. Defeat them with the Hookshot and collect the symbol. This spider doesn’t require a Megaton Hammer or Scarecrow’s Song, which is why you should definitely pick it up now.
Small Key 5/8
Continue your path along the outside wall. After further turns you reach a darker side corridor with a door. Enter it, follow the corridor to the prison and step on the Floor Switch. After the Goron is freed, open the small Treasure Chest in his cell and get the Small Key 5/8.


The traveling wall of fire
Return to the rock maze and follow the curved outer wall of the large tower in the middle until you reach the next locked door. Open it and cross the narrow bridge in the next room. At the other end there is another locked door, for which you use another of the keys you have collected.
You now enter a long hall in which a metal grid runs over the lava. As soon as Link jumps onto the grate, a huge wall of fire appears behind him and slowly moves across the room. So run ahead of her quickly. Several red bone faces jump out of the lava and try to throw you off the path. The raised stone platforms on the sides offer safe intermediate stations as the wall of fire passes them. Use these areas if you need to correct your alignment and continue on your way once the flames are gone.
At the end of the hall there are steps leading up. Climb up and go through the door. You will then find yourself on the upper level above the rock labyrinth you previously crossed.
The upper walls of the rock labyrinth
From here you move on narrow walls high above the rolling rock balls. While a fall isn’t fatal, it would send you back to the lower level and cause a longer detour. Therefore, make a running jump to the opposite platform and remove the Torch Slug before looking around any further.
Nearby, Navi draws your attention to a conspicuous area in the ground. A clear crack can be seen there. Place a bomb on the damaged area. The explosion blows a hole in the ground and reveals a deep shaft.
Small Key 6/8
Climb down the metal grate in the shaft and follow the long corridor. At the end you reach the prison cell that we could previously see from the other side. Activate the switch, free the Goron and open the Treasure Chest in his cell. Inside is the Small Keys 6/8. Then return to the upper level of the rock labyrinth via the grate.
Small Key 7/8
Now search on the upper walls for a platform with a Floor Switch. The way there leads over several narrow footbridges and small ledges. Step on the switch. This will open another Goron cell on the opposite side of the room. The path to the prisoner leads over several free-standing platforms. Carefully jump over and then open the Treasure Chest in his cell. You will receive the Small Key 7/8.
The Dungeon Map
Return to the area where you first reached the upper level of the rock maze. Above a narrow abyss is a silver Eye Switch. Pull the fairy bow and hit the eye. This will open a previously barred door on the side.
Enter the small room and open the large Treasure Chest. Inside is the Dungeon Map. It shows you all the floors and rooms of the fire temple. Since we are now well above the entrance area and several shafts connect different levels, the map is particularly helpful here.


Gold Skulltulas 3/5 and 4/5 – Scarecrow’s Song
Before we continue following the main path, we complete the most important optional section of the Fire Temple. The following two Gold Skulltulas are not required to complete the dungeon, but are part of our 100% route. The prerequisite is the activated Scarecrow’s Song. The normal Hookshot is sufficient for this section; You don’t have to wait for the Longshot from the later Water Temple.
Return to the upper level of the rock maze and go to approximately the spot where you arrived after the room with the traveling wall of fire. Near the Torch Slug and the previously blasted ground, Navi flies to a high ledge and glows green. Stand as close to the edge as possible and play your Scarecrow’s Song. Pierre or Balzac appears on the platform above Dir.
Target the scarecrow with the Hookshot. Even if the red target point does not appear immediately depending on the position, the actual range of the hook is just about sufficient. Pull yourself up to Pierre, then turn around and look for the small moving platform with the round hook target. Go there too. The platform moves up with Link and takes you to a hidden door.
Gold Skulltula 3/5 – in the hidden tower
Go through the door and follow the hallway. Climb up the metal grate. The Gold Skulltula 3/5 sits on one of the grid walls or in the next section. Defeat them with the Hookshot and collect the symbol. Then climb further up and use the next door.
Gold Skulltula 4/5 – top floor
You come to a large round room with a deep shaft in the middle. Walk just a few steps away from the entrance and look to the left at the wall. The Gold Skulltula 4/5 is crawling there. It can also be easily removed and collected with the Hookshot.
This room also contains an optional time trial for a gold Rupee worth 200 Rupees. A Floor Switch briefly deactivates the flames around a high-altitude Treasure Chest. For the 100% collection, the Rupee is not necessary as it is just money and not a unique item. If you still want to get it, plan the route to the chest in advance and use the Hookshot at the existing target points to save time.
When you have collected both Skulltulas, jump into the large shaft in the middle. Link falls down several floors and lands back near the main path or the room with the moving wall of fire. This means that four of the five Gold Skulltulas of the fire temple have already been dealt with.
The labyrinth of invisible fire walls
Return to the room with the metal grate and the traveling wall of fire. There is a locked door on a raised platform to the side. Use the higher grate sections to jump onto the ledge and open the door with one of your remaining Small Key. After a short hallway you enter a huge hall that at first glance looks like an open labyrinth of stone pillars.
There are actually invisible fire walls between numerous pillars. The flames only appear when Link gets close enough. So don’t run blindly through the room, but move slowly and note the blocked passages. In addition, rock balls roll through some corridors and fire flutters attack from above. The fairy bow is particularly useful here because you can take out the bats before they hit you during orientation.
The Compass
First stick to the right on the outer wall of the fire labyrinth. As soon as a wall of flames appears in front of you, dodge around the neighboring pillars and look for the next free passage. This way you can achieve a real door on the outside wall.
Enter the small room and open the large Treasure Chest. Inside is the Compass. Together with the Dungeon Map it shows unopened Treasure Chests as well as the final boss’s room. If you follow our route, there should only be a few important chests missing at this point: the Megaton Hammer, the Eighth Small Keys, and the Boss Key.
Through the second fire maze
Return to the large hall and work your way to the other side of the central pillar. Pay attention to the doors in the walls. Some of them are not real doorways, but door dummies. They protrude a little further from the wall than normal doors and will fall down on Link if you try to open them. A bomb immediately destroys such traps and, if necessary, exposes the actual path behind them.
Follow the safe passages through the invisible fire walls until you reach another locked door. Open it and go through the short hallway. There’s a Goron sitting behind a grate that we can’t free at the moment because the mechanism we need won’t be activated until later with the Megaton Hammer. Note the cell and go through the next door back into another section of the fire maze.
On the left, a massive wall of fire blocks access to an elevated platform. First look for the Floor Switch on the opposite side of the labyrinth and memorize the shortest route to the platform. As soon as you step on the switch, the flames only disappear for a few seconds. So run through the open passages without stopping and climb onto the pedestal before the wall of fire appears again.
The door in the niche initially looks like the goal, but it is another dummy. Place a bomb in front of it. The false door is destroyed, revealing the actual passage to the first major enemy.
Miniboss: Flaming Dervish
In the next room there is a Flaming Dervish waiting. The actual opponent is hiding under a rotating shell of fire and cannot be injured with the Master Sword in this state. As soon as he jumps out of the fire fountain and spins around the room, you first have to remove his flame armor.
The classic method is to throw a bomb so that it explodes near him. However, the Hookshot is much more convenient: aim at the opponent and pull the small black core directly from the fire casing. Once its flames are gone, the actual Flaming Dervish quickly runs along the outer edge of the arena.
Don’t just chase after him, as he runs about as fast or even faster than Link. Instead, turn around and run towards him. If the enemy changes direction and appears in front of you, attack with a jump attack or several quick sword slashes. After a short time he returns to the fire fountain and builds up a new shell of flame.
Repeat this process several times. The color of his flames changes from red to blue to green as his health decreases, roughly indicating how much resistance is left. After the last hit, the fire fountain in the middle of the room goes out and the central platform becomes clear. Climb on it; it functions as an elevator and takes Link to the next level.


The path to the Megaton Hammer
Go through the next door and climb up the narrow shaft on the side metal grate. As with a previous puzzle, the path is blocked by a wall of flames that can only be temporarily deactivated by a Crystal Switch. Stand in a suitable position above the switch and drop a bomb over the edge. While the fuse is burning, you are already running towards the grid wall. As soon as the explosion hits the switch, the fire disappears and you can climb up.
Behind the next door you reach a huge round hall on one of the highest levels of the Fire Temple. A deep shaft gapes in the middle, while an extremely narrow path spirals to a large Treasure Chest. The chest is surrounded by flames. A Floor Switch on an elevated platform disables fire for only a few seconds.
First eliminate all the fire flitters in the room so that they don’t push you off the narrow path during the subsequent sprint. Look carefully at the route from the switch to the chest and pay particular attention to the sharp curves. If you have Farore’s Wind, you can set a return point at the entrance to the room. This isn’t absolutely necessary, but it will save you a long climb back up if you fall into the central shaft.
The Megaton Hammer
Step on the Floor Switch and start running immediately. The flames around the large Treasure Chest only disappear briefly. Stay on the narrow path, don’t cut the turns too aggressively and only stop when you reach the chest. Open it and take the Megaton Hammer.
The Megaton Hammer is the sacred tool or legendary weapon of the Gorons that Darunia was looking for. His powerful blows can destroy heavy statues, drive rusted switches into the ground, and knock down certain pillars. Additionally, hitting the ground with a hammer creates a small shock that can stun or flip some enemies. Above all, the Megaton Hammer is the decisive weapon against Volvagia.
New item: Megaton Hammer
After the Fire Temple, the Megaton Hammer can also be used to access several secrets on the Death Mountain Trail and in the death crater. We smash two red rocks there with Gold Skulltulas and open access to a Great Fairy that doubles Link’s magic bar.
Use the Megaton Hammer back down
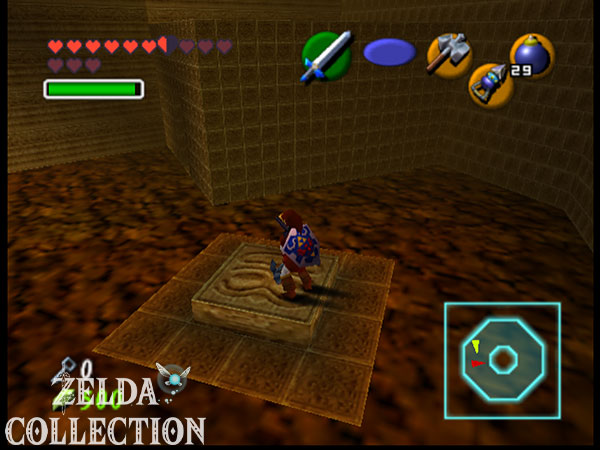
From the large chest area, head back towards the entrance. Near the switch there is a marked floor plate or a large pillar with the symbol of the fire temple. Hit it with the Megaton Hammer. The platform falls into the depths and opens a new shaft through which we can get down much faster.
Jump after it. In the next room, a massive Goron statue blocks the further path. We have not yet been able to move or destroy these statues. Stand next to it and hit it several times with the Megaton Hammer until it is thrown to the side or out of the way. There is a door behind it.
In the following room several fire flutters attack. Eliminate them first. There is another marked pillar on the opposite side. Hit it into the ground with the Megaton Hammer. Part of the floor then folds or collapses into a long staircase. Before you go downstairs, pick up one of the small wooden crates in this room.
Carry the box down the newly created stairs. At the bottom there is a blue Floor Switch, which only remains activated as long as there is weight on it. First step on the switch yourself, then place the box on it and go through the permanently open door.
Rusted switch
In the next room there is another marked floor plate. Stand on it and hit it down with the Megaton Hammer. The platform falls to the floor below and Link lands with it on a lower level. There is one of the rusty switches that cannot be activated with either the sword or normal bombs. Hit the switch directly with the Megaton Hammer. He is pushed into the ground and opens the next door.
Small Key 8/8
In the next area you will see a captured Goron on the opposite side of a deep ditch. There is a blue time block nearby. First jump into the deeper passage in front of the cell and play the Song of Time. The block changes position and can now be used as a platform.
Use his help to climb back up and reach the rusted switch on the other side. Hit it into the ground with the Megaton Hammer. The prison cell opens. Talk to the Goron and open his Treasure Chest. Inside is the Small Keys 8/8. You have now found all eight Small Key of the normal fire temple.
Knock down the huge pillar
Return across the time block and the previous rooms until you are once again high above the maze of invisible fire walls. In the middle of the area is the massive pillar pointed out by both Darunia and one of the captured Gorons.
Jump onto the top of the pillar and stand on the marked area. Hit it with the Megaton Hammer. The massive block of stone breaks through the ground and falls through the temple several stories deep. His destination is the large lava room where we met Darunia at the beginning. The pillar now forms a platform that Link can later use to jump to the previously unreachable boss door.
Then jump through the resulting hole. You can now return to the lower floors via a much shorter route. Before we can face Volvagia, however, the Boss Key is still missing – and on the way there is the last Gold Skulltula of the temple.
The path to the Boss Key
Return to the large entrance hall of the Fire Temple. At the bottom or side of the wide staircase is the large Goron statue, behind which we had no opportunity to progress at the beginning. Now you own the Megaton Hammer. Hit the statue several times from the side or front until it is thrown out of the way and a locked door becomes visible behind it. Open it with one of your still available Small Key.
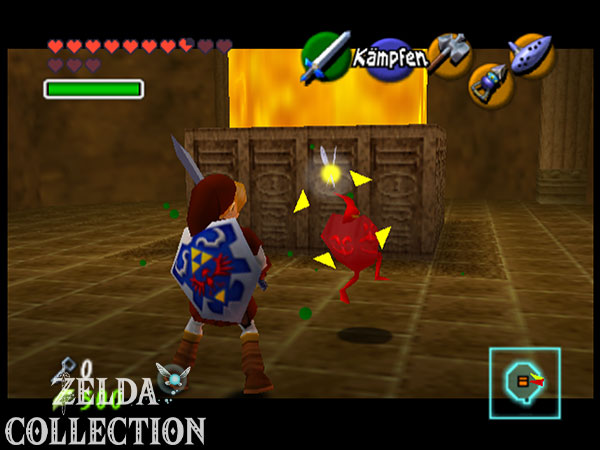
In the first room beyond, you have to clear all the fire flutters and Torch Slug so that the next door opens. The Megaton Hammer is particularly effective against the Torch Slug: a strong blow or the shock turns the opponents or extinguishes their flames, so that you can then follow up with the Master Sword.
In the next room, floor tiles fly towards Link again. Hold up the Hylian Shield and let them smash into it. Afterwards, another predatory slime remains. Keep your distance and defeat him with arrows or Hookshot so that he doesn’t snatch your shield or Goron Tunic.
Gold Skulltula 5/5
After the floor tiles and the predatory slime have been removed, you will hear the last spider scratching. The Gold Skulltula 5/5 sits on the wall of the room. Defeat them with the Hookshot and collect the symbol before going through the next door.
All five Gold Skulltulas of the fire temple have been collected. The corresponding Skulltula symbol should now appear on the Dungeon Map. If missing, especially check the two optional spiders in the hidden scarecrow tower. You can also find your Locations in our overview of the Gold Skulltulas.
Second Flaming Dervish
Another flaming dervish is waiting behind the next door. You could basically defeat him in the same way as the first one, but the fight is much easier with the Megaton Hammer. Hit the ground hard near him. The shock throws the small enemy out of his shell of fire and immediately exposes him to attack.
When the black core runs along the outer edge again, you can pull it closer with the Hookshot or run towards it and attack with the Master Sword. Repeat the process until the Flaming Dervish is defeated. A chest that appears contains bombs and replenishes your supply for the remaining rooms.
The Boss Key and the last Goron
Go through the next door and follow the hallway. There is another rusted switch in front of the last prison cell. Hit it into the ground with the Megaton Hammer to open the grate. Speak to the last captured Goron in the temple. With this you have freed all the prisoners who had intended Ganondorf’s henchmen for Volvagia.
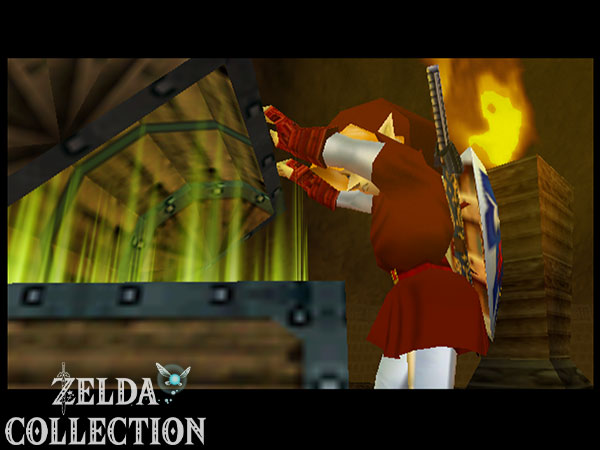
There is no longer a small key chest in this cell, but the large blue and gold Treasure Chest with the Boss Key. Open it and take the key. The path to Volvagia is now fully prepared.




Preparation for Volvagia
Return to the large lava room where you met Darunia at the start of the dungeon. The huge pillar that we knocked down with the Megaton Hammer on the upper level now protrudes from the lava lake and serves as a bridge or platform to the big boss door. This means that a safe route to the opposite side is possible for the first time.
Before you jump over, break the jars in the room. In one of them there is a fairy that you can take with you in an empty bottle. Also replenish your health and equip the Goron Tunic, the Megaton Hammer, the Master Sword and the Hylian Shield. The Megaton Hammer is essential for the intended fight against Volvagia.
Then jump over the fallen pillar to the opposite platform and open the large ornate door with the Boss Key.
Boss: Subterranean Lava Demon Volvagia
Behind the door you first enter a small anteroom and then reach a huge lava cave. Jump over the small platform onto the large stone fighting area in the middle. The path behind Link sinks into the lava and the resurrected fire dragon Volvagia rises from one of the numerous holes.
The battle consists of several repeating phases. Volvagia repeatedly disappears into the lava holes and either attacks directly from the ground or flies over the arena. The key is not to immediately chase after every hole that flares up. Especially later on, Volvagia fakes his appearance several times.
Stun Volvagia with the Megaton Hammer
First, stay roughly in the middle of the platform and watch the holes. Shortly before Volvagia actually appears, fire blazes from the opening in question. During later rounds, multiple holes may light up one after the other without the dragon actually appearing. So don’t start running until you can see Volvagia’s head.
As soon as the dragon rises from the lava, stand in front of him and hit his head with the Megaton Hammer. The hit stuns Volvagia and causes him to fall to the platform. Then immediately attack the head with the Master Sword. A jump attack causes particularly high damage. Volvagia then retreats back into its hole and begins one of its flying attacks.
Dodge Breath of Fire
During a possible flight phase, Volvagia rises completely from the lava and pursues Link above the arena. The dragon spits a long stream of fire. Run across the platform in a large, even arc and do not change your direction unnecessarily. Volvagia has a relatively large turning circle and has difficulty following a link that constantly moves sideways.
Another safe option is to stand on the outer edge of the platform or let yourself hang briefly on the edge. While Link is hanging on the outer edge, the fire breath usually doesn’t reach him. Once Volvagia finishes his attack and returns to the lava, pull yourself back up.
Escaping the falling rocks
During the second major flying attack, Volvagia climbs up to the ceiling of the cave and sends massive boulders crashing down onto the arena. Watch the shadows on the ground and keep moving. The stones mainly fall where Volvagia flies over the arena. Therefore, run to the opposite side and avoid abrupt changes in direction.
Here too, the outer edge is a very safe position. If you hang on the side of the large platform, most falling rocks won’t hit you. Wait there until the hail of stones has passed and then pull yourself back up.
Volvagia – safe strategy
- Watch the lava holes and wait for Volvagia to actually appear.
- Hit the dragon on the head with the Megaton Hammer.
- Immediately attack the stunned head with the Master Sword.
- Dodge fire breath or rock hail while flying.
- Wait for Volvagia to dive back into the lava.
- Repeat the process until the dragon is defeated.
With jump attacks against the stunned head, the fight doesn’t last particularly long. After several successful rounds, Volvagia finally begins to burn up and disintegrate. At the same time, the huge cloud of fire that has hung over the Death Mountain since Ganondorf’s took power goes out.
Heart Container and Fire Medallion
After Volvagia’s defeat, a Heart Container appears in the arena. Be sure to collect it before using the teleporter. This causes Link’s maximum health to permanently increase by one full heart. You can find all other energy improvements in our overview of the Pieces of Heart in Ocarina of Time.
Then enter the blue light. Link is transported to the Hall of the Sages and meets Darunia again. The Goron Chieftain reveals himself to be Sage of Fire. He thanks Link for saving his people and transfers his power to him. You will receive the Fire Medallion.
After the sequence, Link returns to the Death Mountain. The threatening fire cloud over the volcano has disappeared and the Gorons are saved. The Fire Temple itself is now complete – for our 100% route, however, there are still three important tasks remaining on the Death Mountain, which can now be achieved immediately thanks to the Megaton Hammer.


After the Fire Temple: Double magic bar
Before we leave the Death Mountain, we use the new Megaton Hammer for the Great Fairy that was already noted in the Death Mountain Trail chapter. Move from the Fire Temple or warp pedestal back towards the secret entrance to Goron City. Near the passage, several large red rocks block a cave entrance. Bombs do no damage to these stones, but a hit with a Megaton Hammer will shatter them.
Open the path, enter the source and stand on the Triforce symbol. Play Zelda’s Lullaby. The Great Fairy appears and doubles Link’s entire magic bar. This means you can use Din’s Din’s Fire, Farore’s Wind and later magic spells or magic arrows much more often before you need new magic jars. You can find all Great Fairies and their rewards in our guide to the Great Fairies and fairy sources.
Improvement: Double Magic Bar
The magic bar is now twice as long. The upgrade is optional, but extremely useful for the additional 100% route and later spells.
Two Gold Skulltulas on the Death Mountain Trail
Exit Death Crater via the exit to the top of Death Mountain and make sure it is night. The following two Skulltulas only appear after dark. If necessary, play Sun’s Song before entering the Death Mountain Trail. Both spiders are hiding behind red rocks that we haven’t been able to destroy before the Fire Temple.
Gold Skulltula – upper Death Mountain Trail
From the summit, climb down the Death Mountain Trail to the section where young Link used to avoid Death Mountain’s rock rain. There is a striking red stone on the rock wall. Smash it with the Megaton Hammer. Behind it appears the Gold Skulltula. Defeat them and collect the symbol.
Gold Skulltula – above Dodongo’s Cavern
Follow the path further down to the area above Dodongo’s Cavern, where as a child we had to throw the Bomb Flower over the edge to open the dungeon entrance. There is also a red rock here. Break it with the Megaton Hammer and defeat the Gold Skulltula hidden underneath.
This completes all four Gold Skulltulas of the Death Mountain Trail, provided you have followed our previous route. We already collected the two early specimens behind the bomb wall and in the magic pea hole in front of Dodongo’s Cavern during Link’s childhood.
Retrieve the last Skulltula in Dodongo’s Cavern
If you have completed the boomerang return route from the earlier chapter, the spider high above the baby Dodongo passage in Dodongo’s Cavern is still missing. Enter the cave as an adult and go into this passage from the entrance hall. Pay attention to Navi: At one point she flies to the high ledge and glows green. Play the Scarecrow’s Song that you recorded on Lake Hylia as a child and confirmed as an adult. Use the Hookshot to pull yourself up to the scarecrow that has appeared. At the top, defeat the fifth Skulltula of Dodongo’s Cavern and collect its symbol. Then you return to the Death Mountain Trail via the entrance hall.
Reward for 50 Gold Skulltulas
Depending on whether you have taken all of the previous optional spiders on our route with you, you should reach or be very close to the 50 Gold Skulltulas mark after the Fire Temple at the latest. If your meter already shows at least 50 symbols, it’s worth stopping off at Kakariko’s Skulltula House on the way to the next chapter.
Open
One of the family members is now freed from his curse and gives you a Piece of Heart as thanks. We have already picked up or reserved the previous rewards for 10, 20, 30 and 40 Skulltulas along our route. You can find the full scale of rewards and all Locations in our overview of the 100 Gold Skulltulas.
Optional: Bigger Quiver in Kakariko
Since you have owned the fairy bow since Forest Temple, you can also visit the archery gallery in Kakariko. For 20 Rupees you have to hit ten Rupees that appear in a row with arrows. Some targets only remain visible for a short time, which is why you should keep the bow cocked and only shoot when you are safely aligned.
If you hit all ten targets, you will receive the Bigger Quiver. Your maximum arrow supply increases from 30 to 40 arrows. We get the final upgrade to 50 arrows later during Gerudo horse archery. You can find an overview of bomb bags, quivers and wallets in our guide More bombs, arrows and Rupees.
Continue to the Ice Cavern and to Zora’s Domain
With the Fire Medallion, Darunia has now also awakened as a sage after Saria. The Megaton Hammer greatly expands Link’s options and the doubled magic bar makes the coming sections much more enjoyable. However, our next big goal is not another regular temple, but rather the realm of Zora.
When we return to Zora’s Domain, a completely changed landscape awaits us: the entire place is frozen and King Zora is stuck in a huge block of red ice. Lord Jabu-Jabu has disappeared and access to the next important piece of equipment takes us through the Ice Cavern. There we receive the Iron Boots, learn the Serenade of Water and at the same time prepare the way for the later Water Temple.
Frequently asked questions about the Fire Temple
How many Small Keys are there in the Fire Temple?
In the normal Fire Temple of Ocarina of Time, there are a total of eight Small Keys. Most of them lie in small Treasure Chests with the captured Gorons. Additionally there is the Boss Key for Volvagia’s door. If you are missing a Small Key on the way, you should especially check the prisons in the large lava room, in the rock labyrinth and on the upper level.
How many Gold Skulltulas are there in the Fire Temple?
In the Fire Temple are located five Gold Skulltulas. Two of them are hidden directly in secret rooms along the main path, two are in the optional tower above the rock maze and require the Scarecrow’s Song, while the last one is on the way to Boss Key Waits behind the Goron statue, which can be destroyed with the Megaton Hammer.
Do I need the Longshot for the two scarecrow skulltulas?
No. In the normal version of the fire temple, the Hookshot is sufficient if you position yourself correctly on the edge. Play the activated Scarecrow’s Song, move to Pierre or Balzac and then to the moving hook platform. From there you can reach both Skulltulas.
Where can I find the Dungeon Map?
The Dungeon Map is located on the upper level of the rock labyrinth. After you have freed several Gorons there, shoot the silver Eye Switch above the abyss with the fairy bow. This will open a barred door to a small room with the large card chest.
Where is the Compass?
The Compass is located in the large labyrinth with the initially invisible fire walls. After entering, stick to the right on the outer wall and find your way through the fire barriers to a side door. Behind it is the large Treasure Chest with the Compass.
How do I defeat the Flaming Dervish?
First remove its fire shell. Before using the Megaton Hammer, the easiest way to do this is with the Hookshot or a bomb. The little black opponent then runs through the arena. Run towards him and attack him with the sword. With the second Flaming Dervish you can also hit the Megaton Hammer on the ground and thereby remove the flame cover very quickly.
Where can I get the Megaton Hammer?
The Megaton Hammer is located on one of the highest levels of the Fire Temple. After the first flaming dervish, ride the platform up, solve another crystal switch puzzle and reach a large round room. Press the Floor Switch there and run across the narrow path to the briefly exposed large Treasure Chest.
How do I beat Volvagia?
Wait until Volvagia actually appears from a lava hole and hit the dragon on the head with the Megaton Hammer. Then attack the stunned head with the Master Sword. During the flight phases you either avoid the fire breath or the falling rocks. Link can hold on to the outer edge of the platform relatively securely for many of these attacks.
What should I do immediately after the Fire Temple?
Use the new Megaton Hammer in Death Crater first to destroy the red rocks in front of the Great Fairy and double the magic bar. Then at night you collect the two previously blocked Gold Skulltulas on the Death Mountain Trail. Our route then continues via Kakariko to the Ice Cavern.