

The Forest Temple is the first major maze that Link explores as an adult after his seven-year slumber. After obtaining the Hookshot in the Kakariko Cemetery in the previous chapter and learning the Minuet of Forest from Sheik, we can finally search for Saria. Inside the ancient temple, winding corridors, overgrown courtyards, dangerous Stalfos knights and four forest spirits who have stolen the flames from the central hall await us. The twisted corridors in particular make the Forest Temple one of the most unusual labyrinths in The Legend of Zelda: Ocarina of Time.
Our 100% route takes you through all the important rooms and takes into account all five Small Key, the Dungeon Map, the Compass, the Boss Key and the fairy bow. We also collect all five Gold Skulltulas on the first visit. None of these require a later return with the Longshot or other equipment. After we have defeated the four forest spirits, the path to the final boss Phantom Ganon opens. For his victory we receive a Heart Container before Saria awakens in the Hall of the Sages and gives Link the Forest Medallion.
The solution applies to the normal version of Ocarina of Time on Nintendo 64 and to Ocarina of Time 3D. In the Master Quest version, the rooms and puzzles are sometimes arranged differently. You can also find the Locations of all 100 Gold Skulltulas in the game in our Skulltula guide.
Preparation for the Forest Temple
For the Forest Temple you absolutely need the Master Sword and the Hookshot. With the Hookshot you can pull yourself up to the raised temple entrance, collect distant objects and stun numerous enemies. You also need to know the Song of Time, which we already learned before the first time jump. It can be used to remove certain blue time blocks or return them to their original position. We only get the Fairy Bow as we progress through the temple.
The Hylian Shield, some deku nuts and a fairy in a bottle are particularly helpful. In Forest Temple there are several Stalfos fights in which you can quickly lose health despite having good equipment. You will also encounter devil claws for the first time, which will transport Link back to the temple entrance if they catch him. Carrying a fee is therefore a useful insurance policy. If you don’t already have one, you can search several jars for a fairy along the way. The Locations of all four empty bottles are in our bottle guide.
If you want to leave the temple in between, you can return to the warp pedestal in the Sacred Glade at any time with the Minuet of Forest. The keys and items you have already collected will remain with you. However, when you re-enter you will have to overcome some enemies and puzzles again. We therefore choose a route where you have to cross as few rooms twice as possible.
The entrance area – first key and first skulltula
After you have pulled yourself up on the branch above the destroyed staircase in the Holy Clearing with the Hookshot, you enter the Forest Temple. In the first room, thick grass is already growing across the floor. Two large Wolfsheimers guard the path to the next door. These enemies are difficult to hit with normal frontal attacks because they protect their face and body with their front paws. First target a Wolfsheimer, have your Hylian Shield ready and wait for him to jump or claw his way. As soon as his attack goes nowhere, dodge to the side and attack with the Master Sword. Wolfsheimers are particularly sensitive on their backside. That’s why you can often defeat them with a single strong jump attack if you get behind them.
After the fight, you shouldn’t run straight to the northern door yet. There are already two important collectibles in the entrance area, which we will collect immediately. Long ones grow to the right of the entrance climbing plants on the wall. Use that first Hookshot to eliminate the spiders sitting there, then climb up the vines. At the top you reach a thick tree trunk that runs across the room.
Gold Skulltula 1/5 – on the right climbing wall
While on the raised tree trunk, look at the right overgrown wall. The first Gold Skulltula of the forest temple sits there. Aim at them with the Hookshot and shoot. The spider is defeated immediately, but the golden symbol remains stuck on the wall. So shoot the symbol a second time with the Hookshot so that Link collects it straight away. Since we are inside a dungeon, the time of day doesn’t matter for this find. All five Temple Skulltulas can only be collected as an adult Link.
Small Key 1/5 – on the opposite tree
Then carefully walk over the tree trunk or narrow branch to the opposite side. There is a small Treasure Chest on another tree stump. You can jump over with a normal jump, or target the chest with the Hookshot to be pulled directly to it. Open it and you will receive the Small Key 1/5. We will need this key later for one of the locked passages on the way to the Fairy Bow.
Now jump back to the ground and go through the large door at the northern end of the entrance area. In the short hallway beyond, an ordinary large Skulltula hangs from the ceiling. You don’t have to wait for her to turn around: a direct hit with the Hookshot is enough to defeat her. The path to the main hall is then clear.


The central hall – four forest spirits steal the flames
Upon entering the large central hall, a cutscene will begin. Four different colored forest spirits appear on the torches surrounding the large elevator in the middle. Each spirit takes one of the flames before disappearing into different areas of the temple. After the last flame has gone out, the elevator travels deep into the ground and can no longer be used for the time being. Our task is therefore to find the four forest spirits again and bring their flames back to the central hall.
The great hall connects almost all of the important sections of the temple. Several doors lead to the two overgrown courtyard gardens, the northern Stalfos room and the western block puzzle. There are also several passages on the upper levels that can only be reached after solving the twisted corridors. We will therefore return to this hall several times during the course of the dungeon. The inactive elevator in the middle serves as our orientation point.
Gold Skulltula 2/5 – next to the north door
Before we explore the first rooms, let’s get the second Gold Skulltula. From the entrance, run straight towards the large staircase on the north side. Immediately to the right of the door that you reach via the stairs is a Gold Skulltula sitting high on the wall. You can hear their crawling sound from a distance. Target them with the Hookshot and defeat them. Then drag the golden symbol to Link using the Hookshot. We have already collected two of the five Gold Skulltulas without having to use up a Small Key.
Now climb the stairs and enter the northern door. Here we first get our second Small Key before we take care of the two large courtyard gardens.
Small Key 2/5 – the first Stalfos Knights
There is one floating in the short corridor behind the northern door blue bone grimace. As long as her blue flames burn, ordinary sword blows will bounce off her. The easiest option is to attack the opponent with the Hookshot to stun. This will cause his wreath of flames to go out and you can then use it Master Sword turn off. Alternatively, you hold it Hylian Shield up and wait until the bone face hits it. Once the flames are gone, she is vulnerable. Then follow the corridor to the next door.
Wait in the next room two Stalfos knights. These opponents carry a sword and shield and have significantly more health than the previous skeletons. Their fast jump attacks are particularly dangerous, with which they can cause a lot of damage in a short period of time. First, target a Stalfos and move sideways around it. Keep your shield up until the enemy attacks. As soon as his sword slash or jump attack fails, you counter with one or two normal sword slashes. Don’t try to continuously hit his shield. This will only open your own cover and give him the opportunity to counterattack.
While you fight the first Stalfos, the second one usually holds back a bit. Nevertheless, you should keep the two opponents apart as much as possible and not stand between them. If one of the knights prepares a particularly high jump attack, you can retreat and attack immediately after he lands. With a few clean hits the first Stalfos is defeated. Repeat the tactic on the second knight until both are gone. A small Treasure Chest then appears in the middle of the room. Open it and take the Small Key 2/5.
Before you leave the room, you should break the jars on the sides. Inside there are, among other things, hearts and a fairy. If you have a free bottle, you can capture it and save it for later battles. Then return to the central hall through the two doors. We now have two Small Keys and need a third before we take the long route to the Fairy Bow.
The first courtyard garden – the Dungeon Map
Back in the main hall, go to the northeastern area of the lower level, where a large blue time block blocks a passage. The block has the same symbol as the stones we already met in the Kakariko cemetery. Stand directly in front of it and play the Song of Time. The block then disappears, revealing the door to the first overgrown courtyard garden.
Behind the door, a large open courtyard awaits you with high walls, climbing plants, water basins and several plant opponents. First, eliminate the large Deku Baba near the entrance and the Octorok that emerges from the water. The Octorok in particular can be annoying when climbing when it shoots Link off the wall with its projectiles. As soon as the enemies have disappeared, we can take our time to find our way up.
Long ones grow on the right wall of the courtyard climbing plants up to an opening on the upper floor. Several Skullwandtulas sit between the tendrils. You can easily do the bottom two with the Hookshot shoot. However, the third spider hangs so high that you can reach it with the short one Hookshot cannot yet be easily reached. Therefore, climb as far up the right side of the wall as possible and keep your distance from their position. As soon as you reach the upper opening, pull yourself onto the ledge and enter the door there.
The Dungeon Map
In the small room behind, several blue bone faces attack. Have the Hylian Shield ready and use the Hookshot to extinguish her flames. Then defeat them with the Master Sword. As soon as all enemies have disappeared, a large Treasure Chest will appear. Open it and you will get the Dungeon Map. This allows you to see the floors and rooms of the Forest Temple on the Dungeon Map. Especially in the two courtyard gardens and the twisting corridors, the map helps you to distinguish the paths you have already visited from the areas that are still unknown.
Then leave the room through the second door. Behind it you reach a raised balcony that lies above the neighboring courtyard garden. From here we can change the water level in the fountain there and reach two other important collectibles.


Drain the well
Another large Deku Baba is waiting on the upper balcony. Eliminate them with the Master Sword before taking the next jump. Then look to the opposite side of the yard. There is a silver hook symbol on the wall. Aim at it and shoot with the Hookshot. Link automatically pulls himself over to the opposite balcony. Directly in front of you is a Floor Switch. Step on it so that the water flows out of the large fountain in the lower part of the courtyard garden.
The reduced water level opens up an underground passage in which our third Small Key lies. Before we go down into the well, we get the next Gold Skulltula. It sits on a raised wall in the lower area of the courtyard garden and is already fully accessible with the Hookshot.
Gold Skulltula 3/5 – in the courtyard garden
Jump from the balcony down into the courtyard garden and look for the small raised ledge with a Treasure Chest. The chest itself only contains one energy heart, but is particularly useful as a hook target. Stand in front of the ledge so that you can target the front of the Treasure Chest and use the Hookshot to pull yourself up to it. Open it if necessary if you have lost some health.
Then go around the corner on the ledge. There on the wall sits the Gold Skulltula 3/5. Defeat her with the Hookshot and drag her symbol immediately to Link. You have already collected three of the five spiders in the temple. The Hookshot is sufficient for this find; You don’t have to return later with the Longshot or have any other equipment.
Small Key 3/5 – in the drained well
Then go to the fountain in the lower part of the courtyard garden. After we activated the Floor Switch on the balcony, the water drained completely. Climb down the ladder on the inner wall and follow the narrow passage on the floor. There are several energy hearts along the way, which you can use to replenish any lost health if necessary. The tunnel runs under the Hofgarten and ends in a small area with a Treasure Chest.
Open the chest and you will receive the Small Key 3/5. We have now collected all the keys that we need for the first long circular route to the Fairy Bow. Then climb back up the vines at the other end of the well. From there you can return to the central main hall via a short path and a nearby door.
The order of our finds so far is important: key 1 was on the high tree trunk in the entrance area, key 2 in the northern Stalfos room and key 3 in drained well. If you missed one of these keys, you should make up for it now. In the following section, three locked doors await you in a row, so you would otherwise have to turn back later.


The large block puzzle in the western temple wing
In the central hall, on the western side a short staircase leads to a locked door. Open it with the first of your three collected keys. In the corridor behind there is a large Skulltula hanging from the ceiling, which you can remove as usual with the Hookshot. You will then reach a high room with several ladders and large colored stone blocks. Right at the beginning, a blue bone grimace floats, which you can also stun with the Hookshot and then take out with the sword.
Our target is at the top of this room. However, the higher ledges are initially inaccessible because two large sliding stone blocks block the way. There are arrows painted on the floor that show you in which direction the blocks should be moved. We start with the green block on the lower level.
Move the green block
First, go to the green block and drag it out of its original niche. Move it until you pass it to the side and can push it in the direction of the arrows marked on the floor. However, the block cannot be moved to its final position all at once. As soon as he stops at a corner or a wall, you have to use the adjacent side passage to get to his other side.
Therefore, follow the passage revealed by the first movement and run around the walls. You then stand behind the green block and can push it further towards its intended recess. As soon as you have moved it far enough, it falls down a little and audibly clicks into place. The block is now firmly in its intended position and can be used as an elevated step to the next ledge.
Put the brown block in the correct position
First, return to the original niche of the green block. There is now a ladder, which was previously hidden from its position. Climb up and follow the elevated walkway until you reach the second large brown block. First push it as far forward as possible from this side. As soon as it stops on a wall, you return to the green block again.
Now climb onto the already locked green block and from there onto the higher ledge. Follow the path until you reach the brown block from its other side. Push it further towards the marked spot until it also audibly clicks into place in its recess. You can then climb onto the brown block and reach the next level from there. Follow the narrow passage to the last ladder and climb to the top.
There are two circling on the top level blue bone grimaces. You can do it with this Hookshot stun them or just walk past them. Directly in front of the next passage there is a locked door with a conspicuous one above it silver Eye Switch sits. With the Hookshot you can’t activate the eye yet. Note its position for later when we have the fairy bow. Now open the door with that second of the three keys you brought with you and enter the first twisted corridor.


The first twisted corridor and ceiling claw
The following corridor is one of the most unusual rooms in the forest temple. The floor, walls and ceiling are seemingly twisted against each other, so that Link goes through one spiral corridor running. Just follow the path to the other end and enter the door. Behind it, a room with sloping walls, floating platforms and a deep abyss awaits you. There is also one lurking here Ceiling claw, which transports Link back to the temple entrance when she catches him.
The ceiling claw reveals its presence with a noticeable swishing noise. Shortly afterwards, a round shadow appears on the ground, following Link’s position. As soon as you notice this shadow, you should immediately keep running or move to the side. If you stand there for too long, the large hand will fall from the ceiling, grab Link and carry him back to the beginning of the temple. You won’t lose any keys you’ve collected, but you’ll have to cover the entire route through several rooms again.
If you want to defeat the Ceiling Claw, first run in a circle around its shadow until it falls to the ground. Then dodge her first attack and strike with the Master Sword. However, you can also ignore them completely and quickly jump over the inclined platforms to the door opposite. The only important thing is that you don’t stay in one place for long.
Behind the next door you reach a large staircase with three paintings. One of the forest spirits is hiding in the pictures, but so far we don’t have a ranged weapon with which we can destroy the pictures. Therefore, descend the stairs completely. At the bottom there is another locked door, for which you use the third Small Key. This means that the first three keys are used up and we reach the room with the most important item in the temple.
The Fairy Bow – Fight against three Stalfos
In the next room there is a single Stalfos Knight waiting. The arena has a large hole in the middle, so you should be particularly careful not to fall into the depths during the fight. If possible, stay on the outer edge and aim at the opponent. Have the Hylian Shield ready until he uses his sword slash or jump attack. Then dodge to the side and attack with the Master Sword. A targeted jump attack causes a lot of damage, but can be dangerous if you stand too close to the hole.
Once the first Stalfos is defeated, part of the ceiling will lower and close the hole in the middle of the room. Appear at the same time two more Stalfos Knights. This fight has a special feature: If you defeat one of the two opponents while the other is still alive, the fallen Stalfos will start to get back up after a while. You should therefore defeat both knights one after the other as quickly as possible.
First try to weaken the first enemy to a few hits remaining. Then concentrate on the second one until it is also significantly weakened. Then you completely defeat the first Stalfos and immediately attack the second one. With this approach you prevent the already defeated opponent from getting up again before you can complete the fight. If a knight does get revived, you have to defeat him again. The room remains closed until both opponents have finally disappeared.
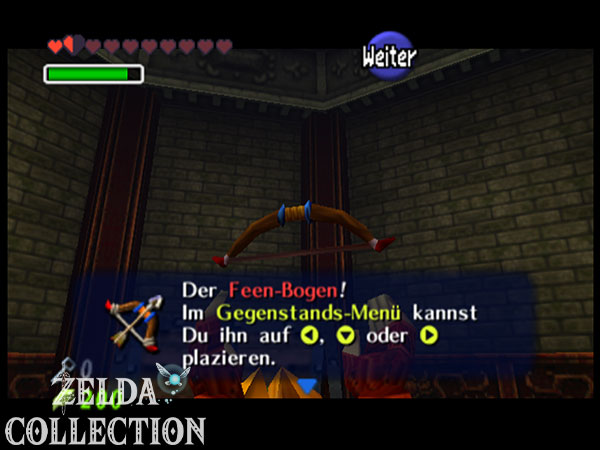
After the battle, a large Treasure Chest will appear in the middle of the arena. Open it and you will receive the Fairy Bow. Link can initially carry up to 30 arrows. The fairy bow is one of the most important weapons in the adult adventure and is required not only in Forest Temple, but also in numerous later dungeons. It allows you to activate distant Eye Switch, drive forest spirits from their paintings and fight the boss Phantom Ganon.
Later you can increase the arrow capacity in two steps to 40 and finally 50 arrows. We will consider the mini-games required for this in the coming chapters. For more information, see our Gear Upgrades Guide.
The Red Forest Spirit Joelle – Small Key 4/5
With the fairy bow we can finally defeat the first two forest spirits. First leave the Stalfos room through the door you entered it through. Behind it you reach the first painting staircase. In one of the three pictures you can now see the red forest spirit Joelle. As long as you don’t get too close to the painting, the spirit in it remains visible. However, if you get too close to him, he will switch to one of the other images in a flash.
So stand as far away as possible on the stairs and pull the Fairy Bow. Target the painting Joelle is currently appearing in and shoot an arrow at it. The picture burns and the ghost takes refuge in one of the two remaining frames. Repeat this process until all three images are destroyed. Afterwards, Joelle can no longer escape and appears at the bottom of the stairwell.
During the actual fight, Joelle slowly floats around Link and periodically becomes invisible . While she is gone, you should not strike indiscriminately with your sword. Instead, keep your shield ready and wait for her to become visible again. Once her body fully appears, you can attack with the Fairy Bow or the Master Sword. A targeted arrow hit is particularly reliable because you don’t have to bridge the distance first. If she gets too close, you can also use a Deku Nut to knock her out of invisibility.
After several hits, Joelle is defeated and the first of the four stolen flames returns to the central hall. At the same time, a small Treasure Chest appears. Open it and you will get the Small Key 4/5. This key is mandatory for our complete playthrough and should not be confused with the Blue Forest Spirit reward. Beth leaves the Compass in the next section and no other Small Key.
The Blue Forest Spirit Beth – Compass
Then go through the door back into the arena where you found the fairy bow. Cross the room and enter the door on the opposite side of . Behind it you reach a second staircase with three paintings. The blue forest spirit Beth is hiding here. Her puzzle works the same as Joelle’s. Stand at a sufficient distance in front of the first painting in which the ghost is visible and shoot it with the fairy bow. Once the picture burns, Beth moves to the next frame.
Repeat the process until all three paintings are destroyed. Beth then appears at the bottom of the stairwell and attacks Link directly. Hold up the Hylian Shield and wait for it to appear. You can then hit them with the Fairy Bow or the Master Sword. It’s particularly easy to stay still in one spot while it disappears and only attack it when it fully reappears. Dodge her lantern attack and repeat the process until she is defeated.
After Beth’s defeat, the blue flame returns to the central hall. At the same time a large Treasure Chest appears with the Compass. Open it and you can now see unopened Treasure Chests and the position of the final boss on the Dungeon Map. We now have the Dungeon Map, the Compass and the fairy bow. Two of the four forest spirits have also been killed.
At the top of this second staircase there is already the next locked door. We could move on now, but first we get the Boss Key, the fourth Gold Skulltula and the last Small Key. This saves us a longer return later through the entire western wing of the temple.
Turn the first corridor straight
First leave the second staircase the way you came and cross the room with the Fairy Bow again. Follow the first painting staircase up and go back through the twisted corridor to the big block puzzle. It sits directly above the entrance door to the twisted hallway silver Eye Switch, which we couldn’t activate on the first visit. Stand in front of the door, equip the fairy bow and shoot an arrow at the eye.
After the hit, the entire corridor begins to move. The twisted structure stands up and transforms into one straight, horizontal walk. The change also affects the room behind, where the floor and walls were previously arranged at an angle. The new orientation creates access to a previously unattainable area Treasure Chest.
Enter the now straight corridor and go to the next room. You will notice that the spatial arrangement has completely changed. The former side wall has now become the floor and the platforms are at different heights. Let yourself fall to the lower level in a controlled manner. There is a large, decorated Treasure Chest that you couldn’t reach on the first pass.
Get the Boss Key
Open the decorated Treasure Chest and take the Boss Key. He later opens the large door to Phantom Ganon’s chamber. You won’t need it until the end of the temple, but now we can collect it without any additional detours. Be careful not to confuse it with a Small Key: The Boss Key is shown separately in the inventory and can only be used for the large boss door.
After you have received the key, jump into the hole in the floor, which has become accessible due to the new orientation of the room. You end up in a small room with two blue bone faces. Use the Hookshot again to extinguish her flames, then defeat her with the sword. As soon as both enemies have disappeared, the next door opens. Behind it you reach an elevated balcony in the second courtyard garden of the forest temple.


Gold Skulltula 4/5 in the second courtyard garden
Leave the room with the blue bone grimaces and initially stay on the raised balcony. Below you lies another large courtyard garden, surrounded by high stone walls and several pillars. On the way across the balcony you will meet a large Deku Baba. Eliminate them with the Master Sword and then head towards the narrow pillars sticking out of the courtyard floor. Some of these pillars have energy hearts floating on them, which you can collect if necessary.
Our target is a Gold Skulltula on the high wall on the opposite side of the yard. It cannot yet be reliably reached from the normal balcony position with the short Hookshot. Therefore, jump carefully onto the narrow pillar with the two energy hearts and stand as centrally as possible on it. From this position, the Skulltula is within reach of the hook.
Target the Gold Skulltula 4/5 and shoot. Then you also drag the remaining golden symbol with the Hookshot to Link. You now have four of the five Skulltula symbols of the Forest Temple. We find the last copy later in the rotating basement directly in front of Phantom Ganon’s chamber. After collecting the spider, carefully return to the balcony and follow the path to the side door, which leads into a small side room.
The ground claw – last Small Key 5/5
A dangerous floor claw is waiting in the small side room. Unlike the Ceiling Claw, which transports Link from above back to the temple entrance, this enemy moves directly across the ground. He attacks by extending his large hand towards Link and attempting to grab him. Observe the color of his body. As soon as the hand lights up green, it is preparing an attack. Therefore, hold your Hylian Shield up or move sideways until your hand is vulnerable again.
Then grab the ground claw with the Master Sword to. Fast sword combinations and jumping attacks are particularly effective. After a few hits, however, it doesn’t just disintegrate, but splits into two three smaller hands. These try to grab Link individually and then give the opponent a complete, large form again. That’s why you should get rid of the little hands as quickly as possible.
Target one small hand at a time and attack them with the sword. If several hands are close together, you can also use a charged spin attack. If you have enough magic, Din’s Din’s Fire is also a way to hit several small hands at the same time. It is important that you do not let any of the small claws survive for too long. Once all three have been defeated, a small Treasure Chest will appear in the center of the room.
Open the chest and you will receive the Small Key 5/5. We have now found all five Small Key of the Forest Temple. Three of them were already consumed on the way to the fairy bow. The fourth has been in our inventory since defeating Joelle and the fifth has just been collected. We need both for the last big section with the icy Eye Switch and the green forest spirit.
Optional arrow chest in block room
Use the floor claw to leave the room through the other door and follow the hallway that leads back to the large block puzzle. If your arrow supply is now running low, you can open an additional Treasure Chest with arrows here. To do this, climb back up the first two ladders and go left at the spot with the painted arrows on the floor. In a small alcove, another ladder leads to a raised ledge.
From there you can see a golden Eye Switch at the top right. Equip the fairy bow and shoot an arrow at it. Once the eye is hit, a small Treasure Chest with additional arrows will appear nearby. Open it and refill your supply. This chest is not required for the normal path through the Forest Temple. However, since we have to hit more pictures, Eye Switch and Phantom Ganon, with the fairy bow in the following section, the additional arrow supply makes sense.


Twist the first corridor again
Our next target is on the other side of the Fairy Bow Room. To do this, we first need to restore the original orientation of the first twisted corridor. Therefore, return to the top level in the block room where the two blue bone faces are circling. Directly above the door to the now straight corridor is the silver Eye Switch. Shoot it again with the fairy bow to make the passage return to its twisted shape.
Go through the spiral corridor and the subsequent room with the sloping platforms. Pay attention to the ceiling claw again. As soon as you see their shadow on the ground, you continue running or dodge to the side. Go through the next door and go all the way down the first painting staircase. The pictures have already been burned and Joelle is defeated, so you don’t have to fight another fight here.
Then cross the arena where you found the Fairy Bow and enter the staircase of the blue forest spirit Beth on the opposite side. This time climb the entire staircase. There is a locked door at the top. Use the fourth Small Key that we received after Joelle’s defeat and enter the next room.
The second twisted corridor
Behind the locked door, another twisted room awaits. Its walls and platforms run at unusual angles, and a ceiling claw once again lurks above the ceiling. So pay attention to the shadow under Link and stay moving as much as possible. Jump across the leaning platforms to the opposite door. If you want to fight the Ceiling Claw, you first let it fall to the ground and then attack its vulnerable body. However, for the main route it is enough to avoid it.
In the next corridor several green bone grimaces are circling. Unlike the blue variants, they lose their wreath of flames at regular intervals. You can therefore wait a moment until their flames go out and then defeat them with the Master Sword. If you don’t want to fight, just walk past them. At the end of the hallway is the next locked door. Open it with the fifth and final Small Key. The temple’s next big mystery awaits behind it.
The icy eye and the burning arrows
In the following room, several platforms rotate around a large burning torch in the center. On the opposite side is a silver Eye Switch, completely covered by a thick layer of ice. A normal arrow cannot therefore activate it. We have to melt the ice first. Since we don’t get the Fire Arrows until later in the game, we use the flame of the torch in the middle of the room.
Jump onto one of the rotating platforms and have the fairy bow ready. Wait until the platform has moved you so far that the burning torch is exactly between Link and the iced up Eye Switch stands. Now aim the fairy bow through the flame at the eye. The arrow ignites as it passes through the fire and then hits the ice surface. As soon as the flaming arrow reaches the icy eye, the ice layer melts and the switch is activated.
The hit changes the orientation of the adjacent corridor again. The passage we just came through rotates into a new position, opening up access to the next area. If you miss the eye on the first try, just stay on the platform and wait for the next good shooting position. You can repeat the attempt as often as you like as long as you still have arrows.
Since we already have Din’s Din’s Fire, there is an alternative shortcut: jump onto the platform near the icy eye and use the spell. If you are close enough to the ice, it will also melt due to the fire wave. However, for our regular solution we use the flaming arrow because it requires no additional magic consumption.
The falling ceiling
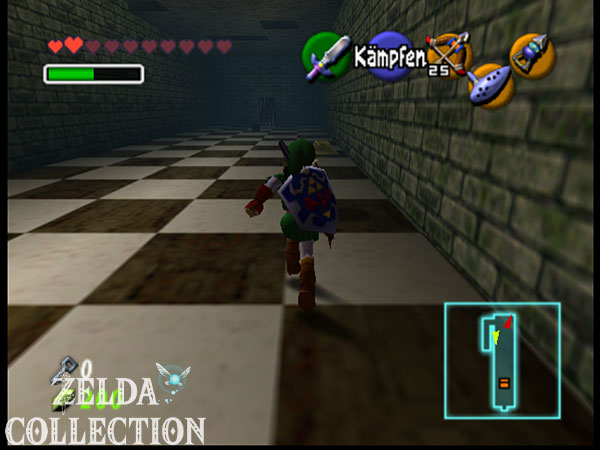
Then return through the door into the now changed corridor. In the adjacent room, the new alignment has opened a hole in the floor. Drop Link through it and you’ll reach a long room with a noticeable checkerboard-like floor. As soon as you take a few steps forward, the entire ceiling begins to fall down at regular intervals. Anyone who is on an unprotected floor space when the heavy stone slab comes down takes damage and is thrown back.
First, observe the ceiling without going too far into the room. There are several square openings in the stone slab. You can safely stand right under these openings while the blanket falls to the floor. Therefore, look for the nearest protected field before each running section. As soon as the ceiling moves up again, quickly run to this position and wait there until the stone slab has fallen down again and been raised again.
In addition, Giant Skulltulas fall from the ceiling in several places. You can eliminate them with the Hookshot or Fairy Bow as soon as they become visible. Make sure that you do not end up standing on an unprotected base plate for an unnecessarily long time. The rhythm of the falling ceiling is more important than fighting the spiders. If a Skulltula is blocking your route, it’s better to wait for another pass and remove it from a safe position.
On the right side of the room is a Floor Switch, which opens the exit at the opposite end. During a safe period, run there and step on it. There is also a small Treasure Chest with arrows nearby. If you want to take it with you, first stand on the safe floor space right next to the chest and wait until the ceiling rises again. Open the chest quickly and return to the protected field immediately. Then you work your way step by step to the exit and leave the room through the now open door.
The green forest spirit Amy and the cube puzzle
In the following room there is a large painting hanging on the wall. On it you will recognize the green forest spirit Amy. Unlike Joelle and Beth, this time there aren’t multiple paintings that the mind jumps between. Instead, a cube puzzle awaits you under time pressure. Stand a little distance in front of the painting and shoot at it with the fairy bow. Shortly afterwards, several large stone cubes fall from the ceiling and spread across the floor.
Four of the dice bear different images of the same forest spirit. A fifth die is not part of the actual motif and only serves as a distraction. Your job is to… four correct dice to form a complete square picture push together. You have about a minute to do this. First check the colors and the position of the individual parts of the image. The false cube has a significantly different representation and should be pushed out of the way first so that it does not hinder the assembly of the remaining pieces.
Then push the four matching cubes together so that their top sides form the complete image of Amy. Orientate yourself on the lines of the background and the color areas that belong together. If possible, try not to move a cube that is already in the right place unnecessarily. Instead, you pull or push the remaining blocks towards him. This saves you time and reduces the risk of accidentally pulling the finished arrangement apart again.
If you exceed the time limit, the puzzle is not permanently lost. After another attempt, the dice are brought back into a solvable arrangement. You can also briefly leave and re-enter the room to reset the puzzle if necessary. As soon as all four correct dice form a complete picture, the green forest spirit Amy appears and attacks Link directly.
The subsequent fight works the same as with the previous two forest spirits. Stand back and watch when Amy becomes visible. While she’s invisible, you can’t reliably hit her with your sword. As soon as her body reappears, attack with the Fairy Bow or the Master Sword. Repeat the process until she is finally defeated. The green flame then returns to the central hall and the next door opens.
We have already defeated three of the four forest spirits. The last ghost waits right in the main hall of the forest temple and has different fighting tactics than his sisters.




The violet forest spirit Meg – recognize the real spirit
Leave the room with the green forest spirit through the newly opened door. In the short hallway beyond, an ordinary large Skulltula hangs from the ceiling. Defeat them with the Hookshot and then move on. You reach an elevated balcony that leads back into the central hall of the Forest Temple. Three of the four torches below have now been lit again. Only the violet flame is missing. Drop down from the balcony and go to the middle of the hall.
The last forest spirit is waiting there, Meg. Unlike her sisters, she doesn’t hide in paintings, but has the ability to create multiple, deceptively real copies of herself. As soon as the fight begins, Meg disappears briefly and then reappears along with three doppelgangers. In total there are four almost identical ghosts floating around Link. Only one of them is real and can be harmed.
Recognize the real Meg
Observe the four figures immediately after they appear. The three false ghosts remain almost motionless while the real Meg makes an additional rotation around its own axis. It is precisely in this brief moment that you have to recognize which of the four appearances is the original. Aim at it and shoot it with the fairy bow. If you meet the real forest spirit, all copies will disappear and Meg will appear in a new position a short time later.
Repeat the process, paying attention to the additional rotation of the original each time. The real Meg’s position changes between attacks, so you can’t just keep shooting the same ghost. If you wait too long or meet a false doppelganger, Meg can attack herself. Therefore, keep enough distance and prepare the Fairy Bow while the ghosts have disappeared.
After several successful hits, Meg is also defeated. Your violet flame returns to the final torch and all four fires burn again in the central hall. The large elevator in the middle of the room then begins to function again. This opens the way to the basement and finally to Phantom Ganon’s chamber.
Before you use the elevator, you should check your arrow supply and your health again. If necessary, break the jars on the walls and collect hearts or arrows. Then you get on the large elevator in the middle of the room and take it to the basement of the forest temple.
The rotating basement
The elevator takes Link to a circular room below the central hall. The last big mystery of the forest temple awaits you here. The outer wall of the room is rotatable and can be moved using two large stone blocks or handles. With each rotation, the wall openings move and other small side chambers become accessible. Several of these chambers included Floor Switch, which we have to press one after the other to reveal the door to the final boss.
Stand at one of the large handles and start pushing the wall counterclockwise. After each complete movement, a different opening becomes visible. Our route leads through a total of three counter rooms and a small side room with a Treasure Chest and the last Gold Skulltula. It is important that you always push the wall in the same direction instead of turning it back every now and then. This means that the individual openings remain accessible in a comprehensible order.
First Floor Switch
First, push the wall further and enter the newly opened chamber. There is the first Floor Switch on a light floor plate. Step on it and wait until you hear part of the latch open. Then return to the central circular room and push the wall counterclockwise again. You will now reach another chamber with a second Floor Switch, which is lying on a reddish floor plate. Activate it too. This means that two of the three necessary switches have already been completed.
Gold Skulltula 5/5 – in the next room with the Treasure Chest
Push the rotating wall further again. Now a small side chamber becomes accessible, in which there is a Treasure Chest with arrows. First, eliminate the common spiders that can fall from the ceiling, then open the chest. The Gold Skulltula 5/5 sits on the wall or in the rear area of the same chamber.
Target and defeat the Gold Skulltula with the Hookshot. Then drag the remaining symbol to Link using the Hookshot. With this we have collected all five Gold Skulltulas of the forest temple. When you open the Dungeon Map, the corresponding Skulltula symbol will now appear next to the name of the forest temple. This confirms that no more Gold Skulltula are missing from this dungeon.
Third Floor Switch and access to the final boss
Return to the rotating circular room and push the wall counterclockwise one last time. This will reveal access to the third Floor Switch, which is located on a blue floor plate. Step on it. As soon as this switch has also been activated, the last lock before the long exit corridor disappears. We have completely solved the entire basement.
Then follow the opened corridor to the large ornate door at the end. On the way you should break the jars and replenish your supply of arrows and hearts. If you have a Fairy in a Bottle, you should keep it for the upcoming battle. Especially in the first phase of Phantom Ganon, it is possible to lose several hearts at once due to his electric attacks if you miss a shot.
The large door at the end of the corridor can be opened with the Boss Key found previously. This opens the way to the last room of the forest temple.


Boss: Phantom Ganon
Behind the large door you reach an unusual circular gallery. Six large paintings hang on the walls, seemingly leading into a dark landscape. There is an elevated fighting area in the middle of the room. At first there is no enemy to be seen. Therefore, climb the stairs and go to the middle of the room. As soon as you approach the exit again, the doors close and a sinister figure appears on a black horse.
At first you could actually mistake the opponent for Ganondorf. But after a short time it becomes clear that it is just an image he created: Phantom Ganon. Adult Link’s first major boss has two different combat phases. In the first phase you have to hit him with the fairy bow as he rides out of the paintings. He then gets off his horse and fights Link with strong magical energy balls, which we can hit back with the Master Sword.
Phase 1 – Phantom Ganon in the paintings
At the start of the fight, Phantom Ganon rides into one of the six large paintings on the wall. Shortly afterwards he appears in two different images at the same time. However, one of the two riders is only an illusion. Therefore, watch carefully as the two figures move towards their respective picture frames. The fake Phantom Ganon turns back just before the frame, while the real opponent actually rides out of the painting and prepares a powerful lightning attack.
It’s best to stand near the outer edge of the arena so that you can keep an eye on several images at the same time. Hold the fairy bow taut and watch which painting changes. As soon as you recognize which frame the real Phantom Ganon is coming out of, shoot him with the fairy bow. A successful hit interrupts his attack and forces him back into the paintings.
If you miss the right time, Phantom Ganon will shoot a powerful electric attack at the arena floor. This spreads along the prominent lines on the floor and can cost Link several hearts. The corners or outer edge areas of the fighting area are particularly safe, where you can stay outside of the direct direction of spread. Use these positions to quickly dodge after a missed shot.
Repeat the process until you have hit Phantom Ganon three times with the Fairy Bow. After the third successful hit, he can no longer stay on his horse. The animal disappears and Phantom Ganon dismounts. This ends the first phase of the fight.
Phase 2 – Knocking back the energy balls
In the second phase, Phantom Ganon floats freely above the ground and attacks Link with glowing energy balls. You can repel these attacks with the Master Sword. Aim at Phantom Ganon and initially keep some distance. As soon as he shoots an energy ball, you wait until it gets close enough to Link. Then perform a normal sword slash. If you hit the right moment, Link will hit the magic bullet back in the direction of Phantom Ganon.
However, the opponent can also hit the bullet back with his weapon. This begins a magical back-and-forth duel in which the bullet becomes faster with each successful hit. Therefore, keep the target lock on Phantom Ganon and pay attention to the rhythm of the bullet flying back. You shouldn’t strike randomly with the sword, but whenever the energy ball arrives just before Link. After several hits, Phantom Ganon loses control of the projectile and is hit by its own magic.
As soon as the energy ball Phantom Ganon hits, he falls stunned to the ground. Immediately run to him and grab him Master Sword to. A jump attack is particularly effective because it causes more damage than a normal sword strike. You can then use further quick strikes as long as the opponent remains motionless. As soon as he gets up again, you should move back a little so that he doesn’t hit you immediately with his next attack.
Occasionally Phantom Ganon forgoes the energy sphere and instead performs a quick charge attack. In this case, you have to move to the side or have your shield ready. Don’t try to interrupt the attack with an unprepared sword strike. As soon as Phantom Ganon fires another energy ball, you return to the usual process: knock back the projectile with the Master Sword, stun the opponent and then land several sword blows.
After several successful damage phases, Phantom Ganon is finally defeated. The last energy ball or your subsequent sword attack hits the opponent so hard that he collapses. Shortly afterwards, the real Ganondorf appears and mocks his failed servant. He then banishes Phantom Ganon to another dimension. The Forest Temple is therefore free from Ganondorf’s influence.
Heart Container and Forest Medallion
After Phantom Ganon’s defeat, a Heart Container appears in the middle of the arena. Be sure to collect it before entering the blue teleporter. The Heart Container permanently increases Link’s maximum health by a full heart and at the same time replenishes his current energy. You have now also received the Heart Container of the first large adult temple. You can find more Locations for additional health in our guide to all Pieces of Heart in Ocarina of Time.
Then enter the blue teleporter. Link will be from the Forest Temple in the Hall of the Magi transported. There he finally meets Saria again. She explains to him that she is… Sage of the Forest has awakened and must henceforth take her place among the wise. Although she can no longer accompany Link on his adventures, her power will help him in the fight against Ganondorf.
As a sign of her support, Saria gives Link the Forest Medallion. With this you have the second amulet in the game after the Light Medallion and you have awakened the first of the five new sages that Link has to search for. The Forest Temple is now fully complete.


Der Spross des Deku-Baumes
After the sequence with Saria, Link finds himself again Kokiri Forest in front of the remains of the old Deku Tree again. Suddenly the ground begins to shake and a new small tree grows out of the earth. It’s about that Deku Tree Sprout, who will now take on the role of his late predecessor. He speaks to Link and explains to him that the curse over the forest was finally broken after Phantom Ganon’s defeat. He then tells him a secret about his origins.
Link is namely no kokiri, but a Hylian. Many years ago, during a war, his mother fled to Kokiri Forest with her newborn son. She was seriously injured and trusted Link with that Great Deku Tree before she died. The Great Deku Tree took the child in and let him grow up with the Kokiri. That’s why Link was able to leave the forest during his childhood and, unlike his former friends, has visibly grown older over the past seven years.
With this revelation, Link finally learns why he has always been a little different from the other Kokiri. The Kokiri Forest is now more peaceful again and the residents can live without the influence of Phantom Ganon’s curse. For our 100% route there is initially nothing new to collect here, as long as you do Gold Skulltulas and have completed the already accessible secrets from the previous chapters.
After Forest Temple – back to the Temple of Time
Before we continue to the Death Mountain and the next temple, we should definitely make a stop at the Temple of Time. After Link receives the Forest Medallion, Sheik waits for him there again. You can either take the normal route across the Hyrule Field to Hyrule City or use familiar teleportation songs to shorten your journey. Then enter the citadel and go to the Pedestal of Time, from which Link pulled the Master Sword seven years ago.
Sheik now explains to you that Master Sword is not only a powerful weapon, but also as Key between past and future serves. As soon as you put it back in the Pedestal of Time, Link can return to his childhood. If you then pull out the sword again, seven years will pass again and Link will grow up. This ability is particularly important for our complete collection route, as numerous Pieces of Heart, Gold Skulltulas and Side Quests can only be reached in a certain time period.
Learn the Cantata of Light
During the conversation, Sheik brings Link the Cantata of Light at. This song is one of the game’s six teleportation tunes. As soon as you play it on the ocarina, Link immediately becomes the Temple of Time transported. This will allow us to switch between already known areas in the future without having to cross the entire Hyrule Field each time.
After you have learned the Cantata of Light, you can put the Master Sword back in its base and return to young Link. We will specifically use this option in our further 100% route. Particularly interesting now are the two missing Pieces of Heart near the frogs at the Zora’s River, the last Magic Bean planting sites and several additional Gold Skulltulas that we can prepare or complete with the adult Link’s equipment.
If you want to continue directly with the main story, you can stay as an adult Link for now. The time travel option remains permanently available and can be used at any time later. For our complete run-through, however, it is advisable to get the first open collectibles as early as possible before we explore other large temples.
Continue to Death Mountain and Fire Temple
With the Forest Medallion, the first sage has awakened, and with the fairy bow, Link has a new weapon with which we can open several previously unreachable secrets. Our next big target is the Death Mountain. There we learn that Ganondorf has captured almost the entire Goron people and Darunia has set off for the dangerous fire dragon Volvagia. Before we can follow him, however, we need the Goron Tunic, which protects Link against the intense heat in the Death Crater.
On our 100% route, we first undertake a targeted collection round. We can now use time travel to get the two missing Pieces of Heart from the frogs at the Zora’s River and collect more Gold Skulltulas in already known areas. We then travel to Kakariko and climb the Death Mountain Trail to Goron City, where the path to the next temple begins.