With the Goron’s Bracelet from Goron City, Link can finally raise the Bomb Flowers on the Death Mountain Trail and the entrance to Dodongo’s Cavern Open. This second labyrinth is almost all about explosions: you blow up crumbling walls, use the baby dodongos as living bombs, trigger a chain reaction of thunderflowers and, at the end, open the mouth of a massive stone skull. You can expect fire flutterers, steel cyclops, adult Dodongos, Echsodorus and a large puzzle with stone blocks. The most important item is about halfway: the Bomb Bag, with which you can use your own bombs in the future.
Our route takes you without unnecessary backtracks to Dungeon Map, Compass, bomb bag, all the important Treasure Chests and three of the five Gold Skulltulas. The remaining two are already in the dungeon, but their symbols cannot yet be reached during the first regular run. We’ll get one later with the Boomerang, the last as an adult link with Hookshot and Scarecrow’s Song. After King Dodongo you will also receive a Heart Container and from Darunia the Goron’s Ruby. This walkthrough describes the normal dungeon from Ocarina of Time for Nintendo 64 and Ocarina of Time 3D; The differently structured Master Quest rooms are not included.
The path into Dodongo’s Cavern
The chapter follows our journey through Kakariko, the Lost Woods and Goron City. You should now have the Kokiri Sword, Fairy Slingshot, Zelda’s Lullaby, Saria’s Song and the Goron’s Bracelet. The Hylian Shield is highly recommended because the fire flutters in the cave can burn the wooden Deku shield. Young Link doesn’t carry the large Hylian Shield in front of him like an adult, but he can duck under it when blocking and thus intercept fire attacks. Also, if you can, take some Deku sticks with you and a filled bottle if you have one. If necessary, we can find dealers in the dungeon for replacement equipment.
If the entrance is still blocked by a large rock, follow the Death Mountain Trail from Goron City downhill a bit. On a ledge above the cave entrance, a Goron sits next to a Thunderflower. Stand at the low gap in the railing, pick up the Bomb Flower with the Goron’s Bracelet and throw it at the rock in front of the entrance. The explosion opens the entrance. There is also a field of soft earth directly in front of the cave. If you didn’t release any beetles from a bottle there in our previous chapter, you can now get the corresponding Gold Skulltula from the Death Mountain Trail. She is part of the upper world and not one of the five spiders within Dodongo’s Cavern. Then enter the dungeon. There are two thunderflowers right in the anteroom. Take one of them and place it in front of the noticeably fragile wall that blocks the actual access.


The entrance hall and the Dungeon Map
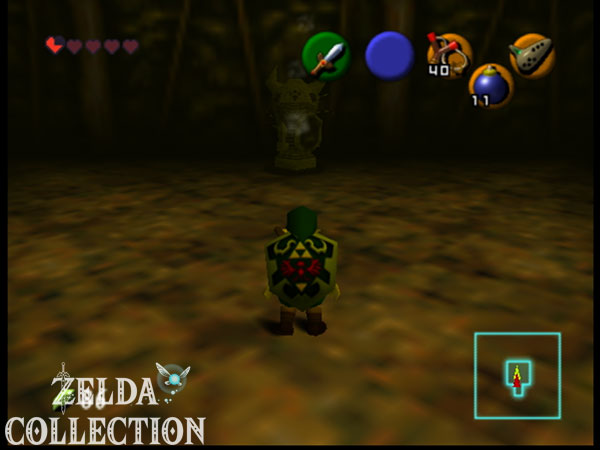
The large entrance hall opens behind the blown wall. Lava flows around a central platform, several stone pillars slowly rise and fall, and a gigantic petrified one rises in the northern part Dodongo skull. His mouth is still closed. Stand on the center platform and on the sides Steel Cyclops, whose rotating eyes shoot energy beams as soon as they spot Link. You can destroy them with Bomb Flowers, but you don’t have to spend time with them for now. Use one of the rising and falling columns to move from the entrance side to the center and from there to the western, left side the hall to jump. It’s better to land on solid ground than run too close to a steel cyclops.
On the western side, a single Thunderflower grows right next to a crumbling wall. Place the plant in front of it and wait at a safe distance for the explosion. There is a large one behind the blown-out entrance Treasure Chest with the Dungeon Map. From now on it will show you both floors as well as the rooms you have already visited. If you blow up a second fragile wall on the same side, you will discover one Deku Trader, who is selling a replacement Deku Shield. The offer is only necessary if your old shield has already burned or you really want to wear a wooden one again. This is enough for the rest of the way Hylian Shield. Return to the entrance hall and cross the moving pillars this time eastern, right side.
Here you will first find a fragile wall with an optional clue stone behind it. The actual path lies further back at a steel cyclops. Detonate a Bomb Flower near him to knock him out of the way, then blow up the crumbling wall he’s guarding. Behind the passage begins a long corridor in which several small Dodongos jump out of the ground. Follow him slowly, because the opponents will soon be needed for a secret.
Gold Skulltula 1/5 – the baby Dodongo gang
The Baby Dodongos are moving quickly towards Link. As soon as you have defeated one of the animals with the sword, its body will remain lying there for a moment, flash red and explode. Therefore, retreat immediately after a hit. About halfway down the corridor you notice a fragile spot on the right wall. Lure a baby Dodongo as close to this wall as possible and defeat it there. Its explosion does the work of a thunderflower and blows open the secret entrance. If the enemy explodes in the wrong place, you wait for the next one or come back here again after finding the bomb bag.
Several Keese are flying in the small room behind. It’s best to eliminate them from the entrance with the fairy slingshot before you approach the Gold Skulltula (1/5). Defeat the spider and collect its symbol too. There’s something hanging above Link’s normal grab height: stand close below, zero in on the spot, and use a jump attack or a neatly aligned backflip to touch the symbol. You don’t need Boomerang or Hookshot for this. If you don’t reach the symbol at first, you can try again after receiving the bomb bag; a later Boomerang makes collection even more convenient. Then return to the Baby Dodongo corridor and go to the end.
Push the statue onto the switch
In front of the next locked door lies a Floor Switch in a small depression. As soon as Link leaves him, he jumps back up and the gate closes. Therefore, place one of the immobile statues on it. Go behind the statue, push or pull it right onto the switch and check that the grate stays open. Afterwards you can walk through undisturbed. In the short hallway behind, Keese sit on the ceiling; remove them with the fairy slingshot and enter the large arena at the other end.


First miniboss – two Echsodorus
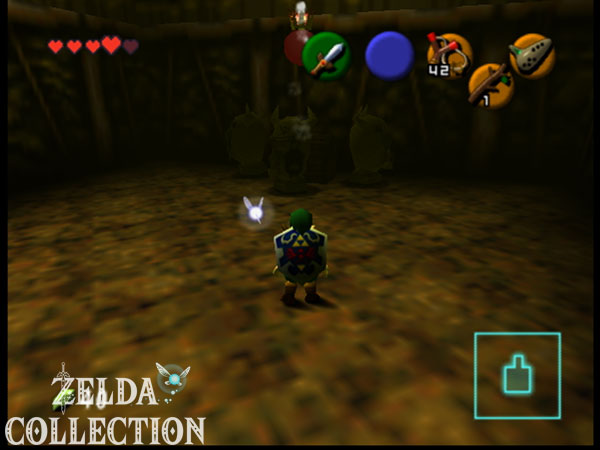
The doors close and two Echsodorus appear on the stone platforms between the lava arms. Although both are in the arena, usually only one attacks directly; Meanwhile, the other retreats to a distant ledge. Target the active enemy, keep him in front of you and wait for his sword attack. The Hylian Shield helps you here, especially in the crouched defensive position; Otherwise, sidestepping is often easier. Once the Echsodorus has struck or jumped over Link, turn to him and counter with a sword slash or two. A jump attack causes a lot of damage, but on the narrow platforms there is also the risk of jumping too far forward.
Don’t chase the Echsodorus to the edge of the lava. Once one has taken enough hits, he jumps to a distant ledge and the other takes over. Repeat the rhythm of dodging, aiming and counterattacking until both enemies are defeated. The doors then open again. If you have taken damage, you will find energy hearts in the pots and on individual ledges. Leave the arena through the opposite exit and follow the path to the large dodongos.
Adult Dodongos and the three torches
In the following room there are three adult Dodongos, which raise their heads and breathe a wide jet of fire forward. You can’t easily defeat them from the front with the Kokiri Sword: their vulnerable spot is the tail. Lure a Dodongo so that it breathes fire in one direction, run past the side of its body, then attack from behind. Immediately after being hit, retreat again as the animal will quickly turn around and lash out with its tail. When it finally flashes red, keep your distance until the explosion passes. The fairy slingshot can also be used to cause damage, but the fight usually takes longer. Work your way past all three enemies in this pattern.
As soon as you enter this hallway, there is one in the corner optional blastable wall. Behind it, a Deku dealer sells Deku sticks. This is particularly helpful if you have your entire supply in… Great Deku Tree has gone out. After the three Dodongos, the room ends at a barred door and a total of four torches. Only one of them is already burning. Pull out a Deku stick, light it on the flame and run with it one by one three extinguished torches. As soon as they are all burning, the grate opens. Try to identify the path between the torches beforehand and put the burning stick away before it is used up.
Behind the open door you reach the large entrance hall again, this time on a raised ledge. Press the clearly visible Floor Switch there. On the opposite western side, a previously locked door opens. Use the moving pillars in the hall to get there. The big puzzle with the Bomb Flowers awaits in the next room – and the Compass.


The Compass and the Thunderflower Staircase
In the new room lies a huge stone block flanked by two long rows of Bomb Flowers. There is exactly one free space between the two rows. Before you trigger the chain reaction, go to the left of the entrance to a crumbling wall. Take one of the thunderflowers growing there and blow up the entrance. In the next room there are several statues and a large Treasure Chest. A statue comes to life when you get too close: a Armos. Dodge his hopping attacks and hit him with a Deku Nut followed by sword attacks or an explosion. Don’t stand next to him when he flashes red after the decisive hit, because Armos will also explode shortly afterwards. Open the chest and take the Compass, which in addition to the floors now shows unopened chests and the location of the boss chamber on your map.
Return to the two rows of flowers and look for the single Bomb Flower next to the entrance. Lift them up and place them exactly in the empty space between the two rows. The first explosion ignites the neighboring plants, and the blast wave propagates in both directions. The huge stone block folds down and forms a wide staircase to the upper walkways. Climb up, follow the wall up and turn back at the top before going through the next door: our second Gold Skulltula is hidden behind the climbing plants.
Gold Skulltula 2/5 – on the vines above the stairs
On the upper level of the stairwell there are climbing plants on the wall, with common skullwandtulas and a Gold Skulltula (2/5) sit. Shoot the annoying little spiders and the golden spider with the fairy slingshot. Then carefully climb up the vines until you can touch the symbol left behind. This gives you two of the five Skulltula symbols in Dodongo’s Cavern.
In the same large room, there is another symbol in a high niche above the original folded-up staircase. However, this find is not part of our first run. When you re-enter the cave later, the stairs will be up again. The niche can then be reached via a return path from the second floor, but you need the symbol itself with the Boomerang or Hookshot. So don’t try to get the newly lowered stairs back up again now: we’ll record this find for a targeted later visit. Now go through the door on the upper walkway.


Armos, steel cyclops and the wooden bridge
In the following hexagonal room several flutter Fire Flutter through the air. Remove them right away from the entrance with the fairy slingshot and leave your Hylian Shield equipped in case someone comes close. In the middle is a raised platform, the ladder of which is blocked by a statue. This statue is immobile and can easily be moved to the side push or pull. Then climb up the ladder and press the switch on the top. The next door is unlocked. Follow her and you will return to the main chamber, but now on the upper wooden walkway directly above the large Dodongo skull.
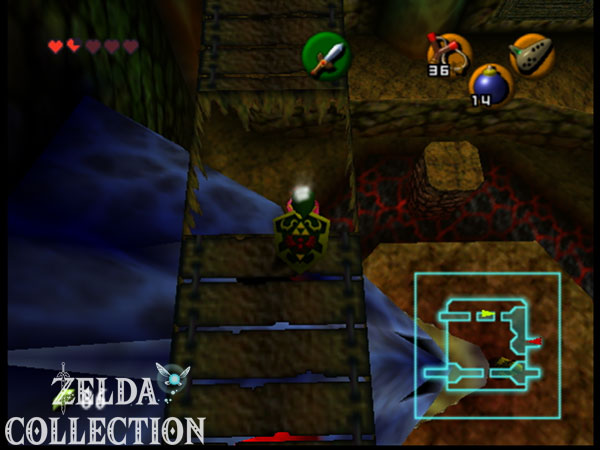
You will encounter more fire flutters on the footbridge. As a precaution, shoot them before running to the middle of the walkway. There you recognize two rectangular openings in the ground. Remember their position and just jump over them at first. Later we will drop bombs through these openings directly into the two eyes of the stone skull. At the other end of the bridge, the door leads into a room full of blade traps.
blade traps, the sliding block and 20 Rupees
The floor of the following room is crossed by several blade traps, which rush off as soon as you get into their path. First, jump from the entrance edge to the lower path and don’t move straight ahead without thinking. Stand behind a pillar, watch the rhythm and only start running when a trap has passed you. Repeat from cover to cover until you reach the large sliding stone block at the end of the hallway. If you pull it back a little first, you can find an Energy Heart in its original niche. Then push it in front of the raised ledge and climb up.
There is a small one at the top Treasure Chest with a redden Rupee worth 20 Rupees. Open them, because for our full run we’ll be taking the solid chest finds with us. Afterwards you will see another crumbling wall above a ladder. The only Bomb Flower is a little ways away from the wall. Lift it, wait a moment until the fuse has burnt down significantly, and then throw it on the narrow ledge in front of the wall. If the plant explodes in the air, the throw was a little too late; If it just grows next to the wall and doesn’t do anything, it was too early or too short. The Bomb Flower grows back again, giving you as many attempts as you want.
After the explosion, jump to the now open passage and go through the door. In the next room there is one blocking it Wall of fire the way across the platform. There is a golden eye symbol directly above the opposite passage. Shoot it with the fairy slingshot: the flame only disappears for a short time. So run straight away, jump onto the platform and continue to the other end. A short hallway with baby Dodongos takes you back to the large Echsodorus Arena, this time on its upper floor.




Second Echsodorus Battle and the Two-Eyed Riddle
Wait again on the upper level two Echsodorus. The basic tactics of the first fight remain unchanged: target an opponent, wait for him to jump or strike with his sword and then counterattack. Because the platforms here are narrower, you’ll want to be extra careful with jump attacks, preferring to use a simple safe slash rather than falling into the lava. Take advantage of the opponents’ behavior: The currently active Echsodorus regularly comes back to you, even if you remain standing. After the victory, you can collect energy hearts on a side ledge if necessary and use the opposite exit.
There is another wall of fire waiting right behind it. First, shoot the golden eye above the passage. This causes the first flame to disappear. Jump onto the middle platform and turn the camera to the left. There is a second eye symbol in a niche on the side of the wall that is easily overlooked. Hit it with the fairy slingshot and quickly cross the now safe second platform. On the other side of the door you return to the blade trap room – but now on the upper level, from which you can reach the large Treasure Chest.
The bomb bag – the most important item
Don’t jump down to the lower trap area. Stay on the upper walkway, cross the small gap and climb onto the ledge on the right. Open the big one there Treasure Chest and you receive this Bomb bag. It contains at the beginning 20 bombs. In contrast to the thunderflowers, you can use them anywhere there is enough space to put them down or throw them. As the game progresses, we use them not only for the cave puzzles, but also for the first bag upgrades, Gold Skulltulas, hidden fairy springs and several Pieces of Heart. The bombs themselves can be bought later or found in pots and chests.
One floor below, behind an optional crumbling wall, there is another side room with two Deku dealers who offer Deku nuts or spin cores. This detour is not necessary to complete the dungeon, but you can now reach the goods with your new bombs. Otherwise, follow the upper path through the next opening until you reach the central entrance hall again. There, press the Floor Switch directly at the upper exit. This will adjust one of the movable columns so that it will rise to the second floor in the future. This shortcut will also be useful for our later Skulltula return visits.
Right next to the upper bridge there is another blastable wall with a small chest behind it. If you still have your Deku Shield, it contains a red Rupee worth 20 Rupees; If the shield is lost, you can get a replacement here. Open it if you want to completely uncheck the fixed chest. Then go back to the familiar bridge with the two openings above the huge Dodongo skull.




Make the eyes of the Dodongo skull glow
The huge stone skull at the north end of the hall is now our target. On the top Wooden bridge There are exactly two holes, each located above an eye. Stand in front of the first opening, pull out a bomb and let them fall vertically into the hole. If you throw too far forward, it may land in front of your skull; then you try a new bomb. As soon as the explosion hits the eye, it begins to glow red. Repeat on the second opening. When both eyes are red, the large stone jaw opens, revealing a previously closed entrance.
Use the newly activated elevator or drop from a safe spot in the upper hall to the lower path. Run north and enters the open mouth. Behind it is a square hall with a switch in a recess. There is no block on it yet, which is why the door to the boss area remains locked. We first have to go through the eastern or right side passage in order to push a suitable stone block into this room from above. We are taking the third Gold Skulltula, which is already accessible, with us.
Gold Skulltula 3/5 – behind the Armos
In the square hall, first go to the elevated path to the right. It leads into a larger, S-shaped side room with fire flutters and staggered stone blocks. Eliminate the bats before climbing over the first few blocks along the low path. On the opposite side is on one higher ledge a fragile wall. Climb onto the adjacent block and throw a bomb so that it lands directly in front of the wall. If this is difficult, you can hold a bomb in your hand for a moment and only throw it when its fuse is almost burned out.
Behind the blown wall you enter a small room with a single Armos statue. The statue guards the Gold Skulltula (3/5). Awaken the Armos and defeat it with a bomb or repeated sure sword hits. As soon as the statue flashes red, keep your distance until it explodes. Now you can target the golden spider, eliminate it and collect its symbol directly. With this find you have all three Gold Skulltulas of the cave that can be reached on the first regular pass. We’ll note the last two for later. Then return to the S-shaped main room.


Bring the stone block to Floor Switch
After finding the third Skulltula, climb to the top of the inner stone walls in the S-shaped room. Follow the elevated path until you can jump down the other side. There are several pots nearby; In one of them there is a fee. If you have an Empty Bottle, you can store it in it. It automatically revives Link if his hearts fall to zero. With a fairy in your pocket, the upcoming battle against King Dodongo will be much more relaxed.
Continue along the high level until you reach a large sliding stone block. Push him over the edge so that he falls into the deeper passage. Follow him and then take him through the connecting passage back to the square anteroom that you first saw after entering the Dodongo Mouth. Finally, push the block exactly into the recess with the Floor Switch. The weight holds the switch permanently and opens the door to the boss chamber. Make sure you’ve already collected the Skulltula symbol behind the Armos, because then we won’t have to go back to this side room for now.
Fill up the bomb supply and open the boss path
There is a small anteroom behind the unlocked door. The floor has a striking, differently colored square area in the middle. Place a bomb on it and wait for the explosion. The floor is blown open and a hole is revealed in the arena below. Before jumping, open the nearby small Treasure Chest with additional bombs to replenish your supply for the fight. Also check your hearts and the bottles. You only need a few hits to win, but King Dodongo can deal high damage with his fire breath and roll attack. Then jump through the opening and start the fight.
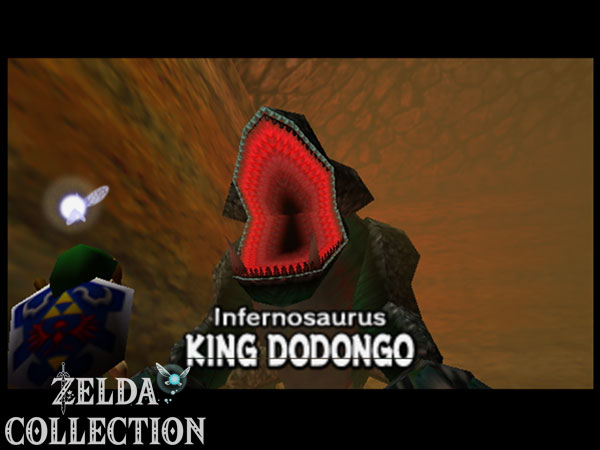
Boss Fight: Infernosaurus King Dodongo
After the fall, you’ll find yourself on a narrow square stone path that encloses a lava lake. The massive Infernosaurus King Dodongo takes up almost the entire path. It attacks in two ways: either it opens its mouth and spews a wide wave of flames, or it curls up and races along the outside of the arena. What is particularly interesting to us is the preparation of his fire breath, because it is precisely at this moment that his inner being is vulnerable. Don’t try to hit his shell from behind; the reliable attack comes via its open mouth.
Stand some distance in front of his head and have a bomb ready. When King Dodongo raises his head, opens his mouth wide and audibly sucks in air, throw the bomb straight in. It explodes in his body and stuns him. Immediately run to his head and perform a Jump Attack with the Kokiri Sword. One or two more blows are possible while he is on the ground. Then you should quickly move away from your head. The bomb must actually land in his mouth as he inhales; If you throw too early or miss, he will usually start his fire attack.
After a successful damage phase, King Dodongo gets up, rolls up and races along the stone path. The safest position is as far inside as possible at one of the four corners, right on the edge of the lava lake. King Dodongo moves past this corner as he rolls on the outside. You can also duck under the Hylian Shield, but the inside corner is usually easier because you don’t risk direct contact. Wait there until the boss comes to a stop at the other end. Don’t run right after him while he’s still rolling; Don’t face him again until he uncurls completely and prepares his mouth for the next fire attack.
Repeat the process Bomb into the open mouth, jump attack to the stunned head and retreat to the inner corner. If you run out of bombs during the fight, they will grow in the corners of the arena Thunderflowers. You can lift them with the Goron’s Bracelet and throw them into his mouth just like bombs. Even without supplies from the bomb bag, the fight can still be solved. Just be careful not to stand too close to King Dodongo while picking up the plant, as his fire breath will start shortly after you inhale.
After a few successful hits, King Dodongo falls to the side, rolls through the arena one last time and finally falls into the lava. She cools down around him and the boss disappears. The appears in the middle Heart Container. Be sure to collect it: it permanently increases Link’s maximum health a whole heart and fills hearts. Then enter the blue teleporter to leave the dungeon.






The Goron’s Ruby and the Way out of the Mountains
After the teleportation, Link is back on the Death Mountain Trail in front of Dodongo’s Cavern. Darunia and several Gorons appear to thank them for saving their food source. Darunia declares Link his blood brother and presents him with the Goron’s Ruby, the second of the three Sacred Stones, as a token of his recognition. Together with the Kokiri’s Emerald from the Great Deku Tree, you are only missing one more stone. It is located at Zora and is the goal of the next major story section.
Before we travel to the Zora’s River, it is worth taking a coherent tour of our 100% route with the new bomb bag. Now you can blow up brittle walls on the Death Mountain Trail, uncover the path to the summit of Death Mountain and reach several additional secrets in Goron City. The Great Fairy on the mountain top gives Link an important spell, and the capacity of the bomb bag can also be expanded. These finds belong on the following section of the path and not in the dungeon itself, so we collect them there one after the other.
Later return: Gold Skulltula 4/5 in the stairwell
The fourth Skulltula is in the same room as the large one Thunderflower Stairs. The decisive factor here is the condition of the stairs: they still need to be folded up be. When you re-enter the dungeon, it will be back in its original position. After the third dungeon at the Zora Link owns it Boomerang, with which you can bring the high-hanging symbol back to you. Alternatively, this works as an adult link Hookshot.
On a later visit, use the elevator unlocked in the entrance hall to the second floor and from there follow the upper circular path backwards across the bridge and the hexagonal Armos room until you reach the stair room from the upper door. This time, specifically do not trigger the Bomb Flower Chain Reaction. Jump from the upper level onto the stair construction that is still up or use the side tendrils to reach the hidden niche above the stairs. The Gold Skulltula (4/5) sits there. Defeat them with the sling or another suitable weapon and get the symbol high up with the Boomerang. This means that the discovery is completed without any detours.
Later return: Gold Skulltula 5/5 in Baby Dodongo aisle
The fifth Gold Skulltula sits high above the corridor with the baby dodongos, in which we found the first Skulltula behind a fragile wall at the beginning. For the intended find you need the adult link with Hookshot and a self-composed Scarecrow’s Song. You first play this melody to the scarecrow brother on the Lake Hylia as a child; As an adult, you can play them again and then summon Pierre at certain points.
Return to the Baby Dodongo corridor as an adult and watch Navi. At one point in the corridor it flies to an unusually high ledge and glows green. Stand so that it indicates the dot and play your Scarecrow’s Song. Pierre appears on the ledge. Target him with the Hookshot and pull yourself up to him. The Gold Skulltula (5/5) sits in the separated upper area. Defeat them and collect the symbol. Afterwards, the Dungeon Map shows the full Skulltula marker for Dodongo’s Cavern. A return visit before adulthood is not necessary.