

This solution applies to the normal version of The Legend of Zelda: Ocarina of Time on Nintendo 64 and to Ocarina of Time 3D. The Master Quest version has different puzzles and is treated separately.
After Link the Forest Temple, the Fire Temple and finally the Water Temple, the search for the next sage takes him back to Kakariko. This is where one of the darkest parts of the game begins. An ancient shadow creature has escaped from captivity, Impa has already left for Shadow Temple and Sheik is teaching Link a new warp song.
Straight into the Shadow Temple However, we can’t leave yet. For its numerous illusions, invisible platforms and hidden dangers, we first need this Lens of Truth. This magical tool lies deep beneath Kakariko Bottom of the well – an area that only young Link can enter. On our 100% route, we don’t just get that there Lens of Truth, but also everyone three Gold Skulltulas and then use the return to Link’s childhood to collect several more collectibles.
The Nocturne of Shadow
Travel to the Water Temple as an adult Link to Kakariko and enter the village from the Hyrule Field. A longer cutscene begins automatically just a few steps behind the entrance. Kakariko is in flames as residents desperately try to control the fires. Particularly striking is the area around the village well, from which an invisible creature escaped.
Sheik opposes the creature, but cannot stop it permanently either. Link rushes to his aid, but the creature is invisible to him and throws him to the ground with great force. When Link comes to, Sheik explains that the Shadow Demon was sealed at the bottom of the well by Impa a long time ago. This seal is now broken. Impa has already left for Shadow Temple to banish the creature again and may have come into danger there herself.
The entrance to Shadow Temple is located on a high ledge above Kakariko Cemetery and cannot be reached via normal routes. Sheik therefore teaches Link the Nocturne of Shadow. Like the Minuet of Forest, the Bolero of Fire and the Serenade of Water, this tune is also one of the warp songs and takes Link directly to the Triforce podium in front of the Shadow Temple.
New song: Nocturne of Shadow
The Nocturne of Shadow teleports the adult Link directly to the entrance of the Shadow Temple above the Kakariko Cemetery. However, we should only enter the temple after we have found the Lens of Truth.


Preparation for the Shadow Temple
The Shadow Temple works intensively with illusions. Entire walls only appear to exist, some floors are invisible and even enemies can escape normal view. Without the Lens of Truth the regular route is therefore hardly viable. However, this tool is not located in the Shadow Temple itself, but underneath Kakariko – and access to it only exists in Link’s childhood.
Play the Cantata of Light, return to the Temple of Time and put the Master Sword back into the Pedestal of Time. As a young Link, you then travel to Kakariko. The prerequisite for the following section is the Anthem of the Storm, which we learned from the Musician in the Windmill at the beginning of our journey as adult Link.
Recommended equipment:
Take bombs, Deku Nuts, Deku Staffs, the Fairy Slingshot and the Boomerang. For the direct route to the Lens of Truth you only need part of it. For the three Gold Skulltulas and the hidden side rooms, bombs, Small Keys and the Boomerang are particularly important.
If possible, equip the Hylian Shield. The fire flutters in the side rooms can burn the Deku Shield.
Draining the well of Kakariko
Enter the windmill as young Link and stand in front of the musician. Pull out the ocarina and play the Anthem of the Storm. The melody sets the windmill in motion and changes the watercourse below the village. Shortly afterwards, Kakariko’s well drained completely. At the same time, one of Ocarina of Time’s most famous time travel paradoxes is resolved: the adult musician taught Link the anthem because a boy played it seven years ago and messed up the windmill – that boy is Link himself.
Leave the windmill and go to the now dry well. Climb the ladder down into the shaft and crawl through the low tunnel. Behind it begins the bottom of the well, a small but highly intricate labyrinth full of illusions, hidden pits and undead.
The direct route to the Lens of Truth
Crawl through the first tunnel and climb down the ladder in the next room. A giant skulltula hangs in the hallway and blocks the way. Defeat them with the fairy slingshot or a well-aimed sword strike. Behind it, the corridor seems to end at a massive wall. Anyway, keep going straight. The wall is merely an illusion and has no real collision.
You reach the large central vault of the fountain. In front of you there is a small pool of water fed by a narrow stream. Make a note of this place, because this pool will later contain the direct route to Lens of Truth. Walk past it and follow the stream to the left. On the way you meet a large green bone grimace. You can put out her flames with the shield and then defeat her or just run past her.
Continue following the stream until you reach a large Triforce symbol on the ground. Stand on it and play Zelda’s Lullaby. The water begins to flow out of the catacombs. The small basin at the beginning of the central vault is also completely emptied.
Return there and jump into the drained pool. You can find bombs in a small Treasure Chest if your supply is running low. What is crucial, however, is the low shaft on the ground. Crawl through, defeat the giant skulltula on the other side, and climb up the metal grate. The Guardian of the Eye of Truth is waiting behind the door.
Miniboss: Brain vacuum
The Dead Hand is one of the scariest enemies in the game. At the beginning, the actual monster is not visible at all. Instead, four long, pale hands protrude from the ground. As soon as Link gets too close to one of these hands, it grabs him and holds him tight. That’s exactly what we have to take advantage of, because only when a hand has caught Link will the Dead Hand rise from its hiding place underground.
Intentionally allow yourself to be grabbed by one hand and then try to free yourself as quickly as possible. While Link is being held, the Dead Hand appears a few meters away and slowly moves towards you. Don’t run straight towards him. His sensitive head is initially held high and many attacks are ineffective. Just before he bites, he lowers his head significantly. Dodge its bite back or to the side and then attack the unprotected head several times with your sword.
After a few hits, the Dead Hand disappears back into the ground. Allow one of the remaining hands to grab you again so that he reappears and repeat the process. You can also damage the hands themselves with the sword, but you should leave at least one of them standing while the actual opponent is still alive.
Tip against the Dead Hand:
Patience is much safer than an aggressive attack. Wait for his bite, back away and only attack when the head is lowered directly in front of Link.
After the defeat, a large Treasure Chest appears. Open it and take the Lens of Truth. When you activate it, illusions become visible or transparent: false walls disappear, invisible platforms become visible and hidden chests or enemies appear. However, the eye continually consumes magic during use. Therefore, only activate it briefly if you want to check the surroundings.
New item: Lens of Truth
The Lens of Truth is part of the basic equipment for the Shadow Temple. It shows invisible floors, false walls, hidden objects and some invisible enemies.
For the main plot, the bottom of the well would already be settled at this point. On our 100% route, however, we don’t leave the catacombs yet, because there are a total of three Gold Skulltulas hidden here.


The three Gold Skulltulas at the bottom of the well
After the Dead Hand, return to the central vault. For the three Gold Skulltulas we need three Small Keys and the Boomerang. Also get the map and Compass beforehand so that you can assign the rooms that are still unopened on the pause screen.
Compass and Dungeon Map in the well
Go through the false wall to the inner area with the wooden cross. In a barred chamber is the large chest with the Compass. Use the Lens of Truth: The access is in a false side wall; An invisible hole lurks in front of the chest. Go past the pit and open the chest from the safe side.
Then let yourself fall through one of the recognizable pits to the lowest floor. At the green poison pool, look for the passage between two burning torches. Blast the blocking rocks, stun the ReDead with the Anthem of the Sun and defeat him. The large chest behind it contains the Dungeon Map. Back at the pool, collect the three silver rubies on the lower level. Then climb up the two ladders and pick up the two remaining silver rubies along the way. The gate opens and you return to the main floor.
All three Small Key in front of the Skulltula rooms
Search with that Lens of Truth the two small niches near the entrance side of the outer walkway: one on the western and one on the eastern side. Both are behind false walls. Open the small chest in each niche. This means you have two Small Keys, without already using a locked door.
For the third key, follow the outer corridor on the west side to the depression with the grate above it. Climb down, climb back up the other side and go through the door into the room with six coffins. Stun the Gibdo with Sun’s Song and defeat it. Ignite a Deku stick on the burning torch and use it to light the torch on the back left coffin , viewed from the entrance door. It opens and reveals the third Small Key in addition to two Keese. The other coffins contain enemies. Leave it closed and return to the tour.
Gold Skulltula 1/3 – invisible base
Return to the large central vault and activate the Lens of Truth. From the entrance side, go through the false wall to the wooden cross and open the right locked door with one of your three Small Key. In the room beyond, a wide abyss seems to block the way. In fact, several invisible floor surfaces lead over the pit.
Leave the Lens of Truth activated and slowly walk over the visible safe areas. Don’t run blindly towards the opposite wall, as falling will take you into a deeper part of the catacombs. At the end of the invisible path sits the Gold Skulltula 1/3. Defeat them from a safe distance and get the remaining symbol to Link with the Boomerang.
Gold Skulltula 2/3 – Deku Baba and flying pitchers
Return to the wooden cross and now open the locked door on the opposite left. A Deku Baba is waiting in the room behind it. At the same time, several jars will begin flying through the air towards Link as soon as you approach them. Hold up your shield so that the jars smash against it, then eliminate the Deku Baba.
The Gold Skulltula 2/3 is crawling on the back wall. Shoot it with the fairy slingshot and then use the Boomerang to bring the symbol across the room to you.
Gold Skulltula 3/3 – the cells
Return to the outer walkway and go to its northeast corner. In front of the eye-catching mural, the Lens of Truth reveals a pit. Go past it to the right and crawl through the low tunnel. You open the door behind it with the last Small Key.
In the following room, check the invisible floor holes with the Lens of Truth. Eliminate the fire flutters and destroy the Beamos with a bomb before heading to the door on the other side. The predatory slime is waiting behind it. Stun him with the Boomerang and attack from a safe distance. On the wall of this room sits the Gold Skulltula 3/3. Defeat them and get the symbol with the Boomerang to Link. With this, Lens of Truth, map, Compass and all three Skulltulas from the well have been collected.
100% fundraising round as young link
Since we’ve already gone back to Link’s childhood for the Lens of Truth and now have almost all of the songs, bottles and permanent upgrades, this is a good time to check older areas again for open collectibles. The following tasks are not necessary for the Shadow Temple. Check the following finds in your saved Heart Piece checklist first. The Roof Dweller, Sunsong Tomb, Dampé, Fishing as a Child, Gerudo Valley Crate and Crawl Bombchu Bowling were already part of our previous route. If you have already received the respective reward, skip the detour. These Pieces of Heart will not be reassigned. In particular, the treasure chest game with the Lens of Truth and the deep water hole with the Golden Scale you have now won are now accessible.
You can also find the complete overview of all Locations in our guide to the 36 Pieces of Heart. Here we concentrate on the tasks that can be particularly well connected to this last major journey through Link’s childhood.
Gold Skulltula at Hyrule Castle
First travel to Hyrule Castle and sneak past the guard post like at the beginning of the game. Go to the tree near the castle moat and stand right next to it. Play Anthem of the Storm. A hidden hole opens in the ground.
Jump into the secret cave and examine the walls. One of them is fragile and can be blown up with a bomb. Behind it is another Gold Skulltula. Defeat them and get the symbol with the Boomerang.
Pieces of Heart 1 and 2 – the frogs on the Zora’s River
Travel to Zora’s River and stand on the tree trunk that sticks out into the water about in the middle of the area. When you take out your ocarina, five frogs will appear. First, play Anthem of the Storm to them. The frogs react enthusiastically and reward Link with the first Piece of Heart.
For the second Piece of Heart you first have to let the five frogs grow completely. Play Zelda’s Lullaby, Epona’s Song, Saria’s Song, Sun’s Song, and Song of Time to them one at a time. After each melody one of the frogs grows. Once all five have reached their maximum size, a quick game of ocarina begins.
A fly appears above one of the frogs. Immediately press the ocarina button on the corresponding frog. The entire key sequence must be played without errors.
Nintendo 64:
A, C-left, C-right, C-bottom, C-left, C-right, C-bottom, A, C-bottom, A, C-bottom, C-right, C-left, A
Nintendo 3DS:
L, X, Y, R, X, Y, R, L, R, L, R, Y, X, L
If you complete the entire episode, you will receive the second Piece of Heart from the frogs.
Piece of Heart 3 – Treasure chest game with Lens of Truth
Enter the Hyrule City Marketplace at night and visit the Treasure Chest Game. One round costs 10 Rupees. There are two Treasure Chests in each room. One contains a Rupee while the other hides the Small Key for the next door. Without aids, the choice is pure luck.
Open
With the freshly received Lens of Truth, however, the game becomes trivial. Activate it in each room and look through the closed chests. Only open the chest with the Small Key and move on. In the last chamber there is a large Treasure Chest with a Piece of Heart.
Piece of Heart 4 – the man on the roof by Kakariko
Only catch up if it is still open: If you have collected this Piece of Heart in an earlier chapter, you can move on directly to the next find.
Return to Kakariko and climb the high observation tower in the center of the village. At the top, position Link so that he is facing the direction of the house with the blue roof. Line it up carefully and do a side jump to the left. If the position is correct, Link will land on the narrow fence below the tower without falling to the ground.
Run over the fence to the house and climb onto the blue roof. There’s a man sitting there that Link can’t reach normally. Talk to him. He is surprised by the unusual visit and gives you another Piece of Heart.
Piece of Heart 5 – Tomb with the Sun’s Song
Only catch up if it is still open: If you have collected this Piece of Heart in an earlier chapter, you can move on directly to the next find.
Go to Kakariko Cemetery and walk to the large tomb of the royal family. Then turn back towards the cemetery entrance. On the left there are several smaller gravestones. Pull the second tombstone back from the right and jump into the revealed hole.
A ReDead is waiting below. Play Sun’s Song to temporarily immobilize him, then defeat him. Then stand on the small stone platform and play the Anthem of the Sun again. A large Treasure Chest appears. Therein lies the next Piece of Heart.
Piece of Heart 6 – Dampé’ Grave Horror Tour
Only catch up if it is still open: If you have collected this Piece of Heart in an earlier chapter, you can move on directly to the next find.
Visit the cemetery as young Link shortly after sunset. Between 6:00 p.m. and 9:00 p.m. Dampé walks through the cemetery and offers his grave horror tour. For every 10 Rupees he digs at the spot he is currently standing in front of.
If possible, only let him dig in the dark areas of the earth. The Piece of Heart is not in a fixed position, so multiple attempts may be necessary. As soon as Dampé digs up the Piece of Heart, you can collect it directly.
Piece of Heart 7 – Fishing on Lake Hylia
Only catch up if it is still open: If you have collected this Piece of Heart in an earlier chapter, you can move on directly to the next find.
Travel as young Link to Lake Hylia and visit the fishing pond. Pay 20 Rupees and search for a particularly large fish. Good specimens often swim near the partially submerged tree trunk or in the deeper area of the pond.
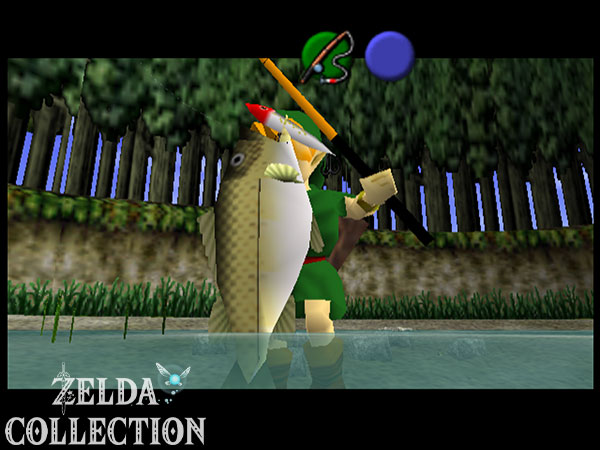
Throw the bait near a large fish and move it only slightly. As soon as the fish bites, keep the line taut and reel it in under control. Bring a fish weighing at least 10 pounds to the owner of the fishing pond. If the catch is big enough, you will receive a Piece of Heart. If you have already set this record earlier in our route, you can of course skip this point.
Piece of Heart 8 – Waterhole in the Hyrule Field
In the Hyrule Field, search for the single tree northwest of Lon Lon Ranch. Place a bomb right next to the trunk. This will open a hidden secret cave. Inside there is a very deep pool of water.
Open
Since the Iron Boots can only be worn by the adult Link, as a child you need the Golden Scale that you have already received. Dive with it to the bottom of the pool and collect the Piece of Heart lying there.
Piece of Heart 9 – the box in Gerudo Valley
Only catch up if it is still open: If you have collected this Piece of Heart in an earlier chapter, you can move on directly to the next find.
Travel to Gerudo Valley and pick up the chicken near the bridge. Stand at the edge of the gorge and look towards Gerudo Fortress. On the left below the bridge you can see a narrow ledge with a wooden box.
Jump into the ravine with the chicken and slowly slide down to the platform. Release the chicken just before landing so Link can grab the edge. Climb up and roll against the wooden box. Another Piece of Heart is hidden inside.
Piece of Heart 10 – Crawling Bombchu Bowling
Only catch up if it is still open: If you have collected this Piece of Heart in an earlier chapter, you can move on directly to the next find.
Return to Hyrule City Market Square during the day and visit the Crawl Bombchu Bowling Alley. One round costs 30 Rupees. You receive ten Bombchus and have to hit three targets one after the other while various obstacles block the way.
The main prizes on offer change after each round. Therefore, wait until the Piece of Heart is visible on the counter and only then begin your serious attempt. For the first run, an almost straight run is usually enough. In the second, you have to guide the Bombchu past a moving obstacle. In the last lane, a chicken and a large rolling opponent make the direct route more difficult. Wait for a good moment and place the mine on the ground slightly to the side so that it passes between the obstacles.
If you hit all three targets in one round, you get the Piece of Heart. If you are also missing the larger bomb bag from the mining game, you should also pay attention to this reward. For more equipment upgrades, check out our guide to more bombs, arrows and Rupees.
Ready for the Shadow Temple
After you have collected the Lens of Truth, all three Gold Skulltulas of the well and the still open collectibles from your childhood route, you return to the Temple of Time back. Pull the Master Sword out of the Pedestal of Time and become an adult Link again.
Then play the Nocturne of Shadow. Link will be teleported directly to the warp pedestal above Kakariko Cemetery. Thanks to the Eye of Truth, we are now able to see the false walls, invisible platforms and hidden dangers of the next dungeon. Our next target is the Shadow Temple.






Continue in Shadow Temple
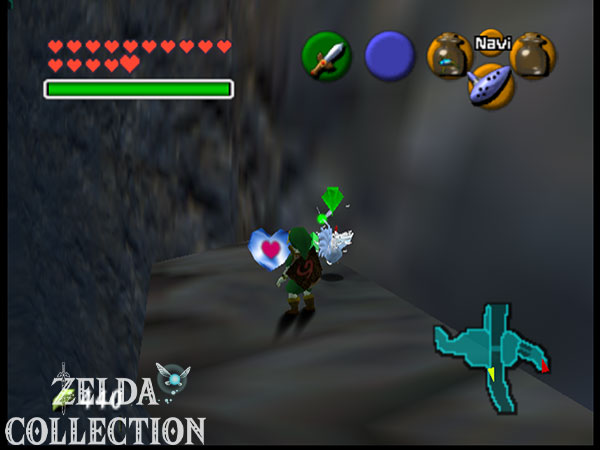
With the Lens of Truth, Link is now prepared for the numerous illusions of the next dungeon. Play the Nocturne of Shadow and teleport directly to the upper area of the graveyard. The Shadow Temple awaits you there.
In the next chapter we use the Lens of Truth to detect invisible platforms and false walls, collect all five Gold Skulltulas of the temple, find map, Compass and Hover Boots, drive the ghost ship through the catacombs and places finally us the shadow demon Bongo Bongo.
Frequently asked questions about the bottom of the well
How do I get to the bottom of the well?
As an adult Link, you must first learn the Anthem of the Storm from the Musician in Kakariko. Then return to the windmill as young Link and play the same tune there. This will drain the well and allow Link to climb down the ladder into the catacombs.
Do I need the Lens of Truth for the Shadow Temple?
For the intended solution you should definitely have the Lens of Truth. Many walls, floors and platforms in the Shadow Temple are invisible or merely illusions. The eye makes these elements visible.
How do I defeat the Dead Hand?
First let one of the pale hands hold you so that the Dead Hand appears from the ground. Free yourself, keep your distance and wait for his bite. As soon as he lowers his head, you dodge and attack the unprotected head with several sword strikes.
How many Gold Skulltulas are there at the bottom of the well?
At the bottom of the well there are a total of three Gold Skulltulas. For all three, you’ll need to explore the area’s optional side rooms. The Lens of Truth and the Boomerang are particularly helpful.
Why is my magic emptying on the Lens of Truth?
The Lens of Truth continuously consumes magic as long as it is activated. Therefore, only switch it on briefly to check walls, floors or enemies, and then deactivate it again. With the double magic bar from the death crater, you have significantly more reserves for this.
Do I have to get the ten optional Pieces of Heart before the Shadow Temple?
No. They are not necessary for the main plot. The collection round is primarily intended for a complete 100% solution. If you have already collected individual Pieces of Heart in previous chapters, simply skip them.