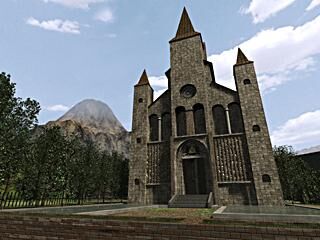

After defeating Barinade, Link has the Zora’s Sapphire and with it all three Spiritual Stones. Princess Ruto is saved, Lord Jabu-Jabu is freed from his parasite, and Princess Zelda’s original task is almost complete. Before we return to the Temple of Time with the three stones, we use our new Boomerang to collect several previously unattainable Gold Skulltulas. We also prepare the magic peas for adult Link, visit Gerudo Valley and complete the mask exchange quest.
Our 100% route therefore leads again through Kakariko, over the Death Mountain Trail, to Dodongo’s Cavern and into the Lost Woods. Afterwards we visit the Great Deku Tree, the Lon Lon Ranch, several secret caves on the Hyrule Field and the Gerudo Valley. There we collect, among other things, two Pieces of Heart and plant the eighth Magic Bean. Only then do we return to Hyrule City. There we experience Zelda’s escape, receive the Ocarina of Time, learn the Song of Time and finally open the time portal to the legendary Master Sword.
The solution applies to the normal version of The Legend of Zelda: Ocarina of Time on Nintendo 64 and to Ocarina of Time 3D. Some collectibles have already been collected in previous chapters. We only mention these again if they are important for our route or if you might have left them out during your previous run. The Master Quest version has different dungeons and is treated separately.
Zora’s Fountain – the last childhood skulltula with the Boomerang
Before setting off, check whether you have already collected the night Gold Skulltula on the rock wall at the end of Lord Jabu-Jabu’s belly. It’s the same find. If you already have the symbol, skip this detour and continue to the exit of the Zora’s Fountain.
If the find is still open, play the Sun’s Song during the day and climb the curved tree trunk south of Lord Jabu-Jabu. Look at the nearby rock wall, defeat the Gold Skulltula with the Boomerang and throw it at the remaining symbol a second time. The find only counts when it has returned to Link. Together with the Skulltula in the tree at the Fairy Spring, you have completed the two childhood finds from the Zora’s Fountain. The third Skulltula can only be reached as an adult Link.
We have already visited the Great Fairy from Farore’s Wind in our previous chapter. If you skipped the spell then, you can do it now: Swim to the southeastern rock wall, blow up the rocks in front of the cave and play the Triforce symbol in the fairy spring Zelda’s Lullaby. Then we leave the Zora’s Fountain through the passage behind King Zora and return to the Zora’s River via the large waterfall.
Buy Magic Beans for the later time jump
The Magic Bean dealer is still waiting at the lower Zora’s River. If you followed our route so far, you have already planted two of his Magic Beans: one right next to his sales area and a second in front of the laboratory at Lake Hylia. Since you will no longer be able to buy or plant Magic Beans as an adult Link, you should get more specimens now. In total, the dealer sells ten Magic Beans. The first one costs ten Rupees, each additional ten Rupees more. The tenth Magic Bean therefore costs 100 Rupees, and for all ten together a total of 550 Rupees is due.
Before our first time jump, we can prepare a total of eight of the ten planting sites. In addition to the Zora’s River and the Lake Hylia, we need more peas for the Kakariko Cemetery, the Death Mountain Trail in front of Dodongo’s Cavern, two locations in the Lost Woods, the Kokiri Forest and the Gerudo Valley. The last two planting locations are in the Death Crater and the Desert Colossus. We reach both areas again in the later adventure as young Link and can then plant the remaining Magic Beans.
If your wallet is currently limited to 200 Rupees, you should not try to buy your entire supply of peas right away. We’re about to visit the Skulltula House in Kakariko and, if we’ve collected enough symbols, we’ll get the Giant Exchange for 500 Rupees. We can then buy the remaining Magic Beans much more conveniently. If you already have enough Rupees, you can of course take additional peas with you. Just make sure to keep a sufficient number in your inventory for later planting locations.
Kakariko – Skulltula Rewards and Graveyard
Leave the Zora’s River and walk across the Hyrule Field to Kakariko. During our trip so far we have already collected several Gold Skulltulas in the village itself, in the cemetery and in the surrounding areas. That’s why it’s now worth visiting the Skulltula House again, which is located in the village. Enter the building and speak to the family members, whose human form has already been restored using your collected Skulltula symbols.
20 Skulltulas – Stone of Agony
You have a total 20 Gold Skulltula Symbols collected, you will receive this Stone of Agony. In the original Nintendo 64 version, he points out hidden secrets using the Rumble Pak. For example, the controller vibrates if there is an invisible entrance to a secret cave near Link. In Ocarina of Time 3D this function takes over the Secret Shard, which is hidden by a corresponding noise Locations draws attention. We don’t necessarily need this help for our directions, as we name the secrets directly. Nevertheless, the reward is for a complete game.
30 Skulltulas – Giant’s Wallet for 500 Rupees
The next important reward is 30 collected Skulltula symbols. Speak to the corresponding exempted family member and you will receive the Giant’s Wallet. This means Link can now carry up to 500 Rupees at the same time. This is particularly useful for purchasing the remaining magic peas and the subsequent mask swap quest. Note that the limit is only reached after 30 total symbols have been collected. So you don’t need 30 additional Skulltulas after getting the first wallet.
If you are still a few symbols missing from the giant exchange, you should first complete the following collection points. In particular, the Skulltulas in Dodongo’s Cavern, on the Lon Lon Ranch and in the secret caves of the Hyrule Field can now be easily collected thanks to the boomerang. You then return to the Skulltula House before spending larger amounts of Rupees.
Kakariko Cemetery – Skulltula and Magic Bean
Leave the Skulltula House and go through the gate into the Kakariko Cemetery. We have already completed the Piece of Heart from Dampé’ grave tour, the anthem of the sun and the Gold Skulltula from the soft earth on our route so far. However, two things are still missing: the nightly skulltula on the cemetery wall and the Magic Bean, which later leads to a high ledge.
Gold Skulltula on the southeastern cemetery wall
Play Sun’s Song if it is daytime and go to the southeast area of the Cemetery. A Gold Skulltula sits on the high outer wall at night. You can shoot them from a distance with the fairy slingshot. However, the symbol then hangs too high to collect with a normal jump. Therefore, equip the Boomerang, aim at the gold symbol and throw it directly at it. Once the Boomerang returns to Link, you will have another Skulltula symbol.
Magic Bean 3/10 – soft soil in the cemetery
Then go to the soft earth on the left side of the cemetery. Here we released beetles from a bottle on our first visit and got the Gold Skulltula out of the ground. So you don’t need any more beetles. Simply place Link in front of the hole in the ground and plant a Magic Bean. At first it is only visible as a small green germ. Once Link is seven years older, a large flying plant grows out of it. This moves to a higher ledge in the cemetery, where we later find another Piece of Heart.
If the Skulltula from this hole in the ground is still missing from your current save, you should definitely get it before or after planting lure out with beetles. Planting a Magic Bean does not replace the skulltula. Both collection campaigns work independently of each other. If you have already dealt with them, we leave the cemetery and go up to the Death Mountain Trail again.
Death Mountain Trail – Magic Bean in front of Dodongo’s Cavern
Leave Kakariko through the northern gate and follow the well-known Death Mountain Trail to the entrance to Dodongo’s Cavern. We have already collected the Gold Skulltula behind the blastable rock wall after the second dungeon. The Skulltula from the soft earth directly in front of the cave should also be included in our overall status. If not, you can release beetles from a bottle there again and lure the spider out.
Directly in front of the cave entrance is the field of soft earth. Plant your next Magic Bean (4/10) here. After the time jump, a flying plant grows here, which transports Link to the high ledge above the cave. There is a Piece of Heart, which you can reach as a young Link with a precise backflip from the Thunderflower ledge. If you have already completed this early find in our second chapter, the fully grown plant will later serve as a convenient shortcut over the Death Mountain Trail.
The plant is still a useful preparation for our complete run. It saves you a longer walk when you visit later and allows you to reach the upper Death Mountain Trail much more quickly. After the Magic Bean has been planted, we enter Dodongo’s Cavern again. With the new Boomerang we can collect another Gold Skulltula that was still unreachable when we first visited the dungeon.
Dodongo’s Cavern – Gold Skulltula in the high stair niche
Enter Dodongo’s Cavern and blow up the wall in the entrance area if it is locked again. You can do it in the large hall already activated elevator Use to go directly to the upper floor. This was activated on the first visit after the bomb bag was found and connects the lower entrance hall with the high bridge. This saves us a large part of the original dungeon path.
A special feature is important for this Skulltula: In the room with the large thunderflower staircase, the chain reaction must not be triggered this time. The stairs must be in their original, folded-up position so that you can reach the hidden niche. When you re-enter the dungeon, the stairs will be in this original position again. If you accidentally lower it again, you will leave the dungeon and re-enter it again.
The way back via the upper floor
Take the elevator up and follow the raised bridge to the room with the Armos statues. There is the immovable statue in front of the ladder. Push it aside like you did the first time, climb onto the platform and hit the switch. Then cross the already familiar rooms on the upper level until you reach the large stairwell again. Be sure to enter it through the upper door, because the folded-up stairs cannot be accessed in the same way from below.
Now carefully go to the edge of the upper walkway and look at the large staircase. As long as it hasn’t been lowered, you can jump onto its raised structure from above. On the left side there are also climbing plants that lead you to a hidden niche above the stairs. Move there carefully and you’ll spot a Gold Skulltula high on the wall. Shoot them with the fairy slingshot or directly with the Boomerang and then throw the Boomerang at the remaining symbol.
With this you have collected four of the five Gold Skulltulas in Dodongo’s Cavern. Only one remains open: it is in a high niche above the Baby Dodongo aisle. We will achieve this later as an adult Link using the hook and the Scarecrow’s Song. We have already prepared the required ocarina song on the Lake Hylia. The last return visit can therefore easily be combined with a later trip to the Death Mountain.
Back to the Magic Bean dealer
After Dodongo’s Cavern we return via Kakariko and the Hyrule Field to the Zora’s River. If you now own the Giant Exchange, you can now buy more magic peas without having to constantly watch your ruby supply. More ruby rewards will be added later, particularly through the mask exchange quest and several Treasure Chests in Gerudo Valley. Link needs a total of ten magic peas to be able to use all of the game’s planting locations.
We can already buy the dealer completely empty. The first eight peas are planted in their respective planting locations until the time jump. However, we keep the ninth and tenth Magic Beans in our inventory until we reach the Death Crater and the Desert Colossus later as young Link. If you don’t currently have enough Rupees, you don’t have to collect money specifically. You can also purchase the rest during a later visit to the Zora’s River, as long as you are back in Link’s childhood.
Lost Woods – Magic Beans and Stock Improvements
Our next destination is Kokiri Forest. Leave the Zora’s River and follow the Hyrule Field to the forest area to the southeast. Pass through Kokiri Village and enter the entrance to the Lost Woods. Here we have already visited Saria in the adventure so far, learned Saria’s song, collected several Pieces of Heart and lured the Gold Skulltulas out of the soft earth. That’s why we’re now focusing on the two missing Magic Beans and the remaining supply improvements.
Magic Bean 5/10 – near the forest bridge
From the entrance of Lost Woods go left twice. You will reach an area near the bridge that connects Kokiri Forest to the Hyrule Field. There is a field of soft earth on the ground. If you followed our previous route, you have already lured the Gold Skulltula out of this hole in the ground with beetles. Now plant a Magic Bean. As Link grows up, a flying plant grows from it, which later transports you to the higher forest bridge.
Deku Stick capacity expand to 20 rods
Below or near the same bridge is a Deku dealer who sells a larger Deku staff bag. If you don’t have the upgrade yet, approach him and hold up the Deku Shield. Reflect his Deku Nut back to make him leave his flower. Then talk to him and pay 40 Rupees. This increases Link’s maximum capacity from ten to 20 Deku Sticks. We can get this upgrade very early. Therefore, if you bought it in a previous chapter, there is nothing left to do here.
Magic Bean 6/10 – at the Forest Stage
Then return to the entrance of the Lost Woods and follow the route right → left → right → left → left. You reach a small clearing with a single tree and a special place where the mask quest later plays an important role. In this clearing there is another field of soft earth. Here too we have already lured out the Gold Skulltula with beetles. So plant the next Magic Bean straight away.
This planting site is particularly important as the fully grown plant links to a high ledge with another Gold Skulltula. In order to find it, you will need, among other things, the time of night and a suitable long-range weapon. However, the plant relieves you of the difficult climb. Before we leave the clearing, also note the spot where several butterflies fly over an invisible hole. The Forest Stage is located there. We will visit her twice more during the mask swap quest.
Deku Nut capacity expand to 30 nuts
If you haven’t purchased the first upgrade for your Deku Nut capacity yet, you can do that now too. Return to the entrance of Lost Woods and follow the path right → left → right → left → straight ahead → left. You reach the area just before the Sacred Forest Meadow. There is a large boulder next to the path. Blow it up with a bomb and jump through the resulting hole into a hidden cave.
Inside there are several Deku dealers. Deflect their missiles with the shield and then talk to them. One of the dealers will sell you an improvement to your Deku Nut capacity for 40 Rupees. This means you can carry 30 instead of 20 Deku Nuts. We’ll get a final expansion to 40 Deku Nuts later on the forest stage once we have the Mask of Truth. If you have already purchased the first improvement, you can skip this merchant and go straight back to Kokiri Forest.
Kokiri Forest – Magic Bean 7/10
Leave the Lost Woods and go to the Kokiri Village shop where you bought the Deku Shield at the start of the game. Behind or to the side of the building there is another field of soft earth. We have already collected the Gold Skulltula from this planting site during our previous collection round. So plant the seventh Magic Bean now. As an adult, Link grows into a large leaf platform that flies through the village, making it easier to access an elevated ledge with more Rupees.
Before we leave the forest again, it is also worth a quick visit to Great Deku Tree. We are still missing a Gold Skulltula, which we were not able to collect completely on our first visit to the dungeon. With bombs and Boomerang we now have both of the items needed for this. The way back is much shorter than on the first visit because we already know most of the rooms and the large spider web in the main trunk remains permanently destroyed.


Great Deku Tree – the fourth Gold Skulltula
Go through Kokiri Forest to Great Deku Tree and re-enter his trunk. You will no longer find the large spider web in the main hall because you have already broken through it on your first visit. So jump straight through the opening into the floor and land in the water basin in the basement. From here you follow the familiar path through the rooms with the water switch, the moving platform and the Gohma larvae.
Our target is in the room where several Gohma eggs fell from the ceiling during your first visit. There are two areas covered with spider webs. One led to the normal solution on the first visit. The other ends in front of a brittle wall that we weren’t able to blow up at the time. If the spider web is still there in front of this spot, light a Deku stick on a torch and burn it. Then place a bomb directly in front of the fragile wall.
After the explosion, a small secret room opens. That’s where it sits fourth Gold Skulltula of the Deku Tree on the wall. Defeat them with the fairy slingshot or that Boomerang. Then you throw it Boomerang on the remaining golden symbol so that he can bring it back to Link. This means you own them all four Gold Skulltulas from the first dungeon. As soon as you have completely collected the symbols, the Dungeon Map the corresponding Skulltula sign as confirmation.
A further visit to Great Deku Tree is not necessary for the normal collectibles. Therefore, leave the labyrinth on the familiar path and return to the Hyrule Field via the Kokiri Forest.
Lon Lon Ranch – the last two Gold Skulltulas
Our next destination is Lon Lon Ranch in the middle of the Hyrule Field. During our first visit here, we already learned Epona’s song, got the Piece of Heart from the warehouse and collected the easily accessible Gold Skulltulas. However, two other spiders are located on raised external walls and were difficult to reach completely without Boomerang. We’ll now get them in a single nightly round.
Gold Skulltula at the window of the residential building
Enter Lon Lon Ranch at night or play the Sun’s Song after entering. From the entrance, go to the apartment building on the left. There is a Gold Skulltula on the upper wall of the house or near a high window. Target them with the Fairy Slingshot or directly with the Boomerang and defeat them. The remaining symbol hangs on the wall and can be easily collected with the Boomerang. Climbing onto the roof is not necessary.
Gold Skulltula on the southwest farm wall
Then run to the southwestern edge of the farm. There is another Gold Skulltula high on the boundary wall. You can hear their characteristic sound before you even recognize them on the wall. Shoot them from a distance and then use the Boomerang to collect their symbol. You have now collected all four Gold Skulltulas from the Lon Lon Ranch, provided the remaining two were already completed on your first visit.
As young Link, we no longer have to prepare anything on the farm. Later we return as an adult Link to win Epona from Ingo. To do this we have to use Epona’s song again and complete two horse races. We’ll do that after the time jump before we head to the Forest Temple.
Hyrule Field – two secret Gold Skulltulas
With bombs, Din’s Din’s Fire and the Boomerang we can now also collect two special Gold Skulltulas on the Hyrule Field. Both are located in hidden caves whose entrances are not immediately visible. However, you can open them with targeted bomb explosions. The Stone of Agony from the Skulltula House can also point you to such secrets, but is not required for these two finds.
Collect the Piece of Heart Near the Lake Hylia Entrance
If you have already collected the Piece of Heart at the entrance to the Lake Hylia in Chapter 4, you can skip this section. Otherwise, head to the southwest entrance of Lake Hylia on the Hyrule Field. Just in front of it are four low fences that form a square. Stand right in the middle and place a bomb there. After the explosion, a hidden shaft opens, through which you get into a small cave.
Inside there is a Deku dealer who will sell you a Piece of Heart for just 10 Rupees. Deflect his projectile with the shield so that he leaves his flower, then talk to him. Pay the ten Rupees and receive the Piece of Heart. Of course, if you have already bought it before, the dealer will not sell it again. Then leave the cave through the beam of light and return to the steppe.
Gold Skulltula near Kakariko
Go on the steppe towards Kakariko. A small river runs between the entrance to Hyrule City and the bridge to Kakariko. North of this watercourse there is a single tree in an open area. Stand as close to its trunk as possible and place a bomb. After the explosion, a hole opens in the ground. Jump in and you’ll reach a hidden cave with a Common Large Skulltula and a Gold Skulltula on the higher wall.
First, defeat the common Skulltula so that it doesn’t bother you. Then target the Gold Skulltula and shoot it with the fairy slingshot. Her symbol remains stuck on the wall, out of Link’s reach. Therefore, throw the Boomerang on it and collect the symbol. This Skulltula does not require a specific time of day and can be picked up during the day or at night.
Gold Skulltula near the Gerudo Valley
Then follow the steppe west to the entrance Gerudotals. Shortly before the passage you see a conspicuous one Stone circle on the floor. Stand in the middle and place a bomb. This will open another hidden shaft. Jump down and you’ll enter a cave with access to a back room through several large ones Spider webs is blocked.
Equip Din’s Din’s Fire and stand near the spider webs. Use the spell to cause a large wave of fire to spread around Link, burning the webs completely. Behind it is a cow, from which you can later get free Lon-Lon milk using Epona’s song. There is also a Gold Skulltula sitting high on the wall behind the cow. Defeat her with the fairy slingshot or the Boomerang and then pull her symbol to you with another boomerang throw.
This also eliminates the two Gold Skulltulas from the hidden caves of the Hyrule Field. We deliberately leave another cave with a deep pool of water and a Piece of Heart open for later, because for the item on the floor we need the Golden Scale or the Iron Boots. With the current Silver Scale, we can’t dive deep enough yet.
Gerudo Valley – two Pieces of Heart and two Gold Skulltulas
From the last visited secret cave it is only a short walk to Gerudo Valley. Enter the area through the western passage of the Hyrule Field. In front of you lies a deep gorge, through which a wide river flows towards Lake Hylia flows. A wooden bridge high above the water leads to the other side. As a young Link, you can’t fully explore the area yet, but with the help of a chicken we can already reach the lower ledges of the gorge. They are right there two Pieces of Heart, one Gold Skulltula of soft soil and the eighth Magic Bean planting site.
Gold Skulltula at the small waterfall
First, wait until night falls or play the Anthem of the Sun. From the entrance, go to small wooden bridge at the beginning of the Gerudo Valley. To the right, water flows out of an opening in the rock face and forms a small waterfall. One sits right in this area at night Gold Skulltula. Target them with the fairy sling or the Boomerang and defeat them. Then you throw it Boomerang on the remaining symbol so that you can collect it from a distance.
Slide the chicken onto the lower ledge
There is an entrance near the bridge Chicken around. Pick it up and take it to the edge of the large ravine. If you jump over a ledge with a chicken in your arms, Link will slowly slide down. This allows you to cover much greater distances than with a normal jump. Our first goal is that wide projection on the opposite side, on which a Gerudo woman and a cow stand. Below the Gerudo you can also see a field of soft earth.
Stand as far as possible to the edge of the wooden bridge or the upper ledge and jump with the chicken towards the opposite platform. Continue holding the movement button forward as Link slowly glides through the air. You should reach the ledge without having to release the chicken prematurely. Once Link has landed safely, you can put the chicken down and explore the small platform.
Gold Skulltula from the soft earth
On the platform with the Gerudo woman and the cow is a field of soft earth. We haven’t visited this place yet. If you have bugs in a bottle, release them directly into the hole in the ground. One of the beetles disappears into the ground, whereupon a Gold Skulltula pops out shortly afterwards. Defeat them with the sword and collect the golden symbol. If you don’t have any beetles with you yet, you can look for them under suitable stones or in one of the previously discovered secret caves. There is no need to revisit Gerudo Valley later just for this Skulltula.
Magic Bean 8/10 – Gerudo Valley
After the Skulltula is taken care of, plant the eighth Magic Bean in the same hole in the ground. As an adult Link, a large flying plant grows at this point, which will later transport you along the gorge and allow more convenient access to the higher areas. With this, we have all prepared eight Magic Bean planting sites, which can be reached on our regular route before the first time jump.
Piece of Heart behind the big waterfall
First, stay on the lower ledge and look at the large waterfall at the end of the gorge. Below it the river flows towards Lake Hylia. Jump from the platform into the water and swim towards the waterfall. Directly behind the cascading water there is a hidden ladder that is difficult to see from the open river. So swim as close as possible to the rock wall below the waterfall and move Link towards the ladder.
Open
Once you find the ladder, climb up and reach a small hidden niche behind the waterfall. There is the first Piece of Heart of the Gerudo Valley. Collect it and then drop back into the water. Be careful not to swim against the current unnecessarily. If you let the river carry you along, you will automatically reach Lake Hylia after a short time. For the second Piece of Heart, however, we have to return to the upper area of the Gerudo Valley.
Piece of Heart in the wooden box at the ravine
Open
The second Piece of Heart is in one Wooden box on a narrow ledge on the rock wall. To reach her as a young Link, you need the chicken again at the beginning of Gerudo Valley. Therefore, return to the entrance across the Hyrule Field and pick up the chicken again. This time, position yourself at the top of the gorge so that you can… narrow ledge on the side of the entrance to the Hyrule Field can see. The eye-catching wooden box is there.
Jump over the ravine with the chicken in your arms and head straight for the narrow ledge. Since Link only loses altitude slowly, you can easily correct the direction during the flight. Try to land as centrally as possible on the ledge so that you don’t immediately fall back into the river. As soon as you are standing securely, put the chicken down and use a rolling attack against the wooden box. It breaks and releases the second Piece of Heart of the Gerudo Valley. Collect it and then let yourself fall into the river in a controlled manner.
So we received both Pieces of Heart of the Gerudo Valley during Link’s childhood. For the two later Skulltulas on the other side of the gorge, the Gerudo Fortress and the Riding Bow challenges, we need the adult Link. These tasks are therefore reserved for a later chapter.
From Gerudo Valley to Lake Hylia
After the second Piece of Heart, jump into the river at the bottom of the ravine again. Let yourself be carried away by the current and don’t try to swim back against it. Link is automatically transported through the watercourse and finally washed into the Lake Hylia. There we can still collect a Gold Skulltula, whose symbol was out of our reach on the first visit.
Gold Skulltula on the laboratory wall
Swim to Laboratory on the northwestern shore of Lake Hylia. If it is daytime, play the Anthem of the Sun to turn it into nighttime. Then go to the small bridge or footbridge near the building and look Exterior wall of the laboratory. One sits there at night Gold Skulltula high on the facade. Defeat them with the fairy slingshot or that Boomerang and then throw it Boomerang directly on the remaining symbol. This means that this previously open Skulltula is also finished.
We planted the Magic Bean in front of the laboratory on our first visit. So you don’t have to use another pea here. If you have already won the Piece of Heart while fishing, prepared the Scarecrow’s Song and got the Gold Skulltula out of the soft earth, all currently achievable tasks on the Lake Hylia have been completed. The Piece of Heart on the laboratory roof and the other secrets for the adult Link remain open for the later collection round.


Complete the mask swap quest
Before we return to Hyrule City with the three Sacred Stones, let’s take care of them Mask swap quest. You can find the Happy Mask Salesman in the marketplace of Hyrule City. His shop has been open since the first visit to Princess Zelda, after you met the guard at the gate to the Death Mountain Trail Zelda’s you showed the letter. From him you can borrow different masks one after the other and give them to specific residents Hyrule’s sell. After each sale, you must return to the merchant and pay the set amount before the next mask is unlocked.
You can already sell the first three masks in full. We keep the fourth one, the Bunny Hood, in our inventory until we have received the Ocarina of Time. Then the appropriate buyer appears or locks into place on the Hyrule Field in a state in which we can speak to him at night. For a complete game, the entire mask exchange quest is particularly worthwhile because, in addition to the Mask of Truth, it also enables two further supply improvements in the Lost Woods.
Keaton Mask – the guardian on the Death Mountain Trail
Enter the Mask Shop in Hyrule City and borrow the Keaton Mask. It has a fixed value of 10 Rupees. Then leave the city and go across the Hyrule Field to Kakariko. There, at the northern exit of the village, is the guard to whom you showed the letter Zelda’s earlier. Equip the Keaton Mask, put it on and talk to the guard. He is immediately interested in the mask and buys it from you for 15 Rupees.
Then return to the Happy Mask Salesman and pay him the requested ten Rupees. You can keep the remaining five Rupees. The first mask is now sold and the dealer next offers you the skull mask.
Skull Mask – first to the forest stage
Borrow the skull mask and go to the Lost Woods. Before we pass them on to their actual buyer, we visit the forest stage, the entrance to which we have already discovered during the Magic Bean round. From the entrance of the Lost Woods, follow the route right → left → right → left → left. There is a single tree in the small clearing. Look for the butterflies flying above the ground and drop into the hidden hole at this point.
Underground you can reach the Forest Stage. Put on the skull mask and stand on the bright stage in front of the assembled Dekus. After a short time, the spectators react to Link’s mask and appear in front of him one after the other. Then talk to the Deku leader. He rewards you with the second Deku Staff expansion, which increases your maximum capacity from 20 to 30 Deku Staffs. If you don’t yet have the first improvement for 40 Rupees, you should buy it first from the dealer under the forest bridge.
Then leave the forest stage and return to the entrance of the Lost Woods. This time go straight left into the area with the single Skull Kid on the tree stump. Stand on the tree stump opposite and talk to him while wearing the skull mask. If you haven’t played Saria’s song with him yet, you first have to use it to make him a friend. He then buys the skull mask from you for 10 Rupees.
However, the Happy Mask Salesman demands 20 Rupees for the skull mask. So you have to pay for the missing ten Rupees yourself. Return to Hyrule City, pay the outstanding amount and then borrow the Spooky Mask.
Spooky Mask – the boy in the cemetery
With the Spooky Mask we go to Kakariko again. This time we visit the cemetery at day. If it’s night, you can bring in the day with the Anthem of the Sun. A little boy runs around the cemetery, imitating Dampé the gravedigger. Put on the Spooky Mask and talk to him. He likes the mask and buys it from you for 30 Rupees.
Then return to the Happy Mask Salesman and pay him 30 Rupees. So with the Spooky Mask you make neither profit nor loss. The last trade mask will then be unlocked: the Bunny Hood. Borrow it and keep it for now. The appropriate buyer is located on the Hyrule Field and will become available after our next major story event.
Hyrule Castle – Princess Zelda’s Escape
We now own the Kokiri’s Emerald, Goron’s Ruby and Zora’s Sapphire and have completed most of our childhood collecting round. Therefore, return across the Hyrule Field towards Hyrule City. As soon as you approach the city gate, a longer cutscene begins. The sky darkens, rain begins and suddenly the castle gate opens. Princess Zelda flees the castle with Impa on a horse.
As Zelda rides past Link, she recognizes him and throws an object in his direction. This flies over Link and lands in the water of the moat. Before you can check what Zelda left you, Ganondorf appears. The Gerudo King pursues the two escapees and demands to know from Link where they have ridden. Link stands up to him, but he has no chance against Ganondorf’s magic at this point. With a single magical attack, Ganondorf knocks him to the ground and then rides on.
After the cutscene you will be back in front of the city gate. Ganondorf is gone and the rain has stopped. Before we enter the castle again, we must retrieve the item from the moat that Princess Zelda left for Link during her escape.
The Ocarina of Time
Jump into the moat in front of Hyrule City and swim to the spot where the Zelda’s object fell into the water. Below the surface of the water you can see a shimmering blue instrument. Dive down and touch it. You will then receive the legendary Ocarina of Time, which once belonged to the royal family of Hyrule. It replaces the Fairy Ocarina that Saria gave you when you left Kokiri Forest. All melodies you have already learned will of course be retained.
The Ocarina of Time is the final item that Princess Zelda entrusted to Link for the opening of the Sacred Realm. Together with the three Sacred Stones, it allows access to the Temple of Time and the Master Sword. But before we go there, we learn a new song that is required to open the time portal.
Learn the Song of Time
As soon as Link has taken the Ocarina of Time, another sequence begins. Princess Zelda appears in his mind’s eye and speaks to him. She explains that together the Ocarina of Time and the three Sacred Stones can open the way to the Sacred Realm. She then teaches you the Song of Time. This song is one of the most important melodies in the game and is later required in several dungeons to make special time blocks appear or disappear.
With the Song of Time, Link now has another ocarina melody. However, the song is particularly important for our imminent visit to the Temple of Time. There we have to play it in front of the altar with the three Spiritual Stones so that the time portal opens.


Sell the Bunny Hood to the running man
Before entering the Temple of Time, we complete the mask swap quest. After Link receives the Ocarina of Time, you can find the so-called Running Man on the Hyrule Field. He runs on a set route around Lon Lon Ranch and is in constant motion during the day. He cannot be reliably spoken to during his run with ordinary conversation. That’s why we wait for the night when he takes a break.
Leave Hyrule City and go to the Hyrule Field. If it is still day, play the Anthem of the Sun to start the night. Then search the area surrounding the Lon Lon Ranch. The running man sits on the ground at a point along his route at night to rest. Once you find him, equip the Bunny Hood and talk to him. He is immediately thrilled and really wants to buy the mask.
As payment, the running man will refill your current wallet to its maximum capacity. If you already own the giant exchange, you can get up to 500 Rupees. It is particularly worthwhile to spend as many Rupees as possible beforehand so that you benefit as much as possible from this sale. If you still have the normal or large wallet, the payout will be correspondingly lower. The Happy Mask Salesman then only demands 50 Rupees back for the Bunny Hood.
Return to the Mask Shop in Hyrule City with the money you received. Pay the merchant the outstanding 50 Rupees. You have now successfully sold all four trade masks and completed the actual mask exchange quest. The Mask of Truth will now be unlocked as a reward.
Unlock Mask of Truth and the remaining masks
After the last sale, the offer in the mask shop changes. You can now borrow the Mask of Truth for free. She has special powers and allows Link to speak to the mysterious Myth Stones, which are located in numerous locations throughout Hyrule. Without this mask, the stones do not react with their actual clues. With it, however, you will learn little secrets, hidden information and occasionally rather unusual stories about the world of Hyrule.
Three more fun masks will also be unlocked: the Goron Mask, the Zora Mask and the Gerudo Mask. These masks do not have their own extensive exchange quests and can be borrowed for free at any time. Some people respond to them with special comments. The Mask of Truth is particularly important for our complete game status, as we need it for a final supply improvement.
Final Deku Nut upgrade on Forest Stage
For the next improvement we have to go back to the Lost Woods. Borrow the Mask of Truth and leave Hyrule City. Run across the Hyrule Field into Kokiri Forest and enter the entrance to the Lost Woods. Again follow the route right → left → right → left → left. The hidden hole of the forest stage is in the small clearing with the single tree. It is close to the butterflies flying above the ground. Stand over it and let Link fall down.
Once you reach the bottom, put on the Mask of Truth and stand on the illuminated stage in front of the assembled Dekus. Wait for the spectators to react to your mask and their leader appears. Then talk to him. As a reward you will receive the final Deku Nut expansion, which increases your maximum capacity to 40 Deku Nuts. Together with the first expansion that has already been purchased, this supply is now completely expanded.
Important note for the Nintendo 64 version: You should definitely collect this reward before the later exchange for the Biggoron sword. In the original Nintendo 64 version, the Forest Stage’s Deku Nut upgrade and a specific Adult Trade Quest item share an internal progression value. Once Link receives the Poaching Saw there, the Deku Nut upgrade may no longer be available permanently. Ocarina of Time 3D has fixed this bug. Since we’re doing the upgrade now, there’s no risk of missing it later on our route.
If you have already shown the Skull Mask on the Forest Stage and received the corresponding Deku Staff expansion, this completes both additional mask rewards. Link can now carry a maximum of 30 Deku Sticks and 40 Deku Nuts.
40 Gold Skulltulas – Bombchus as a reward
After the big boomerang collecting round, you should have collected a significant number of Gold Skulltulas by now. If your counter already shows 40 symbols or more, it is worth another visit to Skulltula House by Kakariko. There, talk to the family member who was freed from his curse by the 40 symbols you collected. As a reward you will receive a supply Bombchus. Once released, these small bombs move independently across the floor and can even run up walls.
If you are still missing individual Skulltula symbols up to the limit of 40, you don’t have to force any additional detours. The reward remains permanently available and can be claimed at any time on a later visit. With 50 symbols, Link also receives another Piece of Heart. The last big reward awaits at 100 symbols when the curse on the entire family is lifted. However, we do not need these rewards immediately for the further course of the story.
Final preparation before the Master Sword
Before we enter the Temple of Time, you should check your previous score again. With our route you have all three Sacred Stones, the Ocarina of Time, the Boomerang, the Bomb Bag and the most important supply upgrades from Link’s childhood. Eight Magic Bean Planting Sites are prepared and the Mask Exchange Quest is fully completed. We also collected the Pieces of Heart and Gold Skulltulas from Gerudo Valley as well as several previously unreachable symbols in already known areas.
Some tasks are deliberately left open for later. These include the last Gold Skulltula in Dodongo’s Cavern, several Pieces of Heart on high ledges, the two remaining magic peas in Death Crater and the Desert Colossus, as well as individual Skulltulas that only appear as an adult Link. For this Locations, we will need the Hookshot, the Master Sword, new ocarina songs or other items later. These secrets are not permanently lost: after completing the Forest Temple, you return to the Temple of Time. There Sheik teaches you the Cantata of Light; You can then put the Master Sword back into the Pedestal of Time and become a young Link again.
If you still want to complete open childhood tasks without additional equipment, you should do so before the Master Sword. However, this is not a mandatory requirement for a complete score. As soon as we have the ability to switch between childhood and adulthood, we can always go back and catch up on individual missing collectibles.
Enter the Temple of Time
Now finally return to Hyrule City. From the market square, a wide path leads to the Temple of Time, which is hard to miss due to its high, bright facade and large staircase. Climb the stairs, cross the courtyard and enter the large building. Inside you will find a long hall with a large altar at the back. On this altar there are three recesses intended for the Spiritual Stones.
Go to the altar and place Link right in front of it. The Kokiri’s Emerald, the Goron’s Ruby and the Zora’s Sapphire are recognized there as the three Sacred Stones. Behind the altar is a massive locked stone door. Behind it lies the actual time portal, which seals access to the Sacred Realm. To open the door, you now need the Ocarina of Time and the melody that Princess Zelda taught you during her escape.
Play the Song of Time before the altar
Continue to place Link in front of the altar, equip it Ocarina of time and play it Anthem of the times. Once the melody has finished playing, a cutscene will begin. The three Spiritual Stones light up and float to their designated locations on the altar. The massive stone door behind them responds to the magical connection between the stones and the ocarina. This is slowly opening up Time portal and opens the passage to the rear part of the citadel.
Go through the opened passage. Behind it is a smaller, solemn room, in the center of which is a single sword in a stone base. It is the legendary Master Sword, the Blade of the Evil Curse, which according to tradition can only be wielded by the chosen hero. Navi immediately recognizes the importance of this weapon and explains to Link that the sword is also the final seal to the Holy Empire.
Pulling the Master Sword from the Pedestal of Time
Walk towards the Master Sword and stand directly in front of the Times Rock. As soon as the corresponding action appears, grab the sword and pull it out of its base. At this moment another cutscene begins. Removing the blade opens the final seal of the Sacred Realm. Ganondorf, who has secretly followed Link, takes advantage of this opportunity and also gets through the open portal. There he can finally reach for the Triforce.
However, Link himself is not yet old enough to fully fill the role of the hero of time. Although he does Master Sword was able to pull out of the Pedestal of Time, his body is still too young to be able to use it in battle. Therefore his spirit will be in the Holy kingdom included. While Link remains in a kind of sleep, the outside world passes away seven years. Ganondorf uses this time to spread his power over Hyrule and lead the kingdom into a dark future.
When Link finally awakens, he is no longer a child. He is in the Hall of the Magi and meets Rauru, one of the old sages. Rauru explains to him that seven years have passed and Ganondorf has now become a large part Hyrule’s brought under his control. Only the Hero of Time can awaken the power of the remaining Sages Ganondorf’s break and save the kingdom. This begins the second major section of The Legend of Zelda: Ocarina of Time.


Continue as adult link
With the pulling of the master sword ends the first major section of Ocarina of Time. Seven years later, Link awakens in the Hall of the Sages, where Rauru tells him the new situation Hyrule’s explained. Ganondorf now rules over large parts of the kingdom, many places have changed and many of his former friends have disappeared or are in danger. Link must now find the sages of the various peoples and their temples Ganondorf’s release curse.
Our next big target is the Forest Temple. Before we can enter it, however, we first get the Hookshot in the Kakariko cemetery, learn new ocarina songs, win Epona at the Lon Lon Ranch and use the fully grown Magic Beans for more Pieces of Heart and Gold Skulltulas. Our path then leads back to Lost Woods and to the Holy Clearing, where the first large temple of the adult Link awaits us.