

This solution applies to the normal version of The Legend of Zelda: Ocarina of Time on Nintendo 64 and to Ocarina of Time 3D. The Master Quest version has a significantly different structure and is covered in a separate Walkthrough.
The Water Temple is one of the most famous and at the same time most demanding dungeons in Ocarina of Time. After finding the Iron Boots in the Ice Cavern, learning the Serenade of Water and freeing King Zora from his red ice crystal, we have the basic equipment for the temple with the Zora Tunic and the Hookshot. Unlike in the forest or Fire Temple, progress here constantly depends on the water level. Three Triforce panels allow the water to rise to the lowest, middle or highest level, which means that new paths open up and others disappear.
Our route takes you step by step through all three water levels and prevents as many unnecessary trips back as possible. We collect all six Small Key, the Dungeon Map, the Compass, the Boss Key and all five Gold Skulltulas. In the middle of the temple, Shadow Link, one of the most unusual enemies in the game, awaits. After his victory, we get the Longshot, whose increased range opens up numerous previously unreachable areas. In the end we face Morpha and free Princess Ruto as the Sage of Water.
Requirements for the Water Temple
Before entering the temple, you should check your equipment. The Zora Tunic, the Iron Boots, the Hookshot, the Fairy Bow, bombs and Zelda’s lullaby. We received the Zora Tunic immediately after King Zora’s Ice Cavern and allows Link to stay underwater indefinitely. With the iron boots, however, we sink to the bottom of the various pools and can move around freely there.
Din’s Din’s Fire is not necessary for any mandatory path, but can especially help you in the later fight against Shadow Link. If you followed our 100% route, you already have the spell. The Biggoron sword, which is also available as an option, makes the fight against Shadow Link and later Morpha much easier. A fairy in a bottle also makes sense, as individual enemies and water currents can quickly cost Link a lot of energy.
Quick Overview
| Found item | Location |
|---|---|
| Small Keys | 6 pieces throughout the temple |
| Dungeon Map | After the first meeting with Princess Ruto |
| Compass | Side room at medium water level |
| Longshot | After fighting Shadow Link |
| Boss Key | In the deep underwater area behind the block puzzle |
| Gold Skulltulas | 5 pieces – some can only be reached with the Longshot |
| Heart Container | After Morpha |
| Water Medallion | By Princess Ruto in the Hall of the Wise |
| Fire Arrows | After the Water Temple on Lake Hylia |
The entrance to the Water Temple
Play the Serenade of Water and travel directly to the Lake Hylia. As long as the Water Temple is not completed, the lake is almost completely dry. There is only a deep pool of water around the small island with the warp pedestal. Jump in and equip the Zora Tunic and the Iron Boots. Link sinks to the bottom and lands directly in front of a locked gate.
There is a blue Crystal Switch above the gate. Although you cannot use the Master Sword or the fairy bow normally underwater, the Hookshot still works. Aim at the crystal and shoot it. The gate opens and you can enter the Water Temple.
Put your normal boots back on behind the entrance and climb through the shaft to the large main hall. The temple consists of three levels one above the other and a tall tower in the middle. This central tower is your most important landmark. If you don’t know exactly where you are during the dungeon, return to this main hall if possible and use the doors around the tower as a guide.
The most important principle in the Water Temple:
Almost every seemingly impossible path depends on the current water level. You can lower the water completely, bring it to the middle level or let it rise back to the top using three Triforce panels.
Princess Ruto and the Dungeon Map
When you first enter the water is at its highest level. Put the Iron Boots and let yourself sink to the bottom of the main hall. Look for the passage there, the entrance to which is framed by two extinguished torches. Follow the corridor and you will meet again for the first time since Link’s childhood Princess Ruto, who has now grown up.
Ruto explains that the Water Temple is the cause of the changes to the Lake Hylia and that Morpha is behind the curse. She wants to examine the temple and then swims up the vertical shaft. Put down the Iron Boots and follow it. Ruto suddenly disappeared on the surface of the water, but the path continues through the door on the dry ledge.
In the next room, several spiked stones attack. As long as their spines are extended, they are difficult to injure. Hold up the Hylian Shield to knock them into it and retract their spines, or hit them with the Hookshot. As soon as all enemies are defeated, a large Treasure Chest appears with the Dungeon Map.


Water level 1: lower completely
Return to the shaft you followed Ruto through. On the wall is the first Triforce tablet. Stand in front of it and play Zelda’s Lullaby. The water almost completely disappears from the temple and sinks to the lowest level. Then jump down through the shaft. This jump is intended and does not cause any fall damage.
Downstairs there is a burning torch in the middle of the room. However, the two torches next to the locked door have gone out. Position yourself so that you see the flame between Link and one of the unlit torches and shoot an arrow through the fire. Repeat the process on the other side. As soon as both torches burn at the same time, the door opens. Alternatively, if you want to save arrows, you can stand between the three torches and use Din’s Din’s Fire.
Small Key 1/6
In the next room there are three killer clams waiting. These enemies close their hard shell almost completely and only open it shortly before an attack. Target a shell and wait for it to open. Then shoot the soft body with the Hookshot. Repeat the process with all three opponents.
After her death, a small Treasure Chest appears. Open it and take the Small Key 1/6. Then return to the dry main hall.
Small Key 2/6
In the main hall, look for the hallway with a large brown block stuck in the opening. Climb onto the ledge and push the block farther into the tunnel until it falls over the edge into the pool of water behind it. Jump after it, equip the Iron Boots and follow the underwater passage. At the end you put your normal boots back on and swim to the surface.
In the next room there is a wide abyss between you and the door opposite. Several Arachnos are waiting on the other side. Shoot them with the fairy bow before solving the puzzle. Then activate the Crystal Switch. A high fountain of water rises from the depths. Jump onto the fountain and let it carry you up before jumping over to the opposite door.
Behind it you will reach a room with a strong circular current. Jump into the water and let yourself drift towards the lower platform near the large dragon head. Shortly before you swim past it, put on the Iron Boots. As a result, Link sinks onto the platform and is no longer carried away by the current.
There is a Crystal Switch in the mouth of the dragon statue. Hit him with the Hookshot. A gate only opens for a few seconds. Immediately aim at the target in the now accessible tunnel and pull yourself through. There are two killer clams waiting behind the grille, which you either defeat or avoid first. Put on the normal boots, climb to the upper niche and open the small Treasure Chest with the Small Key 2/6.
Gold Skulltula 1/5
With the water level still completely low, return to the main hall. Opposite the locked door at the foot of the central tower is another corridor. Follow it until you reach a clearly cracked floor tile. Place a bomb on it. After the explosion, a water hole opens.
Jump in, equip the Iron Boots and follow the underwater passage. A single killer clam blocks the way and can be defeated again with the Hookshot. At the end of the tunnel, climb up to the platform and step on the Floor Switch. The water within this space is rising.
Use the Hookshot to pull yourself to the dragon statue on the opposite side. There is a switch behind a grille. In the Nintendo 64 version, he can be activated with a charged whirl attack or a sufficiently long-reaching blade through the grid. If you already own the Biggoron sword, it works particularly conveniently. In Ocarina of Time 3D, the switch can be hit directly with the Hookshot.
Behind the open grille sits the Gold Skulltula 1/5. Defeat them and collect the symbol. You can also find the Locations of all temple spiders in our overview of the 100 Gold Skulltulas.
Water level 2: to the middle level
Return to the main hall and use a Small Key to open the door at the base of the large central tower. Run inside to the end of the short walkway and turn around. There is a hook target above you. Pull yourself up and stand in front of the second Triforce panel.
Play again Zelda’s Lullaby. The water now rises to the middle level of the temple. At the same time, the large brown block inside the tower is lifted. A previously hidden shaft appears beneath him.
Small Key 3/6 under the center tower
Jump into the water of the central tower and position yourself as precisely as possible over the newly opened shaft. Put on the Iron Boots and sink down. Be careful not to land on the side spikes. Follow the underwater passage into a larger room and activate the Crystal Switch with the Hookshot.
Several spiked stones and killer mussels fall from a grid into the water. Defeat all enemies. As soon as the last one disappears, another grate opens on the ceiling. Stand underneath, put down the Iron Boots and swim up. The Treasure Chest is waiting in the small chamber with the Small Key 3/6.


Small Key 4/6
Swim back inside the center tower and exit on the middle level. In the main hall, put on the Iron Boots again and sink to the bottom. Re-enter the hallway with the two extinguished torches where you met Princess Ruto.
Go to the vertical shaft and put on the normal boots there. Since the water level now only reaches the middle level, you can enter a side area that was completely submerged or inaccessible during your first visit. Look for a clearly visible crack on the wall and blow it open with a bomb.
Behind the destroyed wall is a small Treasure Chest with the Small Key 4/6. Take him with you and return to the main hall.
The Compass
Stay at the middle water level and look for a passage with two jugs in front of the entrance. Follow the corridor until you reach a series of spikes. There are hook targets above them. First pull yourself over the spikes and then up to the target on the ceiling.
In the room beyond there is a large Treasure Chest that is blocked by a water fountain. Stand as close to the chest as possible and shoot the Crystal Switch with the fairy bow. The fountain only disappears for a short time. So run straight to the chest, open it and take the Compass.
Water level 3: raise completely
Return to the main hall and swim on the middle level to the still locked door opposite the middle tower. Open it with a Small Key. In the next room, a fountain of water rises through an opening in the ceiling. First, kill the Arachnos on the upper platform with an arrow so that he doesn’t knock you off while driving.
Stand on the fountain and activate the Crystal Switch with the Hookshot. The water shoots up and carries Link to the next floor. Go through the door there and stand in front of the third Triforce panel. Play Zelda’s Lullaby again. The water level reaches its highest level again.
The path to Shadow Link
Jump from the platform back into the main hall and swim to the locked door on the western side. On the opposite side you can already see a dragon statue that is still out of your reach with the short Hookshot. Note this position – we will return here with the later Longshot.
Open the locked door and first remove the Keese on the walls in the next room. In front of you, several platforms descend a steep waterfall. Each platform has a target. Pull yourself up from one platform to the next with the Hookshot and wait for a favorable moment. If you hesitate for too long, the platform will move back down and make the next shot more difficult.
At the top you open the next locked door. The following room contains several Arachnos and a number of moving dragon statues. First, eliminate the Arachnos with the fairy bow. A Crystal Switch in the middle of the room changes the height of the dragon heads. Activate the switch, move to the first raised statue and shoot the crystal again. Once the statue drops, you can climb over its head to the next platform.
Repeat this principle several times: hit the switch, raise or lower the statue and use the Hookshot. At the last dragon statue, stand on the lowered head and activate the Crystal Switch again. The statue lifts Link directly to the upper door.
In the next area, two Arachnos and a Predatory Slime are waiting behind several spikes. Shoot the Arachnos with arrows. You should also fight the predatory slime from a distance if possible, otherwise it will suck Link in and steal an equipped shield or armor. Then use the Hookshot to pull yourself over the spikes and go through the door.


Miniboss: Shadow Link
Behind the next door, the environment changes completely. Instead of the stone rooms of the water temple, you see a seemingly endless, misty expanse of water. In the middle there is only a small island with a bare tree. First run to the locked door at the other end and then return to the tree. As you approach the center again, a dark shadow will appear under Link, slowly rising to his likeness.
Shadow Link copies many of your movements and reacts particularly reliably to common sword attacks. If you stab head-on with the Master Sword, he can even jump onto Link’s blade and completely block the attack. The longer the fight lasts, the more independent and aggressive the doppelganger becomes.
Simple strategy with the Megaton Hammer
If you have the Megaton Hammer from the Fire Temple, the fight is much easier. Target Shadow Link and deliver single hammer blows. The opponent is much less able to copy or block these heavy attacks than normal sword strikes. After each hit, wait a moment for him to complete his dodge and attack again.
With the Biggoron Sword
If you have fully followed our previous route and have already obtained the Biggoron Sword, this weapon is also excellent. Its long range and high damage often hit Shadow Link outside of his normal counter range. Since the fight takes place entirely in an open space, it hardly matters that Link can’t carry a shield during it.
Din’s Din’s Fire
Another very simple method is Din’s Din’s Fire. Have Shadow Link get as close to Link as possible and cast the spell. He cannot copy the circular fire wave with his sword. Repeat the spell as long as your magic lasts. If you after that Fire Temple the double magic bar In this way, you can significantly weaken Shadow Link or even almost completely defeat him.
If you want to fight exclusively with the Master Sword, you should largely avoid target acquisition and primarily use horizontal punches. Wait for Shadow Link’s attack, dodge and counter while moving. Avoid repeated stabbing attacks.
The Longshot
After Shadow Link’s defeat, the misty landscape disappears and the normal space of the Water Temple reappears. The door on the opposite side opens. Go through and open the large Treasure Chest.
Inside is the Longshot. It completely replaces the previous Hookshot and has approximately twice the range. This means we can now reach targets that are much further away, Treasure Chests and Gold Skulltulas. This greater range is absolutely necessary for the second half of the Water Temple.
New item: Longshot
The Longshot automatically replaces the Hookshot. Many open collectibles in Hyrule that were previously just out of reach can also be collected later.
The Whirlpool Room and Skulltula 2/5
Go behind the chest with the Longshot and play the Song of Time in front of the blue time block. The block disappears and reveals a shaft. Jump down and land on the wooden walkway. In front of you flows an underground river with several strong whirlpools.
Jump into the water as far to the right as possible and swim past the first whirlpool. Don’t put the Iron Boots on until you have passed the strongest suction. Even with the Iron Boots, a whirlpool can catch Link if you get too close. Therefore, run along the bottom as far away as possible from the eddies.
The Gold Skulltula 2/5 sits on a wall. Stand in a safe place with the iron boots, aim at the spider with the new Longshot and also pull the symbol towards you. The additional range makes this find much easier than with the old Hookshot.
Small Key 5/6
Continue following the underground river and stay as far out as possible at the last whirlpool. On a small dry ledge you will find a jug with a fairy, which you can capture in a free bottle if necessary. Then pull yourself with the Longshot to the target on the opposite side.
Above a barred corridor is a gold Eye Switch. Hit him with the fairy bow. The gate only opens for a short time. Immediately target the small Treasure Chest behind it with the Longshot and pull yourself through. Open the chest and take the Small Key 5/6.


Lower water again
Follow the passage behind the key chest and return to the main hall via the room with the circular flow. For the remaining keys and the Boss Key we have to change the water level again. Put on the Iron Boots and sink to the ground. Re-enter the passage with the two extinguished torches and swim through Ruto’s shaft to the first Triforce panel.
Play Zelda’s Lullaby and lower the water level completely. Then return to the dry main hall and enter the central tower. Use the Longshot to pull yourself up to the second panel and play Zelda’s Lullaby again. The water rises again to the medium level.
Gold Skulltula 3/5 in the center tower
Before you leave the central tower, look far up. A Gold Skulltula is crawling high on the inner wall or near the ceiling, which we couldn’t reach with the Hookshot on the first visit. Now you own the Longshot.
Target the Gold Skulltula 3/5, defeat them and drag the symbol across the long distance directly to Link. This means that only two Skulltulas are missing from the temple.
Small Key 6/6
Exit the center tower and look for a gold Eye Switch below a barred hallway on the middle level of the main hall. Shoot the eye with the fairy bow and immediately switch to the Longshot. The grille only stays open for a few seconds. Aim at the target behind the goal and pull yourself through.
Follow the hallway until you come across the large block we moved in the first half of the temple again. Now pull or push it through the corridor until a side passage becomes free. In the small niche is the Treasure Chest with the Small Key 6/6.
The moved block blocks the direct return path. So use second gear and look up. Use the Longshot to pull yourself through the opening in the ceiling and follow the path back to the main hall.
The path to the Boss Key
Completely lower the water level at the first Triforce panel again and return to the dry main hall. Now look for the passage that has not yet been fully explored, the entrance to which is in a shallow puddle of water. Jump in, equip the Iron Boots and follow the tunnel.
There is a target above you in front of a spiked wall. Pull yourself up with the Longshot. Then turn around and aim at the further away target above the locked door on the other side. The old Hookshot would not have managed this distance – with the Longshot you can get there without any problems.
Open the door with a Small Key. In the next pool, several strong whirlpools circle while large rocks roll through the water. If possible, defeat the Arachnos from the entrance with arrows. Then jump in, equip the Iron Boots and move from one safe position to the next on the ground. Wait until the rolling rocks have passed Link.
At the other end of the pool, put on your normal boots and let the current carry you to the bank. Enter the next door and eliminate the enemies there with the Longshot before tackling the block puzzle.
The underwater block puzzle
In this room, a large brown block must be pushed onto a switch that is deep underwater. The block is initially wedged between two gears and cannot be moved directly to the target. First, look for a cracked wall on the side of the entrance and blow it open with a bomb.
Follow the newly opened passage and push the block forward as far as possible from this side. Then return to the main room, swim to the opposite bank and blow up the second cracked wall there. You will now reach the other side of the same block. Drag him into the room until he stops again.
Run back through the first gear and push the block further. This time he ends up falling off the edge and landing directly on the blue switch underwater. The water in the room rises, giving Link access to the previously unreachable stairs.
Swim up and go through the door. In the next room there is a Floor Switch lying in front of a wide abyss. Step on it. Several water fountains rise from the depths and briefly form a path. Jump from fountain to fountain and reach the opposite door before it closes again.
Gold Skulltula 4/5
In the following underwater passage, large rocks roll through the current again. Put the Iron Boots on before you move all the way in and wait in a safe place until the next rock rolls past. Then go deeper and turn right.
The Gold Skulltula 4/5 sits behind a small waterfall or on the side wall. Target it with the Longshot and drag the symbol towards you. This spider is right in front of the area with the Boss Key and should therefore be collected now.
The Boss Key
Then let yourself sink further into the underwater passage. A single killer clam is waiting on the way and can be eliminated with the Longshot. At the end of the tunnel, put on the normal boots and climb up to the locked door.
Open it with your last Small Key. In the room behind it is the large blue and gold Treasure Chest with the Boss Key. Additionally, break the jars. They contain, among other things, fairies that you can take with you in free bottles for the upcoming fight against Morpha.
Gold Skulltula 5/5
Return through the underwater areas to the main hall. First set the water level to medium and then to the highest level. Before we go to the boss chamber, the last Gold Skulltula is missing.
Swim again to the door that leads to the room with the descending platforms by the waterfall – the same room we passed through on the way to Shadow Link. Enter it and look at the right wall of the waterfall.
The Gold Skulltula 5/5 is located there. The normal Hookshot was too short, but with the Longshot you can now reach it easily. Defeat them and drag the symbol to you. This means that all five Gold Skulltulas of the water temple are taken care of.


The path to Morpha
Return to the main hall and raise the water to the highest level. On one side of the central tower is a large dragon statue high above the water. With the Longshot you can now pull yourself up and reach the raised platform.
Break the jars in front of the last door and replenish arrows, magic and health. A fairy in a free bottle is also helpful. Then enter the last corridor.
There is a steep, completely wet ramp in front of you. Three sharp blades move sideways across the slippery surface. Wait until the bottom blade slides to the side and run as straight up as possible. Avoid strong sideways movements, otherwise Link will easily slide back down the entire slope. Use the small spaces between the blades to wait for their rhythm. At the top you open the large door with the Boss Key.
Boss: Morpha
The boss arena consists of a large square pool of water with several small platforms in the middle. Jump onto one of these platforms. A sequence begins and a small red cell nucleus rises from the water. It combines with the liquid and creates long, mobile tentacles. This begins the fight against the gigantic water amoeba core Morpha.
The crucial item is the Longshot. He can pull Morpha’s red core out of its water tentacles and hurl it onto dry ground. Also have your strongest sword ready. If you have the Biggoron Sword, you can defeat the boss particularly quickly.
are fighting on the edge of the arena
At the beginning, jump from the small islands back onto the wide edge of the pool as quickly as possible. There you have much more space and are less likely to be trapped between the tentacles and the water. The corners of the arena are particularly convenient. Morpha’s tentacles can reach Link there, but they have to extend further out of the pool.
Watch the water and look for the little red core. It moves up and down within one of the tentacles. As soon as he gets high enough, target him with the Longshot.
Pull out the core with the Longshot
Hit the red core with the Longshot. If he is hit successfully, he will be ripped out of the water tentacle and thrown onto the ground in front of Link. Immediately run to him and attack with the Master Sword or Biggoron Sword.
Try to hit the core towards a corner or away from the edge of the water if possible. The longer Morpha stays on dry ground, the more hits you can land before the core jumps back into the pool. With the Biggoron Sword, only a few successful attack phases are necessary.
Dodge the tentacles
Initially, Morpha creates a single tentacle. Later two appear at the same time. The actual core is only in one of them. The tentacles try to grab Link. If this succeeds, it is lifted into the air, thrown around and then thrown onto the ground or into the water.
Therefore, keep moving and observe which tentacle contains the red core. When a tentacle leans towards Link, run to the side. As soon as the core becomes visible again high enough in the water, stop briefly, use the Longshot and attack again.
Repeat this process until Morpha no longer has any health. After the final hit, the creature loses control of all the water in the room and completely disintegrates.
Heart Container and Water Medallion
After Morpha’s defeat, a Heart Container appears on the arena floor. Be sure to collect it. Link’s maximum health permanently increases by another heart. You can find a complete overview of the additional energy in our guide to the Pieces of Heart.
Then enter the blue light. Princess Ruto is waiting in the Hall of the Wise Men. She reveals herself as Sage of Water and explains that she must now take her place among the Sages. As a sign of her support, she gives Link the Water Medallion.
Back at Lake Hylia, the effect of Morpha’s defeat is immediately apparent. The previously almost completely dried out basin fills with water again and the lake returns to its former shape. Sheik appears again and watches the return of the water with Link before disappearing over the surface.
The Fire Arrows
Before we leave the Lake Hylia, let’s get one of the most important optional items. On the warp pedestal island, walk to the small stone pedestal at the edge of the lake and wait until sunrise. If it’s the wrong time of day, play the Anthem of the Sun and wait for the next morning.
As soon as the sun appears just above the horizon, take the fairy bow and shoot a normal arrow directly into the rising sun. If the timing is right, a special object will fall from the sky on the small island opposite: the Fire Arrows.
The Fire Arrows consume magic with every shot. To do this, they light torches from a great distance, melt certain ice barriers and deal additional damage to numerous enemies. If you have received double the magic bar after the Fire Temple, you can use the magic arrows much more often.
New weapon: Fire Arrows
At sunrise, shoot towards the rising sun from the stone pedestal at Lake Hylia. The Fire Arrows then appear on the opposite island.
Gold Skulltula on Lake Hylia
There is an old dead tree on the Warp Pedestal Island. Wait until night and look up its trunk. Another Gold Skulltula appears there. With the new Longshot you can easily reach the spider and pull the symbol towards you.
This skulltula is not part of the Water Temple itself, but is the most sensible end to our route on Lake Hylia. For more spiders in the region, check out our complete guide to the Gold Skulltulas.


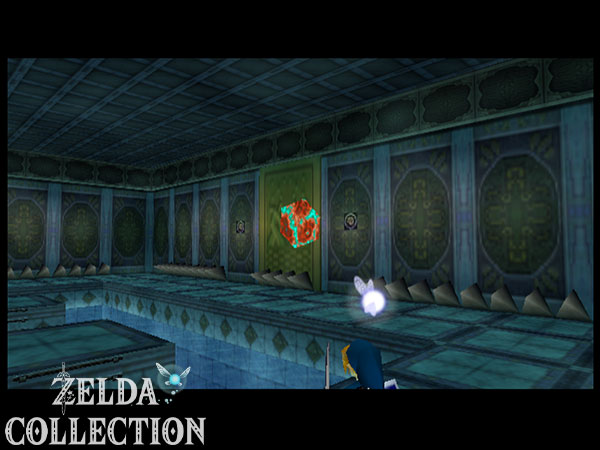


Continue to Kakariko
With the Water Medallion, after Saria and Darunia, Princess Ruto has now also awakened as a sage. The Longshot is one of the most important items in the second half of the game and opens up numerous previously unreachable collection points. We also now have the first type of magical arrow, the fire arrow.
Our next section of action leads back to Kakariko. A catastrophe awaits Link there immediately after his arrival: an ancient being escapes from the well and Sheik is attacked in front of Link’s eyes. We then learn the Nocturne of Shadow. However, before we can enter the Shadow Temple, we have to travel seven years back in time and find the Lens of Truth in the Well of Kakariko.
Frequently asked questions about the Water Temple
How many Small Keys are there in the Water Temple?
In normal Water Temple are in total six Small Keys. It’s particularly easy to miss the key in the shaft under the middle tower, which only becomes visible when you raise the water level to the middle level.
How many Gold Skulltulas are there in the Water Temple?
In the Water Temple there are five Gold Skulltulas. Two of them can already be collected with the Hookshot. The remaining specimens sometimes require the greater range of the grappling hook.
Why can’t I get any further in Water Temple?
First check the water level. Many doors and shafts can only be reached at a certain height. The first panel lowers the water completely, the panel in the center tower raises it to the middle level and the top panel brings it back to the highest level.
Where is the Longshot?
The Longshot is behind the fight against Shadow Link. After you defeat the doppelganger, the foggy arena disappears and the door to the large Treasure Chest opens.
What is the easiest way to defeat Shadow Link?
The Megaton Hammer is one of the easiest options because Shadow Link is less able to copy these attacks. The Biggoron sword also works great. With enough magic, you can also use Din’s Din’s Fire multiple times.
How do I get the Boss Key?
After obtaining the grappling hook, you must open the final areas of the temple, collect the sixth Small Key and then traverse the deep underwater path with the block puzzle. Behind the fourth Gold Skulltula the path finally leads to the large chest with the Boss Key.
How do I defeat Morpha?
Stay on the wide outer edge of the boss arena if possible. Wait for Morpha’s red core to appear in a water tentacle and pull it out of the water with the Longshot. Then immediately attack the core with your strongest sword. Repeat the process and avoid the tentacles to the side.
How do I get the Fire Arrows after the Water Temple?
At sunrise, stand on the stone pedestal on the Warp Island at Lake Hylia and shoot the fairy bow directly into the rising sun. The Fire Arrows then appear on the opposite island.