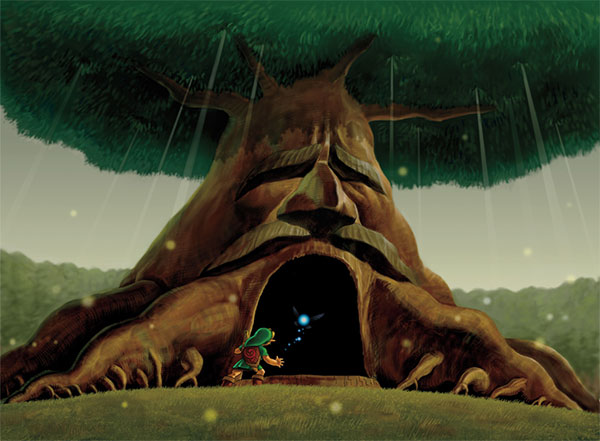

Link’s adventure in The Legend of Zelda: Ocarina of Time begins in Kokiri Forest. The fairy Navi was sent by the Great Deku Tree to awaken Link and take him to the Guardian of the Forest. But before you can visit Great Deku Tree, you first have to convince Mido. He blocks the way and won’t let you pass until you have the Kokiri Sword and a Deku Shield. We get both items directly in the village before we set off for our first labyrinth.
The fairy slingshot awaits you in the Great Deku Tree, the Dungeon Map, the Compass and a total of four Gold Skulltulas. You can collect three of them in full on your first visit. The fourth sits behind a blastable wall and later requires both bombs and the Boomerang. We’ll save them for a later collection round so that you don’t have to travel any unnecessary distances. After defeating Gohma, you will receive your first Heart Container and the Kokiri’s Emerald. On the way out of the forest, Saria will also give you the Fairy Ocarina.
Kokiri Forest – Find the Kokiri Sword
After Navi wakes Link, leave his treehouse and climb down the ladder. Saria is already waiting in front of the house and welcomes you. Your actual destination is in the eastern part of the village, where Mido is guarding the narrow passage to Great Deku Tree. If you talk to him, he will explain to you that you are not allowed to pass without a sword and shield. You can buy the shield you need from the Kokiri Shop. The sword, on the other hand, is hidden in a Treasure Chest on the training grounds.
First, go to the Training Grounds in Kokiri Forest. You’ll recognize it by several small fences, signs, and the low crawlspace in a rock wall. Run between the fences to the opening and crawl inside. Behind it you reach a small labyrinth in which a large rock constantly rolls through the corridors. First wait in a safe corner until the rock rolls past and then follow it at a distance. If you get too close, you can take refuge in one of the niches on the side.
Head towards the large Treasure Chest in the maze. Once you reach it, open it and get the Kokiri Sword. Equip it immediately from the equipment menu. You can now attack with your sword, cut through bushes and grass and eliminate enemies much more easily. On the way back you should also take the Rupees lying in the labyrinth with you. The blue Rupees are particularly valuable because each of them earns you five Rupees. You have already collected some of the money for the Deku Shield.
Collect 40 Rupees for the Deku Shield
The Deku Shield costs 40 Rupees and is sold in the Kokiri Shop. You don’t have to earn money solely by defeating opponents. There are several fixed ruby sources in the village that you can use now. Mido’s house is particularly worthwhile. Open the small Treasure Chests there and collect their contents. Then go back outside and search the areas behind the houses for more Rupees. There are also some coins at the training area and along the watercourses that you can safely collect.
Another easy option is the small water area in front of the shop. Jump over the square stones there to get additional Rupees. If you are still missing a few, cut up the grass and bushes or lift up small stones and throw them away. Many of these ruby sources respawn as soon as you enter and then leave a building. This way you can easily collect the required 40 Rupees without having to leave Kokiri Forest.
Now go to the store and buy the Deku Shield. Then equip it too. The shield protects you from many common projectiles and allows you to throw certain projectiles back at their attackers. This becomes important in Great Deku Tree, where several Leaf Guys shoot Deku Nuts at Link. Also note that the wooden shield can burn if it comes into contact with certain fire attacks. In this case, you will have to get a new one later.
Optional upgrades in the Lost Woods
Before you go to the Great Deku Tree, you could already take a first detour to the Lost Woods. There, a merchant Deku sells an upgrade for your Deku staffs. For 40 Rupees he increases the maximum number of bars from ten to twenty. The first upgrade for the Deku Core Bag will also be available later in this forest area once you have the Fairy Slingshot.
For our complete gameplay, this detour is only worth it a little later. After we visit Princess Zelda, the story takes us back to Lost Woods anyway. Then we look for Saria, learn Saria’s song, collect more Skulltulas and Pieces of Heart and do the first capacity upgrades in a single pass. This saves time and prevents us from having to cross the same section of forest several times without any new use. For more information on gear upgrades, see our Larger Bags, Quivers, and Wallets Guide.
The path to Great Deku Tree
With the Kokiri Sword and Deku Shield equipped, now return to Mido. Speak to him again. He checks your equipment and then reluctantly steps aside. Follow the narrow path behind him and defeat the first Deku Babas with the sword. The dried plants in particular leave Deku Sticks, which we will need later in the labyrinth to light torches and burn spider webs. Therefore, collect as many sticks as possible. You can initially carry up to ten pieces at the same time.
At the end of the path you will reach the large clearing of the Deku Tree. Talk to him and hear why he summoned Link. The tree has been struck by a dark curse and asks you to remove the cause from within its trunk. Agree to his request. His huge mouth then opens and you can enter your first labyrinth.


Great Deku Tree – Dungeon Map and first leaf guy
Inside the Deku Tree you first stand in a huge round hall that extends over several floors. There is a large spider web in the middle of the floor. However, you can’t do anything with it at the moment, because you have to reach the upper floors first. Several Deku Babas grow on the ground, which you can eliminate with the sword. Pay attention to whether the plants leave behind Deku Nuts or Deku Sticks. We will need the rods later; Deku Nuts can stun enemies for a short time and are particularly useful for the first boss fight.
Climb the ladder on the left side and follow the spiral path along the wall. After a short time you will reach a large Treasure Chest. Open it and you will get the Dungeon Map. It shows you the individual floors of the Deku Tree, making orientation easier. Several climbing plants grow on the wall directly near the chest. There are small skullwandtulas on them that would attack you while climbing. You don’t yet have a ranged weapon, which is why you initially follow the normal circular route.
Enter the door at the end of the upper path. In the small room behind there is a Leaf Guy waiting, who shoots Link with Deku Nuts. Point your Deku Shield towards him and wait for him to fire a projectile. The nut bounces off the shield and hits the leafy guy himself. He then jumps out of his flower and tries to flee from you. Run towards him and talk to him. After he gives his clue, the next door opens.
The Fairy Slingshot receives
In the following room, a chasm separates the entrance from the large Treasure Chest on the other side. A small platform floats in between, which immediately falls down after you step on it. So jump quickly onto the platform and continue straight to the opposite ledge. If you do fall into the depths, you can use the climbing plants on the wall to get back up. Open the large Treasure Chest and you will receive the Fairy Slingshot. With it you can shoot enemies from a safe distance, hit switches and eliminate the small Skullwandtulas on climbing walls.
The slingshot initially has space for 30 Deku cores. Later you can increase the capacity in two steps to 40 and finally 50 cores. One of the first improvements you get is a target shooting game in the Lost Woods. For now, the regular Kern bag is sufficient. If your health is already low, you can also open the small Treasure Chest above the room. To do this, climb up the vines to the left of the large chest. There is an Energy Heart in the small chest.
To leave the room again, aim the fairy slingshot at the rolled-up ladder above the entrance door. Shoot her to make her fall down. Then climb the ladder to the opposite ledge and leave the room. Also cross the room of the first leafy guy and return to the large main trunk.
To the top floor – Compass and first Skulltula
Back in the large hall, first go to the place where you found the Dungeon Map. Next to it is the overgrown wall with the three Skullwandtulas. Now you can shoot the little spiders with the fairy slingshot. Target each one and eliminate them before you start climbing. Then you climb up the vines and reach the top circular path. There are several large skulltulas hanging from the ceiling. Carefully walk up to one and wait for it to turn around and show its vulnerable backside. Then strike with the sword. As soon as the path is clear, follow the tour to the next door.
In the following room there is a Floor Switch. Step on it to cause several platforms to rise for a short time. Quickly jump over the platforms to the opposite side and open the large Treasure Chest there. Inside is the Compass. Together with the Dungeon Map, it now also shows you unopened Treasure Chests and the final boss’s room. Before you leave the room again, we’ll get the first Gold Skulltula.
Activate the Floor Switch again and this time jump not to the big Treasure Chest, but to the side niche. There is initially an ordinary large Skulltula hanging in front of a small Treasure Chest. Defeat them by attacking their vulnerable backside. The small chest contains an energy heart and can be opened if necessary. The Gold Skulltula 1/4 is also located on the back wall of the niche. Shoot them with the fairy slingshot and collect the golden symbol left behind. Only by collecting the symbol will the Skulltula be registered in your overall score.
With this you own the first of a total of 100 Skulltula symbols in the game. You can also find the Locations of all spiders in our guide to the 100 Gold Skulltulas. Then return to the front door. It is now locked and is guarded by two torches, only one of which is burning. Pull out a Deku Staff, light it on the burning torch and run with it to the second torch. As soon as both flames are lit, the door opens again. If you then put the staff away in time or switch to the sword, you can prevent it from burning completely.


Through the large spider web into the basement
After collecting the Compass and the first Skulltula symbol, return to the main trunk. There you now have to break through the large spider web on the ground. However, it is not enough to simply jump down from a low platform. Link must fall exactly in the middle of the net from a sufficient height. Therefore, initially stay on the top circular path and eliminate the large skulltula that is blocking your jump path.
Then stand on the edge of the upper platform and aim the camera so that you can see the large round spider web on the ground. Run over the edge with a bit of a running start and jump as precisely as possible onto its center. Due to the long fall, Link creates enough force to tear the net. You end up in a large pool of water in the basement of the Deku Tree. There are two more Gold Skulltulas here, which we collect immediately before we continue on the actual path to the final boss.
Gold Skulltulas 2 and 3 in the basement
The second Gold Skulltula sits on the overgrown wall that leads from the basement back towards the upper floors. You can target and shoot them from the ground or from shallow water with the fairy slingshot. Then climb up the vines and touch the golden symbol. Once it’s collected, you own total two Skulltula symbols. Then let yourself fall back down into the water.
The third Gold Skulltula hangs on the large metal grid on the other side of the water room. Swim to the nearby platform and shoot the spider with the fairy slingshot as well. The symbol initially remains attached to the grid. From the raised ledge you can jump towards it and collect it as it falls. If it doesn’t work on the first try, simply return to the platform and try again. Once you touch the symbol, you have three Gold Skulltulas from the Great Deku Tree.
You can’t collect more completely on your first visit. The fourth Gold Skulltula is behind a blastable wall in a later room. We’ll go right past their hiding place, but we can’t get the symbol until we have the bombs and the Boomerang. We get both items as the game progresses. This means we don’t leave behind any permanently missable collectibles here.
You can check off the two finds separately as Skulltula 20 and Skulltula 21 in your checklist as soon as you have collected their symbols.
Burn the first spider web
Swim to the raised platform with the Floor Switch. Step on it to light the previously extinguished torch. There is also a small Treasure Chest nearby with an Energy Heart in case you need healing after the fall or previous battles. Now you have to light a Deku stick on the burning torch and transport the flame to the opposite side of the water basin. Be careful not to let Link fall into the deep water, as the burning stick would go out immediately.
Therefore, use the shallow water area or the raised platform edges to get to the opposite side with the burning stick. Blocked there big spider web access to a door. Touch the net with the burning stick to make it catch fire and disappear completely. Afterwards you can go through the uncovered door. If your staff goes out along the way, simply return to the torch, light a new staff and try again.
The Leaf Guy and the Solution 2–3–1
Another leaf guy awaits you behind the door. Hold up the Deku Shield and reflect his projectile to force him to leave his flower. As soon as he runs away from you, you talk to him. This time he gives you an important tip for the further path through the Great Deku Tree. Before the final boss you will have to meet three leafies in a certain order. The correct solution is:
2 – 3 – 1
The leaves will later be counted from left to right. So you have to hit first the middle one, then the right one and finally the left leaf guy. Remember this order before moving on. Then look over the locked door on the opposite side. There is a silver Eye Switch. Shoot it with the Fairy Sling to open the door.
Under the spiked roller
In the following room, a small platform moves over a pool of water. Above it is a large rotating spiked roller that would hurt Link if it crossed over. The puzzle can be solved by first lowering the water level. Jump into the water and swim to the underwater switch on the side of the pool. Stand directly above it and dive down to activate it. The water level then drops for a short time.
Immediately swim back to the moving platform and climb onto it. Since the water level is now lower, the platform travels deep enough to get under the spiked roller. Crouch for safety while driving. Once you reach the opposite side, jump onto the solid ledge and defeat the large Skulltula that is blocking the way there. Then push the large stone block under the raised platform. Climb the block and jump from its top to the exit. If you have stayed too long and the water has risen again, you can press the switch again and repeat the process.
Light all torches
In the next room there are several Deku Babas growing that you should first eliminate with the sword. Then you can worry about the actual puzzle. There are several torches on the walls. One of them is already burning while the others are still extinguished. Pull out a Deku Staff and light it on the lit torch. Run with it first to the first extinguished torch and then on to the second. As soon as all the required torches are lit, the door to the next room opens.
If you still have a few Deku sticks, you should take a quick look at the paths between the torches beforehand. A lit stick burns down completely after a while. However, you can put it away in time if you switch back to the sword after lighting a torch. This way you save on rods and still have enough supplies for the last spider web.
Gohma larvae and the hiding place of the fourth Skulltula
In the following room, several large eggs hang from the ceiling. As soon as Link walks under an egg, it falls and a Gohma larva hatches. You can avoid these fights by destroying the eggs from a distance with the fairy slingshot. If a larva still hatches, target it and attack as soon as it moves towards Link. A targeted jump attack is usually enough to quickly eliminate small enemies. Then take care of the large Skulltula in the room.
In this area there are two paths blocked with spider webs. One leads through a low crawlspace towards the final boss. Behind the other net there is an initially inconspicuous area with a brittle wall. Right behind it sits the fourth Gold Skulltula of the Deku tree. You can now remove the net with a burning Deku stick, but you cannot blow up the fragile wall yet. For this you need the bomb bag from Dodongo’s Cavern.
Even if you return later with bombs, for this Skulltula you will also need the Boomerang from Lord Jabu-Jabu’s Belly. The gold symbol is outside Link’s normal range. The Boomerang allows you to reach the symbol from a distance and bring it back to you. That’s why we plan the return visit only after we have both items.
When you visit later you can go back to Great Deku Tree as a young link. The large spider web in the main hall remains destroyed, allowing you to jump straight to the basement. Work your way through the already known rooms to the area with the Gohma larvae, if necessary, burn the net in front of the suspicious wall and blow up the wall with a bomb. In the small secret room behind it is the Gold Skulltula 4/4. Defeat them and get the symbol with the Boomerang. The way back can be easily combined with the later 100% collection round in front of the Temple of Time.
The second spider web and the shortcut in the basement
For the normal route to the final boss you need the other exit. Light a Deku Stick on the existing torch and burn the spider web in front of the low crawler. Crawl through and you’ll return to the large water room in the basement. This time, however, you are on a previously inaccessible raised platform. On the left there is a large stone block that can be pushed to the edge.
Push the block into the water. It stays there, creating a permanent shortcut between the lower torch and your current ledge. Then jump back down to the torch that you lit earlier. Bring out a new Deku Staff, light it, and return up the stone block. This means you can now transport the flame to the higher platform without it going out in the deep water.
On the platform there is another large spider web in the ground. Touch it with the burning tip of the Deku Staff. Alternatively, you can roll the flaming stick across the center of the net. Once it catches fire, the net collapses and Link falls to the lowest floor of the Deku Tree. There is a pool of water below you, which is why you survive the fall without much damage. Then swim to the shore and go to the last puzzle before the boss room.
The Three Leaves – Solution 2-3-1
Stand in front of the door to the final boss three leaves next to each other. Now the hint we received before comes into play. First, stand in front of the opponents so that you can throw their projectiles back with the Deku Shield. The leaves are counted from left to right: the one on the left is number 1, the one in the middle is number 2 and the one on the right is number 3.
First reflect the bullet of the middle leaf guy (2). Then you hit the right leaf guy (3) and finally the left leaf guy (1). The correct order is therefore center – right – left. After the third hit, the last leafy guy leaves his flower and runs away. Chase him down and talk to him. He gives you one last clue for the fight against Gohma and then opens the door to the boss chamber.
Before you leave the room, you should check your health and equipment again. If necessary, cut up the grass or bushes nearby to collect additional hearts, Deku Seeds, or Deku Nuts. Also make sure that you still have enough ammunition for the fairy slingshot. With some Deku Nuts and at least two or three Deku Sticks, the following fight will be much easier. Once you’re ready, enter the large door to the first boss.


Boss Fight: Armored Spider Parasite Gohma
He’s waiting in the dark boss room Armored spider parasite Gohma, who the Great Deku Tree poisoned. As soon as you enter the room, nothing seems to happen at first. So look up with the camera and look for the big spider on the ceiling. Once you capture her glowing eye, the real battle begins. Gohma falls from the ceiling and attacks Link. Your only vulnerable point is this big eye on her head.
First keep a little distance and aim at Gohma. As long as her eye is closed or not glowing red, you shouldn’t waste your Deku Cores. As soon as the eye lights up red, you shoot with it Fairy Slingshot on it. One hit stuns Gohma and causes her to fall to the ground, motionless. Immediately run to her eye and attack with the Kokiri Sword. A jump attack is particularly effective because it causes more damage than a normal sword strike. Immediately afterwards, use more blows while Gohma is stunned.
If you still have several Deku staffs, you can use them for particularly strong hits. Attacking with a Deku staff causes significantly more damage than a normal strike with the Kokiri sword. However, the staff breaks as soon as you hit an opponent directly with it. For a safe tactic it is enough to stun Gohma with the sling and then attack with the sword. If you want to end the fight particularly quickly, you can use multiple strong hits with Deku Staffs instead.
After the first phase of damage, Gohma stands up again and retreats to the ceiling of the boss chamber. There she begins to lay more eggs. If possible, don’t let them hatch at all. Keep the camera on Gohma and watch her eye. As soon as it lights up red again, immediately shoot it with the fairy slingshot. If you hit the eye in time, Gohma will fall from the ceiling and you can attack her again with the sword.
If you miss the right time, the eggs will fall and Gohma larvae will hatch. It’s best to use the fairy slingshot to remove the eggs before they hatch. If the larvae are already running around, you should defeat them first so that they don’t bother you during the next attack on Gohma. Then focus again on the boss’s eye. Deku Nuts can also briefly stun Gohma if you use them from a short distance. However, the fairy sling remains the most reliable way to hit her eye directly.
Repeat this process until Gohma is finally defeated: Hit the red eye with the fairy sling, attack immediately and then retreat in time. When Gohma climbs to the ceiling again, wait for the red glowing eye again. With this tactic you can safely defeat the first boss even with the initial three hearts. Once Gohma can’t take any more damage, she collapses and disappears. The curse inside the Deku Tree is now defeated.
First Heart Container and Kokiri’s Emerald
After Gohma’s defeat, a appears in the middle of the arena Heart Container. Be sure to collect it before entering the blue teleporter. The Heart Container Permanently increases Link’s maximum health from three to three four hearts and at the same time completely replenishes its energy. This has given you the first of several heart containers that you will find after the game’s dungeon bosses.
Then enter the blue teleporter and you will return to the clearing of the Deku Tree. The tree now tells Link about Ganondorf, a dark man from the desert who tried to take the sacred stone from him. When the Great Deku Tree refused, Ganondorf cursed him and left Gohma inside. Even though Link has now defeated the parasite, the Great Deku Tree can no longer be saved.
Before he dies, the Great Deku Tree tells of the three goddesses who once created Hyrule, and of the creation of the Triforce. He then gives Link the Kokiri’s Emerald, the first of three Sacred Stones. He asks you to leave the forest and find Princess Zelda in Hyrule Castle. Shortly afterwards, the Great Deku Tree dies, leaving Link with his new task.
Farewell to Saria and the Fairy Ocarina
After the death of the Deku Tree, you return to the village through the narrow forest path. Mido is already waiting there and is anything but happy about the events in the forest. Speak to him if necessary and then follow the path to the western exit of Kokiri Forest. There is the bridge that connects the village to the Hyrule Field. Before you can cross it, Saria appears again and says goodbye to Link.
As a reminder of the time we spent together, she gives you the Fairy Ocarina. With this instrument you can later play different melodies that open doors, summon people or trigger special events. Link hasn’t mastered any of these melodies yet. In the next chapter, however, we will learn the first important songs, including Zelda’s Lullaby, Epona’s Song, the Sun’s Hymn and Saria’s Song.
Then leave the Kokiri Forest and enter the Hyrule Field. From now on the normal day-night cycle begins. Among other things, this makes an additional Gold Skulltula available in Kokiri Forest, which appears behind the Omniscient Brothers’ House at night. We’ll bring them into the Lost Woods on our already planned return visit. There we will also take care of the first upgrade for the Deku staffs, the larger Deku core bag and the other forest collectibles that have been accessible so far.
By completing the first chapter you should have all the important items from the Kokiri Forest and the Great Deku Tree. The following overview shows you which collectibles we have already taken with us and which have been reserved for a later visit.
| Item | Location | status |
|---|---|---|
| Kokiri Sword | Treasure Chest in the training area | Get |
| Deku Shield | Kokiri store for 40 Rupees | Get |
| Dungeon Map | Large chest in the main trunk | Get |
| Fairy Slingshot | Chest behind the first leaf guy | Get |
| Compass | Upper floor platform room | Get |
| Gold Skulltula 1 | Side niche in the compass room | Collected |
| Gold Skulltula 2 | Tendrils in the first basement | Collected |
| Gold Skulltula 3 | Metal grille on the first basement floor | Collected |
| Gold Skulltula 4 | Behind the blastable wall in the larval room | Later with bombs and Boomerang |
| Heart Container | After Gohma’s defeat | Get |
| Kokiri’s Emerald | From Great Deku Tree | Get |
| Fairy Ocarina | From Saria on the bridge | Get |
Your score should be four hearts, three Gold Skulltula symbols, the Kokiri’s Emerald and the Fairy Ocarina have. There are also the Kokiri sword, the Deku shield, the fairy slingshot and the two orientation aids from the first labyrinth. There are further collectibles in the Kokiri Forest itself, which we complete in one continuous round after the first trip to the Hyrule Field.
Continue to Hyrule Castle
With the Kokiri’s Emerald in his luggage, Link’s path now leads across the Hyrule Field to the city of Hyrule and on to the castle. There we look for Princess Zelda and find out more about Ganondorf’s plans. We then visit Lon Lon Ranch, collect the first Pieces of Heart and bottles, explore Kakariko and its cemetery, return to Lost Woods and finally make our way to Goron City. We take all collectible objects that are within reach before the next big labyrinth is on the program.