

This solution applies to the normal version of The Legend of Zelda: Ocarina of Time on Nintendo 64 and to Ocarina of Time 3D. The Master Quest version has partially changed puzzles and is covered in a separate Walkthrough.
After defeating Volvagia in Fire Temple and obtaining the Fire Medallion, our journey takes us back to the East Hyrule’s. The next major temple is at Lake Hylia, but before Link can enter it, we need a way to sink to the bottom of deep waters and survive there for a long time. We can find the necessary items at Zora – however, the once vibrant realm has completely changed during Link’s seven-year sleep.
Our path first leads through the frozen Zora’s Domain into the Ice Cavern. There we all collect three Gold Skulltulas, the Dungeon Map, the Compass and a Piece of Heart, use the mysterious blue fire for the first time and finally get the Iron Boots. Sheik then teaches Link the Serenade of Water. We then free King Zora from his red ice crystal, receive the Zora Tunic and can also complete the long exchange quest for the powerful Biggoron sword.
Quick Overview
| Found item or event | Location |
|---|---|
| Piece of Heart | Ice floe in Zora’s Fountain |
| Gold Skulltulas | 3 pieces in the Ice Cavern |
| Dungeon Map | Room with the first blue fire |
| Compass | Side space behind red ice |
| Piece of Heart | In the same side room as the Compass |
| Iron Boots | After the White Wolfsheimer |
| Serenade of Water | From Sheik after receiving the Iron Boots |
| Zora Tunic | From King Zora after his liberation |
| Golden Scale | Fishing pond at Lake Hylia |
| Piece of Heart | Research Institute at Lake Hylia |
| Gold Skulltula | Underwater crate in the research institute |
| Biggoron Sword | Completion of the exchange quest on the Death Mountain |
Zora iced realm
After our follow-up to the Fire Temple, leave the Death Mountain and travel across the Hyrule Field to the Zora’s River. Follow the familiar path upstream and play Zelda’s Lullaby again in front of the large waterfall to open the entrance to the Zora’s Domain. As soon as you enter, you realize that something terrible has happened here: the entire pool is covered by a thick layer of ice, the waterfalls have frozen and there is no trace of the numerous Zora that we got to know during Link’s childhood.
Climb the icy paths to the royal chamber. King Zora also couldn’t escape Ganondorf’s curse and is completely stuck in a huge red ice crystal. Normal bombs, the Megaton Hammer, and even Din’s Din’s Fire cannot melt this special ice. For this we need a new substance: the blue fire. A source of this unusual flame can be found in the Ice Cavern behind Zora’s Fountain.
King Zora cannot currently be spoken to or moved. So go right past his throne through the passage to Zora’s Fountain. Lord Jabu-Jabu, who we entered during our search for the Zora’s Sapphire, has disappeared. In its place is a large frozen expanse of water on which numerous ice floes float.


Detour at night: Before you go to the spring behind King Zora, take the side stairs to the earlier diving game. Stand at the top of the frozen waterfall and look left at the nearby rock face. Sits there at night the Gold Skulltula at the waterfall. Defeat them with this Hookshot and also bring the symbol to you. The short one Hookshot is enough. If it is daytime, ask before entering Zora’s Domain at the Zora’s River turn to night with the Sun’s Song and return.
Piece of Heart on the ice floes
Open
Jump from the first ice floe to the next and move carefully across the frozen pool. The floes are sometimes relatively far apart, so you should jump off as straight as possible. At the first major junction, keep to the right and jump onto the ice floating further out. A Piece of Heart is clearly visible on one of the floes. Collect it and then return to the main route using the same platforms.
Now follow the ice floes to the left or western side of Zora’s Fountain. There is a new cave entrance in the rock wall. Behind it begins the Ice Cavern. It is not a complete temple and has neither Small Keys nor its own boss, but contains several important collectibles for our 100% route and the equipment we need for the later Water Temple.
Preparation for the Ice Cavern:
Take at least if possible two empty bottles with. One bottle is generally enough, but several containers save you numerous trips back to the sources of the blue fire. Be sure to leave the Ice Cavern later with at least a portion of blue fire so that we can free King Zora immediately.
The Ice Cavern
Follow the only tunnel deeper into the cave. Several icicles block the way and can be smashed with the Master Sword. More cones will fall from the ceiling as Link passes under them. Therefore, keep moving and do not spend unnecessary time under the large ice peaks. After a short while you will reach a round room in which several Ice Breathers are patrolling.
These enemies are made of living ice and emit cold breath that can completely freeze Link. While stuck in the ice, he continually loses health. Therefore, approach from the side if possible and attack quickly with your sword. Alternatively, you can hit the enemies from a safe distance with the fairy bow or Hookshot. If Link is still frozen, move the control stick or quickly press various buttons to free yourself from the ice sooner.
At the same time, in the middle of the room, a large ice blade rotates across the floor. Keep enough distance from their path and defeat all ice breathers. As soon as the last enemy has disappeared, the previously closed door opens and you can move on.
Five Silver Rubies and Skulltula 1/3
In the next large room there is another rotating ice blade waiting. This time, however, the exit does not open by defeating enemies. Instead, you have to collect five silver rubies that are scattered throughout the room. These small silver Rupees belong to various dungeon puzzles in Ocarina of Time and disappear immediately once collected. Only when all five have been found will the associated mechanism be activated.
Three silver rubies lie relatively exposed along the path of the large ice blade. It’s best to run behind it in the same direction as the rotating blade instead of running towards it. This leaves enough time to collect the Rupees before the obstacle passes your position again. A fourth silver ruby lies behind several icicles near the entrance. Break the cones with the sword and collect it. For the last Rupee, climb onto the rocks on the opposite side and jump from there to the elevated position or directly down to the Rupee.
The Gold Skulltula 1/3 of the Ice Cavern is also waiting in this room. Search the high wall near the silver ruby hidden behind icicles. The spider sits well beyond Link’s normal range, but can easily be defeated with the Hookshot. Then drag the remaining symbol towards you. As soon as all five silver rubies have been collected, the exit on the upper level opens.
The blue fire
Go through the opened door and follow the icy hallway. More ice breathers and moving ice traps try to stop Link. Use the niches on the walls and eliminate dangerous enemies from a distance if possible. Finally you reach a larger room in which several icy enemies float through the air. It’s best to shoot them with the fairy bow before you approach the raised platform at the end of the room.
The mysterious blue fire burns on this platform. Although it looks like an ordinary flame, it is a transportable item. Stand right next to it, select an Empty Bottle and catch the fire. Each bottle can hold one serving. Blue fire has one important property in particular: it melts the red ice crystals that have formed everywhere in the cave and also around King Zora.
A portion of blue fire can only be used once. Stand directly in front of the red ice and use the bottle. All of the flame is consumed and the crystal melts. If you have several free bottles, you should therefore fill them up completely at each fire source. This way you don’t have to run back to the previous room after every single red ice crystal.
The Dungeon Map
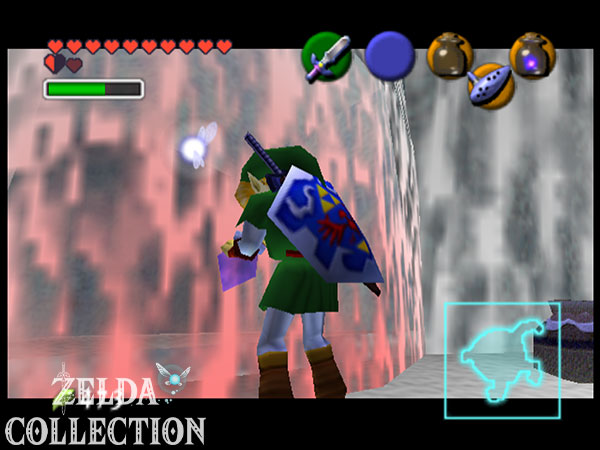
From the fire source, cross the small bridge and eliminate the Ice Breather waiting there. On the right is a large Treasure Chest, completely encased in red ice. Use a portion of blue fire directly in front of the crystal. After the ice has melted, you can open the chest and receive the Dungeon Map of the Ice Cavern.
The map is not absolutely necessary in this small cave, but it helps to identify the side rooms that are still open. Of course we take them with us to ensure a complete score. Before you leave this area, refill used bottles with blue fire at the source.




Compass, Piece of Heart and Skulltula 2/3
With several doses of blue fire, return to the large room with the rotating ice blade and silver rubies. As you come from the direction of the first fire source, there is a large reddish area of ice on one side of the room, completely blocking a side path. Use a bottle of blue fire to melt the crystal and follow the newly opened passage.
In the room behind you will conveniently find another source of blue fire. First, eliminate the existing icicles and enemies so that you can work undisturbed. On one side stands a large Treasure Chest, again encased in red ice. Melt the crystal and open the chest. Inside is the Compass.
Open
On the opposite side there is a Piece of Heart in another red ice crystal. Use the next portion of blue fire and collect it. Directly in this area you will also find the Gold Skulltula 2/3. Look at the large ice pillar or wall next to the frozen Piece of Heart. Defeat the spider with the Hookshot and drag its symbol to you.
Before you leave the room, you should refill your bottles again. For the rest of the main path we still need blue fire and later we also need to take at least one portion with us to King Zora outside the cave.
The ice block puzzle
Return to the central room with the rotating ice blade and now melt the second large red ice wall on the opposite side. Follow the revealed passage and smash the icicles until you reach a large square room. In the middle is a massive block of ice that can only be moved in straight lines on the smooth ground.
As soon as you push the block, it will continue to slide until it hits a wall, rock or other obstacle. If it falls into one of the abysses at the edge of the room, that’s no problem: after a short time, a new block will automatically appear in its original position. The puzzle can therefore be reset at any time.
Here too you have to overall five silver rubies collect. First, shoot all flying ice enemies with the fairy bow so that they don’t freeze you while you push. Some Rupees You can reach them on foot, others are on raised platforms and require the ice block as a movable step. Work your way systematically through the room and before each push, think about which obstacle the block will come to a stop on.
A silver ruby lies on a low platform and can be collected without complicated preparation. For the higher Rupees, push the block so that it stops right next to the corresponding rock platform, climb up and jump to the Rupee. One of the last silver rubies is located behind red ice on a raised ledge. Position the block below, climb up and use a portion of blue fire before collecting the Rupee.
Once all five silver rubies have been found, the door to the final section of the Ice Cavern will open.
Gold Skulltula 3/3
Before you leave the room, we get the last Gold Skulltula from the Ice Cavern. From the entrance, look at the high left wall. The Gold Skulltula 3/3 is located there. Defeat them with the Hookshot and then drag the symbol to Link. This completes all of the Skulltulas in this mini-dungeon cave.
If necessary, intentionally push the ice block into an abyss to reset it. Move the new block so that it comes to a stop in front of the raised exit, climb up and jump into the opened passage. If your bottles are no longer sufficiently full, you should first use blue fire again. We have to bring at least one portion outside.
The Iron Boots
Follow the last corridor and eliminate the ice breather. Two large red ice crystals block the path. There’s no need to waste both: melt the crystal blocking access to the next door and enter the icy room beyond.
After a few steps a White Wolfsheimer appears. His combat pattern basically corresponds to the dark Wolfsheimers that you already fought before the Forest Temple. Aim at him, have the Hylian Shield ready and avoid rash frontal attacks as he deflects many hits. Wait for his own attack, dodge sideways and strike when he shows Link’s back or flank. Especially after his jump attack, he remains open for a brief moment.
After the Wolfsheimer’s defeat, a large Treasure Chest appears. Open it and take the Iron Boots. These heavy boots completely change how you move in the water: when Link wears them, he sinks to the bottom and can walk there. This will allow us to reach areas in the future that were previously far below its maximum diving depth.
New equipment: Iron Boots
With the iron boots, Link sinks to the bottom of deep waters. However, only certain items can be used underwater. Particularly important are Hookshot and later Longshot. For longer stays underwater we also need the Zora Tunic.
The Serenade of Water
Immediately after opening the chest, Sheik will appear. He explains to Link that the frozen realm of Zora is connected to the next sage and Princess Ruto has left for Water Temple. The temple lies deep beneath the surface of Lake Hylia and is inaccessible with normal boots.
Sheik then teaches you the Serenade of Water. In the future, this warp song will transport Link directly to the small island in Lake Hylia, near which is the entrance to the Water Temple. Together with the Minuet of Forest, the Bolero of Fire and the Cantata of Light, we already have four extremely important fast travel options.
New song: Serenade of Water
The Serenade of Water takes Link directly to the Lake Hylia. Although it is not absolutely necessary for actual access to the Water Temple, it saves you from having to make numerous trips through Hyrule.
The exit from the Ice Cavern
There is a water hole behind the large chest. Equip the Iron Boots and jump in. Link sinks to the bottom of the pool. Run through the short underwater passage and open the door at the other end. As soon as you reach dry land again or the entrance area of the Ice Cavern, you should immediately put the Iron Boots down again so that Link can move normally.
Leave the Ice Cavern via the familiar ice floes. Be sure to check your bottles beforehand. You now need at least a portion of blue fire. If you accidentally use up everything, return to a fire source in the cave and fill up a bottle. Without blue fire we cannot free King Zora.


Free King Zora and get Zora Tunic
Return across the ice floes to the frozen Zora Empire and climb up to the royal chamber. Stand directly in front of King Zora red ice crystal and use the blue fire you brought with you. The ice melts completely and the king can finally move again after seven years.
Then talk to him. He reports on the events in the empire and gives Link the Zora Tunic as thanks. This blue tunic allows adult Link to breathe underwater indefinitely. The Iron Boots alone does not prevent Link from drowning after his normal breathing time has expired. Only the combination of iron boots and Zora Tunic allows longer exploration of the lakebed.
New equipment: Zora Tunic
With the Zora Tunic, Link can stay underwater indefinitely. Along with Iron Boots and Hookshot, we now have the basic equipment for the Water Temple.
Piece of Heart at the bottom of the Zora’s Fountain
Open
With the new Zora Tunic and the iron boots, go back to the Zora’s Fountain behind King Zora throne. Swim to the deep middle of the pool and put on the Iron Boots. Link sinks to the bottom where the Piece of Heart lies at the bottom of the spring. Collect it, take off the Iron Boots again and swim up. Thanks to the Zora Tunic, you won’t be under time pressure when searching. Only then do we move on to Lake Hylia.
Before the Water Temple: The Golden Scale
We could now travel to Lake Hylia with the Serenade of Water and enter the next temple. However, for our 100% route we take the opportunity to do some additional tasks. The most important of these is the fishing pond, because here we can win the Golden Scale. With it, the adult Link can dive significantly deeper even without Iron Boots.
Play Serenade of Water and travel to Lake Hylia. Since the lake is largely dry at this point, the fishing pond is on an elevated island that cannot be reached via the normal route. If you followed our route so far, as young Link you planted a Magic Bean in front of the laboratory and also prepared the Scarecrow’s Song. Both options can help you reach the higher areas of the lake.
Catch the biggest fish
Enter the fishing pond and pay 20 Rupees for a fishing rod. As an adult Link, significantly larger fish swim in the pond than during Link’s childhood. To win the Golden Scale, you have to beat the existing record with a sufficiently large catch. Particularly large specimens often reside in deeper water in the middle of the pond or around the partially submerged tree trunk.
Throw the bait near a large fish and move it only slightly. Short movements seem more natural than constant, quick retrieves. As soon as a fish bites, you tighten the fishing rod and keep the line taut. Reel in the fish evenly and move the rod against its swimming direction. If he pulls strongly to the side, you should not react frantically, but rather keep the pressure controlled until his stamina wears off.
Take the caught fish to the owner of the fishing pond and have it weighed. If your catch is big enough to beat the previous adult record, you will receive the Golden Scale. It replaces the previously obtained Silver Scale and permanently improves Link’s natural diving depth.
Important: For the record catch, use the normal fishing rod and the usual bait. Any special bait that may be discovered is interesting for various challenges, but should not be used for this regular reward.
Piece of Heart in the research institute
Then return to the research institute at Lake Hylia. Inside is the researcher’s deep experimental tank. Jump in, but this time use not the Iron Boots. Dive as deep as possible under your own power with the new Golden Scale and reach the bottom of the pool.
Open
Then swim back up and talk to the researcher. Since Link can now dive deep enough, he rewards you with another Piece of Heart. This find is tied to the Golden Scale’s improved diving depth and therefore cannot simply be replaced with the Iron Boots.
Gold Skulltula in the research institute
A second 100% find is waiting in the same basin. Jump into the water again and this time equip both the Zora Tunic and the Iron Boots. Link sinks to the bottom and can walk around there without any time pressure. Find the wooden box on the ground and use a roll attack on it to break it.
There is a Gold Skulltula hidden in the box. You cannot use the Master Sword normally underwater, but the Hookshot still works. Target the Skulltula, defeat it, then drag the icon to Link. Then put your normal boots back on so you can swim to the surface.


The Biggoron Sword – continue the exchange quest
If you followed our 100% route, we started the Biggoron Sword exchange quest before the Forest Temple. Cojiro, the mold, the Odd Poultice and the saw led us to Epona to the foreman in the Gerudo valley. From him we received the Broken Goron’s Sword, which we brought to Biggoron at the top of Death Mountain. Because of his sore eyes, Biggoron was unable to work at the time and instead gave Link a recipe for King Zora.
Now that King Zora is freed from the red ice, we can finally continue the quest. The following two deliveries have a time limit and may not be abbreviated with Warp Songs. Epona is therefore once again extremely helpful.
The Gazing Frog – three minutes
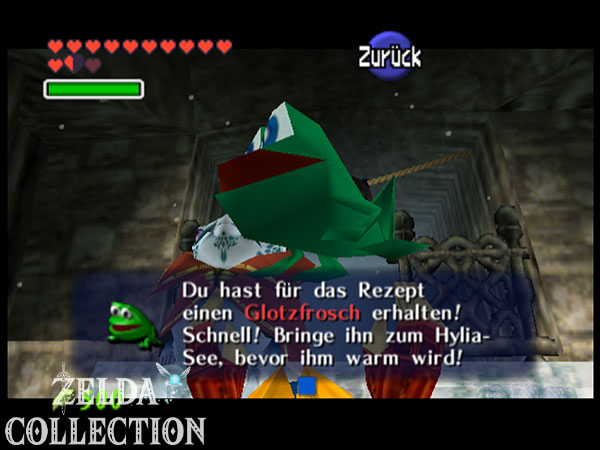
Return to King Zora and show him Biggoron’s recipe. The king hands Link a sensitive one Goggle frog, which can be made into medical eye drops. However, the animal must be fresh to the researcher Lake Hylia arrive. That’s all you have to offer three minutes available.
Warp songs and other teleportation options are off limits during this delivery. If you use teleportation, the Gazing Frog is no longer usable and you have to return to King Zora. Therefore, leave the Zora Empire immediately, follow the Zora’s River to the Hyrule Field and call Epona there. Ride as directly as possible to Lake Hylia, get off in front of the research institute and enter the building.
Show the staring frog to the researcher in time. He is enthusiastic about the rare specimen and processes it into Eye Drops for Biggoron. Unfortunately, these don’t last long either.
The eye drops – four minutes
As soon as you receive the eye drops, a new time limit of four minutes begins. This time we have to go from Lake Hylia to the top of Death Mountain. You are not allowed to use warp songs this way either. In particular, the Bolero of Fire, while an obvious shortcut, would invalidate the delivery.
Leave the laboratory, immediately mount Epona and ride across the Hyrule Field to Kakariko. You have to leave Epona behind at the village entrance. Run through Kakariko and take the northern gate to Death Mountain Trail. Since we’ve already defeated Volvagia, the climb is much quieter than before. Walk straight up and climb the rock face to the summit.
Give the eye drops to Biggoron within the time limit. His eyes heal immediately and he can finally start repairing the Broken Goron’s Sword. As proof of the order, he gives Link a Claim Check.
Wait three days for the Biggoron sword
The repair will take three full days. You don’t have to wait at the summit and can move around Hyrule freely while you’re there. If you want to shorten the waiting time, you can play the Anthem of the Sun several times and switch between day and night. Once enough time has passed, return to Biggoron and show him the Claim Check.
As a reward you will receive the Biggoron Sword. The massive blade deals significantly more damage than the Master Sword and, unlike Medigoron’s Goron Sword, never breaks. To do this, Link wields the sword with both hands and cannot use a shield. The enormous attack power is still a big advantage, especially against many later minibosses and bosses.
New weapon: Biggoron Sword
The Biggoron Sword is one of the most powerful melee weapons in the game. It is optional and not mandatory for any temple, but it makes many of the fights in the second half of the game much easier.



Go to Water Temple
With the Iron Boots, the Zora Tunic and the Hookshot, Link now has everything he needs for the first areas of the next temple. The serenade of the water takes us straight back to Lake Hylia, where the landscape is still almost completely dry. The reason for this lies deep beneath the small island in the lake.
In the next chapter we enter the Water Temple. There we have to change the water level several times, find Princess Ruto again, collect numerous Small Keys, compete against Link’s mysterious doppelganger Dark Link and find the Longshot. Only with its greater range can we reach all areas of the temple and finally face Morpha.
Frequently asked questions about Ice Cavern
How many Gold Skulltulas are there in the Ice Cavern?
There are a total of three Gold Skulltulas in the Ice Cavern. All three can be collected on the first visit with the Hookshot. A later return with the Longshot from the Water Temple is not necessary.
How many bottles of blue fire do I need?
Basically, a single free bottle is enough, as you can return to the fire sources at any time. However, with two or three empty bottles the passage becomes much more pleasant. The most important thing is that you still have at least one portion for King Zora when you leave the Ice Cavern.
Where can I find the Dungeon Map of the Ice Cavern?
The Dungeon Map is in the first large room with a source of blue fire. Cross the small bridge and melt the red ice around the large Treasure Chest.
Where can I find the Compass?
The Compass is located in a side room that you can reach from the central room with the rotating ice blade. Melt the red ice wall there with blue fire. In the next room you will find the Compass, a Piece of Heart, a Gold Skulltula and another fire source.
How do I get the Iron Boots?
First solve the big ice block puzzle and collect the five silver rubies. A White Wolfsheimer is waiting behind the open exit. After his defeat, a large Treasure Chest appears with the Iron Boots.
How to get the Zora Tunic?
After the Ice Cavern, take a bottle of blue fire to Zora’s Domain and use it to melt the red ice crystal around King Zora. Then talk to him. He gives Link the Zora Tunic for free.
Do I absolutely need the Zora Tunic for the Water Temple?
For very short underwater passages, Link can theoretically get by without the Zora Tunic. However, you should wear them for a normal full walkthrough of the Water Temple, as they allow Link to breathe underwater indefinitely and make the many paths significantly safer with the Iron Boots.
How do I get the Golden Scale?
As an adult Link, catch a fish in the fishing pond at Lake Hylia that beats the existing adult record. Show the catch to the owner of the fishing pond. If the fish is big enough, you will receive the Golden Scale.
When can I get the Biggoron Sword?
As soon as King Zora has been freed from his red ice after the Ice Cavern, the Biggoron exchange quest that has already begun can be continued. The recipe is exchanged for the Gazing Frog, which creates the eye drops and after a three-day repair, Link finally receives the Biggoron Sword.