

This solution applies to the normal version of The Legend of Zelda: Ocarina of Time on Nintendo 64 and to Ocarina of Time 3D. The Master Quest version has a significantly different structure and is not mixed with this solution.
The Shadow Temple is one of the darkest and most dangerous dungeons in Ocarina of Time. After we discussed in the previous chapter Bottom of the well the Lens of Truth found and all three there Gold Skulltulas have collected, we can finally follow Impa. Located deep beneath the Kakariko Cemetery, the temple is full of illusions, invisible platforms, guillotines, rotating blades, devil claws, and other traps that can do without that Lens of Truth would be difficult to detect reliably.
Our 100% route takes you completely through the Shadow Temple. We’ll get them Dungeon Map, the Compass, all five Small Key, the Hover Boots, the Boss Key and all five Gold Skulltulas. Later we travel through the catacombs in a ghost ship and face the shadow demon at the end Bongo Bongo. After his victory, Impa awakens as a Sage of Shadow and gives Link the penultimate amulet.
Requirements for the Shadow Temple
For the Shadow Temple you need several items that we have already collected in the previous chapters. Indispensable are the Lens of Truth from the bottom of the well, the Longshot from the Water Temple, the fairy bow, bombs and enough magic. In addition, you need Din’s Din’s Fire to even open the entrance to the temple. The Iron Boots will also be used later when powerful fans try to push Link off narrow paths.
For our full 100% route we should also have Scarecrow’s Song enabled. One of the five Gold Skulltulas is on a high ledge in the ghost ship room and can be reached via the scarecrow. A fairy in a bottle is also recommended, as Bongo Bongo can deal significant damage and the Lens of Truth consumes additional magic during battle.
Quick overview of the Shadow Temple
| Found item | Location |
|---|---|
| Small Keys | 5 pieces throughout the temple |
| Dungeon Map | In one of the first illusion rooms |
| Compass | After fighting two mummies |
| Hover Boots | After the second Dead Hand |
| Boss Key | In the labyrinth after the ghost ship |
| Gold Skulltulas | 5 pieces – all accessible on the first complete pass |
| Heart Container | After Bongo Bongo |
| Shadow Medallion | From Impa in the Hall of the Sages |
Open the Shadow Temple
After our collection round at Bottom of the Well, become an adult Link again and play the Nocturne of Shadow. You will be teleported directly to the high warp pedestal above Kakariko Cemetery. Turn around and go down the long stairs. At the end you reach a dark anteroom in which numerous extinguished torches are arranged in a circle around a central platform.
Stand in the middle of the torch circle and use Din’s Din’s Fire. The wave of fire spreads through the entire room and ignites all the torches at the same time. As soon as the last flame burns, the huge stone gate opens in front of you and reveals the entrance to the Shadow Temple.
Enter the temple and follow the dark hallway to a wide abyss. On the opposite side you can see a target for the Longshot. Aim at it and pull yourself over. The path then seems to end at a massive stone wall, but this is exactly where the central principle of the temple begins: just walk straight through the wall. It is merely an illusion.
Behind it you come to a large room with a stone eagle statue. Behind the statue lies a deep abyss. On the opposite side you can already see a locked gate that we can only reach after finding the Hover Boots.


The Dungeon Map
Go left past the eagle statue and activate the Lens of Truth. A hidden passage appears on the side wall. Enter it and go through the next door. In the following corridor you will see a wall with a large skull. This wall is not real either. Run straight through it.
In the area behind it you should switch the Lens of Truth on again. Several walls look identical, but only some of them actually exist. Go right around the next corner and look for another false wall. Run through and enter the door behind it.
In the next room several Keese and a ReDead are waiting. If the undead is causing you problems, play the Anthem of the Sun. The ReDead becomes immobile for a few seconds and can be attacked safely. Then defeat all Keese. As soon as the last enemy has disappeared, a large Treasure Chest appears with the Dungeon Map.
The Hover Boots
Return to the areas with the false walls. Activate the Lens of Truth and look for another passage, which is additionally marked by two jars immediately in front of it. Behind it you reach a second room that is almost completely identical to the area with the Dungeon Map. Here, too, several illusions are hidden between the seemingly solid walls.
Use the Eye of Truth to find the hidden passage on the right and go through the door. In the next room an old acquaintance is waiting Bottom of the well: Another Dead Hand guards one of the most important objects in the temple.
Miniboss: Brain vacuum
As in the first fight, the actual Dead Hand initially remains hidden underground, while several long, pale hands stick out of the ground. Approach one hand and intentionally allow yourself to be grasped. Then free yourself as quickly as possible. As soon as Link is held by one hand, the actual opponent rises from the ground and slowly moves towards him.
Keep your distance and wait for his attack. Shortly before the Dead Hand bites, it lowers its head far down. Dodge back or sideways and then immediately attack with several sword strikes. After a few hits he buries himself again. Let one hand grab you again and repeat the process.
After the last hit, a large Treasure Chest appears. Open it and take the Hover Boots. With these special boots, Link has additional propulsion for a few moments after leaving an edge, allowing him to cross short gaps that would be too wide for a normal jump. However, on solid ground the grip is significantly worse and Link slides in a similar way to ice.
New equipment: Hover Boots
Only use the Hover Boots where they are really needed. Before an abyss, take enough running up and, if possible, switch back to normal boots after landing so that Link does not slip on narrow platforms.


The puzzle with the eagle statue
Return to the large room with the eagle statue. There are several poles around the statue on which skulls rest. An inscription indicates that only one skull is real and the eagle’s beak must be pointing at it. Activate the Lens of Truth. All of the fake skulls disappear from view and only the actual pole remains visible.
Go to the handle of the eagle statue and slowly turn it. Align the beak exactly with the only real skull. Be careful: if you align the statue with the wrong pole, the floor will open and Link will be transported back to the temple entrance. With the right position, however, the large gate on the other side of the abyss opens.
Put on the Hover Boots and stand on the stone tongue at the edge. Take enough running time and run straight ahead. After jumping off, Link slides a few meters over the abyss and should reach the opposite edge. Pull yourself up and immediately switch back to normal boots. Then follow the stairs deeper into the temple.
The Compass and the first Small Keys
In the next room there is a steel cyclops in the middle. Place a bomb next to the enemy and keep your distance. After the explosion the path is clear. Then activate the Lens of Truth. Three apparently buried passages branch off from this room. Two of the walls are just illusions, while the third path is actually blocked by rubble.
First enter the wrong passage on the right. Two mummies are waiting in the room beyond. Play Anthem of the Sun to temporarily stun both enemies, then attack them from behind or from the side. Once both mummies are defeated, a large Treasure Chest will appear with the Compass.
Return to the Steel Cyclops room and go through the false hallway on the opposite side. Here a huge blade rotates just above the ground. Be sure to activate the Lens of Truth, because in addition to the visible cutting edge, there is an invisible hole in the ground that Link can easily fall into.
Collect the five silver rubies in the room. If possible, run in the same direction as the rotating blade and stay behind it instead of running towards it. As soon as you collect the last silver ruby, the grate opens into a small side chamber. In the chest there is the Small Keys 1/5.


The path to the guillotine cave
Return to the room with the Steel Cyclops again. The third passage is actually blocked by a massive wall of rubble. Place a bomb in front of it. The explosion opens the hallway and reveals a locked door. Use your first Small Key.
In the narrow corridor that follows, several giant skulltulas hang from the ceiling. Run slowly and wait for each spider to lower itself completely. With the Longshot you can turn them off from a safe distance. At the end of the corridor the first of several huge guillotines awaits. Watch the rhythm of the hatchet and run through it immediately after it hits. There is another giant skulltula lurking between the first two guillotines, which you should also eliminate before moving on.
After the first traps, Navi warns of a shadow falling from the ceiling. This is a devil’s claw. As soon as you hear a whizzing noise and a large shadow forms around Link, you keep moving. Dodge until the hand lands on the ground, then attack it with the sword. If Link is grabbed, the devil’s claw will carry him back to the entrance to the Shadow Temple.
A huge cave opens in front of you with deep abysses, narrow platforms and more guillotines. Equip the Hover Boots and jump from one platform to the next. Wait in front of each hatchet until it has just reached the lowest point and run through immediately after. After the third guillotine you land on a larger platform where a Stalfos appears. If possible, fight in the middle of the area and avoid uncontrolled jumping attacks so that Link doesn’t fall into the abyss himself.


Gold Skulltula 1/5
Before you continue following the main path, we collect the first Gold Skulltula of the temple. Stand on the platform where you fought the Stalfos and activate the Lens of Truth. On the left side of the cave, several invisible platforms will become visible, leading to what appears to be an isolated door.
Jump carefully from platform to platform and enter the side room. Inside, another blade rotates through the room, which remains invisible without the Lens of Truth. Leave the eye activated and first eliminate the Keese and the robbery slime. Stay away from the Robber Slime so that it doesn’t swallow Link and steal his armor or shield.
As soon as all enemies have been eliminated, the grate on the back wall opens. Behind it is the Gold Skulltula 1/5. Defeat them with the Longshot and drag the symbol towards you. In the remaining chests in the room you will also find a blue Rupee and arrows.
The falling spiked plates
Return to the large guillotine cave. To the right of the Stalfos platform, a small platform moves up and down regularly. Tighten the Hover Boots and wait until it reaches its lowest point. Glide over, then when you land, switch back to the normal boots and let yourself be carried up. From there you jump to the opposite surface.
There are several blades spinning in this area while another steel cyclops guards the center of the room. Destroy it with a bomb and then collect all five silver rubies. One of them is located directly under the Steel Cyclops and only becomes easily accessible after it is destroyed. Once all five Rupees are collected, a grate on the wall will open.
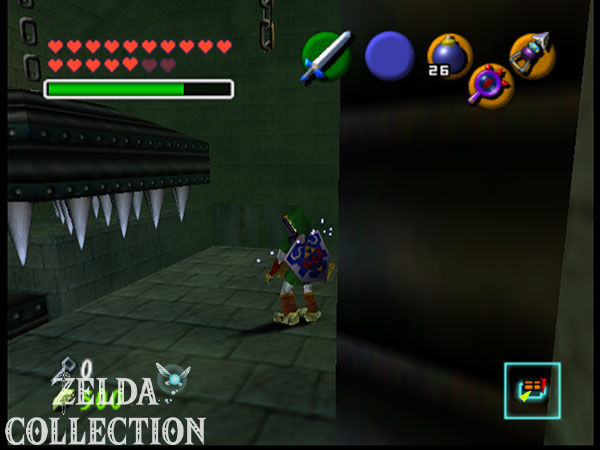
Follow the hallway into a room where two huge spiked plates drop from the ceiling at regular intervals. A direct passage is impossible. Activate the Lens of Truth and look at the right wall. A large brown block that was previously invisible appears there.
Pull the block out of the wall and push it under the first spiked plate. She falls onto the massive stone and can no longer reach Link. Slowly push the block until it finally supports both spiked plates at the same time. If possible, stay directly behind the block so that Link is constantly protected by it.


Gold Skulltula 2/5
As soon as both spiked plates are on the block, you can safely enter the two side cells. In the right cell there is a small Treasure Chest with arrows. In the left cell the Gold Skulltula 2/5 is crawling on the wall. Defeat them and collect the symbol before continuing the block puzzle.
Small Key 2/5
Continue pushing the block to the marker at the end of the hallway and climb to its top. From there jump onto the ledge above the left cell. Wait until one of the large spiked plates has completely lowered and briefly jump onto its top. Use it like a moving platform to get to the opposite ledge.
There is a Floor Switch there. Step on it. On the other side of the room, a small Treasure Chest drops onto a raised ledge. You don’t have to jump all the way back: target the front of the chest with the Longshot and pull yourself straight over. Open it and take the Small Key 2/5.
Invisible platforms and spikes
Return to the large guillotine cave and move to the platform with the single guillotine at the end of the narrow path. Activate the Lens of Truth. An invisible solid platform and another platform appear behind the hatchet, which travels through the abyss on a chain.
Equip the Hover Boots, pass the guillotine immediately after its impact and slide onto the invisible platform. Wait there until the moving platform approaches. Jump onto it and let it carry you towards the opposite wall. From there you glide on to the locked door. Open it with the second Small Key.
In the next room there are numerous invisible spikes in the ground. Without the Lens of Truth the area seems almost empty, but one wrong step can injure Link several times in a row. Keep the eye activated and only move over the safe places. Two ReDeads are also waiting in the room. Play Sun’s Song to immobilize both of them, then defeat them.
Now you have to collect five silver rubies again. Several float above the invisible spikes. Position Link so that a Silver Ruby is between him and a grappling hook target, and pull yourself through the Rupee. One of the targets on the ceiling is also invisible and only becomes visible with the Lens of Truth. Once the fifth Rupee is collected, the door to the next side room will open.




Gold Skulltula 3/5 and Small Key 3/5
Enter the opened room and first eliminate the four Keese. In the middle stands a huge skull, the opening of which is surrounded by blue flames. Run behind the skull. There the Gold Skulltula 3/5 is crawling on the back wall. Defeat them with the Longshot and collect the symbol.
Then climb the stairs and take one of the bomb flowers growing there. Throw them into the top opening of the large skull. The explosion destroys the statue and knocks a Small Key onto the ground. Collect him. So you own the Small Key 3/5.
Return to the previous room and activate the Lens of Truth. Above the locked door you can now see an invisible grappling hook target. Pull yourself up and open the door with the key you just found.
The aisle with the fans
In the following corridor, huge fans try to push Link back or blow him straight into the abyss. Therefore create the Iron Boots. Their extra weight allows Link to resist the airflow. Keep running when the first fan stops briefly, avoiding the moving blades along the way. A giant skulltula is also hanging in the hallway and should be removed with the Longshot.
There is a wooden beam on the ceiling in front of the next abyss. Pull yourself over with the Longshot. There is a silver eye hanging above a door that periodically shoots fire at Link. This mechanism cannot be permanently deactivated. So have the Hylian Shield ready and block the burst before moving forward.
First stay in this area and activate the Lens of Truth. Opposite one of the fans, a false wall with a hidden passage becomes visible. Walk back a little and wait until the fan stops briefly. Then put on the Hover Boots and stand directly in its wind path. As soon as it starts again, you let the air current carry you over the abyss and slide straight through the illusion wall. Go through the door behind it.
Small Key 4/5
Two mummies and several flying jars are waiting in the next room. First play Sun’s Song to immobilize the mummies, then defeat them. A small Treasure Chest appears and contains five Rupees, but is not the real reason for our visit.
To the right of the entrance door is a pile of bones and dirt. Place a bomb next to it. After the explosion you activate the Lens of Truth. An invisible Treasure Chest appears at the exposed location. Open it and take the Small Key 4/5. Use it directly on the locked door at the other end of the room.


The ghost ship
In the next large room, an old ghost ship floats over a bottomless abyss. Before we board, we first turn left. There is a large brown block in a niche. Pull it out and move it along the marked path to the ladder. Then slide it into the recess so that it serves as a raised step. Climb onto the block and from there onto the upper platform.
Gold Skulltula 4/5
If you followed our scarecrow route, you can play your prepared melody on this platform. On the opposite side, the scarecrow appears as a grappling hook target. Pull yourself over and collect the Gold Skulltula 4/5.
Then return to the ghost ship. This Skulltula is optional for the normal completion of the temple, but is of course part of our 100% route.
With the ghost ship through the catacombs
Jump onto the deck and stand on the Triforce symbol. Play Zelda’s Lullaby. The ghost ship slowly starts moving and travels through the underground catacombs. During the journey, two Stalfos jump onto the deck one after the other.
Fight the knights in the middle of the ship if possible. A hit directly on the railing can throw Link into the abyss. If you have the Biggoron sword, the two Stalfos can be defeated particularly quickly due to their high damage.
Watch the left side while driving. As soon as a stone shore appears, you have to leave the ship. Jump onto the ledge in time. The ghost ship travels a few meters further and then falls into the abyss along with the rest of the deck.
The Boss Key and the last Skulltula
Follow the shore to the single door next to where the ship disappeared. A small labyrinth begins behind it. The Lens of Truth is again indispensable here, because several supposed walls don’t really exist. In addition, devil’s claws, bone grimaces and predatory slime lurk between the corridors.
It’s best to orientate yourself systematically and first examine the northern part of the labyrinth. The room with the Boss Key is located there.
The Boss Key
In the northern room, two large wooden walls with long spikes are slowly moving towards each other. If you just stand still, Link will be crushed between the walls. Stand roughly in the middle and use Din’s Din’s Fire. The wave of fire ignites both wooden walls, burning them completely before they reach Link.
Afterwards, two ReDeads remain in the room. Play Anthem of the Sun and defeat both opponents. Then open the large blue and gold Treasure Chest. Inside is the Boss Key. A smaller chest contains an additional five Rupees.


Gold Skulltula 5/5
Return to the illusion maze and look for the western side room. Several large skulls float inside, rotating continuously on their own axis. Run behind the skulls and look at the back wall. The Gold Skulltula 5/5 sits there.
Defeat the spider with the Longshot and collect the symbol. You have now found all five Gold Skulltulas of the Shadow Temple. The floating skulls can also be destroyed with bombs and contain some Rupees, but are not required for the main path. You can also check all Locations in our guide to the Gold Skulltulas.
Small Key 5/5
Then enter the southern room of the labyrinth. Activate the Lens of Truth immediately, because a invisible devil claw is moving through the room. Once it is visible, you can fight it as usual. Dodge their attack and attack the big hand with the sword.
After several hits, it breaks into three small hands. Defeat all three as quickly as possible before they grow back into a full devil’s claw. As soon as the last small hand disappears, a Treasure Chest appears. Open it and take the Small Key 5/5.
The bridge to the final boss
Exit the labyrinth through the eastern door and return to the stone bank. Follow the path until two jugs on the edge mark a favorable shooting position. On the other side of the chasm there is a huge stone statue. Several bomb flowers grow around their base.
Take the fairy bow and shoot one of the bomb flowers. The explosion sets off a chain reaction. The statue loses its footing and falls across the abyss. This creates a massive stone bridge.
Cross the fallen statue and open the locked door with your last Small Key. In the room behind it, there initially seems to be no safe path to the big boss door. Activate the Lens of Truth. Several invisible platforms appear over the abyss.
Create the Hover Boots. From the entrance, jump straight ahead to the larger T-shaped platform, then to the left and from there continue to the last platform directly in front of the large door. After each safe landing, briefly switch to your normal boots if necessary so that you don’t slip over the edge. Finally, open the big lock with the Boss Key.


Boss: Bongo Bongo
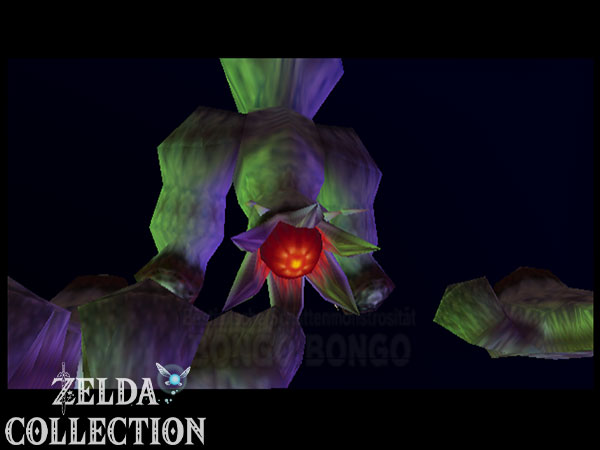
There is no normal corridor behind the boss door. Link automatically runs into the large opening in the floor and falls deep into the darkness. He ends up landing on a massive drum floating above a toxic lake of acid. Shortly afterwards, the entire membrane begins to shake and the shadow creature Bongo Bongo appears.
For the fight you should equip the fairy bow, the Lens of Truth and your strongest sword. Having the magic bar as full as possible is also important, as Bongo Bongo’s actual body remains invisible. If you brought a fairy in a bottle, it serves as additional insurance.
Phase 1 – stun both hands
Bongo Bongo’s actual body is invisible, but you can see his two huge hands even without the Lens of Truth. Stay as close to the outside of the drum as possible. Each time the monster hits, the taut surface is pushed upwards and Link jumps slightly into the air, making aiming more difficult.
First target an open hand and shoot it with the fairy bow. If the hit is successful, the hand turns bluish and remains immobile for a short time. Immediately turn to the second hand and stun it too. In principle, you can also use the Longshot, but arrows can usually hit your hands more quickly from a greater distance.
Hurry between the two hits. Bongo Bongo has several attacks with his hands. He can grab Link, hit the drum, strike with a fist, or slam both hands together like a gigantic swatter. If Link is grabbed, move the control stick and press several buttons as quickly as possible to free yourself.
Phase 2 – meeting the invisible eye
Once both hands are stunned, activate the Lens of Truth. Now Bongo Bongo’s floating body becomes visible. A large eye opens between the two hands and the monster charges straight towards Link.
Target the eye and shoot the fairy bow into it before Bongo reaches Bongo Link. A successful hit causes the entire body to collapse. The monster now lies stunned on the drum for a short time.
Immediately run to the eye and attack as often as possible with the Master Sword or the Biggoron Sword. A jump attack deals high damage on the first hit. With the Biggoron sword you can exploit the vulnerable phase particularly effectively.
After a few seconds, Bongo Bongo stands up again and the process begins again. Stun both hands with arrows, only then activate the Lens of Truth, hit the charging eye and attack the collapsed body with the sword.
Magic save:
The Lens of Truth does not need to remain on throughout the fight. The hands are visible even without magic. Only activate the eye after both hands have been stunned, and turn it off again after the hit.
Arrows and magic jars may appear on the drum during battle. Collect them when you’re running low on supplies, but don’t lose sight of the monster’s hands. After several successful rounds of attacks, Bongo Bongo hits the drum one last time, loses its shape and completely disintegrates.
Heart Container and Shadow Medallion
After Bongo Bongo’s defeat, a Heart Container appears. Be sure to collect it before using the teleporter. This causes Link’s maximum health to permanently increase by one full heart. You can find all other Locations in our overview of the Pieces of Heart in Ocarina of Time.
Then enter the blue light. Link is transported to the Hall of the Sages. Impa is waiting there, revealing herself as Sage of the Shadow. She explains that Princess Zelda is still safe. Since Impa herself must now take her place in the Hall of the Sages, she asks Link to continue protecting Zelda.
As a sign of her support, she gives you the Shadow Medallion. This completes the Shadow Temple. After the forest, fire, water and Shadow Temple only one more amulet is missing before the six wise men are united.


Continue into Gerudo Valley
With the Shadow Medallion, Impa has now also awakened as a sage. Link now has the Amulet of Forest, Fire, Water and Shadow. Only one last wise man is missing. The next section of the action therefore leads to the west Hyrule’s.
Our path leads via the Gerudo Valley to the Gerudo fortress. There we free four captured carpenters, earn the trust of the Gerudo and receive the Gerudo membership card. We can then venture into the Haunted Wasteland and look for the way to the desert colossus and the later Spirit Temple.
Frequently asked questions about the Shadow Temple
Do I need Din’s Din’s Fire for the Shadow Temple?
Yes. The entrance is already blocked by a circle of extinguished torches. Din’s Din’s Fire lights all the torches at the same time and opens the large stone gate. The spell will also be needed later on the Boss Key to burn two wooden walls that are approaching each other.
How many Small Keys are there in the Shadow Temple?
In the normal Shadow Temple, there are a total of five Small Keys. They are in the room with the rotating blade, in the area of the spiked plates, in the large skull, in an invisible Treasure Chest behind the fan passage and after the invisible devil’s claw in the labyrinth behind the ghost ship.
How many Gold Skulltulas are there in the Shadow Temple?
In the Shadow Temple are in total five Gold Skulltulas. All can be collected during the first complete playthrough. For one of them, however, you need the Scarecrow’s Song activated.
Where can I find the Hover Boots?
You will receive the Hover Boots relatively early in the temple. In the first illusion area, use the Lens of Truth and look for the hidden passage to the second Dead Hand. After his defeat, the large Treasure Chest with the sliding boots appears.
How does the eagle statue puzzle work?
Activate the Lens of Truth and look at the skulls on the posts around the eagle. Only one is real. Rotate the statue so that its beak points directly at this skull. If you aim the eagle incorrectly, the floor opens and Link falls back to the entrance.
How do I get through the room with the spiked plates?
Activate the Lens of Truth and look for the invisible brown block in the right wall. Pull it out and slide it under the two falling spiked plates. The block holds the plates above Link and allows you to move safely through the room.
How do I get on the ghost ship?
First move the brown block in the room and use it as a step. Then return to the ship, jump onto the deck and play Lullaby on the Triforce symbol Zelda’s. The ship then begins its journey through the catacombs.
How to beat Bongo Bongo?
First, stun both hands with arrows. Then activate the Lens of Truth so that the invisible body and its big eye become visible. Shoot an arrow into the eye as Bongo Bongo charges towards Link. As soon as the boss collapses, attack the eye with your strongest sword. Repeat this process until Bongo Bongo is defeated.