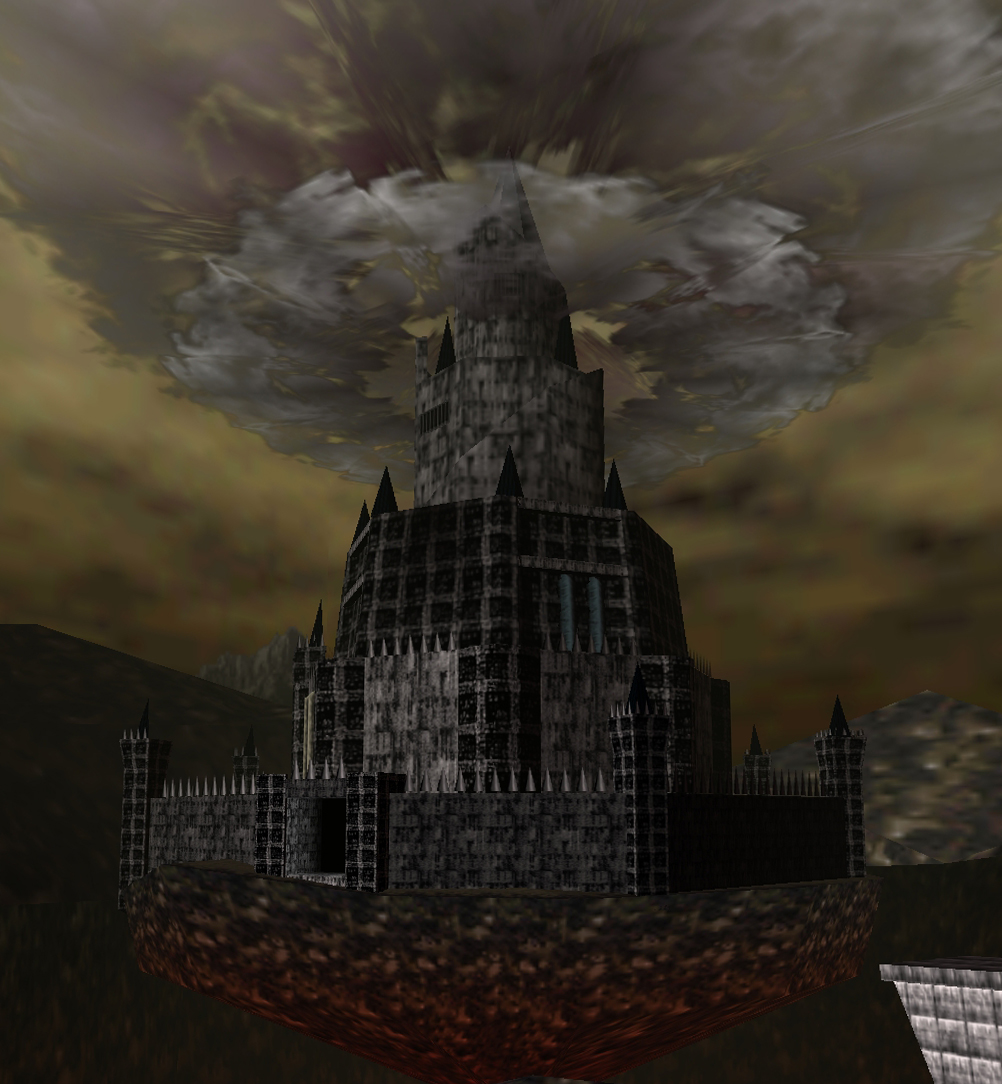

This solution applies to the normal version of The Legend of Zelda: Ocarina of Time on Nintendo 64 and to Ocarina of Time 3D. The Master Quest version of Ganon’s Castle has different tests and is therefore treated separately.
After seeing Nabooru in Spirit Temple As the last wise men have awakened and received the amulet of the spirits, the final section of Ocarina of Time. All six sages are now united, but Ganondorf continues to rule and own Hyrule Triforce the power still retains some of the holy power. Before we can enter his castle, Rauru first leads us back to the castle Temple of Time. There we finally find out Sheik’s true identity and get to know him arrows of light the last decisive weapon.
Ganon’s Castle then forms the last major dungeon of the game. Unlike the previous temples, it does not have a classic Dungeon Map and no Compass. Instead, Ganon’s Fel Tower is protected by six magical seals, each associated with one of the awakened sages. Only when we have completed the tests of forest, water, shadow, fire, light and spirits and destroyed their magical cores with the light arrows will the barrier around the central tower fall. On our way we also pick up the titanium gloves, visit the last Great Fairy and permanently improve Link’s defenses.
In the Ganon’s Castle itself, several particularly strong opponents wait before Link faces Ganondorf in person. After his supposed victory, we have to escape the collapsing castle together with Zelda. But even then the fight is not over: Ganondorf uses the power of his Triforce fragment and transforms into the massive beast Ganon.
Quick overview of the final
| Section | Important reward or task |
|---|---|
| Temple of Time | Zelda’s reveal and Light Arrows |
| In front of Ganon’s castle | Last Gold Skulltula in area |
| Forest seal | 5 Silver Rubies and Forest Seals destroy |
| Water seal | Blue Fire and Ice Block Puzzle |
| Shadow Seal | Titanium Gloves |
| Great Fairy | Double defense power |
| Fire Seal | 5 Silver Rubies above the lava |
| Light Seal | 2 Small Keys and silver rubies |
| Spirit Seal | Crawling mine and mirror puzzle |
| Ganon’s Castle | Boss Key |
| Ganondorf | First final boss fight |
| Escape | 3 minute time limit |
| Ganon | Final battle and end of game |
Last collection round in front of Ganon’s Castle
Before the final, check the open entries in your heart part checklist and the skulltula checklist. The saved checkmarks help you to catch up on missing finds in certain areas. For the fourth bottle you can find the complete fishing route at the ten nighthawks; Further stock improvements are available for bomb bags, quivers and wallets.
The hidden passage in the Zora’s Fountain
With the Silver Gauntlets from the Spirit Temple, the last adult Skulltula find from the Zora’s Fountain is now accessible. As an adult, travel to the source via Zora’s Domain and prepare for night before entering the realm. Go to the small area of land near the fairy spring. Lift the large gray rock and use a bomb or Megaton Hammer to destroy the smaller rock underneath. Jump into the exposed entrance. In the hallway, turn on the Lens of Truth, defeat the invisible common Skulltulas and climb up to the raised outer ledge at the end. The Gold Skulltula waits there at night above the hidden passage. Defeat her and get her symbol with the Longshot. You can then return to the Temple of Time with the Cantata of Light.
The Light Arrows and Princess Zelda
After completing the Spirit Temple, Rauru reports from the Hall of the Sages. He explains that all six Sages have been awakened and an important person is waiting for Link in the Temple of Time. Play the Cantata of Light and enter the citadel.
As soon as you reach the large hall, a longer cutscene begins automatically. Sheik appears and tells the last part of the legend of the Triforce. When Ganondorf entered the Sacred Realm seven years earlier through the time portal opened by Link, he was unable to fully seize the Sacred Power. His heart was not in balance between strength, wisdom and courage, which is why the Triforce split into three separate fragments.
Ganondorf retained the Triforce of the power. The other two fragments looked for new carriers whose hearts corresponded to their respective characteristics. Since then, Link himself has worn the Triforce of Courage. The third fragment, the Triforce of Wisdom, is located at Sheik.
Sheik then dissolves his disguise and reveals his true identity. The mysterious person who has accompanied Link since his awakening as an adult and taught him the warp songs is actually Princess Zelda. She explains that she used the Sheikah’s teachings to stay hidden in order to escape Ganondorf and support Link from the background.
Zelda also reports again on the crucial events seven years ago. When Link pulled the Master Sword out of the Pedestal of Time, he unknowingly opened access to the Sacred Realm. Since young Link was not yet ready to wield the Master Sword, his body was sealed for seven years. Ganondorf used this time to conquer Hyrule and spread his power across the land.
With all six sages now awakened, Ganondorf can finally be sealed in the Sacred Realm. First, however, Link must weaken him in direct combat. Zelda therefore gives him the Light Arrows.
New item: Light Arrows
The Light Arrows consume magic with every shot. They destroy the six seals in Ganon’s castle and are able to stun Ganondorf in the later battle. Link then causes the actual damage with his sword.
However, the reunion only lasts a few moments. Ganondorf has been waiting the entire time for the bearers of the two missing Triforce fragments to show themselves. He tracks down Zelda via the Triforce of wisdom, encloses her in a magical crystal and takes her to his castle. At the same time he asks Link to follow him there.


The path to Ganon’s castle
Leave the Temple of Time and cross the ruined marketplace. Run north to the area where the royal castle of Hyrule stood during Link’s childhood. There is almost nothing left of the former facility. Instead, Ganon’s Castle now floats above a huge lava crater.
Approach the abyss. Link can’t possibly cover the distance alone. The six wise men therefore combine their powers and create a glowing rainbow bridge that leads from the edge of the crater directly to the entrance to the castle.
Gold Skulltula in front of Ganon’s castle
Before you cross the bridge, you can collect another Gold Skulltula for our 100% route. Follow the edge of the lava crater and look for the stone arches or remains of the wall near the abyss. Behind one of these arches, the Gold Skulltula crawls in front of Ganon’s castle.
Defeat them with the Longshot and drag the symbol towards you. The Skulltula appears as an adult Link regardless of the time of day. There are no other Gold Skulltulas inside Ganon’s castle itself. After collecting, compare your actual symbol count with the saved checklist. You can catch up on any detours that are still open before climbing Ganon’s Ganon’s Castle. You can find a complete check in our guide to the 100 Gold Skulltulas.
Ganon’s Castle
Cross the bridge created by the Sages and enter Ganon’s Castle. Follow the wide stairs down and walk past the steel cyclops to the next door. A huge main hall opens behind it. In the center rises Ganon’s Fel Tower, but a black magical barrier makes access impossible.
Six colored energy beams run from the outside areas of the main hall into the barrier. Each of these rays is powered by its own seal and represents one of the six wise men. As long as even one of these seals exists, the central tower remains protected.
The Six Seals:
Forest, water, shadows, fire, light and ghosts. In principle, the exams can be completed in different orders. For our route, we do the Shadow Seal relatively early because we get the Titan Gloves there. These are then required for the fire seal, the light seal and the last Great Fairy.
Hidden storage room
Before we start the exams, you should remember an important supply point. Below the bridge to the central Ganon’s Castle there is an invisible passage on the outer wall of the main hall. Activate the Lens of Truth and run through the seemingly solid wall.
Behind it there are several fairies and leafies waiting from whom you can buy potions, bombs and other supplies. If you run out of health, magic, arrows, or other consumable items during the six trials, you can return here at any time.
The Seal of the Forest
Enter the door with the green forest symbol. A Wolfsheimer appears in the first room. Defeat him and then take care of the five torches. Four stand on the floor and can be easily ignited at the same time with Din’s Din’s Fire.
The fifth torch, on the other hand, is above the locked exit door. It is beyond the range of the spell. Therefore, take the fairy bow and ignite it with a fire arrow. As soon as all five torches burn at the same time, the next door opens.
Five silver rubies between the fans
In the following room you have to collect five silver rubies over a deep abyss. Multiple fans turn on at different intervals and can blow Link off the narrow platforms. Both the Hover Boots and the Iron Boots are used here.
First, play the Song of Time right at the entrance. This causes blue time blocks to appear. With the iron boots you can stand safely on them without being carried away by the air currents. Collect the first silver ruby this way.
Then observe the side fan. As soon as it switches on, you put on the Hover Boots and consciously use the strong airflow to be carried to a smaller platform. Destroy the Steel Cyclops on the middle platform with a bomb.
Then jump to the Floor Switch on the far wall. As soon as you enter it, a pillar with a grappling hook target will rise out of the ground. Put on the Iron Boots and pull yourself towards the target with the Longshot. On the way you pass through a high floating silver ruby.
The remaining Rupees are on the remaining platforms in the room. Before each jump, watch the fans and only move when the air flow has completely stopped. After all five silver rubies have been collected, the exit door will open.
In the next room floats the magical core of the forest seal. If necessary, break the jars and refill magic or arrows. Then shoot a Light Arrow at the golden ball. The seal breaks and Saria appears. She uses her Sage of the Forest power and teleports Link back to the main hall. The green energy beam to the barrier disappears.


The Seal of Water
Next, enter the door with the blue water symbol. Already in the first room several large icicles fall from the ceiling. Keep moving and defeat the two ice breathers. As soon as both enemies have disappeared, the gate in front of the next door opens.
Smash the icicles around the source of the blue fire and fill a free bottle. Use the blue fire to melt the red ice crystal in front of the door. Afterwards, be sure to return to the source and fill the bottle a second time.
Important:
Take a second portion of blue fire with you. In the next room, red ice blocks a rusted switch. Without new blue fire, you have to return to the source and repeat the entire route.
The ice block puzzle
A time limit of two minutes starts in the following room. Within this time you have to position a block of ice correctly, melt the red ice, press a switch and reach the exit door.
First push the ice block further back to the right twice. This causes it to fall into the large hole in the ground and then serves as a boundary for the second block. Now turn to the remaining ice block. First push it away from the entrance and then to the left twice. Due to the previously sunk block, it stops right under the raised ledge with the red ice.
Climb the block and pour the blue fire over the red crystal. A rusty switch appears behind it. Hit it into the ground with the Megaton Hammer. The exit door opens.
Jump down and leave the room before the two minutes are completely up. In the following room you destroy the water seal with a light arrow. Ruto appears and takes Link back to the main hall. The blue energy beam goes out.


The Seal of Shadow
Now enter the door with the purple shadow symbol. Behind the entrance lies a huge dark abyss. There is an extinguished torch in the room to the right. Shoot a fire arrow at it. For a short time, several white platforms appear in the void.
Equip the Hover Boots and cross the briefly visible platforms to the large solid area in the middle. A green bone grimace and a predatory slime are waiting there. At least get rid of the robbery slime so that it doesn’t suck Link in and then throw him into the abyss.
Light the torch again and jump across the single white platform to the next solid surface. Activate the Lens of Truth now. Several previously completely invisible paths become visible.
First follow the hidden path to a rusted switch. Hit it into the ground with the Megaton Hammer. This will open the gate in front of the exit door. Then return to the previous platform.
Light one of the torches again and follow the briefly visible platforms to a normal Floor Switch. Step on it. A Treasure Chest appears on the large central area. Target the front with the Longshot and pull yourself straight over.
The titanium gloves
Open the large Treasure Chest. Inside lies the Titanium Gloves, the strongest power upgrade for Link. They surpass the Silver Gauntlets from the Spirit Temple and allow Link to lift the massive black stone pillars that were previously immovable even with his enhanced strength.
New item: Titanium Gloves
In the original German Nintendo 64 version they are called Titan Gloves. In Ocarina of Time 3D they are referred to as Gold Gloves.
Re-activate the Lens of Truth. An invisible path begins right next to the Treasure Chest and leads you to the now open exit door. Walk carefully across the path and enter the next room.
Destroy the Shadow Seal with a Light Arrow. Impa appears and teleports Link back to the main hall. The violet energy beam disappears.
The last Great Fairy
After you have received the titanium gloves, it is worth taking a short detour out of Ganon’s castle. Leave the building, cross the Rainbow Bridge and follow the wall outside the castle.
At the end of the path, a huge black stone pillar blocks access to a cave. Stand in front of it and use the titanium gloves. Link lifts the massive boulder over his head and throws it to the side.
Enter the uncovered fairy spring and stand on the Triforce symbol. Play Zelda’s Lullaby. The Great Fairy of Courage appears and permanently improves Link’s defense.
From now on, enemy attacks only cause half as much damage. You can then recognize the improvement by the white or silver edges around the hearts of the energy bar. This improvement is extremely helpful, especially for the following fights against Ganondorf and Ganon.
Last permanent upgrade: Double defense
The defense upgrade is not mandatory, but is part of a full 100% route and halves the damage from most enemy attacks.
Then return across the bridge to Ganon’s castle.


The Seal of Fire
Enter the door with the red fire symbol and immediately equip the Goron Tunic and the Hover Boots. The entire exam room consists of a large lava pool with several small platforms. Your task again is to collect five silver rubies.
Many platforms decline as soon as Link is on them. However, the sliding boots reduce his weight to such an extent that the large gray center platform does not sink. This platform therefore serves as a safe starting point for almost all jumps.
First jump from the middle to the right onto the small square block. Collect the first silver ruby there and quickly return before the platform completely disappears into the lava.
Then move to the opposite side. Watch the rotating stream of fire and wait for it to pass Link. Climb onto the solid platform and collect the second silver ruby.
On the left side of the room there is a huge black stone pillar. Reach it via the small sinking platform and the narrow ledge. Thanks to the titanium gloves you can now lift them. Link throws the pillar to the other side of the lava pool, where it then lies as an additional stable platform.
The third silver ruby is located where the pillar stood. Collect it and return to the center platform. Then move to the other side and defeat the Torch Slug on the solid platform.
Then jump onto the previously thrown stone pillar and from there to the sinking platform with the fourth silver ruby. Immediately return to the pillar before the small platform completely sinks. You can find the fifth and final Rupee on the fixed platform where the Torch Slug was previously sitting.
After all five silver rubies have been collected, the exit door will open. Return to the center platform and use the Longshot to pull yourself over to the target next to the door. In the next room, destroy the fire seal with a light arrow. Darunia appears and extinguishes the red energy beam.


The Seal of Light
The entrance to the Light Trial is blocked by another huge black stone pillar. Use the Titan Gloves to lift her up and throw her to the side. Then enter the door with the yellow symbol of the light.
In the first room, immediately activate the Lens of Truth. Between the numerous Treasure Chests there is an invisible giant skulltula and three invisible Keese. Defeat all four enemies. An additional Treasure Chest then appears with a Small Key.
The remaining chests contain hearts, Rupees or ice traps. You don’t have to open it for the main route. Use the key on the next door.
In the following room there is a Triforce symbol on the floor. Play there Zelda’s Lullaby. A small Treasure Chest appears. Open it and take the second Small Key. Use it to open the next door.
Five silver rubies in one minute
In the round room behind it, two large rocks are constantly rolling in a circular path. At the same time, a time limit of one minute starts. Within this time you have to collect five silver rubies and reach the exit.
Two Rupees are located in small niches on the outer wall. Two more are in the recesses of the Y-shaped middle wall. Keep an eye out for the rolling rocks and, if necessary, wait in the niches until they pass.
The last silver ruby floats higher above the ground. Stand in the middle of the room and look up. There is a grappling hook target above the Rupee. Pull yourself up and collect the Rupee as you fly.
Once all five silver rubies have been collected, the exit door will open. Leave the room within the time limit.
The next area initially appears to be empty. Activate the Lens of Truth and watch out for a Devil’s Claw falling from the ceiling. The wall where the light seal should normally be is just an illusion.
Run straight through it. The real light seal is in the hidden room. Destroy it with a light arrow. Rauru appears and teleports Link back to the main hall. The yellow energy beam goes out.


The Seal of Spirits
Lastly, enter the door with the orange spirit seal. In the first room you have to collect five silver rubies again. First, destroy the Steel Cyclops with a bomb. One of the silver rubies is right in its original position.
Then move the Armos statues so that the rotating blades can continue to move through the room and the areas behind them become accessible. Collect the silver rubies hidden there.
For the high-floating Rupee you look at the ceiling. There is a target directly above it. Use the Longshot to pull yourself up and cross the silver ruby. Once all five have been collected, the next door will open.
Bombchu through the grid
There are two Torch Slugs waiting in the next room. Eliminate them first. Behind the metal grilles there are two Crystal Switch. In the Nintendo 64 version you can hit the first one through the bars with a charged whirl attack or the Biggoron sword. In Ocarina of Time 3D the switch is directly accessible.
After its activation, a Treasure Chest appears with Bombchus. Then stand in front of the second grid so that the small hole above the bars is exactly in line with the Crystal Switch that is further away.
Drop a Bombchu on the ground. It rides up the wall, passes through the small opening and explodes next to the Crystal Switch. The next door opens.
Sunlight and Mirror Shield
In the next area there are several sun switches mounted on the walls, but there appears to be no light source in the room. Look up. A large spider web covers the opening in the ceiling.
Shoot a fire arrow at the net. It burns and sunlight falls into the room. If you don’t want to use Fire Arrows, you can also shoot a normal arrow through a burning torch in the previous area.
Stand in the beam of light and equip the Mirror Shield. Reflect the light onto the sun switch directly to the left of the entrance. The remaining symbols only trigger devil claws or other traps.
Go through the opened door and destroy the spirit seal with a light arrow. Nabooru appears and teleports Link back to the main hall. The last energy beam goes out.


Ganon’s Fel Tower
Once the sixth and final seal is destroyed, all energy beams collapse. The black barrier around the central tower completely dissolves. Ganon’s Fel Tower is now accessible.
Before you enter, you should visit the hidden storage room one last time. Completely replenish your health, magic and arrows. For the upcoming battles, we recommend at least one fairy or a blue elixir in a free bottle. If you followed our 100% route, you will also have double defense and the Biggoron Sword.
Cross the bridge to the central tower and enter the Ganon’s Castle. Follow the long spiral staircase up. You can eliminate the fire flitters on the way or simply walk past them.
Two Dinosaurs
Two dinosaurs are waiting in the first battle room. Both attack at the same time and are significantly more aggressive than normal Echsodorus. Try to keep both of them in sight, but concentrate your attacks entirely on one opponent.
Block his attacks, dodge the jumps and counter immediately afterwards. With the Biggoron sword, just a few hits are enough. As soon as both enemies are defeated, the next door opens.
The Boss Key
Climb the next set of stairs and enter the room with two Stalfos Knights. Defeat them one after the other as quickly as possible. If too much time passes between the two defeats, the knight you defeated first gets back up and you have to fight him again.
As soon as both Stalfos have finally disappeared, the fire barrier around the large blue-gold Treasure Chest goes out. Open it and take the Boss Key of the Ganon’s Castle.
Two Iron Princes
In the next battle hall, a black and a white Iron Prince sit motionless at the sides. First attack only one of the two. As long as you don’t hit the second opponent, he stays in his place and you don’t have to fight against both of them at the same time.
Lock out a heavy ax blow like in Spirit Temple, dodge sideways or backwards and attack the Iron Prince while his weapon is still in the ground. If you defeat the first opponent, you dedicate yourself to the second.
After the fight the next door opens. Follow the last large staircase to the locked boss door and use the Boss Key.
In the anteroom there are several jars with arrows, hearts and magic. Only break as many as you immediately need. Some supplies may become important during the fight against Ganondorf.
Then go through the side door and follow the spiral staircase all the way to the top. Ganondorf is waiting behind the last door.
Final boss: Ganondorf
In the top room of the Ganon’s Castle, Ganondorf sits at a huge organ. Princess Zelda continues to float above the arena in her crystal. The three fragments of the Triforce react to each other and the Grand Master of Evil rises to battle.
With a wave of dark energy, Ganondorf keeps Navi at bay. This means that no targeting works during the entire fight. You have to align all Light Arrows and many movements by hand.
Recommended equipment:
Have the Master Sword or Biggoron Sword, the fairy bow with light arrows and a well-filled magic bar ready. The Hover Boots can facilitate the jumps between the corner platforms and the middle.
Move to the outer platforms
At the beginning, Ganondorf hits the ground with his magic and destroys a large part of the central platform. Immediately run to the outer edge of the arena. The four corner platforms offer a comparatively safe location and are not completely destroyed.
Avoid standing in the middle for an unnecessarily long time. Ganondorf regularly hits the ground there and causes further parts of the platform to collapse.
Knock back the energy ball
Ganondorf’s most common attack is a large glowing energy ball. Wait until she’s almost to Link and hit her back with the sword. Ganondorf often throws them again in Link’s direction, resulting in an increasingly quick exchange of blows.
Focus on the rhythm of the ball and not Ganondorf’s body. If you hit too early or too late, the energy will hit Link and cause significant damage. If Ganondorf is finally hit by his own attack, he will be stunned in the air for a short time.
Hit Ganondorf with the light arrow
Immediately after the successful energy exchange, switch to the fairy bow and shoot a light arrow at Ganondorf. Since navigation is not available, you have to manually aim the shot at his body.
A successful light arrow causes Ganondorf to crash. He falls onto the central platform and remains there unable to move for a short time. Immediately jump to the center and attack him with the Master Sword or Biggoron Sword. Try to land multiple hits during this short phase.
As soon as Ganondorf gets up again, retreat to one of the safe corner platforms and wait for the next energy attack.
Ganondorf’s large energy attack
Later, Ganondorf collects a large amount of dark energy above his head. This attack breaks up into several smaller projectiles when fired and can destroy large parts of the ground.
You have two options. The easiest way is to shoot a light arrow at Ganondorf while he is still charging the attack. This will interrupt his attack. Alternatively, you can prepare a spin attack with the Master Sword and release it at the right moment. The energy balls are thrown back and can also stun Ganondorf.
Then jump back to the middle and attack him. Repeat the process of energy exchange, light arrow and sword strikes until Ganondorf finally collapses.
Replenish supplies:
If you run out of magic or arrows, you can carefully drop down to the bottom of the room. Ganondorf doesn’t directly attack Link there. Break the jars and then climb back up the middle pillar.
Refusing to accept defeat, Ganondorf unleashes his remaining power. The upper part of the entire Ganon’s Castle is destroyed. Ganondorf falls motionless to the ground and Zelda is released from her crystal.
The Escape from Ganon’s Castle
Ganondorf appears to be defeated, but the Ganon’s Castle immediately begins to collapse. Zelda explains that you must leave the castle immediately. Only stand for escape three minutes available.
Follow Zelda closely through the opened doors and over the destroyed stairs. Only Zelda can deactivate the magical gratings along the way. So don’t run too far ahead. If she stops in front of a door, you must wait for her magic to open the obstacle.
At the same time, watch out for falling stones. Before a boulder hits Link, his shadow appears on the ground. Immediately run to the side. A hit not only costs hearts, but also knocks Link to the ground and wastes valuable seconds.
Free Zelda from the circle of fire
In the former Stalfos room, Zelda is suddenly surrounded by a circle of fire. Two Stalfos appear at the same time. You have to defeat both of them in relatively short succession, as a fallen knight will be revived if the fight against his partner takes too long.
Therefore, concentrate completely on one enemy, eliminate him and then immediately attack the second one. With the Biggoron sword you can take out the two knights very quickly. Once both are finally defeated, the fire barrier disappears and Zelda leaves behind several hearts.
Continue following her through the tower. There is another ReDead waiting on the bridge in the large main hall. Don’t waste time fighting. Just walk past him. Even if his scream paralyzes Link for a short time, the time limit is usually enough.
As soon as Link and Zelda leave Ganon’s castle, the entire Devil Tower collapses behind them. For a few moments, Ganondorf’s’s reign actually seems to have ended.
The final battle
After the cutscene, a noise suddenly comes from the rubble. Approach the remains of the Ganon’s Castle. Ganondorf rises again. The Triforce of power responds to his anger and transforms him into a massive demonic beast: Ganon.
At the beginning, Ganon knocks the Master Sword out of Link’s hand. The weapon lands outside the circle of fire near Zelda. As long as the magic barrier remains active, Link cannot reach the sword and must use another weapon.
Boss: Ganon
Ganon’s body is almost completely armored. Its only real weak point is its glowing tail. Hits to the head and body do not cause permanent damage, but may partially stun or distract.
Since the Master Sword is outside the arena during the first phase, you should use the Biggoron Sword. If you don’t have it, the Megaton Hammer from the Fire Temple also works.
Recommended weapons:
The Biggoron Sword deals the highest damage in the first phase. However, the Megaton Hammer is also sufficient. For the final final blow against Ganon, the Master Sword is required later.
Roll under Ganon
One of the easiest methods is to run straight towards Ganon. Wait for him to attack with his two swords and roll between his legs.
Immediately after the roll, turn around and attack the glowing tail. A single powerful strike or jump attack with the Biggoron Sword causes high damage. Then move away immediately before Ganon turns around and swings his weapons at Link.
Repeat the process: wait for the attack, roll under Ganon, turn around and hit the tail.
Stun Ganon with light arrows
Alternatively, you can hit Ganon’s head with a light arrow. The holy energy blinds him for a short time. Immediately run around the beast and attack the tail.
Deku Nuts, the Longshot and Din’s Din’s Fire can also briefly influence Ganon. However, the Light Arrows usually offer the largest time window.
If you run out of magic or arrows, you can lure Ganon specifically to the large pieces of rubble at the edge of the arena. His sword strikes destroy the stones and release various supplies, including magic jars, arrows, bombs and sometimes even fairies.
Retrieve the Master Sword
After several successful hits, Ganon collapses for the first time. The fire barrier around the arena disappears for a short time. Immediately run to Zelda and pick up the Master Sword again.
Then return to the arena. The second part of the fight works basically the same way, but Ganon moves more aggressively and reacts faster. Stun him with a light arrow or roll between his legs again and now attack the tail with the Master Sword.
Important:
You can still weaken Ganon with the Biggoron Sword or the Megaton Hammer. However, the fight can only be finally ended with the Master Sword.
The final blow
After suffering enough damage again, Ganon collapses one last time. Zelda uses her magical power and immobilizes the massive beast.
Now run to Ganon’s head and equip the Master Sword. Attack him. Link strikes the decisive blow and ends the fight against the grand master of evil.
The end of Ocarina of Time
The six wise men combine their forces and open the seal to the Sacred Realm. Ganondorf is drawn into the banished dimension along with the Triforce of power. Even while sealed, he refuses to accept defeat and vows revenge on Link, Zelda, and their descendants.
After the immediate danger has been averted, Link and Zelda meet in a quiet white room. Zelda realizes that her attempt to stop Ganondorf unintentionally triggered the very events that gave him access to the Sacred Realm. She therefore asks Link to return the Ocarina of Time to her.
With her power, Zelda sends Link seven years into the past. In the Temple of Time, young Link puts the Master Sword back into the Pedestal of Time and closes the time portal. Navi then leaves Link and flies away through one of the high windows.
During the end credits, life returns to Hyrule. The country’s residents celebrate together at the Lon Lon Ranch. The six wise men watch the saved kingdom from Death Mountain as Hyrule slowly recovers from Ganondorf’s rule.
In the last scene, young Link returns to the castle garden again. There he meets Princess Zelda at a time before Ganondorf could enter the Sacred Realm. In contrast to their first encounter, Link now has knowledge of the coming future and can warn Zelda about the actual consequences of Ganondorf’s’s plans.
Congratulations – you have completed The Legend of Zelda: Ocarina of Time!
Frequently asked questions about Ganon’s Castle
How many seals are there in Ganon’s castle?
Ganon’s castle contains a total of six seals: Forest, Water, Shadow, Fire, Light and Spirits. Each seal is protected by a short examination. At the end you have to destroy the respective golden core with a light arrow.
Which test should I take first?
Most exams can be completed in different orders. For the most practical route possible, you should do the shadow seal relatively early, as that is where the titanium gloves are. These are then needed for the Fire Trial, access to the Light Trial and the final Great Fairy Source.
Where can I find the titanium gloves?
The Titan Gloves lie in a large Treasure Chest within the Shadow Trial of Ganon’s Castle. You will need Fire Arrows, Hover Boots, Lens of Truth, Megaton Hammer and Longshot to completely traverse the area.
What does the last Great Fairy bring?
The Great Fairy outside Ganon’s Castle doubles Left’s defense. Enemy attacks then only cause about half as much damage. The improvement is part of a complete 100% route, but is not required to complete the game.
How to defeat Ganondorf?
Hit back his large energy ball with the sword until Ganondorf is hit by his own attack. Then shoot a light arrow at him. As soon as he falls onto the middle platform, jump over and attack him with the sword. Repeat this process until his defeat.
How long do I have to escape Ganon’s castle?
After Ganondorf’s defeat you have three minutes time. Follow Zelda closely through the tower. She has to open several magical gates. In one room you also have to defeat two Stalfos in quick succession.
How to defeat Ganon without Master Sword?
In the first phase you can use the Biggoron Sword or the Megaton Hammer. Roll between Ganon’s legs or stun him with a light arrow, then attack his glowing tail.
When will I get the Master Sword back?
After you hit Ganon in the tail several times in the first phase, he briefly collapses and the fire barrier disappears. Immediately run to Zelda and get the Master Sword back. The second part of the fight then continues with the Master Sword.
Can I defeat Ganon with the Biggoron Sword?
You can greatly weaken Ganon with the Biggoron Sword. However, the final finishing blow must be delivered with the Master Sword after Zelda restrains the beast with her magic.
What happens after defeating Ganon?
The six wise men seal Ganondorf in the Sacred Realm. Zelda then sends Link back seven years into the past. The young Link places the Master Sword back in the Pedestal of Time and in the last scene meets Princess Zelda again in the castle garden – this time with knowledge of the events of the future.