
After the Forest Temple, check the beds around Hyrule in Ocarina of Time on Nintendo Switch 2 . Sleep in a bed that glows green to enter the Hall of Fallen Foes . Kaepora Gaebora greets you among statues of defeated enemies. Read their entries, challenge bosses again, and take on three longer battle series.
All Monsters with Images and Locations · Access · Boss Rematch · Battle Streaks and Rewards
Unlock the Hall of Fallen Foes
Defeat Phantom Ganon, receive the Forest Medallion, and return to the Temple of Time . Learn the Prelude of Light from Sheik. The green beds then grant access to the hall. One suitable bed is upstairs in the large house in southern Kakariko Village. Other entrances are in Link’s house in Kokiri Forest and the house beside the Lakeside Laboratory at Lake Hylia.
Examine the bed and choose the dream or the visit to the Hall of Fallen Foes. Adult Link can also enter this way. If you go from the plains to Kakariko Village as a child, Kaepora Gaebora will explain the entrance to you. In the hall, speak to the owl in the center again to leave. You will then wake up at the bed you used.
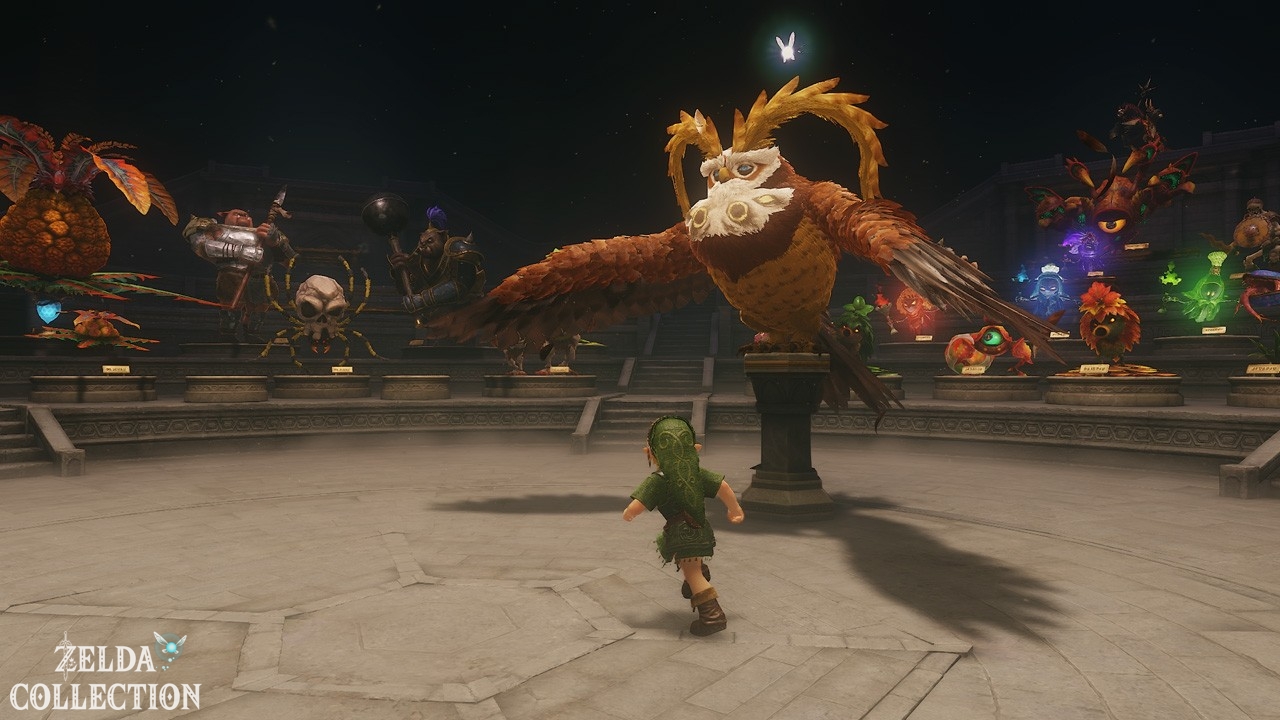
Examine monster statues and find missing enemies.
Defeated monsters add to the collection. Go to a statue and examine it: The entry lists the enemy, its typical locations, and helpful items. Rotate the model to take a closer look. Speak with Kaepora Gaebora about your collection if you want to know if any monsters are missing.
If you encounter a gap in the information, first use the location listed in the entry and then combine your search with a relevant section of our walkthrough . It’s especially worthwhile to take a close look at the statues of enemies with multiple appearances. For Gold Skulltulas, you can also refer to our Locations of All Symbols .
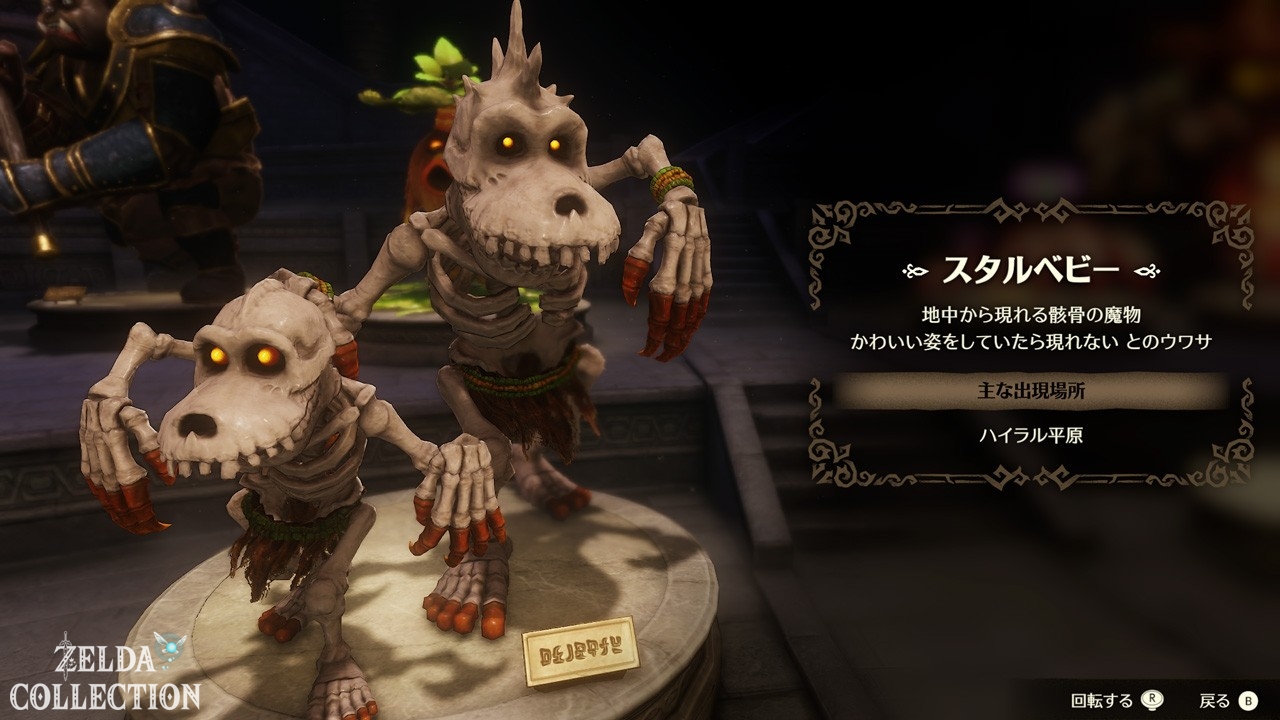
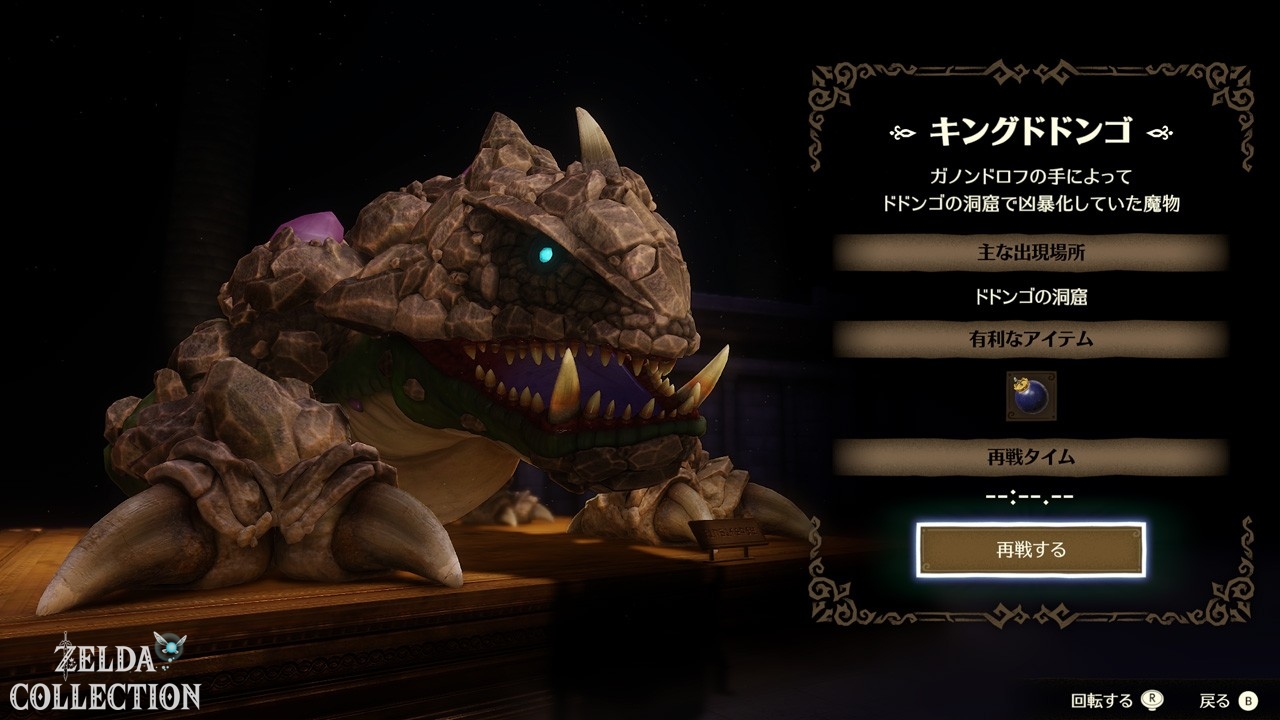
Re-fight individual bosses and minibosses
The statues of the stronger enemies are located at the outer edge. At an available statue, select Rematch to repeat the fight. This includes the final bosses and selected minibosses, such as Big Octo, the Flare Dancer, Dark Link, and the Dead Hand. The timer saves your successful run for the next record attempt.
For the rematch, you’ll receive specific equipment and a predetermined number of hearts. For example, Gohma’s one-on-one fight starts with three hearts. Therefore, check your equipped items before the first attack. Used ammunition, potions, and injuries do not affect your total during the actual adventure. If you wish to abort an attempt, speak to Navi or Navi .
For practice, a clear objective is recommended: First, recognize the attack signal, dodge, and then use the opening. Only once you’ve mastered the sequence should you try to shorten the distances between hits. You can find the individual tactics in our guide to bosses and final bosses .
The three rematch series and their rewards
Examine one of the owl statues to start a chain. Each leads through a fixed sequence of boss fights. The following information applies to the normal game state:
| Streak | Order | Start and Unlock | First Win |
|---|---|---|---|
| Trial of the Three Spiritual Stones | Gohma → King Dodongo → Barinade | 3 Hearts; At the entrance to the Monster Hall | Stone Owl Statue |
| Trial of the Five Sages | Phantom Ganon → Volvagia → Morpha → Bongo Bongo → Twinrova | 6 Hearts; After the five temple bosses | Silver Owl Statue |
| Trial of the Hero of Time | The eight bosses of the other two series, then Ganondorf and Ganon | 6 hearts; After completing the storyline | Golden Owl Statue |
After completing the first series, Kaepora sends Gaebora the corresponding trophy. Link’s house in Kokiri Forest Leave the dream and look on the shelf there. Each of the three series yields its own statue.
Resting Places, Rupees, and Healing in the Battle Series
Between battles, you will reach a resting place . The timer pauses there. First, open the chest containing 200 Rupees and then speak to the Business Scrubs. Your remaining heart supply will carry over to the next battle; therefore, plan your purchases before proceeding.
Red and green elixir each cost 100 Rupees Three individual hearts 30 Rupees . A Heart Container increases and replenishes your heart supply within the passage. Its price increases over the course of the series from 200 to up to 400 Rupees . Later rest stops offer additional equipment, including the Longshot for 50 Rupees, Nayru’s Love for 300 Rupees, and the Biggoron Sword for 1,000 Rupees.
Before each purchase, compare your current health with the next opponent’s. With low health, healing is the more reliable choice; if you’re confidently winning battles, you can save Rupees for a later weapon. Only start the next battle when your required items are assigned to the desired buttons. A loss ends the streak and resets you to the beginning for the next attempt.
You can find the paths to the original battles in our OOT walkthrough for Switch 2 . The first entries are: Great Deku Tree with Gohma , Dodongo Cavern , and Lord Jabu-Jabu .
All Monsters: Images, Locations, and Battle Tips
The following 77 named monster entries cover regular enemies, minibosses, and bosses. Find each monster in the specified age and defeat it. Individual entries identify additional forms. For Deku Scrubs and Business Scrubs, reflect the nut and then approach the exposed enemy.
Jump to name: A–D · E–G · H–L · M–R · S · T–Z .
Some model images show multiple variants without their fire, ice, or color aura. The notes below the image and at the location will help you distinguish them in the game.
Monster A-D
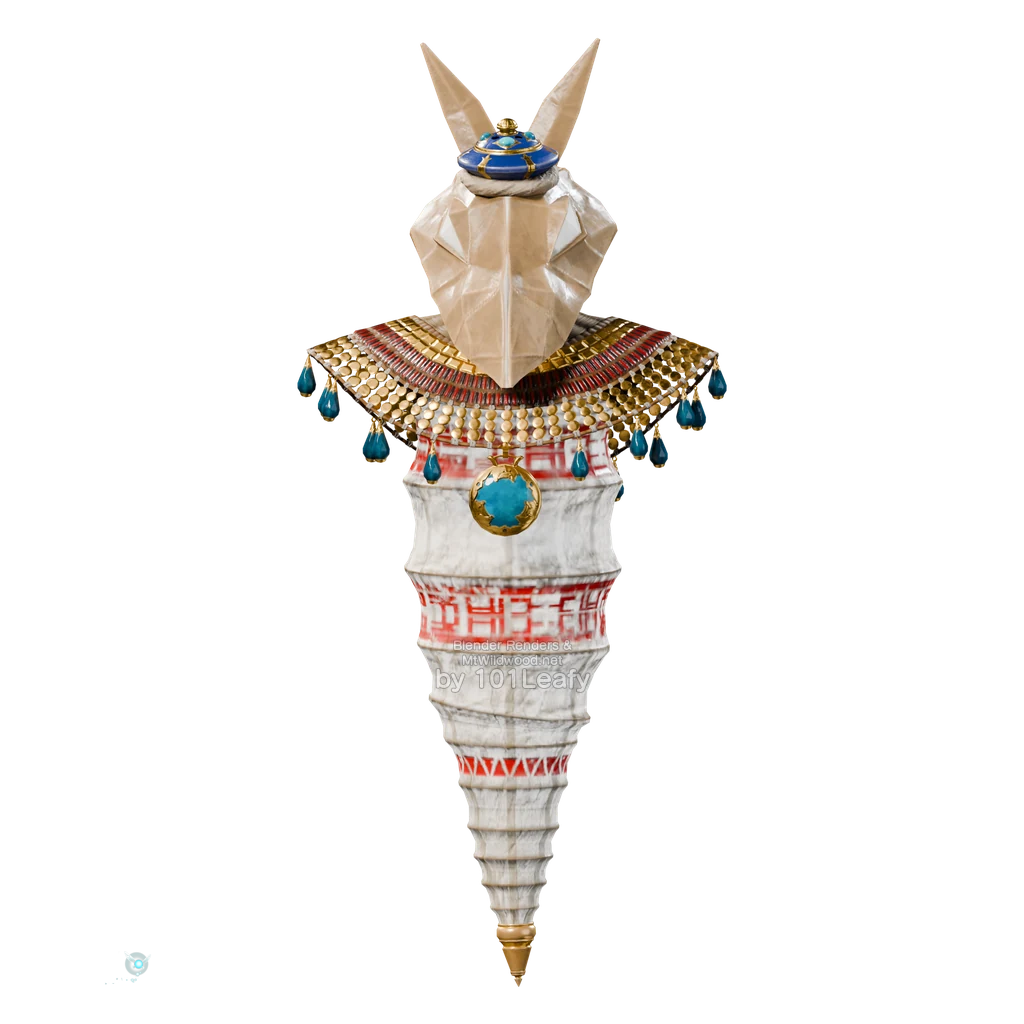
Anubis
Age: Child or Adult
Location: Spirit Temple, in the rooms with the floating mummies and flame traps.
Defeat: Guide his mirrored movements into an active flame trap. Din’s Fire or fire arrows will also hit his fire weakness.
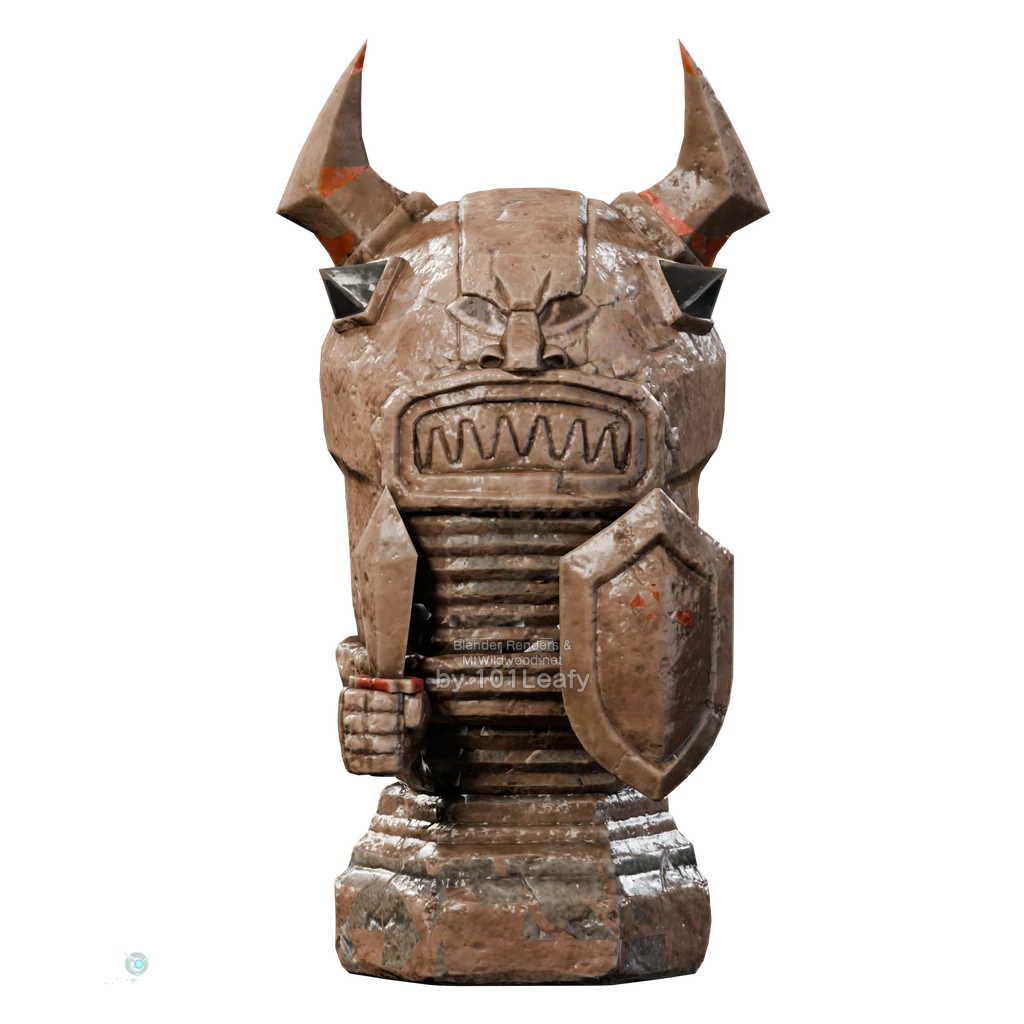
Armos
Age: Child or Adult
Location: Dodongo Cavern At the statues along the path through the dungeon; later also in the Spirit Temple.
Defeat: Touch the statue, back away, and place a bomb. After the decisive hit, keep your distance until the Armos explodes.
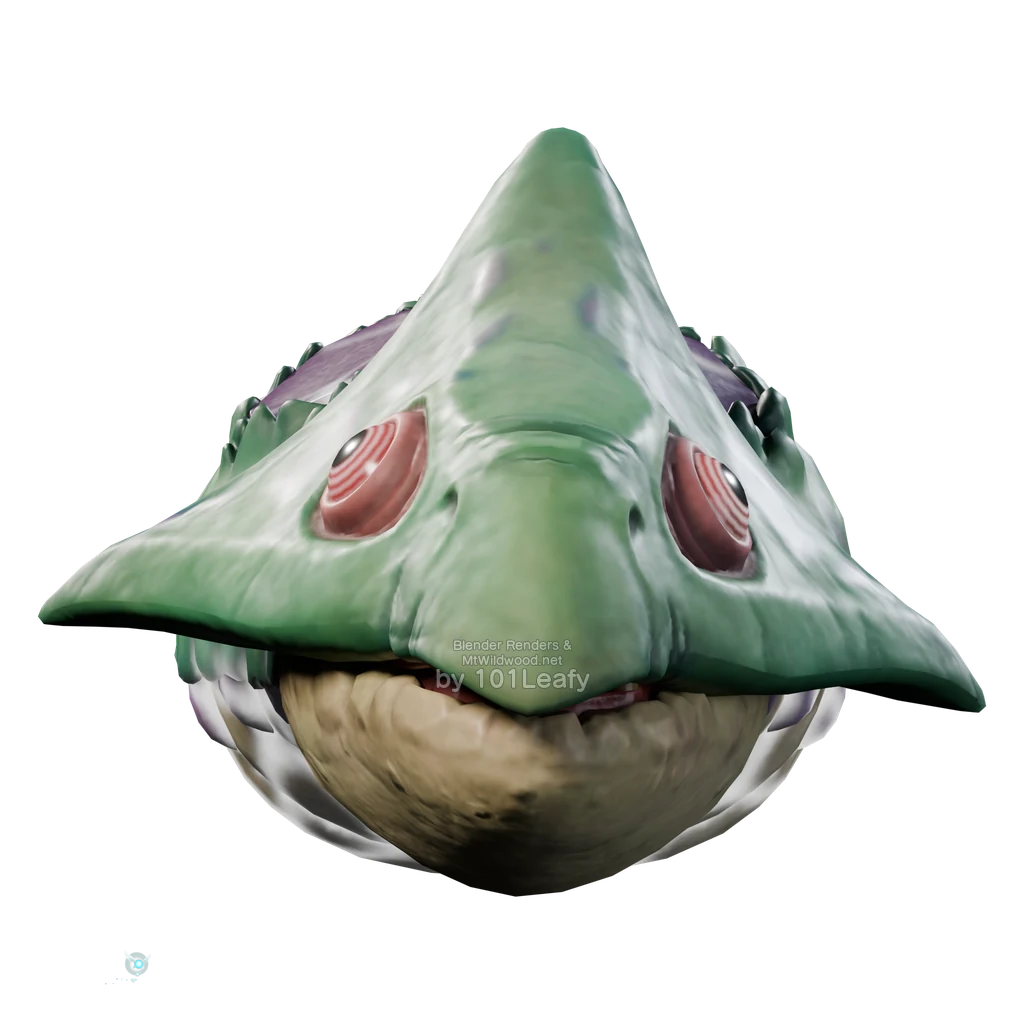
Baby Dodongo
Age: Child
Location: Dodongo Cavern, in the connecting passage with the small Dodongos emerging from the ground.
Defeat: Wait until the creature appears and attack with your sword. Move away from its explosion after being hit.
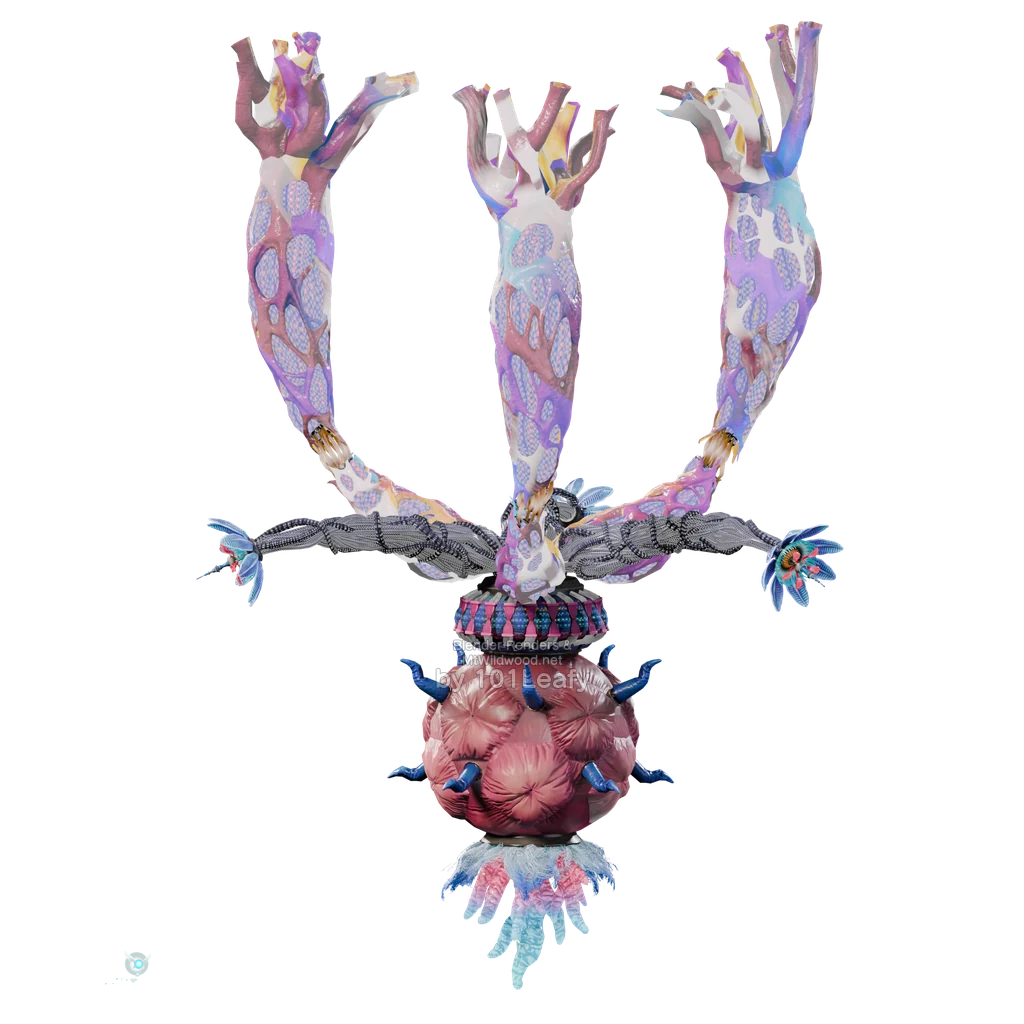
Barinade
Age: Child
Location: Lord Jabu-Jabu’s Belly, final boss chamber at the end of the dungeon.
Defeat: Sever the connections with the boomerang, eliminate the jellyfish, and stun the exposed body. Then attack with the sword.
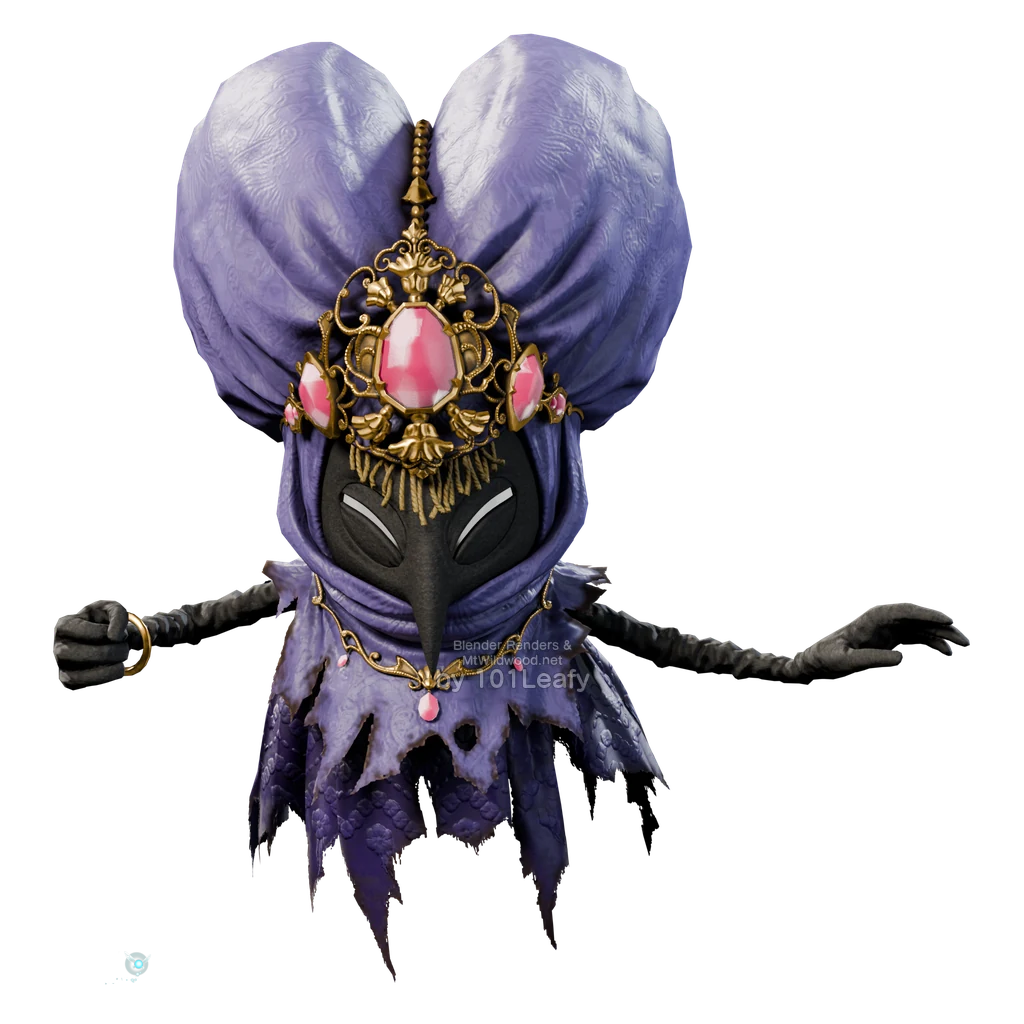
Meg
Age: Adult
Location: Forest Temple, in the central hall after the other three Will-o’-the-Poe Sisters.
Defeat: When the four images appear, watch which one rotates. Hit this original with an Arrow.
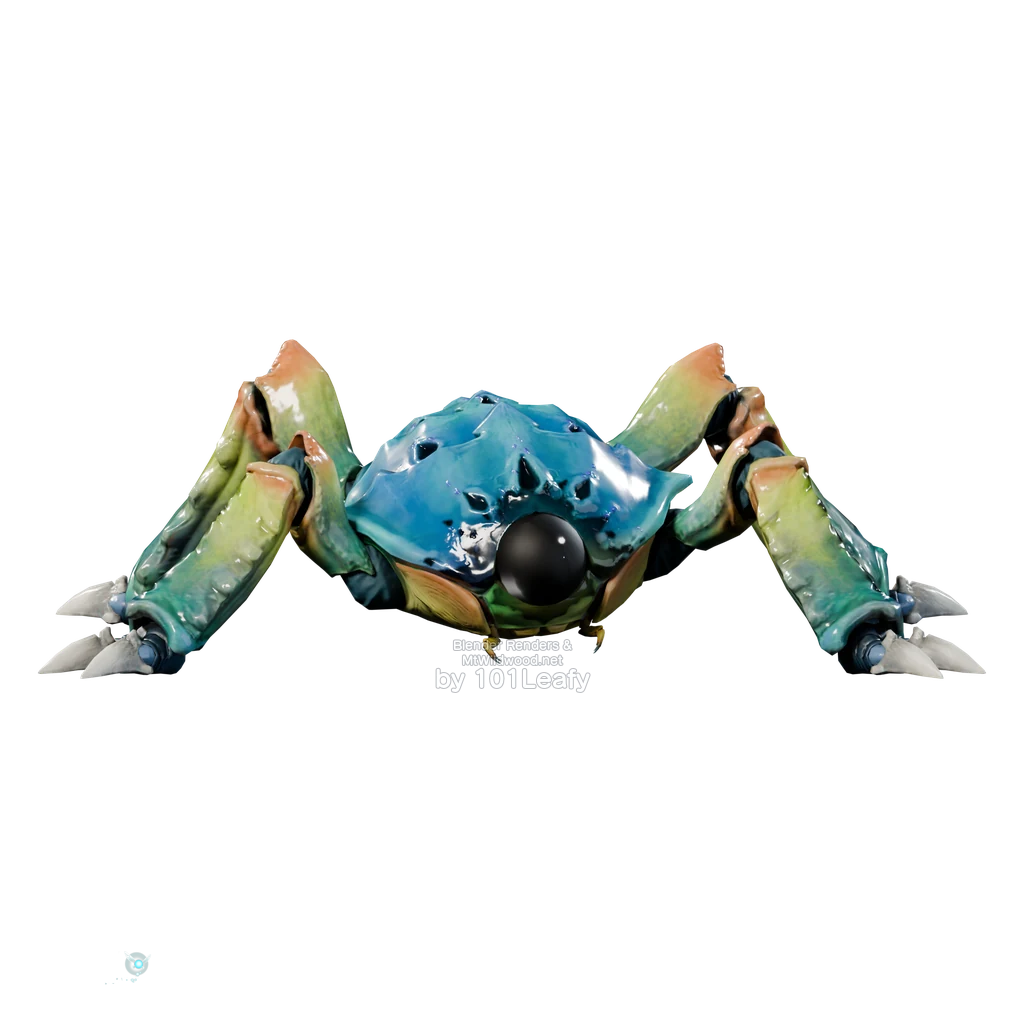
Blue Tektite
Age: Child or Adult
Location: Lake Hylia, at the shallow shorelines; also at the Zora River as a child.
Defeat: Let him jump and hit him with your sword. From the safety of the shore, you can also use your bow or Hookshot.
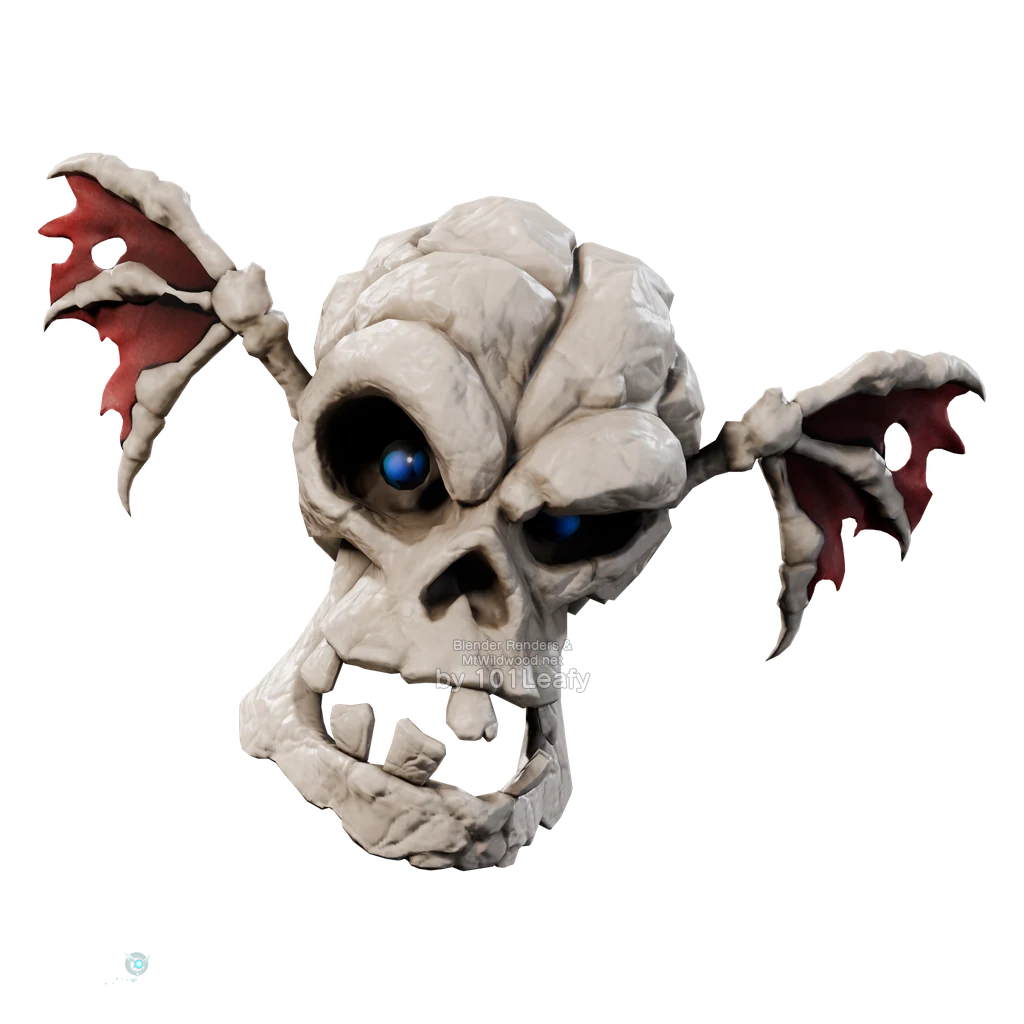
Basic skull model; the aura distinguishes the variants.
Blue Bubble
Age: Adult
Location: Forest Temple, on the way through the interiors and connecting passages.
Defeat: Block the approaching skull with your shield to remove its blue aura. Attack the exposed skull with your sword.

Shabom
Age: Child
Location: Lord Jabu-Jabu’s Belly, in the first corridors and rooms with the floating bubbles.
Defeat: Pop them with your shield or hit them with the Boomerang. The Fairy Slingshot is ineffective against these bubbles.
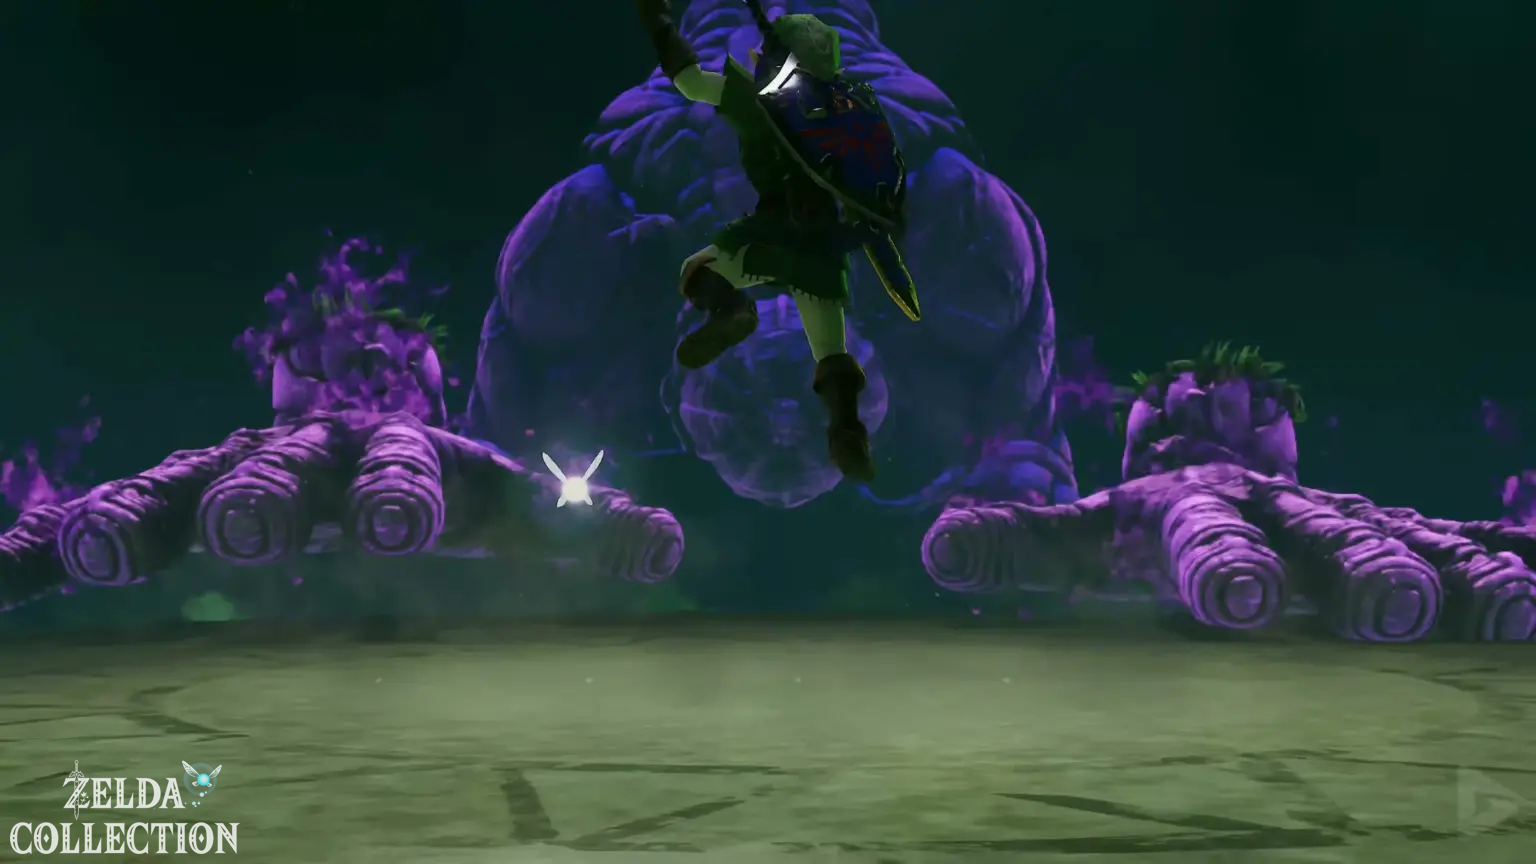
Bongo Bongo
Age: Adult
Location: Shadow Temple, in the Boss chamber on the big drum.
Defeat: Stun both hands with arrows. Make the eye visible with the Eye of Truth, stop the onslaught, and attack the eye with the sword.
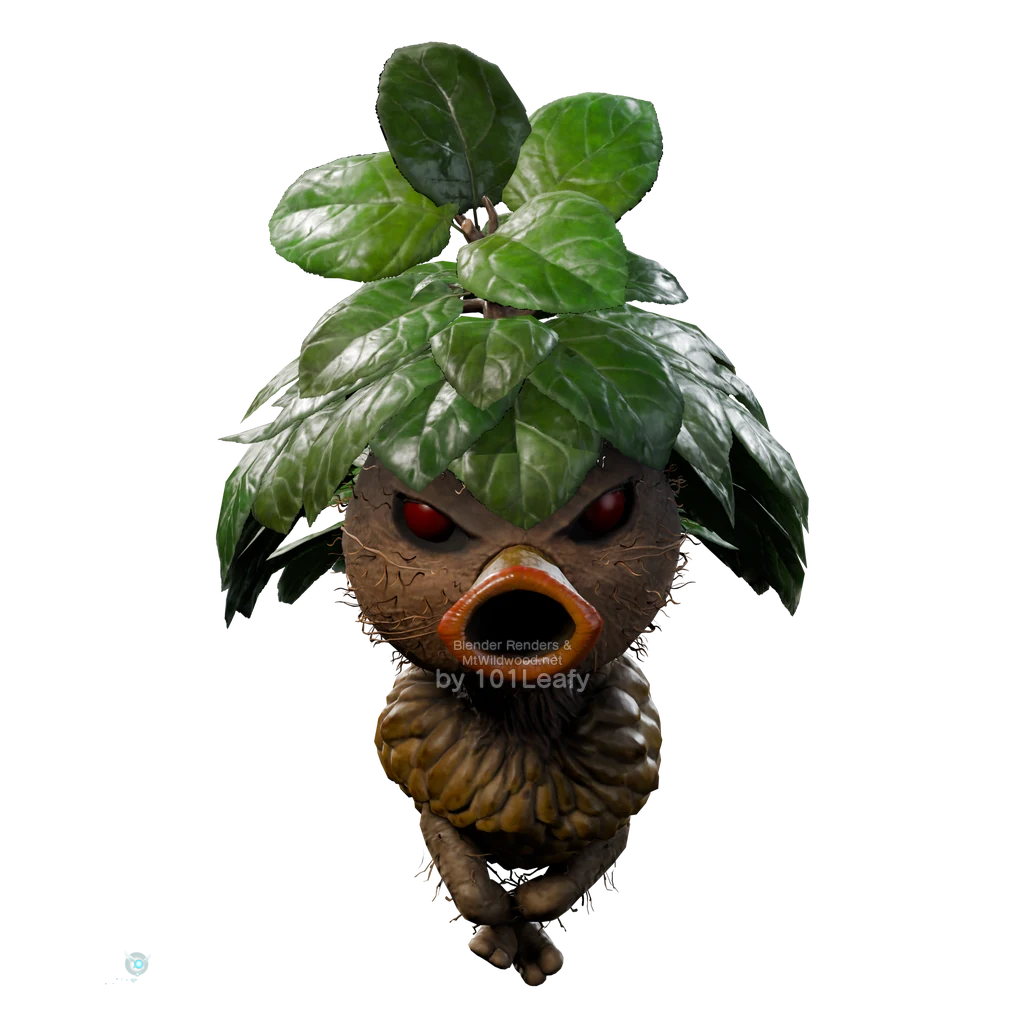
Deku Scrub
Age: Child
Location: In the Great Deku Tree, near the Deku Scrubs guarding the passages with their nuts.
Defeat: Throw the nut back with the Deku Shield and approach the lured Deku Scrub. For the triplets, the order is 2-3-1.
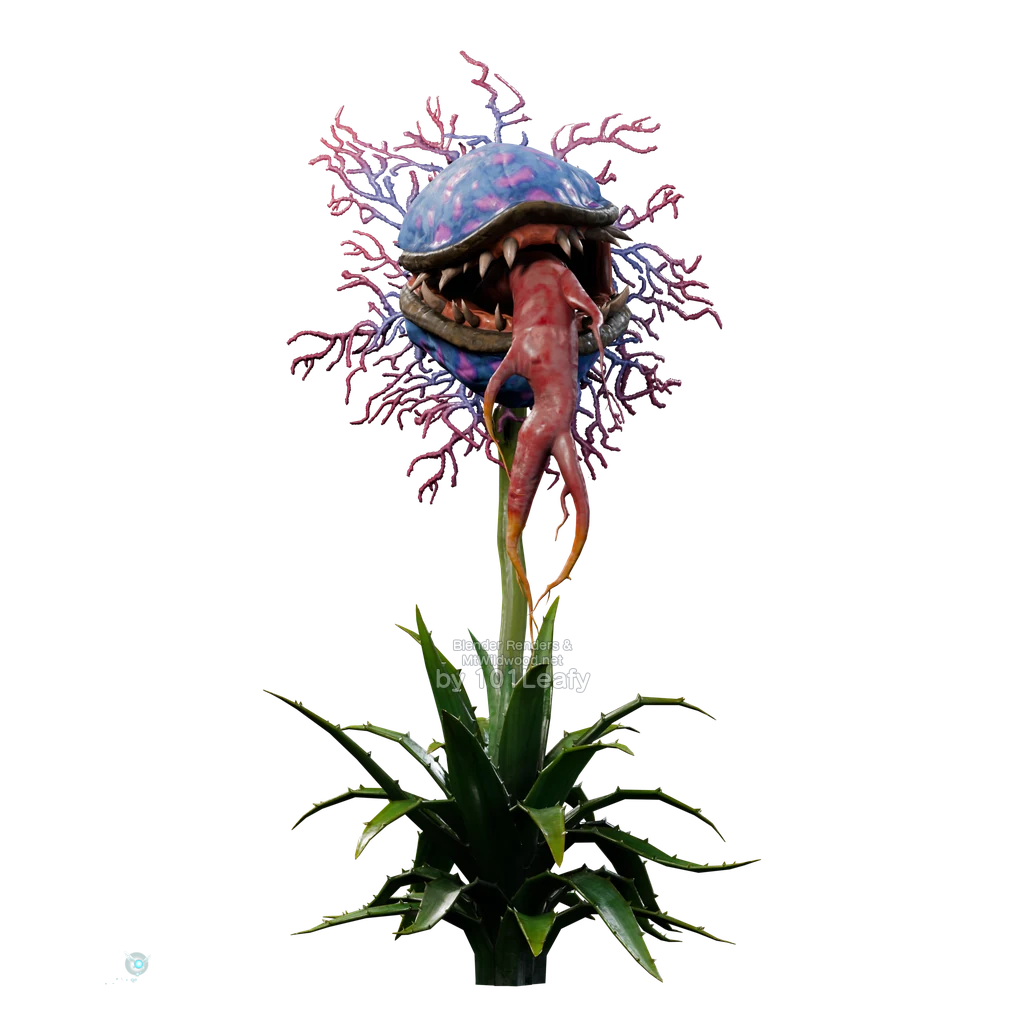
Deku Baba
Age: Child or Adult
Location: Kokiri Forest and Great Deku Tree; as an adult, also in the Forest Temple.
Defeat: Keep your distance, wait for the bite, and then hit the stalk with your sword.
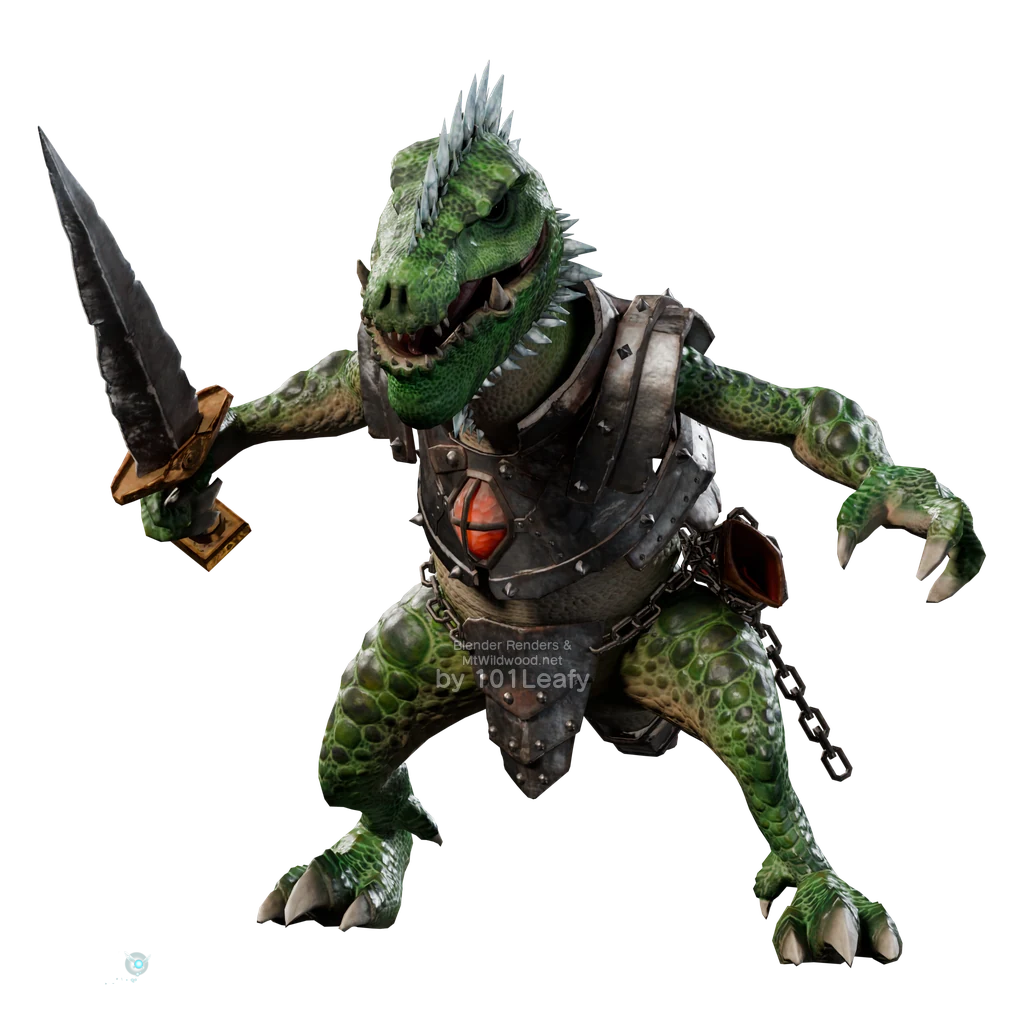
Dinolfos
Age: Adult
Location: Gerudo Proving Grounds, in the combat rooms; further examples in the Spirit Temple and Ganondorf’s Castle.
Defeat: Block or dodge the sword attack and counter in the resulting opening. Stay outside the fire breath.
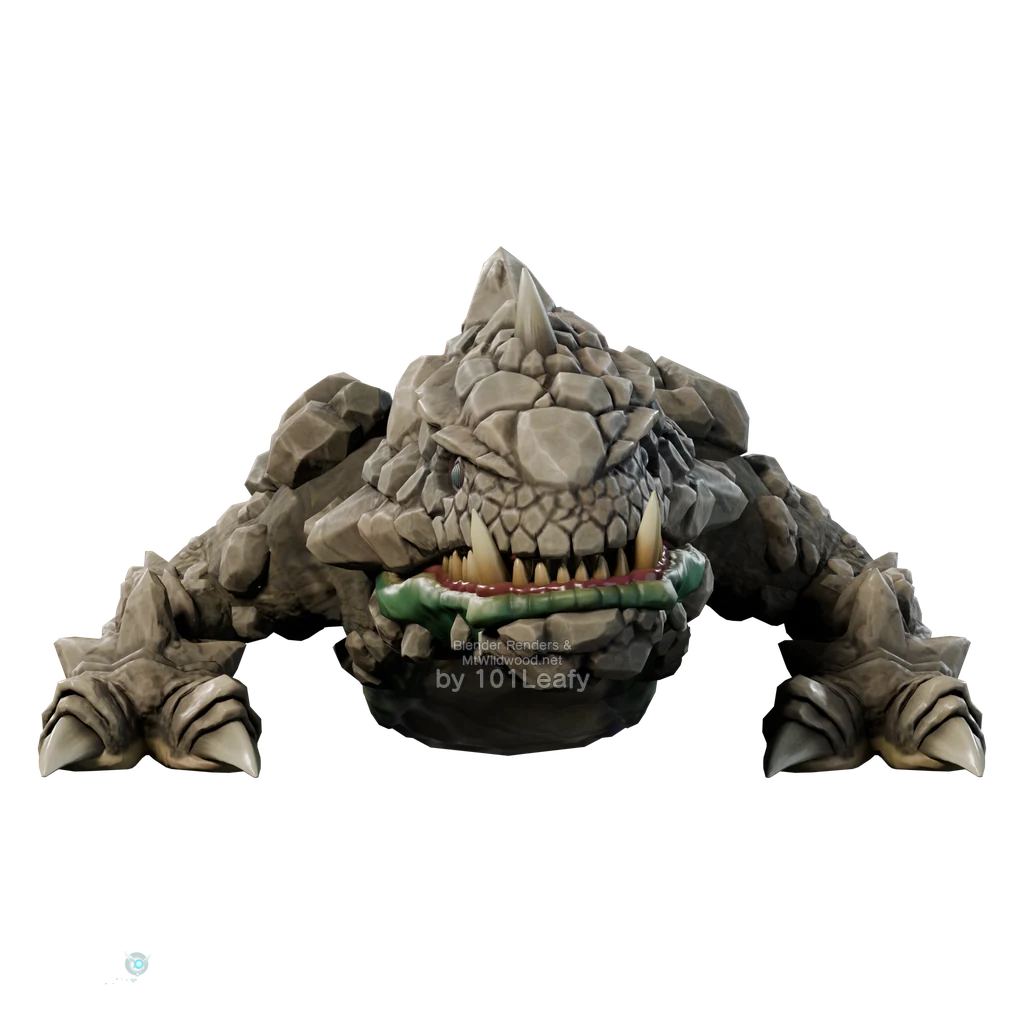
Dodongo
Age: Child
Location: Dodongo Cavern, near the larger fire-breathing lizards in Dungeon.
Defeat: Circle around the fire breath and strike the unprotected tail. After the final hit, move away from the explosion.
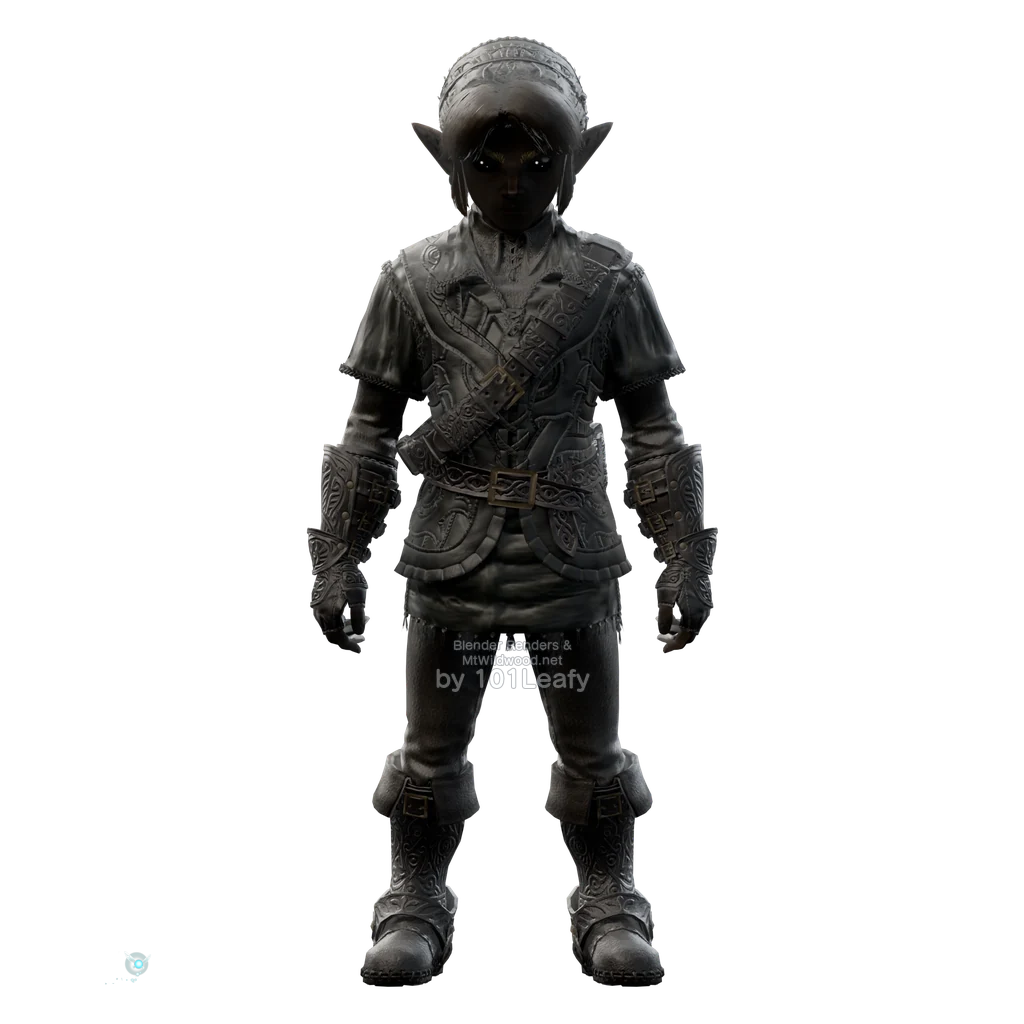
Dark Link
Age: Adult
Location: Water Temple, in the large Mirror room with the tree, in front of the Longshot.
Defeat: Attack with the Megaton Hammer without engaging in a long sword duel. Distance and Din’s Fire also help.
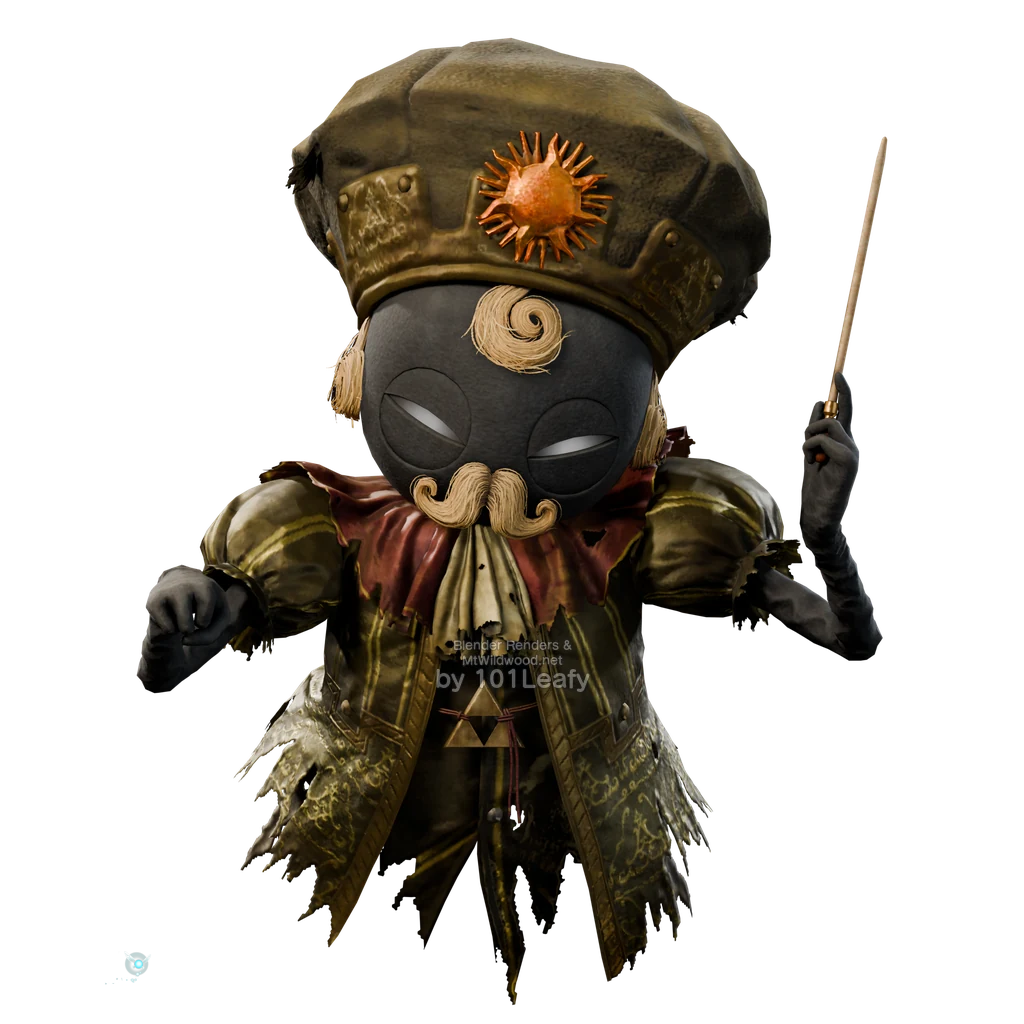
Sharp the Elder
Age: Child or Adult
Location: Graveyard of Kakariko Village, at the composer’s grave inscribed with Sharp the Elder, near the Royal Family Tomb.
Defeat: Read the inscription to make the ghost appear. Wait until it is visible and strike it with your sword.
Monster E-G
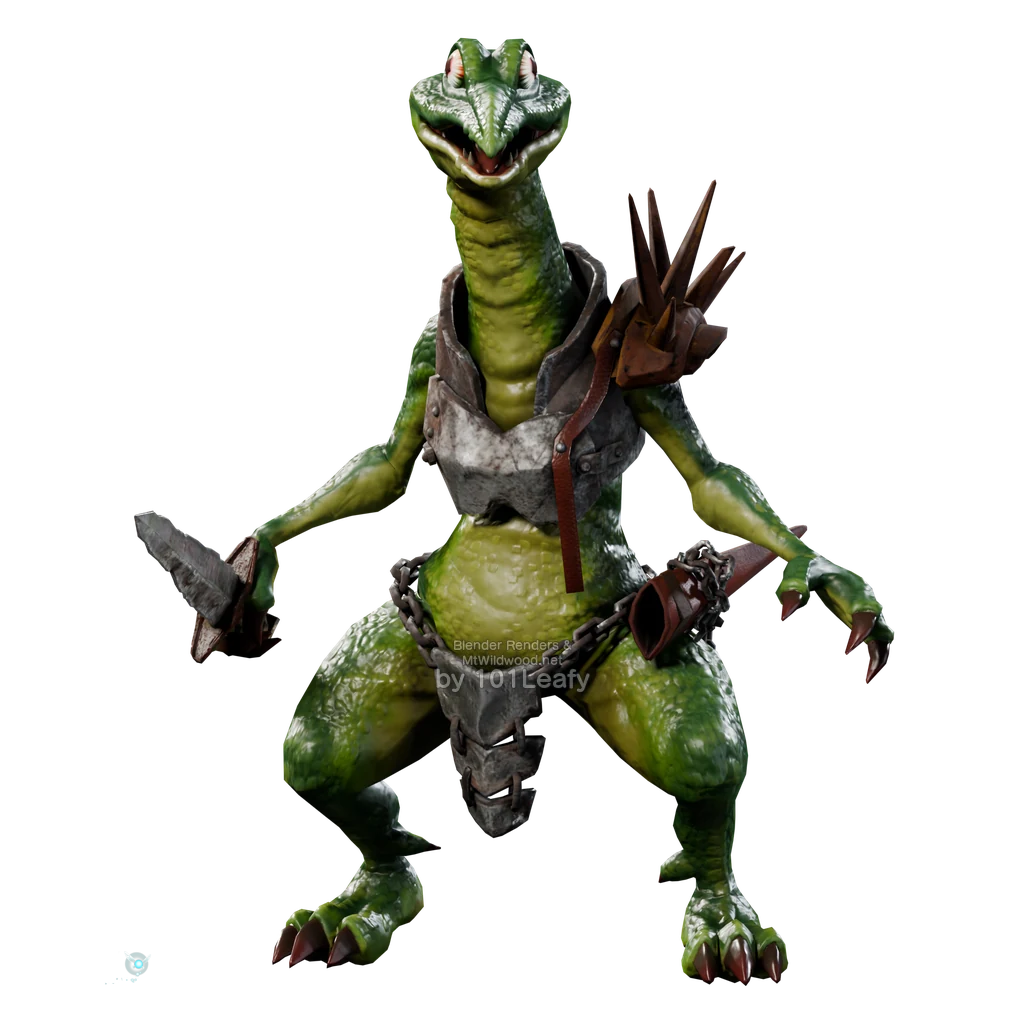
Lizalfos
Age: Child or Adult
Location: Dodongo Cavern, in the two combat rooms on the main path.
Defeat: Keep your shield ready, dodge the attack, and counter with your sword. Defeat both enemies in a room.
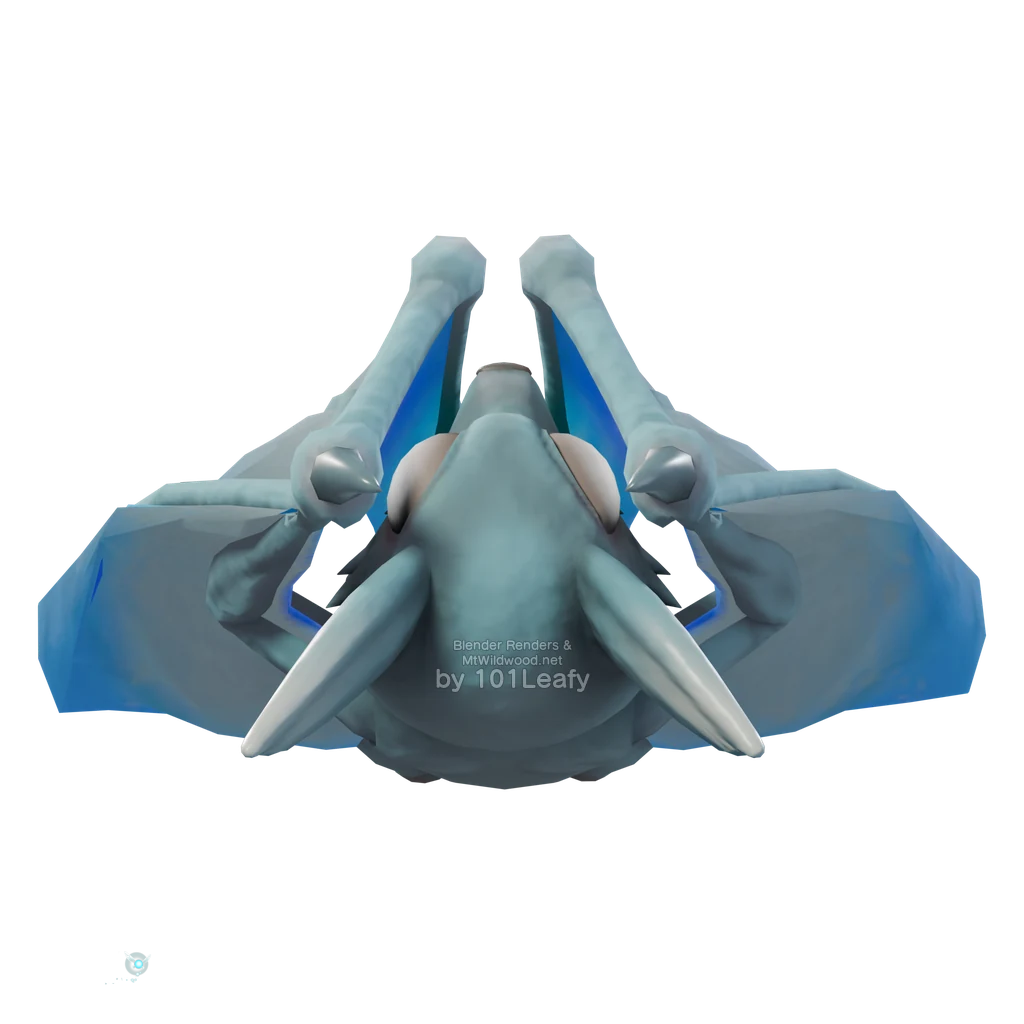
Bat-basic model; fire and ice are recognizable as the shell in the game.
Ice Keese
Age: Adult
Location: Ice Cavern, in the frozen rooms and corridors.
Defeat: Hit the frost-covered bat from a distance with the bow. Avoid physical contact, which freezes Link.
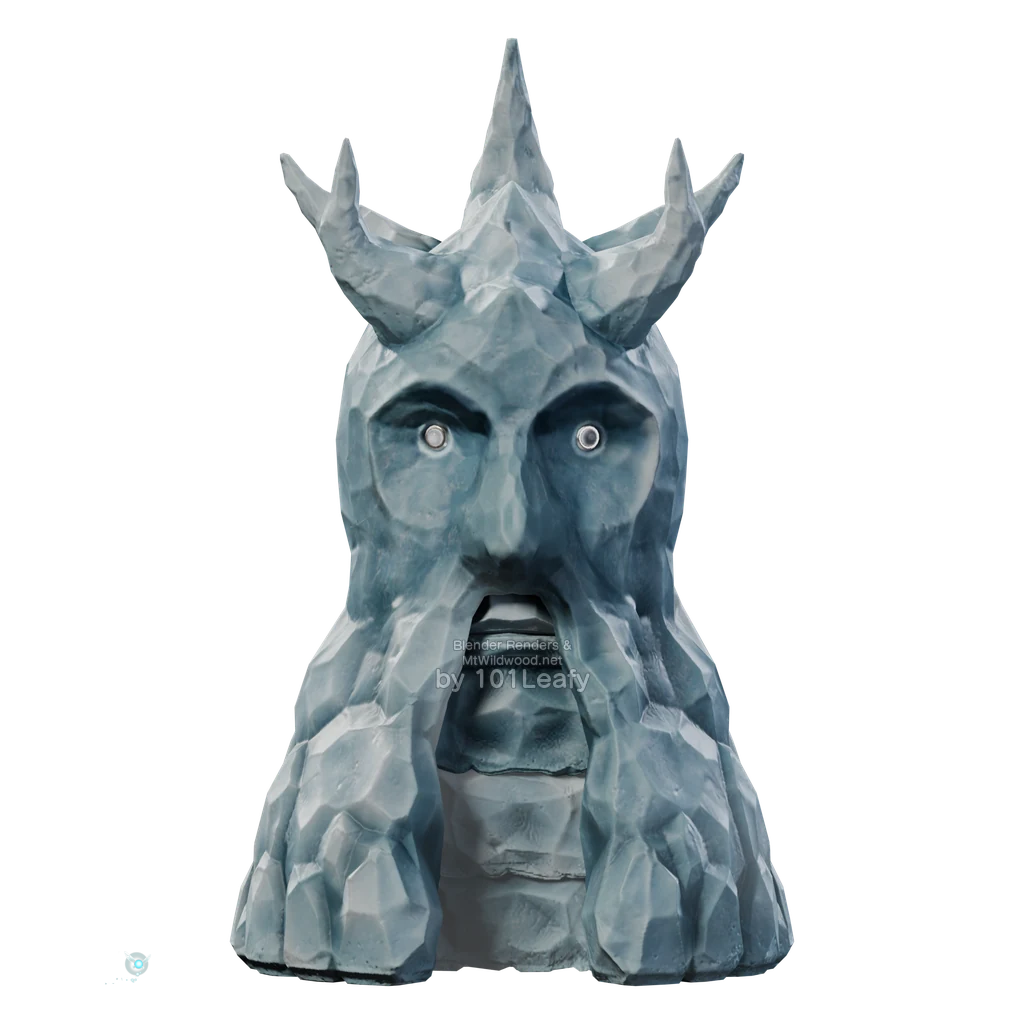
Freezard
Age: Adult
Location: Ice Cavern, near the Ice pillars with faces that exhale cold breath.
Defeat: Dodge the breath to the side and strike with the Megaton Hammer. Bombs and fire also work.
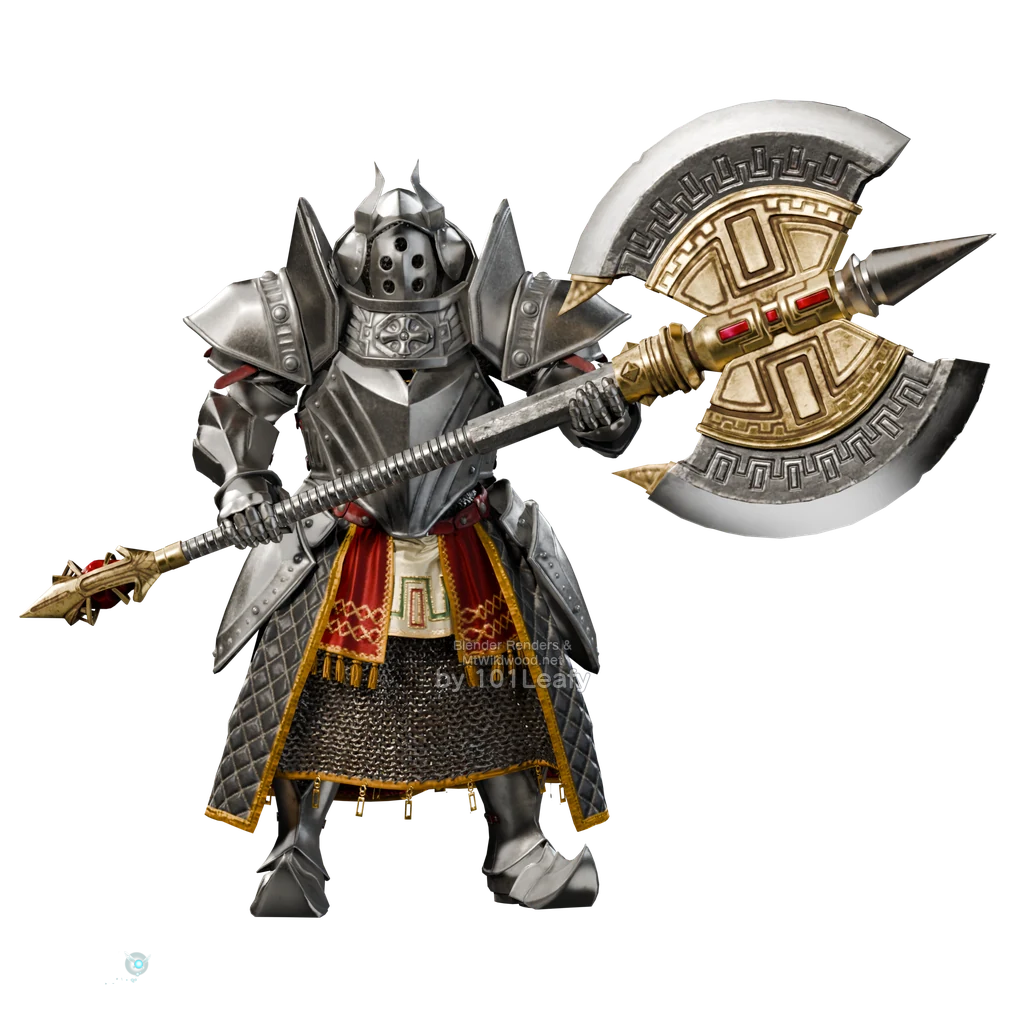
Iron Knuckle
Age: Child and Adult
Location: Spirit Temple: Children’s section, Adult section, and Naboorus’ guarded room; more Iron Knuckles in the tower of Ganondorf’s Castle.
Defeat: Draw out an axe attack, jump back, and counter while the opponent raises the axe. Repeat this even after losing their armor.
Other forms: Defeat the Iron Knuckles in both age sections of the Spirit Temple, Nabooru’s enchanted form, and the pair in the final tower. The different armor sets and the Nabooru encounter are among the forms in this entry.
Route and locations in our walkthrough
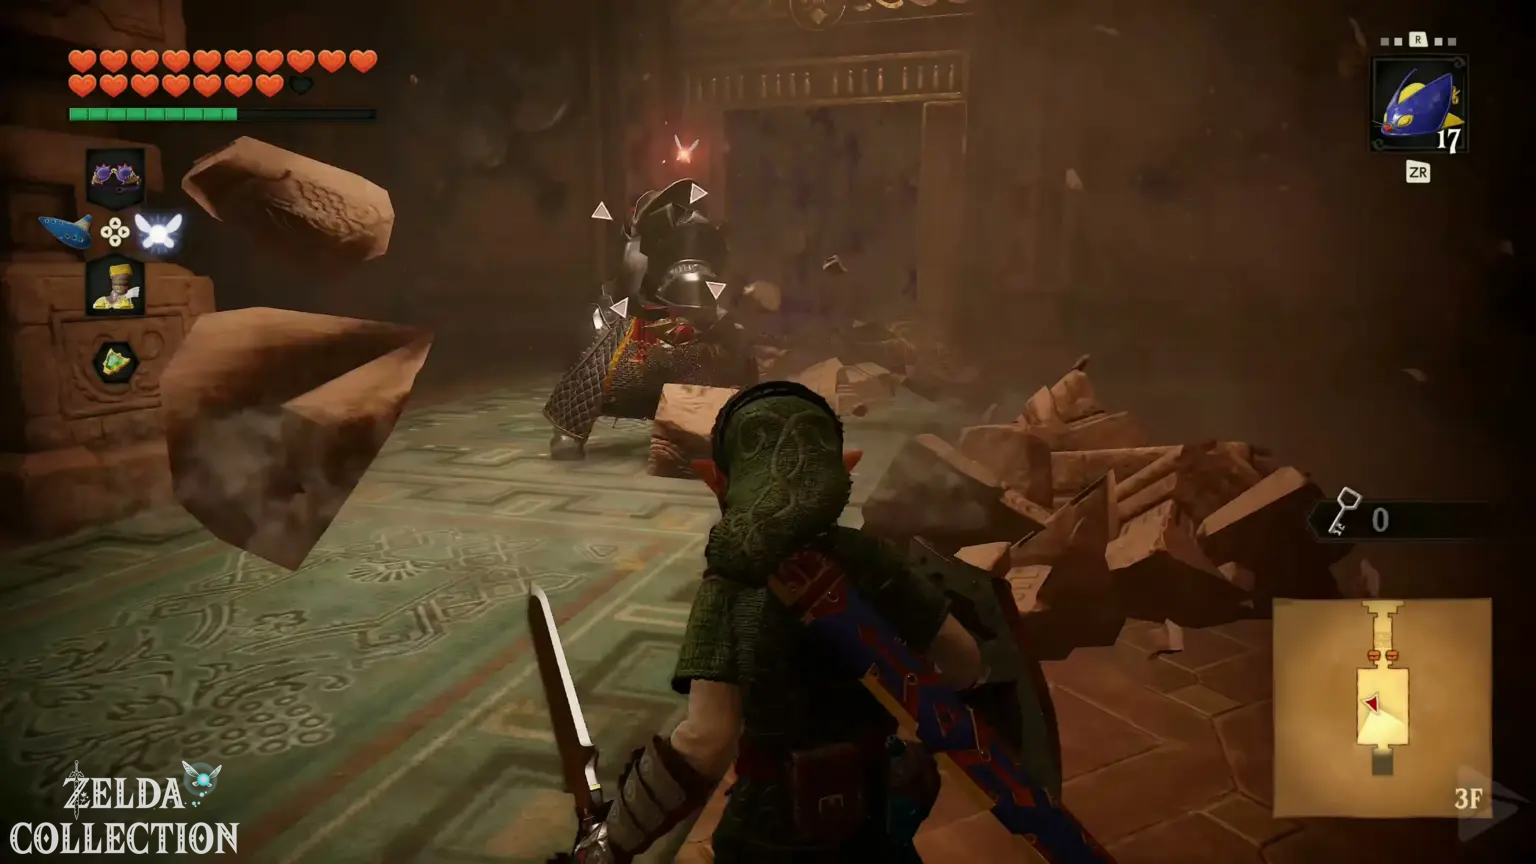
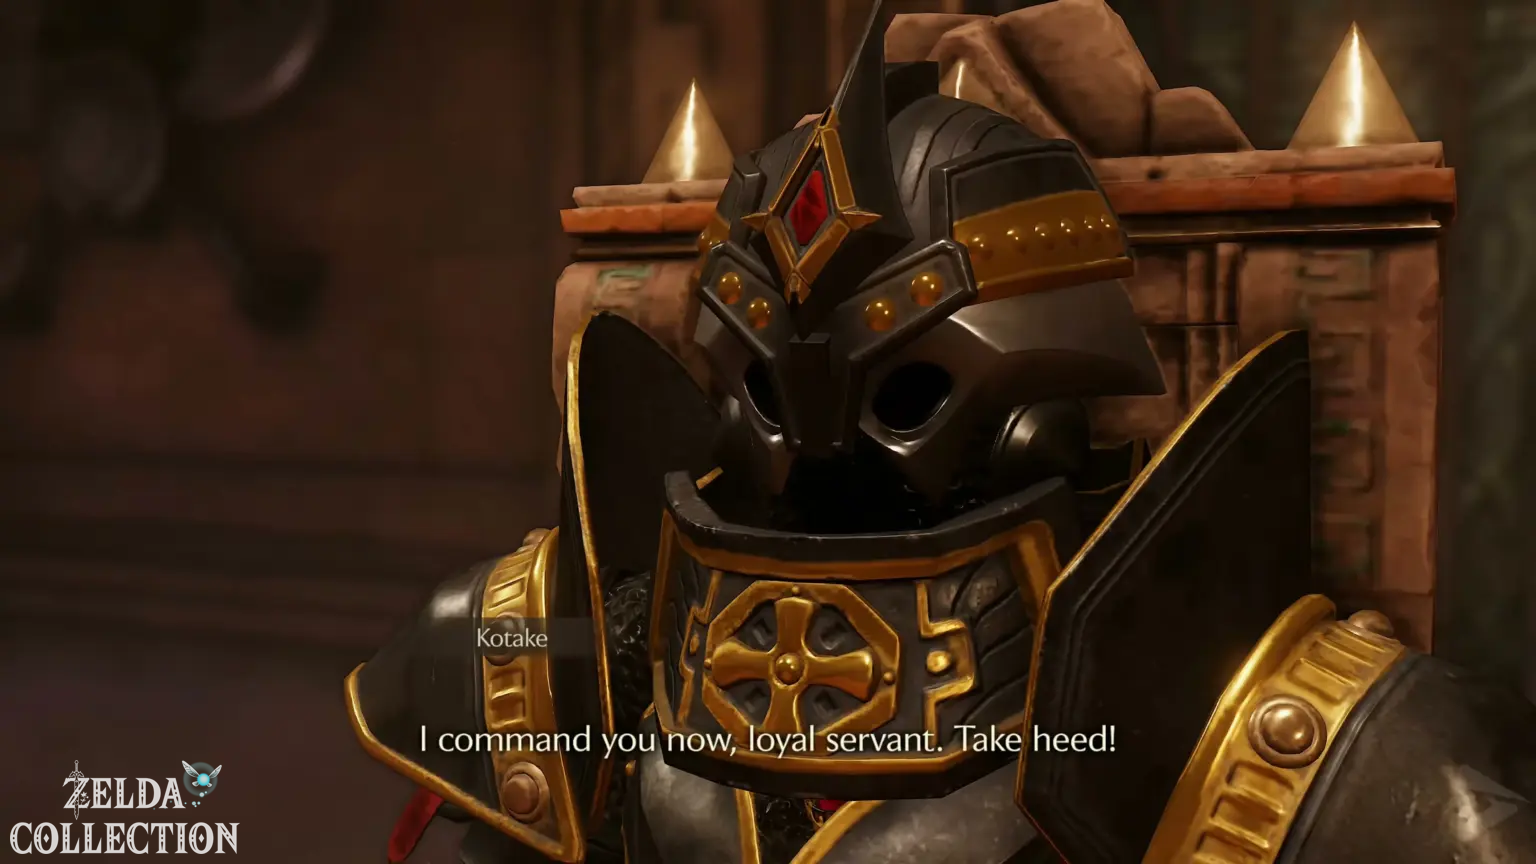
Recognize the Iron Knuckle forms in the game
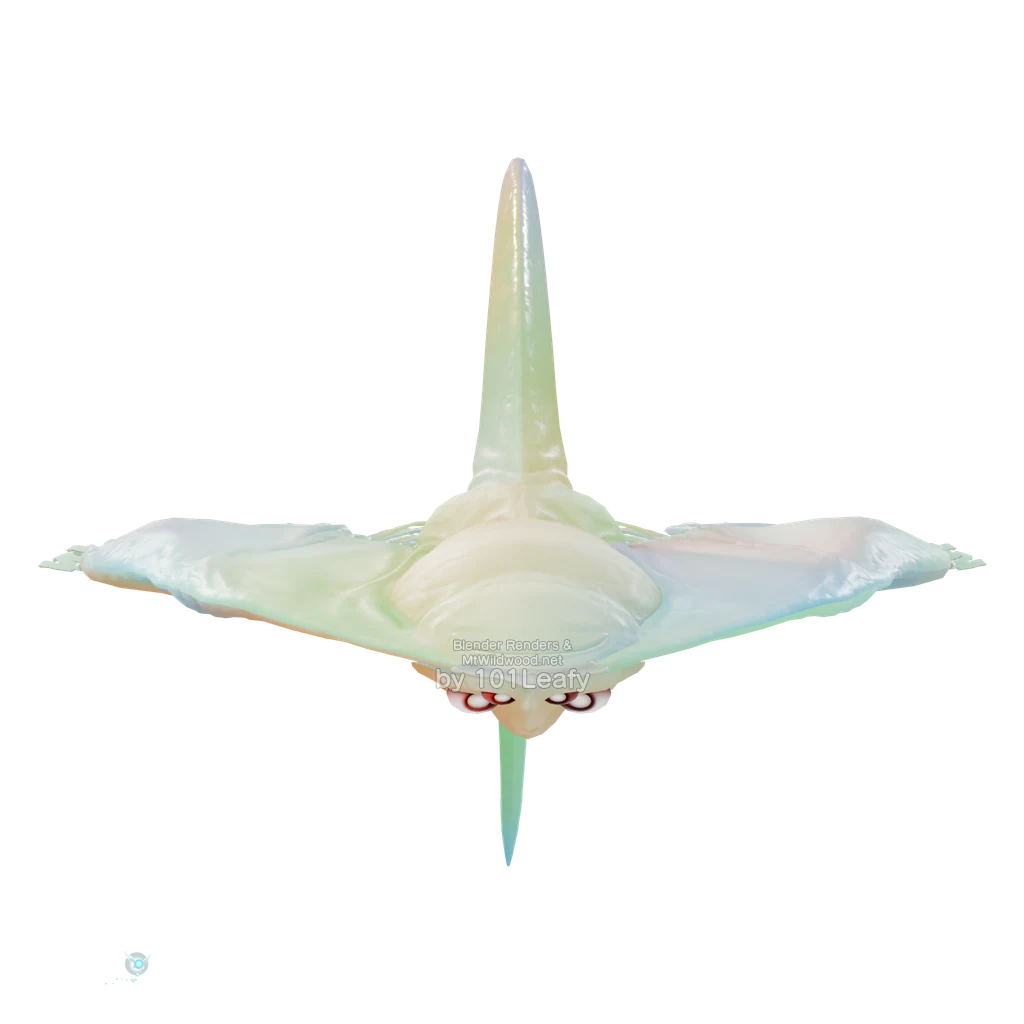
Stinger
Age: Child or Adult
Location: Lord Jabu-Jabu’s Belly, in the rooms with the flat rays lurking in the floor; later also in the Water Temple.
Defeat: Lure the enemy out of hiding. Stun him as a child with the Boomerang and attack as soon as he is within reach.
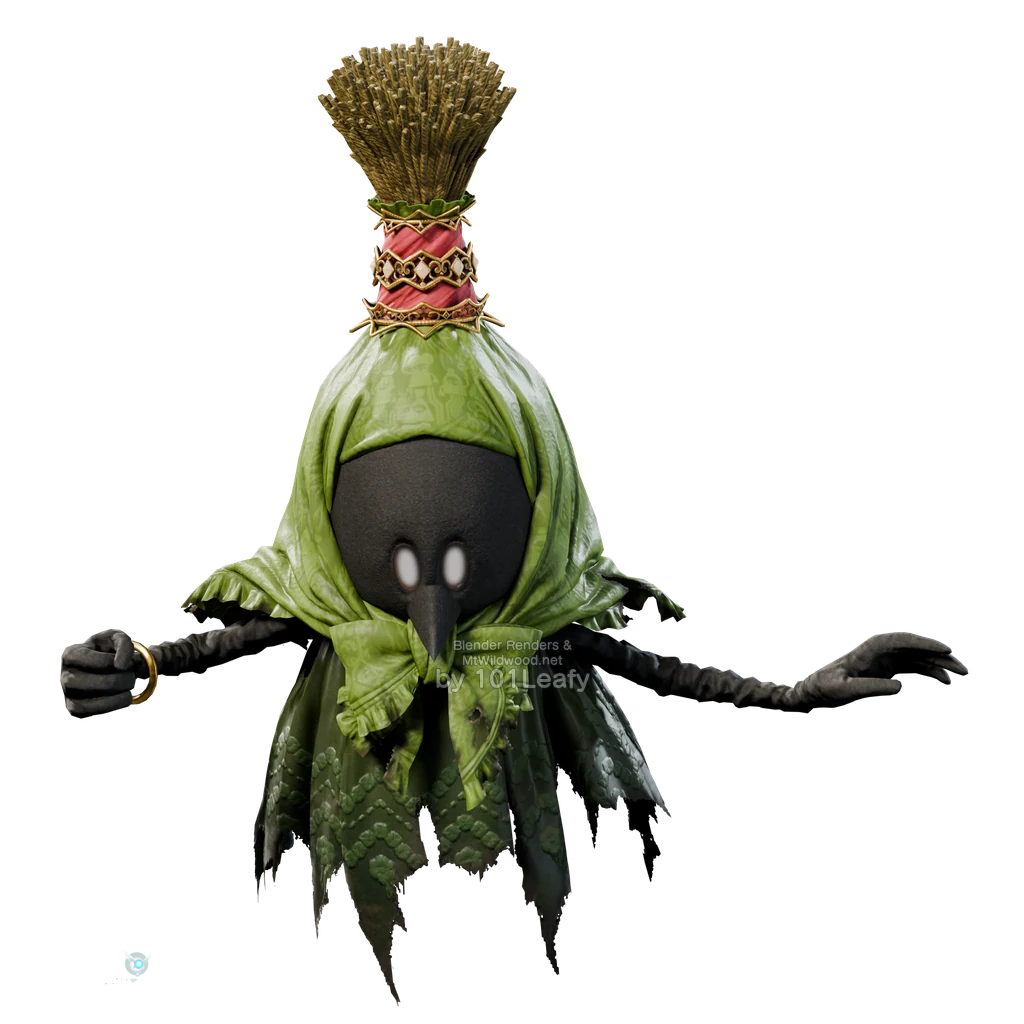
Amy, Fourth Born
Age: Adult
Location: Forest Temple, during the puzzle with the falling picture blocks.
Defeat: Shoot the picture and assemble the blocks within the time limit. Defeat the sister who appears afterward with arrows as soon as she is visible.
Bat-Keese base model; Fire and Ice are recognizable in-game as the shell.
Fire Keese
Age: Child or Adult
Location: Dodongo Cavern or Fire Temple, near the flame-encased bats.
Defeat: Shoot them down with the slingshot or bow. As a child, keep the Deku Shield away from the flames.
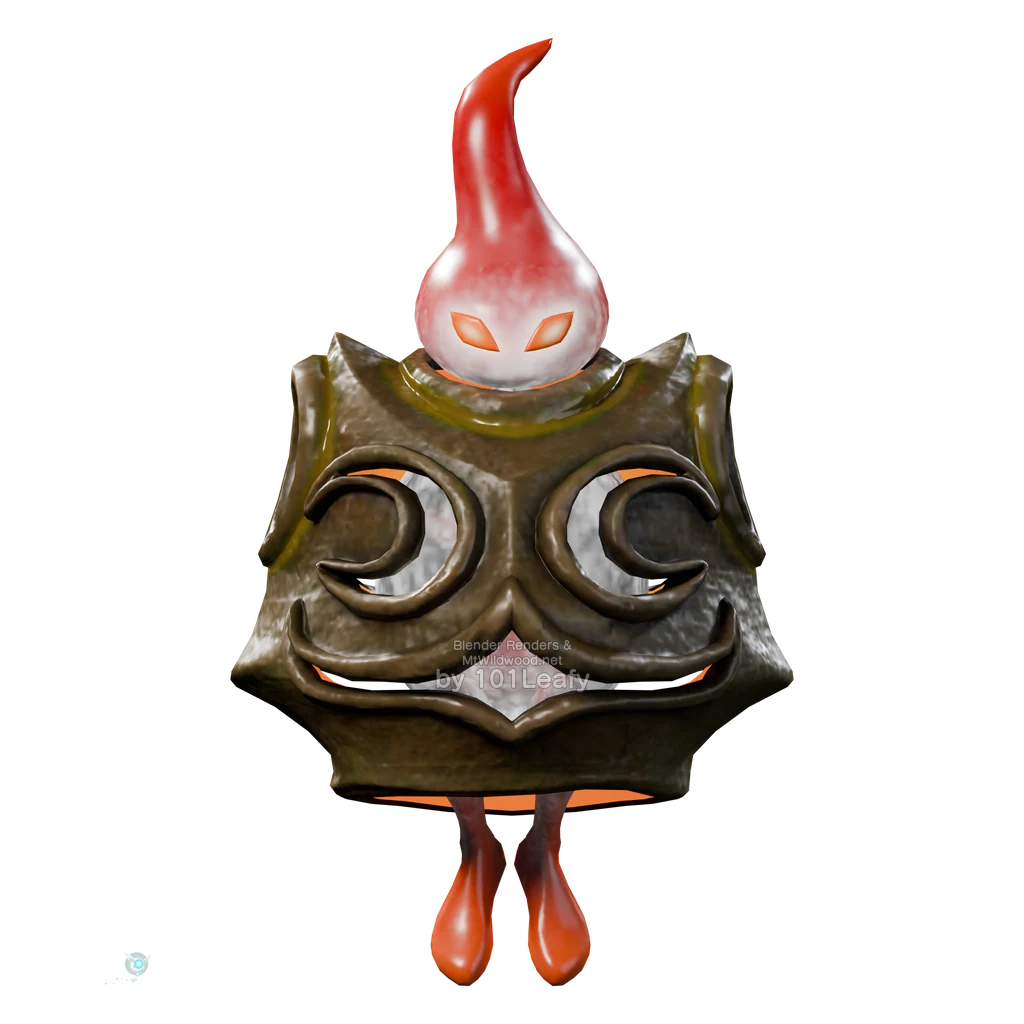
Flare Dancer
Age: Adult
Location: Fire Temple, initially On the way to the Megaton Hammer and later in the lower wing before the Boss Key.
Defeat: Pull the core out of the fire shell with the Hookshot and catch it with your sword. In the second fight, you can also dislodge the core by striking the ground with a hammer.
Bat-Basic model; fire and ice are recognizable as the shell in the game.
Keese
Age: Child or Adult
Location: Dodongo Cavern, cemetery tombs, or the dark chambers of the fire temple.
Defeat: Hit a bat without a fire or ice shell using a sling, bow, or sword.
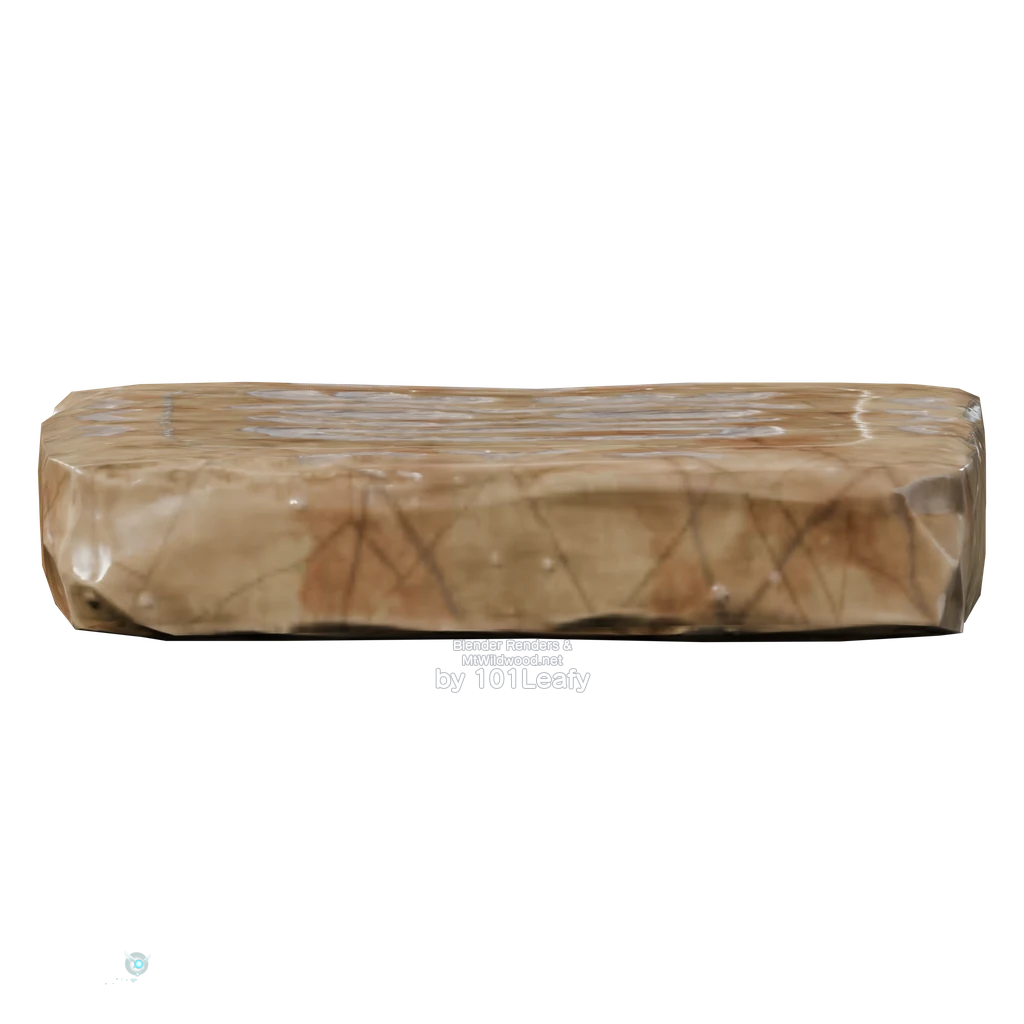
Flying Tile
Age: Adult
Location: Fire Temple, in the first room Gold Skulltula behind the time block; another room lies on the way to the Boss Key.
Defeat: Hold up the shield and let the attacking floor tiles shatter against it.
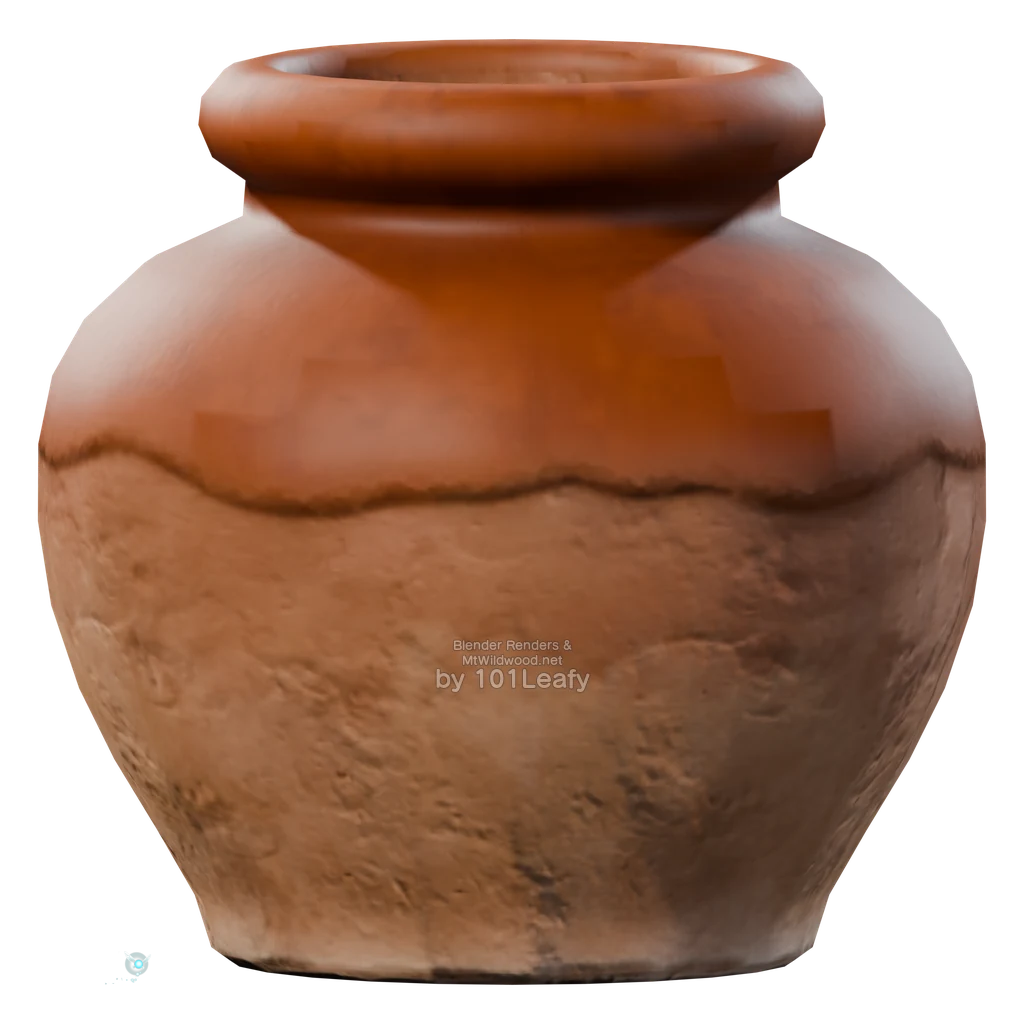
Flying Pot
Age: Adult
Location: Shadow Temple, in the corridors with Individual attacking jugs; also in the Ice Cavern and the Spirit Temple.
Defeat: Approach until the jug flies off, then smash it against the shield or destroy it with a single hit.
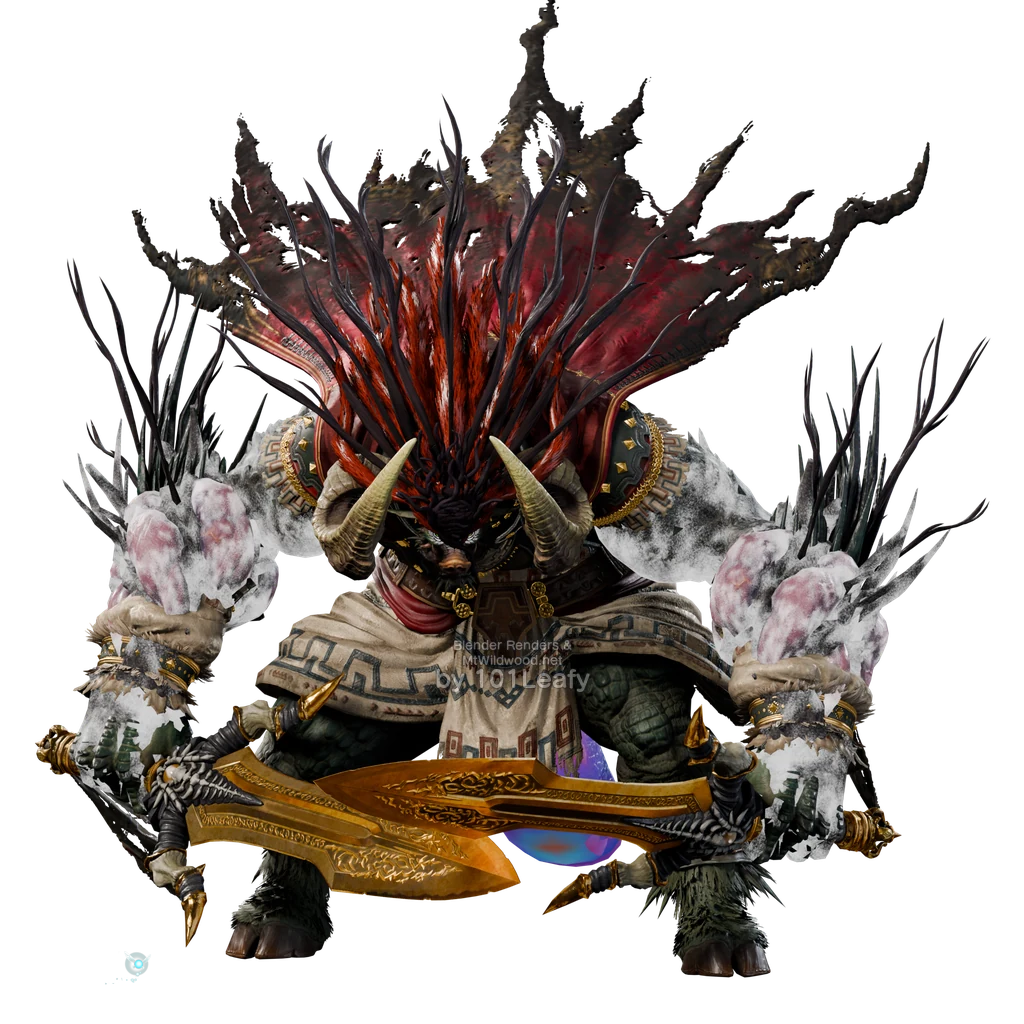
Ganon
Age: Adult
Location: After the collapse of Ganondorf’s tower, in the final battle of the story.
Defeat: Dodge past him and strike his tail. During the battle, take Zelda’s Master Sword and use it to finish the fight.
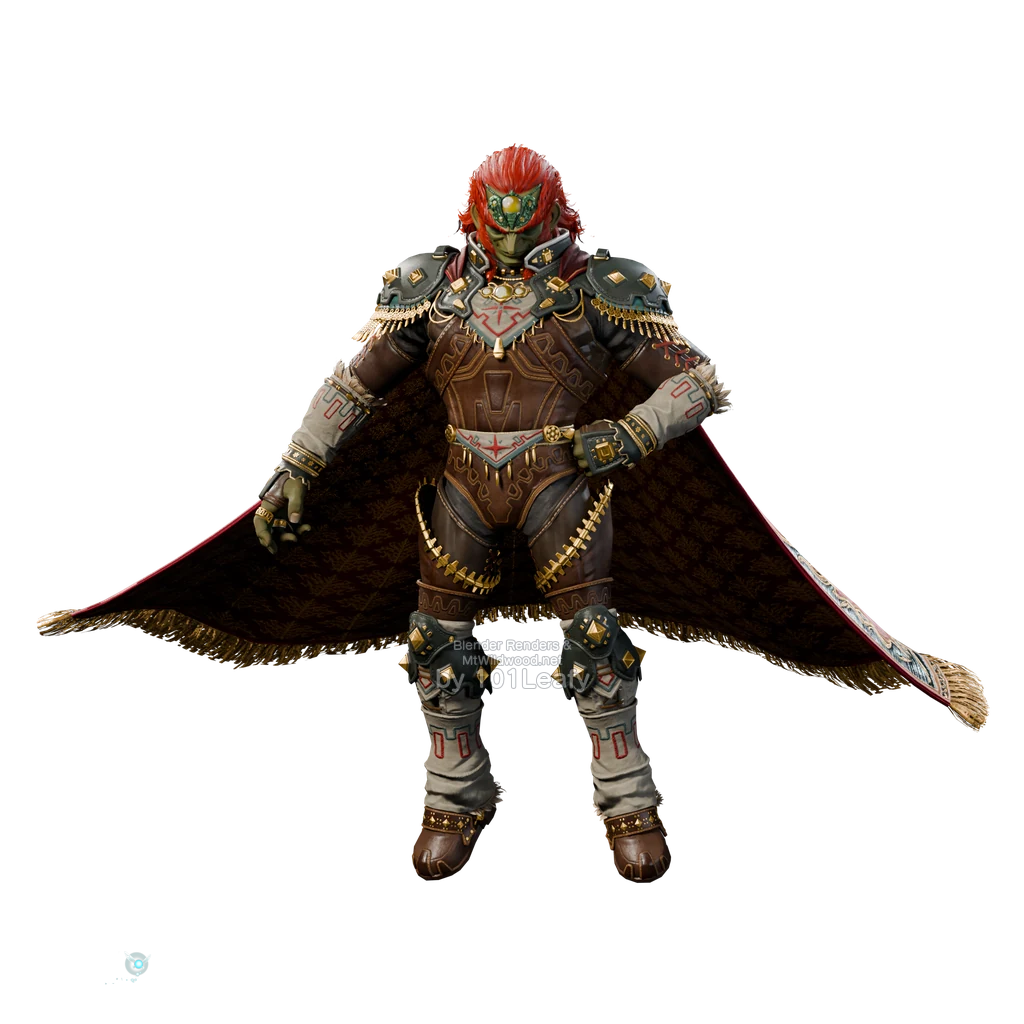
Ganondorf
Age: Adult
Location: Ganondorf’s Castle, in the top chamber of the tower.
Defeat: Repel the energy ball, stun Ganondorf with a Light Arrow, and reach him for sword strikes.
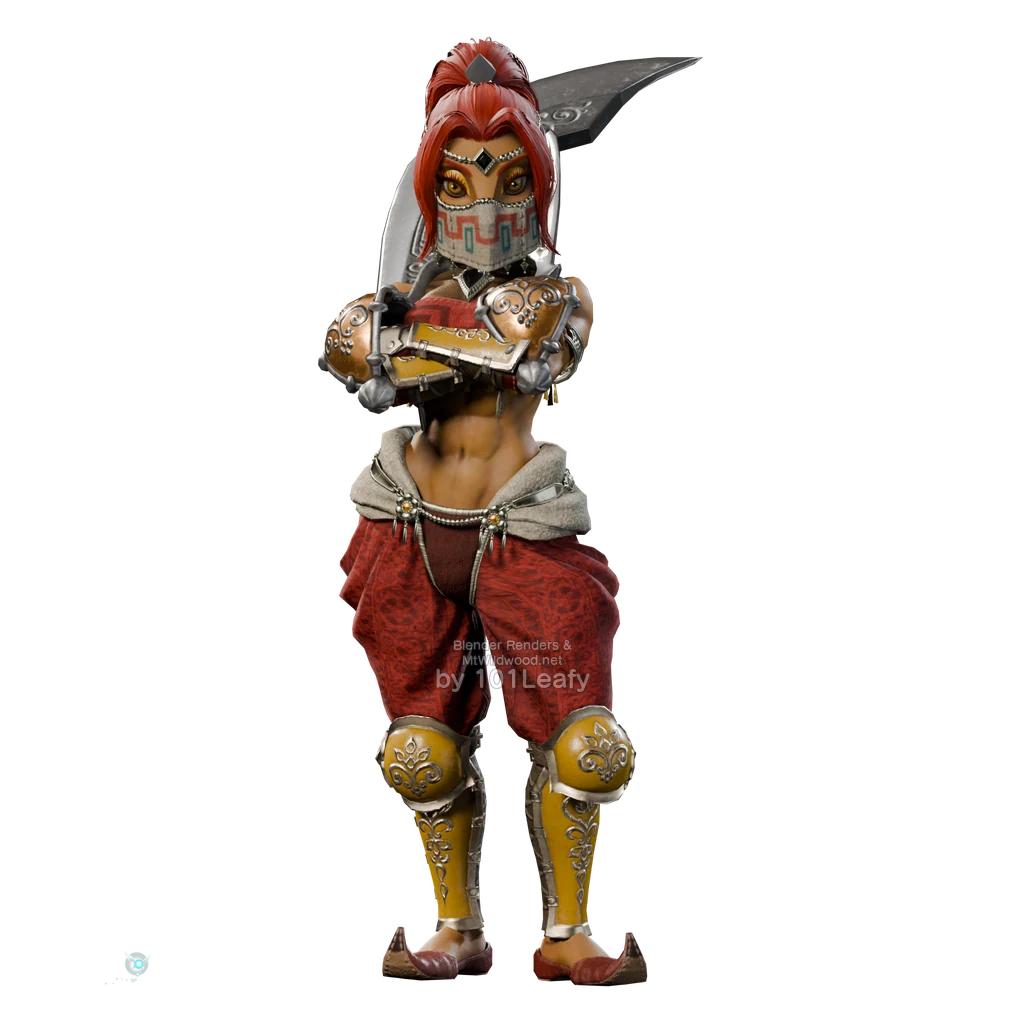
Gerudo Thief
Age: Adult
Location: Gerudo Fortress, near the prison cells of the four carpenters.
Defeat: Defeat one of the warriors with the two blades. Especially dodge her spinning attack and use the pause after her strikes.
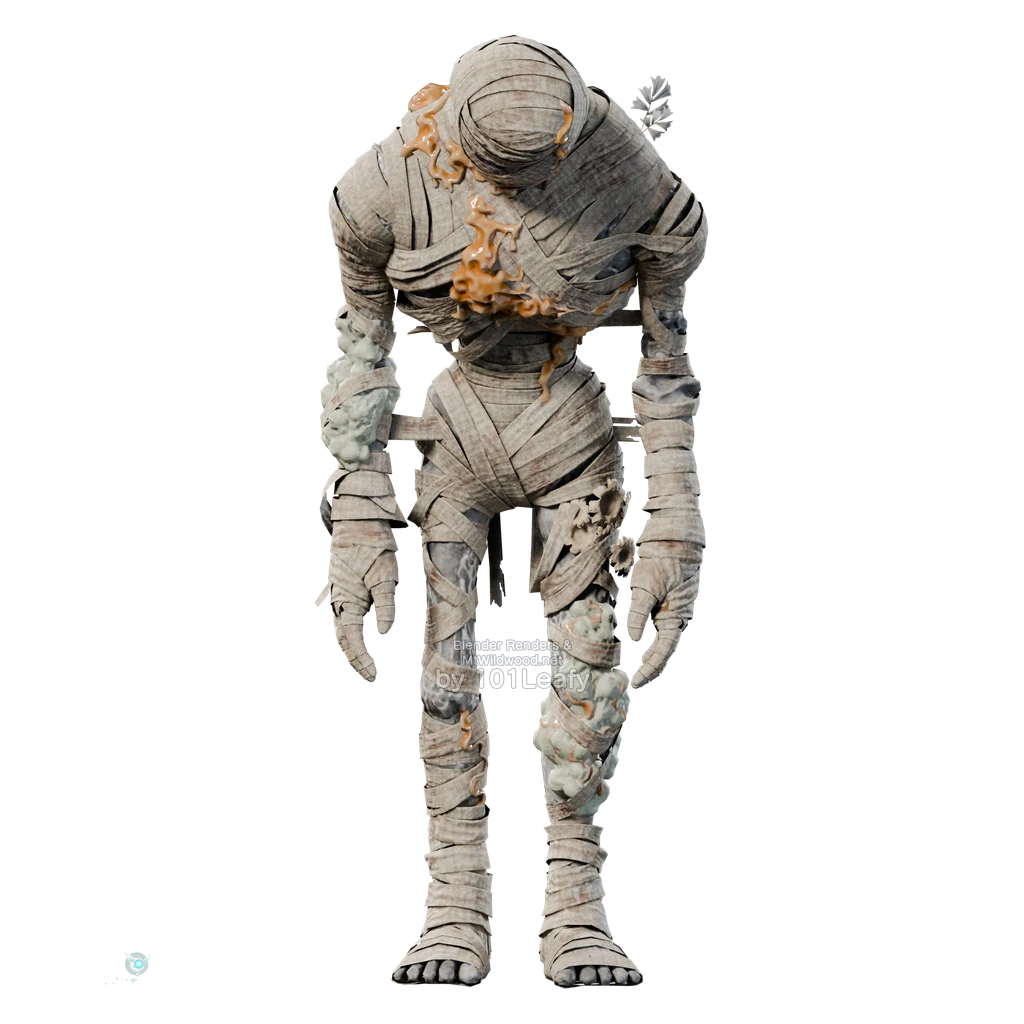
Gibdo
Age: Child or Adult
Location: Bottom of the Well or Shadow Temple, in the rooms with bandaged Undead.
Defeat: Play Sun’s Song to freeze them and attack from behind with your sword.
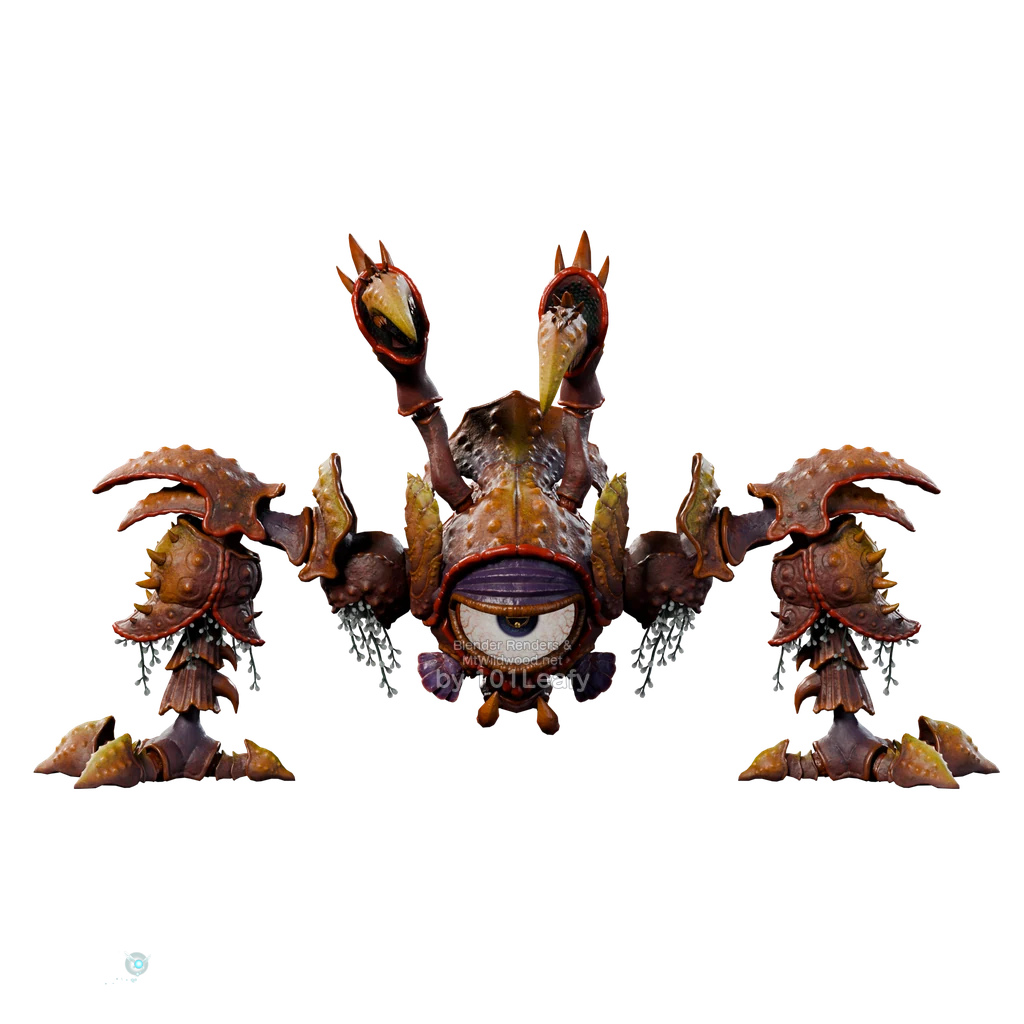
Gohma
Age: Child
Location: Great Deku Tree, in the Boss chamber below the cellar.
Defeat: Hit the red eye with the Fairy Slingshot while Gohma is on the ground, and attack the stunned eye with the sword.
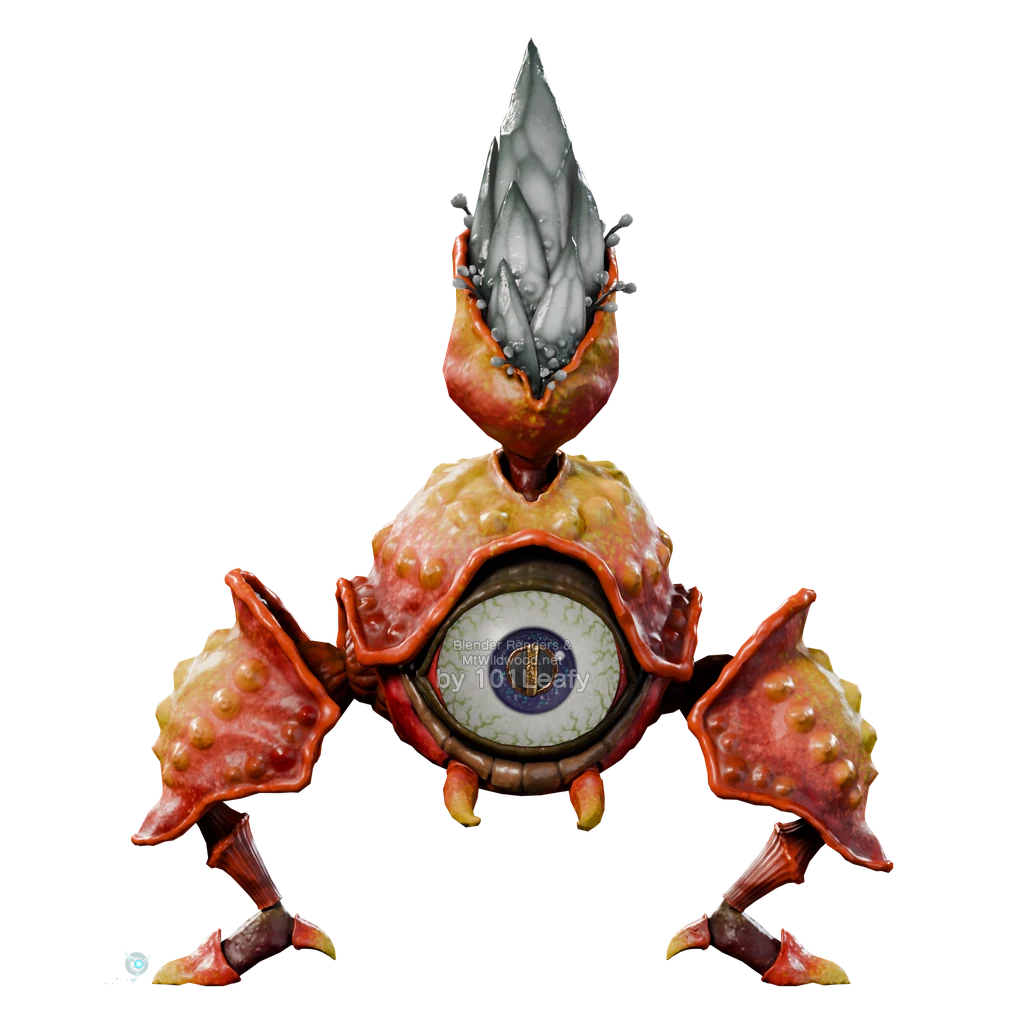
Gohma Larva
Age: Child
Location: Great Deku Tree, in the rooms with Gohma eggs; also during Gohma’s battle, when eggs hatch.
Defeat: Hatch an egg and defeat the walking hatchling with the sword. Destroying an egg does not replace defeating the baby.
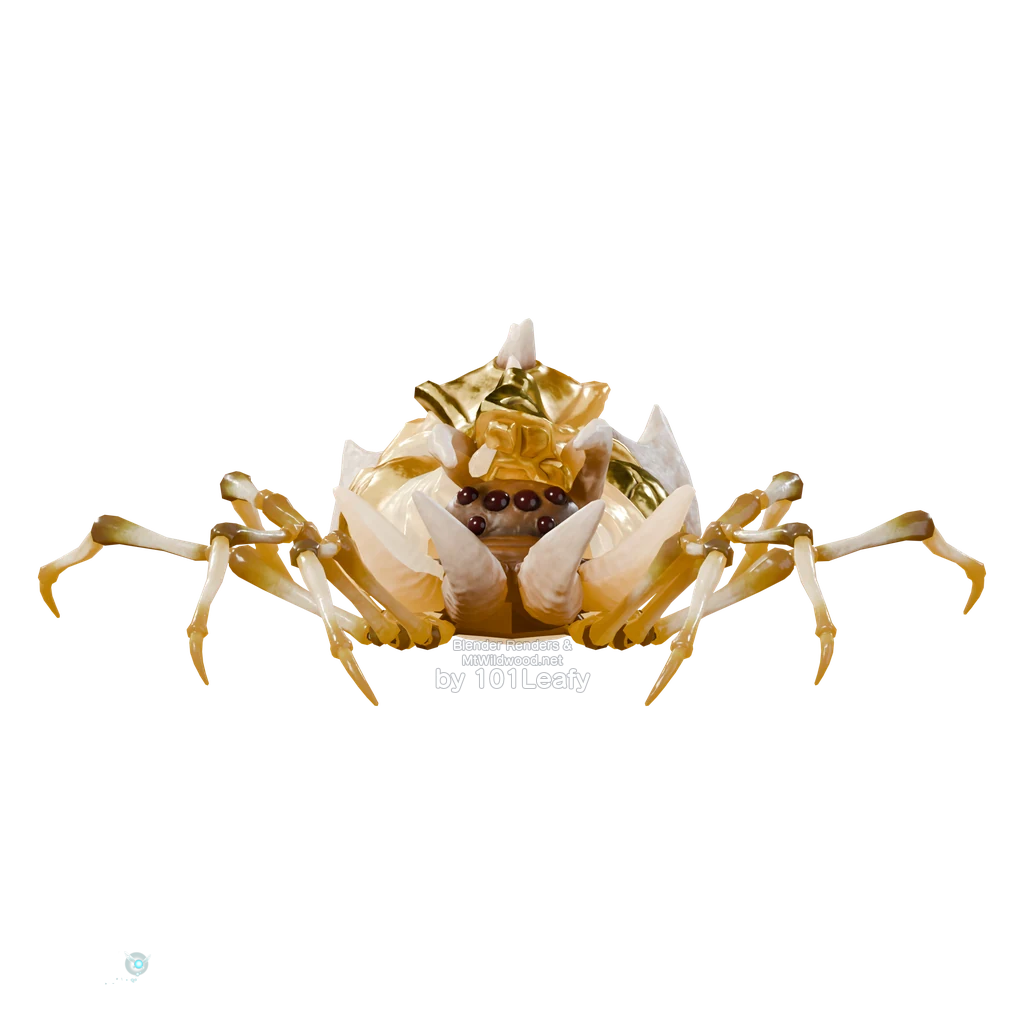
Gold Skulltula
Age: Child or Adult
Location: In the Collection points in Hyrule and the dungeons, for example, in the Great Deku Tree or on houses in Kakariko Village.
Defeat: Defeat a golden spider with a sword, slingshot, boomerang, or hookshot and collect its golden token.
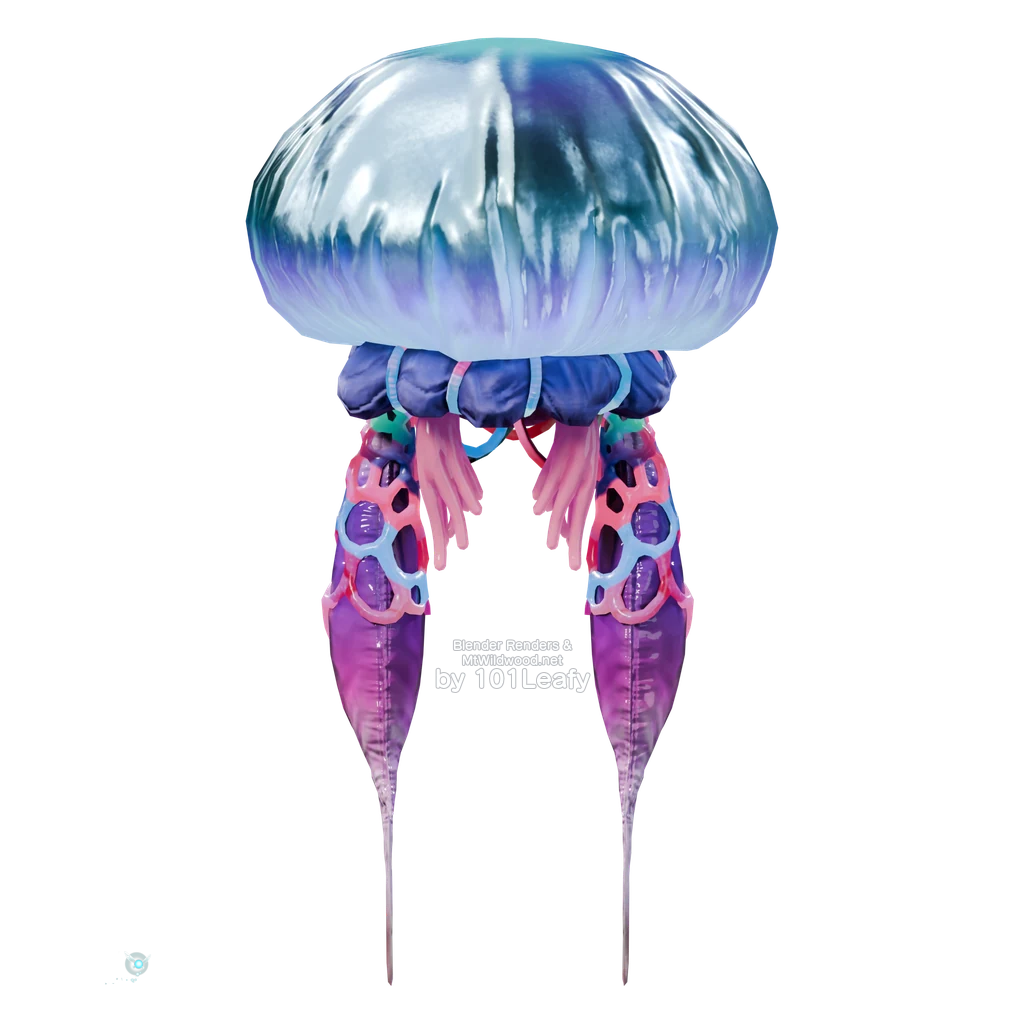
Bari
Age: Child
Location: Lord Jabu-Jabu’s Belly, in the rooms with the large electric jellyfish.
Defeat: Use the boomerang. Also defeat the smaller jellyfish that the large creature splits into.
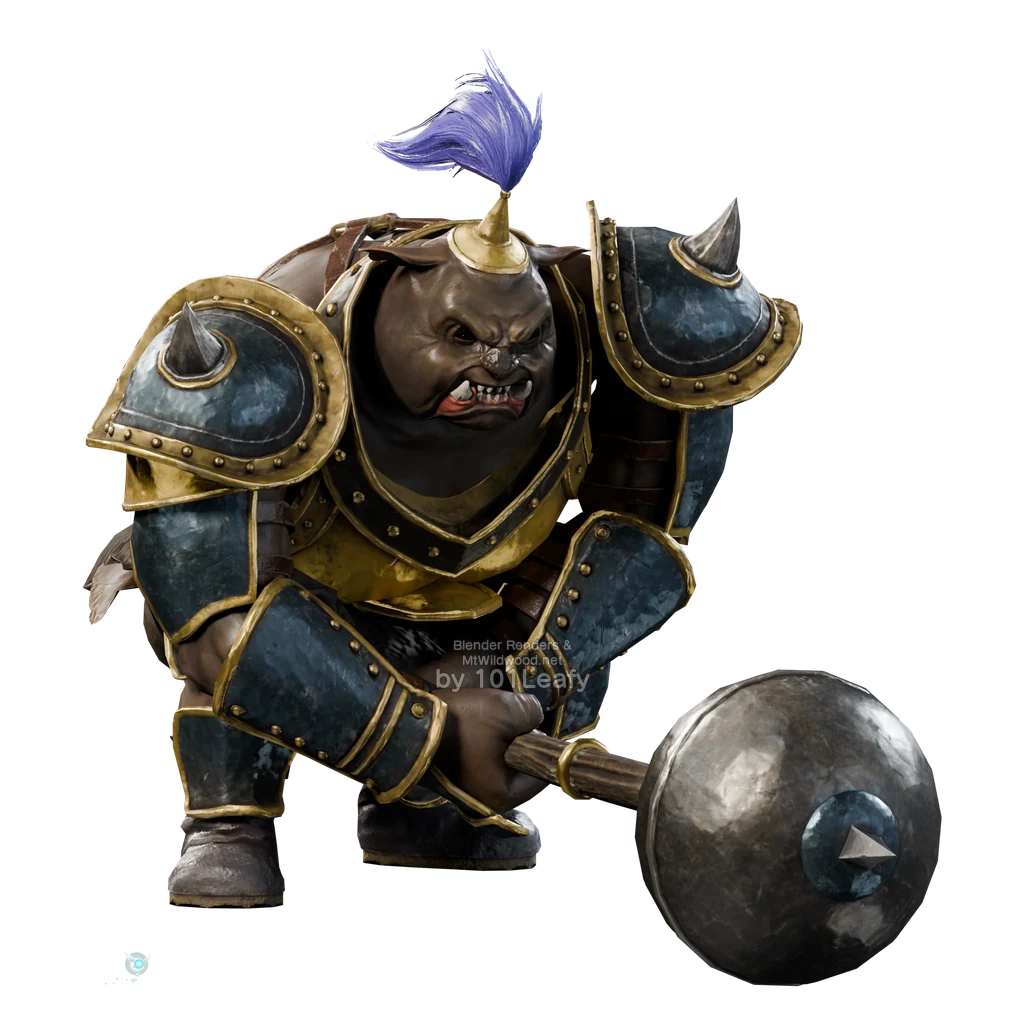
Great Moblin
Age: Adult
Location: Sacred Grove, at the end of the Moblin Maze, before the stairs to Sheik and the Forest Temple.
Defeat: Dodge the club’s shockwaves to the side, get behind the enemy, and hit them with your sword. Simply running past doesn’t count as a victory.
Basic skull model; the aura differentiates the variants.
Green Bubble
Age: Child or Adult
Location: Forest Temple, near the green-wrapped skulls; the large form is found at the Bottom of the Well.
Defeat: Wait until the green protective aura disappears, then strike the skull.
Other forms: In addition to the smaller version, look for the significantly larger one at the bottom of the well. A win using only the smaller version will not cover this encounter.
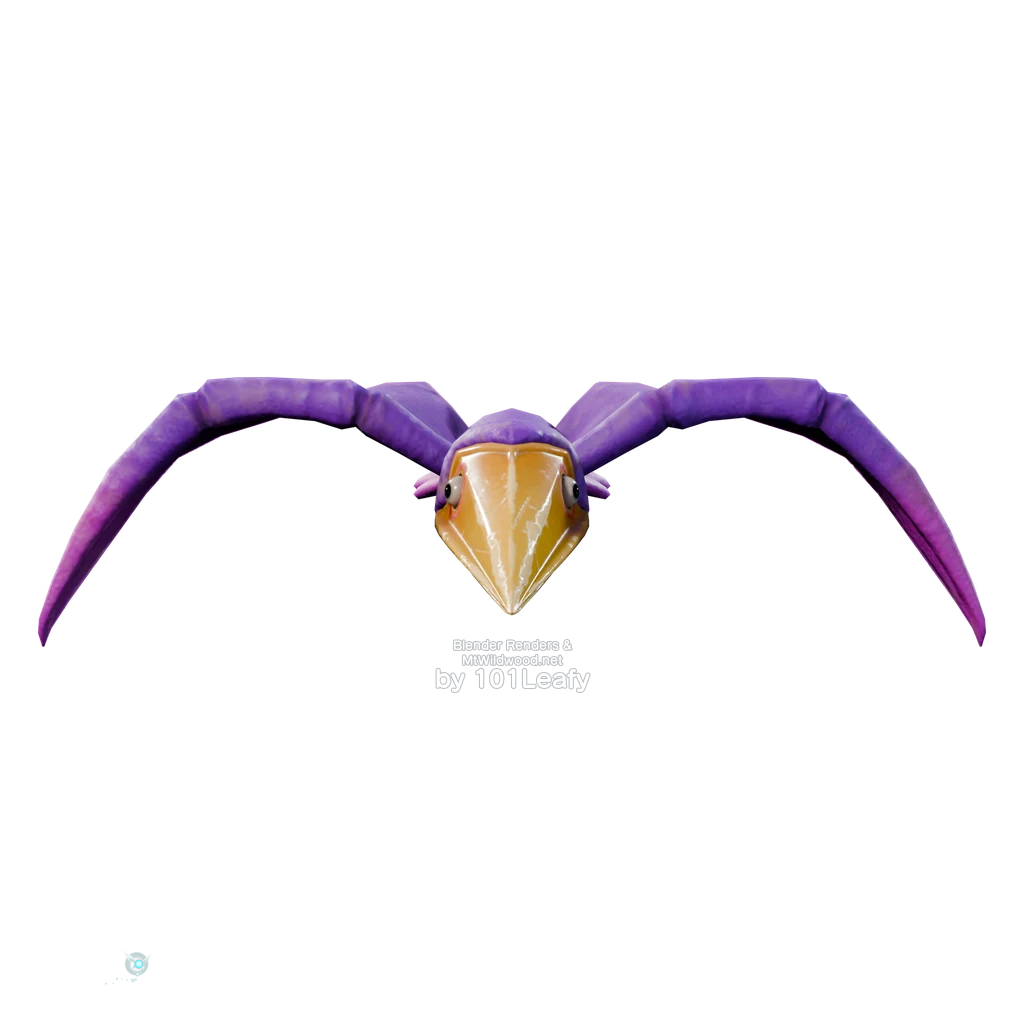
Guay
Age: Child or Adult
Location: Lon Lon Ranch Over open areas; also found at Lake Hylia as an adult.
Defeat: Wait for the bird to swoop down and hit it with a sword or bow.
Monster H-L
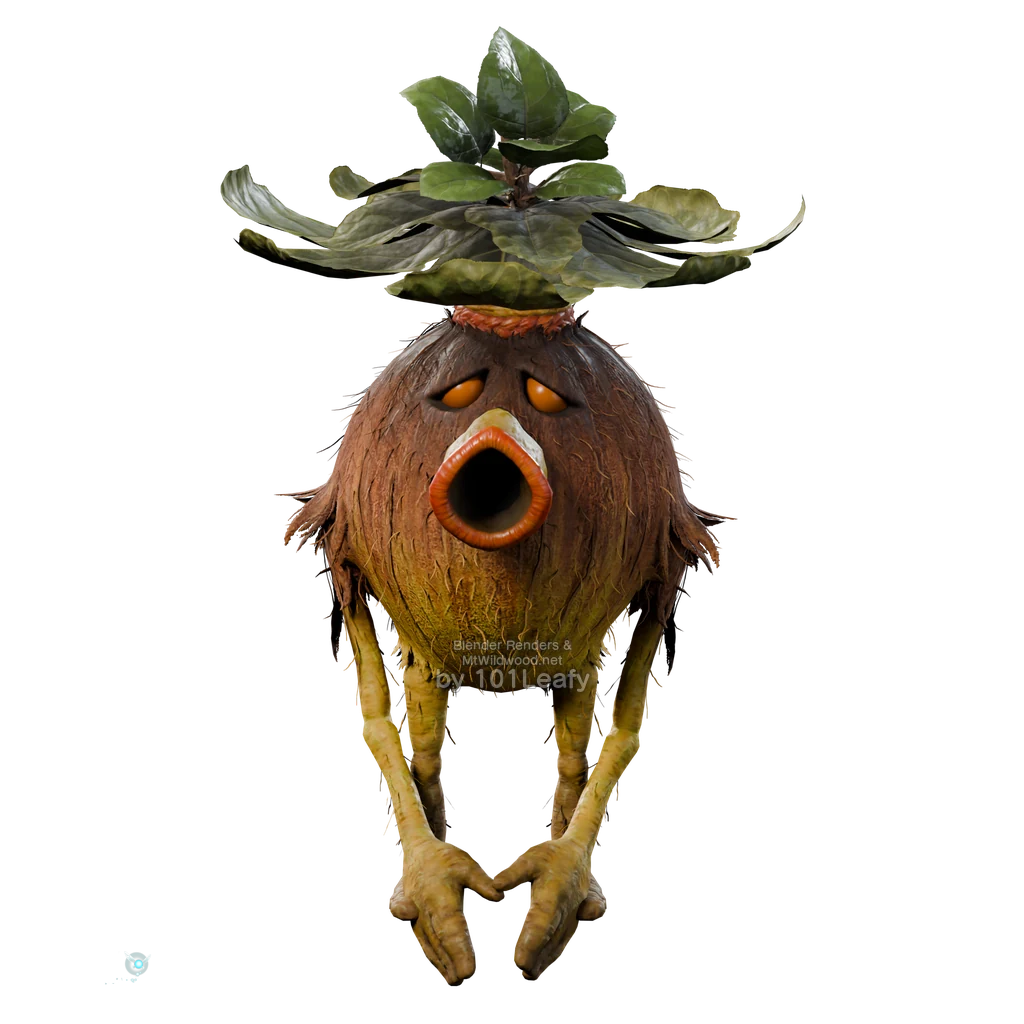
Business Scrub
Age: Child or Adult
Location: Lost Woods, near the Business Scrubs on the Gathering Route; more merchants await in secret caves of Hyrule Field.
Defeat: Throw the spat-out nut back with your shield and approach the merchant for his offer.
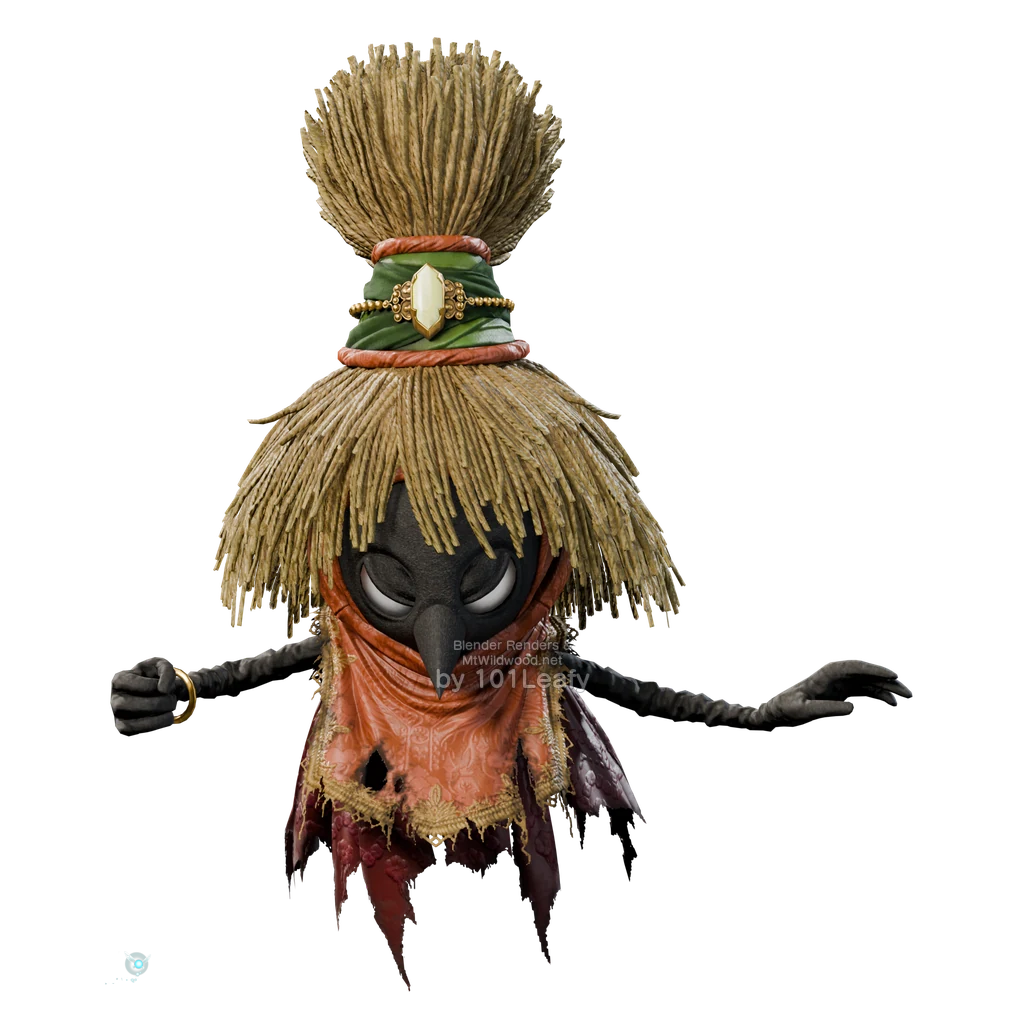
Jo, Second Born
Age: Adult
Location: Forest Temple, near One of the picture rooms with the red wisp sister.
Defeat: Hit her pictures with arrows to make her appear. Shoot again once she shows herself in battle.
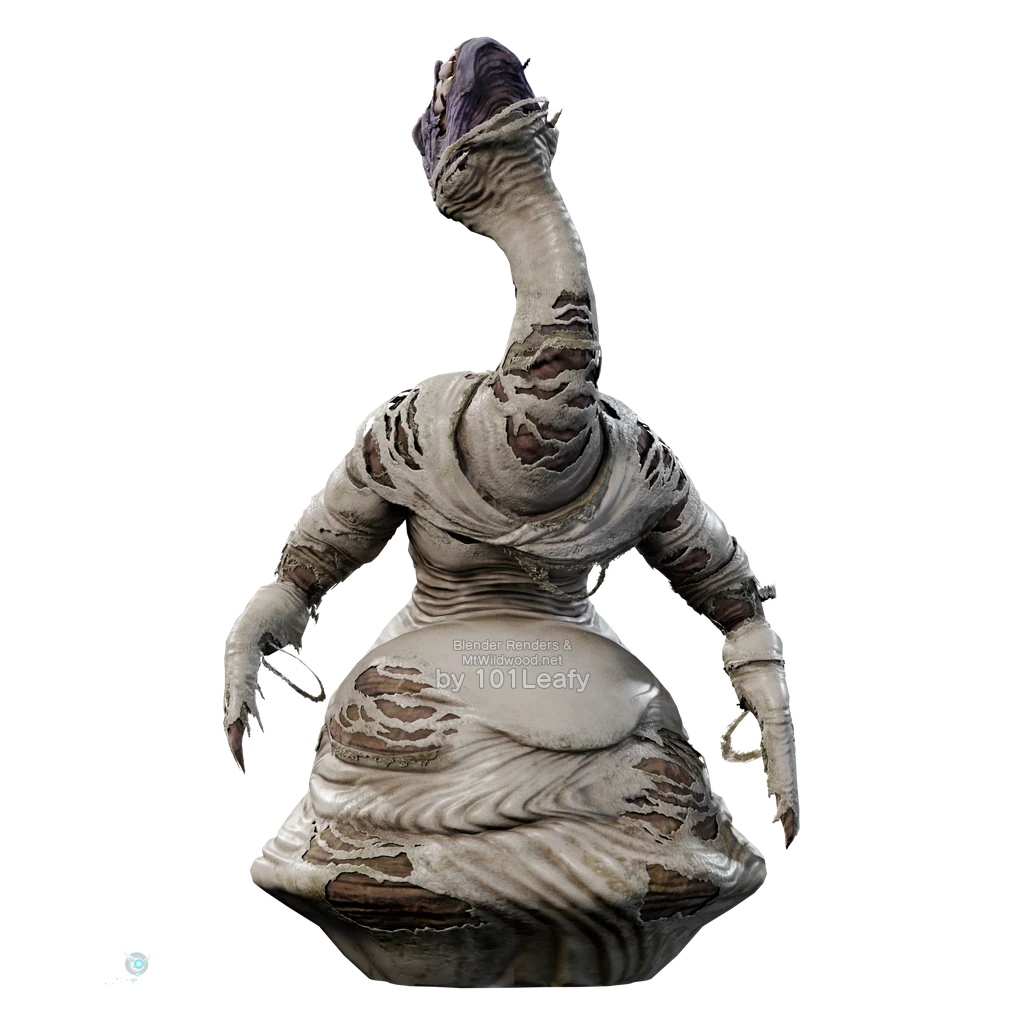
Dead Hand
Age: Child or Adult
Location: Bottom of the Well, in the chamber with the arms protruding from the floor; another encounter follows in the Shadow Temple.
Defeat: Let a hand briefly grab you, break free, and wait until the body appears. Strike its lowered head with your sword.
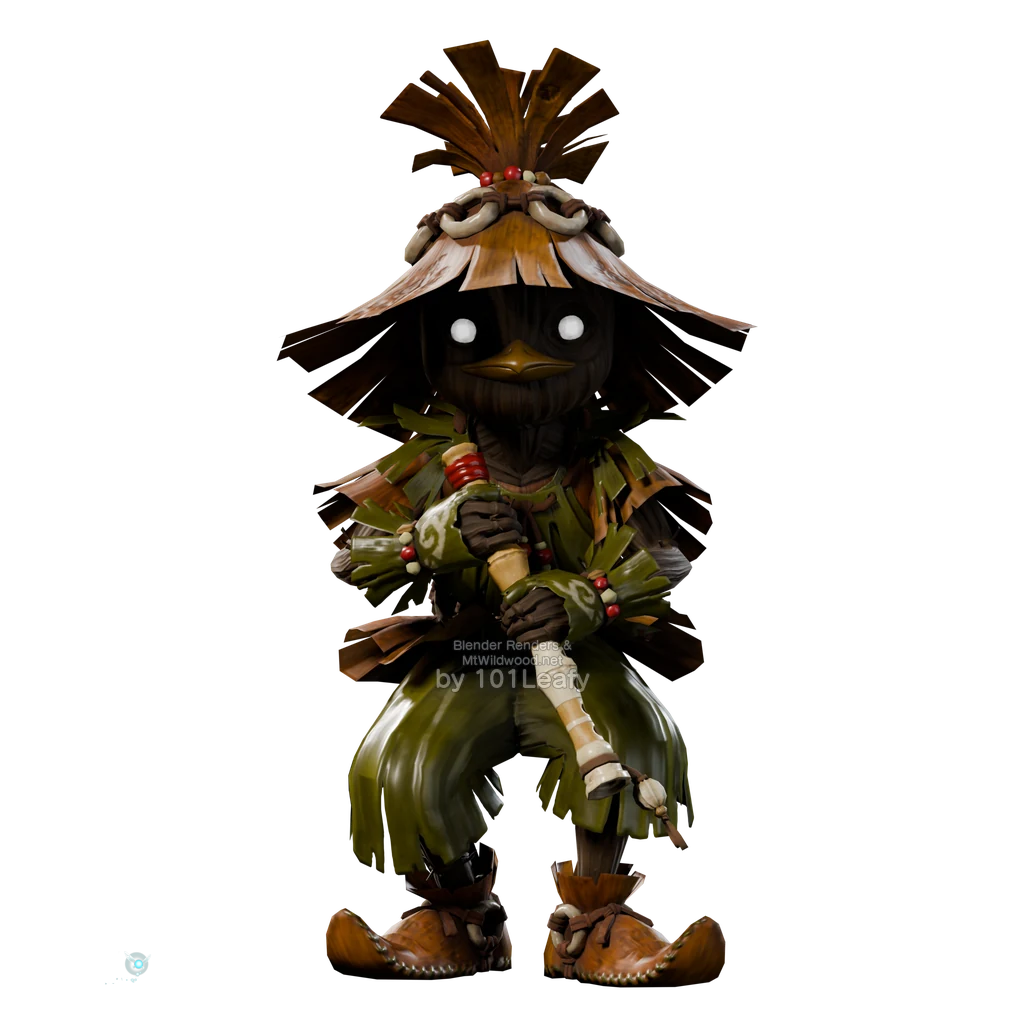
Skull Kid
Age: Adult
Location: Lost Woods, on the Clearing to the left of the entrance, by the tree stumps.
Defeat: Enter the area as an adult and defeat the enemy Skull Kid. Swapping masks as a child is a different encounter.
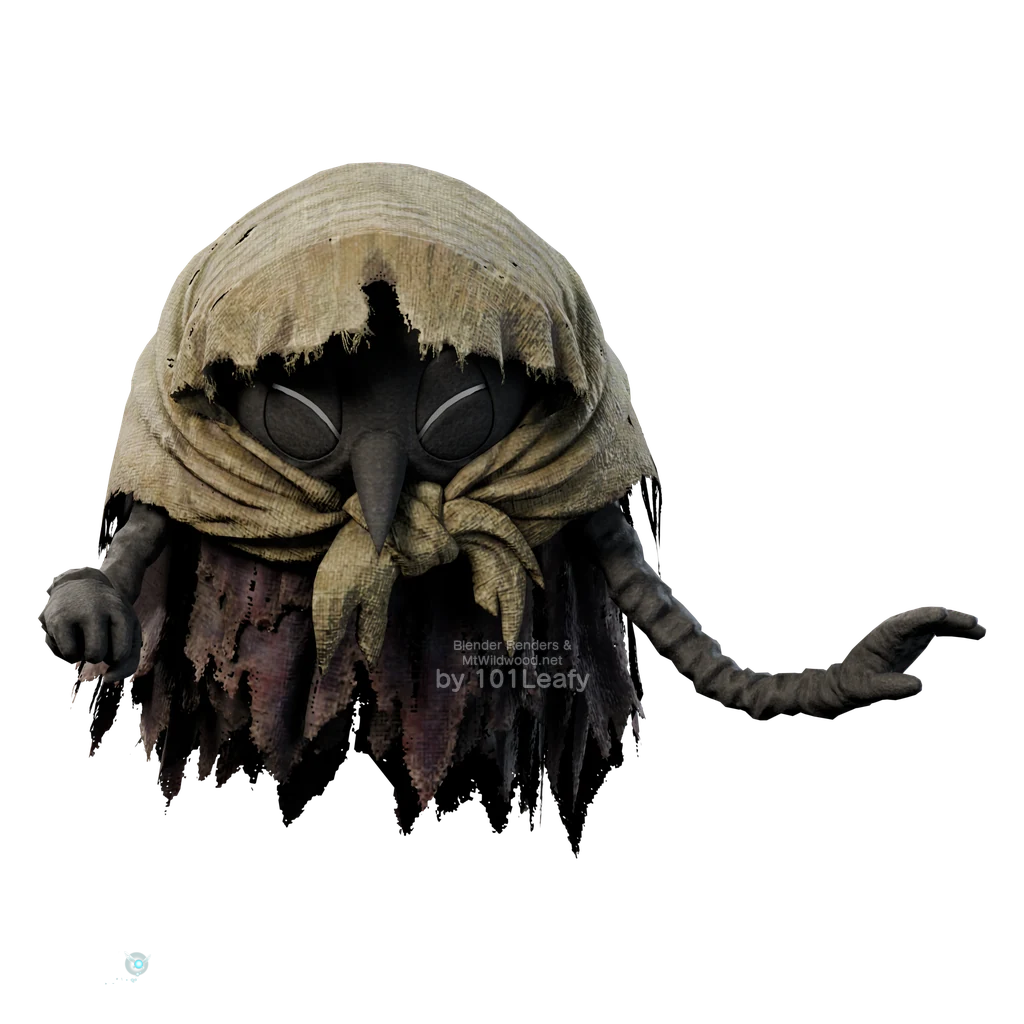
Poe
Age: Child or adult, depending on location
Location: Kakariko Village Graveyard, at the graves; as an adult, also on the Plains and at Lon Lon Ranch.
Defeat: Wait for the visible phase and hit the ghost with a sword or bow. On the Plains, search for the smaller ghosts on foot.
Other forms: Consider both the ghosts at the graves and the smaller Poes that appear freely in the adult world. Big Poe are a separate entry.
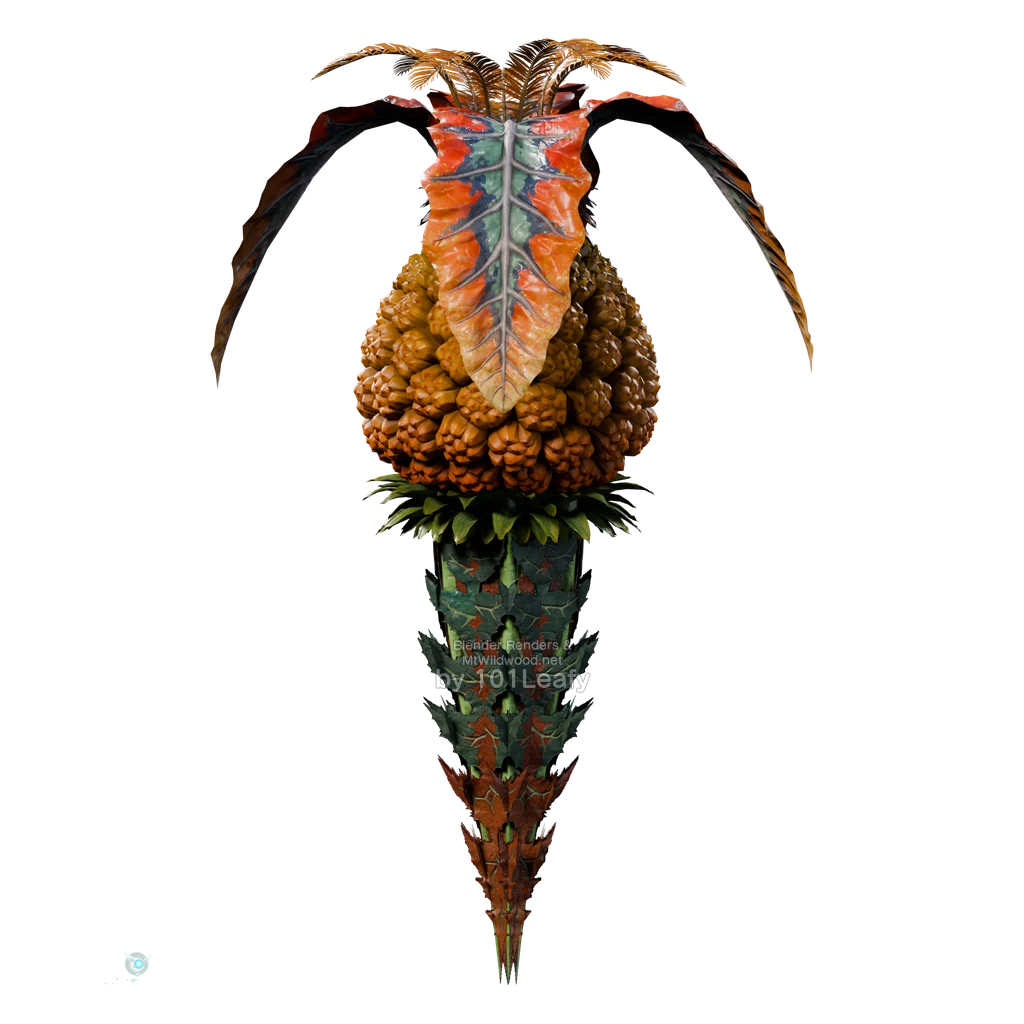
Peahat
Age: Child, daytime
Location: Hyrule Field On the grassy areas with the large flying plants.
Defeat: Approach during the day. Attack the exposed lower body and keep your distance from the rotating leaves.
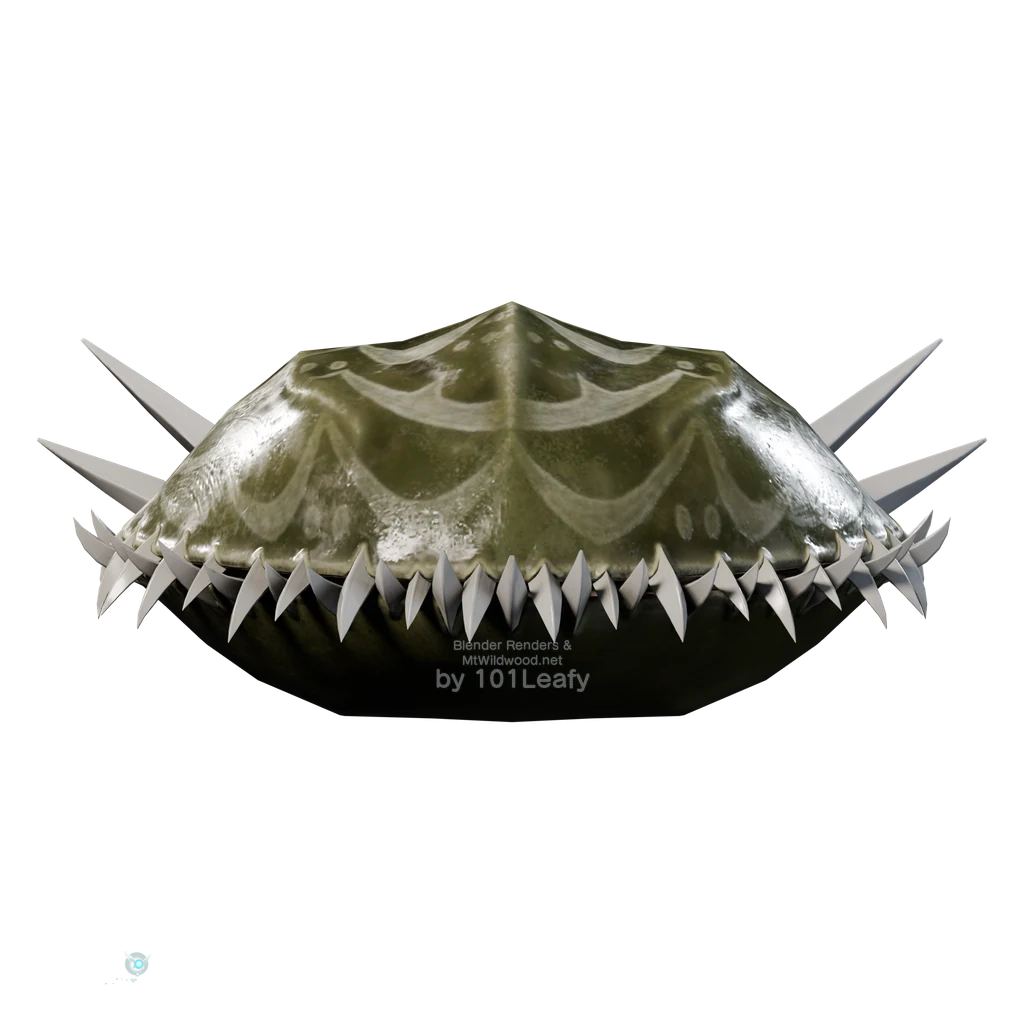
Shell Blade
Age: Adult
Location: Water Temple, in the underwater passages; More specimens in the Gerudo Proving Grounds.
Defeat: Equip the Iron Boots underwater. Wait until the shell opens and hit its inside with the Hookshot.
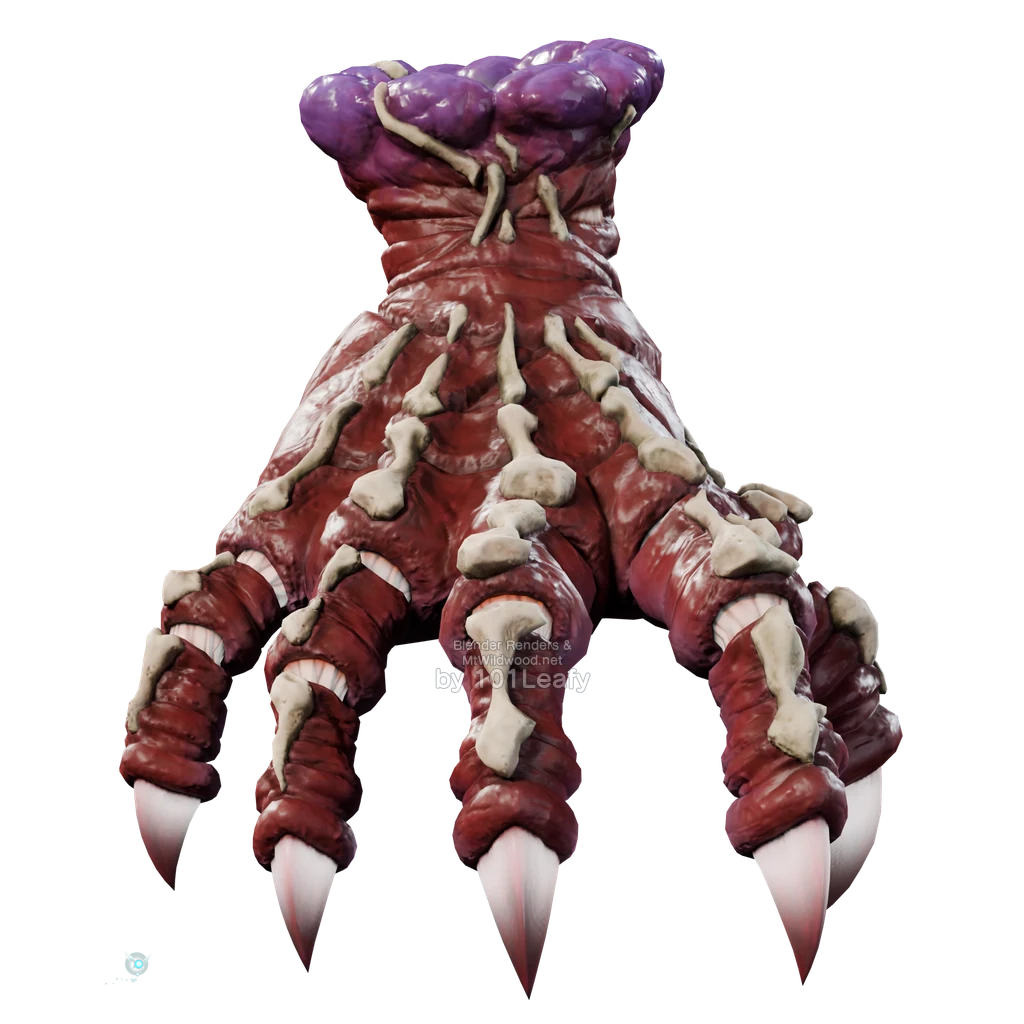
Common Hand Basic Model; Pay attention to the described behavior.
Wallmaster
Age: Adult
Location: Forest Temple, in the area where Navi warns of an enemy approaching from above; also in the Shadow Temple.
Defeat: Wait for the growing hand shadow, dodge, and attack the landed hand before it grabs you.
Common basic hand model; pay attention to the described behavior.
Floormaster
Age: Adult
Location: Forest Temple, in the rooms with a hand walking on the floor; further specimens in the Shadow Temple.
Defeat: Wait until the hand stops glowing and attack. Then defeat all the small hands so they don’t reunite.
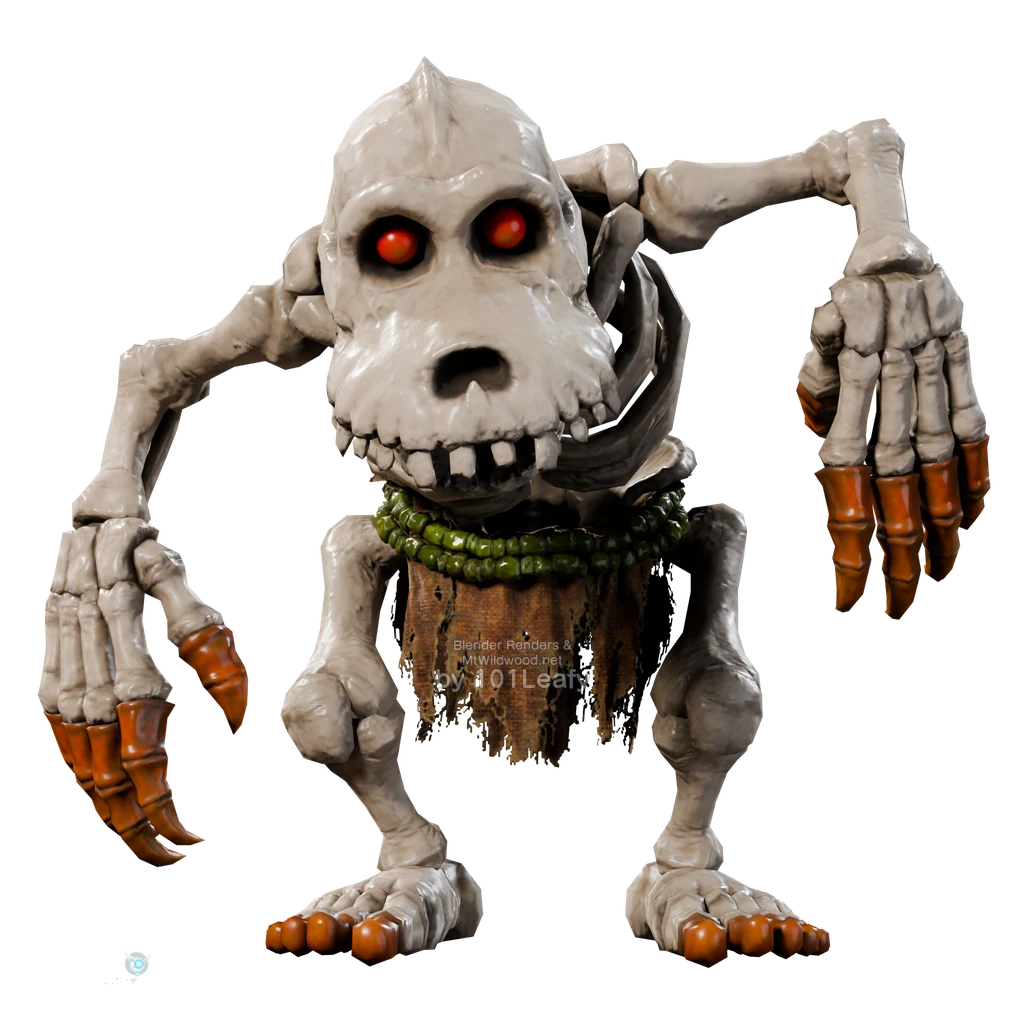
Stalchild
Age: Child, at night
Location: Hyrule Field on the open grassy areas away from the paths.
Defeat: Defeat the skeletons rising from the ground with your sword. Remain on Hyrule Field for further encounters.
Other forms: Also fight the larger Stalchild, which appears at night during continued battles. Do not leave Hyrule Field immediately after your first victory.
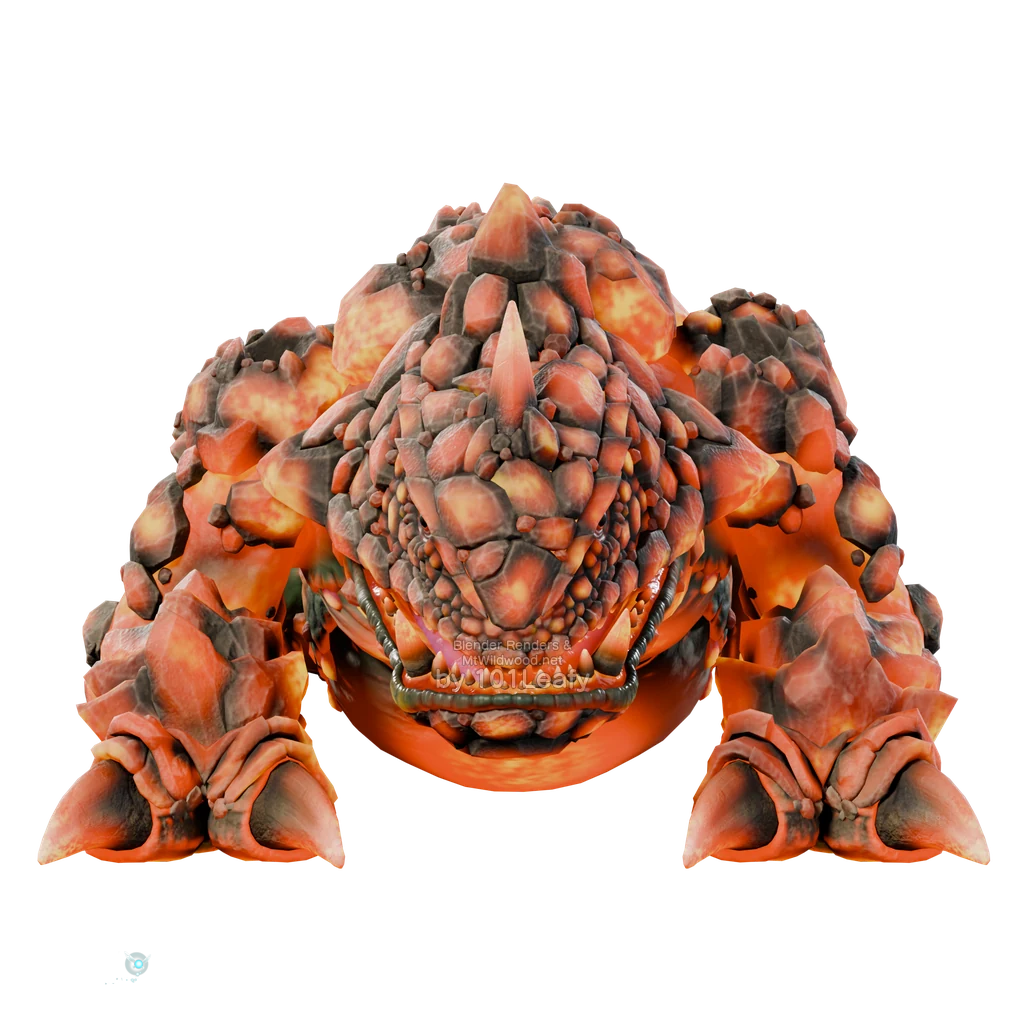
King Dodongo
Age: Child
Location: Dodongo Cavern, in the boss chamber under the large skull.
Defeat: Throw a bomb into its open mouth while it inhales. Hit its stunned head with your sword and dodge its subsequent roll.
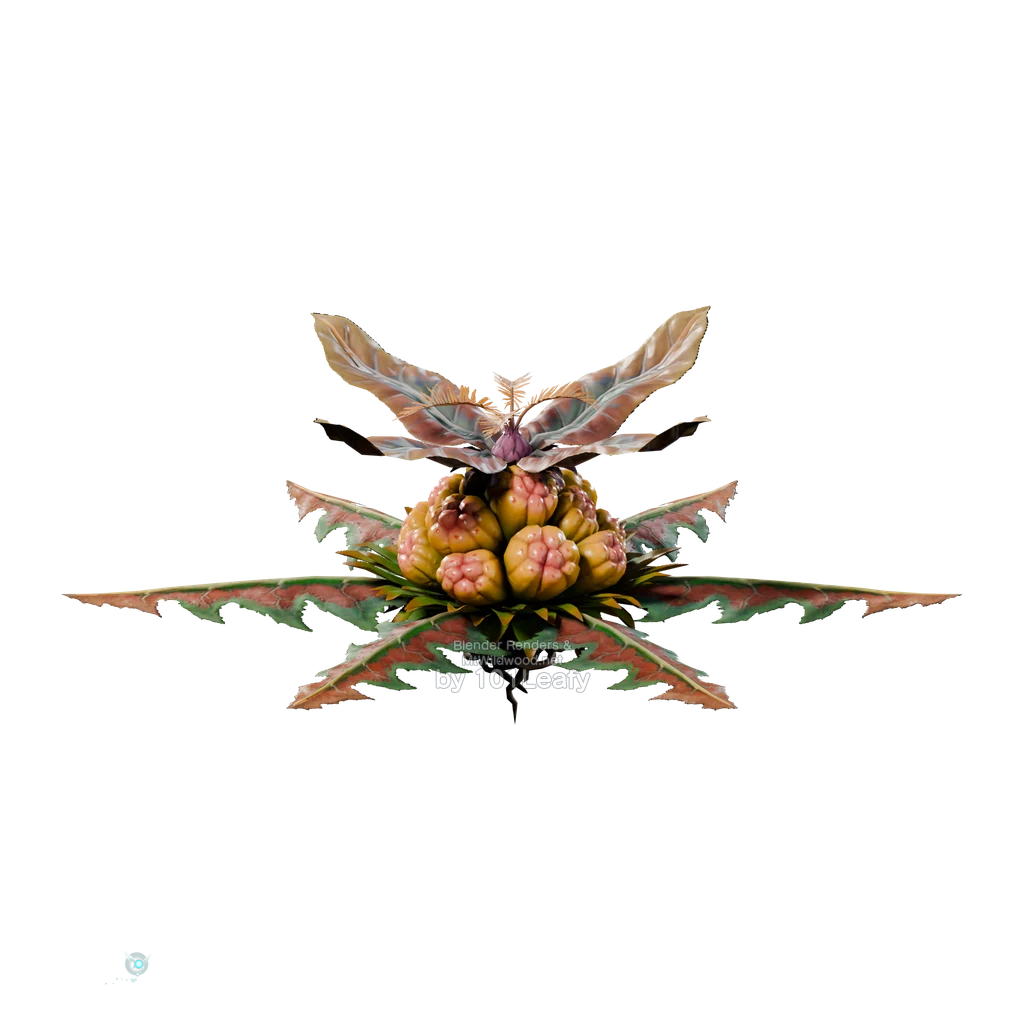
Peahat Larva
Age: Child
Location: Hyrule Field, near the large Peahat plants, as soon as they release their small flying larvae.
Defeat: Make a larva appear and defeat it with the sword or shield. Simply hitting the adult plant does not replace this encounter.
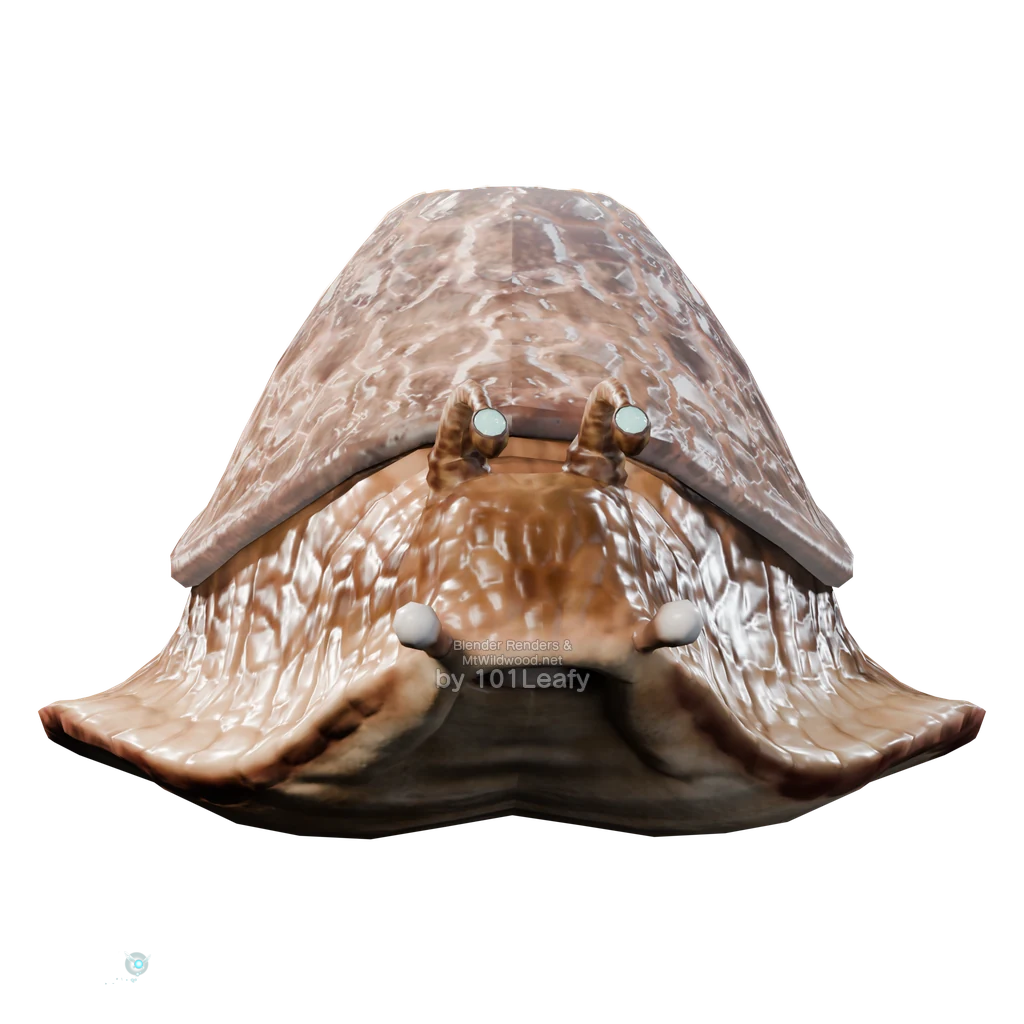
Torch Slug
Age: Adult
Location: Fire Temple, on on the ledges and in the lower combat areas.
Defeat: Extinguish the flames with an arrow or hammer blow and follow up with the sword.
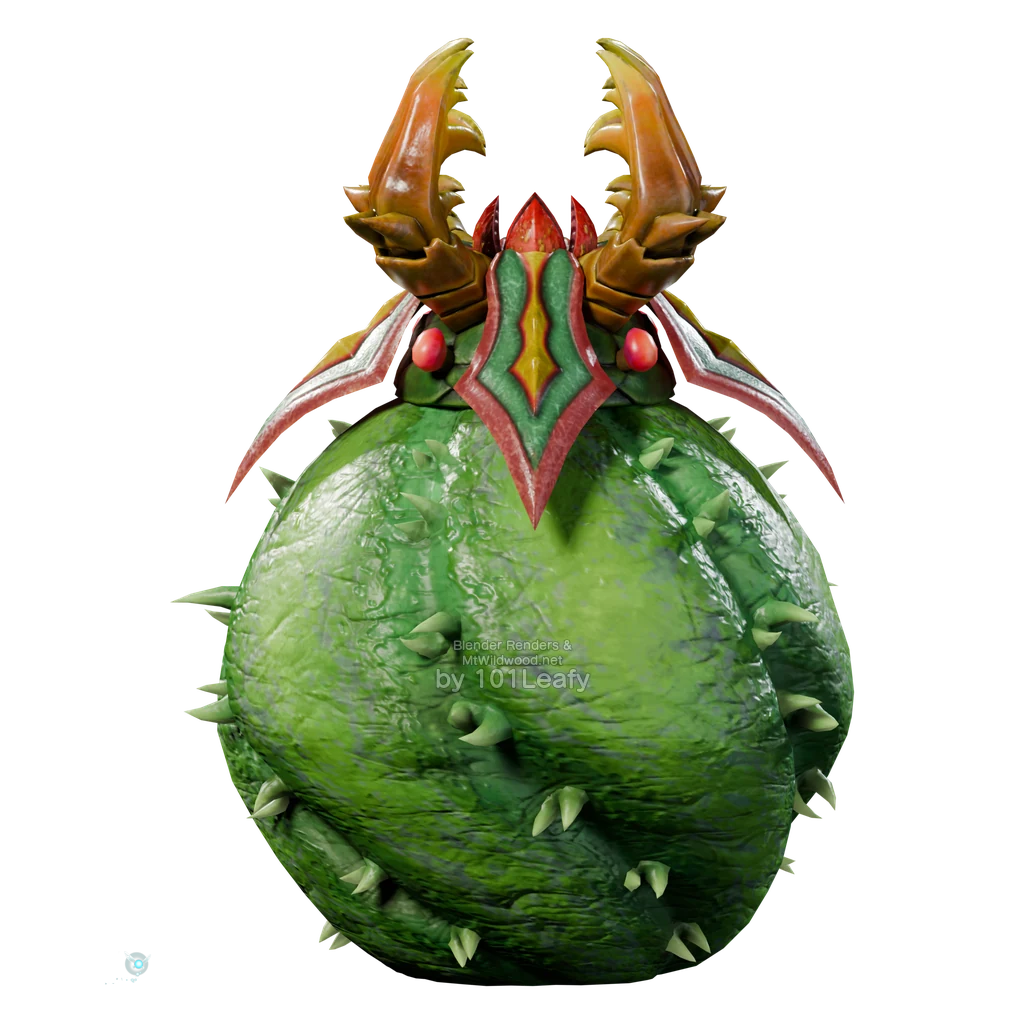
Leever
Age: Adult
Location: Evil Desert Colossus, on the Open sand areas in front of the Spirit Temple.
Defeat: Hit the creatures emerging from the sand with your sword and dodge their attacks.
Other forms: Also look for the significantly larger leader in the group. Defeat him in addition to the smaller Leevers.
Monster M-R
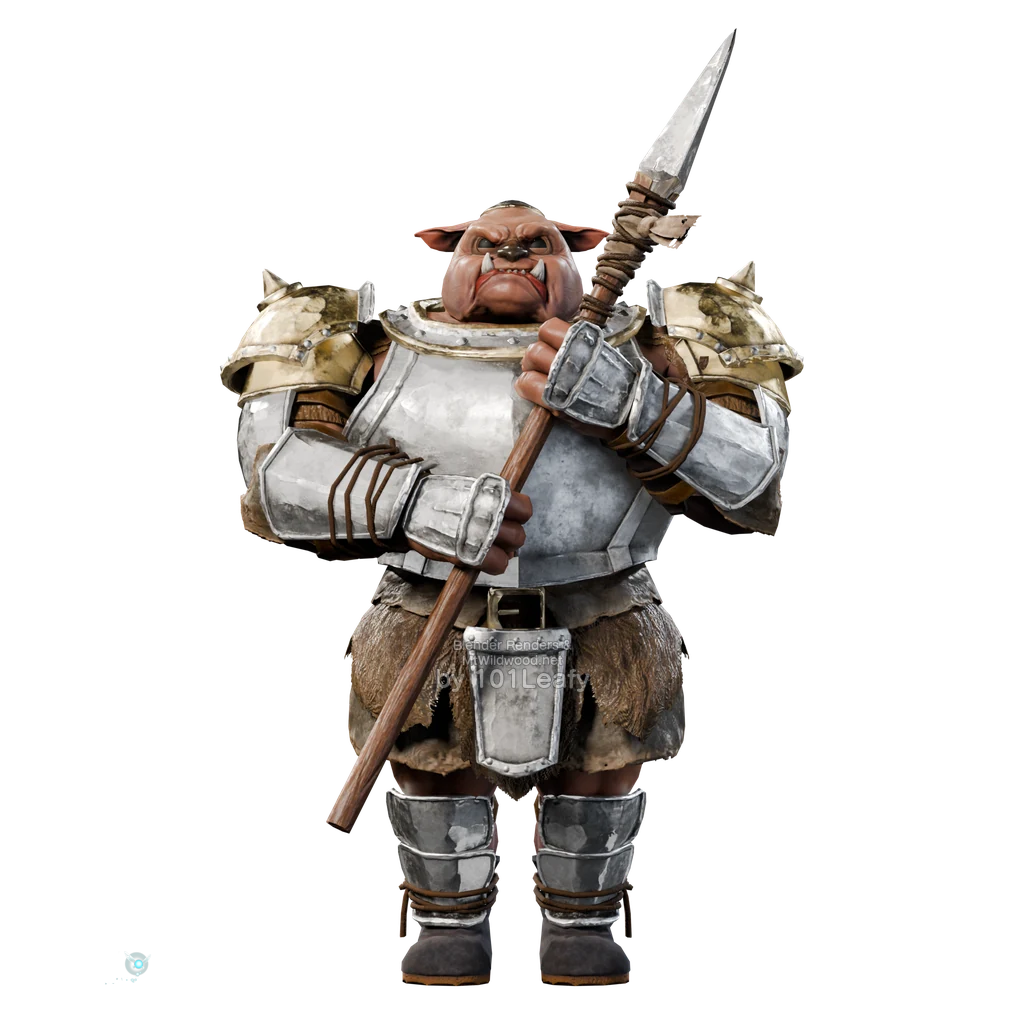
Moblin
Age: Adult
Location: Sacred Grove, in the guarded stone labyrinth on the way to the Forest Temple.
Defeat: Use the walls for cover. Hit its back with the Hookshot or attack from behind with your sword.
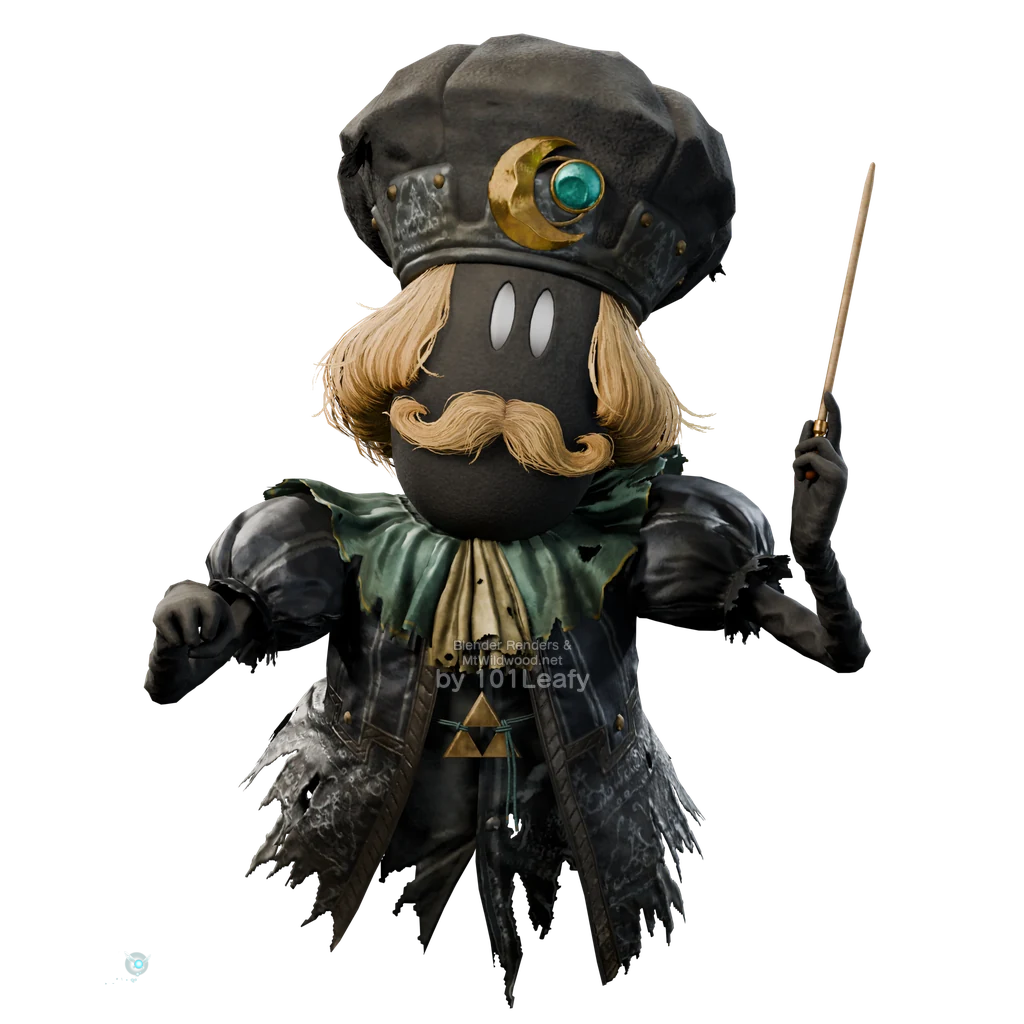
Flat the Younger
Age: Child or Adult
Location: Kakariko Village Graveyard, at the composer’s grave inscribed with “Flat the Younger,” near the Royal Family Tomb.
Defeat: Read the inscription and defeat the appearing ghost with your sword during its visible phase.
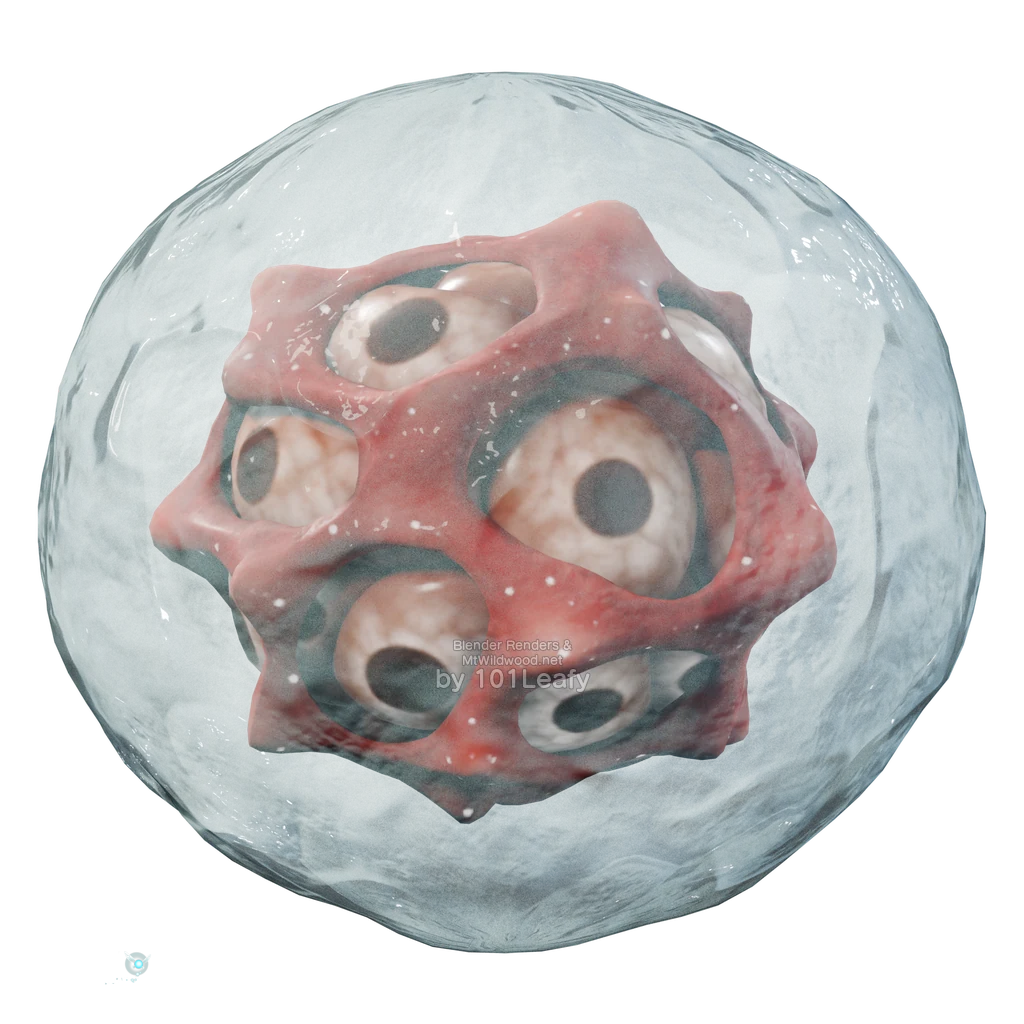
Morpha
Age: Adult
Location: Water Temple, in the Boss Chamber.
Defeat: Pull the red core out of the water with the Longshot and hit it with your sword. Stay out of the tentacles.
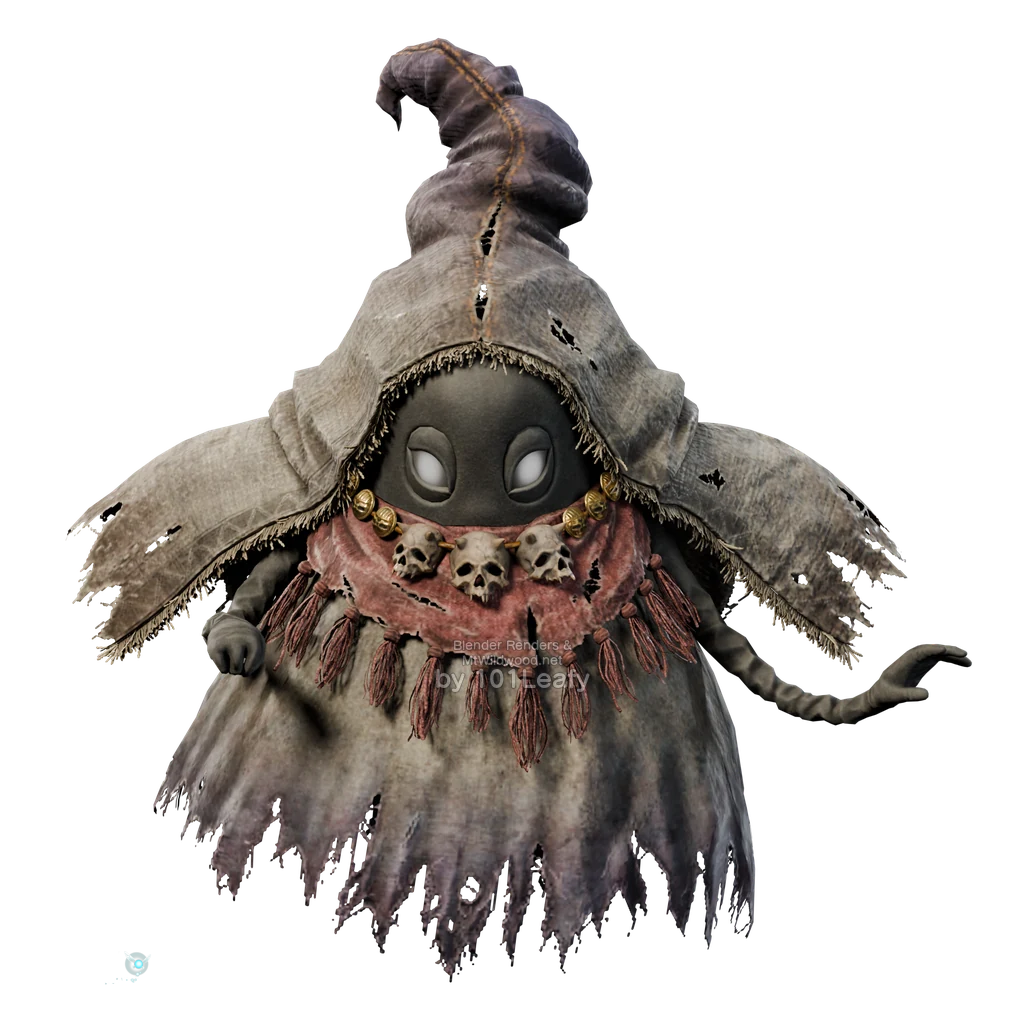
Big Poe
Age: Adult
Location: Hyrule Field, on The ten Big Poes Hunt locations.
Defeat: Ride Epona through a location and shoot the fleeing ghost with your bow. Capture its soul in a bottle for the Wisp Collector’s Rewards.
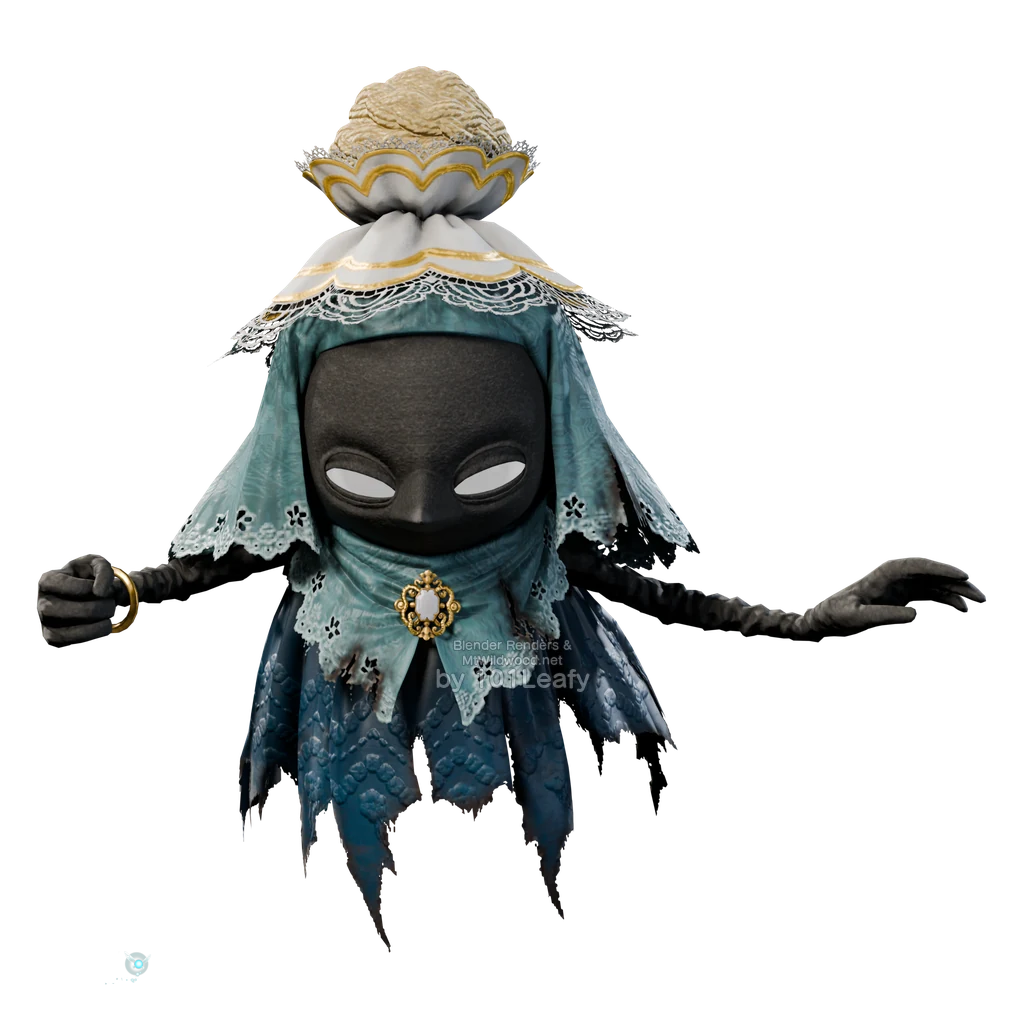
Beth, Third Born
Age: Adult
Location: Forest Temple, in the picture area with the blue wisp sister.
Defeat: Shoot down her pictures and then defeat her with arrows while she is visible.
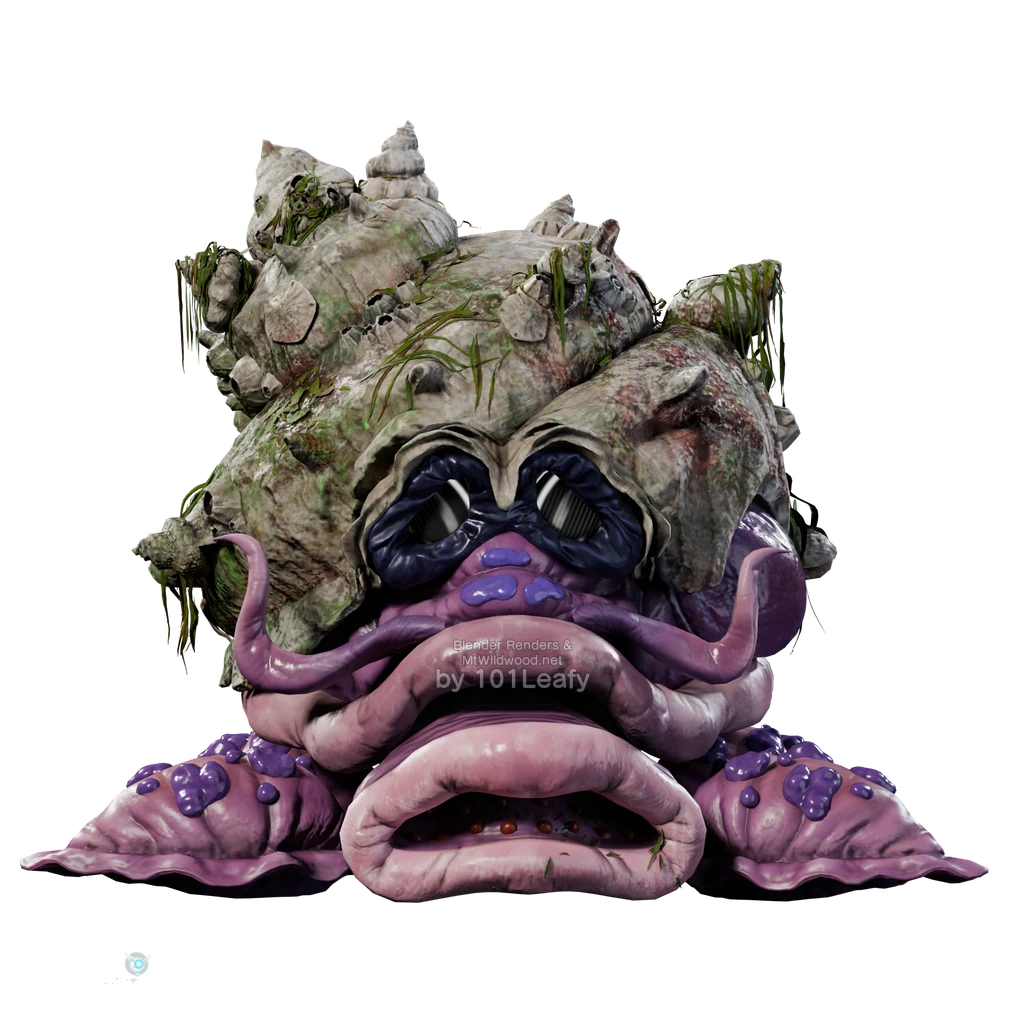
Big Octo
Age: Child
Location: Lord Jabu-Jabu’s Belly, after meeting Ruto at the large platform.
Defeat: Stun him with the Boomerang and reach his unprotected back for sword strikes.
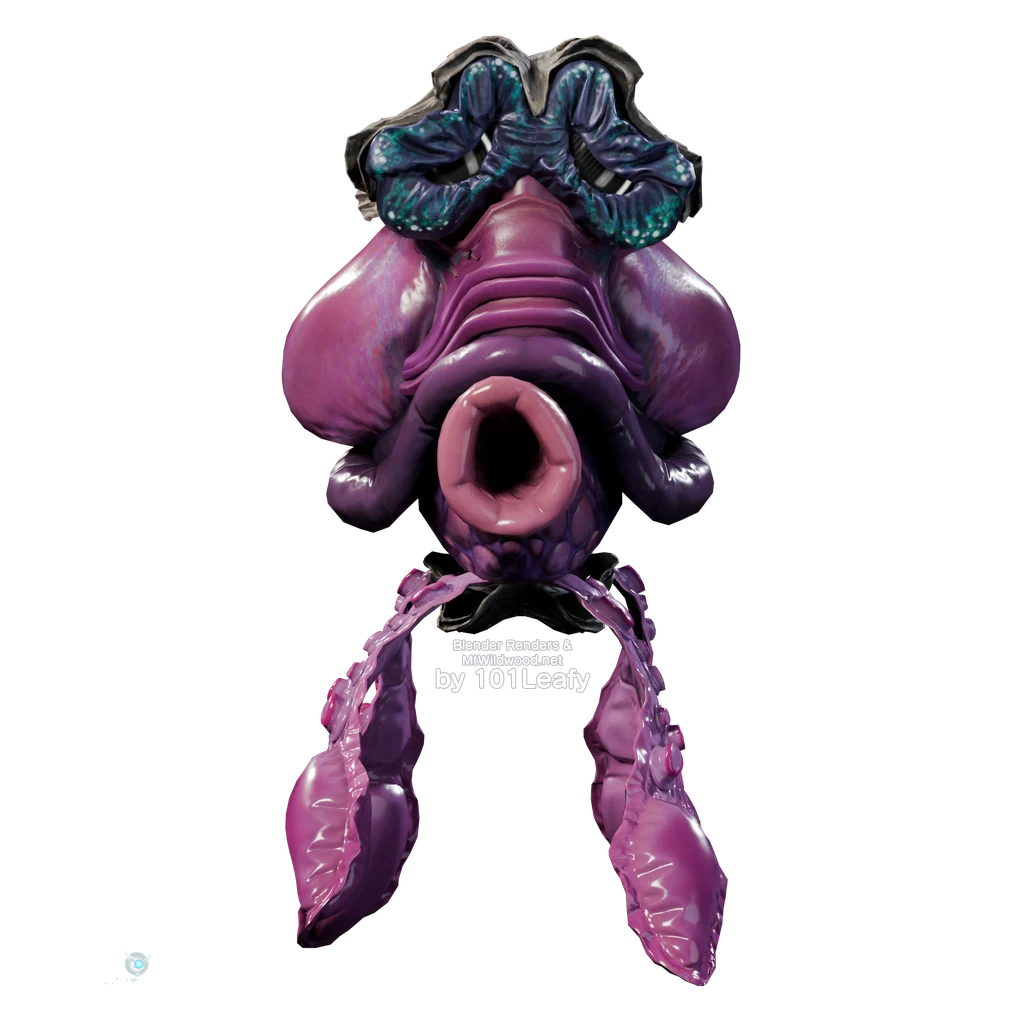
Octorok
Age: Child or Adult
Location: Zora River In shallow water; also in the first rooms of Lord Jabu-Jabu’s Belly.
Defeat: Stand back and throw the projectile back with your shield.
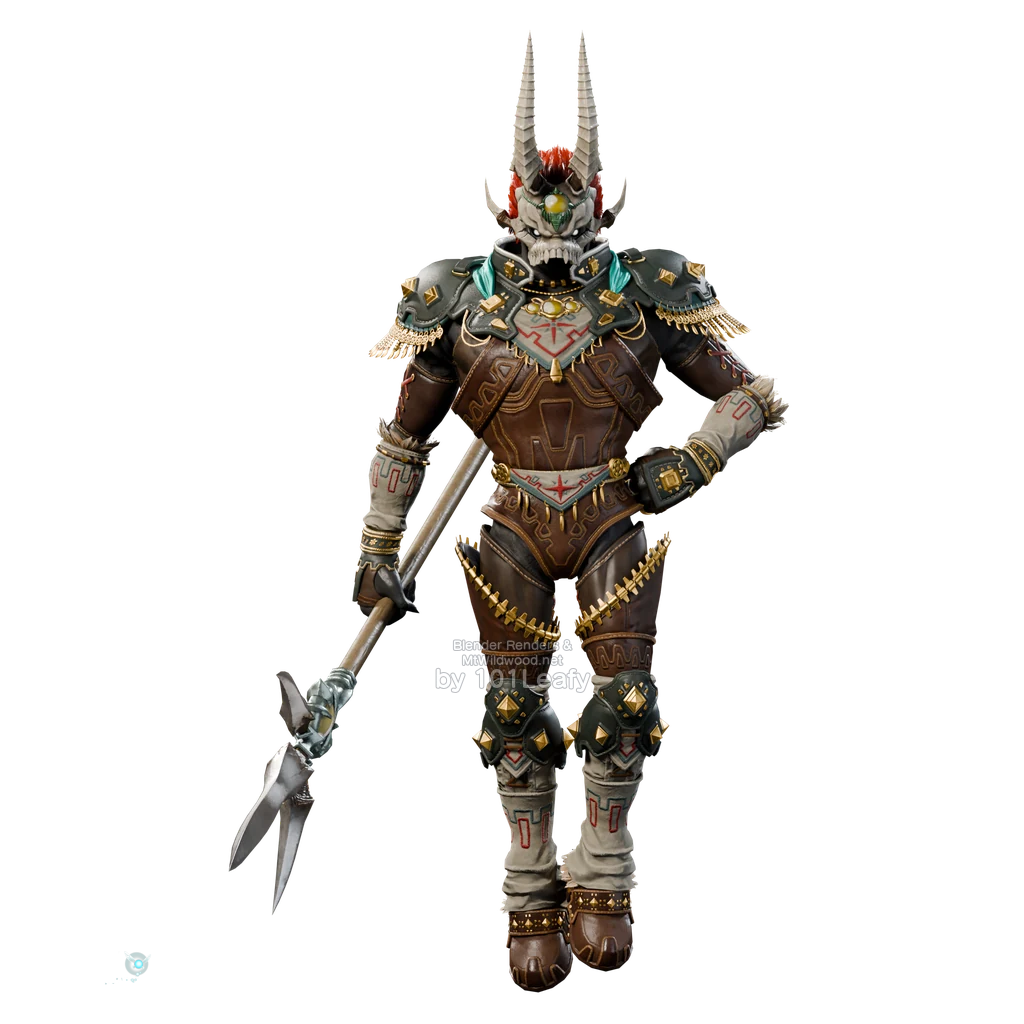
Phantom Ganon
Age: Adult
Location: Forest Temple, in the boss chamber with the paintings.
Defeat: Hit the correct painting with an arrow while riding out. Later, deflect the energy orb and attack the stunned enemy.
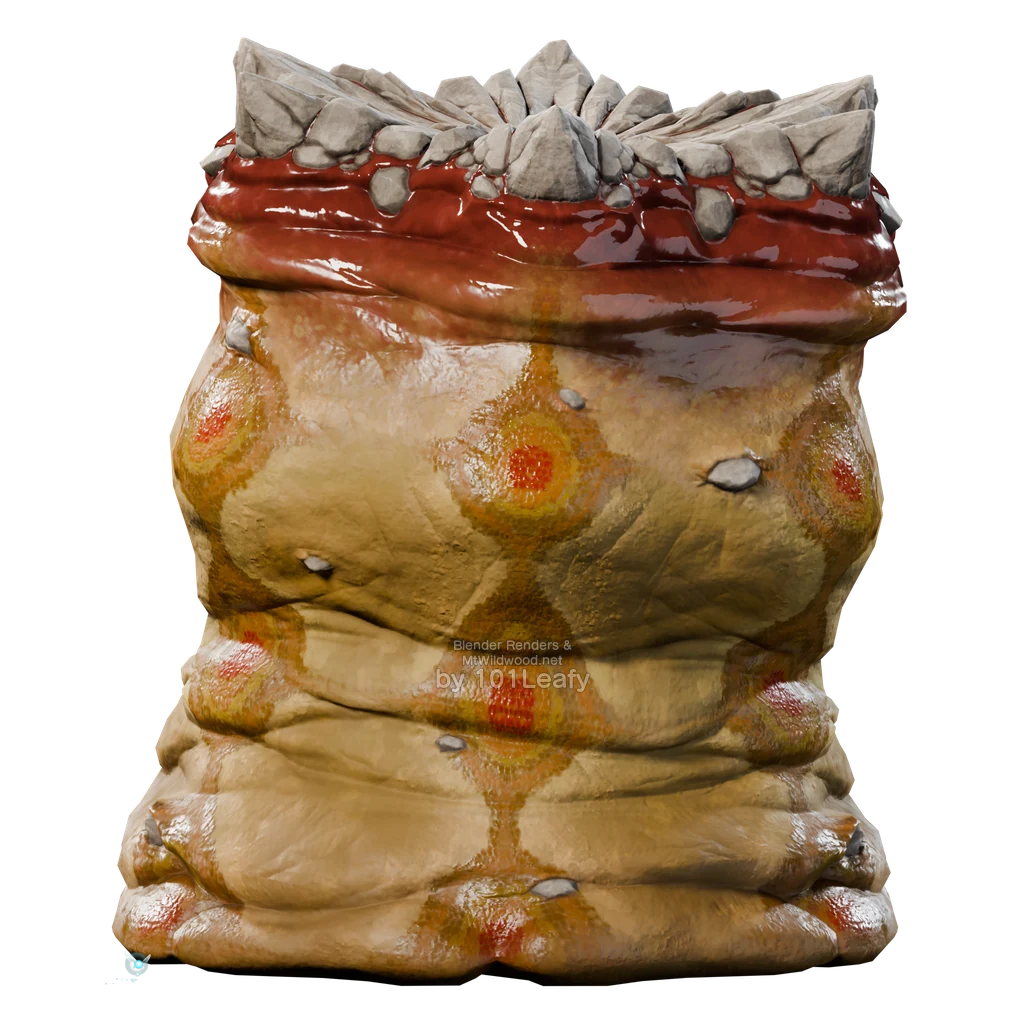
Like Like
Age: Adult
Location: Fire Temple, in the room behind the first time block and later on the way to the Boss Key; also in the Water Temple.
Defeat: Keep your distance and attack with arrows or Hookshot. Don’t let it swallow your shield or armor.
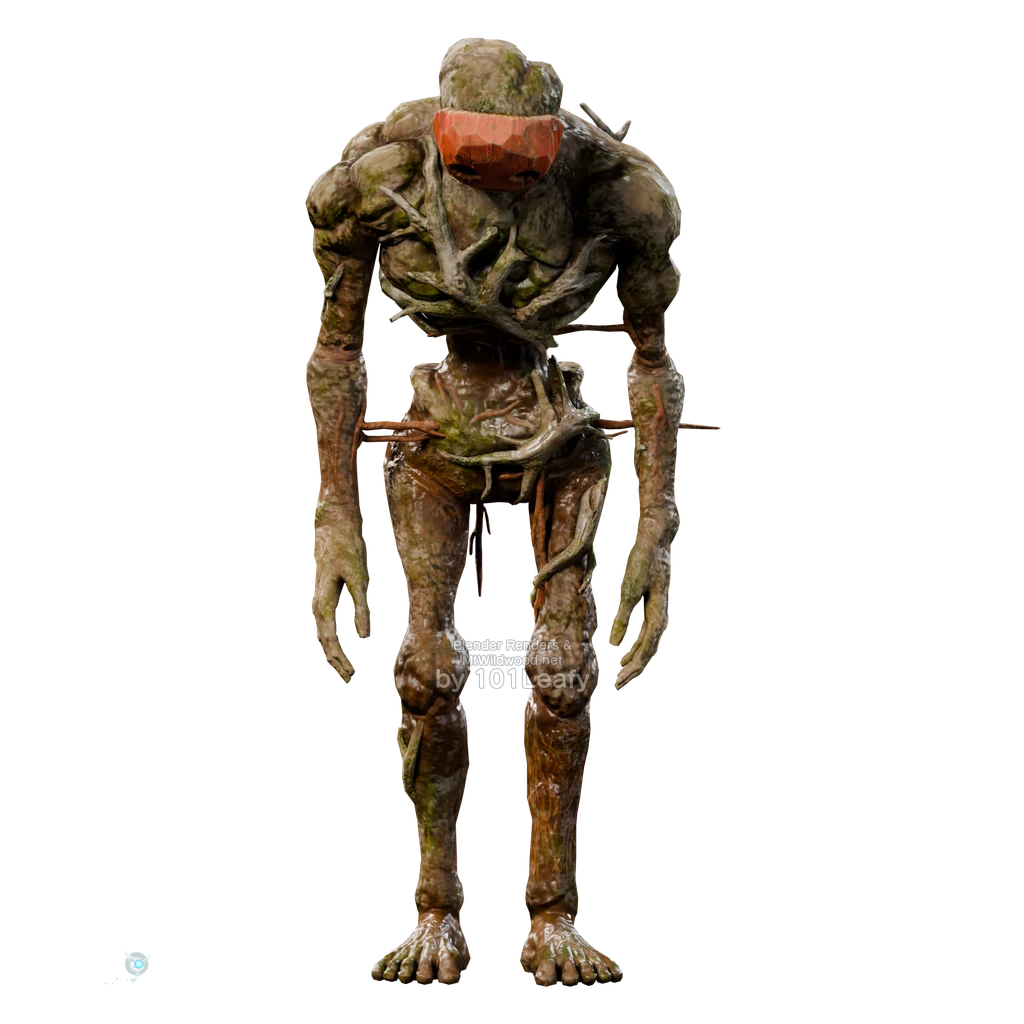
ReDead
Age: Child or Adult
Location: Hyrule Castle Town after the time skip; also in the Royal Family Tomb in the Graveyard as a child.
Defeat: Play the Sun’s Song and attack the petrified undead from behind.
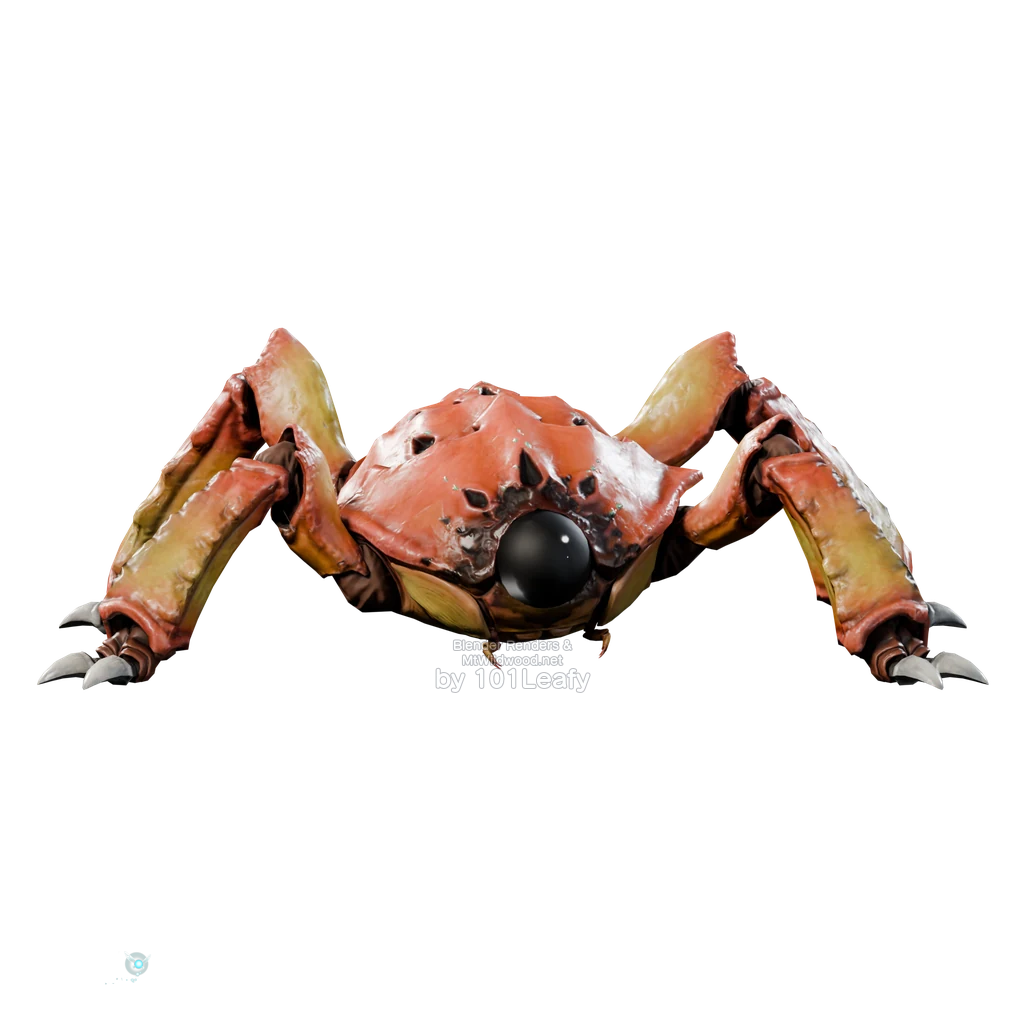
Red Tektite
Age: Child or Adult
Location: Death Mountain Trail, on the rocky paths between Kakariko Village and Goron City.
Defeat: Wait for it to jump and hit it with your sword as it lands, or from a distance.
Basic skull model; the aura distinguishes the variants.
Red Bubble
Age: Adult
Location: Fire Temple, above the lava fields; further specimens in Death Mountain Crater.
Defeat: Block the flaming skull with your shield and attack when its protective aura disappears.
Monster S
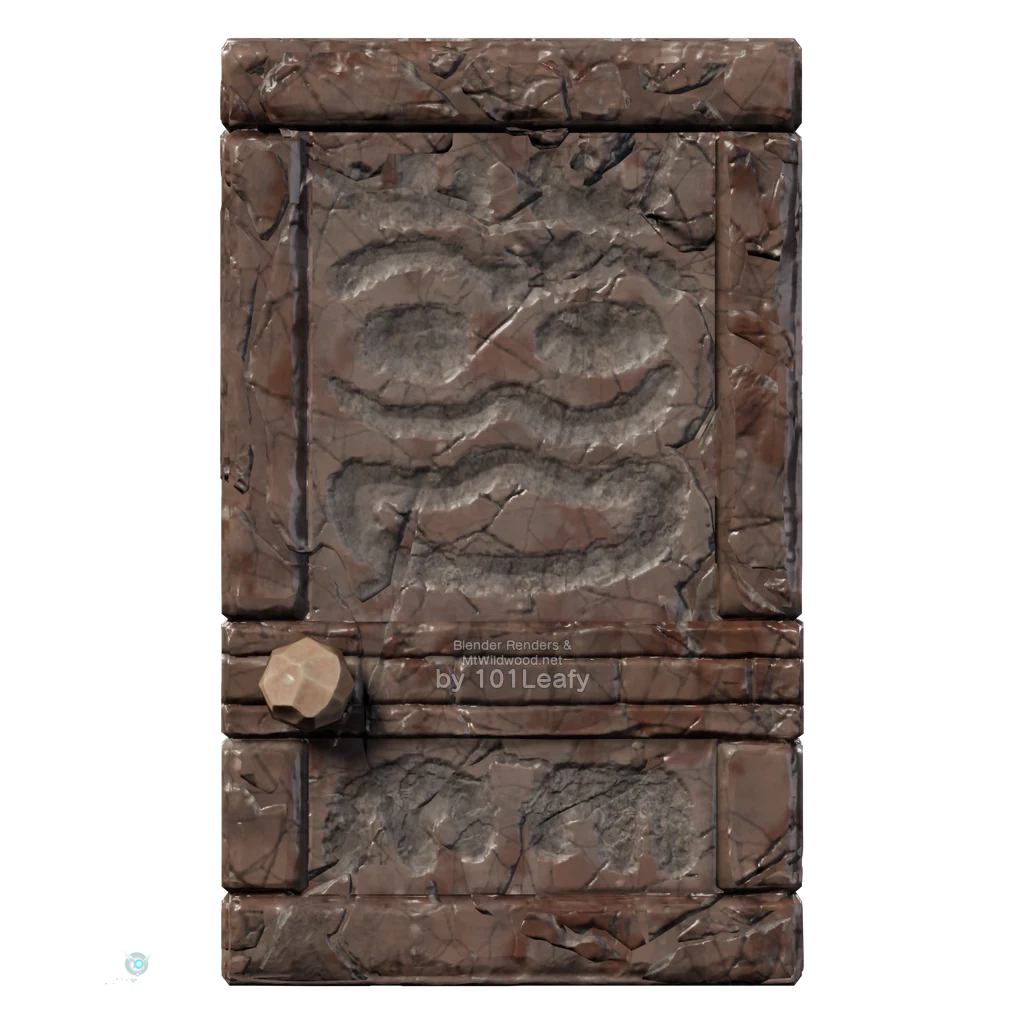
False Door
Age: Adult
Location: Fire Temple, at the fake doors in the Fire Maze; another door type can be found in the Spirit Temple.
Defeat: Destroy the fake door with a bomb or the Megaton Hammer. Simply attempting to open it is not enough.
Other forms: Destroy both a Fire Temple door and the differently constructed variant in the Spirit Temple or the Training Arena.
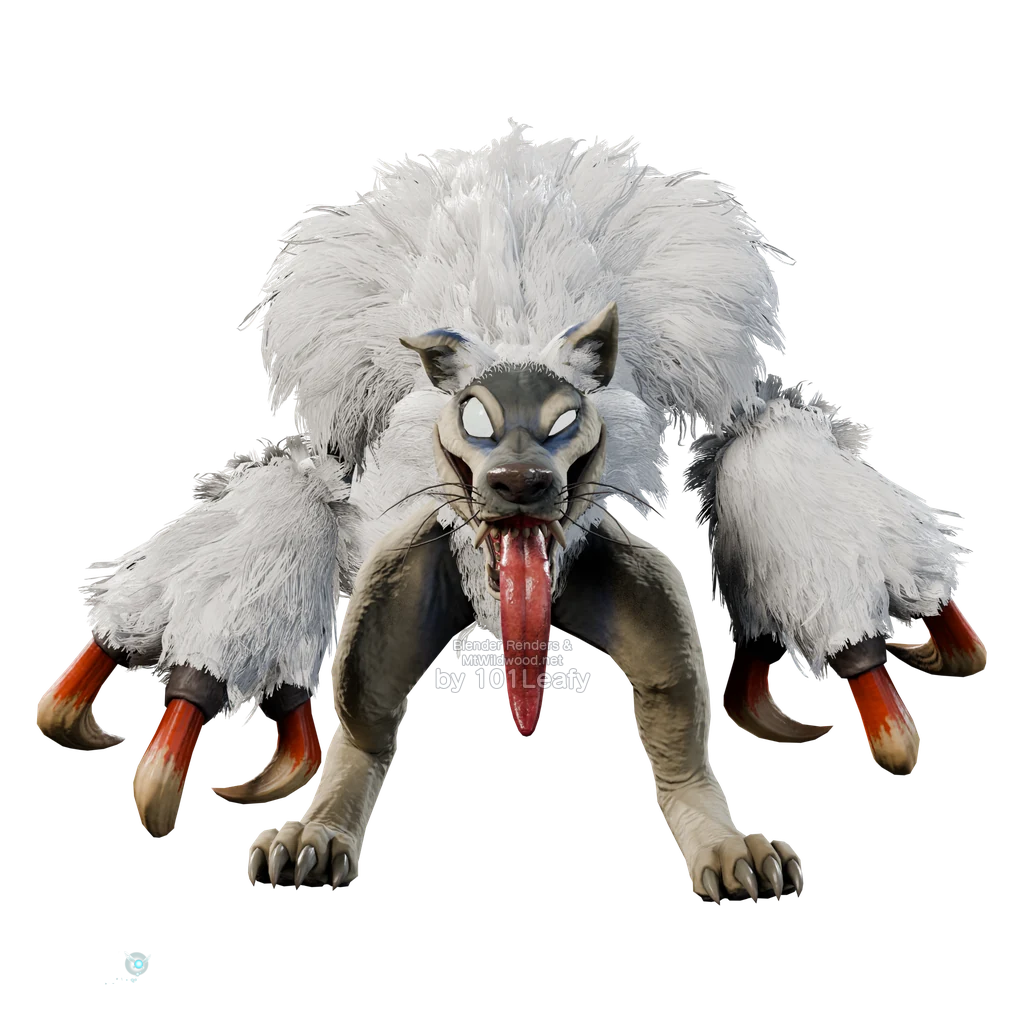
Common Wolfos base model; The location and the frost attacks differentiate the variants.
White Wolfos
Age: Adult
Location: Ice Cavern, in the last room before the Iron Boots; other specimens in the Gerudo Proving Grounds.
Defeat: Dodge the claw attack and counter from the side or back with your sword.
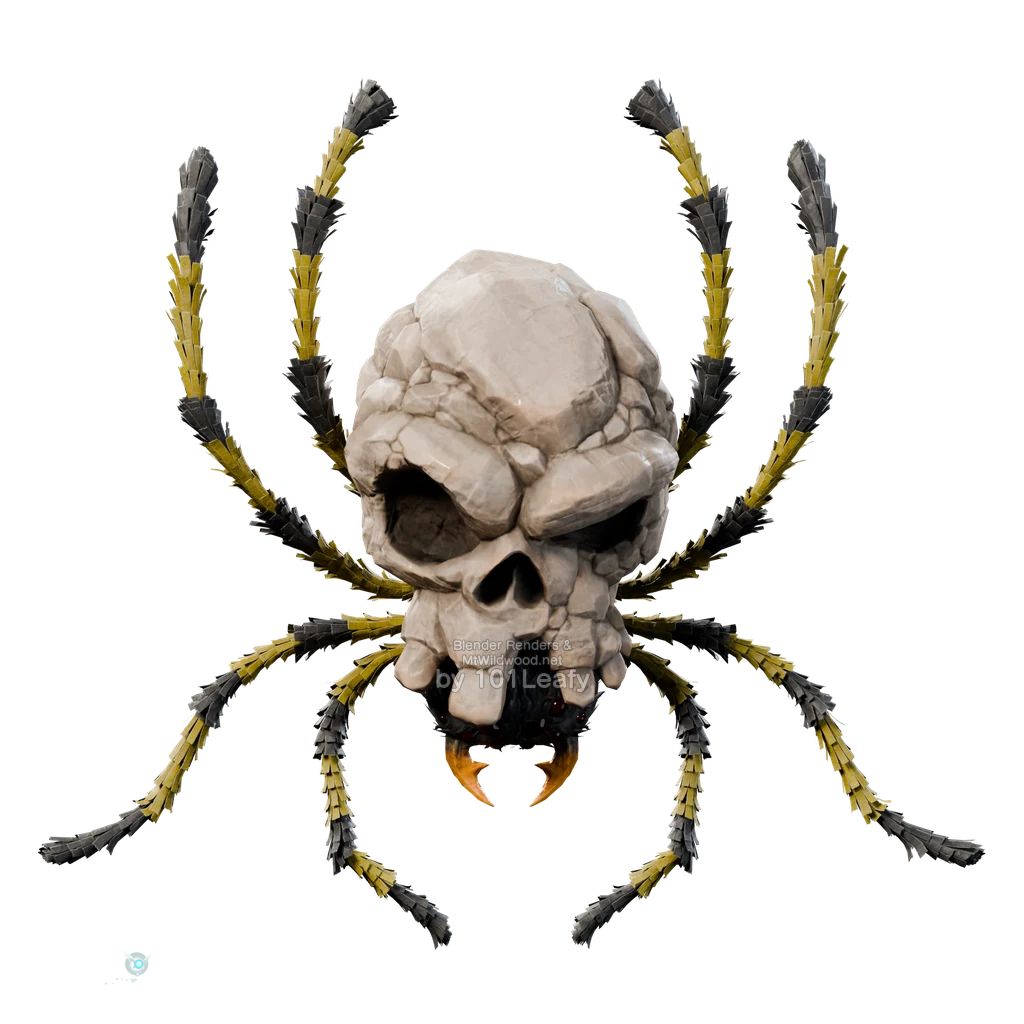
Skulltula
Age: Child or Adult
Location: Great Deku Tree, near the large spiders lowered from above; later also in the Forest Temple.
Defeat: Wait until it exposes its unprotected underside and hit it with a sword or ranged weapon.
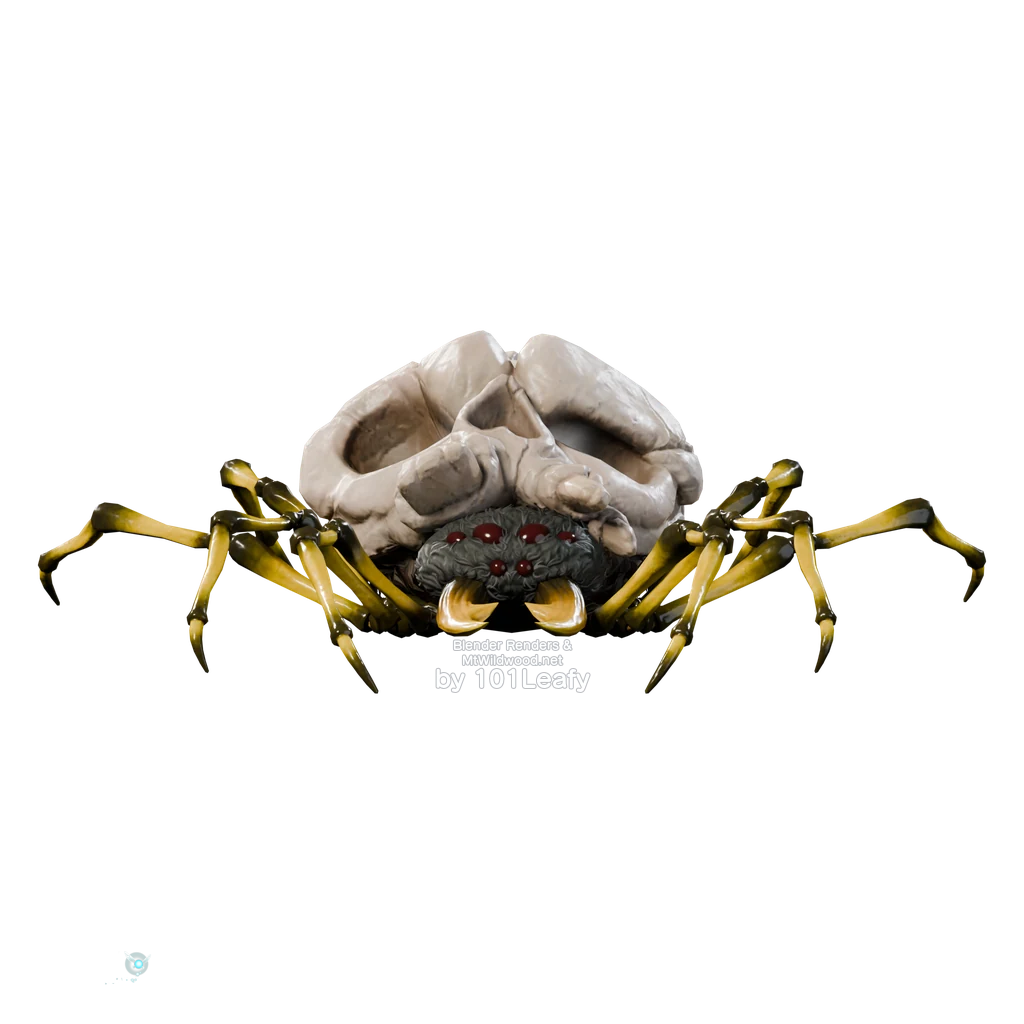
Skullwalltula
Age: Child or Adult
Location: Great Deku Tree, on the climbing walls; also on the large climbing wall of the mountain trail.
Defeat: Hit the small wall spider before climbing with a slingshot, bow, or hookshot.
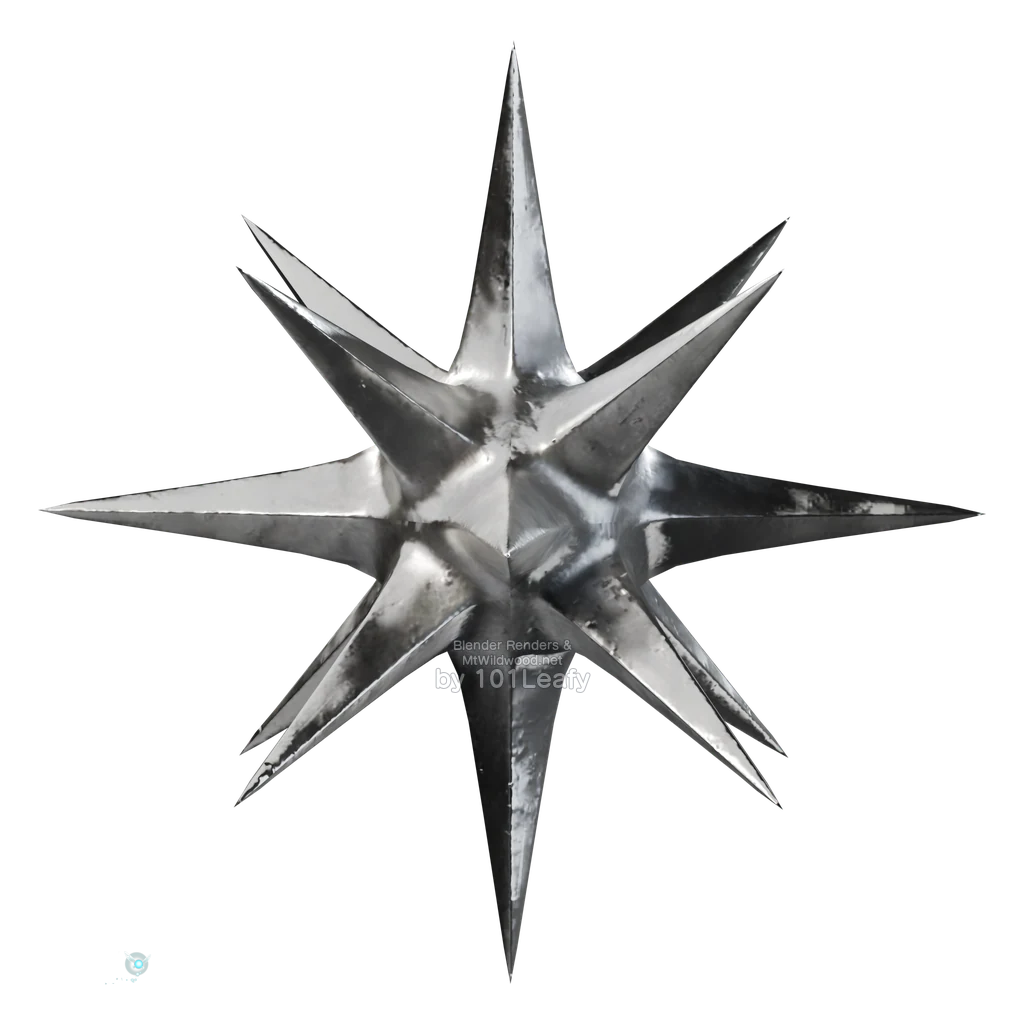
Spike
Age: Adult
Location: Water Temple, in the waterways with the Rolling spiky enemies.
Defeat: Keep your shield ready. Only attack when the spikes are retracted.
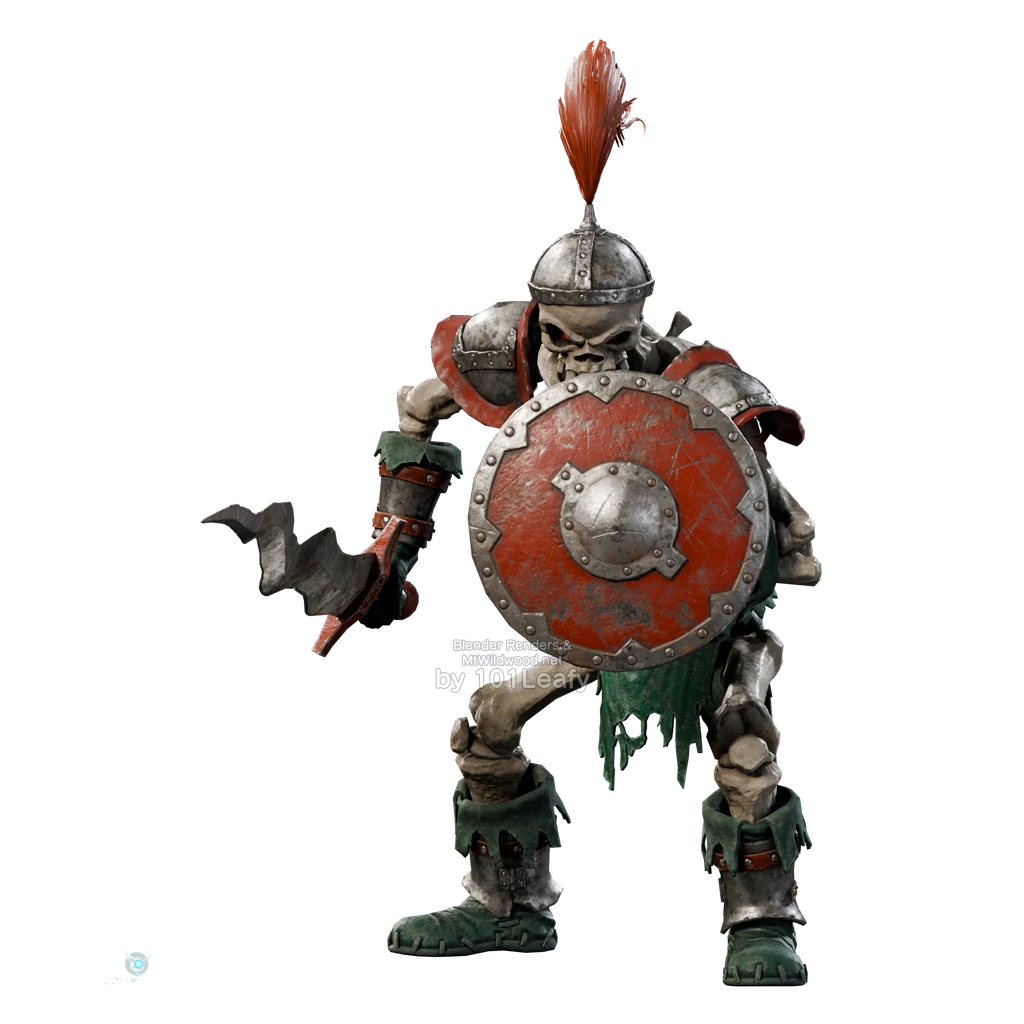
Stalfos
Age: Adult
Location: Forest Temple, under among other things, in the Fairy Bow Room; further battles in the Shadow Temple, the Training Arena, and the final tower.
Defeat: Wait for a sword attack, dodge, and counter. In group battles, defeat all opponents quickly one after the other.
Other forms: In addition to the Forest Temple battles, also include the later Stalfos encounters. The entry distinguishes two forms.
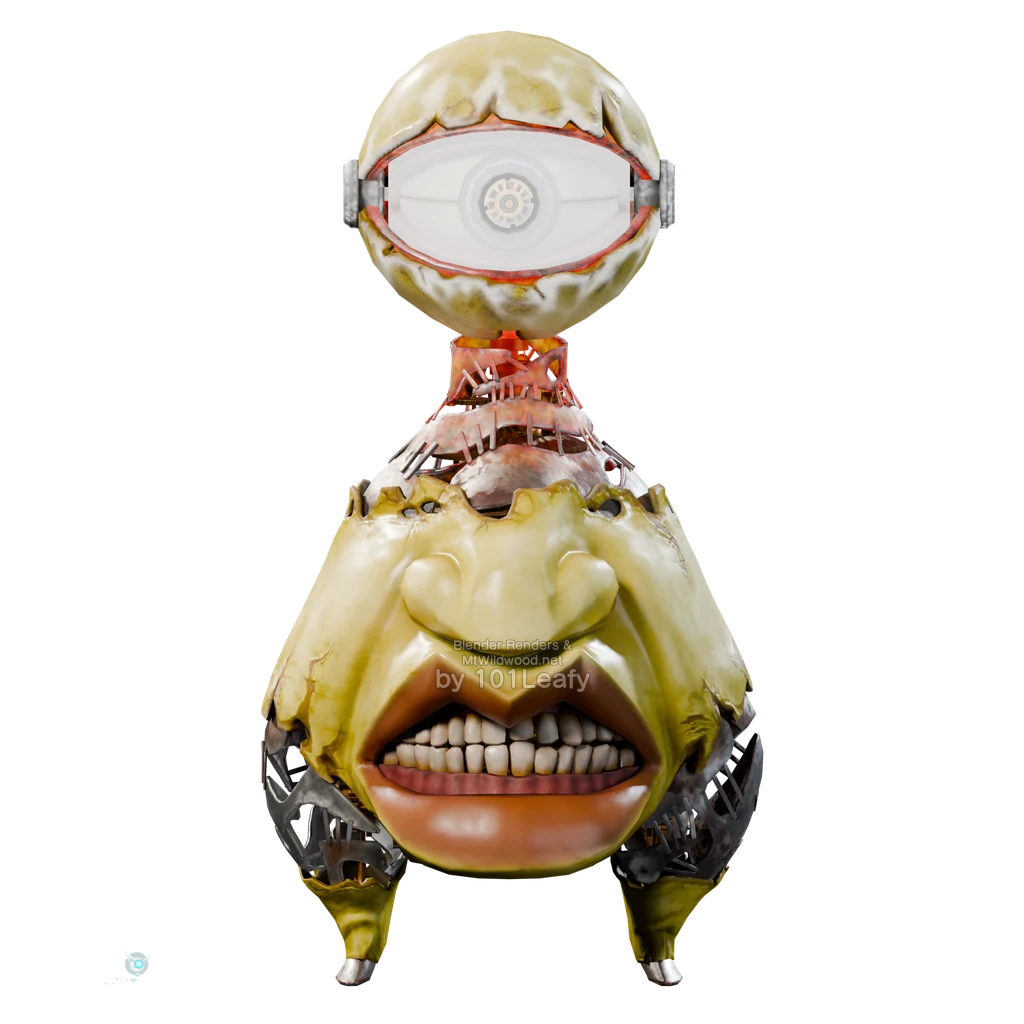
Beamos
Age: Child or Adult
Location: Dodongo Cavern The stone guardians with one eye; also in the well and Shadow Temple.
Defeat: Place or throw a bomb next to the guardian and move out of its beam area.
Monster T-Z
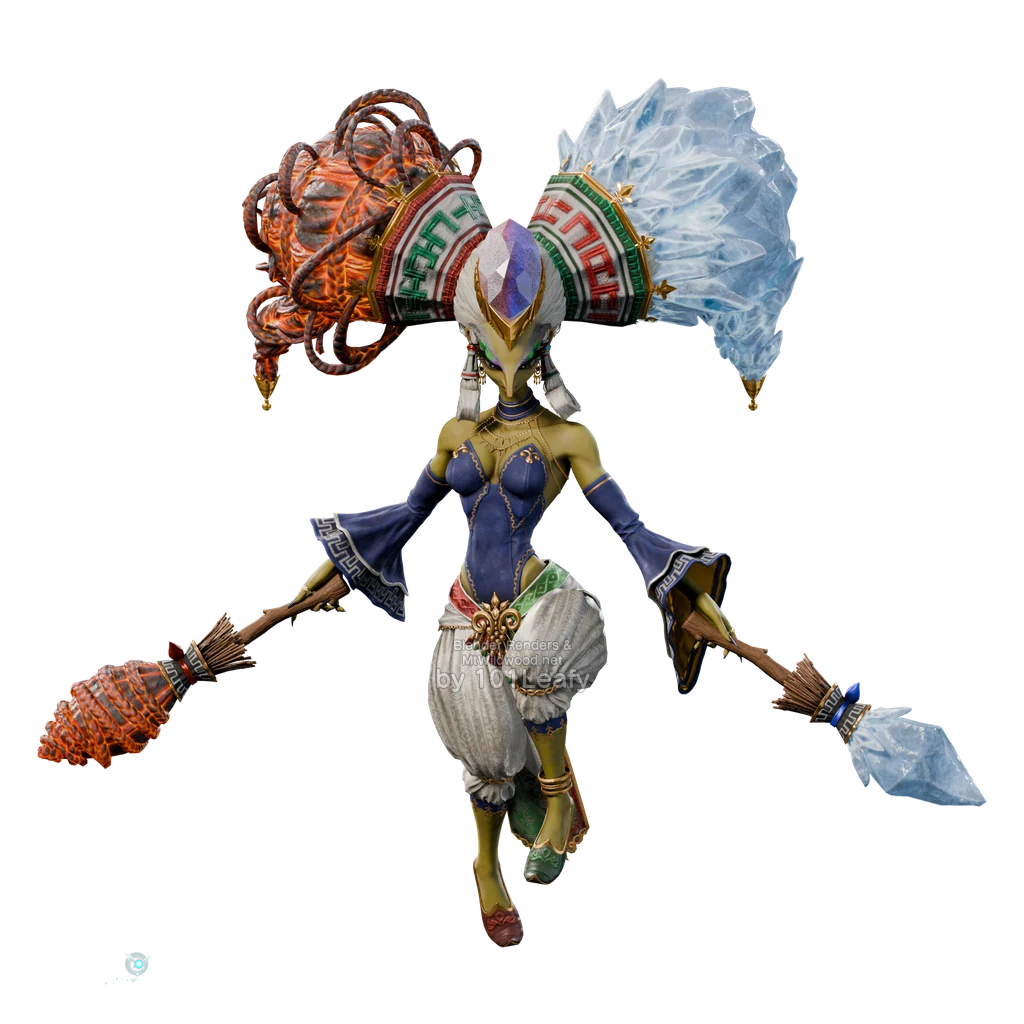
Twinrova
Age: Adult
Location: Spirit Temple, final boss chamber after Nabooru’s liberation.
Defeat: First, reflect fire and ice at the other witch using the Mirror Shield. Later, charge three of the same element, throw them back, and attack Twinrova.
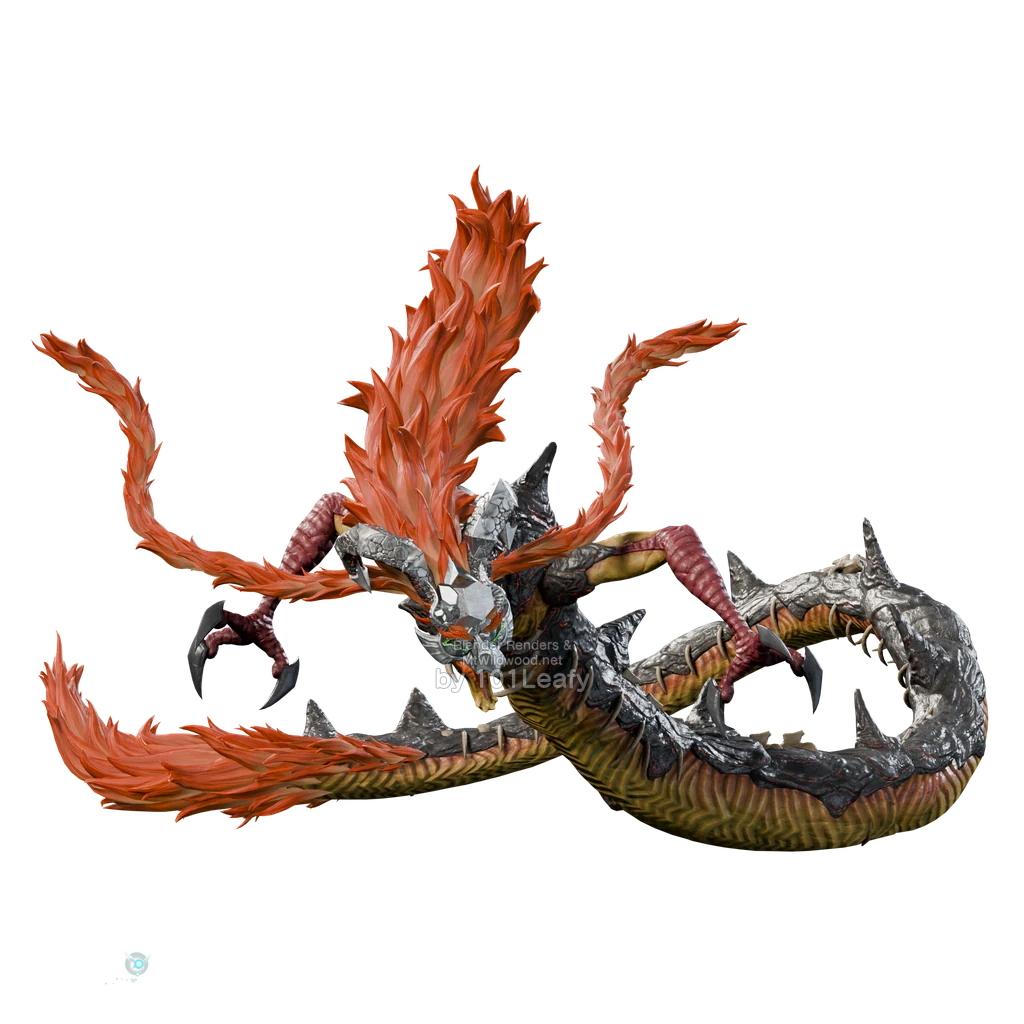
Volvagia
Age: Adult
Location: Fire Temple, in the boss chamber.
Defeat: Strike the emerging head with the Megaton Hammer and attack with the sword. Dodge fire and falling rocks during the flight phases.
Basic skull model; the aura distinguishes the variants.
White Bubble
Age: Adult
Location: Spirit Temple, near the white-wrapped, circling skulls.
Defeat: Wait for an accessible section of its flight path and hit it with a bow or sword.
Common basic Wolfos model; the location and frost attacks differentiate the variants.
Wolfos
Age: Child or Adult
Location: Sacred Grove: as a child at the entrance to the Maze; as an adult also in the Forest Temple.
Defeat: Dodge the claw attack and counter on its back. A regular Wolfos and the White Wolfos are separate entries.
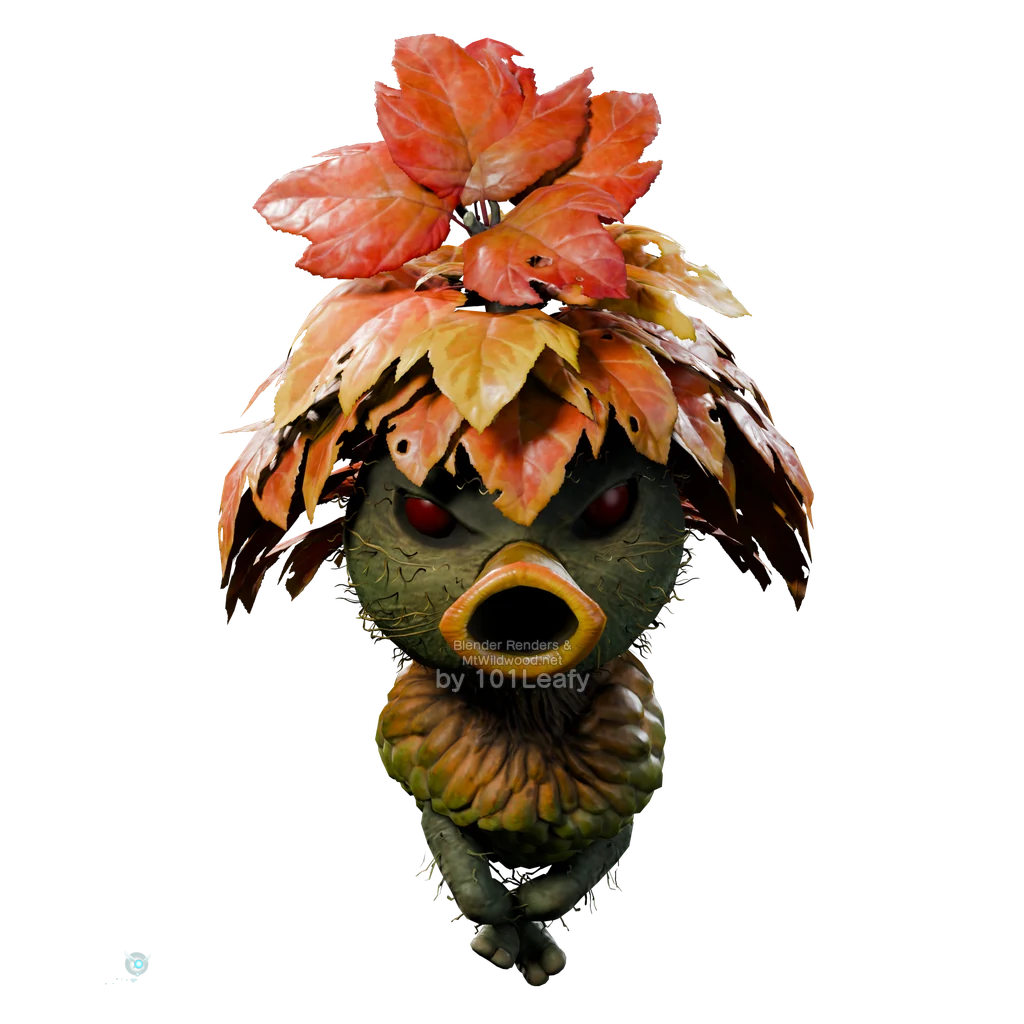
Mad Scrub
Age: Child or Adult
Location: Sacred Grove As a child; as an adult also in Kokiri Forest and on Lon Lon Ranch.
Defeat: Block the rapid nut sequence with your shield, then approach and attack.
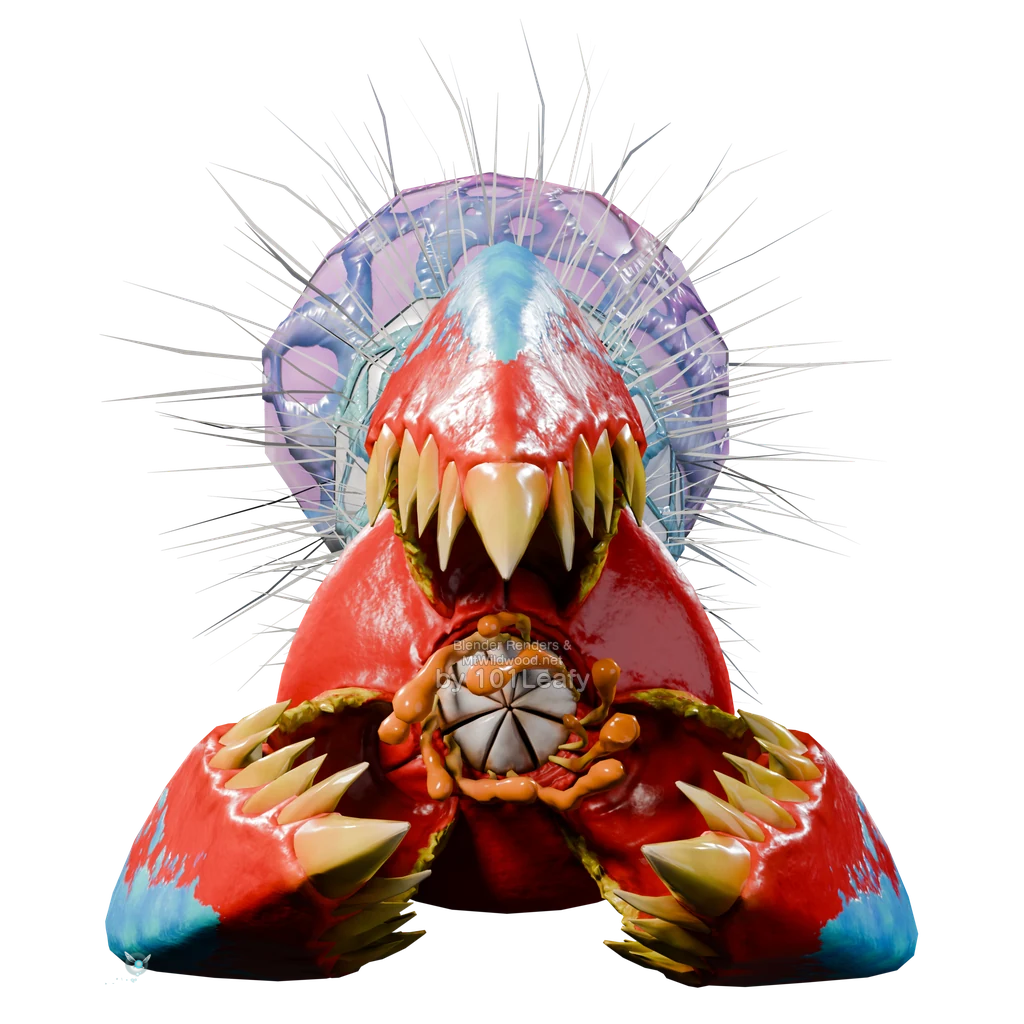
Tailpasaran
Age: Child
Location: Lord Jabu-Jabu’s Belly, against the electric enemies flying through the body.
Defeat: Hit the enemy with the boomerang. Keep your distance from its electrically charged body.
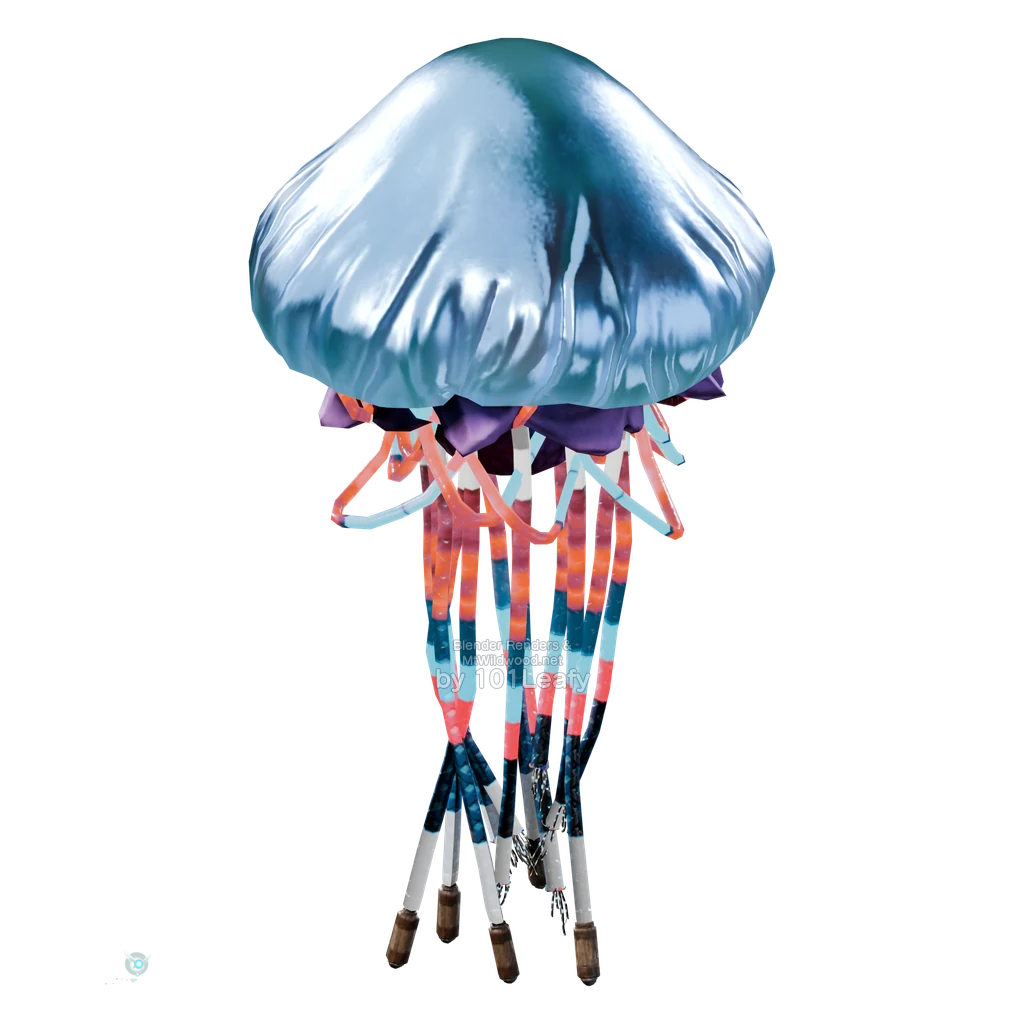
Biri
Age: Child
Location: Lord Jabu-Jabu’s Belly, with the small electric jellyfish and the creatures that evolved from large jellyfish.
Defeat: Use the boomerang to avoid getting electrocuted during attacks.