

The path to the Zora in The Legend of Zelda: Tears of the Kingdom occurs sooner or later as part of the main quest “Regional Phenomena”.
In the Lookout Landing you will receive four markers and should investigate the unusual phenomena in the different regions Hyrule’s. One of these destinations lies far to the east in Lanayru, home of the Zora people.
Since the events of Hyrule Castle, a viscous, dark purple substance has been falling from the sky. The mud pollutes the water, blocks paths and threatens the residents of Zora’s Domain.
This Walkthrough leads from the Lookout Landing to the Zora village and then through the complete main quests
“Covered in mud”,
“Sidon of the Zora’s Domain”,
“The Broken Stone Tablet”,
“Clues about Heaven” and
“Repairing the Zora Armor”.
Afterwards we cross the Ancient Zora Sanctuary, the Island of Sparkling Waters and the entire Water Temple. The solution ends with the fight against Mucktorok, the scourge of the Water Temple.
Preparation for the journey to the Zora’s Domain
You do not need any special cold or heat protection for the journey to Lanayru. Much more important are water sources that can be used to remove the purple mud.
Recommended equipment
- At least two usable sheets
- About 30 to 40 arrows
- Multiple water fruits
- Normal or blue Chuchu Jelly
- At least one hydrant from the Zonai component bag
- A blunt weapon for breaking rock blockades
- Healing dishes
- One or two endurance dishes
- Optional: Sticky Elixir or the toad set for wet rock walls
How to remove the mud?
The mud reacts to all water attacks. Suitable are:
- Arrows connected to water fruits,
- thrown water fruits,
- normal or blue Chuchu Jelly,
- Zonai hydrant,
- Wands or weapons associated with an opal,
- later Sidon’s water wave.
Splash Fruit arrows are particularly suitable for distant or high-altitude contamination. For large areas, a hydrant is much more economical.
1. The long way from Lookout Landing to Lanayru
The classic route leads from Lookout Landing over the Hyrule Field and through the swamps of Lanayru. It’s longer, but features several shrines, stables, and other fast travel points.
- Leave the Lookout Landing in a southeast direction.
- Follow the road through Hyrule Field.
- Cross the rivers and bridges towards Lanayru Swamp.
- Pass the swampland stable.
- Follow the main road further east and then northeast.
- Orient yourself along the Zora River and the signposts to the Zora’s Domain.
A horse makes the first part of the route easier. However, in the rocky and muddy areas in front of the village you often have to continue on foot.
The purple mud areas deal damage and slow Link down significantly. Don’t try to walk through larger areas. Instead, clear a narrow corridor with aquatic fruits or bypass the polluted areas over rocks.
tower on the Upland Zorana
To the west of the village is the Skyview Tower on the Upland Zorana. Its entrance is completely covered with mud.
- Collects a Splash Fruit from the surrounding plants.
- Throw them on the mud in front of the front door.
- Alternatively, shoot a Splash Fruit arrow at the blockade.
- Enter the tower and activate the terminal.
The tower reveals the surface and sky map of Lanayru. It is also the starting point for the fastest route to Zora’s Domain and to the Land of the Skyfish, which will be required later. You can find more towers in our solution for all Skyview Towers .
2. The short route via the Skyview Tower
If you have already activated the tower on the Upland Zorana, most of the walk can be skipped.
- Teleport to the tower on the Upland Zorana.
- Let Link shoot into the sky.
- Turn to the east or southeast.
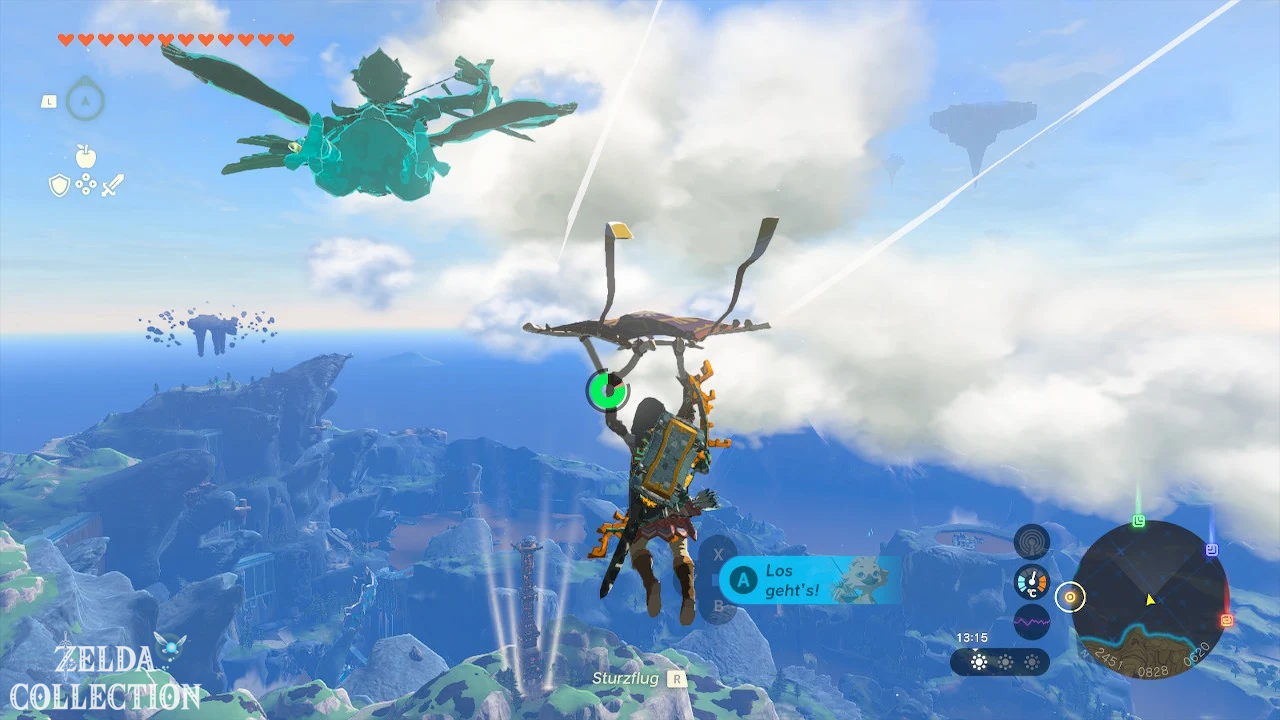
- Opens the Paraglider and glides to the clearly visible Zora’s Domain.
The village lies in a valley crossed by watercourses. Its curved silver buildings can be clearly seen from the air.
With Tulin’s gust of wind you can reach the village without stopping. If you haven’t completed the Orni main quest yet, an improved stamina bar or a stamina dish is usually enough. The walkthrough to Tulin’s ability can be found at Tulin of Rito Village .
3. Zora’s Domain and Mogawak Shrine
After arriving, you immediately notice that large parts of the village are covered in mud. Speak with the residents to learn more about the situation, Prince Sidon, and the disappearance of King Dorephan.
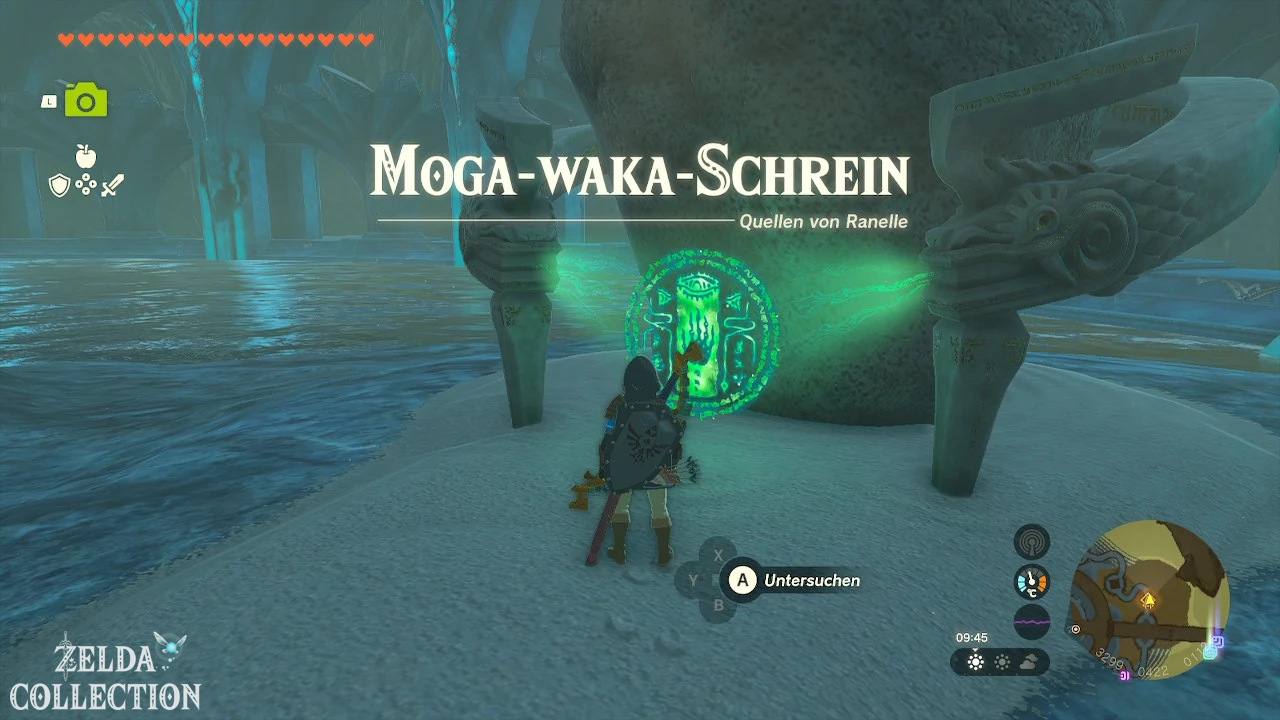
Activate Mogawak Shrine
Activate the Mogawak Shrine below the central city platform as early as possible. It serves as the main fast travel point during the long Zora questline.
You don’t have to complete the shrine immediately. Enabling the entrance is enough to register it as a fast travel destination.
Shops and supplies
Despite the pollution, several facilities are open. You can buy arrows, ingredients and Zora equipment. Also collect the water fruits around the village and on the surrounding mountain paths.
4. Covered in Mud: Clean the statue in Zora’s Domain
In the central square, Yona and several Zora stand in front of a completely dirty statue. Speak to them to begin the short main quest “Covered in Mud”.
Cleanse the statue with a water attack. The easiest way is with a Splash Fruit:
- Axyl up a Splash Fruit and throw it at the statue.
- Alternatively, connect a Splash Fruit with an arrow while aiming.
- Hit the large mud area at the front of the statue.
A single well-placed water attack is enough. The mud dissolves and the statue becomes visible again.
Then talk to Yona again. The quest “Covered in Mud” ends and the main quest “Sidon of the Village of Zora” begins.
Yona explains that Sidon is treating the injured Zora at Mipha Court on the Ploymus Mountain.
5. Sidon at Mipha Court on the Ploymus Mountain meet
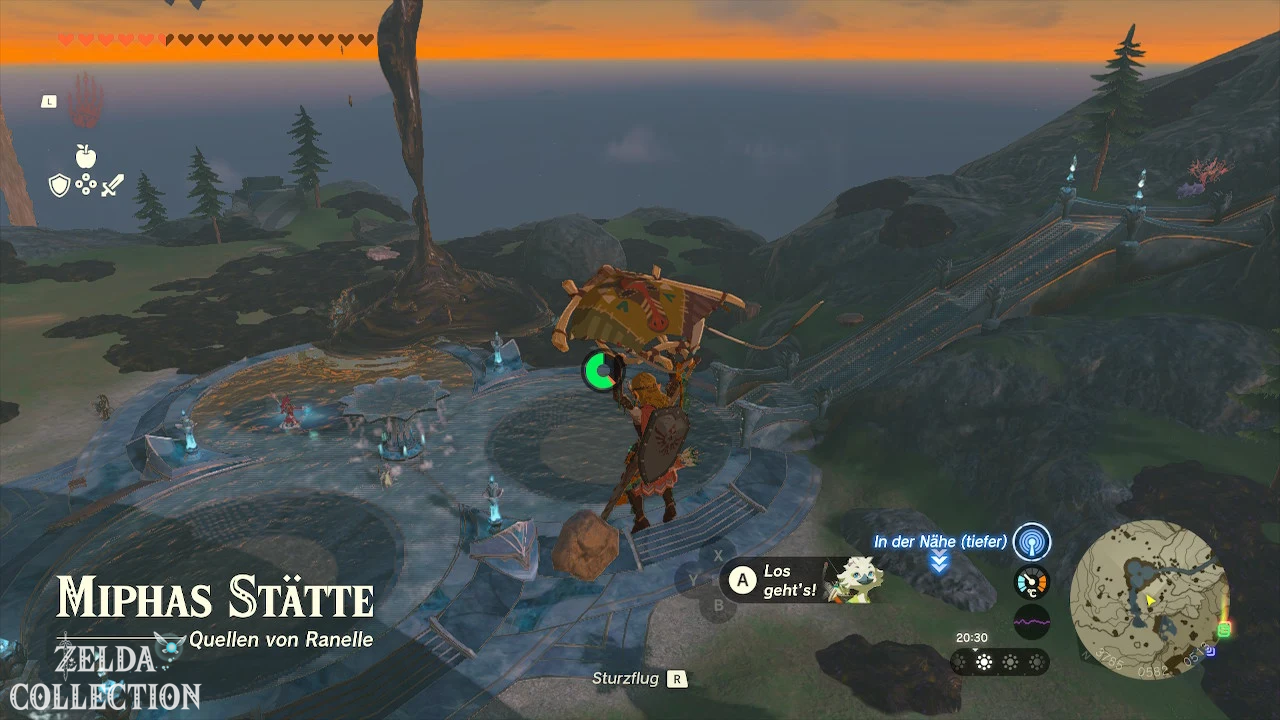
Mipha Court is located on the Ploymus Mountain east of the village. There are several ways to reach the elevated facility.
The normal mountain trail
- Leave Zora’s Domain via the eastern bridge.
- Follow the stairs and the ascending mountain path.
- Follow the signs towards Ploymus Mountain.
- Avoids large areas of mud or cleans them with water fruits.
Path through cave
Northwest of the village, a cave path leads through the Upland Zorana. In the cave you have to break several rock blockages and then use the Ascend to gradually go higher.
Expressway from Skyview Tower
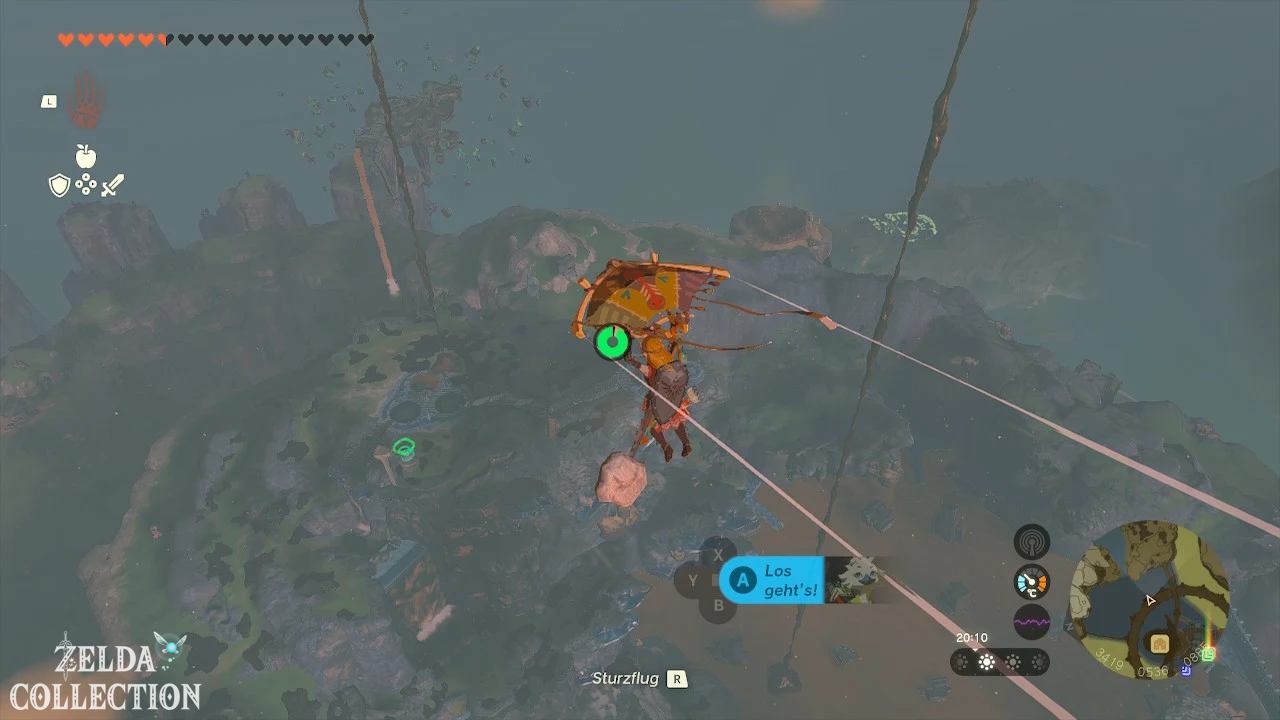
From the tower on the Upland Zorana you can be shot into the sky and glide directly towards Mipha Court.
Activate Ihen-a Shrine
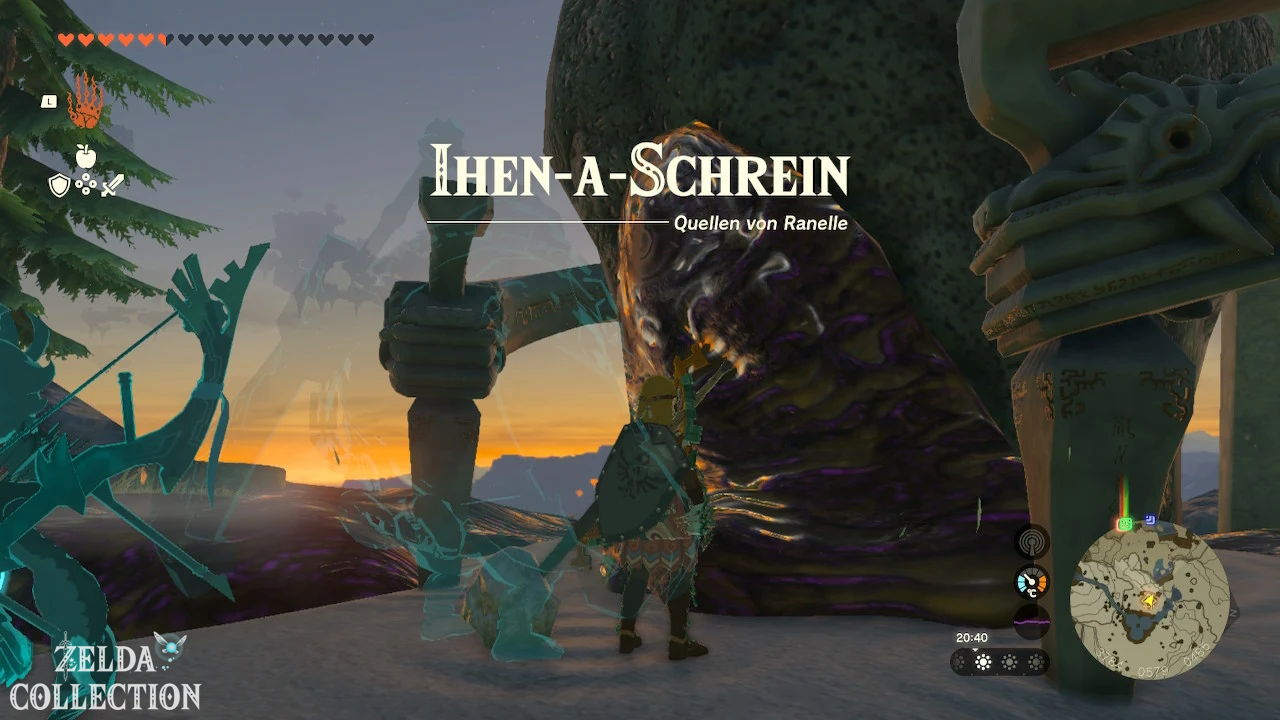
Directly at Mipha Court is the Ihen-a-Shrine. Be sure to activate it. You will have to return to Sidon, Yona and the adjacent highlands several times as the quest progresses.
Then talk to Sidon. He uses his water powers to keep the mud away from the injured Zora.
Sidon reports Zora historian Jiahto examining an ancient stone tablet at Toto Lake. This could contain clues to the mud and the appearances in the sky.
Find 6. Jiahto on Toto Lake
The Toto Lake is located north or northwest of Mipha Court. Because of the mud, it does not appear on the map as a normal blue lake, but has a brownish color.
- Starts at Ihen-a-Shrine or at Mipha Court.
- Glides northwest.
- Look for a small cave on the southwest edge of Lake Toto.
- Enter the cave and talk to Jiahto.
Jiahto stands in front of a damaged stone tablet. A crucial part is missing, which is why he cannot fully translate the ancient inscription.
This begins the main quest “The Shattered Stone Tablet”.
7. Find the missing piece of the stone tablet
The fragment you are looking for is located just a few meters from Jiahto’s cave. Leave the cave and look at the rocks to the right of the entrance.
The piece of the table is almost completely covered in mud. With Ultrahand activated you can recognize the fragment as a moving object despite the contamination.
- Clean the fragment with a Splash Fruit or a fire hydrant.
- Then grab it with the Ultrahand.
- Carry it into Jiahto’s Cave.
- Rotates it so that its edges fit into the gap in the stone tablet.
- Inserts it into the vacant space.
Once the piece is in place, the tablet is completed and Jiahto can decipher the inscription.
8. Decipher the inscription on the stone tablet
Tradition mentions several enigmatic terms:
- the land of the sky fish,
- floating rocks forming a drop from a certain perspective,
- the sign of the king,
- a water bridge that should appear after solving the puzzle.
The King’s Mark can only come from King Dorephan. However, this is not located in Sanctum and its whereabouts are kept secret by the residents.
After the conversation, “The Broken Stone Tablet” ends and the main quest “Clues about Heaven” begins.
9. Find King Dorephan in Pristine Sanctum
The wanted king is in the Pristine Sanctum or in the hidden crystal water sanctuary. The place is located between the Zora village and the Ploymus Mountain behind one of the few still clean waterfalls.
Received the intended notice
First return to the Sanctum of the Zora’s Domain. There are three Zora children playing and talking about the king’s A Place of Shelter. If you approach them openly, they interrupt the conversation.
- Go behind the throne.
- Climb into the raised seat or behind the low wall.
- Crouches down.
- Approach the children from the hidden side.
- Press the displayed button to listen.
The children name a secret place between Ploymus Mountain and Zora’s Domain.
Direct route to Pristine Sanctum
- Teleport to the Ihen-a Shrine at Mipha Court.
- Glides west or northwest to Lulu Lake.
- Look north of the lake for a small hole next to a waterfall.
- Drop down through the opening.
Alternatively, you can use the lower entrance. To do this, swim through the clean waterfall at the foot of the mountain. Behind the water lies the large cave of the Crystal Water Palace.
Inside you will meet King Dorephan and Muzu. Speak to the King to learn more about a mud monster attack and the mysterious apparition Princess Zelda’s.
10. The Royal Scales receive
Report to Dorephan about the reconstructed stone tablet. The king realizes that the “sign of the king” must mean one of his scales.
You will receive five royal scales . Only one is needed for the puzzle. The remaining copies remain in your inventory.
11. Reach the land of the sky fish
The Land of the Sky Fish is the Scale Dance Island, a fish-shaped sky island southeast of Mipha Court.
Its elongated shape can be clearly seen on the sky map. The island is significantly lower than the later Water Temple.
Route via the Skyview Tower
- Teleport to the tower on the Upland Zorana.
- Let Link shoot into the sky.
- Opens the sky map and highlights the fish-shaped island.
- Glide southeast to the island.
route with the Zora armor
If you have already had the Zora armor repaired, you can also use the waterfall that falls from the island. Jump into the waterfall and press the button shown to swim up.
There are numerous scale stones and several large mud areas on the island. You don’t have to clean the entire island.
12. Find the drop of floating rock
The drop you are looking for is not a single item. Several separate boulders only form a closed teardrop shape from a very specific perspective.
- Head approximately to the southwest area of the island.
- Looking from the edge of the island towards Mipha Court or southwest.
- Slowly moves Link left or right.
- Observe the floating rocks until they visually combine into a
complete drop.
Stops at the point where a clearly visible opening forms in the middle of the drop.
- Draws the bow.
- Opens the material selection for arrows.
- Connects a king’s scale to the arrow.
- Shoot the arrow through the opening in the drop.
The arrow flies to the East Reservoir and creates a bright beam of light there. This solves the puzzle and locates the water bridge.
The main quest “Clues about Heaven” will be completed.
13. Zora Armor Repair: Find Ancient Arowana
The Zora Armor is mandatory to swim up the falls to the Island of Bubbling Waters.
Speak to Yona at Mipha Court. She can repair Link’s old Zora armor, but requires the scales of a Ancient Arowana.
Simplest Location
Climb the large stairs to the Mipha statue at Mipha Court. Several fish swim in the clean pool around the statue.
- Approach the water slowly.
- Jump into the pool.
- Swim to an Ancient Arowana.
- Collect it using the button shown.
Ancient Arowanas can also be found on various Sky Islands. However, the pond at Mipha Court is the fastest and safest Location during this quest.
14. Have the Zora Armor repaired
Bring the Ancient Arowana to Yona. She repairs the Zora Armor and gives it to Link.
The armor has two important properties:
- Link can swim up waterfalls.
- Individual parts increase swimming speed.
After completing the Water Temple, the Zora Leg Guard can also be found in the Ancient Zora Sanctuary as part of a Side Quest.
15. Sludge Like, spotter of Mipha Court
After finding Dorephan, solving the drop puzzle, and obtaining the Zora Armor, return to Sidon at Mipha Court.
During the call a Sludge Like appears. The monster is completely surrounded by mud and is initially protected against common attacks.
Use Sidon’s ability
- Approach Sidon and activate his ability.
- A protective bubble of water surrounds Link.
- Performs a normal attack with a melee weapon.
- The attack sends a wave of water forward.
The water wave removes the mud from the Like Like. Sidon’s bubble simultaneously protects Link from a single enemy hit. If the protection is hit, it disappears and Sidon’s ability must be recharged again.
Hit weak point
- Removes the mud layer with Sidon or a Splash Fruit.
- Waits until the Like Like opens its mouth wide.
- Hits the exposed weak point with an arrow or weapon.
- Attack the stunned monster with your strongest melee weapon.
Repeat the process until the Sludge Like is defeated. Take a photo of him before the last hit if you want to complete the Hyrule Compendium with pictures you took yourself.
After the fight, Sidon accompanies you to the eastern reservoir.
16. Sidon at the east reservoir meet
The East Reservoir is located south of Mipha Court. Follow the quest marker or glide directly down to the lake from Ploymus Mountain.
Sidon waits on a large stone platform near the beam of light created by the drop puzzle.
Talk to him. Sidon creates a huge whirlpool in the water. Jump into the middle of the whirlpool and let yourself be pulled into the cave below the lake.
17. Traverse the Ancient Zora Sanctuary
After falling through the whirlpool, Link ends up in the Ancient Zora Sanctuary. The goal is to unclog several blocked water tributaries and thereby increase the water level in the large cave room.
Build a hammer weapon
There is a chest with a weapon near the entrance. You will also find several rocks.
- Axyl up a suitable weapon.
- Connects them to a rock.
- Uses the resulting hammer weapon for the blockades.
First rock blockade
Smash the rocks in the right corner of the first room. The released water raises the level and allows access to the large main room.
Second blockage
In the main room there is another blocked opening just above the surface of the water.
- Places a wooden plank in the water.
- Puts Link on the board.
- From there, smash the rock blockade.
Be careful not to accidentally destroy the wooden board with the hammer weapon.
Third blockade on slippery slope
Another blocked opening is on a slippery and difficult to climb surface.
- Connects several wooden boards to form a long ramp.
- Leans the construction against the slippery wall.
- Run across the boards to the blockade.
- Smash the rocks.
Through the pipe opening
Then swim to the left side of the main room and climb onto the ledges. Jump from an elevated point into the large pipe opening.
Follows the pipe to an area where dirty water drips through a grate. Stand under the grate and use the Ascend.
Break the last rock blockade and climb up the ladder. Open the gate with the large lever.
Activate The Altar
Swim to the central The Altar and examine it. A huge waterfall now shoots up from the eastern reservoir all the way to the sky islands.
This waterfall is the water bridge announced in the stone tablet.
18. Use the water bridge
Leave the Ancient Zora Sanctuary and speak to Sidon again. Put on the Zora armor now at the latest.
- Jump into the big waterfall.
- Press the displayed button to swim up.
- Link is carried into the sky by the entire waterfall.
You land on the island of bubbling waters. There is low gravity in this area of the sky. Link jumps higher and falls much slower than on the surface.
19. Traverse the Island of Sparkling Waters
After landing, talk to Sidon. Then follow the largely linear island path.
water bubbles as lifts
The green glowing devices produce large water bubbles. Touch a bubble to be trapped inside and carried upwards.
- Stand in front of the bubble device.
- Get caught in a water bubble.
- Waits for the bubble to reach its highest position.
- Jump out and slide to the next platform.
Water bubbles burst after a short time. So leave them on time.
constructs and mud areas
Several Zonai constructs are waiting on the larger islands. You can defeat the opponents or run past them if supplies are low.
Cleans only the mud areas that block a path, waterfall or bubble device. You can save materials with water fruits and Sidon’s ability.
Polluted Waterfalls
Some waterfalls are covered in mud. Shoot a Splash Fruit arrow at the head of each fish or snake statue. As soon as the waterfall flows cleanly again, you can swim up it with the Zora armor.
20. Activate Igoshon Shrine as a fast travel point
On the designated route is the Igoshon Shrine. Be sure to activate it before continuing the climb.
The Shrine is the main reset point on the Isle of Bubbling Waters. If you crash later, you can quickly return to the ascent route from here.
Inside you also use the low gravity and rising water bubbles. One of the bubbles can be sent back to its previous direction using the Recall.
21. From the Island of Sparkling Waters to Water Temple
Reverse water bladder
A water bubble comes towards you at a larger gap and then moves away from the target.
- Applies the Recall to the water bubble.
- Quickly jump into the running back bubble.
- Get transported to the higher platform.
Deflect bubble over a ramp
In the following area, the water bubbles generated hit a wall.
Leans a large stone slab diagonally against the wall to create a ramp.
The water bubbles slide up the sloping plate. Jump into a bubble and let yourself be carried to the next level.
Start aircraft
Shortly before the end, a Wing, fans and other Zonai Devices are ready.
- Places the Wing on the designated launch pad.
- Attaches at least one fan to the rear.
- Stand on the Wing.
- Activates the fan or the starting mechanism.
- Glide to the next island.
Meet Sidon there again and defeat the waiting construct. Then use the last waterfall to swim up to Water Temple.
22. Water Temple – The Great Source Hyrule’s
Upon arrival, speak to Sidon and activate the green Zonai terminal. This will register the Water Temple as a fast travel point.
The large mass of mud in the middle cannot yet be completely washed away. To do this, four water wheels must be activated.
Each water wheel can only be switched on with Sidon’s water wave:
- Approach Sidon.
- Activates his ability.
- Imagine the water wheel.
- Performs a normal melee attack.
The fired water wave turns the Big Wheel and opens one of the four locks.
orientation in Water Temple
- 1F: Main Platform and Outer Sky Islands
- B1: small interior space to the west under the main platform
- Low gravity is active throughout the temple.
- The order of the four water wheels can be freely selected.
The following route starts in the basement and then works clockwise across the outer islands.
23. Waterwheel 1 – Basement B1
Jump down from the western edge of the central platform. Follow the narrow path to a chamber whose entrance is blocked by a wall of fire.
Through the wall of fire
- Activates Sidon’s Water Bubble.
- Run through the flames with the protection.
- Places a floating cube on the Floor Switch to permanently turn off the fire wall.
Sidon can now follow you into the room.
Transport the ball over the spike field
There is a large ball at the other end of the room. In between there is a wide field of spikes.
- Activates one of the green floating blocks with one hit.
- Positions it over the spike field.
- Jumps or slides to the other side.
- Attaches the ball to a floating cube.
- Transports the construction back to the entrance.
Hold the ball in the wall opening
The round holder is located vertically in the wall. A loose ball would immediately fall out again.
- Leave the ball attached to the activated floating cube.
- Rotates the cuboid so that the ball faces the wall.
- Pushes the ball into the round holder.
The cuboid holds it in position and the grille in front of the waterwheel opens.
Activates Sidon and hits the water wave against the Big Wheel. The first water wheel is turned on.
24. Waterwheel 2 – Western Sky Island
Return to the main platform and go to the larger island to the west or southwest.
Uses low gravity, surrounding waterfalls and floating blocks to reach the elevated platform.
Clean bubble device
There is a large ball on the lower level. The nearby water bladder device is clogged with mud.
- Cleans the device with a Splash Fruit or Sidons shaft.
- Lifts the large ball with the Ultrahand.
- Hold it in front of a newly created water bubble.
- Let the bubble carry the ball to the upper level.
- Climbs into the next water bubble yourself.
Drain basin
On the upper level, the ball floats above its round holder. It can only click into place when the bowl is emptied.
- Take an activated floating cube.
- Attach it to the top of the large flood gate.
- Lifts the gate and cuboid together with the Ultrahand.
- Let go as soon as the cuboid holds the gate in the open position.
The water runs out and the ball falls into the holder. The second water wheel becomes accessible behind the opened grille.
Activate Sidon and hit the Big Wheel with the water wave.
25. Waterwheel 3 – Northeast Sky Island
Return to the center and look northeast. A polluted waterfall falls from a fish or snake statue.
- Shoot a Splash Fruit arrow at the mud at the water outlet.
- Jump into the purified waterfall.
- Swim up with the Zora armor.
Alternatively, you can reach the platform via suspended blocks, climbing passages or a self-built Wing.
Build hydroelectric power station
There is a Big Wheel with a horizontal axis on the island. There are two elongated stone slabs next to it.
- Attaches a stone plate to one end of the wheel axle.
- Attach the second plate on the opposite side.
- Turns a plate with the Ultrahand into the water jet.
The water flow captures the plates and sets the Big Wheel permanently in motion. This generates electricity.
Close open circuit
There is a gap between the two electrical conductors in front of the door. A water bubble can conduct electricity.
- Grabs a water bubble with the Ultrahand.
- Positions it between the two conductors.
- Make sure that both contacts touch the water bubble.
The circuit is closed and the grid opens. Activate the third water wheel behind it with Sidon’s water wave.
26. Waterwheel 4 – Southeast Sky Island
Head from the northeast island to the southeast platform. If necessary, defeat the Fire Like and the constructs there.
The water wheel is under water. To empty the pool, you must hit a switch inside a rapidly rotating tower.
Remove mud from the turret
The upper part of the tower is covered in mud. Clean it with a Splash Fruit, Sidon’s Wave or a water bubble.
A reliable method is to hold a water bubble close to the rotating tower with the Ultrahand. Once the bubble pops, the mud will be washed away and the orange switch will be visible.
switch hits
in slow motion
- Activates a floating box.
- Positions it high above the platform.
- Use the Ascend or climb the cuboid.
- Jumps from above.
- Draws the bow while falling.
Time slows down. Wait until the opening of the rotating turret is facing Link and shoot the orange switch.
The water runs out of the pool and the fourth water wheel is exposed. Activate it with Sidon’s Water Wave.
27. All Treasure Chests in Water Temple
There are six permanently placed Treasure Chests in the Water Temple. Additionally, the Fire Like drops a loot chest on the southeast island.
| No. | Contents | Location |
|---|---|---|
| 1 | 5 arrows | In a mud flat on the northeastern Sky Island; Remove mud with water |
| 2 | Opal | Under a stone arch in the water on the southeastern island of |
| 3 | Large Zonai Charge | On the highest ledge of the southeastern island |
| 4 | Zora Shield | On a raised rock of the southwest island; swim up the cleaned waterfall |
| 5 | Sapphire | Underwater in the basin west of the main platform or above the access to B1 |
| 6 | Large Zonaite | On a floating cube above the spike field in the room on B1; Deactivate cuboid and bring down chest |
| 7 | Scaling weapon, often strong Zonaite longsword | Fire Raid Slime Additional Loot Chest; Content may depend on game progress |
28. Activate the large water system
After the fourth water wheel, return to the green Zonai terminal on the main platform.
Before activating, prepare for the boss fight:
- Fully heal link
- Equip at least one intact bow
- Prepare a fast melee weapon or spear
- Take enough water fruits and arrows with you
- Have at least one hydrant available
- Save manually
- Optionally eat an attack or defense dish
Activates the terminal. The four large water reservoirs empty over the central mud mass. The mud is washed away and Mucktorok is revealed.
29. Boss: Mucktorok, Water Temple Scourge
Mucktorok is a small, extremely agile monster. It surrounds itself with a large mud figure that resembles a shark.
As long as the shark shell exists, ordinary melee attacks can hardly reach Mucktorok. Water removes the shell and forces the actual boss out into the open.
Suitable water attacks
- Sidon’s water wave
- Splash Fruit arrows
- thrown water fruits
- hydrant
- Opal Weapons
- blue or normal Chuchu Jelly
In the first phase, Mucktorok moves through the arena mainly in his shark shell.
mud waves
The boss hits the ground, creating a wave of mud. Use the low gravity, jump over the wave and briefly open the Paraglider if necessary.
mud jet
Mucktorok fires a focused beam in Link’s direction. Run sideways and keep your distance. Sidon’s active water bubble can completely absorb a single hit.
Ram attack
The mud shark races straight towards Link. Dodge to the side and, if possible, send Sidon’s water wave towards him at the same moment.
Mucktorok expose
- Activates Sidon’s Water Bubble.
- Target the Shark Shell.
- Performs a normal attack to fire the water wave.
- Alternatively, you can hit the shell with Splash Fruit arrows.
After sufficient water damage, the mud shark will disintegrate. Little Mucktorok immediately tries to run away.
- Hit the fleeing Mucktorok with an arrow.
- The boss falls to the ground and stays there for a moment.
- Run to him and attack with your strongest weapon.
Spears and other fast weapons are particularly suitable because the time window is comparatively short.
Repeats the process until Mucktorok has lost about half of its health.
Phase 2 – The arena sinks into the mud
At the beginning of the second phase, Mucktorok spreads large amounts of mud all over the ground. Link is slowed down significantly and cannot jump normally.
Flush escape routes
Does not randomly clean the entire arena. Instead, create several wide walkways between you, Sidon and the boss.
- Sends Sidon’s wave lengthwise across the ground.
- Throw water fruits into larger mud areas.
- Deploys one or more hydrants.
- Reposition yourself on clean surfaces.
Mucktorok jumps through the mud
After the shark shell is destroyed, Mucktorok will jump back and forth between the mud puddles very quickly in phase 2.
Don’t try to go after him with a heavy weapon. Instead, use one of the following methods:
- Shoot a normal arrow at him.
- Connects a Keese Eyeball to the arrow to make it track its target.
- Jump up in low gravity and use arc slow motion.
- Have a fire hydrant clean its escape route.
Phase 2 attack flow
- Cleanse a wide path to Sidon.
- Activates Sidon’s Water Bubble.
- Removes the shark shell with the water wave.
- Hit the fleeing Mucktorok with an arrow.
- Attacks the fallen boss with quick melee attacks.
- Backs away before forming the shark shell again.
Repeats the process until Mucktorok no longer has any health.
Alternative fire hydrant tactic
If the fight with Sidon is too confusing, you can set up several hydrants
.
- Opens the Zonai component bag.
- Place two or three fire hydrants at a distance.
- Aims her water jets across the arena.
- Activates it in one hit.
A homing truck with a hydrant is even more effective. It automatically follows Mucktorok and removes both its shell and the mud on the ground.
After the last hit, Mucktorok is destroyed and the mud above Lanayru disappears.
30. Completion of the Water Temple
After the victory, a Heart Container appears. Collect it before speaking to Sidon.
In the following cutscenes, Sidon learns about his ancestor, the former Sage of Water. He then accepts the Secret Stone and promises Link his support.
Link and Sidon automatically return to the Zora village. The mud has disappeared, the water flows cleanly again and King Dorephan can return to the palace.
Sidon takes control of the Zora people at the subsequent ceremony.
Vow of Sidon, Sage of Water
As a permanent reward you will receive the Vow of Sidon, Sage of Water.
You can summon or send away Sidon’s avatar via the important items menu.
His ability has two functions:
- The water bubble protects Link from an enemy hit.
- A melee attack sends a wave of water forward.
The water wave can clear mud, put out fires, hit enemies and activate certain mechanisms. Additionally, after using them, Link is briefly considered wet, which activates the special attack power of many Zora weapons.
After the Water Temple
New calls and Side Quests are now available in the Zora village. Among other things, you can:
- Find the Zora Legguard in the Ancient Zora Sanctuary,
- Find the Zora Helmet on Scaledance Island,
- have the Lightscale Lance crafted,
- solve further tasks for Sidon, Yona and the residents.
More walkthroughs for Tears of the Kingdom
- Tears of the Kingdom – full Walkthrough
- To the Kingdom of Hyrule
- Activate all Skyview Towers
- Tulin of Rito Village and the Wind Temple
- Yunobo of Goron City and the Fire Temple
- Riju of Gerudo Town and the Lightning Temple
- Interactive Map for Tears of the Kingdom
- The floating lock
Once you have examined the other three regional phenomena, return to Purah in Lookout Landing. The main story then continues with “Crisis at Hyrule Castle”.