

You get the main quest “Crisis at Hyrule Castle” in The Legend of Zelda: Tears of the Kingdom early in the game. After you visit Hyrule Castle for the first time, talk to Hoz and then report to Purah, the extensive main quest “Regional Phenomena” starts.
This must be completely completed before Purah begins the next section of the story. Through the telescope on her house at Lookout Landing we see Princess Zelda at Hyrule Castle. She is surrounded by a blood moon and appears to be calling Link to her.
Then go to the floating castle and follow the supposed princess through the different levels. You can expect six fights against hordes of monsters and then an extensive boss fight against Phantom Ganon.
Navigation
- Prepare for Hyrule Castle
- Hyrule Castle reach
- First target point: Second gatehouse
- Second objective point: Library and Black Hinox
- Third objective point: Gibdos on the stairs
- Fourth target point: Zelda’s Room
- Fifth target point: Silver Moblin
- Sixth objective point: Shock Likes
- Return to Sanctum
- Boss: Phantom Ganon
- Reward and return to Purah
Prepare for Hyrule Castle
Before you set off, you should prepare yourself sufficiently. Six fights against hordes of monsters await you in the castle, followed by a boss fight that consists of two phases. Take several good weapons, at least two durable shields, a strong bow, plenty of wooden arrows and enough healing dishes.
Sunspot Sundelion meals are particularly useful, as Phantom Ganon’s attacks damage your hearts with Gloom. Normal food cannot replenish the hearts blocked by the Gloom. Therefore, eat a Sundelion meal first and then, if necessary, a normal healing dish.
Also activates the oaths of Tulin, Yunobo, Sidon and Riju. The four sages accompany you through the castle and are of great help, especially in the fight against Phantom Ganon.
Armor that has been improved as much as possible will make the upcoming battles much easier. If you have hardly strengthened your equipment so far, you can first unlock the Great Fairies and have your favorite pieces of armor improved there.
Reach Hyrule Castle
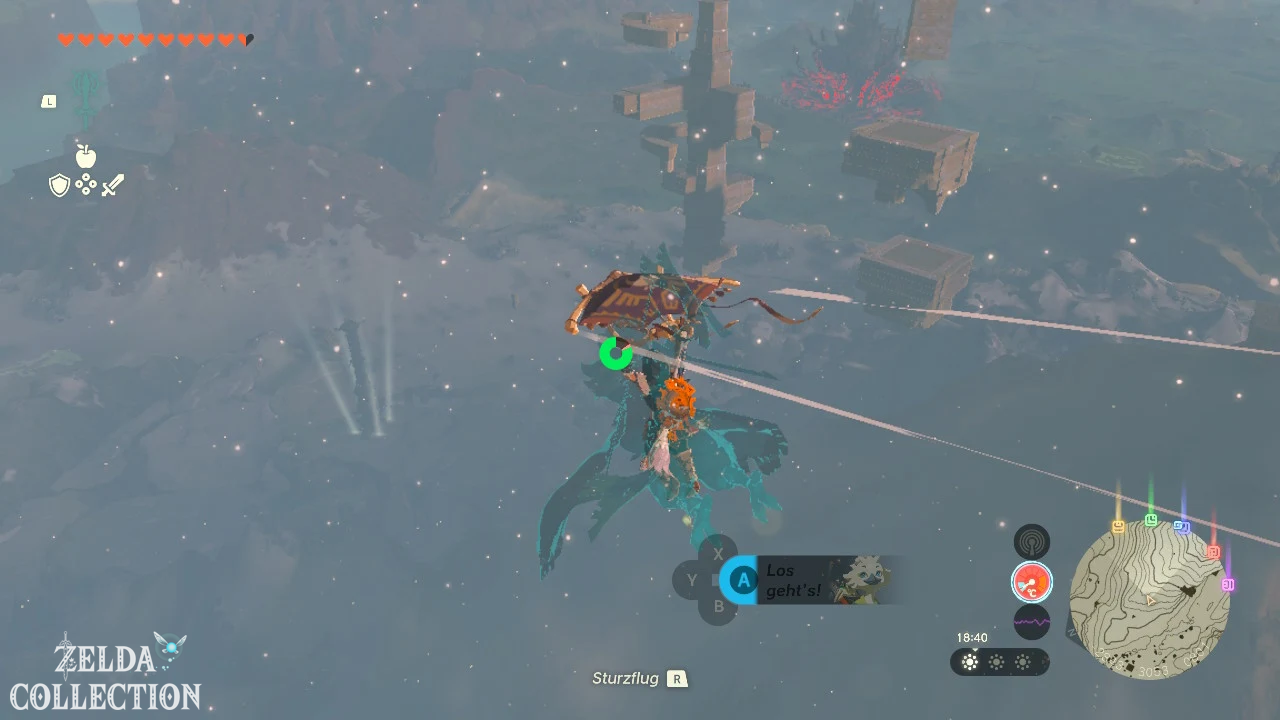
The easiest way to reach the floating castle is with the cartography tower in the Lookout Landing. Let yourself be shot up, open the Paraglider and glide north towards Hyrule Castle.
Use Tulin’s Gust of Wind along the way to move faster. If your stamina is not enough, stamina dishes or stamina medicine will help. When approaching, keep a little to the right and head for the southeast side of the castle. There is the second gatehouse where the first yellow target point is displayed.
During the quest there is a thunderstorm around the castle. Pay attention to the lightning display and put down metallic weapons, bows and shields in time as soon as Link is surrounded by electrical sparks. Otherwise, the lightning bolt will hit Link or his equipment directly.
First target point: The second gatehouse
Land on the roof of the second gatehouse and drop through the opening inside. Zelda is already waiting behind the large gate, but disappears again and leaves you to a horde of monsters.
You have to compete against a black Boss Bokoblin and several Bokoblins. Take care of the smaller Bokoblins first so that they don’t constantly interrupt you with arrows and melee attacks. You can then stun the Boss Bokoblin with headshots and attack with your strongest weapons.
Tulin’s Arrows and Riju’s Lightning are particularly useful in this limited area. After the fight, a Treasure Chest will open. Inside is a guard shield with a defense of 70, which you should take with you for later battles. Then use the Ascend to get back to the roof of the gatehouse.
To the Serutabomac Shrine and to the library
From the roof of the gatehouse you glide north or northwest to the open entrances to the actual castle. Follow the outer path down onto U2 and then head north.
Near the next target point you will discover the Serutabomac Shrine. Be sure to activate it, even if you don’t want to complete its test at first. From now on, the shrine serves as a teleport point and saves you from having to fly again from the Lookout Landing in the event of a crash or defeat. You can find more shrines in the area in our overview of the shrines inside Hyrule.
Directly below the shrine there is a long staircase leading to U3. Follow it down and turn into the library. Zelda appears there for the second time.
Second objective point: Black Hinox in the library
The supposed princess also disappears here and summons a Black Hinox as well as a Fire, Ice and Electric Chuchu. The Hinox represents the greatest danger in this fight.
Aim an arrow at his big eye. After a successful hit, he falls to the ground and is defenseless for a few seconds. Run to him, attack his legs with a strong weapon and retreat as soon as he gets up again.
You can defeat the elemental slimes next to the Hinox so that their explosions cause additional damage. Keep enough distance to avoid being frozen, burned or electrified. Repeat the eye hits until the Hinox is defeated.
There is also a secret room in the library. Examine the large bookshelves with the Ultrahand. One of them can be moved and provides access to the king’s study. There you will find the bodyguard boots in a Treasure Chest as well as other high-quality equipment.
To continue the quest you then have to go to the stairs on the eastern or northeastern side of the library.
Third objective point: Gibdos on the stairs
Climb the stairs until Zelda appears in a passage again. Shortly afterwards you will be attacked by several Gibdos and a flying Gibdo.
Normal attacks initially do little damage. Hit the enemies first with fire, ice, water or electricity to turn their hard shell white and sensitive. You can then defeat them with normal weapons and arrows.
The fight with Riju is particularly easy. Wait until its yellow area of effect has spread across the stairs and then shoot an arrow at one of the Gibdos. Lightning often hits multiple enemies at the same time.
Stay at the bottom of the stairs if possible so that the monsters don’t surround you. Also watch out for the flying Gibdo’s projectiles and kill it with arrows when you get the chance.
Fourth target point: Zelda’s Room
After the fight, the marker takes you back towards U2 and then to the western part of the castle. On the way you will meet, among others, Horriblins, Black Lizalfos, a Black Moblin and a Ice Like.
Horriblins can be shot from the ceiling with arrows. A Ice Like shows its vulnerable core after expelling its ice mist. Wait for this attack, dodge to the side and then shoot at the visible weak point.
Follow the path until you reach what appears to be a dead end. Use the Ascend there to get to the level above. Climb the building or tower and then drop through the opening into the Zelda’s room.
Of course this time too it is a trap. Three Fire-Breath Lizalfos appear and attack you in the small room. Use Ice Fruits, White Chuchu Jelly, or other ice materials on your arrows. A direct ice hit immediately defeats a Fire-Breath Lizalfos.
Without ice materials, you should keep your distance, wait for the fire blasts and then counter with headshots or quick melee attacks. After the fight, search the room and take the bow from the wall. Then return to the room above Zelda’s via Ascend.
Fifth target point: Silver Moblin on U3
The next destination is deep in the western part of U3 and is easiest to reach from outside. Exit the upper room at Zelda’s Chamber on the western side and look down.
There you will see a small ledge or an open space in the rock wall. Jump off, open the Paraglider and slide into this entrance. If you fall too far, you can teleport to Serutabomac Shrine and try again.
Two Ice Keese and a Silver Moblin appear in the room. First kill the Keese with arrows so that they don’t freeze Link. The Silver Moblin has a lot of life points and causes high damage with its attacks.
Hits in the head make him stagger briefly. Ice fruits and other ice materials can freeze it completely. After freezing, attack with your strongest weapon, retreat and repeat the process. Yunobo can also knock down the Moblin, giving you an additional attack window.
After the fight, take the Silver Moblin Horn with you. It has a high Fuse Attack Power and is great for improving a good weapon for the upcoming boss fight.
Sixth objective point: Three Shock Likes
Leave the room with a Ascend and follow the marker through the western castle area. The direct route to U3 is blocked in places by rubble or Gloom.
If you don’t get any further, climb up to U2 and slide through one of the southern openings back to U3. Finally you reach an elongated corridor with three electro-Like Likes hanging on the walls.
Don’t try to just walk between them. Her electric missiles can disarm Link and cause high damage. Wait until a Like Like has fired its projectile and then opens its mouth.
Shoot the emerging weak point and attack the tongue that falls out with a melee weapon. Ice fruits or bomb arrows can also quickly expose the weak point.
Focus on one enemy at a time and stay out of reach of the other two. Use non-metallic equipment if possible and only collect dropped weapons when there are no more electrical attacks nearby. After the third Like Like, Zelda calls for Link one last time.
Return to Sanctum
The final destination is in Sanctum in the central and highest part of the castle. Return from the corridor towards the Zelda’s room and use the Ascend several times until you are back on the rooftops.
Then glide east to the main building and climb onto the path that leads directly into the Sanctum. Orientate yourself on the yellow target point on the map.
Don’t jump into the large abyss below the castle. This path leads towards the later final battle against Ganondorf and is part of the final main quest “Destroy Ganondorf”.
In the Sanctum, Zelda is on the opposite side. As soon as you approach her, a longer cutscene begins. It is now finally confirmed that the apparitions in the castle were not the real princess.
Ganondorf used a puppet to lure Link and the four sages into a trap. The boss fight against Phantom Ganon begins immediately afterwards.
Boss: Phantom Ganon, Shadow of the Demon King
The fight against Phantom Ganon consists of two phases. In each phase, five Phantom Ganons compete simultaneously. Before starting, activate all four vows and completely fill Link’s hearts.
Recommended are armor that has been improved as much as possible, several one-handed weapons with at least 30 to 40 attack points, good shields, a strong bow and at least 30 to 40 arrows. Prepare several Sundelion meals from Sundelions, as normal food cannot restore hearts blocked by Gloom.
Phantom Ganon: First phase
At the beginning, five Phantom Ganons appear in the Sanctum. All five enemies contribute to the common life bar at the bottom of the screen, but also have their own energy.
Your four Sages usually employ multiple Phantoms, allowing you to focus on a single enemy. Don’t keep running towards the Sages to trigger their abilities. In the confusing battle, this often leads to Link running directly into an enemy attack.
Instead, let the sages work primarily as a distraction. Select a Phantom Ganon and attack it until it disappears. With each enemy defeated, the fight becomes clearer.
sword, lance and Gloom Club
The Phantom Ganons use different weapons. The swordsmen attack with quick slashes and a sudden charge. The lancers attempt to impale Link from a greater distance.
The Phantoms with Gloom Clubes perform slower but particularly powerful punches and jumping attacks. Keep your shield ready, watch their movements and only dodge at the last moment.
A perfect side jump or backflip triggers a series of attacks that can cause a lot of damage. It’s better to keep your distance when using heavy jump attacks, as weaker shields break quickly.
Headshots and strong arrows
Headshots with the bow are the surest way to stop a Phantom Ganon. As soon as an enemy approaches you or prepares an attack, aim for their head.
A successful hit interrupts it and gives you time for more arrows or some melee strikes. Reinforce the arrows with strong monster parts such as Gibdo Bones, high-quality Construct Horns, or other materials with high attack power.
Concentrate completely on a phantom until it disappears and only then move on to the next enemy. Don’t try to damage all five enemies evenly.
Phantom Ganon: Second phase
After the shared life bar is emptied, the fight is not over yet. Ganondorf summons all five Phantom Ganons again. The enemies become more aggressive and use their various weapons more frequently.
The most important difference is the Gloom, which can now spread across the floor of the entire throne room. One of the Phantom Ganons stands aside, raises his weapon and begins to send black and red waves of gloom in all directions.
As soon as you see a phantom standing still and the Gloom spreading, you have to ignore everything else. Shoot an arrow into its head or quickly attack it in melee combat. A successful hit interrupts the ability and the already spread Gloom retreats.
If you let the Phantom have its way, almost the entire floor becomes dangerous and your freedom of movement is severely restricted. Sundelion meals restore damaged hearts. Parts of the underground set provide additional Gloom-Protection, but are not absolutely necessary for victory. You can find more armor in our overview all armor in Tears of the Kingdom.
Otherwise, stick to the strategy from the first phase: choose an opponent, land hits in the head, dodge their attacks and defeat them completely. Always pay attention to the remaining phantoms, as they can also attack Link outside of the visible frame.
Simple strategy with slow motion
If direct melee combat is too difficult for you, you can prepare a Zonai Rocket Shield or a shield with Spring. Hold up the shield and activate the attached rocket or spring to propel Link into the air.
Then draw the bow. Time slows down and you can land several targeted headshots before Link reaches the ground again. Multi-shot bows and arrows reinforced with Gibdo bones cause particularly high damage.
Another option is the upper gallery next to the stairs of the throne room. Retreat to an elevated ledge and fight the phantoms with your bow. The elevated location gives you a better overview, but does not completely protect you from teleporting enemies and long-range attacks.
If a phantom teleports directly to you, block the first attack, jump from the ledge and create distance again. Use the gallery primarily to stun individual opponents with headshots and then switch back to melee combat.
reward and return to Purah
Once the last Phantom Ganon is defeated, the confrontation ends with another cutscene. Then be sure to take the Heart Container with you, which appears in the Sanctum.
Visiting Hyrule Castle does not trigger the end of the game and does not lead to the final battle against Ganondorf. After victory, you can safely leave the castle and continue exploring the open world.
Teleport back to Lookout Landing and talk to Purah. Link and the four sages report the false Zelda and Ganondorf’s trap. The group notices that in addition to Zelda, a total of five other sages were mentioned in the traditions about the Imprisoning War.
Since only Tulin, Yunobo, Sidon and Riju have accompanied you so far, there must be a fifth sage. This starts the next part of the main story: “Find the Fifth Sage”.
The main quest “Crisis at Hyrule Castle” can still be in the diary for the time being. It will be finally completed after you find the fifth sage and then report back to Purah.
Further solutions:
Find the fifth wise man – walkthrough
Secret of the Ring Ruins – walkthrough
Guidance from Ages Past – Mineru and Spirit Temple
Destroy Ganondorf – final main quest
Tears of the Kingdom – walkthrough