

After our full tour of Hyrule Castle, we turn to a region that is particularly important for the 100% walkthrough. Akkala is not only home to eight shrines and 57 Koroks, but also a complete settlement, Tarrey Town, which Link has to build himself, the Akkala Institute, the most important source of ancient equipment, and Kilton, a dealer whose monster shop later becomes indispensable for several unique items and the three monster medals. There is also the source of power, another souvenir photo, the Great Fairy Mija, the last great maze, two other special DLC finds and some individual Hinoxes or a Stalnox, which we have already ticked off for Kilton’s later orders.
The eight shrines of the map section are Ze Kasho, Dah Hesho, Ke’nai Shakah, Katosa Aug, Tutsuwa Nima, Zuna-Kai, Ritaag Zumo and Tu Ka’loh. You can also find a compact overview at our shrines at the Akkala Tower. However, several chest contents are incorrectly stated in the old overview. For this playthrough we’re using the verified rewards: Ze Kasho includes a Scale Lance, Tutsuwa Nima a Fire Lance, Zuna-Kai a Fire Sword, and Tu Ka’loh the Barbarian Mask.
| Shrine | exam | Treasure Chest |
|---|---|---|
| Ze Kasho | Ze Kasho’s apparatus | Scale lance |
| Dah Hesho | A Minor Test of Strength | Giant Ancient Core |
| Ke’nai Shakah | A Modest Test of Strength | Sapphire |
| Katosa Aug | Katosa Aug’s apparatus | Ice Greatsword |
| Tutsuwa Nima | A Major Test of Strength | Fire lance |
| Zuna Kai | Zuna-Kai’s Blessing | Fire sword |
| Ritaag Zumo | Ritaag Zumo’s blessing | Giant Ancient Core |
| Tu Ka’loh | Toh-Karos Blessing | Barbarian Helm |
Preparation for Akkala 100% walking tour
For this chapter, it’s worth tidying up your inventory a bit before setting off. We need at least 110 bundles of wood to fully build Tarrey Town. If yours is ours Walkthrough If you have followed and regularly felled trees with remote bombs, you should already have a large supply. Otherwise, almost any dense forest is suitable for quick farming. We also need an Dinraal Scale for the Spring of Power, an Ember Dragonfly, a Frost Dragonfly and a Shiver Dragonfly for one Side Quest as well as the ingredients for a monster cake. We can only start building Tarrey Town if Link is in first Hateno Village be own dream house bought and with Hudson has spoken.
Expansion Pass owners should also make sure that “EX: Teleportation” is present in the diary. We get the teleport medallion at the end of the regional route under Lomei Labyrinth Island. Revalis Storm+ saves a lot of climbing work in Akkala, especially on the tower, Skull Pond and Lomei Labyrinth Island. Urbosa’s Fury+ helps with the three tests of strength and the mini-bosses.
South Akkala Stable and Ze Kasho Shrine
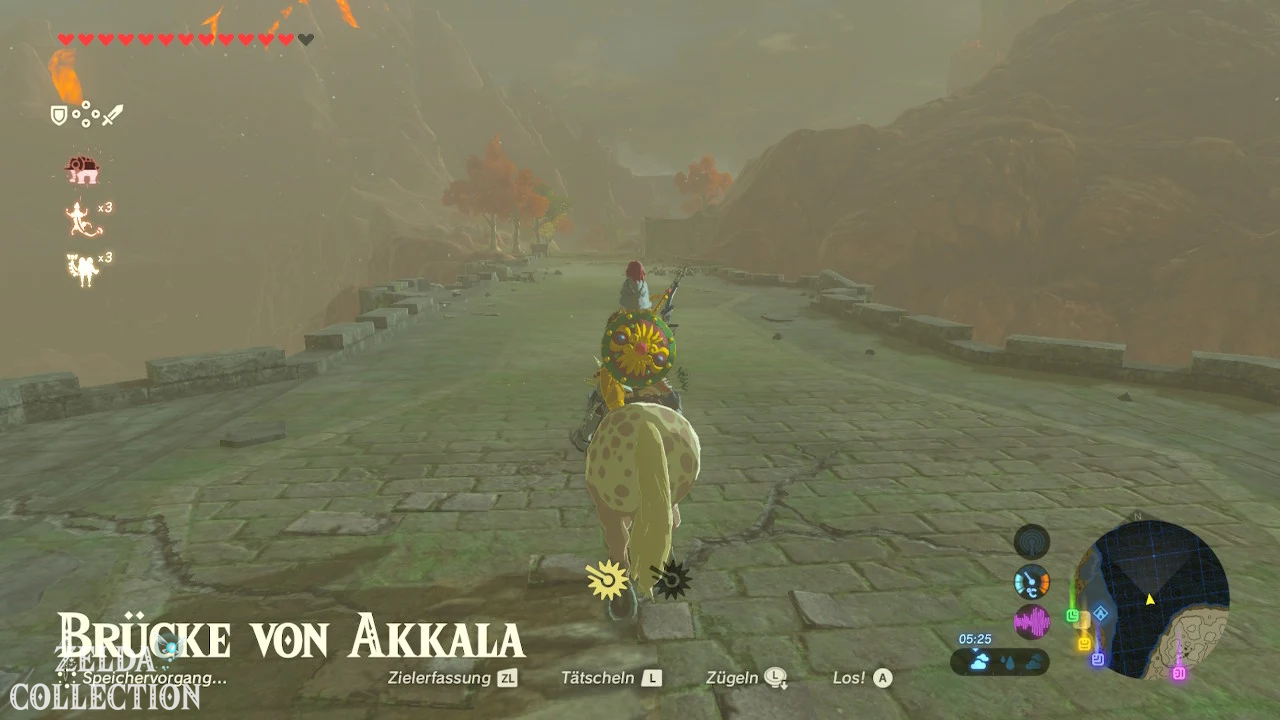
We enter Akkala from the south and follow the road over the Akkala Bridge to the South Akkala stables. The Ze Kasho Shrine is just a few meters west of the stable and is activated immediately. This gives us a reliable fast travel point for the southern part of the region.
Ze Kasho Shrine – Ze Kasho’s Device
In the first section you use the device terminal and turn the spiked platform so that a safe path to the opposite exit is created. In the second room you press the Crystal Switch. Several blocks begin to rotate, alternately blocking the laser beams. Move to the middle, wait for a safe moment and hit the Crystal Switch again with an arrow to pass the second part of the obstacle. On one of the rotating blocks is the only Treasure Chest. Slide there from the top position and take the Scale Lance with you.
The final room uses motion controls again. Three balls must roll into the three designated recesses. Turn the device slowly and control the tilt in small movements rather than tilting the controller sharply. As soon as all three balls are in place, the gate to Ze Kasho opens and you receive the Spirit Orb.
Little Sister’s Big Request
We meet Jana at the stable. She wants to give her younger sister Gleema a special birthday present, but doesn’t know which insect she likes best. Then talk to Gleema. She raves about dragonflies of all things – a species that Jana is disgusted by. Tell Jana about it. Now she needs a ember dragonfly, frost dragonfly and trembling dragonfly. If all three are already in your inventory, you can complete the task immediately. Otherwise you will find glow dragonflies especially in warm areas, frost dragonflies in cold regions and shimmering dragonflies often in Lanayru and Akkala. Hand the three insects directly to Gleema and then talk to Jana again. For “Small, Big Wishes” you will receive 100 Rupees.
Optional (DLC): Rumor Mill Extra 2
A copy of Traysi’ “Rumor Mill Extra” lies on a table at the stable with the expansion pass installed. Read the book. It indicates an item that allows Link to set his own fast travel destination at a location he chooses. This gives us the crucial clue for “EX: Teleportation”: The treasure is on Lomei Labyrinth Island in the far north of Akkala. We’ll get him at the end of the chapter when we complete the Tu Ka’loh Shrine there anyway.
Akkala Parade Ground – Blue Hinox
From the stables, follow the road north or northeast to the ruins of the Akkala Parade Ground. In the middle sleeps a blue Hinox. For our future Hinox medal from Kilton, each individual specimen must be defeated at least once, so we won’t leave the giant behind. Shoot an arrow into his eye, sprint to his legs and attack with a powerful two-handed weapon. If the Hinox later protects his eye with his hand, waits for an attack and sets the next arrow at the right moment. Urbosa’s Fury+ shortens the fight significantly.
There are several regional Koroks in the immediate vicinity of the parade ground. The metal doors and piles of leaves on the ruins and rock edges are particularly important – activate the magnetic module here again and again and lift every small stone that you discover underneath.
Akkala Fortress Ruins and Akkala Tower
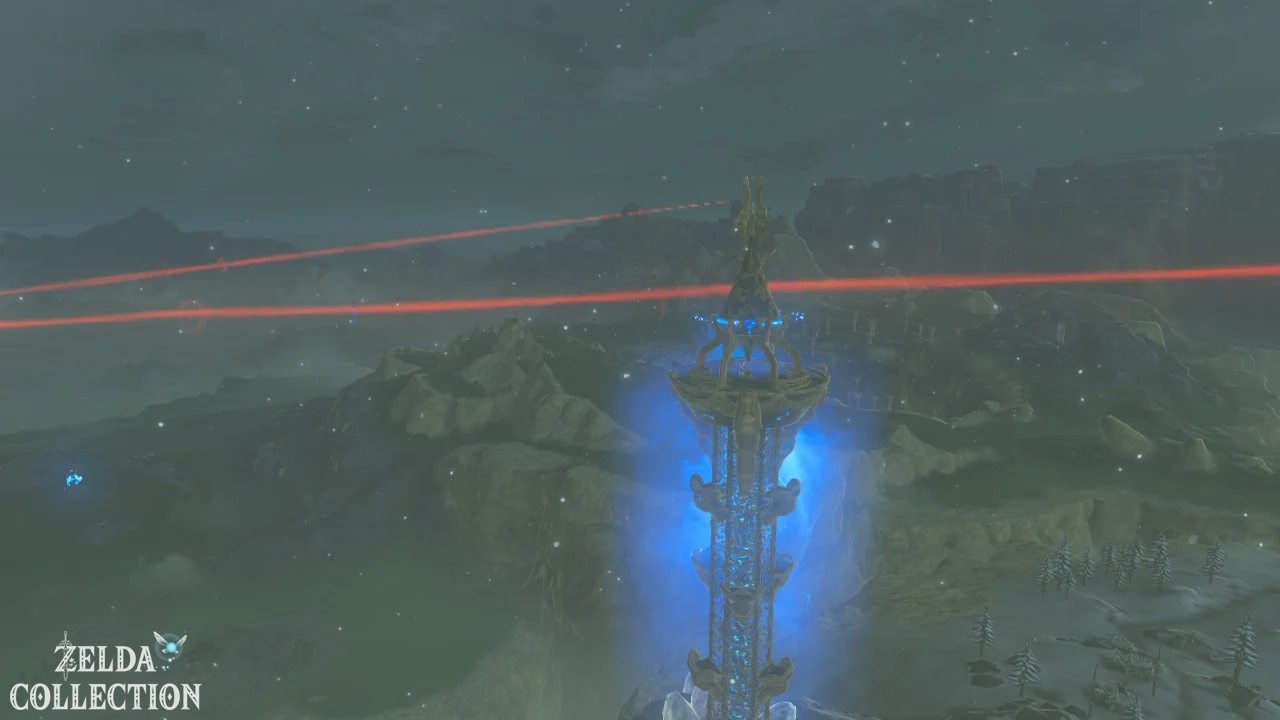
The Akkala Tower is one of the more elaborate Sheikah towers. He stands in the middle of the ruins of the ancient Akkala Fortress, with parts of the structure blocked by Mud of Hatred and several Guardian Airmen surveying the area. The most pleasant access is from the south via the fortress ruins. Anyone who owns Revalis Sturm+ can skip a large part of the climbing passage and land directly on a higher level. Without Revali’s help, you search for the eyes of the Ooze of Hatred, destroy them with arrows and use metal parts or debris with the magnetic module to get over blocked sections.
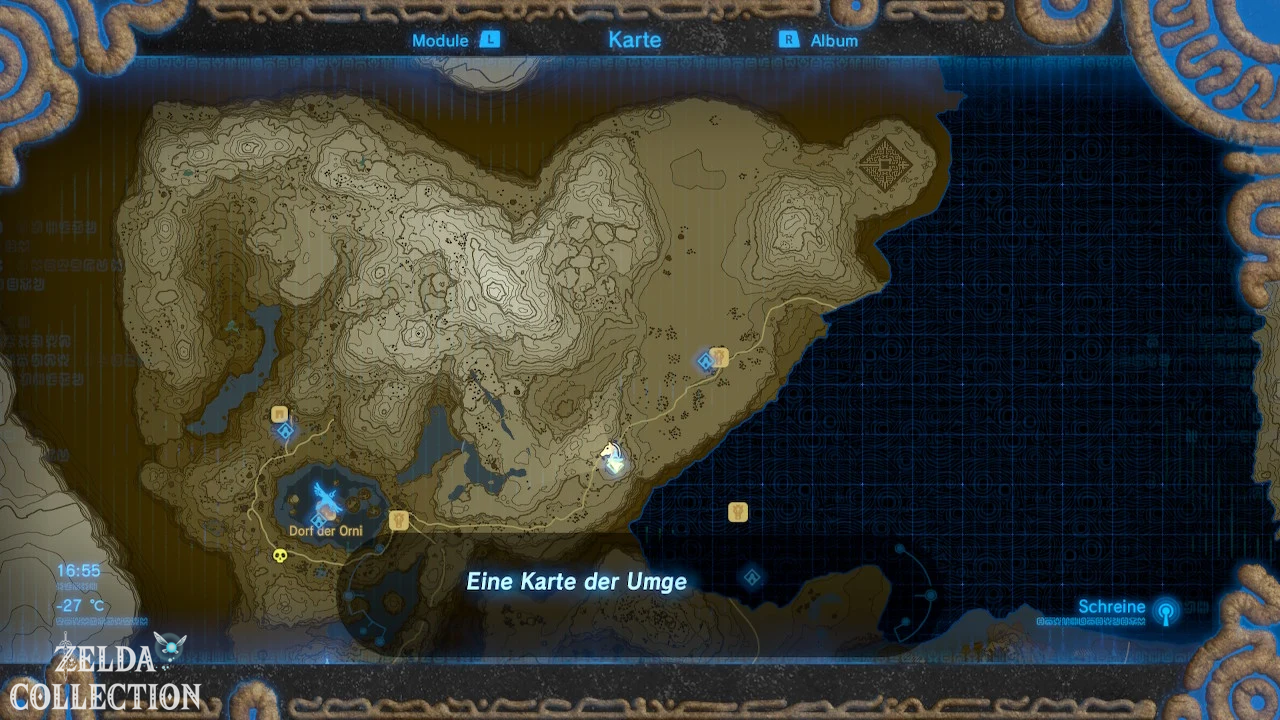
Reach the upper platform and activate the terminal. This reveals the entire map of Akkala – from Lake Akkala and Tarrey Town to Skull Pond, Marcuse Peninsula and Lomei Labyrinth Island. There are several Koroks around the fortress: on and under old guns, in piles of leaves, under metal plates and north of the tower on a rocky edge. Take them with you when you descend; the complete checklist follows at the end of the chapter.
Ke’nai Shakah Shrine in Ulra Gorge
From the tower we first move east or southeast to the Ulra Gorge. The Ke’nai Shakah Shrine is not visible from the outside. Examine the northern rock wall of the canyon until you discover a large cracked area. Blow it up with a remote bomb and enter the cave behind it.
Ke’nai Shakah Shrine – Trial of Strength (Medium)
A Guardian Scout III is waiting in the main room. With our equipment, the middle test of strength is now routine: Dodge side blows at the last moment, use the counter hail and stand behind a pillar during his whirling attack. Urbosa’s Fury+ also works great. After the victory, the path to the priest opens. The Treasure Chest contains a sapphire. Then get the Spirit Orb.
Dah Hesho Shrine over Lake Akkala
The next shrine is on the high ground of the Kaepora Pass south of Tarrey Town. The Dah Hesho Shrine is openly visible and is ideal as a fast travel point to the new settlement later. There is one waiting inside A Minor Test of Strength against a Guardian Scout II. After a few hits the fight should be over. Behind the guard is a particularly valuable one Treasure Chest with a Ancient giant core. Be sure to take it with you, because we will need large amounts of ancient materials at the Akkala Institute.
Tarrey Town – On course for expansion
From the Dah Hesho Shrine you can look directly at the large rocky island in Lake Akkala. Slide over and find Hudson. If Link has already bought his house in Hateno Village and sent Hudson there, “On Expansion Course” begins or continues here. This task is one of the longest side quests in Breath of the Wild, but is particularly important for our 100% pass: Tarrey Town receives several shops, a free inn, more Side Quests and, Granté, a merchant who can buy lost unique equipment.
10 bundles of wood – Greyson from the South Mine
Give Hudson first 10 bundles of wood. He then needs a strong Goron whose name ends in “-da” according to the rules of the Jolanda Construction Company. Teleport to Eldin and find the South Mine. There you will meet Greyson. Talk to him and tell him about Tarrey Town. Greyson and his brother Pelison then move to Akkala. Turn to Hudson back. Pelison opens a gem shop while Greyson clears the rocks at the construction site.
20 Wood Bundles – Rhondson at Desert Bazaar
Hudson now requires 20 wood bundles and then a Gerudo that can sew. Teleport to the Desert Bazaar and find Rhondson. Convince her to move to Tarrey Town. After her arrival, she opens an armor shop. Parts of the desert set, among other things, can be purchased here if you are still missing something.
30 bundles of wood – Fyson in the village of Rito
Next, Hudson needs 30 wood bundles. After that, a Rito is supposed to open a general store. Travel to the Rito village and speak to Fyson. He wants to become independent of his family’s business anyway and accepts Hudson’s offer. Back in Tarrey Town, Fyson sells, among other things, various arrows and antique materials.
50 bundles of wood – Kapson in the village of Zora
Then give 50 wood bundles to Hudson. Now you find out that he and Rhondson want to get married. They need a Zora priest for the ceremony. Teleport you to the Zora village. Kapson is below or near the stairs to the throne room. Talk to him and tell him about the upcoming wedding. The former priest sets off for Tarrey Town and later runs the inn there where Link can stay overnight for free.
Invite Bolson and Karson to the wedding
Finally, Hudson asks you to invite Bolson and Karson. Teleport to Link’s house in Hateno Village and talk to both construction workers. Then we go to Tarrey Town one last time. Speak to Hudson and attend Hudson and Rhondson’s wedding. After the ceremony you will receive 3 diamonds. This means that “On Expansion” has ended and Tarrey Town has been fully established.
You can also find a detailed individual overview of residents and shops in our guide to the city of Tarrey Town.
Granté – buy unique equipment
After the complete expansion, Granté also appears in Tarrey Town. He is on a balcony at one of the houses near the entrance and is extremely important for a 100% score: special equipment that has been obtained once and does not respawn regularly can be purchased from him again. This also includes the Hylian Shield. If the shield from Hyrule Castle breaks at some point, Granté will sell a replacement copy for 3,000 Rupees after the appropriate progress. Various special pieces of armor can also be recovered here after they have been lost or sold.
Great Fairy Mija
Glides from Tarrey Town to the southeast or to the eastern shore of Lake Akkala. There is the large closed bud of Mija. How much money she demands does not depend on this specific fee, but rather on how many of the four Great Fairies have already been freed: The costs increase from 100 to 500 and 1,000 to 10,000 Rupees for the fourth source. Pays the requested amount. Mija can then perform the same armor upgrades as her sisters; What matters is the total number of fairies awakened. Anyone who has followed our route should now check whether all four Great Fairies are available. You can find an overview in our guide to the Great Fairies.
Tarrey Town – pastime for the nouveau riche
After the complete construction, two more Side Quests appear. First, talk to Hagie, who is looking out over Tarrin Swamp. He gives Link an advance of 100 Rupees and requires us to defeat two active Guardian Runners in the Swamp. After our tour of the castle, this shouldn’t cause any problems. An Ancient Arrow to the eye instantly destroys a bishop; Alternatively, you can parry his lasers with a shield. Defeat both guards and return to Hagie. He pays another 20 Rupees. This concludes “Pastime for the Newly Rich”.
A Parent’s Love
Wait in Tarrey Town until night and go to Hagie and Ruli’s house. Listen through the open window. You find out that her daughter Hunnie practically only eats cake and has now become ill. The next morning, talk to Ruli. For the solution we need a monster cake. We already found the recipe in the library of Hyrule Castle in the previous chapter: Cook monster essence, Tabanta wheat, goat butter and cane sugar together in one pot. Give the cake to Ruli. Hunnie recovers and Link receives a Golden Rupee worth 300 Rupees as a reward.
East Akkala Stable and Katosa Aug Shrine
We leave Tarrey Town to the north and follow the main road to the East Akkala stable. Directly opposite is the Katosa Aug Shrine. Activate it first so that the stable serves as a new fast travel point.
Katosa Aug Shrine – Katosa Aug’s Device
An unusual golf test awaits in the shrine. Use the device terminal and control the bat using the motion controls. The goal is to hit the ball cleanly into the hole at the end of the lane. A controlled, straight stroke is more reliable than a hectic movement. As soon as the ball is sunk, the platform starts moving and takes Link to the priest.
Don’t finish the shrine yet. Behind Katosa Aug is a second, optional equipment room with a curved track. Sink the ball there too. The activated platform brings Link to a Treasure Chest with a Ice Greatsword. Only then do you pick up the Spirit Orb.
A Shady Customer – Photo by Kilton
Speak to Hoz at the stable. He wants to know what the ominous owner of a monster shop looks like. This begins “Suspicious Seller”. We’ll complete the task later at the skull pond. Important: If possible, photograph Kilton before the first conversation. After you speak to him for the first time, he leaves the skull pond and from then on appears at the larger settlements at night. The photo can still be taken later, but the first visit is the most convenient opportunity.
Start the Spring of Power
Also speak to Nobo at the stable. She tells of an old legend about the source of power west of the stable. This starts the shrine task “The Spring of Power”. If you don’t already have an Dinraal Scale, you need to get one now. The Tabanta Bridge offers a particularly easy opportunity: Wait there until Dinraal appears, glide into his updraft and shoot the body once. Collect the falling scale. You can find our complete dragon route at the locations of Dinraal, Naydra and Farosh.
Commemorative photo at the source of power
Go west from the stable into the valley to the source of power. Before dealing with the shrine, look for the memorial’s golden glow and examine it. Link receives the memory “The Missing Power”. Although this location is depicted in the ninth photo in the Sheikah Slate, the scene is listed as Memory 13. Zelda tries in vain to awaken her sealing power. If you have followed our route through all previous regions, the collection of twelve photo memories should be almost or completely completed by now. If necessary, check the status in our guide to the memories.
Unlock Tutsuwa Nima Shrine
Then pray at the goddess statue. She demands a scale of the crimson spirit Dinraal. Open the inventory, pick up an Dinraal scale and place it in the water in front of the statue. The secret entrance behind the goddess statue then opens and the Tutsuwa Nima Shrine becomes accessible. This concludes “The Spring of Power”.
Tutsuwa Nima Shrine – A Major Test of Strength
A Guardian Scout IV awaits you inside. Use the well-known techniques from the difficult tests of strength: perfect evasive maneuvers against melee attacks, shield parries against the laser and a column or the intended spatial structure against the whirl attack. Urbosa’s Fury+ and ancient weapons make the fight significantly shorter. After the victory, the path to the priest opens. In the Treasure Chest is a fire lance – not the fire sword from the old ZeldaCollection shrine overview.
Stalnox in the plains of East Akkala
East or northeast of the stable lies the plain of East Akkala. During the day you will only see a large pile of bones there. Return after 9:00 PM for a Stalnox to emerge from it. This individual example also counts for Kilton’s later Hinox Medal. Shoot the eye, attack the body while stunned, and towards the end completely destroy the eye that falls out. Only when the eye is destroyed will the Stalnox finally remain.
Akkala Institute – The Other Researcher
Continue following the road northeast to the Akkala Institute. Robbie and Jerrin have converted the old lighthouse into a research institute. If the Side Quest “The Other Researcher” started by Purah is still open, we are closing it completely now. Robbie’s Sheikah Furnace is not working because the blue flame in front of the Institute has gone out.
The Flammeborn is located west of the institute on the Tumlea Heights. Take a torch, light it on the blue flame and follow the path back to the institute. Light the little lanterns along the way. They serve as stopovers in case rain extinguishes the torch or you accidentally lose the flame. As soon as the large fire bowl in front of the institute burns blue, Cherry, the Sheikah oven, will be activated again. This concludes “The Other Researcher”.
Antique Equipment at Cherry
Cherry can craft special equipment against Rupees and ancient guardian materials. For a complete collection run, Ancient Helmet, Ancient Armor and Ancient Leg Guard should be purchased in the long term. The set is one of the strongest armor against guardians and can be improved with the Great Fairies. Cherry also makes ancient arrows and various ancient weapons and shields. If you are still missing Ancient Cores or Ancient Giant Cores for the complete set, mark the target for later and use the already cleared level of Hyrule or Hyrule Castle to farm the Guardians after a blood moon.
Left eye of the skull
Speak to Jerrin at the Institute. She reports a shrine on the left eye of the Skull Pool. This begins “Left Eye of the Skull”. The eye is not a flat island area, but an enormously high rocky pinnacle. The Zuna Kai Shrine is at the top. We therefore do not approach the pond directly from below, but rather over the higher rocks to the north or northwest of it.
Stormwind Rift – Black Hinox
On the way to Skull Pond we pass through the Stormwind Divide. In a forest north or above the chasm sleeps a black Hinox. This is another individual example for Kilton’s later medal. His higher health hardly plays a role anymore after our progress so far: hit the eye, attack while stunned and use Urbosa’s Fury+. After the fight, collect his weapons and materials.
Skull Pond – Photograph Kilton
Reach Skull Pond at night. Kilton’s eye-catching balloon sits on the low eye island. Don’t go to him yet, but first activate the Camera Rune. Photograph Kilton from a sufficient distance and make sure his name is recognized in the viewfinder. So we have the picture for Hoz.
Then talk to Kilton. After this first meeting, he opens the monster shop and from then on travels between several settlements in Hyrule. He only appears there at night, approximately between 8 p.m. and 4 a.m. Monster parts can be exchanged for his own currency “Mon”. As the main story progresses, his range expands to include monster masks, special horse equipment and the Dark Set. Since we have already completed all four Titans, the relevant range is unlocked. Don’t randomly sell all the rare monster parts – many are still needed for armor improvements. You can find details about the range and the later medals in our Kilton Guide.
Zuna Kai Shrine – Left Eye of the Skull
The Zuna Kai Shrine stands at the top of the high pinnacle. The easiest way is to first climb the high rocks north of the lake and glide from there to the needle. Revalis Sturm+ can additionally increase the required height. Hold on to the rock wall, climb the last bit up and activate the shrine. This completes Left Eye of the Skull.
Zuna Kai Shrine – Zuna Kai’s Blessing
Reaching the shrine was the real test. Open the only Treasure Chest and take the fire sword with you. You will then receive the Spirit Orb.
Optional: Xenoblade Chronicles 2 – Salvage Diver Vest
If the free Xenoblade Chronicles 2 task has not yet been completely completed, the high Zuna Kai rock is ideal for the second treasure. Wait until night and look east from the skull’s left eye. A red shooting star appears. Follow its impact location and open the special chest. Inside lies the recovery diving vest. We have already collected the helmet at the Hylian Bridge; the third part is or was taken from the Hebra summit.
Suspicious seller complete
Briefly teleport to the Katosa Aug Shrine at the East Akkala Stables and show Hoz the photo he took of Kilton earlier. As a reward for “Suspicious Seller” you will receive 100 Rupees. Afterwards we return to the north of Akkala.
Marcuse Peninsula – The Eye of the Whirlpool
East of Tarrey Town, the striking spiral-shaped Marcuse Peninsula stretches into the sea. At the beginning of the spiral there is an old stone tablet next to an ancient ball. Read the inscription and start the shrine task “The Eye of the Vortex”. The ball must be transported to the base in the middle of the spiral.
The intended path runs along the entire peninsula and past several Bokoblins, Lizalfos, Moblins and water octoroks. This route is no problem for our now very strong equipment. If you want to save time, you can also use Stasis to hit the ball towards the center. If it falls into the water, it is not lost: Build Cryonis blocks under the ball, use them to lift it to the surface and continue the transport. Finally place it in the depression in the center. The Ritaag Zumo Shrine rises from the ground.
Ritaag Zumo Shrine – Ritaag Zumo’s Blessing
After the ball transport, there is no further mystery. Open the chest with the Giant Ancient Core and then take the Spirit Orb.
Lomei Labyrinth Island – the last great labyrinth
The last major target in Akkala is far off the north coast. Lomei Labyrinth Island consists entirely of a massive labyrinth and is monitored by several Guardian Airmen. The most pleasant starting point is the Akkala Institute. Go to the northern cliff, use Revali’s Gale+ and glide as far as possible to the island. You can swim or raft the remaining part.
Enter the labyrinth through regular access to start the shrine quest “Trial on a Deserted Island”. Only then is the shortcut worth it: Use Revalis Storm+ or climb an outer wall and move over the wide tops of the walls towards the center. Guardian flyers can see Link there; stay moving or destroy them with Ancient Arrows. In the central complex, look for the entrance to the inner corridors and drop down to the Tu Ka’loh Shrine. If you want to solve the maze in the classic way, follow the winding corridors and pay attention to stairs and openings in the interior walls.
Tu Ka’loh Shrine – Tu Ka’loh’s Blessing
Activates the shrine. This concludes “Trial on a Deserted Island”. Inside there is no further examination. Opens the Treasure Chest with the Barbarian Mask. Together with the barbarian clothes from the southern maze and the barbarian trousers from the northern maze, we now have the complete barbarian set. The set increases Link’s attack power and, fully upgraded, is one of the best offensive armors in the game. You can compare all armor pieces with our guide to the armor in Breath of the Wild.
Under Lomei Labyrinth Island – Diamond Headband
Leave the shrine after receiving the Mark of Probation. The previously closed shaft in front of the shrine has now opened. Drop down. You end up in a large underground hall full of Guardian wreckage. Two Guardian Runners awaken as you approach; additional wrecks activate when certain chests are opened. Therefore be ready to fight.
One of the regular Treasure Chests contains a diamond headband. If you have already purchased one in Gerudo Town, this is still a valuable find. The updraft in the shaft then brings Link back to the surface.
Optional (DLC): Travel Medallion
With the DLC installed, there is a chest clearly marked “EX” in the same underground hall. Open it and take the Travel Medallion with you. This completes EX: Teleportation. The medallion allows Link to place an additional teleport field at a freely chosen point in the overworld. This is particularly useful later for locations without a nearby shrine, such as when farming dragon materials, rare enemies or resources.
All 57 Koroks in the Akkala Tower area
Akkala Tower map section contains 57 Koroks. Lomei Labyrinth Island itself does not contain any Korok, so all seeds are distributed on the mainland around Akkala. The following checklist is based on the tower region and prevents border krogs from being counted twice later.
| # | Location | solution |
|---|---|---|
| 1 | South of Ulra Gorge | Climb the tallest tree and examine the sparkles. |
| 2 | Southwest of Ulra Gorge | Move large rock with Stasis and lift the small rock underneath. |
| 3 | Southeast of Ulra Gorge | Capture moving swirl of light on the hill. |
| 4 | North of Ulra Gorge | Bring the three apple trees to the same fruit pattern. |
| 5 | West of Ulra Gorge | Activate wind turbine and shoot three balloons; one stands far between the trees. |
| 6 | South of Mija’s Spring | Track yellow flowers from one to five; the last group is in the tree. |
| 7 | South of Mija | Place three apple trees on the same pattern. |
| 8 | North of Dah Hesho | Place the apple in the empty offering bowl of the statues. |
| 9 | Akkala Falls | Throw a stone into the stone circle in front of the middle waterfall. |
| 10 | Western Sokkala Bridge | Run under the bridge and lift the stone. |
| 11 | Akkala Bridge | Knock away the stone slab on the destroyed pillar with Stasis and lift the stone. |
| 12 | Northeast of Akkala Bridge | Place the missing stone in the stone circle between the trees. |
| 13 | South of Akkala Tower | Lift the stone near the old guns. |
| 14 | South of Akkala Tower | On the lower level, clear piles of leaves and lift stone. |
| 15 | West of Akkala Tower | Remove piles of leaves from the large stone blocks and lift the stone. |
| 16 | North of Akkala Tower | Remove leaves and lift the stone underneath. |
| 17 | Northern rocky slope at tower | Lift away metal plate with magnetic module and lift stone underneath. |
| 18 | Southeast of Akkala Tower | Remove metal plate at the edge of the forest and lift stone. |
| 19 | Tarrin Swamp | Climb the destroyed structure and lift stone on the top. |
| 20 | Ulri Mountain | Place three apple trees on the same pattern. |
| 21 | Western Ulri Mountain | Remove pile of leaves and lift stone. |
| 22 | Northern Kanalet Ridge | Capture moving sparkles. |
| 23 | Northern Shadow Pass | Climb the tallest conifer and examine sparkles. |
| 24 | Western Ordorac Quarry | Complete the metal block puzzle on the rock face. |
| 25 | Southeast Ordorac Quarry | Solve second metal block puzzle. |
| 26 | Southeast of the | Catch moving sparkles on the hill. |
| 27 | West of the Spring of Power | Lift stone on an elevated rock step. |
| 28 | Forest in the valley of North Akkala | Shoot the acorn in the fallen tree trunk. |
| 29 | Northwest of the Valley of North Akkala | Shoot the balloon below the higher rock face. |
| 30 | Center of the Octo Forest | Climb the very large tree and lift the stone. |
| 31 | Western Octo Forest | Move large stone slab with stasis and lift small stone underneath. |
| 32 | Southwest of Skull Pond | Activate tree stump and reach the higher target ring in time. |
| 33 | Northwestern Edge of Akkala | Climb the big tree and lift the stone on the top. |
| 34 | North of Skull Pond | Insert the missing stone into the stone circle on the hill. |
| 35 | Northeast of Skull Pond | Move the large rock away and lift the small rock underneath. |
| 36 | East of Skull Pond | Move the stone slab and lift the stone underneath. |
| 37 | Akkala Wilderness | Roll large rock into the circular hole; Beware of the Lynels in the area. |
| 38 | Northern Akkala Wilds | Touch yellow flowers in increasing numbers. |
| 39 | Western Wilt Plateau | Remove piles of leaves between the trees and lift stone. |
| 40 | Eastern Wilt Plateau | Activate tree stump and reach the target ring via Bloodleaf Lake in time. |
| 41 | West of Akkala Institute | Lift stone between the destroyed guards. |
| 42 | Roof of Akkala Institute | Examine sparkling leaves near the seat. |
| 43 | Northwest of the institute | Blast a fragile rock wall on the coast and lift the stone behind it. |
| 44 | Northeast of the institute | On the small island, move stone slab with stasis and lift stone. |
| 45 | East of Institute | Follow the succession of flowers over the small islands and shallow water bodies. |
| 46 | West of East Akkala Stable | Remove piles of leaves in the forest and lift stone. |
| 47 | Northwest of the stable | Track yellow flowers from one to five. |
| 48 | East of the stable | Insert the missing stone into the stone circle. |
| 49 | Coast east of stable | Retrieve metal cubes from the water and complete block patterns. |
| 50 | Southwest of the stable | Activate tree stump at a guard wreck and reach the ring on the hill in time. |
| 51 | South of the stable | Activate the wind turbine on the cliff and shoot three balloons. |
| 52 | Center of the Marcuse Peninsula | Remove piles of leaves and lift stone underneath. |
| 53 | Southeast of Malin Bay | Solve metal block puzzles between the ruins. |
| 54 | South of Malin Bay | Follow yellow flower sequence to the northeast. |
| 55 | East of Tarrey Town | Activate tree stump and reach the high target ring; Revalis Sturm+ helps. |
| 56 | Northeast of Tarrey Town | Insert the missing stone into the stone circle. |
| 57 | Bridge to Tarrey Town | Follow the yellow flower sequence over and under the bridge. |
Control the important places in Akkala
For complete map progression, the route should not only cover shrines and Koroks. Therefore, during this chapter, make sure that you check in particular the Akkala Bridge, Akkala Parade Ground Ruins, Akkala Fortress Ruins, Akkala Falls, Tarrin Swamp, Lake Akkala, Tarrey Town, Ulra Gorge, Spring of Power, South Akkala Stable, East Akkala Stable, Bloodleaf Lake, Withered Plateau, Akkala Institute, Plains of East Akkala, Stormwind Divide, Octo Forest, Skull Pool, Malin Bay, Marcuse Peninsula and Lomei Labyrinth Island. Some smaller landscape names only appear when traversing a specific section of the map; our Korok route leads specifically through almost all of them.
Completed all eight shrines at Akkala Tower
| Shrine | Task | Reward |
|---|---|---|
| Ze Kasho | Ze Kasho’s apparatus | Scale lance |
| Dah Hesho | A Minor Test of Strength | Giant Ancient Core |
| Ke’nai Shakah | A Modest Test of Strength | Sapphire |
| Katosa Aug | Katosa Aug’s apparatus | Ice Greatsword |
| Tutsuwa Nima | The Spring of Power / A Major Test of Strength | Fire lance |
| Zuna Kai | Left eye of the skull | Fire sword |
| Ritaag Zumo | Into the Vortex | Giant Ancient Core |
| Tu Ka’loh | test on desert island | Barbarian Helm |
100% status according to Akkala
This means that Akkala has also been completely processed for our passage. The Akkala Tower is activated and all eight shrines in the region are completed. With “The Spring of Power”, “Left Eye of the Skull”, “The Eye of the Vortex” and “Trial on a Deserted Island” all four regional shrine tasks are completed. There are also “Small, Big Wishes”, “On Expansion”, “Pastime for the Newly Rich”, “The Little Cake Monster”, “Suspicious Salesman” and “The Other Researcher”. Tarrey Town is fully constructed, Granté is available as a trader, the Great Fairy Mija has been freed and the Sheikah Furnace in the Akkala Institute is working again.
We met Kilton and unlocked his monster shop, defeated the blue Hinox in Akkala Parade Ground, the black Hinox at Stormwind Rift and the Stalnox in the East Akkala Plains for the eventual Monster Medal. The souvenir photo at the Spring of Power has been activated. With the Tu Ka’loh Shrine we now also have the complete barbarian armor. DLC owners have recovered the Travel Medallion; In the Xenoblade Chronicles 2 task, the recovery diver vest is also collected. All 57 Koroks of the map section are covered by the checklist.
Akkala is no longer an open construction area, but one of our most important later bases: Tarrey Town replaces lost special equipment, Kilton is needed for final control of all Hinoxes, Stone Talus and Molduga and Cherry supplies us with Ancient Arrows and Ancient equipment at any time. In the next chapter we will continue the 100% route with the map regions that have not yet been completely cleaned up and close the final shrines, Side Quests, Koroks and map locations step by step, before we move on to the final 100% check and the Calamity Ganon.